
")
In This Article
Reboot your smartphone
This is the first trick for any Android smartphone problem. As we’ve mentioned in most of the Android tips and tricks, Sometimes, a simple reboot of the device will do the trick. So restart your smartphone if your calls aren’t displaying on your screen, the problem will possibly go away after this.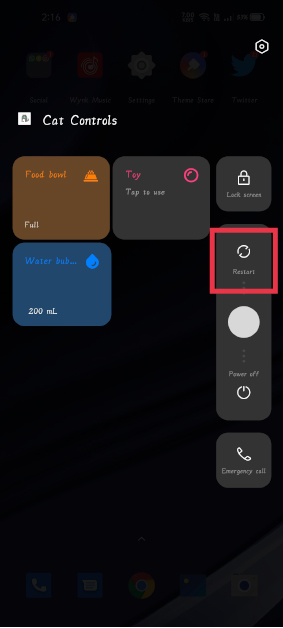 Read also: How to live with a smartphone with low internal storage
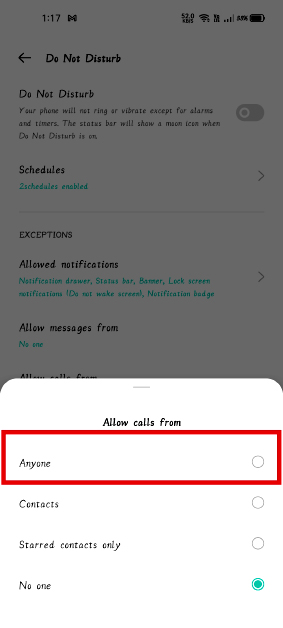
Check DND Mode
If the restart doesn’t fix the problem and you still can’t fix incoming calls not showing on Android smartphones, it can be the DND mode that is causing this problem. DND mode blocks all the notifications until you have allowed some apps to modify this. To check this: Step a: Open ‘Settings’ and select ‘Sound and Vibration’. Step b: Now tap on “Do not Disturb”, and if it is on, turn it off.
 Step c: However, if you want DND mode turned on for some reason, tap on “Calls” and allow calls from anyone in DND mode.
Enable Call Notification
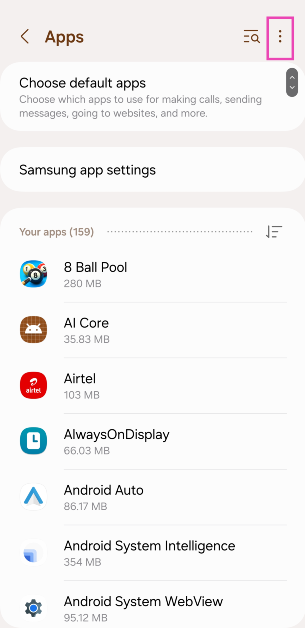
Notifications are by default enabled for all incoming calls on all the smartphones and no one usually changes this setting. However, sometimes an update might change it. To enable the notification again, follow these steps: Step a: Open Settings and go to Apps management. Step b: Find the Phone app, tap on it.
 Step c: After that tap on ‘Manage Notifications’ and see if the toggle is on.
 Read also: Download these top Android apps to manage your finances
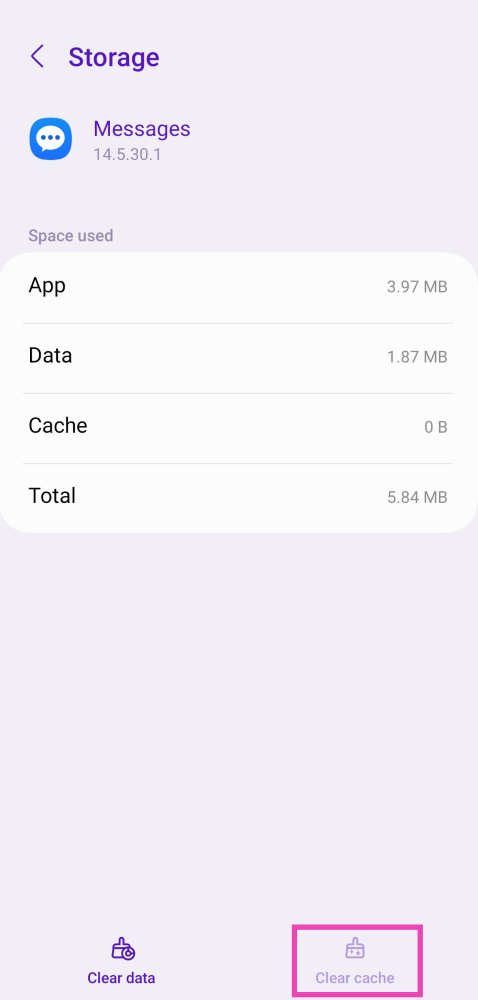
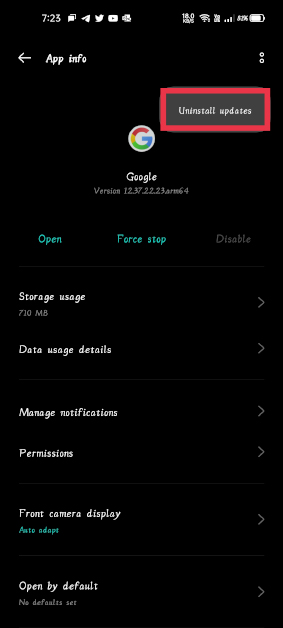
Clear Cache and Data
Clearing the cache on any app can be a solution to many issues. So, try this way to fix incoming calls not showing, on your smartphone. It is to be noted that it doesn’t delete your data. However, if this also doesn’t help, you can try clearing your data, to fix incoming calls on your Android smartphones. Step a: Open Settings and open Apps management.
Step b: Look for ‘App list’ and find the Phone App.
Step c: Tap on it and then tap on Storage.
 Step d: On the next page, tap on the clear cache and clear data button. If the issue still persists, follow the same steps as above and this time tap Clear data.
 Note: Clearing data will also delete your call logs, use them accordingly and with caution.
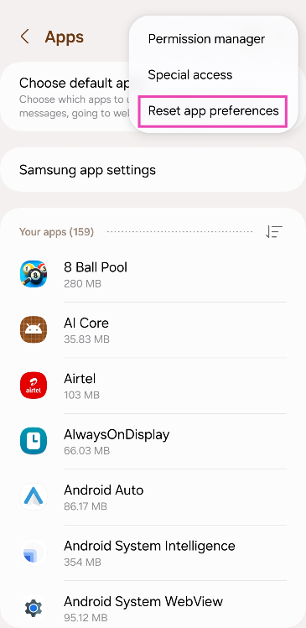
Reset App Preferences
Step 1: Go to Settings and select Apps.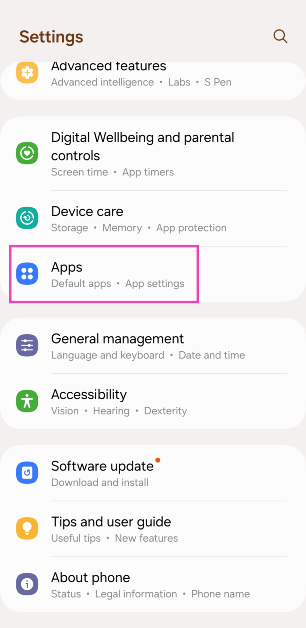 Step 2: Hit the ellipses at the top right corner of the screen.
 Step 3: Select Reset app preferences and confirm your selection in the pop-up box.
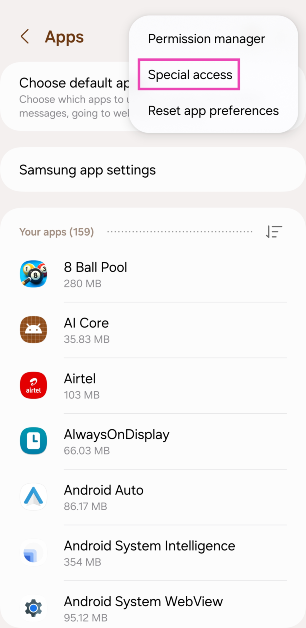
Allow the Phone app special access
Step 1: Go to Settings and select Apps.
Step 2: Hit the ellipses at the top right corner of the screen.
Step 3: Tap on Special Access.
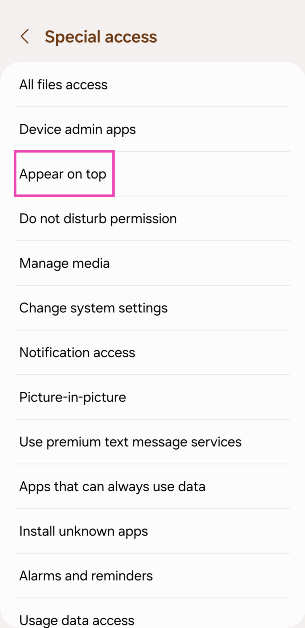
 Step 4: Select Appear on Top.
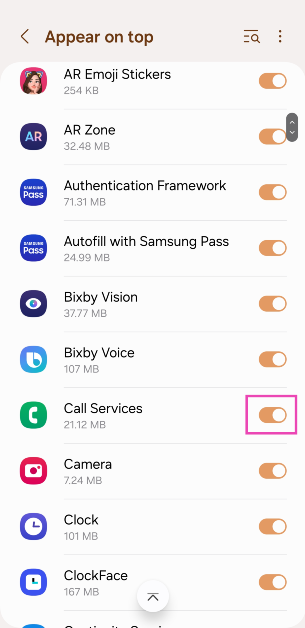
 Step 5: Scroll down and turn on the toggle switch for Call services.
Bonus Tip: Make incoming calls display in full screen when the phone is unlocked
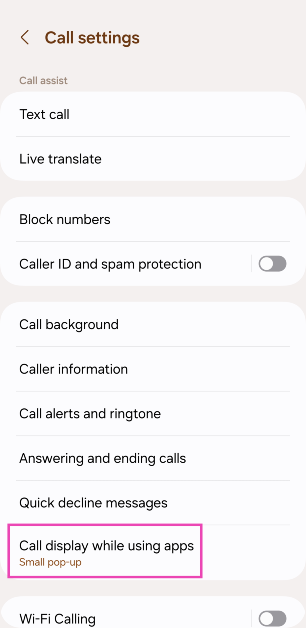
Don’t want the pop-up notification for incoming calls while you’re using the phone? Here’s how you can make it full-screen. Step 1: Launch the Phone app. Step 2: Hit the ellipses and select Settings.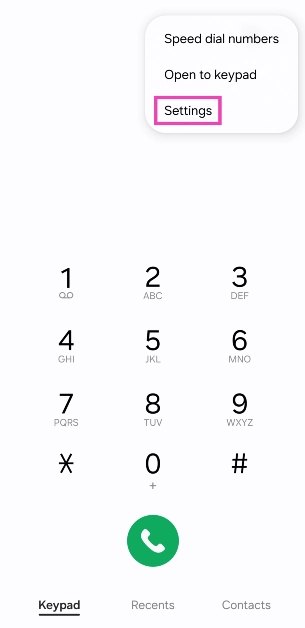 Step 3: Tap on Call display while using apps.
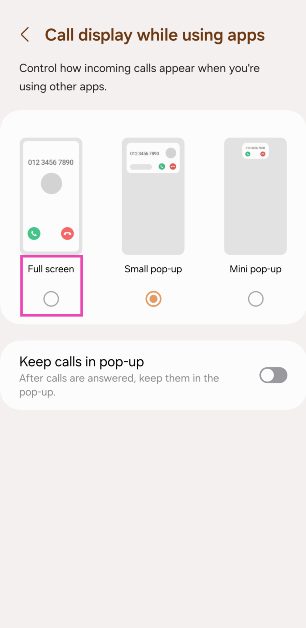
 Step 4: Select Full screen.


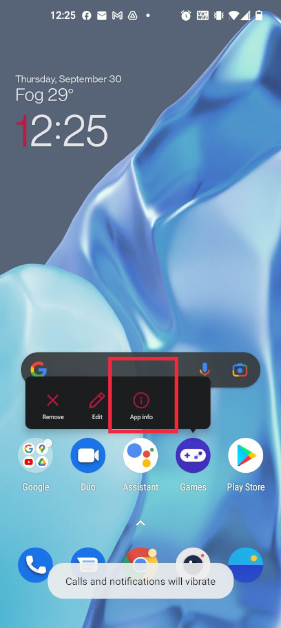
 Step 2: Select the native messaging app.
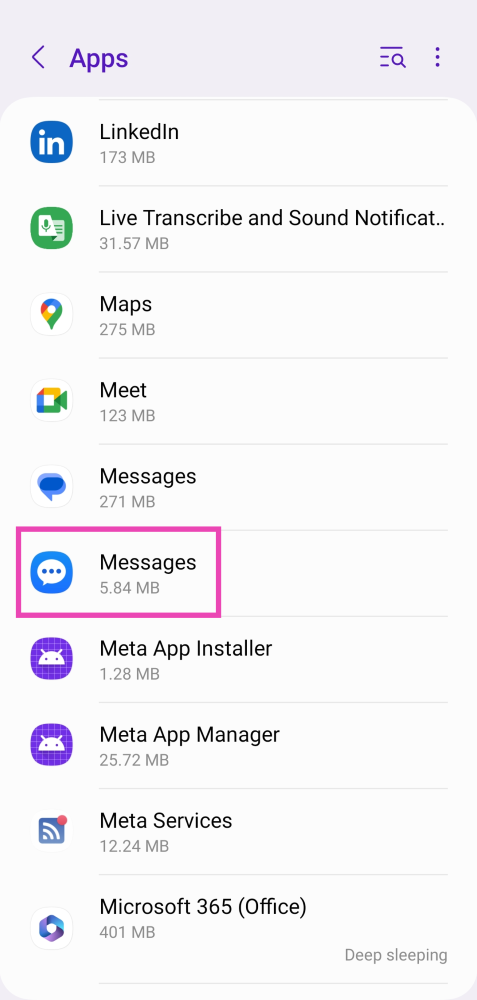 Step 3: Tap on Force Stop at the bottom of the screen.
 Read Also:
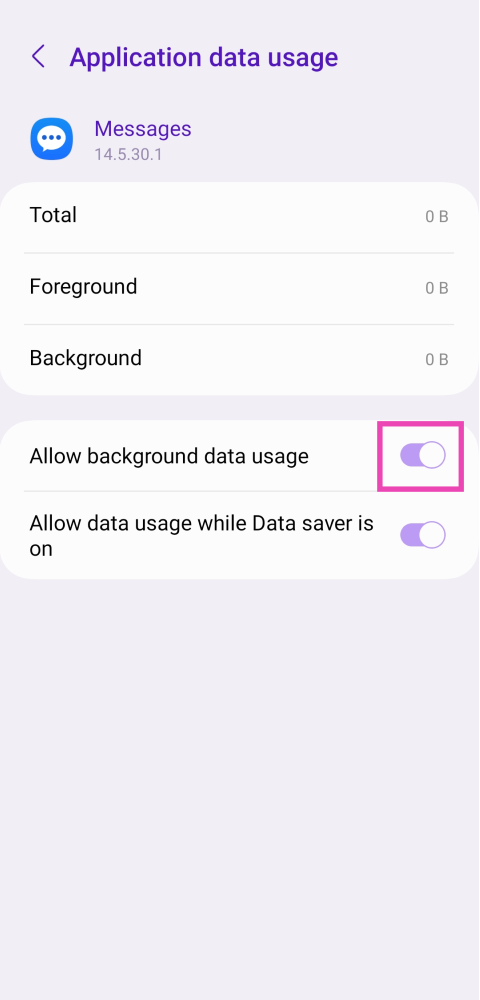
 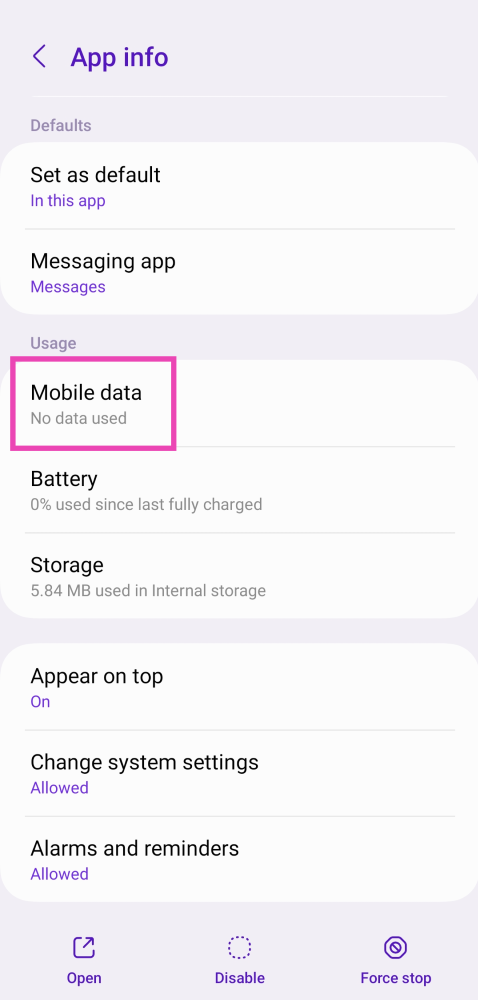 Step 4: Turn on the toggle switch for Allow background data usage.
 Step 4: Tap on Clear Cache.
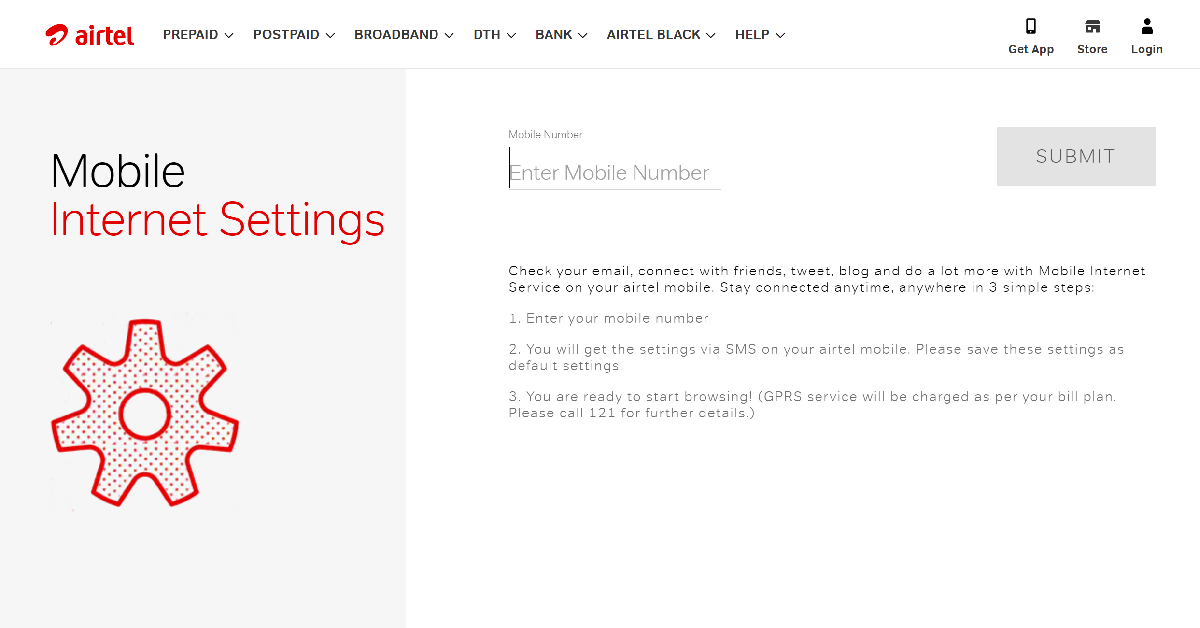 If your MMS APN settings are faulty or outdated, you won’t be able to send pictures or video clips as texts to your loved ones. To fix this, request MMS APN settings from your network provider. Dial the code for customer service and navigate your way to GPRS and MMS settings. Airtel users can visit the network provider’s official website and enter their number to receive the settings.
 Step 2: Scroll down and select Reset.
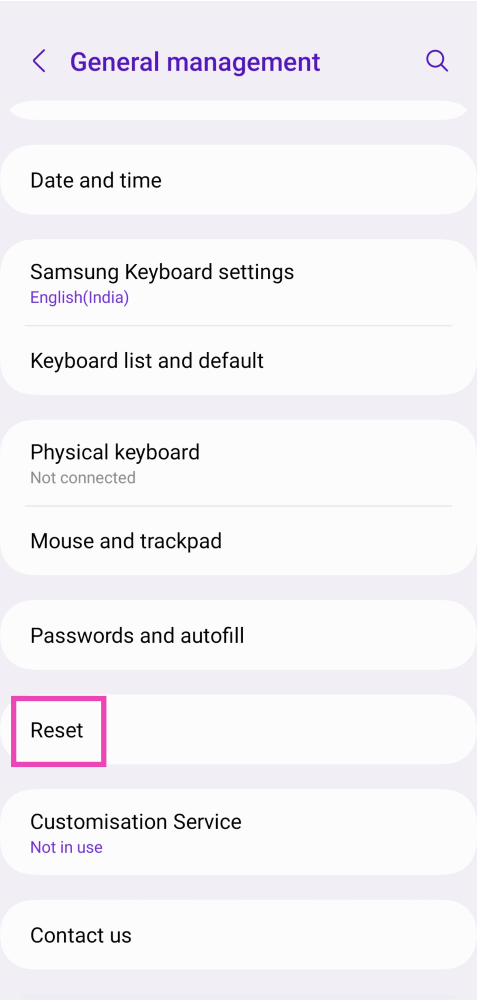 Step 3: Tap on Reset Network Settings.
 Step 4: Select Reset Settings.
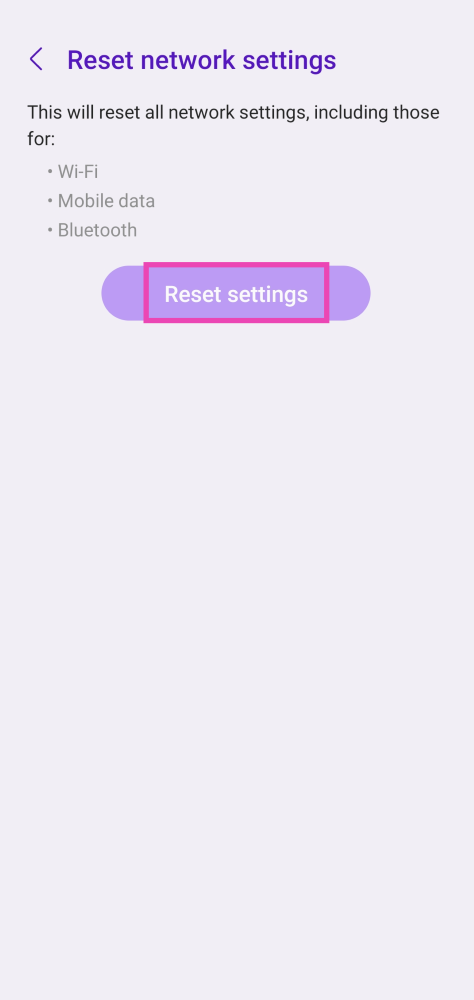 Step 5: Enter your PIN to confirm your selection.


 review: A good option for work and play from home")
 Open it and you are greeted by a large full QWERTY with NUM pad keyboard and medium-sized trackpad. Which, by the way, is multi-touch/gesture ready. The large 15.6-inch (FHD IPS) display can be swivelled to 180 degrees and does not feel flimsy. The screen to body ratio is about 82% and you do get an HD webcam a well as few MICS over it in the Acer Aspire 7. The keyboard is backlit and comes with function keys that also double up as multimedia buttons. The typing experience on the keyboard
  There are plenty of ports on the Acer Aspire 7. The company has put in the power USB and audio (3.5mm) on the right side, while the left side has two more USBs, one USB Type-C, HDMI and the ethernet ports. Two downward-firing speakers can also be found under the laptop (on the left and right side). Overall, the laptop looks premium, and it does say it means business.


 Windows 10 Home edition is what users get, which was a bit strange as we were expecting the Pro edition on this laptop. There is a little bit of bloatware that comes along with the laptop, but all the extra software can be uninstalled. Users also get 100GB of free storage with Acer Aspire 7, which they can use for 1 year. This machine also comes with 30 days trial of Norton security.
We played a lot of movies and Netflix shows on the laptop and we quite liked the experience. The screen is bright and viewing angles are good. With it, the sound is not too bad. However, a little bit louder would have been perfect. The gaming experience on the Acer Aspire 7 is good too. Games like CS: GO and Dota 2 can be played at 100FPS, but PUBG or more graphics hungry games have to be figured down to 30-60FPS at medium settings. But the experience with these games at mid settings is not bad either.
Windows 10 Home edition is what users get, which was a bit strange as we were expecting the Pro edition on this laptop. There is a little bit of bloatware that comes along with the laptop, but all the extra software can be uninstalled. Users also get 100GB of free storage with Acer Aspire 7, which they can use for 1 year. This machine also comes with 30 days trial of Norton security.
We played a lot of movies and Netflix shows on the laptop and we quite liked the experience. The screen is bright and viewing angles are good. With it, the sound is not too bad. However, a little bit louder would have been perfect. The gaming experience on the Acer Aspire 7 is good too. Games like CS: GO and Dota 2 can be played at 100FPS, but PUBG or more graphics hungry games have to be figured down to 30-60FPS at medium settings. But the experience with these games at mid settings is not bad either.
 The battery life of the Acer Aspire 7 is one of its brightest points. The 3-cell battery lasted over 7.5 hours for us, when not gaming. A 135W charger comes in the box that quickly charges it back. Our experience in Zoom calls was good too. The MICS work well, and the screen did a good job. Again, a slightly louder speaker output would have been perfect. The writing/typing experience on Google docs or MS Word was nice. The tactile feel of the keys is excellent and the lightest of taps registers the alphabet on screen.
")


 Step 3 –

 Step 4 –
 Read Also:
  Step 3 –
 Read Also:


 TWS earbuds will be offered at reduced price during the Flipkart Big Billion Days Sale")

 Step 3 –


