

Hardware acceleration has been an important fixture in Windows devices for years. While older PCs were more reliant upon it due to CPU constrictions, it is not just a relic of the past. You can still toggle it on your new Windows PC or laptop, depending on whether it is needed or not. Different applications on your device may also have a dedicated option to turn it on or off. So, let’s take a closer look at how to enable or disable hardware acceleration in Windows 10 and Windows 11 devices using these top 4 methods.
Read Also: Best 4 Ways to Detect AI-Generated Deepfake Videos
In This Article
What is Hardware Acceleration?
In order to boost your PC’s performance, the CPU delegates some of its tasks directly to the hardware. This is called ‘hardware acceleration’. Most of the tasks are handed over to the graphics card and the sound card for resolution, depending on the nature of the task. If your PC is performing a visual-heavy task like streaming HD video or playing a graphic-intensive game, the CPU hands over this task to the graphics card on your device. The GPU, which is specially designed for tasks like these, can handle them with ease, leading to a faster performance.
As good as hardware acceleration sounds, sometimes it may lead to certain malfunctions and breakdowns. Let’s be honest, not every activity demands the use of a dedicated graphics card. Your PC’s CPU is perfectly capable of handling everyday tasks with ease. Sometimes, hardware acceleration can cause unexpected shutdowns, screen tears, and overheating. In this scenario, you should turn it off.
Enable or Disable Hardware Acceleration in Windows 11
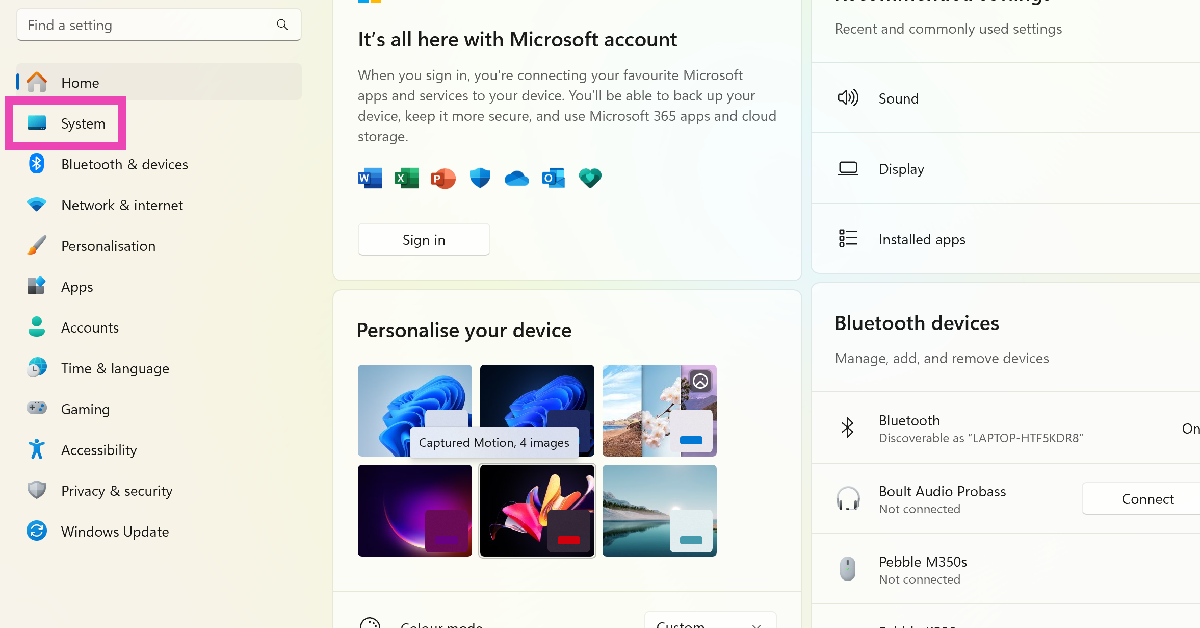
Step 1: Go to Settings and switch to the System tab on the left.
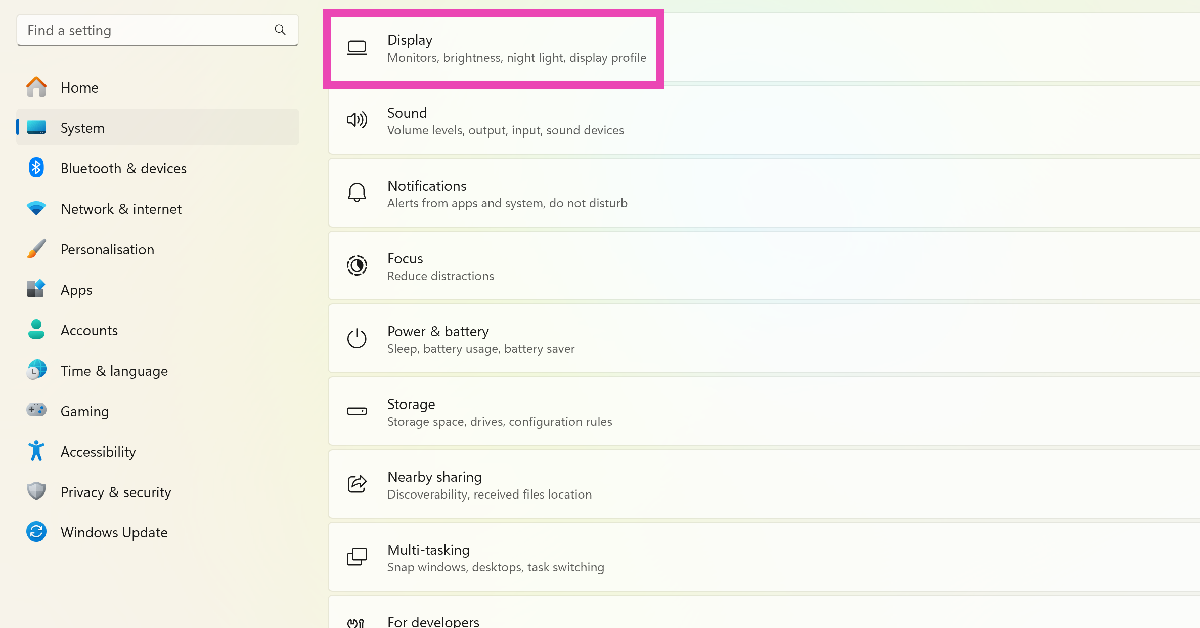
Step 2: Select Display.
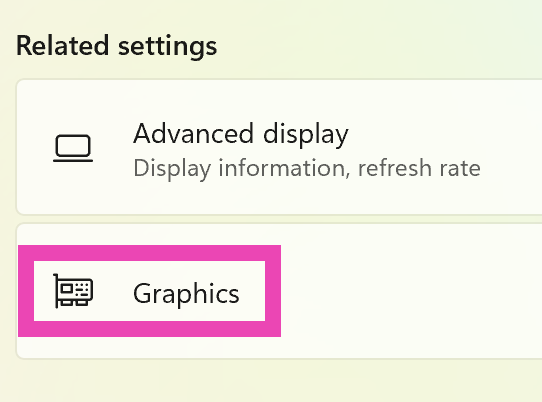
Step 3: Scroll down and click on Graphics under Related settings.
Step 4: Click on Change default graphics settings.
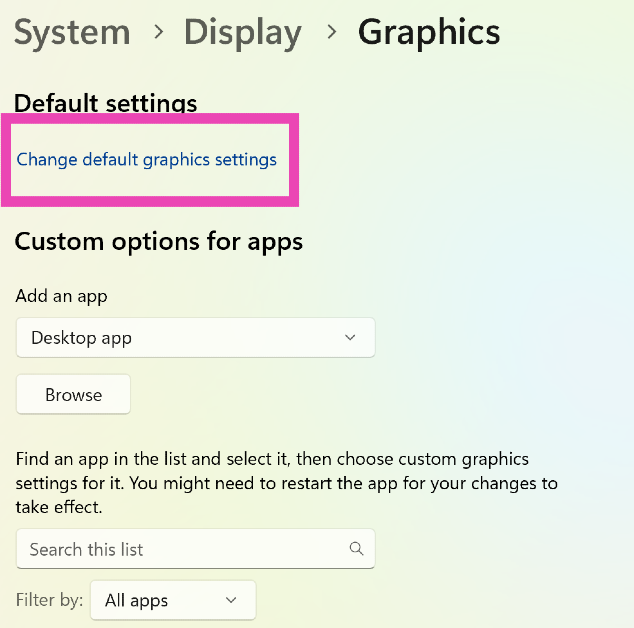
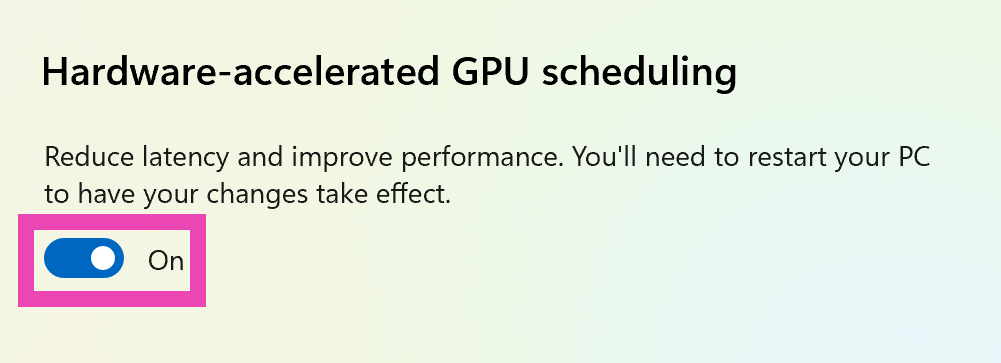
Step 5: Turn on the toggle switch for Hardware-accelerated GPU scheduling to turn on Hardware Acceleration. Flick it back to turn it off.
Enable or Disable Hardware Acceleration in Windows 10
Step 1: Go to Settings and select System.
Step 2: Switch to the Display tab.
Step 3: Click on Graphics settings.
Step 4: Turn on or turn off the toggle switch for Hardware-accelerated GPU scheduling.
Enable or disable Graphics Hardware Acceleration
Step 1: Right-click on the desktop and select Display settings.

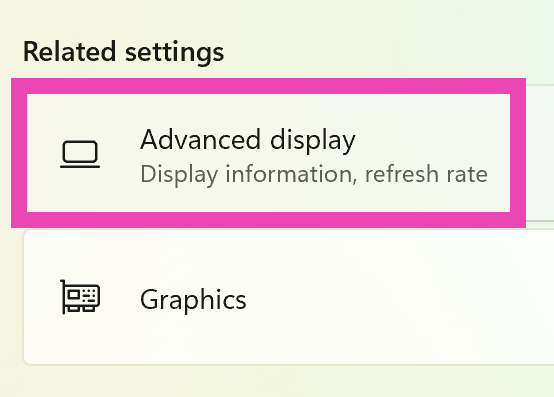
Step 2: Click on Advanced display under Related settings.
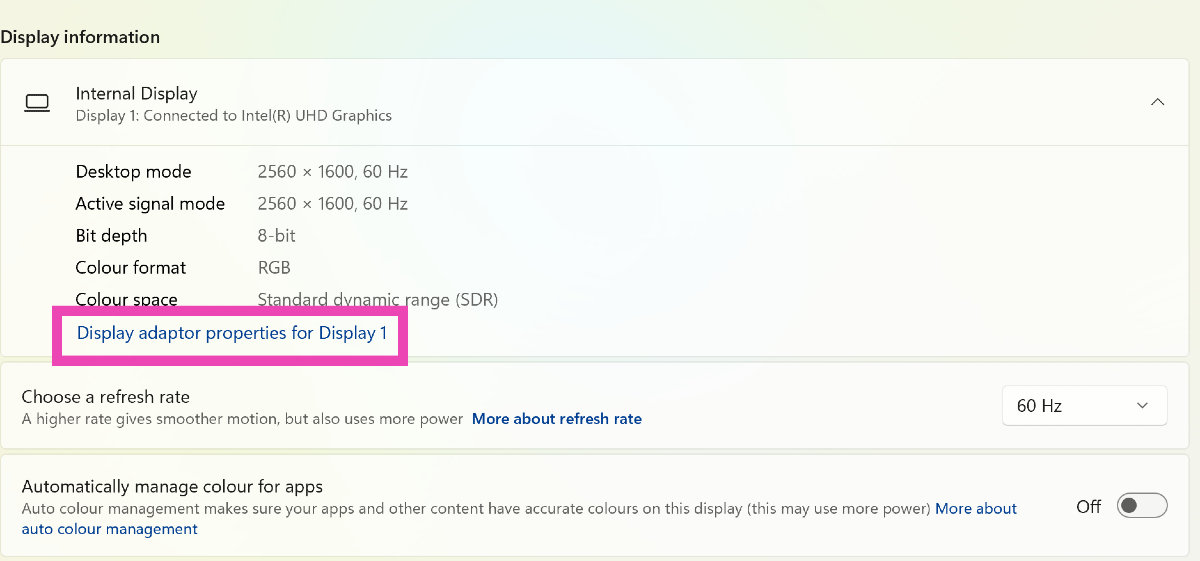
Step 3: Click on Display adaptor properties for Display 1.
Step 4: Switch to the Troubleshoot tab and select Change settings. If you don’t see the Troubleshoot tab, click on Properties>Change settings. If the Change settings option is greyed out, it means the graphics card on your PC does not support changing hardware acceleration.

Step 5: Find the Hardware Acceleration slider and move it all the way to the left.
Enable Hardware Acceleration using Registry Editor
Step 1: Press Ctrl + R to launch the Run box.
Step 2: Type regedit in the Run box and hit Enter.
Step 3: Hit Yes on the popup box and enter the following path in the address box at the top of the screen:
Computer\HKEY_LOCAL_MACHINE\SYSTEM\CurrentControlSet\Control\GraphicsDrivers
Step 4: Select HwSchMode.
Step 5: Set Value Data to 2. Select Hexadecimal in the Base section. Hit OK.
Change Audio Hardware Acceleration
Step 1: Go to Settings and select System.
Step 2: Click on Sound.
Step 3: Select Device properties.
Step 4: Scroll down and click on Additional device properties.
Step 5: Switch to the Advanced tab.
Step 6: Check the box for Allow hardware acceleration of audio with this device and uncheck it to turn it off.
Frequently Asked Questions (FAQs)
Should hardware acceleration be on or off?
Typically, hardware acceleration is turned on by default, as it should be. However, if you recognise it as the source of a problem, you should turn it off.
Does hardware acceleration affect RAM?
Since hardware acceleration utilises more resources, it also takes up a significant amount of space on the RAM.
What happens when hardware acceleration is turned off?
If you notice that certain applications on your PC are running slow or taking a long time to respond, disabling hardware acceleration can speed them up.
How to turn on hardware acceleration in Windows 11?
Go to Settings>System>Display>Graphics, click on ‘Change default graphics settings’, and turn on the toggle switch next to ‘Hardware-accelerated GPU scheduling’.
How do I enable hardware acceleration in Chrome?
Go to Chrome Settings>Advanced>System and turn on the toggle switch next to ‘Use hardware acceleration when available’. Hit ‘Relaunch’.
Read Also: How to check who viewed your Instagram Highlights (2023)
Conclusion
This is how you can enable or disable hardware acceleration in Windows 10 and 11. Apart from changing the hardware acceleration from system settings, you can also change it for specific applications like Google Chrome, Microsoft Edge, Discord, and Microsoft Office. If you’re experiencing any trouble with the performance of either of these applications, you might want to consider disabling the hardware acceleration from their settings.
