

If you use Microsoft Excel for tasks like tracking your expenditures and storing banking information, you should consider protecting your personal spreadsheets with a password. Excel has a native protection tool that allows you to do this. This means you do not need to install a third-party app or add-in for this task. The process is seamless and it takes less than a minute to keep your personal information away from prying eyes. Here’s how you can password-protect an Excel worksheet.
Read Also: Upcoming budget smartphones in India (2025)
In This Article
Managing access to your Microsoft Excel spreadsheet
Microsoft Excel offers a good range of protection tools for spreadsheets. Here’s what they can do.
Always Open Read-Only: When this option is selected, users can view the spreadsheet but not make any changes to it.
Encrypt with Password: Users can view the spreadsheet and make changes to it only if they have the password.
Protect Current Sheet: This option lets the spreadsheet owner decide what kind of changes other users can make to the sheet.
Protect Workbook Structure: This prevents users from making any changes to the structure of the workbook, like adding more spreadsheets.
Restrict Access: The spreadsheet owner can use this tool to limit the viewing and editing access to the sheet. The owner can decide which users get read-only and editing access.
Add a Digital Signature: This allows the owner to add an invisible digital signature to the workbook, thereby validating its integrity.
Mark as Final: Lets other users know that the spreadsheet is in its final form and should not be changed.
Password protect your Microsoft Excel spreadsheet
Step 1: Launch Microsoft Excel on your PC and open the spreadsheet you want to protect with a password.
Step 2: Click on File.
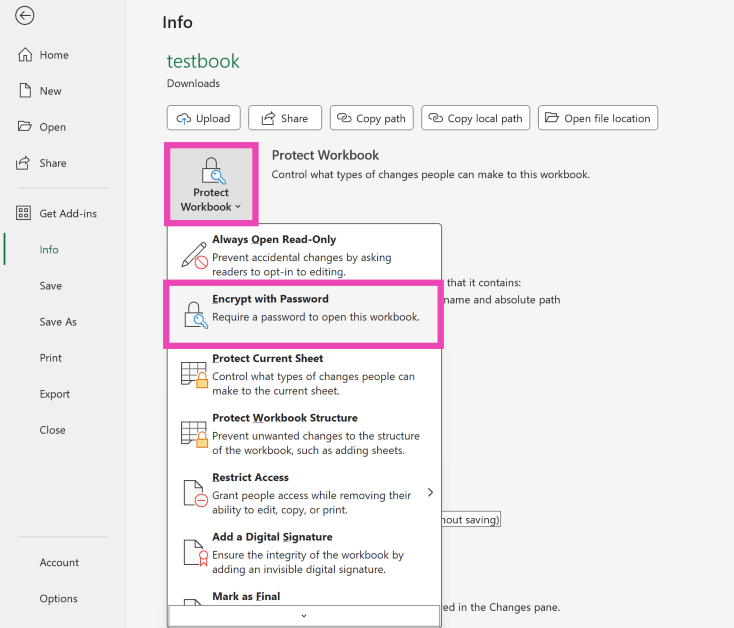
Step 3: Select Info from the sidebar.

Step 4: Click on Protect Workbook and select Encrypt with Password from the drop-down menu.
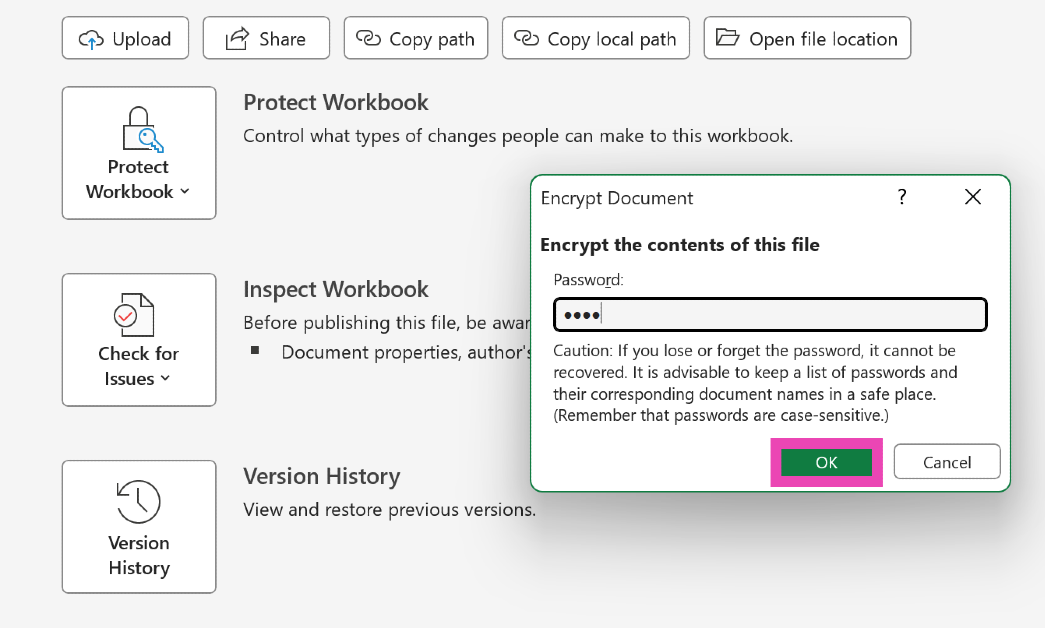
Step 5: Create a password and hit OK.
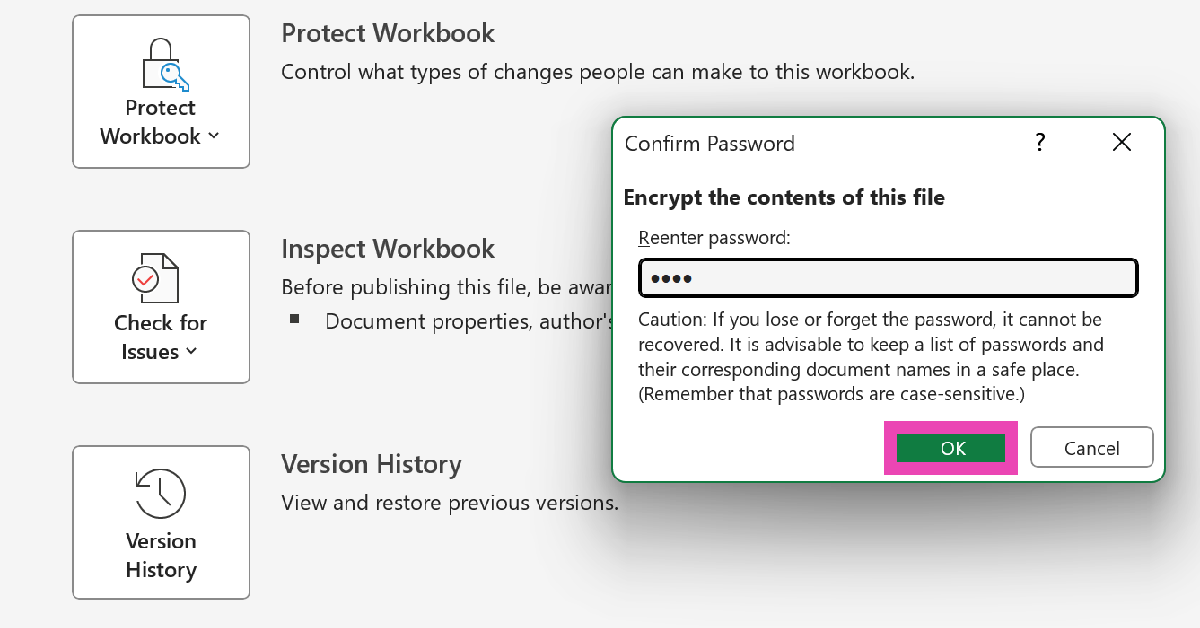
Step 6: Re-enter the password and hit OK.
Step 7: Close the spreadsheet.
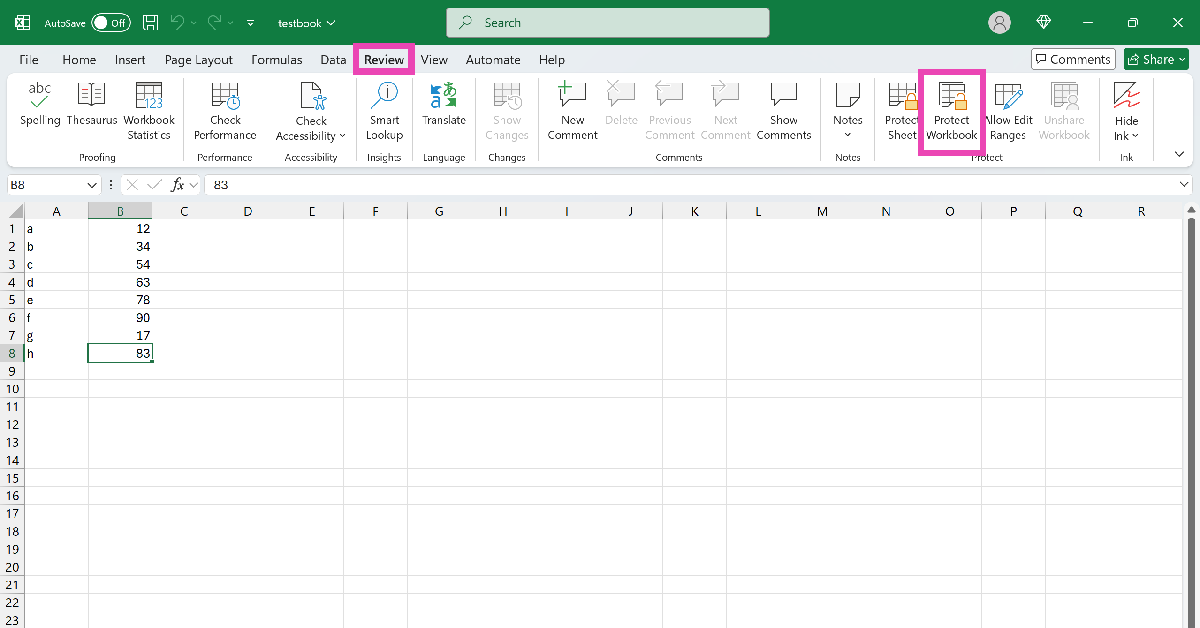
Password protect the structure of a spreadsheet in Microsoft Excel
Step 1: Launch Microsoft Excel and open a spreadsheet.
Step 2: Go to the Review tab and select Protect Workbook.
Step 3: Tick the checkbox next to Structure.
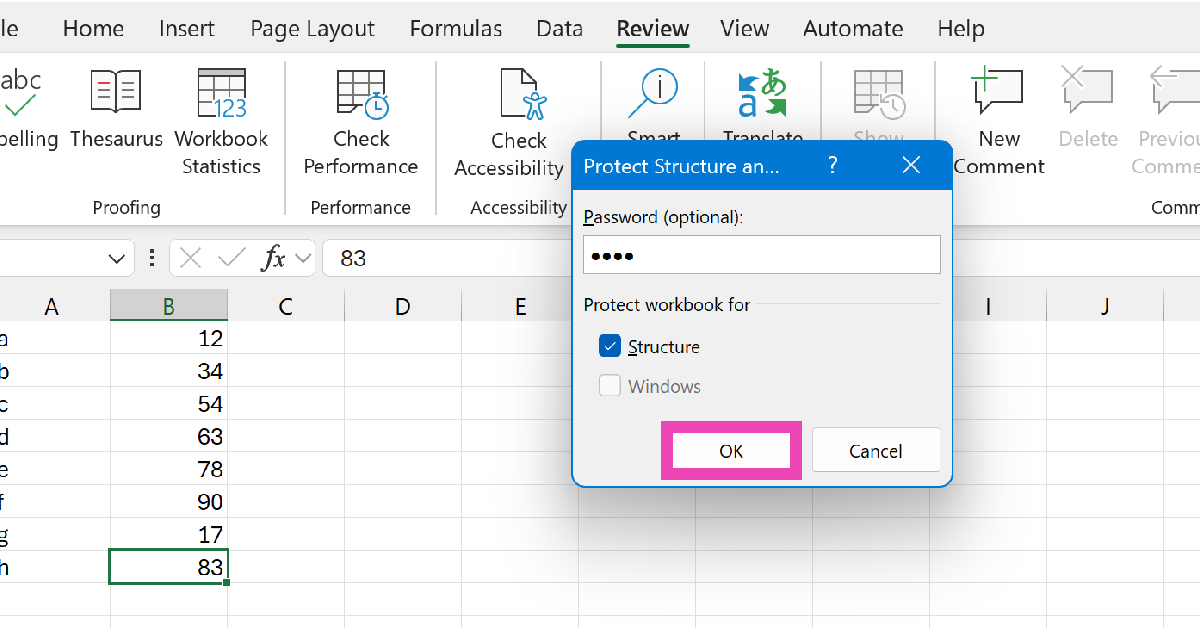
Step 4: Create a password.
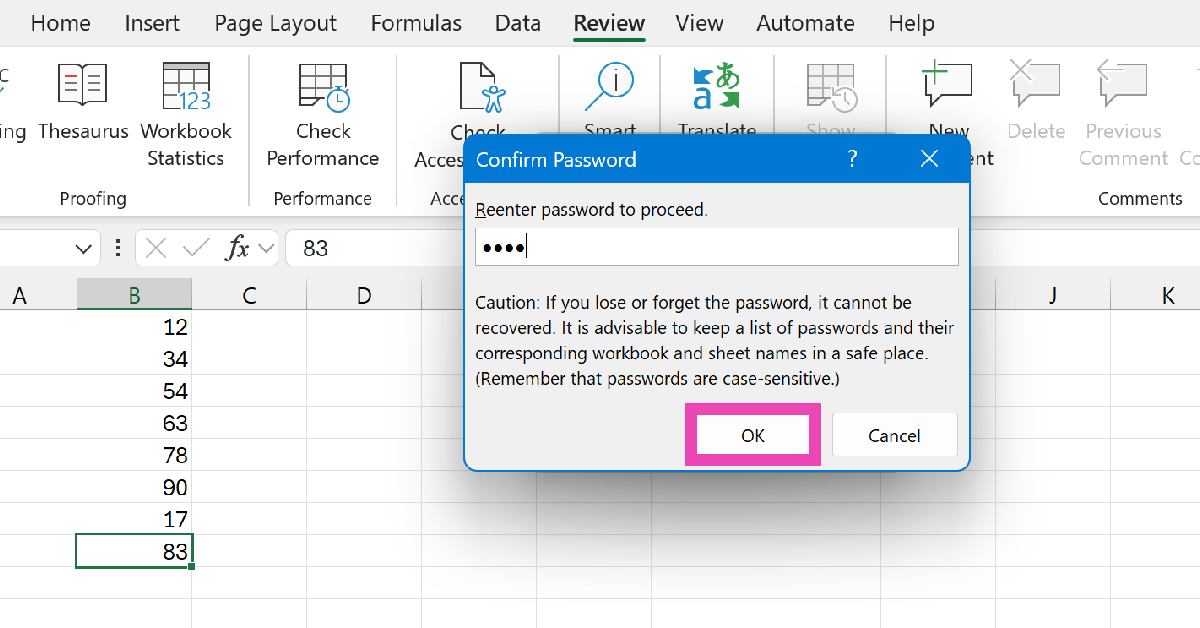
Step 5: Hit OK.
Frequently Asked Questions (FAQs)
How do I password-protect an Excel spreadsheet?
Open the spreadsheet and go to File>Info. Click on ‘Protect Workbook’ and select ‘Encrypt with Password’ from the list of options.
How do I restrict access to an Excel file?
Go to File>Info>Protect Workbook>Restrict Access>Restricted Access. In the pop-up window, choose the users who get access to the spreadsheet and can make changes to it.
Can I password-protect an Excel file without opening it?
Since you need to access the File options for an Excel file to encrypt it, you cannot password-protect it without opening it.
How do I make an Excel file read-only?
If you don’t want other users to make changes to your spreadsheet, you can make it read-only by going to File>Info>Protect Workbook and selecting ‘Always Open Read Only’ from the list of options.
Is it safe to password-protect an Excel file?
It is safe to password-protect an Excel file as long as you remember the password. If you forget the password, you won’t be able to access the spreadsheet.
Read Also: JVC enters the Indian market with the launch of new AI Vision series QLED TVs
Final Thoughts
This is how you can password-protect a spreadsheet in Microsoft Excel. If you want to make sure that no one changes the structure of the spreadsheet, use the Protect Sheet/Workbook tools in the Review menu. While you’re here, check out how you can use the IF-THEN function in Excel. If you have any questions, let us know in the comments!
