

If you want your video to sound great, it’s a good idea to record the audio separately from the video. Using your camera or phone to record audio can sometimes pick up unwanted noises like scratching, hissing, or background sounds.
Also, the people in your video might sound too quiet or far away because the camera’s microphone is usually not close enough to them.
But when you record the audio separately, it can be tricky to make sure it matches perfectly with the video. If the sound is even a tiny bit behind what’s happening on the screen, it can be distracting and make the video less enjoyable to watch.
Not sure how to do it? In this article, we’ll explain everything you need to know about syncing audio with video and how to sync audio to video using Wondershare Filmora.
In This Article
Part 1: What is Audio Video Sync
Audio-visual synchronization, or AV sync, means making sure that what you see and hear in a video or presentation happens at the same time. For example, if someone is talking in a video, their lips should move in sync with the words you hear.
This is important in meetings and presentations because it helps everything feel smooth and makes it easier to understand what’s going on. A good match of audio to video is especially important in online meetings and webinars, where people rely on seeing and hearing everything clearly at the right time to stay engaged and understand the content.
Part 2: Reasons Why Video Can Be Out of Sync With Audio
Now that we have an understanding of what is synchronize sound with video it is time to dig into the reasons for it. If you’ve watched your video and noticed that the sound doesn’t match up with the picture, there could be a few reasons why.
First, there might have been a problem with the device you used to record. For example, if you’re recording a live stream and your internet connection gets weak, the video might get squished into a lower-quality file. The sound might stay the same, but the video changes, causing them to go out of sync.
Another issue could happen if you record the audio and video separately, especially if you don’t use something like a clapper to start them at the same time. You’d have to go back and match them up later.
Part 3: How to Sync Audio to Video with Filmora
Wondershare Filmora is an all-in-one video editor, which means it has everything you need to create awesome videos. It’s easy to use, with a simple interface, drag-and-drop editing, and powerful tools that make professional video editing a breeze.
One of the coolest features of Filmora Video Editor is automatically syncs audio and video. This tool helps you match the sound with the video perfectly. You can easily make the audio faster or slower to fit with what’s happening in the video by using simple buttons and settings. Auto Audio Sync can automatically line up the video and audio for you, so they play together smoothly.
Audio Synchronization Software Filmora has some cool audio features that make video editing super easy. One of these features is Silence Detection. It helps you find and remove any quiet parts in your video that you don’t need. Filmora also has other tools like Audio Ducking, Text to Speech, and Audio Visualizer, which help you improve the sound in your videos.
Auto-sync video and audio in Filmora isn’t as hard as it might seem. Just follow these simple steps:
Step 1: Open Filmora and Add Your Video
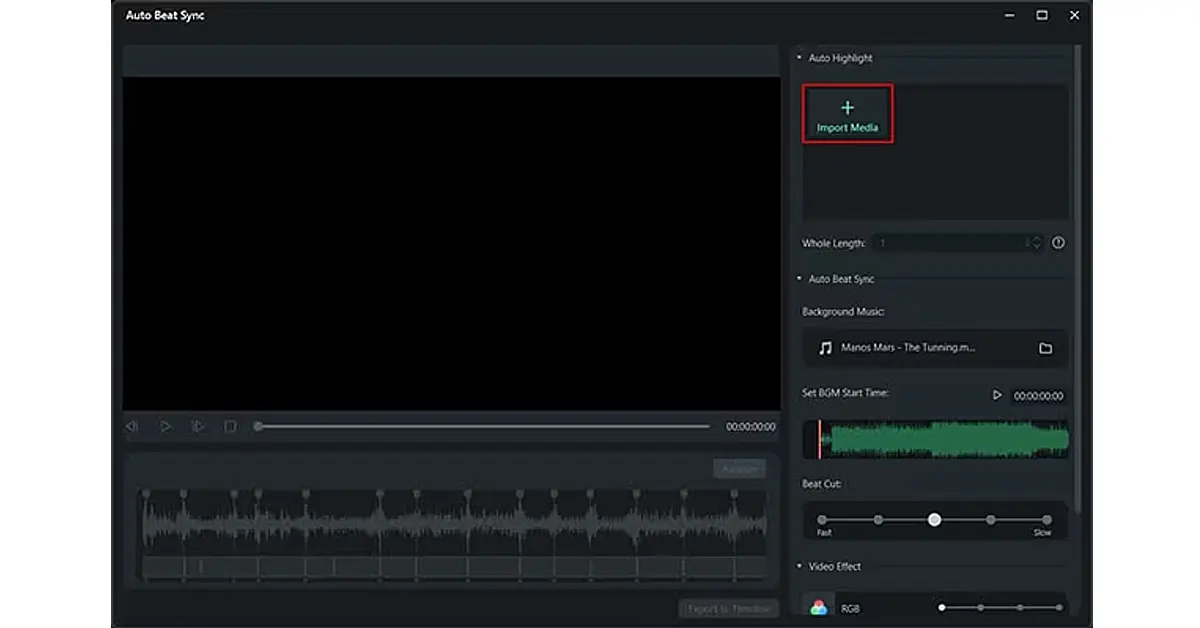
First, open Wondershare Filmora on your device. From the main screen, choose the “Auto Beat Sync” option. Then, click the “Import Media” button on the right side to add the video you want to sync with the audio.
Step 2: Sync the Video with the Audio Automatically
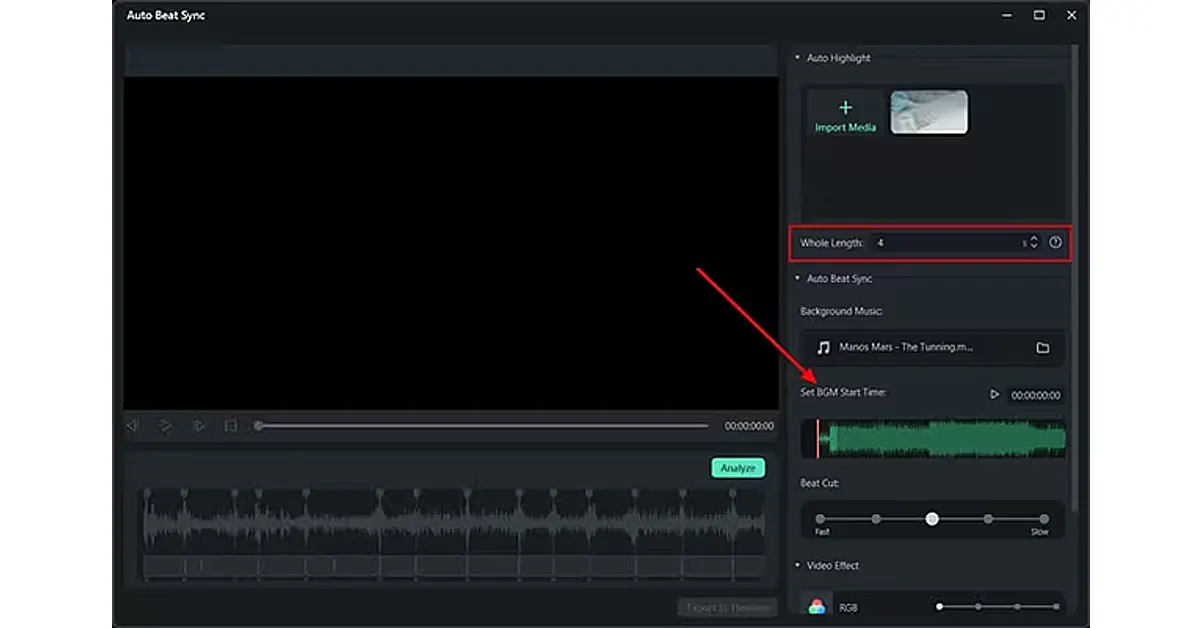
After you add your video, decide how long the whole video should be. Next, pick the background music you want to sync with the video. Set when you want the music to start and choose any “Beat Cut” and “Video Effects” from the options on the right.
Step 3: Save and Export Your Video
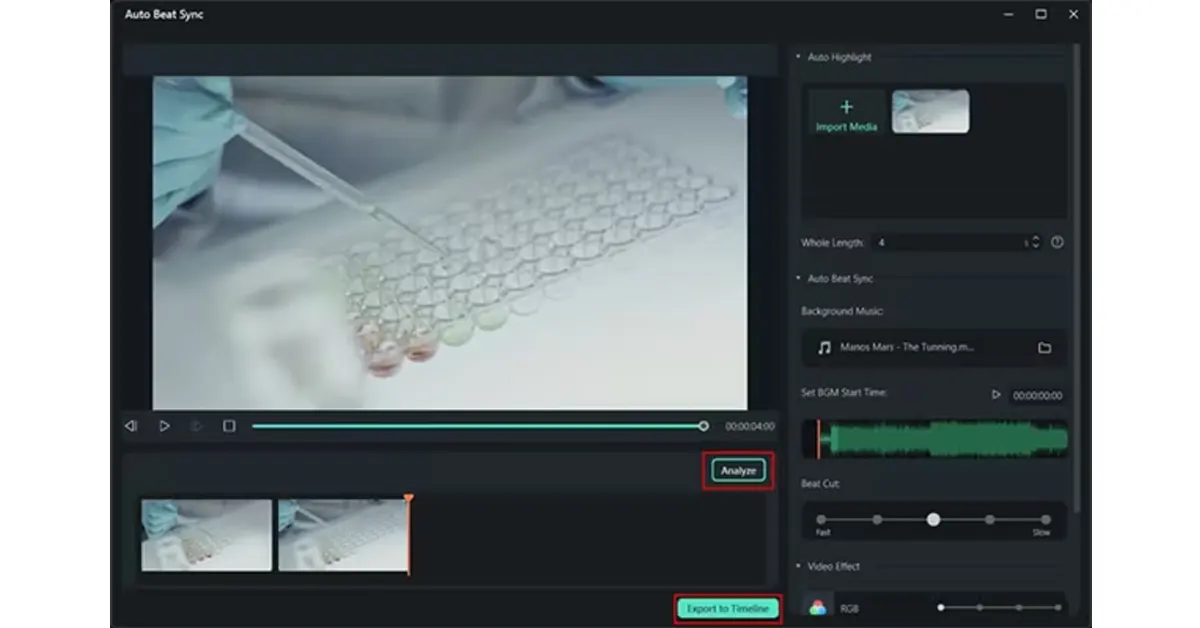
Once you’re done editing, click the “Analyze” button to check how well everything synced up. If it looks good, click the “Export to Timeline” button to add the video to the timeline, where you can save it.
Conclusion
Audio and video synchronization is essential for a smooth and engaging viewing experience. Wondershare Filmora makes this process easy with its Auto Audio Sync feature, allowing users to automatically align sound with video.
By following simple steps importing media, setting synchronization parameters, and exporting the final product you can ensure your audio and visuals are perfectly in sync.
Filmora also offers additional audio tools like Silence Detection and Audio Ducking to enhance your video’s sound quality, making it an all-in-one solution for professional video editing.
