

Snapping pictures on your phone is as easy as it gets with the standard point-and-shoot approach. However, taking the perfect shot requires controlling a lot of external factors. One of the important things that often goes under the radar is the angle at which you’re holding the phone. If you notice that your pictures are slightly misaligned or crooked, it is recommended that you use the level tool on your phone. If you want to take more balanced pictures, we recommend turning on grid lines as well. So, here are the top 3 ways to add the level tool and grid lines to the viewfinder of your Android phone’s camera app.
Read Also: Top 5 ways to improve your Smart TV’s audio
In This Article
How do grind lines and level bars work?
The level bar on your phone’s camera app helps you adjust the angle at which you’re holding the phone. If the bar isn’t resting at a 180-degree angle, it means that your viewfinder isn’t perfectly level and the resulting shot will be slightly bent towards one side. The camera app uses the accelerometer in your phone to overlay the level bar on the viewfinder.
The grid lines on the camera app are used to take more balanced images. If you’re familiar with the rule of thirds, you’ll know what we’re talking about. The grid lines create nine equal panels on the viewfinder, giving you better compositional awareness of the shot.
Add level and grid lines on the camera app on your Android phone
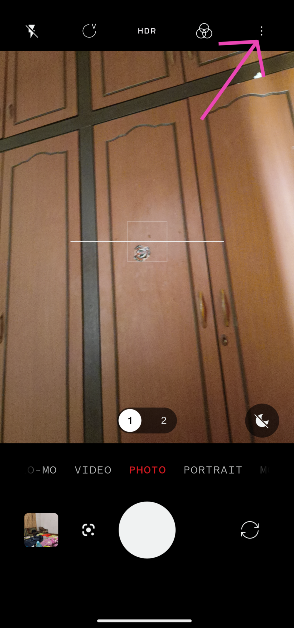
Step 1: Launch the camera app on your Android phone.
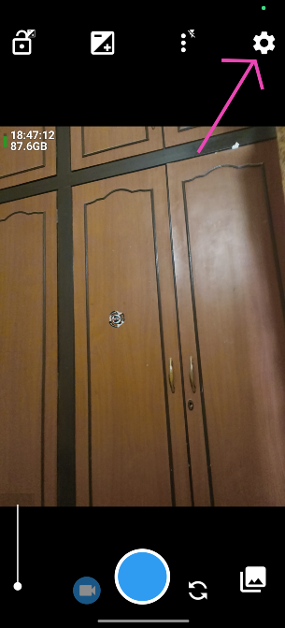
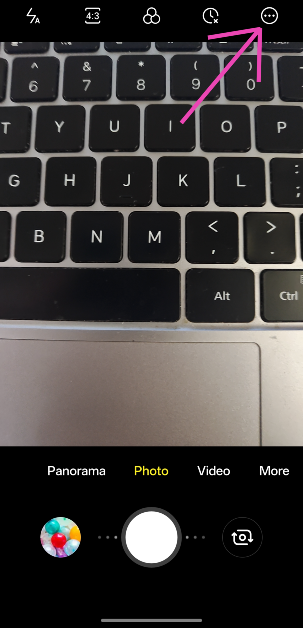
Step 2: Tap the ellipses or hamburger menu at the top right corner of the screen.
Step 3: Hit the On option next to Grid.
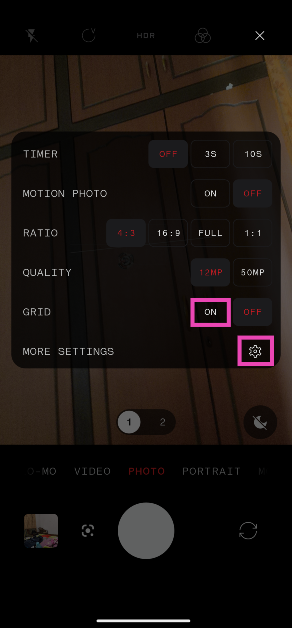
Step 4: Tap on More Settings.
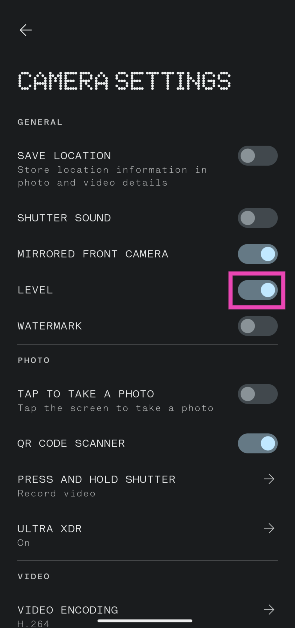
Step 5: Turn on the toggle switch for Level.
Use Open Camera (Third party)
Step 1: Download and install the Open Camera app on your Android phone.
Step 2: Hit the cog wheel icon at the top right corner of the screen to access settings.
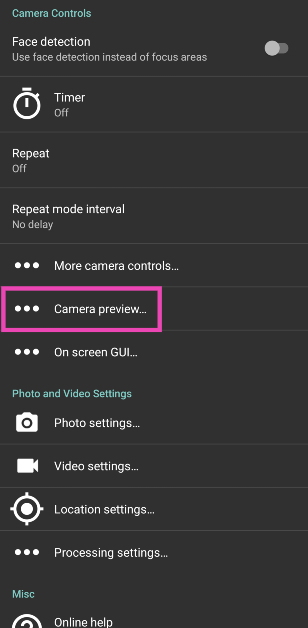
Step 3: Tap on Camera preview.
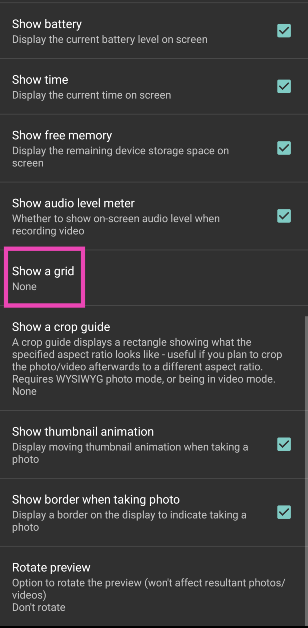
Step 4: Select the checkbox for Show angle line.

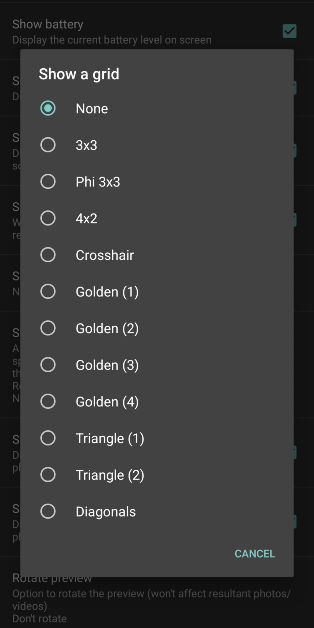
Step 5: Scroll down and tap on Show a grid.
Step 6: Select your preferred grid from the list.
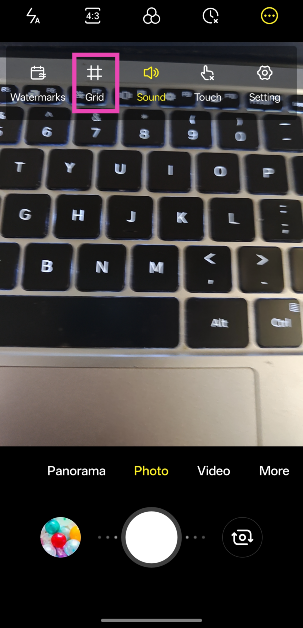
Use Camera for Android (Third party)
Step 1: Install the Camera for Android app on your phone.
Step 2: Launch the app and give it the necessary permissions.
Step 3: Hit the ellipses in the top right corner of the screen.
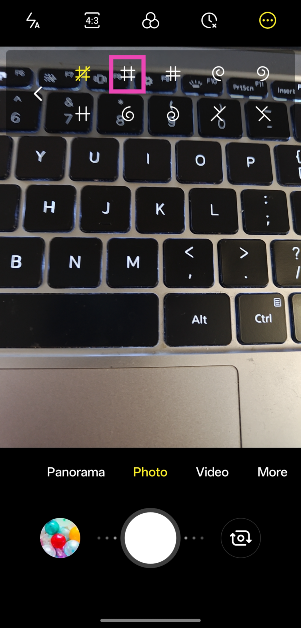
Step 4: Tap on Grid.
Step 5: Select a grid design.
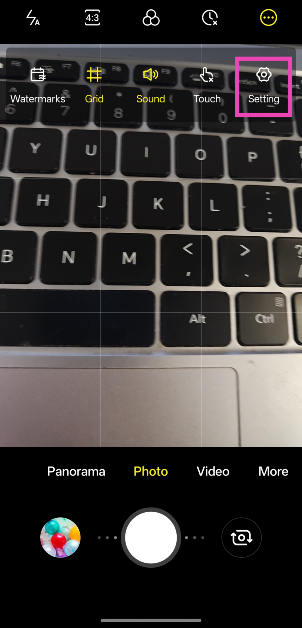
Step 6: Hit the ellipses again and select Settings.
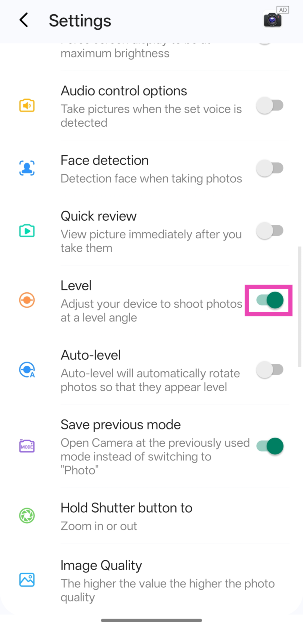
Step 7: Scroll down and turn on the toggle switch next to Level.
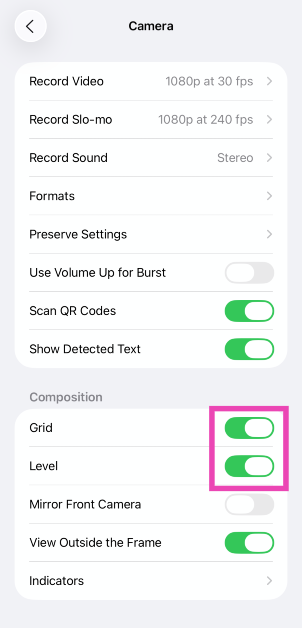
Bonus Tip: Add the grid and level tool to the iPhone’s camera
Step 1: Go to Settings.
Step 2: Tap on Camera.

Step 3: Turn on the toggle switches next to Grid and Level.
Frequently Asked Questions (FAQs)
How do I add the level tool and grind on my camera app’s viewfinder?
Open the Camera app, tap on the ellipses/hamburger menu at the top right corner of the screen, hit the On switch for grid lines, tap on ‘More Settings’, and turn on the toggle switch for ‘Level’.
How do I calibrate the level tool on my Android phone’s camera app?
The native camera app on your Android phone does not offer the option to calibrate the level tool. However, you can calibrate it on the Open Camera app. Launch the app, go to Settings>More camera controls and tap on ‘Calibrate level angle’.
How do I automatically add a watermark to my pictures?
Go to Camera>Settings>Watermark, turn on the toggle switch, and enter the text you want for the watermark.
Read Also: How to back up text messages and SMS on your Android phone
Conclusion
These are the top 3 ways to add the level tool and grid lines to your Android phone’s camera app. Check out this article to learn how to add a watermark to your images. If you have any other questions, let us know in the comments!
