

In such a modern society where digital music prevails everywhere, listening to CDs seems to be an archaic thing for most of you now. But there are still some of you who desire to make a CD that is a collection of all your favourite songs for playing back. Also, you may want to burn a delicately designed CD as a gift for a person who is important to you. Confronted with such a demand, the very need for you, for example, is how to burn Apple music to CD. Don’t worry, this post will share with you the solutions to it specifically. Just take a seat and read along.
In This Article
What You Need to Burn Apple Music to CD
Good tools are prerequisites to the successful execution of a job. So, first, you need to prepare the necessary tools on the list below so that it can go on wheels.
- A Blank Recordable CD
This is indubitably needed because it is the storage media for saving converted Apple Music Songs.
- A CD Drive
A CD drive is used to insert and read blank CDS. If your computer does not have a built-in CD drive, you can purchase an external CD burner and connect it to your computer via a USB cable. Alternatively, you can use a desktop computer with a CD burner.
- A Music Burner
You should download the disc-burning application on Windows or Mac to burn the converted DRM-free MP3 Apple Music songs to a CD.
- A Music Converter
Before you burn an Apple Music song to a CD, you need to use a certain music converter to remove DRM protection from Apple Music and convert Apple music to MP3 format or any other format the CD can recognize.
Preparations Before Buring Apple Music to CD
As mentioned before, Apple Music songs are encrypted with DRM. Therefore, before burning music onto a CD, the first and necessary step is to make sure the songs you want to burn are free of DRM. To remove the DRM, you will need a music converter.
After searching and trialling, MuConvert Apple Music Converter is discovered as the leading helper which is designed specially to adapt to your needs. It is an easy-to-use software program dedicated to removing DRM from Apple Music songs, and quickly downloading songs/playlists/albums/podcasts from Apple Music into high-quality MP3, WAV, M4A, and FLAC formats.
Highlighted Features of MuConvert Apple Music Converter
- Get rid of DRM Protection: Easily remove DRM from Apple Music songs for you.
- Multiple Output Formats: Download Apple Music to local MP3, M4A, WAV, and FLAC formats.
- Best Audio Quality: Get your desired audio quality by adjusting the sample rate and the bit rate.
- Fast Converting Speed: Convert Apple Music at a lightning-fast speed of up to 10X speed and batch download all your favourite Apple Music songs in one go.
- Preserve ID3 tags: Song details like title, artist, album, genre, and album will be perfectly preserved throughout the conversion process to facilitate efficient management and organization of your music collection.
How to Remove DRM from Apple Music
Here are the steps on how to use MuConvert Apple Music Converter to remove DRM, and download Apple Music songs in MP3. For lossless quality, you can also download them in WAV.
STEP 1. Install MuConvert Apple Music Converter
After downloading and installing MuConvert Apple Music Converter, launch it. Then enter the Apple Music web player and log in using your Apple ID.
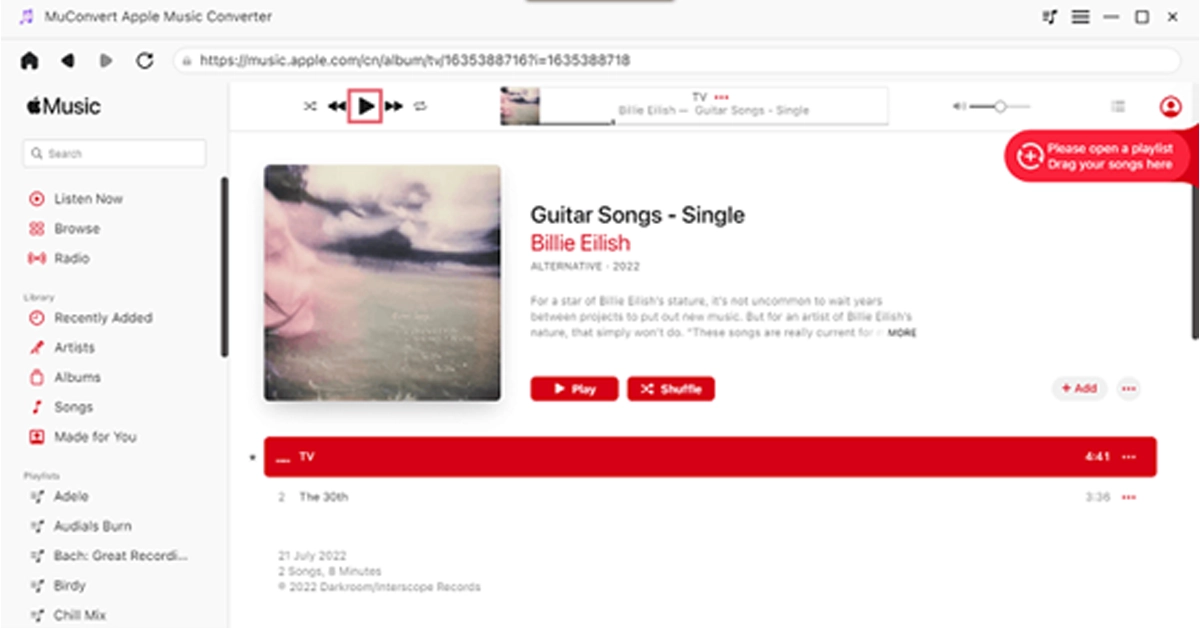
STEP 2. Add Your Desired Song for Conversion
After logging in, go to the Apple Music web player and choose some songs to download. Simply drag any song, playlist, or album you like to the “+” button located on the right for conversion.
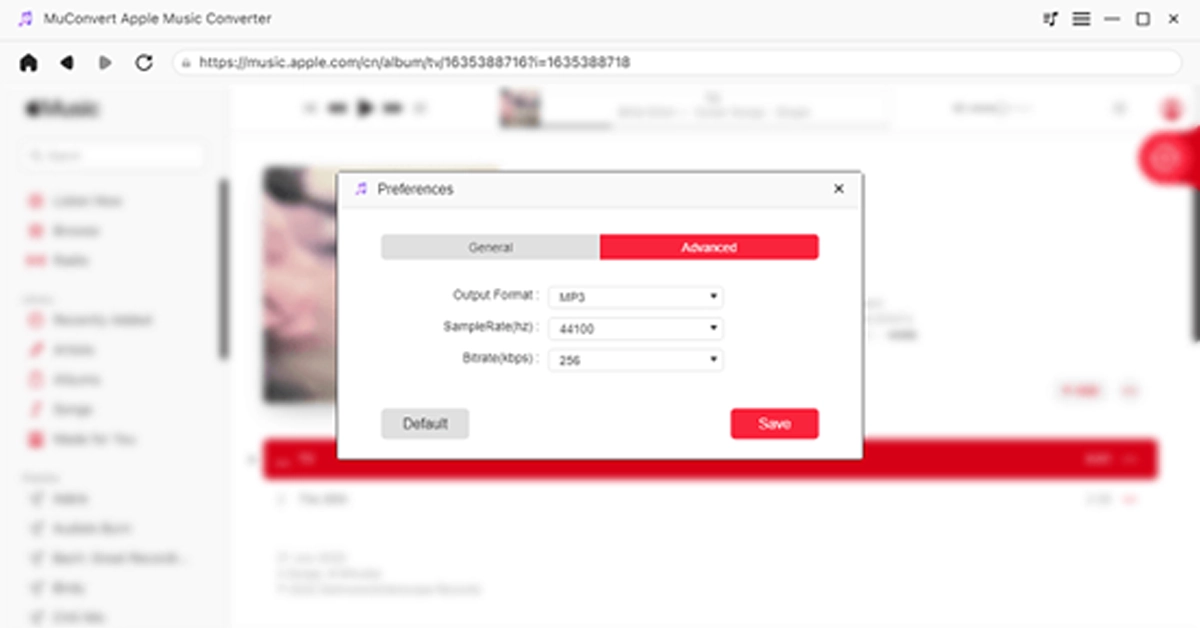
STEP 3. Customize Your Settings (Optional)
Navigate to the “Menu” and select “Preferences” to customize the “Advanced” settings. Within this window, you have the option to adjust the format, sample rate, and bitrate based on your preferences.
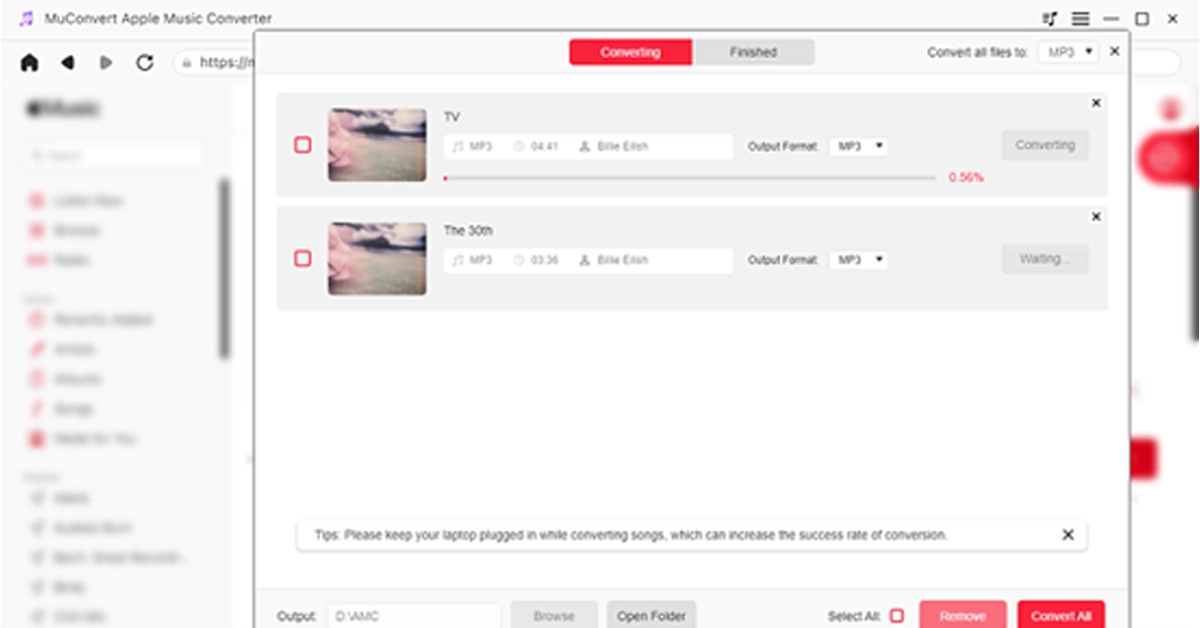
STEP 4. Remove DRM and Download Music to MP3
Now, go to “Convert all files to” in the top right corner and select “MP3” as the output format. Finally, click on the “Convert All” icon at the bottom, and MuConvert Apple Music Converter will remove the DRM from the Apple Music songs, and download all the Apple Music songs you’ve selected to MP3.
Now that you have all DRM-free Apple Music songs, the next step is to burn them into your CD. Keep reading for detailed steps.
Burn Apple Music to CD on Windows
For Windows users, Windows Media Player, a default legacy Apple Music to CD converter, is highly recommended for you to burn Apple Music to CD without additional software. It is easy to use and completely free. Follow the steps below to start burning Apple’s music to a CD.
Step 1. Insert a blank CD and then run Windows Media Player immediately.
Step 2. Choose the “Burn” tab located in the upper-right corner.
Step 3. In File Explorer, find the music files you want to burn. Drag them to the burn list.
Step 4. Click “Start Burn” to begin burning your music files to the CD. Wait for the process to finish before taking away the CD to avoid losing progress or sabotaging your efforts.
Burn Apple Music to CD on Mac
If you are a Mac user, iTunes is often the primary choice for you when it comes to burning Apple Music onto CDs. It can be utilized effortlessly without necessitating the search for an alternative CD burner. Now, let’s read about how to burn Apple Music to CD with iTunes. Note that a playlist needs to be established before burning.
Step 1. Open iTunes and create a new playlist by clicking on “File”-“New”-“New Playlist”. Proceed to name the playlist accordingly before dragging and dropping these converted Apple Music songs into the playlist.
Step 2. Please insert the blank CD into the CD drive. Subsequently, a prompt will appear stating “A CD or DVD has been inserted.” Click on “OK”.
Step 3. Right-click on the playlist and choose the option “File” followed by “Burn the Playlist to disc”.
Step 4. In the popped-up window, either select “Audio CD” or “MP3 CD”, and then click the “Burn” button at the bottom to start burning Apple Music songs to the disc.
Read Also: Qualcomm introduced Bluetooth aptX Lossless Audio feature
Final Words
By and large, this post mainly introduces you to how to burn Apple music to CDs easily as well as quickly. From the very tools you need to the specific procedures listed for reference, everything is to the most extent illustrated and covered to better help you solve your problems. It’s worth mentioning that the key to burning Apple Music songs to CD is removing the DRM and downloading them to your desired format via MuConvert Apple Music Converter. This music converter surely helps you a lot. Don’t hesitate anymore, download it now!
