

If you’re in a rush and need to hide your personal information in a screenshot before sharing it with someone, the Snipping Tool in Windows 11 has got you covered. The native screenshot tool on your Windows PC has a bunch of editing options to customise the screengrab and extract text from it. These options come in quite handy when you don’t want to seek the help of a photo-editing app to make quick tweaks. Here is how you can remove sensitive information from screenshots in Windows 11.
Read Also: Wobble to launch its first smartphone in India soon; launch date announced
In This Article
Before you begin
There are 2 broad ways you can go about hiding personal information in your screenshots. The first method is the traditional way of using a pen, brush, or highlighter tool to conceal the text in the image. You don’t need to go to a different photo-editing app to make the edit. The Snipping Tool has its own ballpoint pen tool that can cover text with ease. There are options to select the colour and size of the strokes.
The other method is quicker and more straightforward, but limited in its functionality. The ‘Quick redact’ option in Snipping Tool is designed to quickly erase your personal information from your screenshots. The redactions look neat and professional. The downside is that this option works on email addresses and phone numbers only. Names, physical addresses, and other sensitive information are not covered by this feature.
Use Quick Redact in Snipping Tool
Step 1: Take a screenshot using the Windows + Shift + S keyboard shortcut on your Windows 11 laptop or PC.
Step 2: Click the preview pop-up to open the screenshot in Snipping Tool.
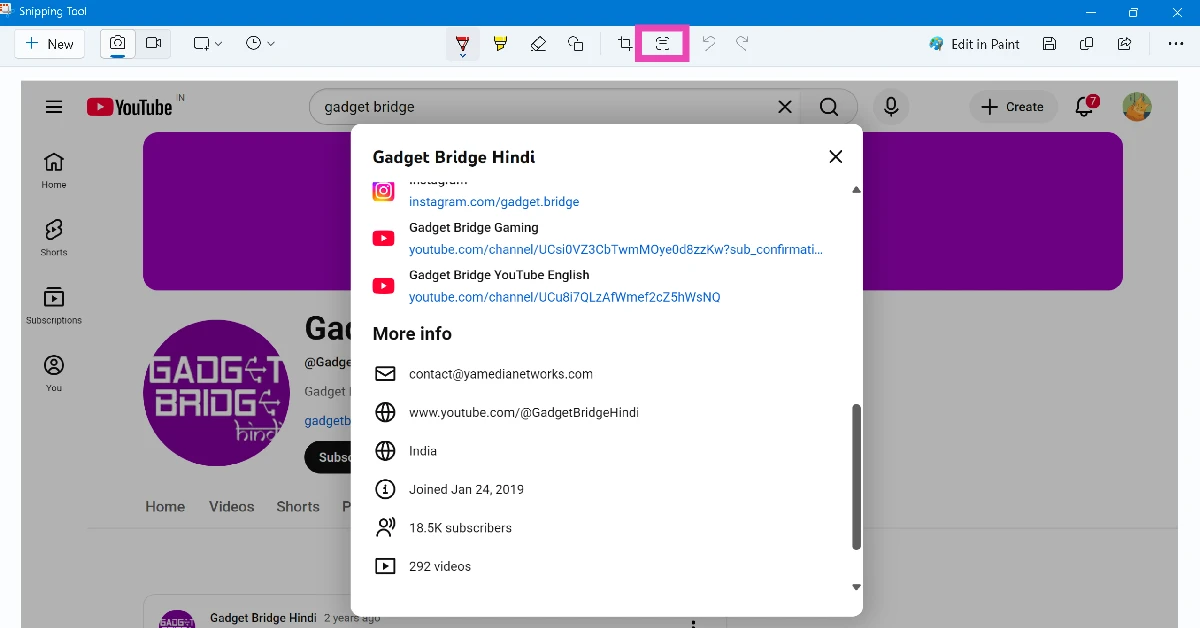
Step 3: Hit the text actions icon in the top row.
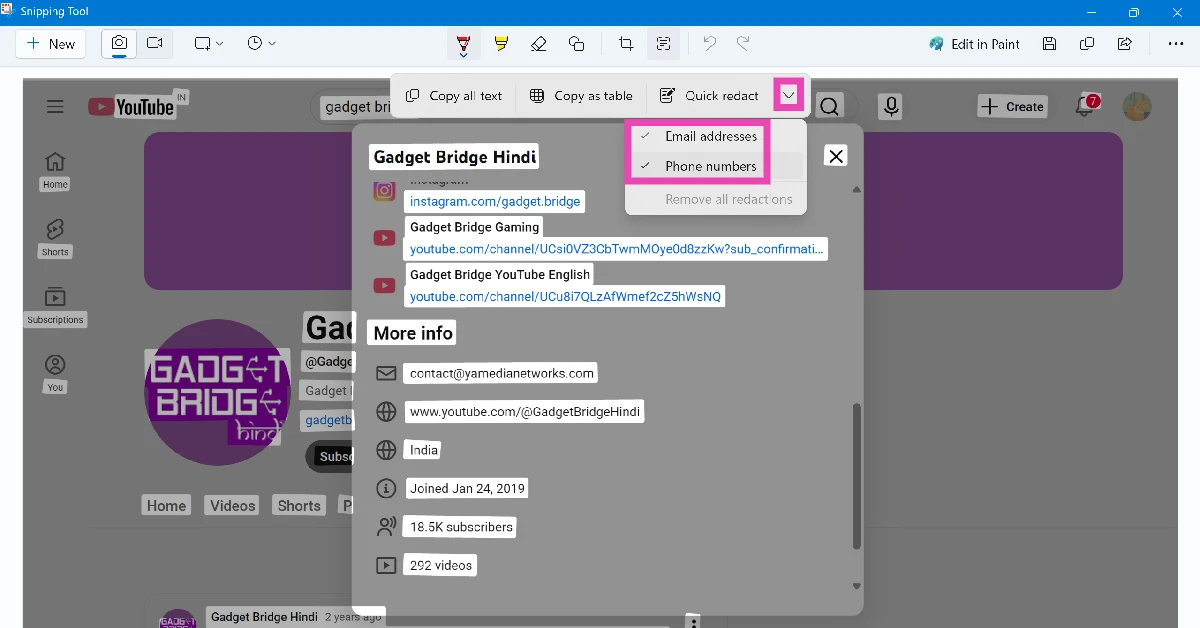
Step 4: Hit the arrow icon next to Quick redact and select Phone numbers and Email addresses.
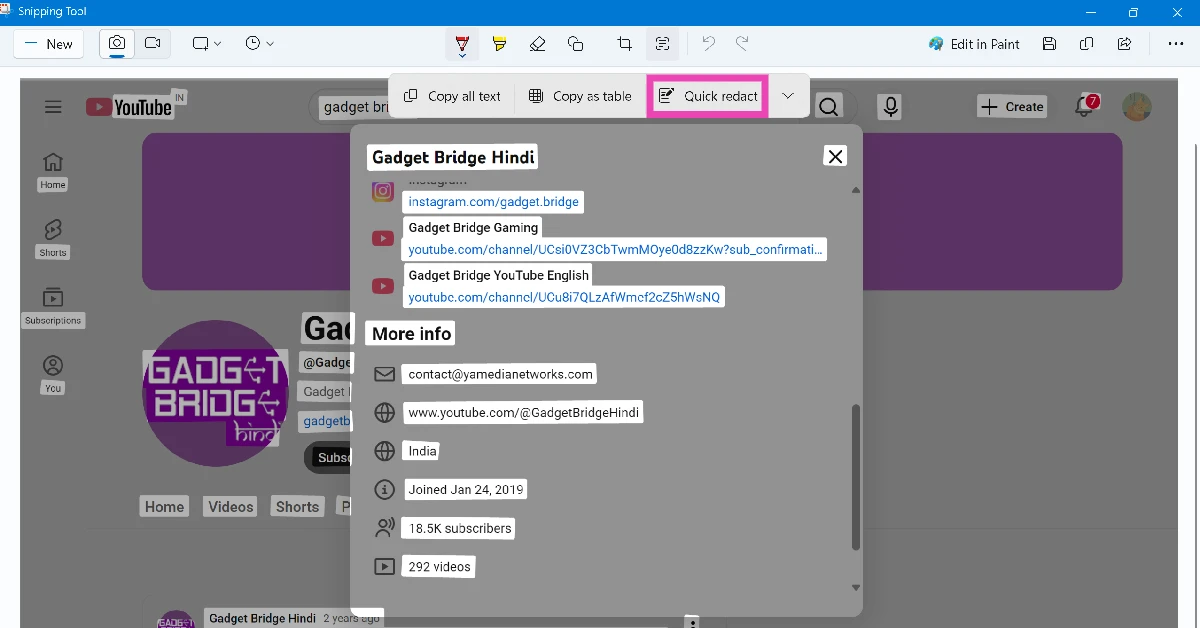
Step 5: Click on Quick redact.
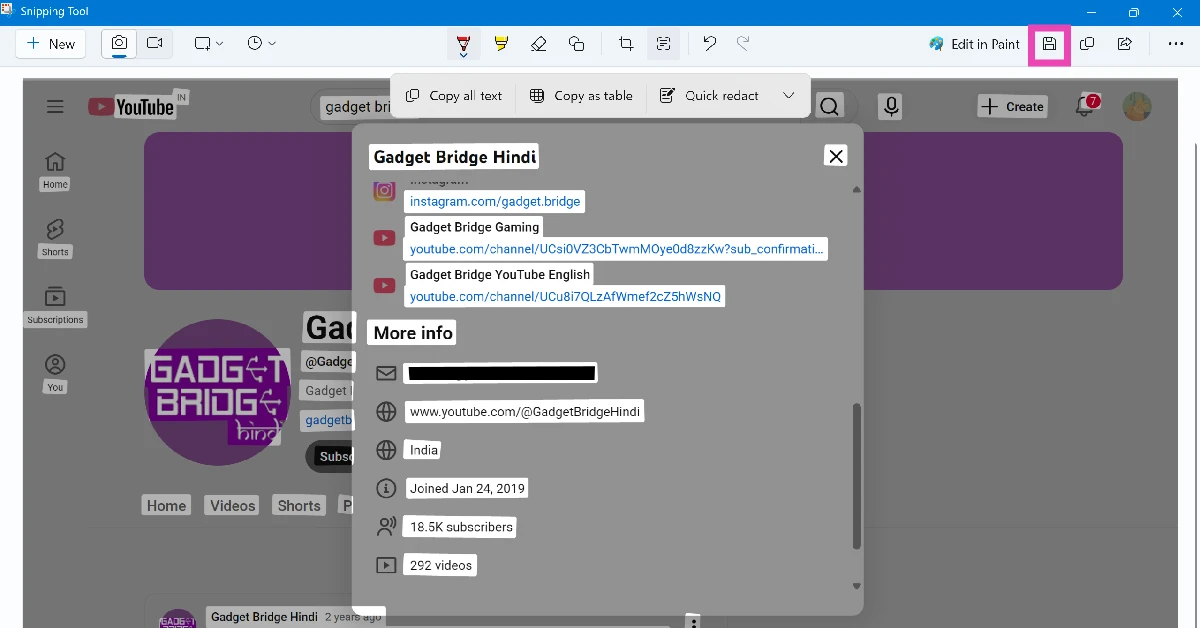
Step 6: Hit the save icon to save the screenshot on your device.
Use the Ballpoint Pen in Snipping Tool
Step 1: Take a screenshot using the Windows + Shift + S keyboard shortcut on your Windows 11 laptop or PC.
Step 2: Click the preview pop-up to open the screenshot in Snipping Tool.
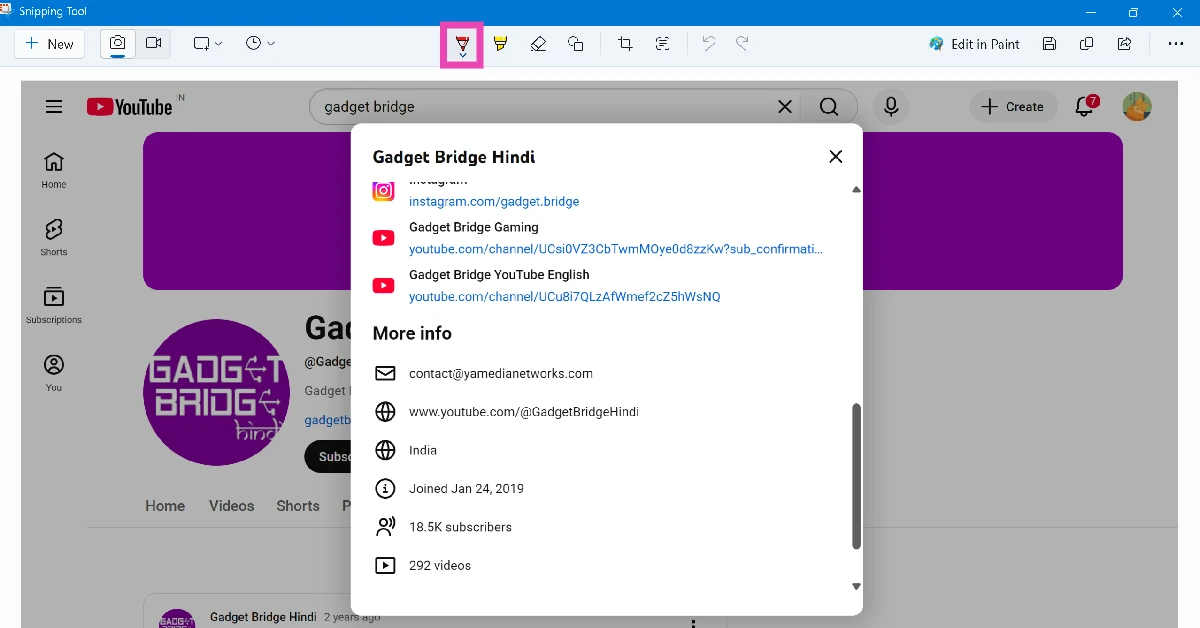
Step 3: Click the ballpoint pen icon in the top row.
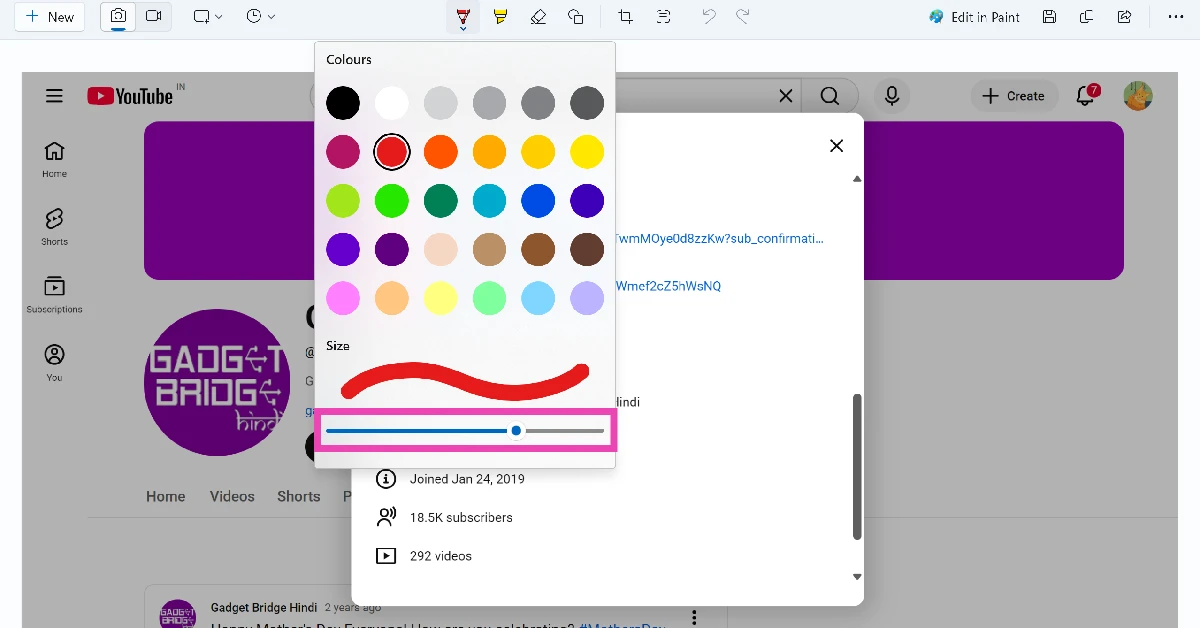
Step 4: Select a colour and stroke size.
Step 5: Drag the cursor over the information you wish to redact.
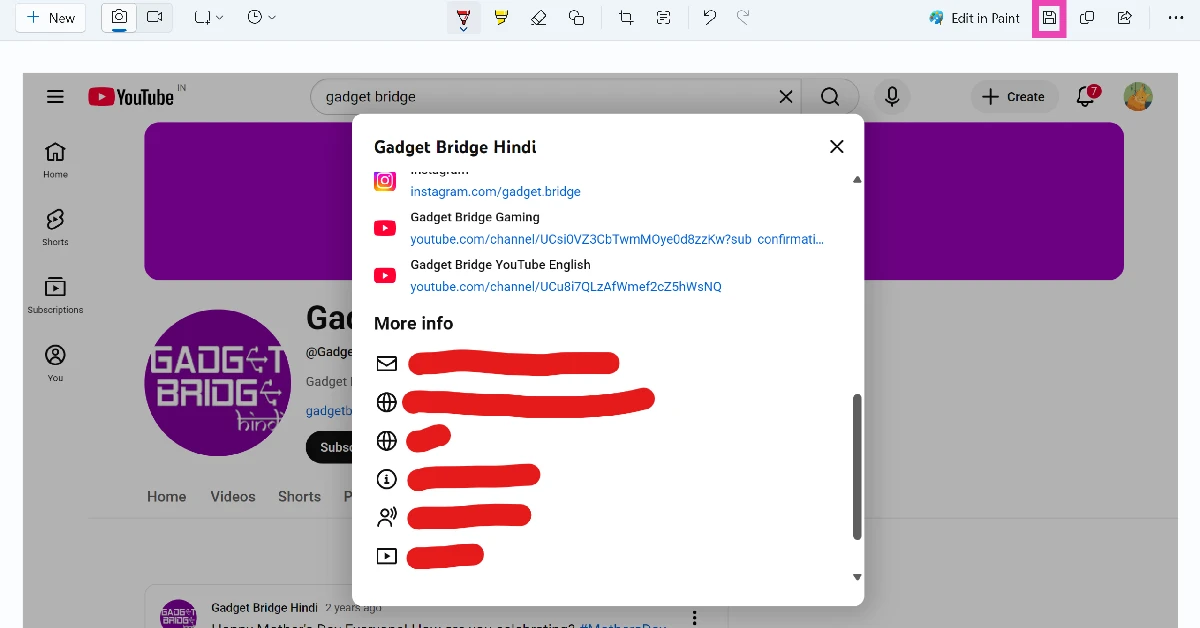
Step 6: Hit the save icon to save the screenshot on your device.
Frequently Asked Questions (FAQs)
How do I hide details in Snipping Tool?
You can hide sensitive information on your screenshots by using Quick Redact in Snipping Tool. Open the screenshot preview, click the text actions icon, hit the arrow icon next to ‘Quick redact’, and select ‘Remove all redactions’. As of now, this tool only removes phone numbers and email addresses.
How do I hide sensitive information in Snipping Tool?
Open your screenshot in Snipping Tool, select the ballpoint pen tool in the top row, choose a colour and size for the tool, and drag the cursor over the content that you wish to hide.
What is the keyboard shortcut to take a screenshot in Windows 11?
Press Windows key + Shift + S on your keyboard to take a screenshot in Windows 11.
Where are the screenshots stored in Windows 11?
You can find your screenshots by opening the File Explorer and going to Pictures>Screenshots.
How do I change the Snipping Tool’s save location in Windows 11?
Launch the Snipping Tool, hit the ellipses, go to Settings, and click on ‘Change’ next to ‘Screenshots are saved to’. Go to your preferred destination and click on ‘Select Folder’.
Read Also: How to check your watch history on Instagram
Final Thoughts
The editing and redaction options in Snipping Tool may be limited, but they are enough to strike out sensitive information from your screenshots. If you want to hide certain information by blurring or pixelating it, click the ‘Edit in Paint’ option in Snipping Tool’s preview window.
