

Enabling automatic app updates on your phone is recommended if you want to gain access to new features as soon as they are rolled out. New updates also boost the security of your device and patch bugs and malfunctions. If you have WiFi access at home, you don’t need to worry about the data consumed by automatic updates. Sometimes, users often report that despite internet access, their phone cannot install new updates. So, let’s take a look at the 10 quick fixes for the ‘Google Play Store not auto-updating apps’ issue on your Android phone.
Read Also: Top 7 fixes for ‘Emails not syncing’ on Android phone (2024)
In This Article
Why are apps not updating automatically on my phone?
The process of updating apps occurs in the background and mostly goes unnoticed by the user. While your phone doesn’t explicitly notify you about downloading updates, you can always find the progress bar in the notification shade when an update is being downloaded. If your phone stops updating apps all of a sudden, it could be due to one of the following reasons.
- Auto-updates aren’t allowed over mobile data
- The date and time information on your phone is incorrect
- Connection issues with the WiFi
- You have run out of mobile data
- Google Play Store is out of date
- Google Play Store’s cache is corrupted
- Google Play Store isn’t allowed to function in the background
- Google Play Store isn’t allowed to use data in the background
- Your phone’s OS is out of date
Allow apps to auto-update on mobile data
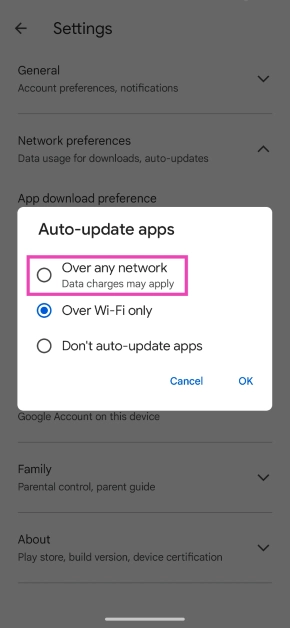
By default, apps are set to auto-update when your smartphone is connected to a WiFi network. Automatically updating apps using your mobile network can consume a fair share of your allotted data and rack up a lot of data charges. If you’re fine with that, here’s how you can go about it.
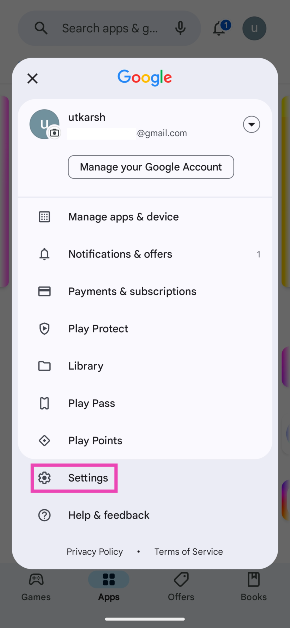
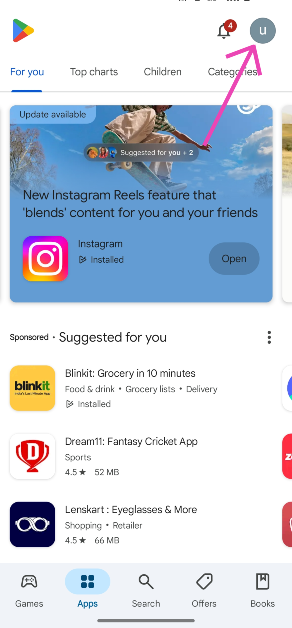
Step 1: Launch the Google Play Store on your phone and tap your profile picture at the top right corner of the screen.
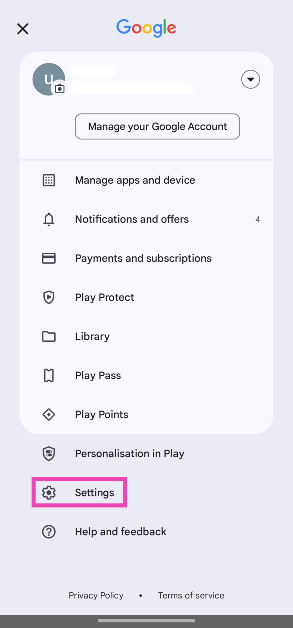
Step 2: Tap on Settings.
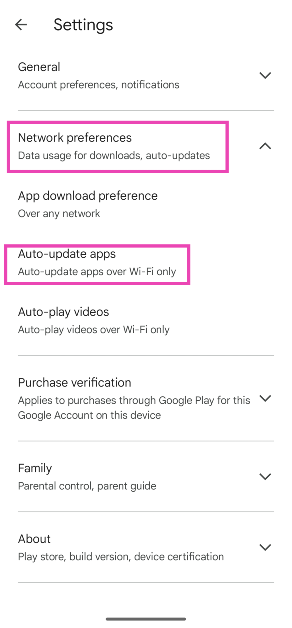
Step 3: Tap on Network preferences and select Auto-update apps.
Step 4: Select Over any network.
Update the Play Store version
Step 1: Launch the Google Play Store on your phone.
Step 2: Tap your profile icon in the top-right corner of the screen.
Step 3: Tap on Settings.
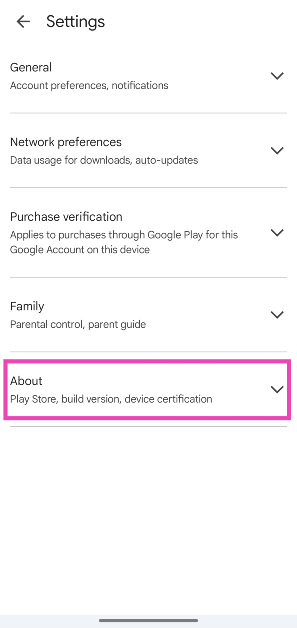
Step 4: Expand the About section.
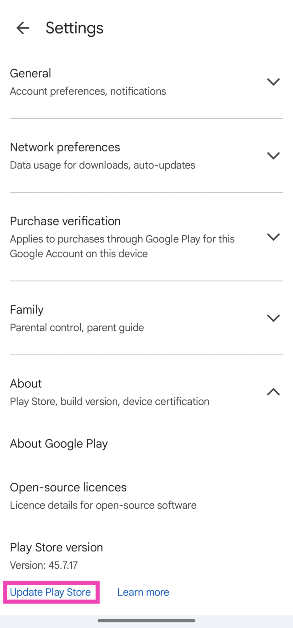
Step 5: Tap on Update Play Store.
Make sure Google Play Store is allowed to use background data
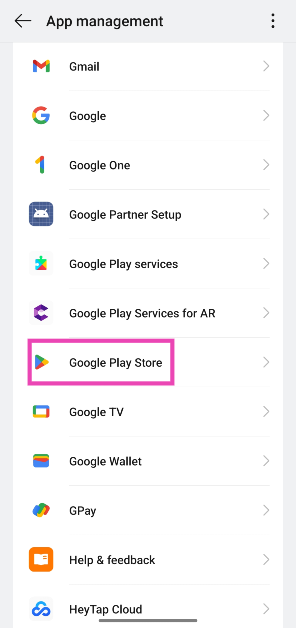
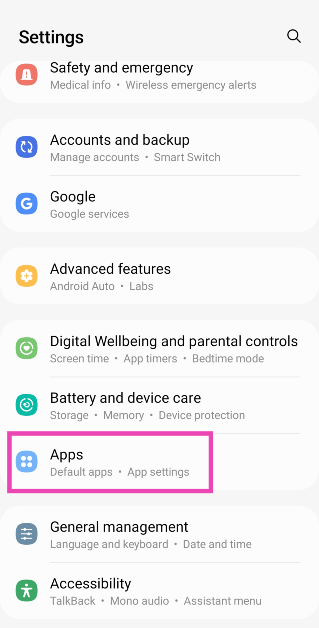
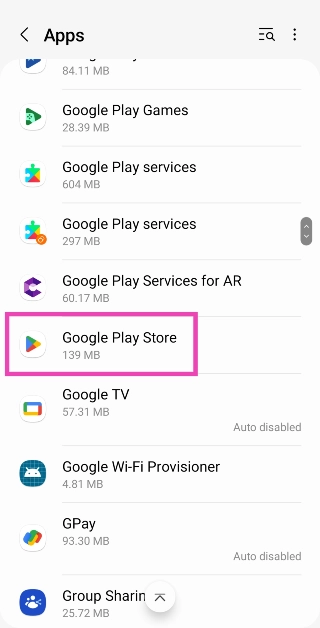
Step 1: Go to Settings and select Apps.
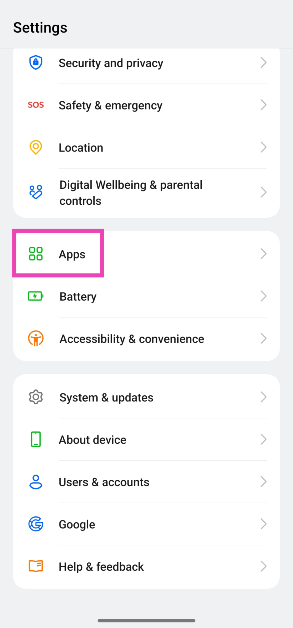
Step 2: Tap on App management.

Step 3: Select Google Play Store.
Step 4: Tap on Data usage.
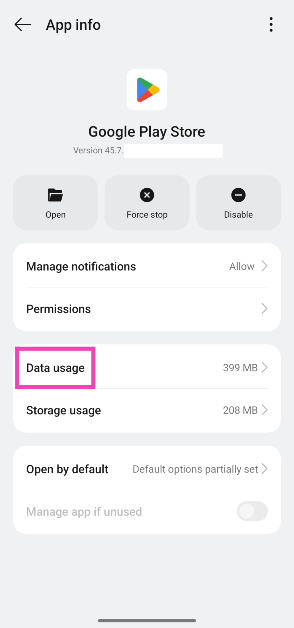
Step 5: Turn on the toggle switch next to Background data.

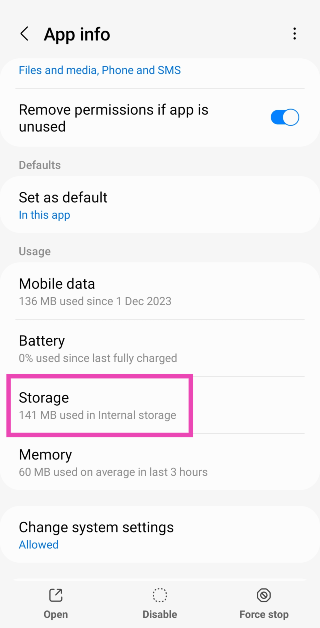
Clear Google Play Store’s cache
Step 1: Go to Settings and select Apps.
Step 2: Select Google Play Store.
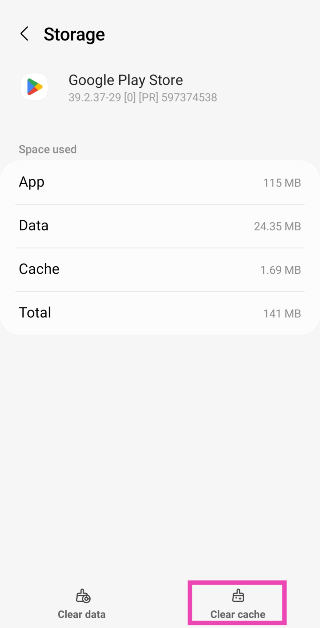
Step 3: Tap on Storage.
Step 4: Select Clear Cache.
Uninstall Google Play Store updates
New Play Store updates can often fail to install correctly, causing unwanted malfunctions. Uninstall the updates and reinstall them to fix the issue at hand.
Step 1: Go to Settings and select Apps.
Step 2: Select Google Play Store.
Step 3: Tap the ellipses at the top right corner of the screen.
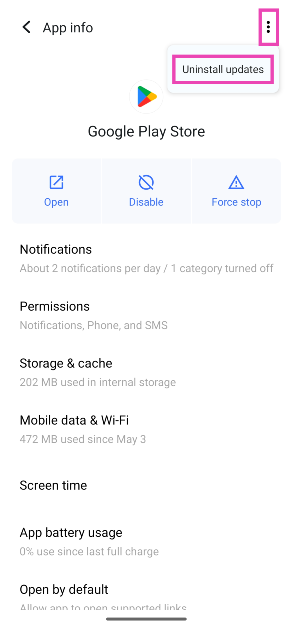
Step 4: Tap on Uninstall updates.
Check date and time settings
Several integral apps on your phone rely on the correct data and time data to function properly. Google Play Store is one of them. If you notice any issues with the Play Store, check if the data and time info on your phone is accurate. Better yet, use the date and time provided by your network. Here’s how.
Step 1: Go to Settings and select General Management.
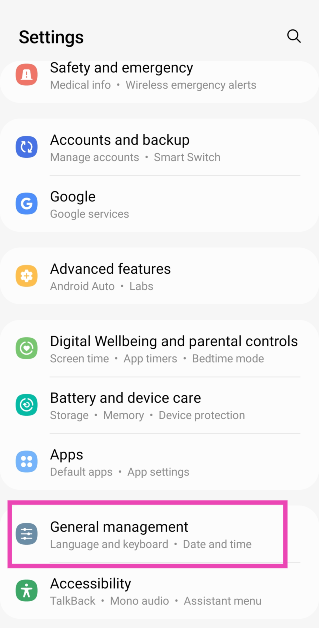
Step 2: Tap on Date and time.
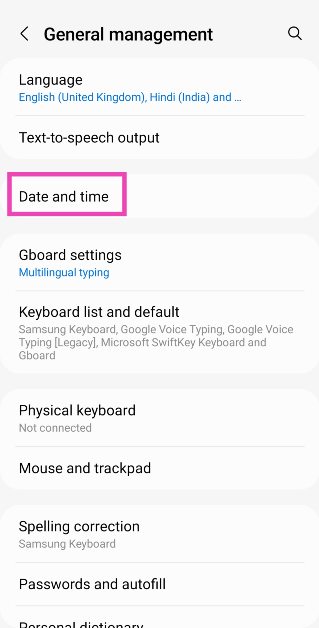
Step 3: Turn on the toggle switch for Automatic date and time.

Check your phone’s storage
Updating the apps on your phone requires a little extra storage space. This is because the newer versions of apps are often larger than the ones they replace. If your phone is running low on storage, the apps will fail to update in the background. Go to Settings>Storage to check the storage status and delete large files from your device to create more space. You can also use cloud services like Google Drive and Dropbox to store large files from your device.
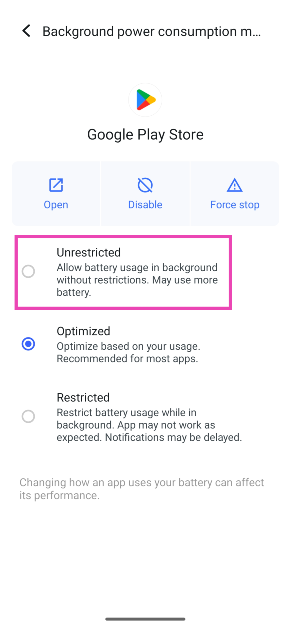
Turn off Battery Optimisation
The auto-update process for apps takes place in the background. If you’ve turned on Battery Optimisation for the Play Store on your phone, it can impose restrictions on the app, keeping it from working in the background. Here’s how you can disable it.
Step 1: Go to Settings and select Apps.
Step 2: Select Google Play Store.
Step 3: Tap on App battery usage.
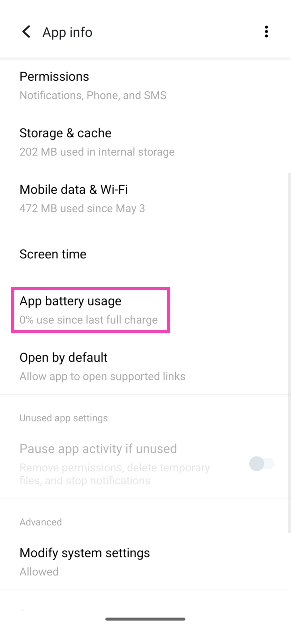
Step 4: Select Unrestricted.
Log out and log back into your Google Account
If any account-related issues are keeping the apps on your phone from updating automatically in the background, try logging out and logging back in.
Step 1: Go to Settings and select Passwords and accounts.

Step 2: Select your Google Account.
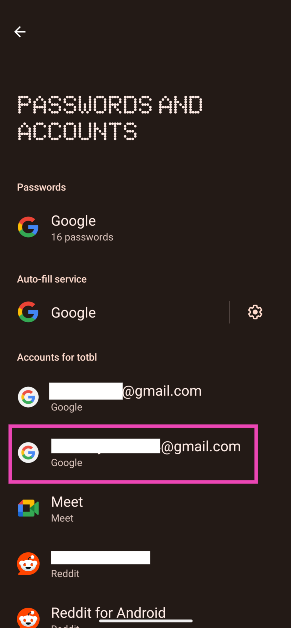
Step 3: Tap on Remove account.
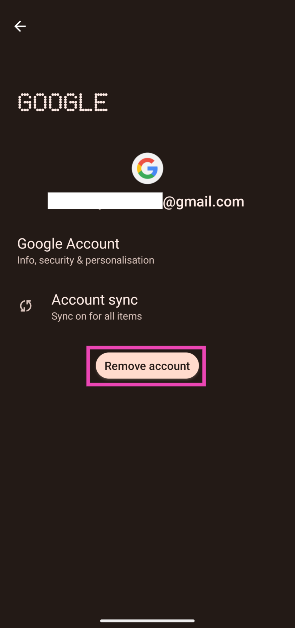
Step 4: Now, select Add account and enter your login credentials.
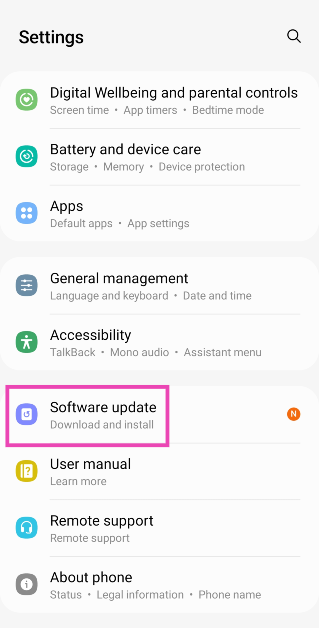
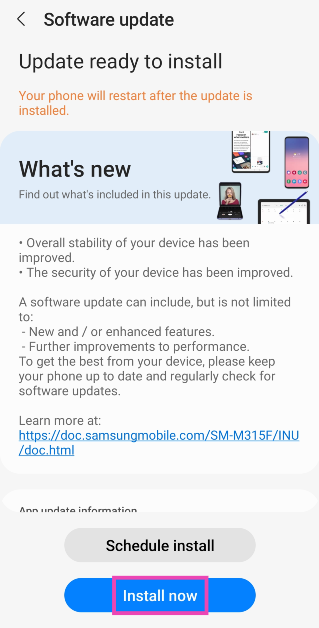
Update the OS
Step 1: Go to Settings and select Software update.
Step 2: Tap on Download and install.
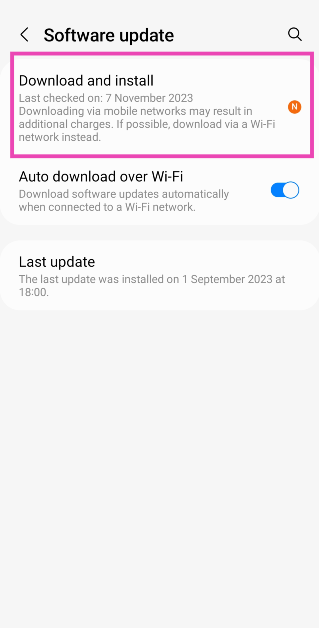
Step 3: Select Install now.
Frequently Asked Questions (FAQs)
How do I turn on auto-updates for apps on Android?
Go to Google Play Store>Settings>Network Preferences>Auto-update apps and select ‘Over any network’ or ‘Over WiFi only’, depending on your preference.
How do I enable auto-updates for just one app?
Go to the app’s page on the Google Play Store, hit the ellipses at the top right corner of the screen, and select ‘Enable auto-update’.
How do I update the Play Store?
Launch the Google Play Store, tap your profile picture, go to Settings>About, and tap on ‘Update Play Store’.
How do I allow the Google Play Store to use background data?
Go to Settings>Apps>Google Play Store>Data usage and turn on the toggle switch next to ‘Use background data’.
How do I download an app without using the Google Play Store?
Most Android OEMs have their own app marketplaces. If you don’t want to use the Play Store, you can use the Galaxy Store on Samsung phones, V-Appstore on Vivo/iQOO phones, Mi GetApps on Xiaomi phones, and so on.
Read Also: Moto G04s with 50-megapixel rear camera launched in India
Conclusion
These are the top 10 ways to fix the ‘Google Play Store isn’t auto-updating apps’ on your Android phone. As a last-ditch measure, you can try performing a factory reset on your device to fix this issue. This will erase all the data on your phone and restore it to its factory settings. If you found this article helpful, let us know in the comments!
