

One of the most annoying things that PC users have to deal with is unprompted reboots. This problem gets compounded when the PC keeps restarting after every few minutes without any reason. If you’re encountering the same issue, you’ve landed on the right page. Here are 8 possible fixes for the ‘Windows 11 PC keeps restarting’ problem.
Read Also: Top 3 ways to take a scrolling screenshot on a Windows 10/11 PC (2024)
In This Article
What’s causing the problem?
If your Windows 11 PC keeps restarting, it could be due to one of the following reasons:
- Inconsistent voltage
- Failing hardware
- Malfunctioning RAM
- Automatic Restart is enabled
- PC has hit the internal temperature limit
- Software bugs
- Update installed incorrectly
Disable Automatic Restart
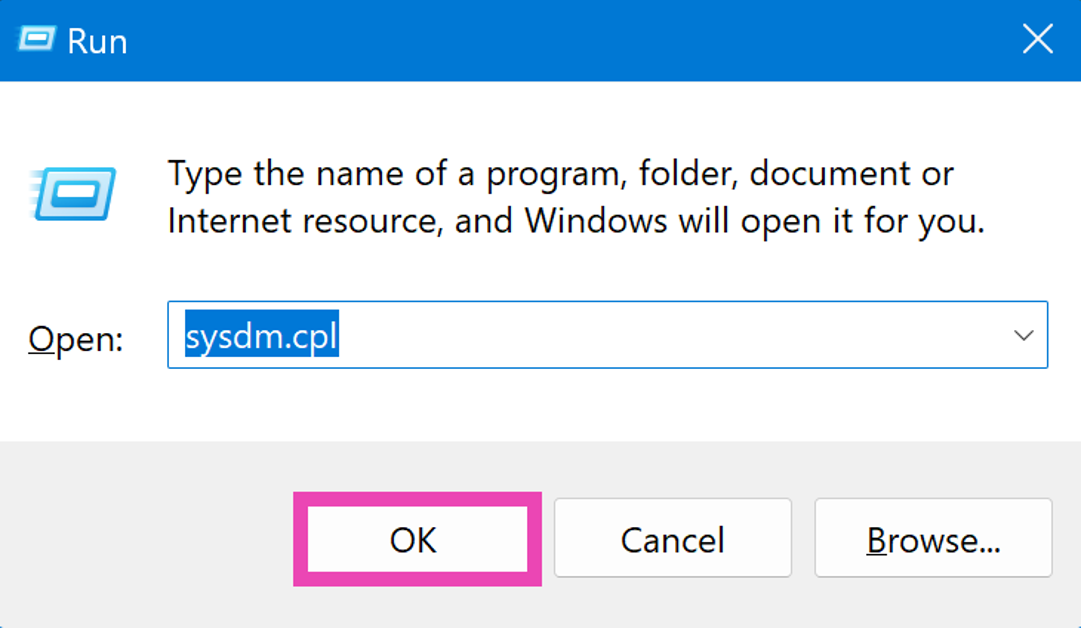
Step 1: Press Windows Key + R to open the Run box.
Step 2: Type sysdm.cpl in the Run box and hit Enter.
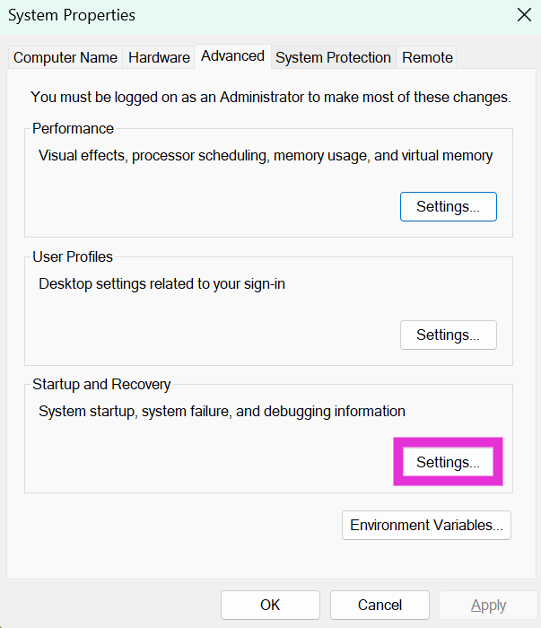
Step 3: Switch to the Advanced tab and click on Settings in the Startup and Recovery section.
Step 4: Uncheck the box for Automatic Restart in the System Failure category.
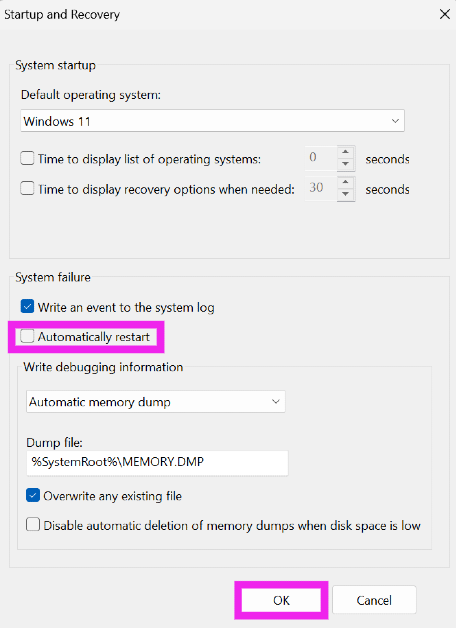
Step 5: Hit OK.
Check the Power Supply Unit
Inconsistent voltage can cause your PC to restart without any warning. Luckily, there are easy methods to check for fluctuating voltage. If you have a stabiliser unit attached to the AC or refrigerator, check the voltage notation on it. The lights and fans in your room may also stop working when the incoming voltage drops below a certain level. The only thing you can do in this situation is wait until a consistent power supply has been restored.
Allow the PC to cool down
If your PC overheats rapidly and hits an internal temperature limit, it will suspend all current tasks and forcefully shut down to preserve the hardware. If you notice a sharp increase in the PC’s temperature, close the demanding task at hand and wait for it to cool down to avoid sudden shutdown. Make sure the internal fan and cooling system of the PC are working as intended.
Check your PC’s RAM
Issues with your PC’s RAM can cause it to restart suddenly. Here’s how you can check the system’s memory.
Step 1: Press Windows + R to launch the Run box.
Step 2: Type mdsched.exe and hit Enter.

Step 3: You will be asked to restart your PC. Go through with the request.

Step 4: Windows will perform a RAM test on your PC. You will be able to see the results when your PC starts up again.

Step 5: If Windows does not automatically load the results, right-click on the Start icon and select Event Viewer.

Step 6: Expand the Windows Logs section in the side menu and select System.
Step 7: Open the MemoryDiagnostic file.
Run additional diagnostic checks

Apart from the RAM, run additional checks for components like the battery, CPU, and hard drive. Oftentimes, failing hardware is the reason why your PC gets stuck in a boot loop. There are a bunch of checks you can run at home to check which component is causing the PC to restart. Read this article for more information.
Update the OS to the latest version
Keeping your PC updated to the latest OS version keeps weird bugs and glitches at bay.
Step 1: Go to Settings and switch to the Windows Update tab.
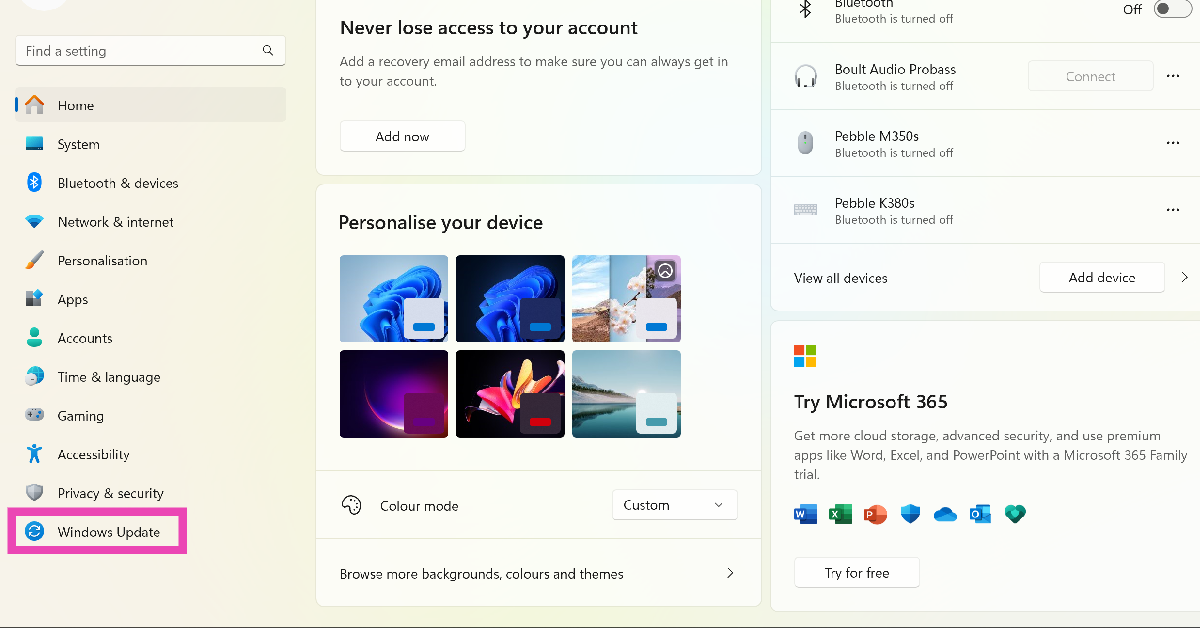
Step 2: Click on Check for updates.
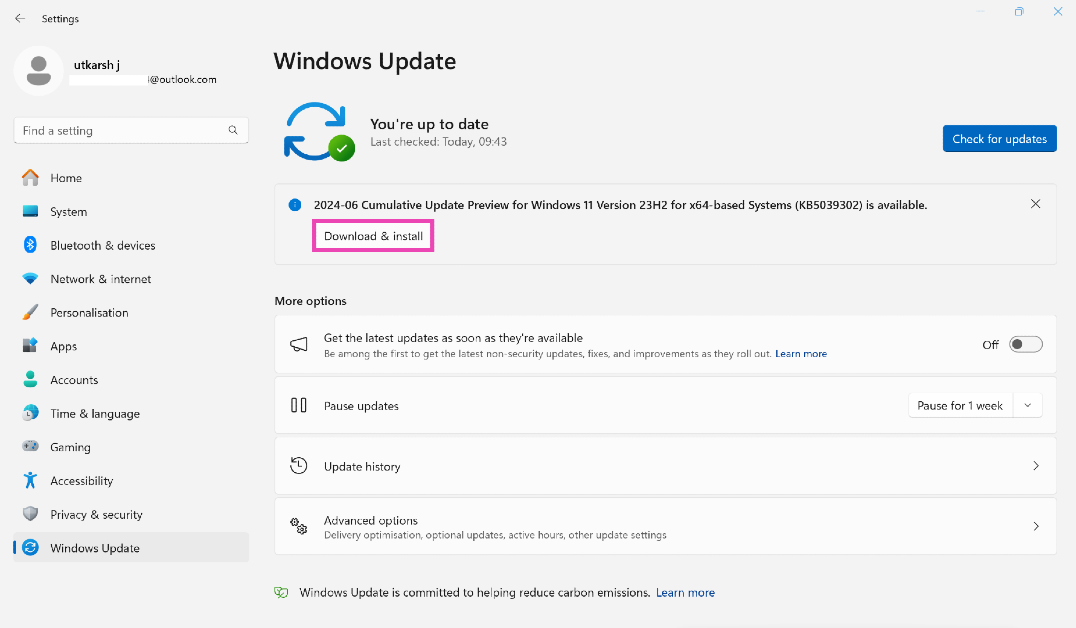
Step 3: Select Download and install.
Uninstall recent updates
If you start encountering constant reboots after installing an update, uninstall it and check if it resolves the issue. Sometimes an update can get installed incorrectly and cause this issue. If you installed the Beta version of an upcoming OS, we would recommend going back to the older, more stable version.
Perform a Factory Reset
Reinstalling Windows 11 on your PC can reset it to its factory settings. However, this will erase all your personal data on the device. If you don’t want that to happen, you can choose to keep your files but remove apps and settings (in-place upgrade).
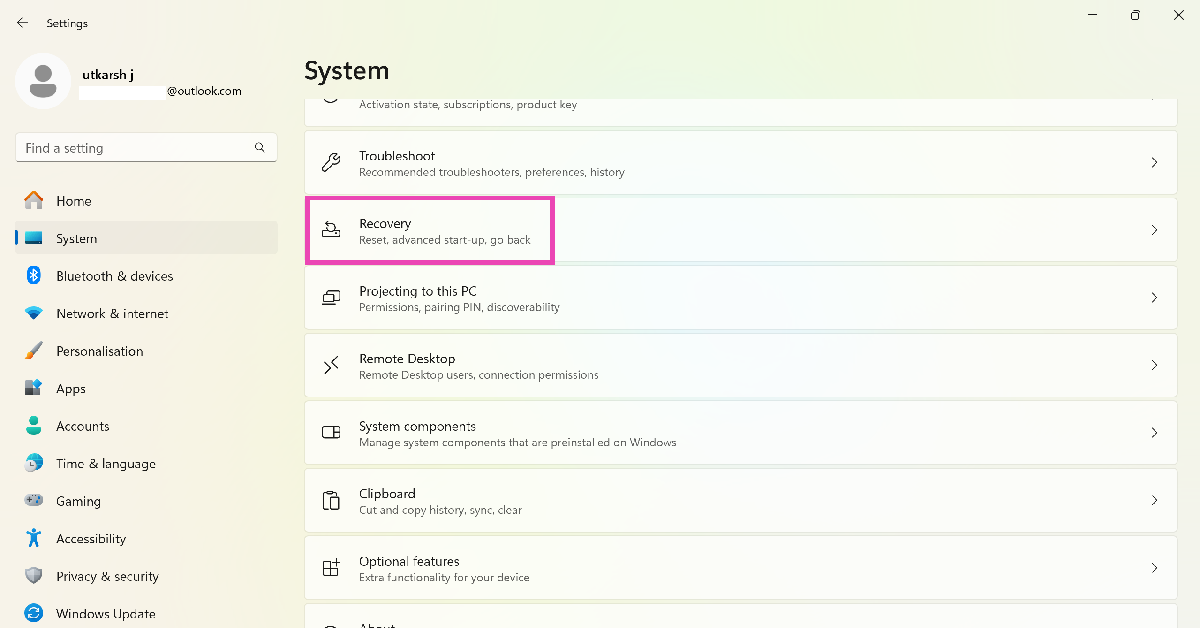
Step 1: Go to Settings and switch to the System tab.
Step 2: Scroll down and select Recovery.
Step 3: In the following window, click on Reset PC.
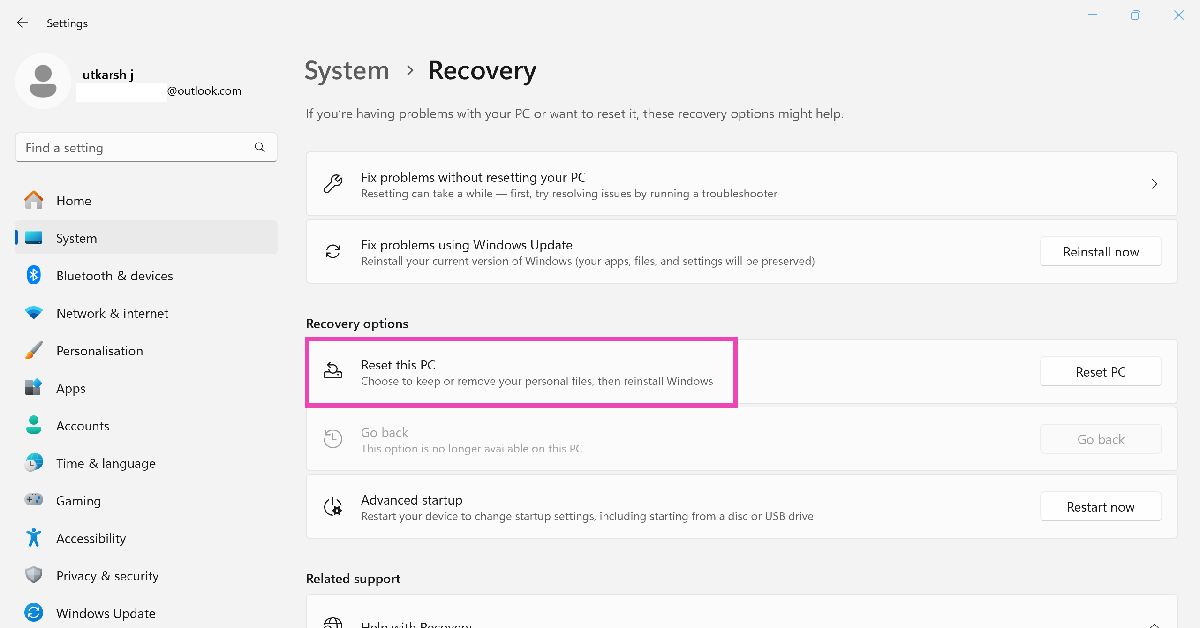
Step 4: You will be presented with two options. You can choose to keep your personal files and remove apps & settings or remove all of your personal files, apps, and settings. Choose the option you want.

Step 5: Select how you would like to reinstall Windows. You can choose between Cloud download or Local download.
Step 6: After you’ve made your choice, click on next to confirm your selection and then click on reset to begin the factory reset process.
It will take some time for your PC to reset and for Windows 11 to get reinstalled. After the process is complete, your PC will restart.
Frequently Asked Questions (FAQs)
Why does my Windows 11 PC keep restarting and how do I fix it?
If your Windows 11 PC is stuck in a reboot loop, it could be due to insufficient power supply, overclocked CPU, failing hardware, or buggy software.
How do I reinstall Windows 11 on my PC without erasing my data?
Go to Settings>System>Recovery>Reset PC, and select ‘Keep my files’. Follow the onscreen instructions to reset the settings and clear all the apps on your device.
How do I check my PC’s RAM?
To check the condition of your PC’s RAM, press Windows + R, type mdsched.exe, and hit enter. Your PC will restart to run a RAM test and show you the results upon startup.
Read Also: How to summarise a Google Doc using Gemini AI (2024)
Conclusion
This is how you can fix the ‘Windows 11 PC keeps restarting’ issue. You may need to take your PC to an authorised service centre if the issue keeps persisting. If you know any other methods to fix this problem, let us know in the comments!
