

The screenshots taken using the native Snipping Tool on Windows get copied to the clipboard and saved in the Screenshots folder. Earlier, there was no way to change the destination folder for the screenshots. Microsoft recently changed this with a quick update. If your Screenshots folder is overflowing with images and you need a new landing spot for new screengrabs, this trick will come in handy. So, without further ado, here’s how you can change the save location for the screenshots taken using the Snipping Tool on your Windows 11 PC or laptop.
Read Also: 2 ways to disable mouse acceleration in Windows 11
In This Article
Don’t want to save screenshots on your PC?
Snipping Tool automatically saves your screenshots to the Screenshots folder by default. This is quite helpful when you’re archiving and cataloguing stuff on your PC. However, if you’re taking screenshots for a project and they need to be edited before being saved, this default setting can lead to a considerable amount of spam. Luckily, the Snipping Tool gives you the option to not save screenshots by default.
Go to the Snipping Tool settings and turn off the toggle switch next to ‘Automatically save original screenshots’. Once this setting has been disabled, your screenshots will be copied to the clipboard but not saved on your PC. You can use the popup box to edit your screenshots and save them to your device.
Change the Snipping Tool’s save location on your Windows 11 PC or laptop
Step 1: Launch the Snipping Tool app on your PC or laptop.
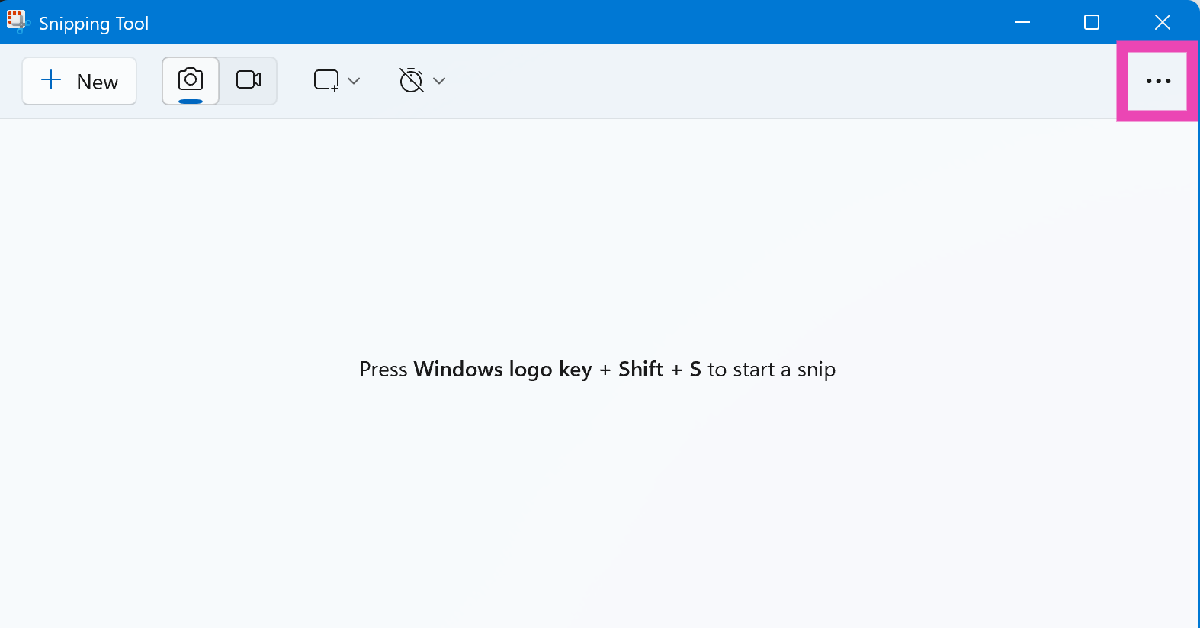
Step 2: Hit the ellipses in the top right corner of the page.
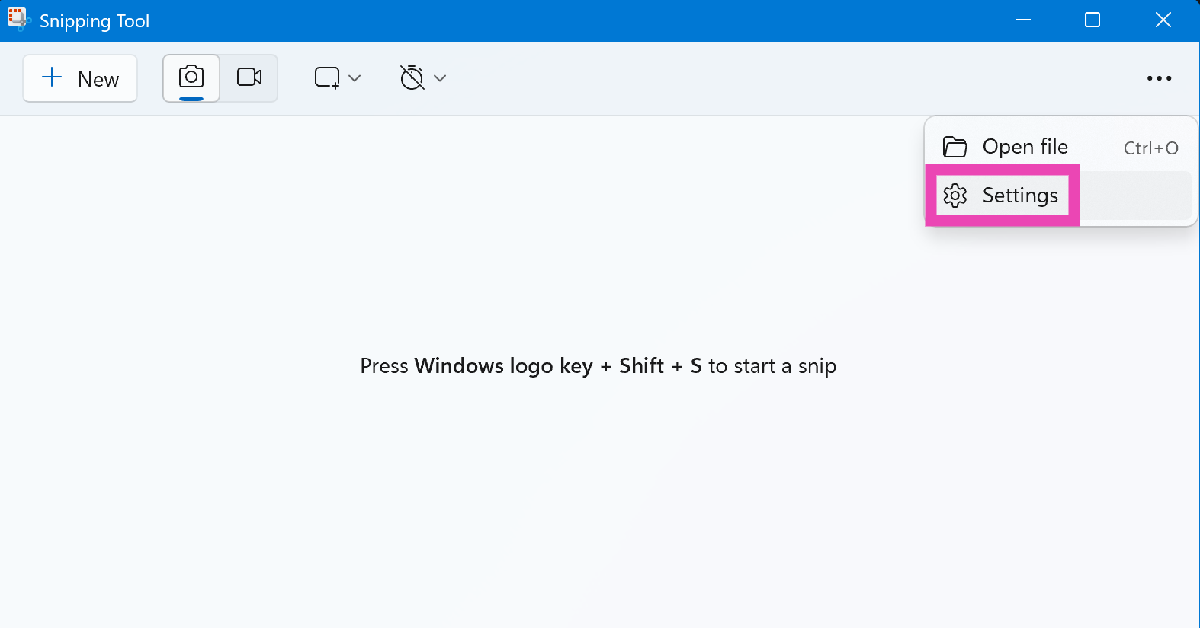
Step 3: Go to Settings.
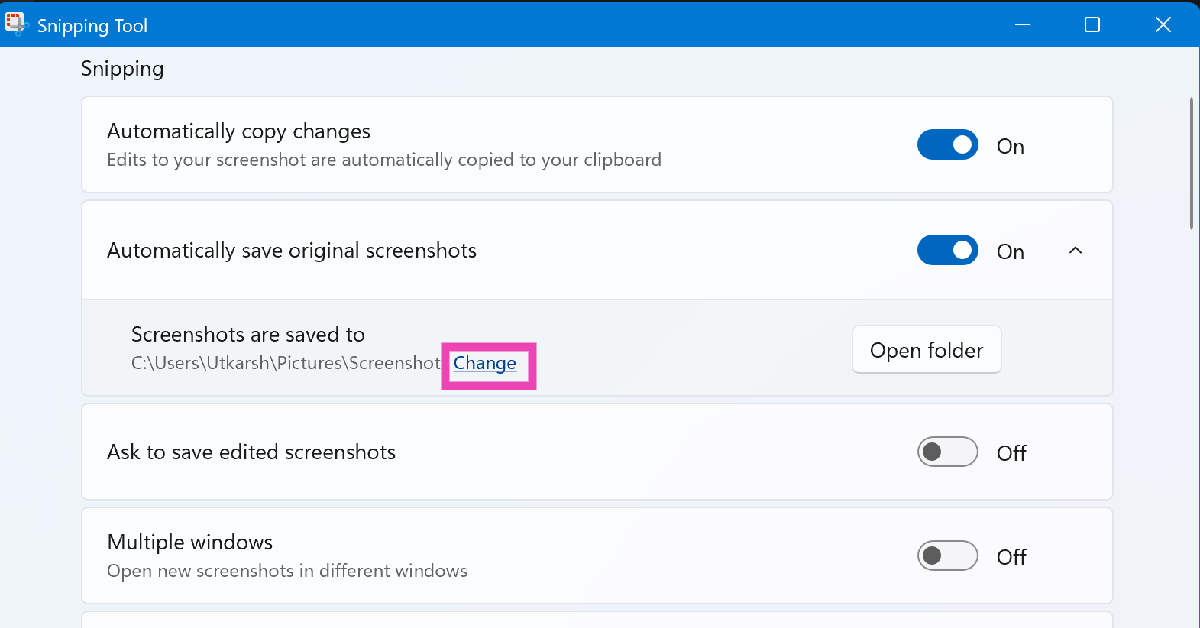
Step 4: Click on the Change option next to ‘Screenshots are saved to’.
Step 5: Go to your preferred target destination.
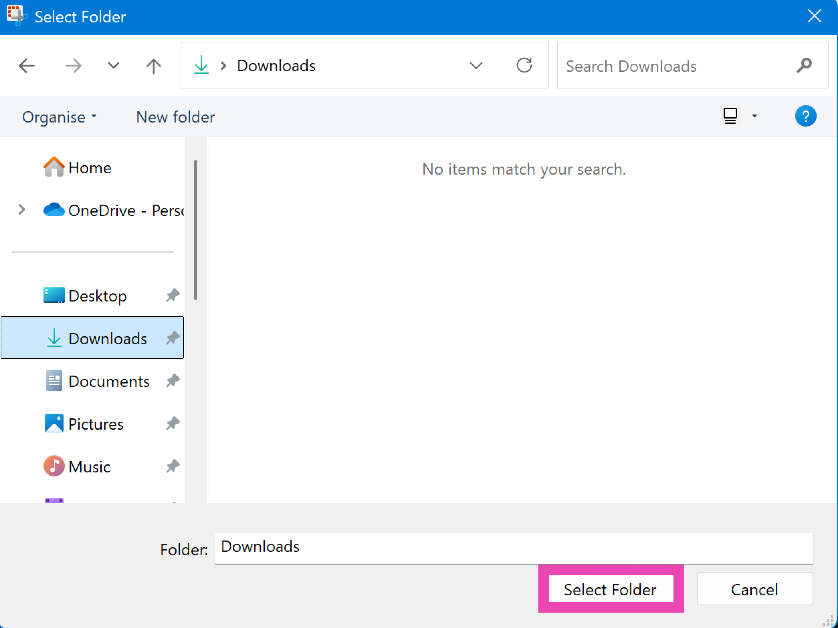
Step 6: Click on Select folder.
Frequently Asked Questions (FAQs)
What is the shortcut for the Snipping Tool?
You can trigger the Snipping Tool on your Windows PC or laptop by pressing Windows + Shift + S.
How to find Snipping Tool screenshots?
The screenshots you take using the Snipping Tool are copied to the clipboard and saved in the Screenshots folder on your PC. You can paste them on a canvas or worksheet by pressing Ctrl + V or open them by going to Pictures>Screenshots.
Can I use the macro key on my keyboard for the Snipping Tool?
If your PC or laptop keyboard has a macro key, you can remap it to trigger the Snipping Tool. Go to the Macro Key app and drag the Snipping Tool icon from C:\ProgramData\Microsoft\Windows\Start Menu\Programs\Accessories to the app window.
Can I change the save location of the screenshots taken using the Snipping Tool?
Launch the Snipping Tool, hit the ellipses, go to Settings, and click on ‘Change’ next to ‘Screenshots are saved to’. Go to your preferred destination and click on ‘Select Folder’.
How do I record my PC’s screen using the Snipping Tool?
Press Windows + Shift + R to record your PC’s screen using the Snipping Tool.
Read Also: Realme P3 Ultra 5G, Realme P3 5G supporting AI-based GT Boost features launched in India
Final Thoughts
This is how you can change the save location of the screenshots taken using the Snipping Tool on your Windows 11 PC or laptop. If you’re not a fan of Snipping Tool, you can always use Xbox Game Bar to take screenshots. If you have any questions, let us know in the comments!
