

With over a billion monthly active users, Instagram is one of the most used apps in the world. With such big numbers, it becomes absolutely necessary to make sure the servers are running at all times. To reduce the load on its servers, Instagram automatically scales down the media that users upload on the app. This means that any photo or video you upload to Instagram gets compressed and loses some quality before getting published. Apart from reducing the load on servers, this also increases the speed of the app and creates uniformity in browsing. While there is no way to bypass this downscaling, there are some ways to limit its effects. In this article, we bring you the 10 best ways to upload photos and videos on Instagram without compression or losing image quality.
Read Also: Flipkart Big Diwali Sale 2022: Get exciting deals on Poco smartphones
In This Article
Follow the upload guidelines

Instagram has very particular upload guidelines in place to maintain uniformity across the app and offer an optimised and smooth browsing experience for all users. If you follow these guidelines, Instagram will not downscale your photos and no compression will take place during the upload. Here are the basic guidelines for every type of upload.
For images, make sure the image resolution is at least 1080p and the aspect ratio is between 1.91:1 (Landscape) and 4:5 (Portrait). For videos, follow the guidelines mentioned below.
Instagram Story
Aspect Ratio: Portrait (9:16)
Frame: 30fps
Minimum Resolution: 720x1280p
Recommended Resolution: 1080x1920p
In-feed videos
Maximum file size: 4GB
Maximum length: 60 seconds
Frame: 30fps
Aspect Ratio: Square (1:1), Landscape (1.91:1), Portrait (4:5)
Minimum Resolution: 600x600p (Square), 600x315p (Landscape), 600x750p (Portrait)
IGTV
File Size: 3.6 GB
Length: 60 minutes
Aspect Ratio: Portrait (9:16)
Minimum Resolution: 600x1067p
Recommended Resolution: 1080x1920p
Change the media upload quality setting
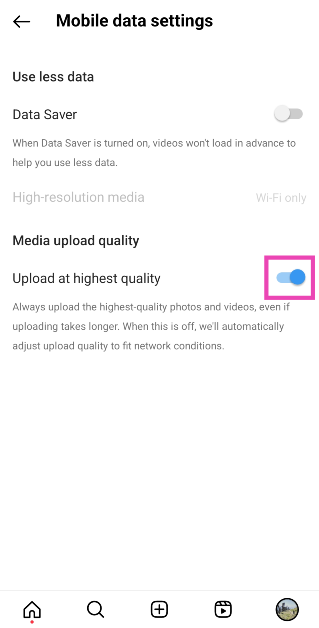
Instagram automatically downscales the quality of your images and videos depending on the strength of your network connection. To avoid this from happening, make sure your media is uploaded at the highest quality by turning on this setting.
Step 1: Launch the Instagram app and go to your profile.
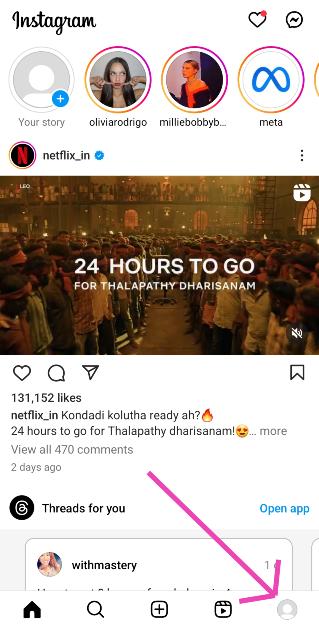
Step 2: Hit the hamburger menu at the top right corner of the screen.
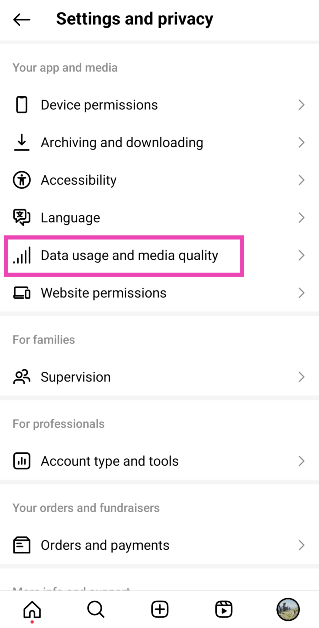
Step 3: Select Settings and privacy.

Step 4: Tap on Data usage and media quality.
Step 5: Turn on the toggle switch for Upload at highest quality.
Make sure image quality isn’t lost in transfer between devices

If you took an image from your DSLR or mirrorless camera and want to upload it to Instagram using your smartphone, make sure there is no loss in quality while transferring the image from your camera to your phone. Conversely, you need to ensure the quality of the image remains intact when you’re uploading an image to Instagram from your computer. AirDrop, Google Drive, and Dropbox will not reduce the quality of your image while transferring it to another device. However, WhatsApp and other messengers are notorious for downscaling the images you send through them.
Use your smartphone’s native camera app instead of Instagram’s app camera

Your smartphone’s default camera app is the best way to take highly detailed pictures. The native camera app is familiar with the hardware of the phone and is designed to make the most out of it. The in-built camera in the Instagram app doesn’t take the best quality pictures and often downscales the image while processing it. Use the native camera app to take the pictures and resize them later according to Instagram’s guidelines.
Turn off ‘High Efficiency pictures’ in your smartphone camera’s settings
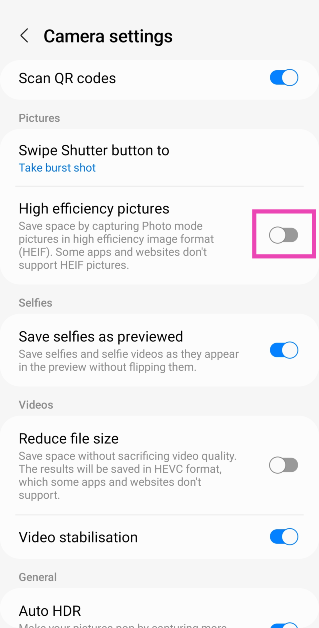
The High Efficiency Image Format (HEIF) saves space on your device by applying compression to the images captured by the camera before storing them. This reduces their file size. Here’s how you can turn it off.
Step 1: Launch the Camera app on your phone and hit the gear icon at the top left corner of the screen.

Step 2: Scroll down and turn the toggle switch off for High efficiency pictures.
Disable video compression on your smartphone
Step 1: Launch the Camera app on your phone and hit the gear icon at the top left corner of the screen.
Step 2: Scroll down and turn the toggle switch off for Reduce file size under Videos.

Compress the videos before uploading them

If your videos are of ultra-high quality, chances are Instagram will compress them before uploading. It is better to compress them yourself and have more control over how the output looks. Instagram usually compresses the videos more than required and it causes a severe drop in quality. There are a large number of software and online tools you can use to compress your video.
Resize your image before uploading it
Similar to videos, Instagram can compress your images a lot more than required before uploading them. There are a lot of photo editing apps on the Play Store that will help you in resizing the images for Instagram. Make sure the resolution is 1080p and the aspect ratio fits either the landscape, portrait, or square frame. Resizing the image prior to upload gives you more control over how it looks.
Do not add music to pictures
Adding music to images for your Instagram Stories can reduce their quality. This is largely due to the fact that Instagram limits the size of every upload, and adding music bulks up the size of the media. As a result, the image quality takes a hit. To make sure this doesn’t happen, avoid adding music to your pictures.
Adjust your camera settings
Use the manual mode in your phone’s camera app to capture highly detailed images in maximum resolution. Resize these images later according to Instagram’s guidelines. This gives you greater control over how your image will look.
Frequently Asked Questions (FAQs)
Why do my images drop in quality when I upload them on Instagram?
This happens because Instagram automatically downscales your images by compressing them before they are uploaded. This is done to limit the size of the files uploaded on the platform. If your image is under the file size limit, it will not get downscaled by a large degree.
How do I make sure Instagram uploads the highest quality images?
Go to Profile>Menu>Settings and privacy>Data usage and media quality and turn on the toggle switch for Upload media at highest quality.
What is the maximum upload size for videos on Instagram?
Instagram allows you to upload videos up to 4GB in size.
Read Also: Flipkart Big Diwali Sale 2022: Get exciting deals on Poco smartphones
Conclusion
These are the 10 best ways to upload photos and videos without compression or losing quality on Instagram. While uploading an image without any loss of quality is almost impossible, you can retain a lot of essential details in your images and videos using the tips listed above. Try these methods and let us know how they work out for you.
