

Overheating is one of the biggest reasons why PCs and laptops deteriorate over time. This is why it is a good idea to place your computer in a spot which is well-ventilated. If you primarily use a laptop for work or gaming, get a cooling pad to keep its internal temperature in check. Almost every PC or laptop has multiple internal fans that keep its motherboard cool and prevent it from crashing when the internal temperature rises. Here’s how you can control the fan speed on your Windows PC or laptop.
In This Article
Why should you control the fan speed of your Windows PC?
The internal fans on your computer are tuned to kick in when the internal temperature rises above a certain point. These fans run at frequent intervals, depending on the amount of heat that needs to be dissipated. You may have noticed the loud sounds when the fan is operating at full blast.
This noise can get quite annoying, especially when there is no need for the fan to be operating at a high speed. Sometimes, the fan may start working due to a rise in the surrounding temperature and not because your PC is undertaking a heavy task that taxes the motherboard. Or maybe it is the opposite case, where the fan isn’t operating at the highest level even though the CPU is warm. In these scenarios, it is important to know how you can control the fan speed of your Windows PC or laptop.
Read Also: Samsung Galaxy S24+ Review: Underrated but not an underperformer
Use the SpeedFan app
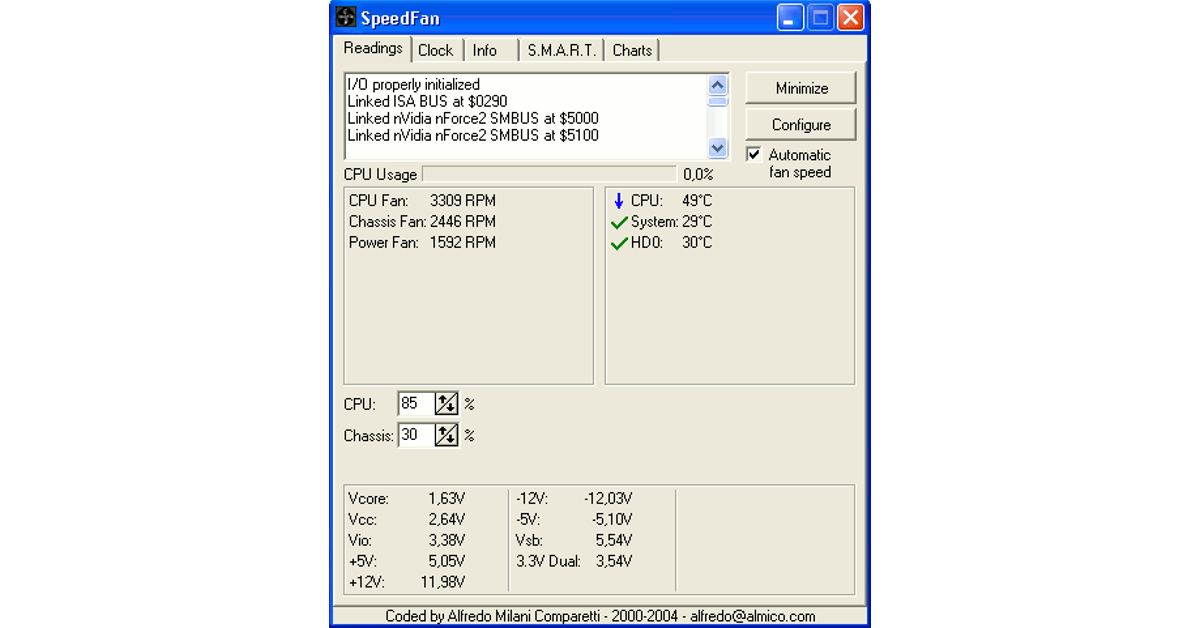
Step 1: Download the SpeedFan app on your Windows PC or laptop using this link.
Step 2: Click on the downloaded file and install the tool by following the onscreen instructions.
Step 3: Launch SpeedFan on your PC and hit Configure.
Step 4: Switch to the Advanced tab.
Step 5: Hit the dropdown menu for Chip and select your CPU from the list.
Step 6: Set all PWM Modes to Software Controlled.
Step 7: Hit OK.
Step 8: Alter each PWM’s setting to find out which component’s fan it controls. Set it to 0 and check which component warms up.
Step 9: Go to the Speeds tab to set the minimum and maximum level for every fan.
Use the Fan Control app
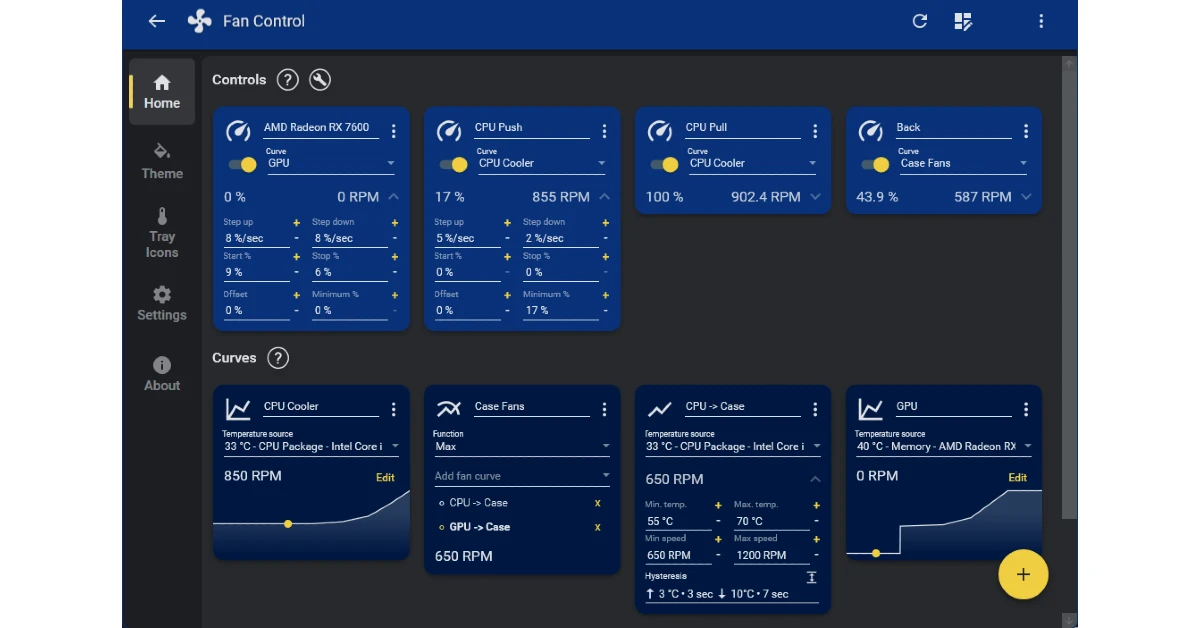
Step 1: Go to Fan Control’s website and download the software on your PC.
Step 2: Launch Fan Control on your PC.
Step 3: Hit the ellipses on the card of a fan and select Manual control.
Step 4: Use the slider to increase or decrease the fan speed.
Use BIOS
Step 1: Restart your PC and while it is booting, press Delete + F12 to enter BIOS. This key combination may vary, depending on the manufacturer.
Step 2: Go to Fan Control Settings. Typically, you should find this in the Advanced tab, but it may be placed in a different category depending on the manufacturer.
Step 3: Go to Monitor and select Status.
Step 4: Select Fan speed control.
Step 5: Select the speed of the fan.
Frequently Asked Questions (FAQs)
Is there a native way to control the CPU fan speed on my Windows PC or laptop?
You can set the level of your CPU’s fan speed by booting your PC or laptop in BIOS and going to the ‘Fan speed control’ section.
Are there any good alternatives to SpeedFan?
If you don’t want to use SpeedFan, you can use tools like Argus Monitor and Commander Pro to control the speed of your PC’s fans.
Why is my CPU fan loud?
CPU fans tend to get louder when they are running at full speed or when a significant amount of dust accumulates on their spokes.
Read Also: IQOO Z9 Vs Nothing Phone 2A Vs Realme 12+: Comparing The Three
Conclusion
This is how you can control the CPU fan speed on a Windows PC or laptop. If you own a gaming laptop, check the OEM’s gaming interface for any special controls related to the fans on the device. If you found this article helpful, let us know in the comments!
