

Like Windows PCs and laptops, Chromebooks are well-equipped to capture and record the screen. You may find use for this functionality while recording tutorials and making presentations. To make things simpler, your Chromebook lets you record from the webcam while you’re capturing the screen. The footage appears in a little popup on the edge of the screen. You can also choose to record your voice from the Chromebook’s microphone to create a voiceover for your tutorial video. Here are the top 3 ways to screen record on a Chromebook.
Read Also: How to stop Snapchat from using your ‘My Selfie’ picture in personalised ads
In This Article
Which method is best for you?
If this is your first time recording the screen, you should figure out what kind of functionalities you are looking for. If you simply want to capture a few seconds from a video or gameplay, the native tool will suit you fine. This tool lets you record webcam footage and voiceovers as well.
If you want to scribble and write on the screen while recording it, use the Screencast app on your Chromebook. This will help you make your tutorial videos more interactive and easy to follow. When the video has been recorded, this app automatically transcribes it for you. The added benefit of using Screencast is that it lets you upload your recordings to Google Drive.
Lastly, third-party tools like Movavi, Awesome Screen Recorder, and more let you record the screen in different resolutions and transcribe the audio from over 50 languages. These tools have additional editing options as well. Some allow you to add captions and subtitles to the final video.
Use Screen Capture

Step 1: Click on the status bar in the bottom right corner of the screen.
Step 2: Select Screen capture. You can also use this keyboard shortcut to trigger this tool – Ctrl + Alt + Overview.
Step 3: Hit the Record icon.
Step 4: Select whether you want to record a particular window, a portion of the screen, or the entire screen.
Step 5: Hit the gear icon to enable the microphone and camera. You can also select the destination folder for the recording from this panel.
Step 6: Based on your preference, use the following methods to start recording:
Window: Click the window that you want to record.
Partial screen: Drag the cursor over the area that you want to capture, then hit ‘Record’.
Full screen: Click anywhere on the screen to begin recording.
Use Screencast

Screencast uses the Screen Capture tool to record the screen and adds a couple of features that some users may find useful. If you’re recording your Chromebook’s screen for a tutorial or lecture, you may want to write on the screen to make it easy to follow. Screencast allows you to do that. Once a recording is over, you can even transcribe your voiceover to text.
You can access the Screencast app on your Chromebook’s app launcher. Once the app is running, select ‘+ New screencast’ in the top-left corner of the screen. The Screen Capture toolbar will appear at the bottom of the screen. Use the steps mentioned in the previous to start the screen recording. Once the recording has ended, you can access it in the Screencast app. The transcription of your commentary appears on the panel on the right.
Use an extension (Movavi)
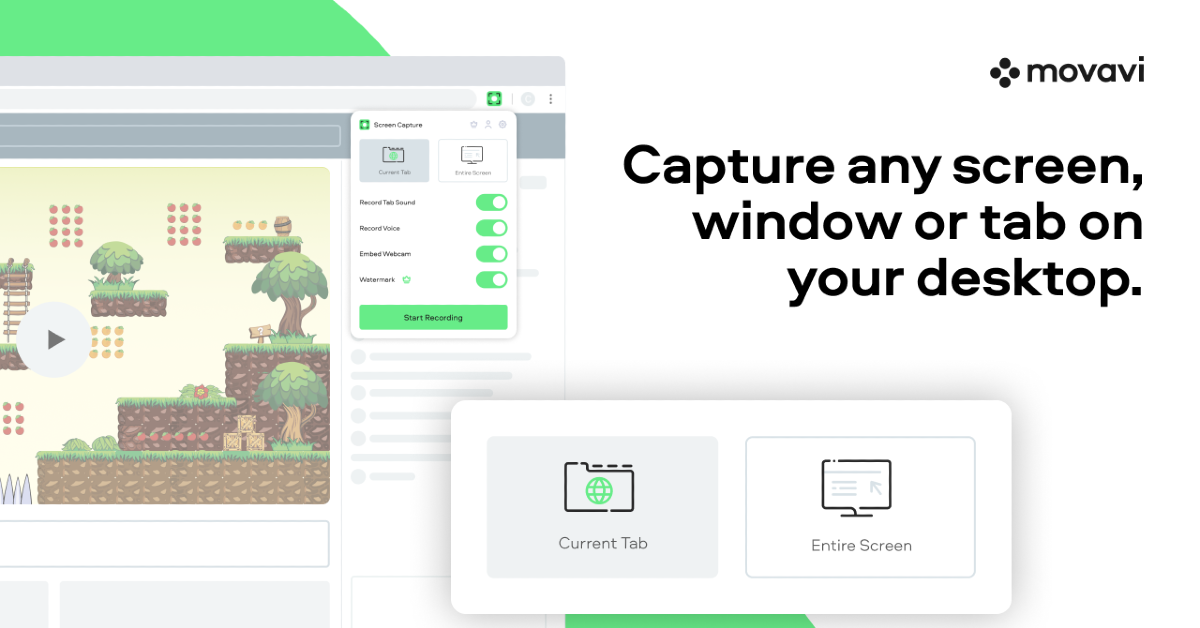
Step 1: Download and install the Movavi extension on your Chromebook.
Step 2: Hit the Puzzle icon and select Movavi.
Step 3: Allow Movavi to access the microphone and webcam.
Step 4: Select which part of the screen you wish to record.
Step 5: Click the Start Recording button to begin.
Step 6: When you’re done, click on the green Movavi icon and hit the Stop button.
Step 7: You will be redirected to a new tab to download the video recording.
Frequently Asked Questions (FAQs)
How do I screen record on Chromebook?
Hit the status bar, select ‘Screen capture’, and click the recorder icon to switch to screen recording mode. Click anywhere to record the entire screen.
What is the keyboard shortcut for Screen Capture on Chromebook?
Press the Ctrl + Alt + Overview keys to access the Screen Capture tool on your Chromebook.
Which is the best extension to screen record on a Chromebook?
Movavi, Bluedot, Loom, and Wondershare are some of the best screen recording extensions for Chromebooks.
Read Also: How to use Google Translate’s Dual Screen feature on Google Pixel 9 Pro Fold
Conclusion
This is how you can record your Chromebook’s screen. While the native screen capture tool on Chromebook works for the most part, third-party tools are better equipped to handle presentations, tutorials, and such. Check out tools like Movavi, Awesome Screen Recorder, Loom, and Bluedot and decide which one fits your requirements. If you have any questions, let us know in the comments!
