

If you’re working on a paper for your college assignment, reviewing the changes made by a peer can be a hassle. Comparing two Word files is quite annoying when you’re constantly switching back and forth between their respective windows. Luckily, the text editor offers a couple of handy solutions that allow more accessibility while reviewing two documents. Here are the top 2 ways to compare two documents in Microsoft Word.
Read Also: Top 5 Ways to Enable Dark Mode in Notepad on Windows 10/11?
In This Article
Which method is best for you?
If you want to go the old-school route and simply place the two documents side by side for manual review, there is an option in Word’s ‘View’ tab that does exactly that. This option is easy to miss since its icon does not have any label. When the two documents are juxtaposed together, it is easy to work on them simultaneously.
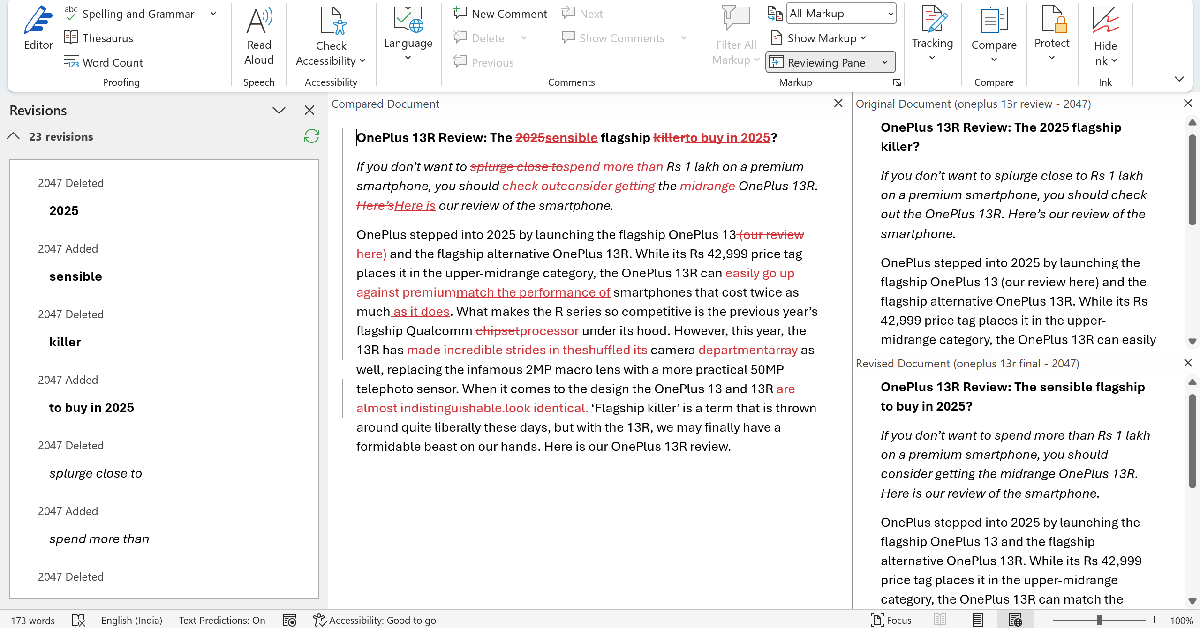
However, if you’re in a rush and want to review the changes in one document, use the comparison tool offered by Word. When you compare two documents, you can presented with the option to view the changes in:
- The original document
- The revised document
- A new document
If you choose the last option, the original and revised documents will open up in the sidebar.
Compare two documents in Microsoft Word
Step 1: Launch Microsoft Word and open a blank document.
Step 2: Switch to the Review tab and hit Compare.
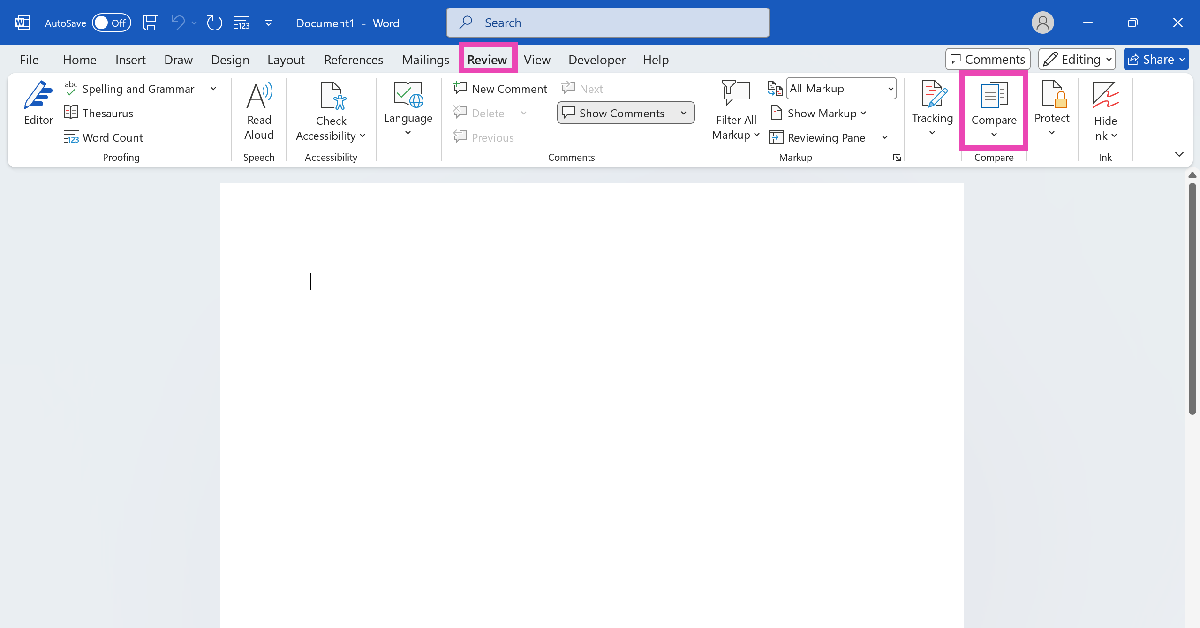
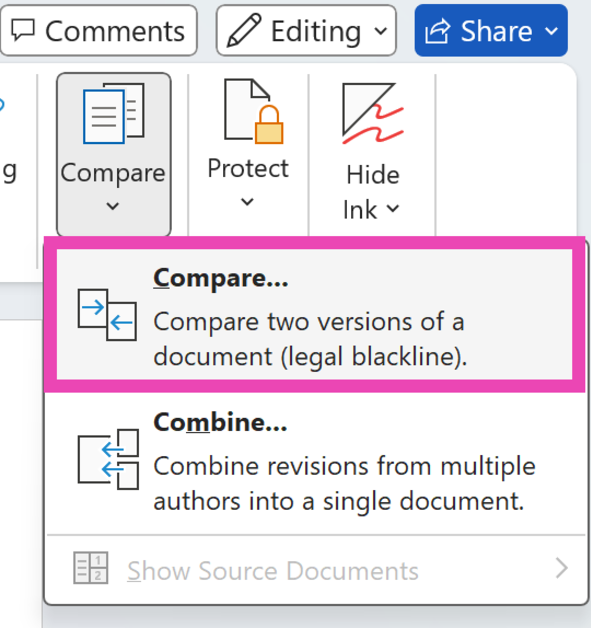
Step 3: Click on Compare.
Step 4: Upload the two documents in the Original and Revised categories.
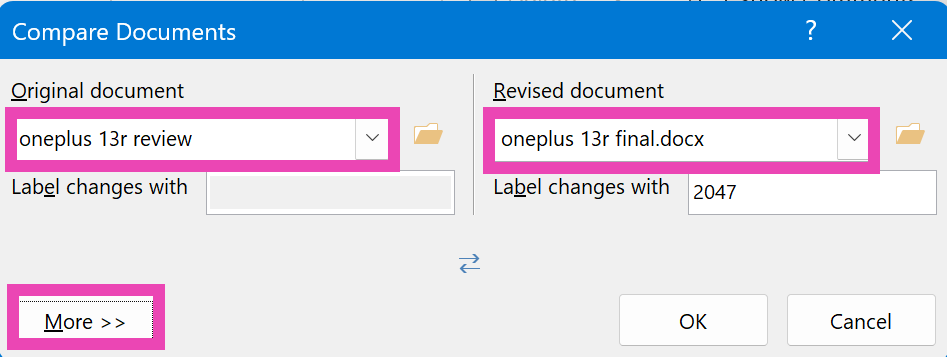
Step 5: Hit More and select the comparison parameters. You can also choose whether the changes show up in the original document, revised document, or a new document.
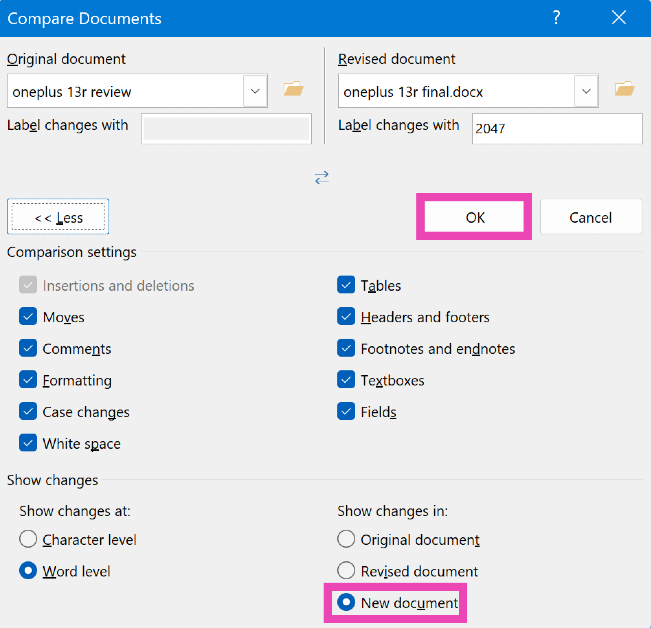
Step 6: Click OK to compare the two documents.
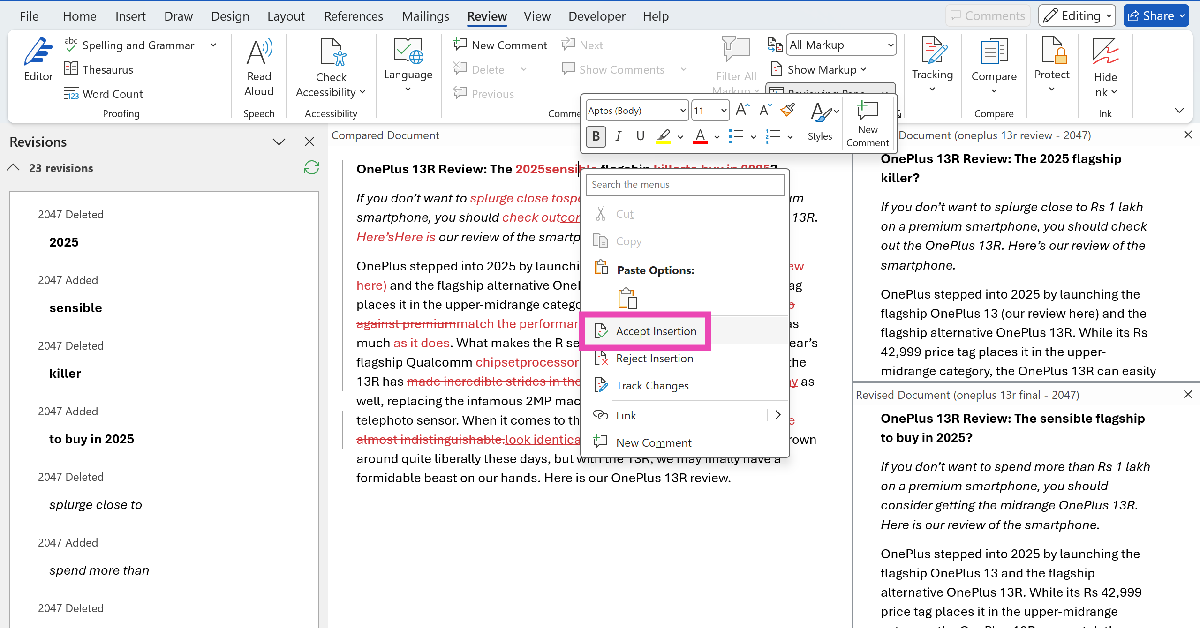
Merge two documents in Microsoft Word
Step 1: Right-click on a change and click on Accept Insertion to add it to your document. You can also choose to reject a change.
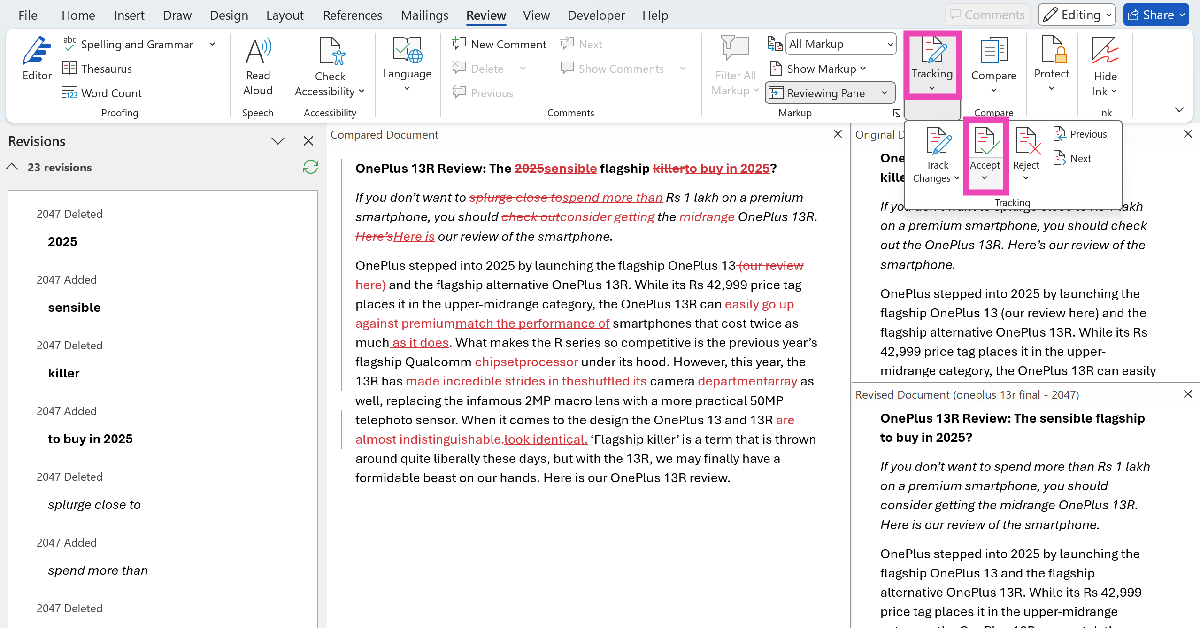
Step 2: To accept all changes, click on Tracking and hit Accept.
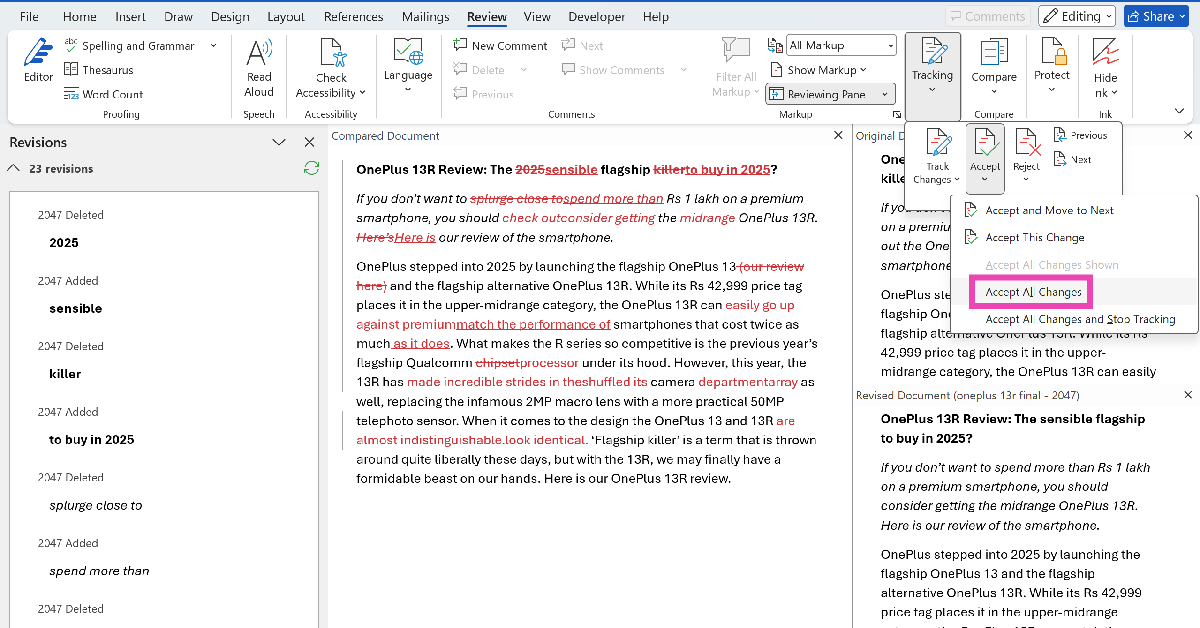
Step 3: Click on Accept All Changes. Similarly, you can choose to reject all changes.
Manually compare two Microsoft Word documents
If you manually want to go through the revisions on your document, use the Side by Side mode on Microsoft Word. Here’s how you can do that.
Step 1: Launch Microsoft Word on your PC and open the two documents.
Step 2: Go to one of the documents and click the View tab.
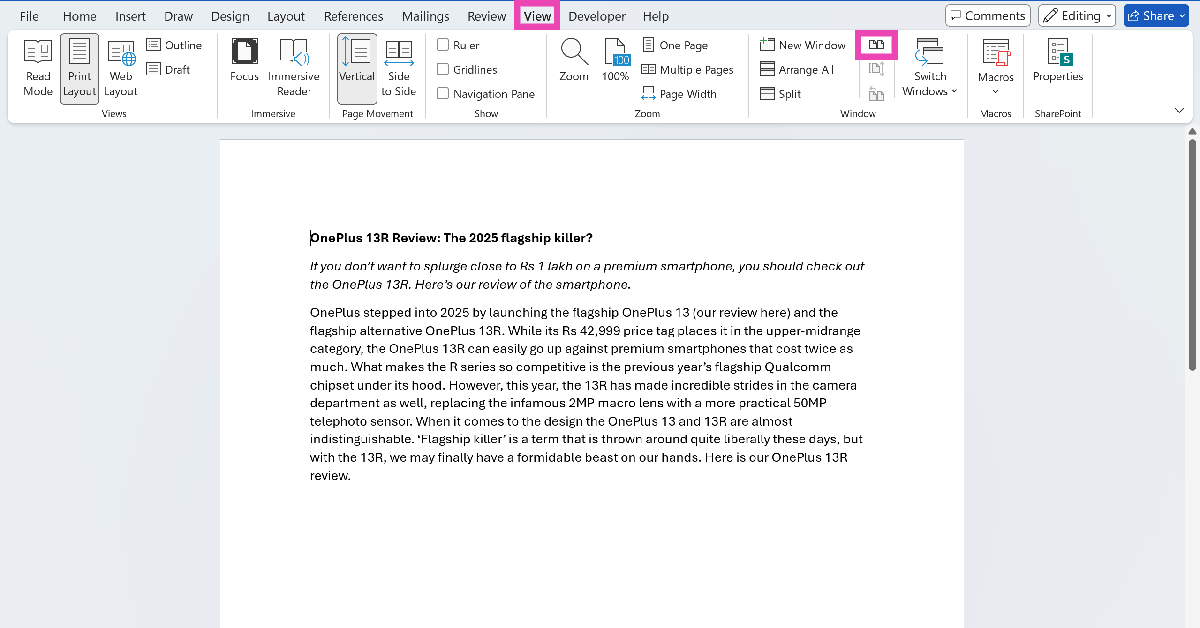
Step 3: In the Window category, click the topmost icon in the middle row.
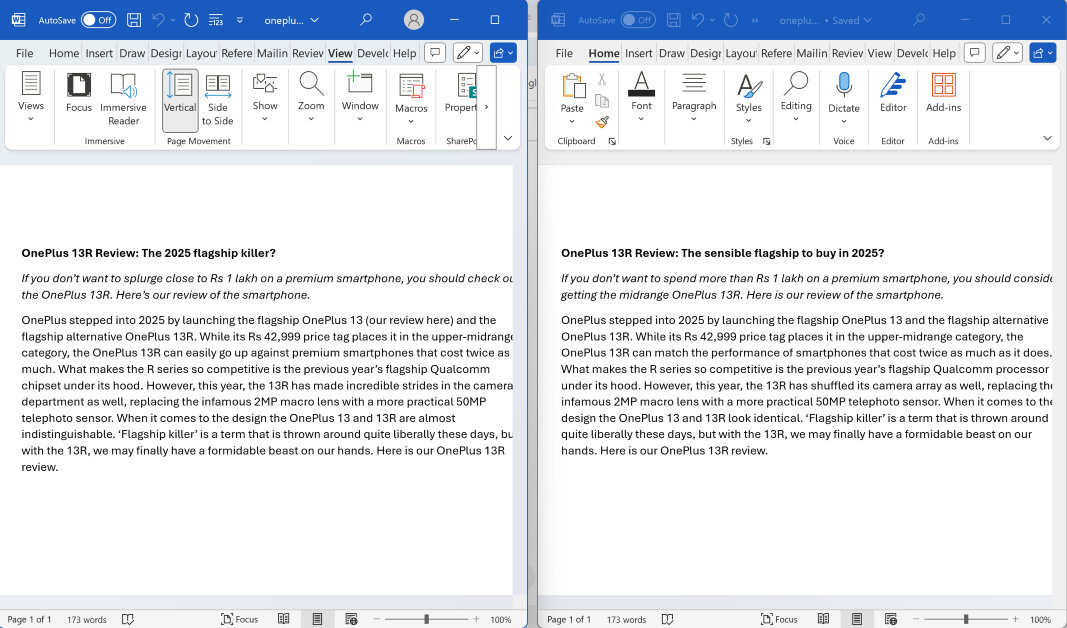
Step 4: The two documents will be arranged side by side.
Frequently Asked Questions (FAQs)
How do compare two documents in Word for differences?
Go to Review>Compare and click on Compare. Upload the two documents in the Original and Revised categories. Hit OK. A new document with all the revisions will open in a new panel, with the two documents placed on the side.
How do I view two documents side by side in Word?
Open the two documents, then select one document and go to its View tab. In the Window category, click the topmost icon in the middle row.
Does Word have a comparison tool?
The Review tab in Microsoft Word lets you compare two documents and analyse the changes. You can approve each change individually or greenlight all of them at once.
Which online tools can be used to compare two Word documents?
You can use online tools like Draftable, Copyleaks, Text Compare, and Aspose to compare two Microsoft Word documents.
How do I put two pages side by side in Word?
If you want to put two pages of a document side by side, go to the View tab and select ‘Side by Side’ in the Page Movement category.
Read Also: Samsung Galaxy S25 Review: Samsung’s compact flagship has got its punch back
Final Thoughts
This is how you can compare two documents in Microsoft Word. While you’re here, check out how you can create a word cloud and view the word count of a document in Microsoft Word. If you have any questions, let us know in the comments!
