

Updates are an important part of any technology to get new features and stay up to date with security. The latest updates also come with bugs and glitch fixes to improve performance. But there might be some users who don’t want these forced updates and update the system according to their time and convenience. Want to stop automatic updates on Windows 10 or Windows 11?
There are many times that the new updates bring an even buggier user experience, which especially we can see from the current Windows 11. If you are also annoyed with Windows updates, worry not, here is how you can stop these updates.
-
In This Article
- Advertisement -Pausing auto-update
Step 1 – Press Start and search Windows update settings.

Step 2 – Inside the opened settings head to pause update and select accordingly.

This will also save some memory on your system along with the Internet as well.
Read Also: How to pause and disable Windows 10 updates?
-
With Command Prompt
Step 1 – Press start and search run or alternatively press Win+R to open the Run box.
Step 2 – Now enter services.msc on the open field and press OK.

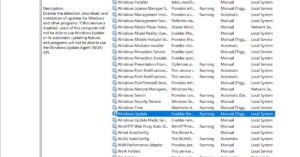
Step 3 – Search for Windows Update (usually at the end of the list).
Step 4 – Right-click the option and head to properties.
Step 5 – Here in the Startup type, make it disable.

After pressing Ok restart your computer and your PC will no longer update automatically. To turn it back on follow the same route and either make it manually or set it automatic.
-
Using Registry editor
Before using it always be careful as doing something wrong with the registry will make your OS malfunction.
Step 1 – Search for Registry Editor in the Start menu and open it.

Step 2 – Copy the path from below in the registry editor
HKEY_LOCAL_MACHINE\SOFTWARE\Policies\Microsoft\Windows

Step 3 – Right-click on the Windows folder and select New>Key (name it Windows Update).

Step 4 – Inside the Windows Update folder right click and New > DWORD (32-bit) Value. (Name it NoAutoUpdate).
Step 5 – Double click the file and set the Value Data to 1.

This will permanently disable auto-update on your Windows 10/11 machine.
Use third party application
If doing these steps feel like a hassle to you you can always use a third-party application to solve your issue. The software of our choice for this work is Windows Update Blocker by Sordum. Though we advise you to not install any third-party application that can hinder your system settings. If you still want to use it you can download the application from here.
Read Also: Top 5 ways to force uninstall programs in Windows 10
Bonus Tip for Pro users
If you are using Windows 11 or Windows 10 professional versions. There is a way you can easily stop system updates. Search gpedit.msc on the start menu and select. After that head to this path Computer Configuration > Administrative Templates > Windows Components > Windows Update. Here select Configure Automatic Update and select Disable. After clicking Ok your system running the professional version of OS will not automatically update.
For the latest gadget and tech news, and gadget reviews, follow us on Twitter, Facebook and Instagram. For newest tech & gadget videos subscribe to our YouTube Channel. You can also stay up to date using the Gadget Bridge Android App. You can find the latest car and bike news here.
