

The speed of your mouse pointer is set at a standard setting by default. Most users rarely ever need to change this speed. However, you may need to speed up the mouse pointer when your mouse slows down or when you attach another monitor to your system and need to customise the mouse accordingly. Today, we show you how to change your mouse pointer speed in Windows 11.
Read Also: 5 wireless mice under Rs 5,000 for work from home.
In This Article
How to change mouse pointer speed using Settings
Step 1: Open Settings.
Step 2: Select Bluetooth & Devices.

Step 3: Select the Mouse option in the window that opens.

Step 4: Use the slider next to ‘Mouse Pointer Speed’ to change the speed of your mouse pointer according to your liking.

How to change mouse pointer speed using the Control Panel
Step 1: Open Control Panel.

Step 2: Select the Mouse option.

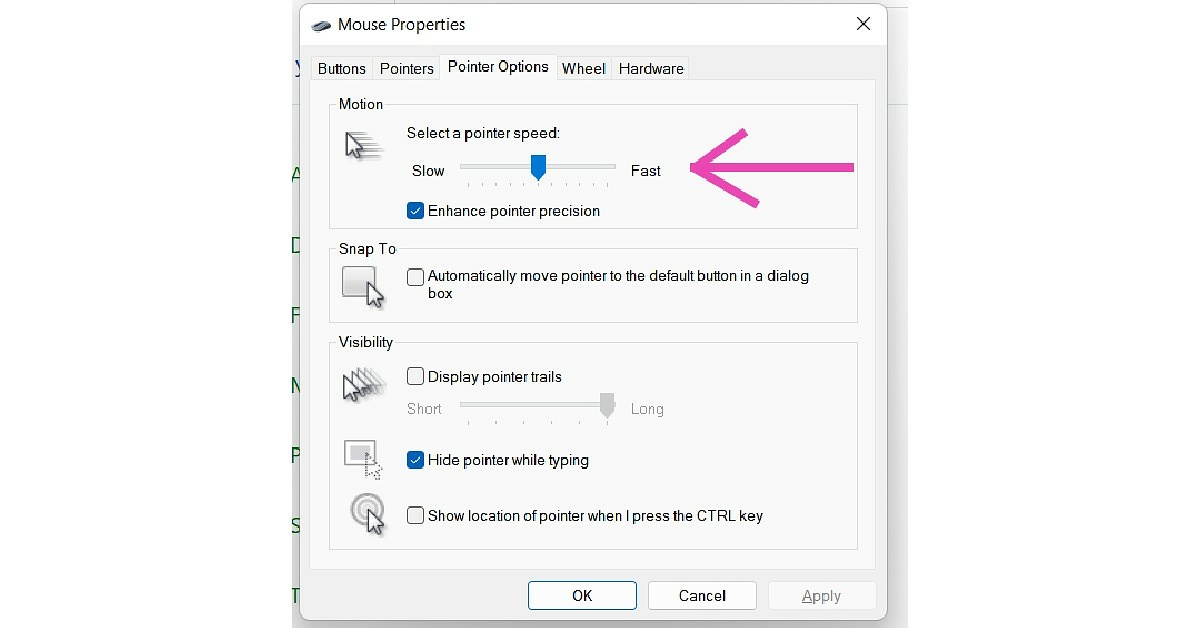
Step 3: In the small window that opens up, click on the ‘Pointer Options’ tab.

Step 4: Use the slider in the ‘Motions’ sections to change the mouse pointer speed according to your liking.
Read Also: 5 best Ergonomic mice for working from home
Following the steps above you will be able to change the mouse pointer speed in Windows 11. You can also change your mouse pointer speed through the Registry Editor, but this can be a risky process and isn’t ideally advised when there are much easier ways to carry out your task. Once you enter Mouse settings, you can also customise your mouse icon and add other functionalities to your mouse. You can also change the visibility of the pointer by adding a trail to its movement or by choosing to hide it while you’re typing.
For the latest gadget and tech news, and gadget reviews, follow us on Twitter, Facebook and Instagram. For newest tech & gadget videos subscribe to our YouTube Channel. You can also stay up to date using the Gadget Bridge Android App. You can find the latest car and bike news here.