

iPhone’s camera arrangement and image processing are in a category of its own, unmatched by its peers. This doesn’t mean that it is immune to malfunctions. Users often report seeing a black screen upon opening the camera app. Usually, this issue is caused by the phone case blocking the camera sensors, but if that isn’t the case with your device, there are a few steps you can take to fix it before taking your phone to the service centre. In this article, we bring you the top 11 ways to fix the ‘camera not working’ issue on iPhone 13 and 14 series.
Read Also: Unlocking the Potential of Your VPN: 8 Things to Do
In This Article
What’s causing my iPhone’s camera to malfunction?
If your iPhone 13 or 15 series camera suddenly stops working, it could be due to one of these reasons.
- Overheating issues: If you’ve been video recording on your iPhone under direct sunlight for a long time, it can cause the device to overheat. Once the internal temperature of your iPhone hits a certain limit, it causes the camera to shut down. Typically, you would see an alert on your iPhone’s display before the camera app shuts down.
- Software issues: Your iPhone isn’t immune to software glitches. The good news is that these glitches can be quickly fixed by restarting your phone or updating its software. If your camera isn’t working in a particular app, then the fault lies with the app and not the camera arrangement.
- Hardware issues: Hardware issues are more serious since they can rarely be fixed at home. Sometimes, even a small knock can damage your iPhone’s camera if it lands on the lens. You can prevent the damage by using lens cover accessories.
Switch between the camera lens

Switching between the front and rear cameras refreshes the software and fixes any minor issues with the camera app. If your iPhone displays a black screen upon launching the camera app, it may be because the software wasn’t able to transition between the two camera units previously. Tap the camera switcher icon at the bottom right corner of the screen to toggle between the front and rear cameras.
Restart the camera app
Closing the camera app and starting it again can resolve any minor background issues with your iPhone’s camera software. To close the camera simply swipe and hold from the bottom of your iPhone’s screen to access the app switcher. iPhones without a FaceID have a dedicated home button that can be pressed twice to access the app switcher. Slide to the camera app and then swipe upwards to close it. Launch the app again from your iPhone’s home screen to see if it is working.
Check if your iPhone’s case is blocking the camera

An ill-fitting phone cover can hinder the camera lens, leading to a partial blackout on the viewfinder. This problem is more common in knock-off phone covers, which is why it is recommended you buy phone accessories from reputed sellers only. Take off your iPhone’s case and check if the camera is working again. If it isn’t move on to other fixes.
Turn off VoiceOver
Oftentimes, iPhone users report that the VoiceOver feature interferes with the basic functioning of the phone. This issue extends to the camera app as well. If your iPhone’s camera unexpectedly stopped working, try turning off VoiceOver and see if normalcy has been restored. Here’s how you can turn off VoiceOver on your iPhone 13 or 14.
Step 1: Go to Settings and select Accessibility.

Step 2: Select VoiceOver.

Step 3: Turn the toggle bar off.

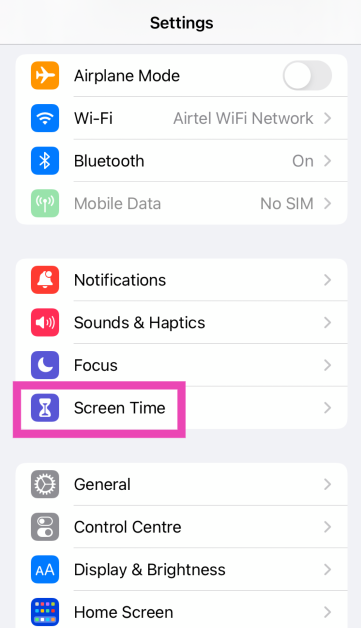
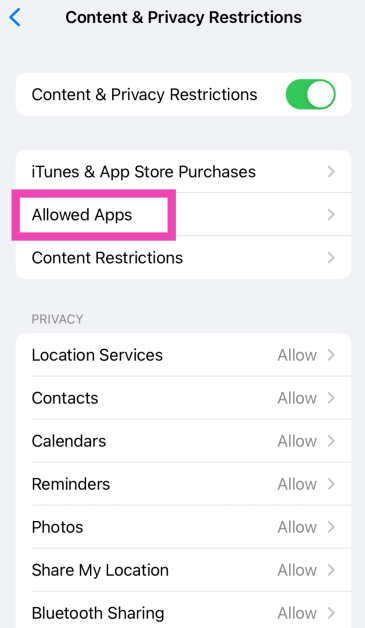
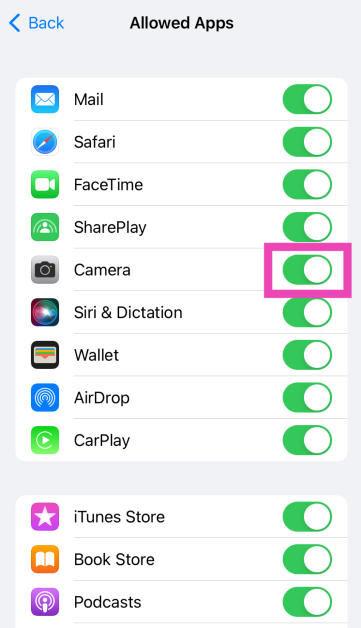
Make sure the camera app isn’t blocked by Screen Time
Step 1: Go to Settings and select Screen Time.
Step 2: Scroll down and select Content & Privacy Restrictions.

Step 3: Tap on Allowed Apps.
Step 4: Make sure the toggle switch for Camera is turned on.
Let your iPhone cool down

If you’re using your iPhone to shoot videos under direct sunlight, it can warm up very quickly. The overheating can cause the camera app to stop working. In this scenario, you’re iPhone gives you an overheating warning to let you know it is shutting down the camera app. Rest your iPhone and let it cool down before starting the camera app again.
Restart your iPhone

A simple restart can fix any software glitches that may be keeping your iPhone’s camera from working properly. To restart your iPhone, simply press one of the volume buttons along with the side key until the power slider appears on the screen. Drag the power slider to the right to turn off your iPhone. Power the phone back on by pressing and holding the side key.
Update your iPhone

Are you using an older version of iOS? Apple is quick to patch any bugs with an update to the system software. Update iOS to its latest version and check if the issue has been resolved. To update your iPhone, go to Settings>General>Software Update and download the update.
Use a third-party camera app
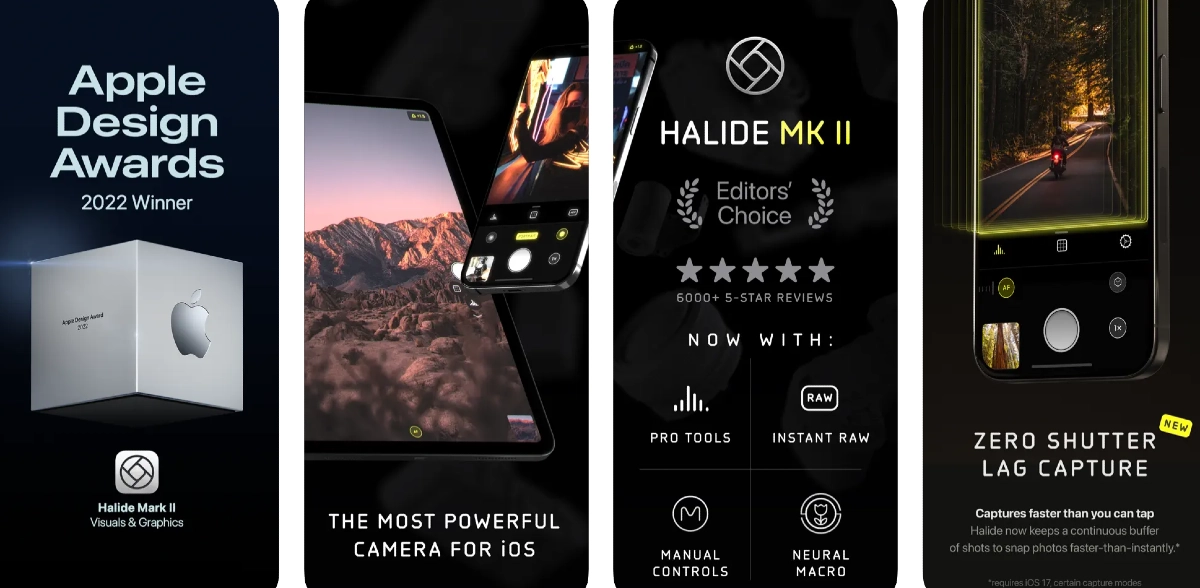
Sometimes, the native camera app on your iPhone can start malfunctioning out of the blue. This may lead you to believe that there’s something wrong with the camera module, when in reality it is a software issue. This problem can be resolved by updating your iPhone’s software, but in case it doesn’t work, try using a third-party camera app like Halide Mark II. If that doesn’t work, your iPhone’s camera hardware might be damaged.
Check for hardware damage

If one of the camera lenses on your iPhone is damaged, it can cause the viewfinder in the Camera app to black out. Take off the cover of your iPhone and inspect the lenses for any cracks or other kinds of damage. Put it under a light source to check if there are any cracks under the glass cover.
Perform a factory reset
If the fixes mentioned above did not work for you, you can try performing a factory reset on your iPhone as a last-ditch effort to resolve the camera issue. Before you go through with this, make sure all your personal data is backed up to cloud storage as you will lose it in the process. Here’s how you can reset your iPhone 13 or 14 to its factory settings.
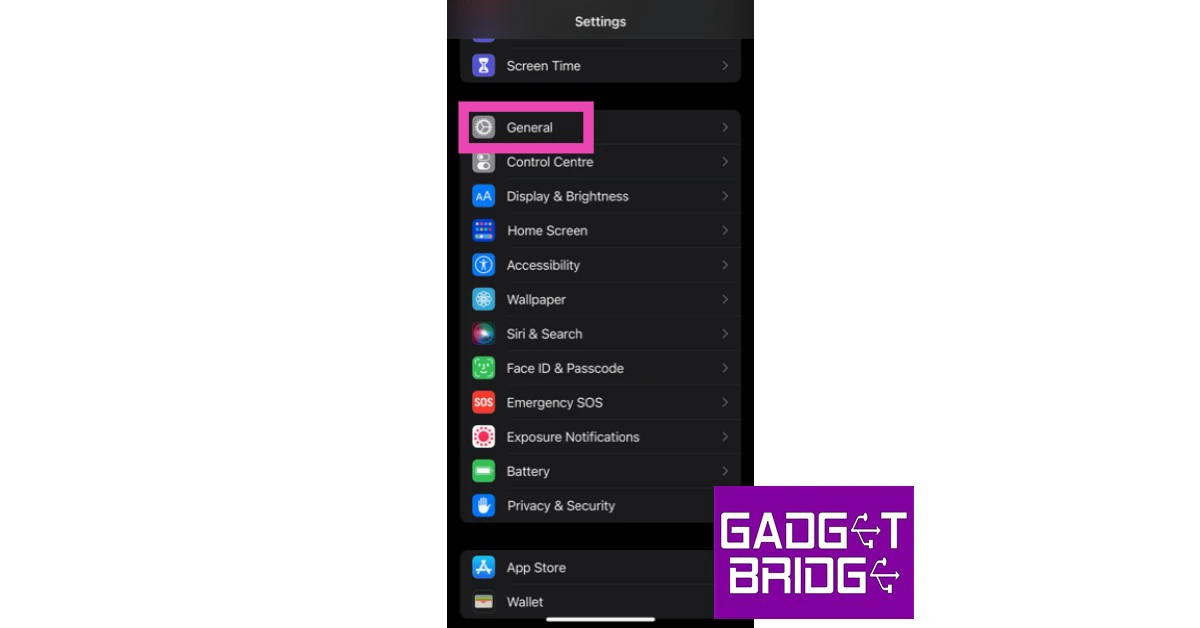
Step 1: Go to Settings and select General.
Step 2: Scroll down and select Transfer or Reset iPhone.

Step 3: Tap on Reset.

Step 4: In the following window, select Reset All Settings.

Step 5: Enter the PIN and confirm your selection.
Read Also: How to Use Google Assistant to Identify a Song in Any Language
Frequently Asked Questions (FAQs)
Why is the camera on my iPhone not working?
Your iPhone camera can start to malfunction if the device gets overheated. Software glitches can also cause it to stop working. A simple restart should fix both issues.
Why is my iPhone’s camera only partially working?
If you’re able to see a partial view of the surroundings on the viewfinder, it is possible that your iPhone’s camera is being blocked by the device cover. Take off the cover and try again.
How do I turn off the shutter sound on my iPhone camera?
You can turn off the shutter sound of your iPhone camera by muting the system volume. Use the ringer switch or volume rocker keys to mute it.
Conclusion
These are the top 11 ways to fix the ‘camera not working’ issue on the iPhone 13 and 14 series. If neither of these fixes worked for you, the problem is likely rooted in the camera hardware. For further diagnosis, take your iPhone to an Apple-authorised service centre. If you know of any other ways to fix the iPhone camera, let us know in the comments!
