In This Article
Before you begin
The option to disable touch input on your touchscreen laptop is not included in device settings. You can use either the Device Manager or PowerShell to turn it off. However, these methods only temporarily disable the touch display. Once you reboot your device, its touchscreen will become active again. If you want to permanently disable the touchscreen, use the Windows Registry Editor. This method will suspend the touch input until you choose to re-enable it. You may also want to check your laptop manufacturer’s proprietary management app for options related to disabling the touch display.Use Device Manager to turn off your laptop’s touchscreen
Step 1: Right-click the Windows icon on the taskbar. Step 2: Select Device Manager from the menu.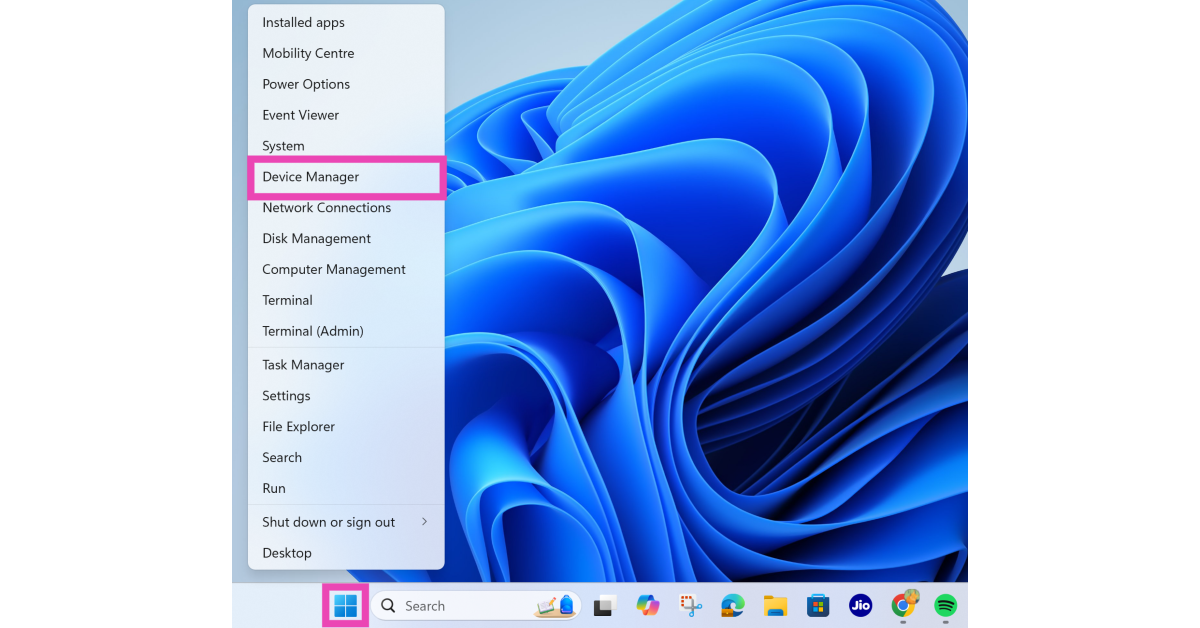 Step 3: Double-click Human Interface Devices.
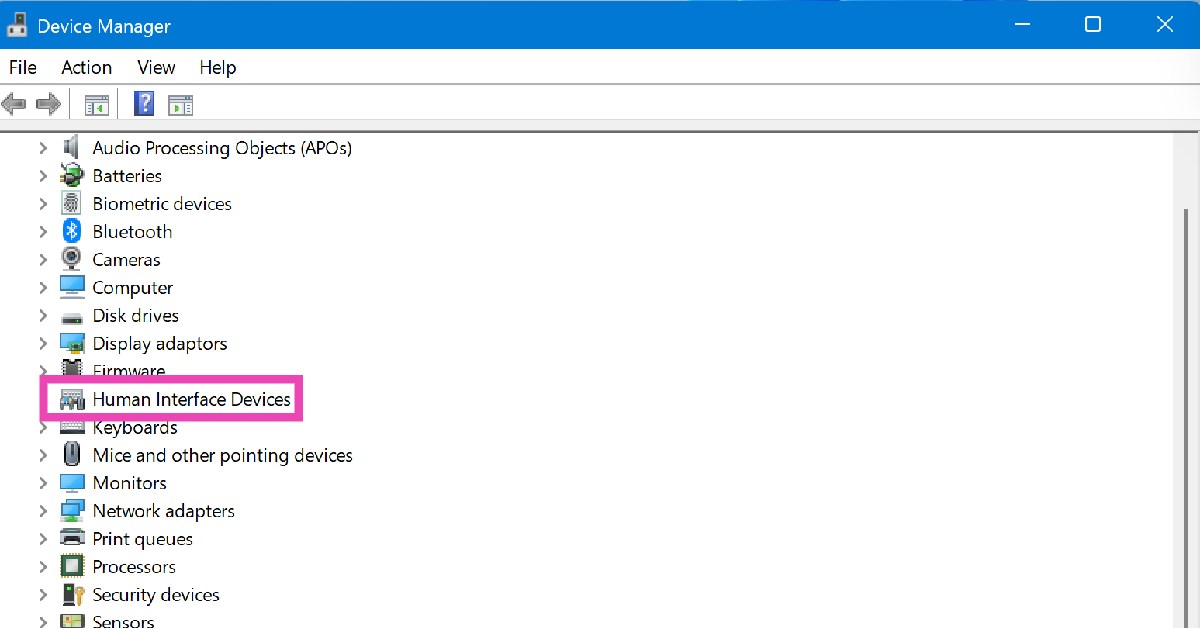 Step 4: Right-click HID-compliant touch screen.
Step 5: Click on Disable device.
Step 6: Hit Yes.
Step 4: Right-click HID-compliant touch screen.
Step 5: Click on Disable device.
Step 6: Hit Yes.
Use PowerShell to disable your laptop’s touchscreen
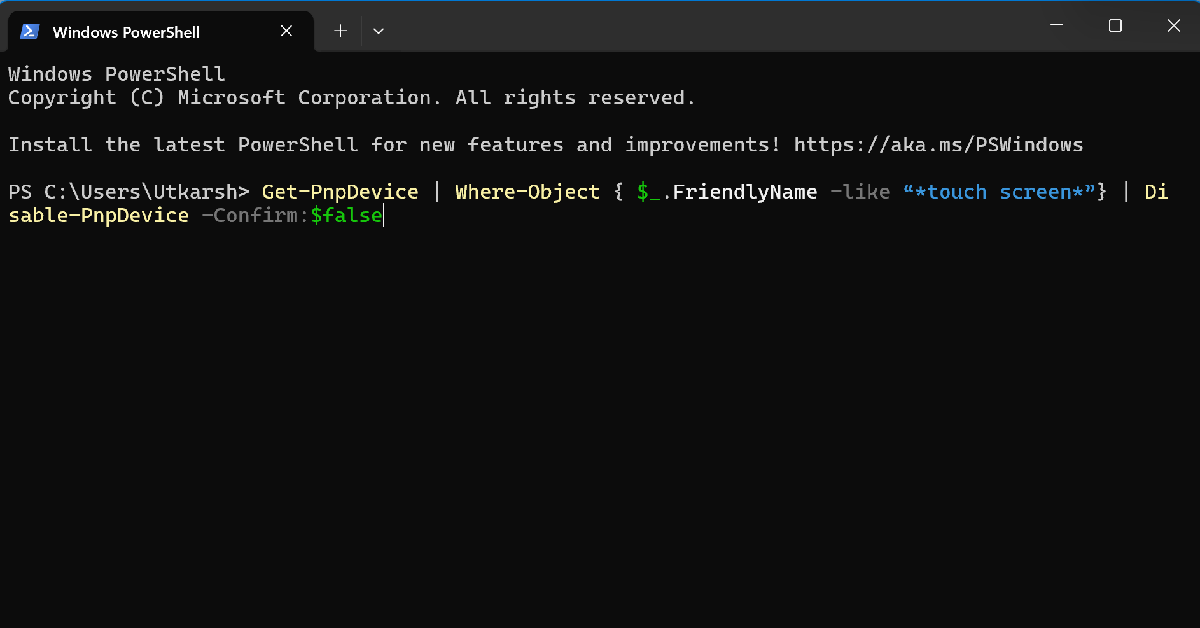
Step 1: Run PowerShell as administrator on your laptop. Step 2: Type the following command and hit Enter:Get-PnpDevice | Where-Object { $_.FriendlyName -like “*touch screen*”} | Disable-PnpDevice -Confirm:$false
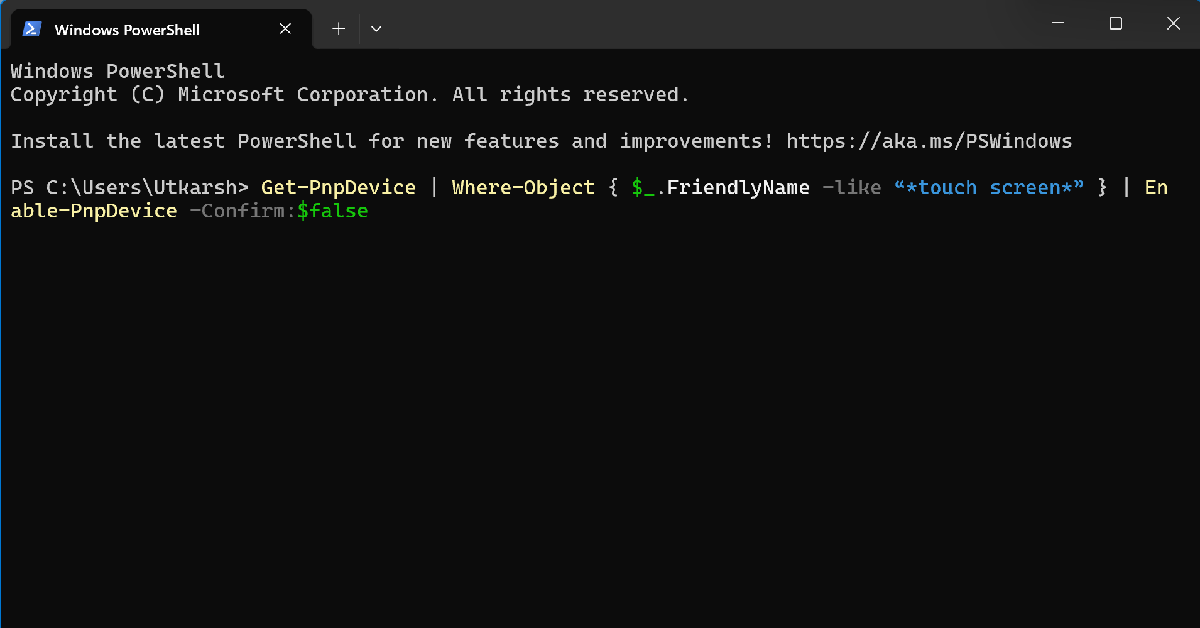
 Step 3: Your laptop’s touchscreen will be disabled. Enter the following command to enable it:
Get-PnpDevice | Where-Object { $_.FriendlyName -like “*touch screen*” } | Enable-PnpDevice -Confirm:$false
Use Windows Registry Editor to permanently disable your laptop’s touchscreen
The methods mentioned above disable your laptop’s touchscreen temporarily. Once you reboot your device, the touchscreen will come back to life. Here’s how you can disable it until you choose to enable it manually. Step 1: Launch the Windows Registry Editor. Step 2: Paste the path mentioned below in the address bar.Computer\HKEY_Current_USER\Software\Microsoft\Wisp\Touch
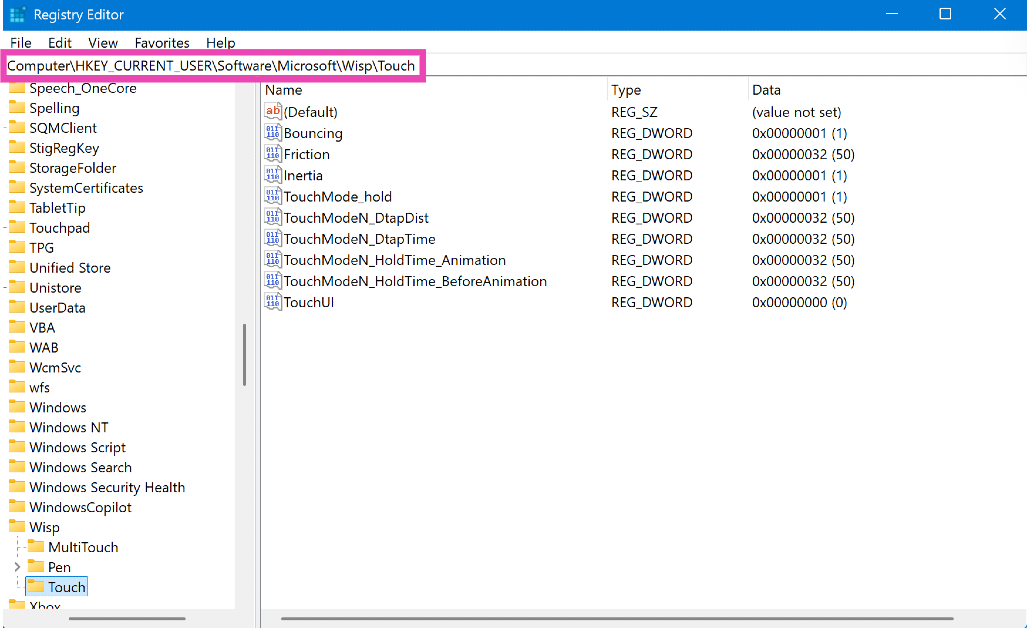 Step 3: Double-click TouchGate.
Step 4: Change the Value data to 0 and hit OK.
Step 5: Restart your laptop to execute the change. To enable the touchscreen, change the Value data back to 1.
Step 3: Double-click TouchGate.
Step 4: Change the Value data to 0 and hit OK.
Step 5: Restart your laptop to execute the change. To enable the touchscreen, change the Value data back to 1.


")


 Step 2:
 Step 3:
 Step 3:
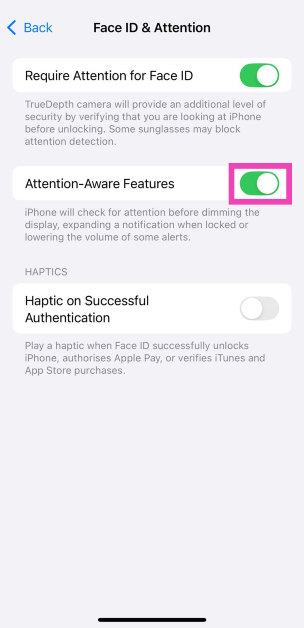 Step 4:
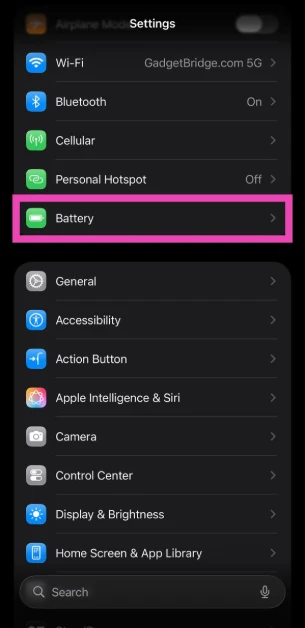
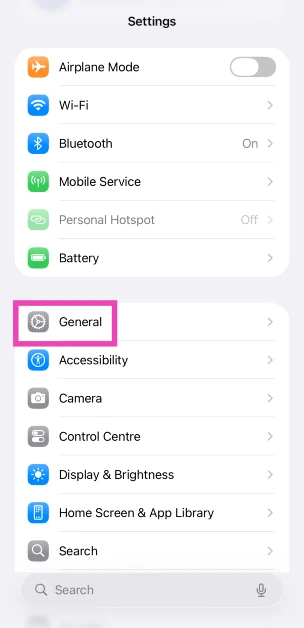
 Step 2:
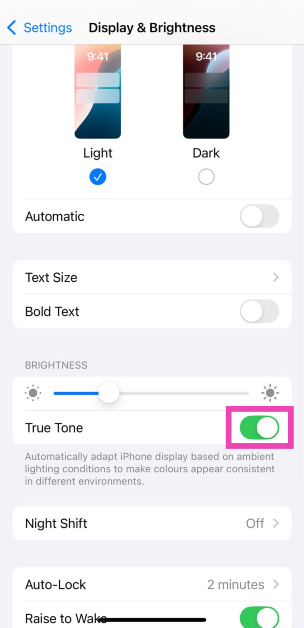 Step 3:
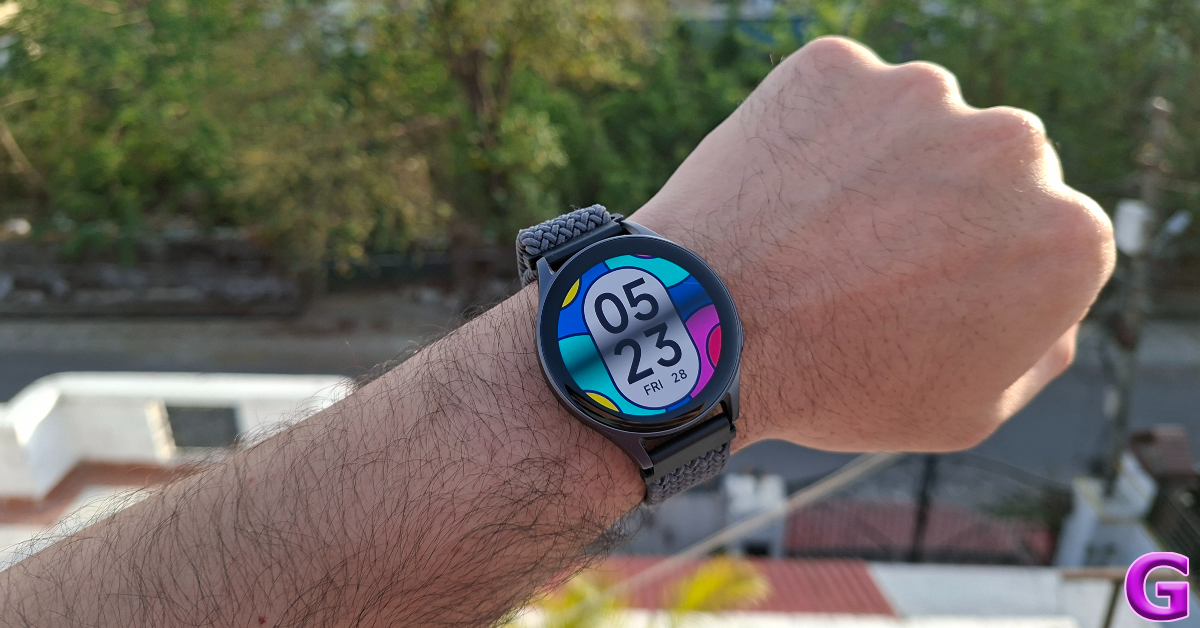
 Step 3: Tap on Power Mode.
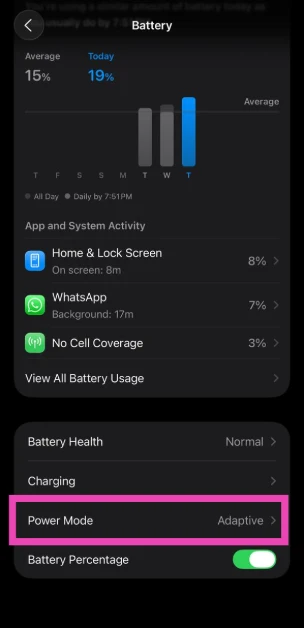 Step 4: Turn on the toggle switch next to Adaptive Power.

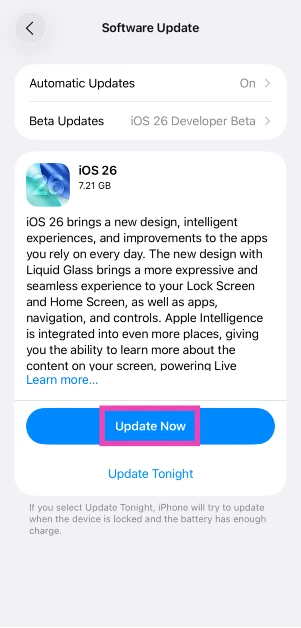
 Step 3: Tap on Software Update.
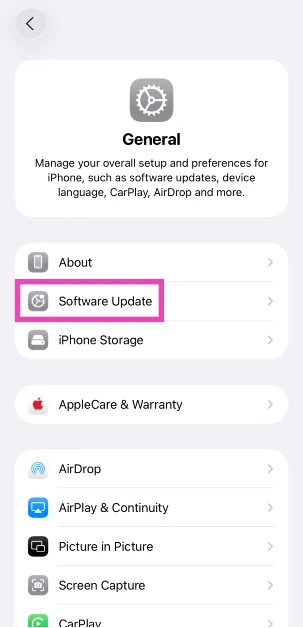 Step 4: Your iPhone will update automatically. Hit Update Now.


 Also Read:


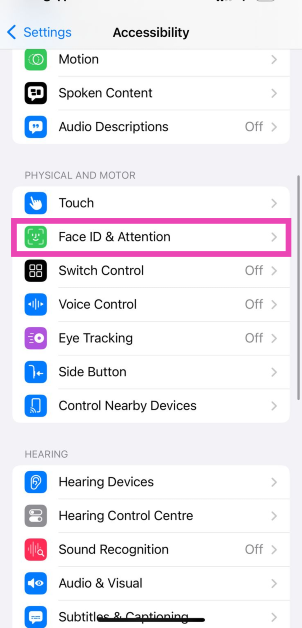
 Step 3:
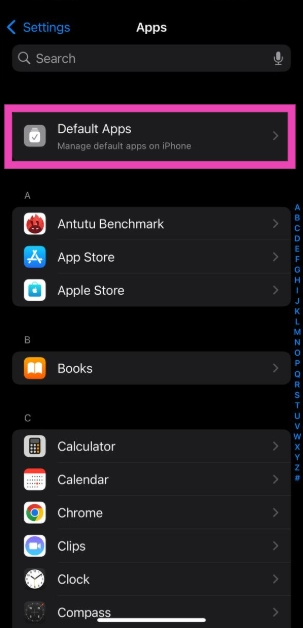 Step 4:
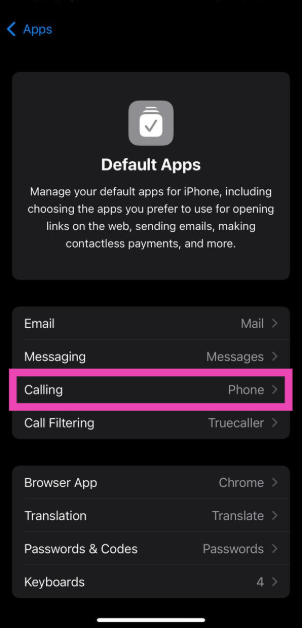 Step 5:
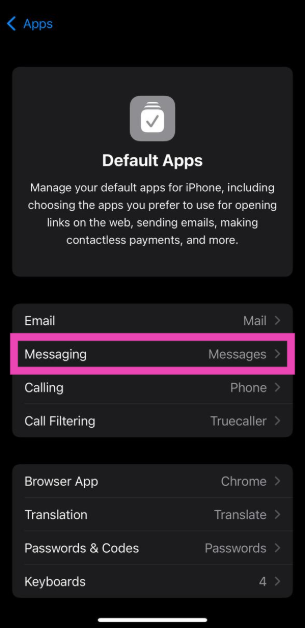 Step 8:
")


")

")
 Step 4:
 Step 3:
 Step 4:
  Step 4:
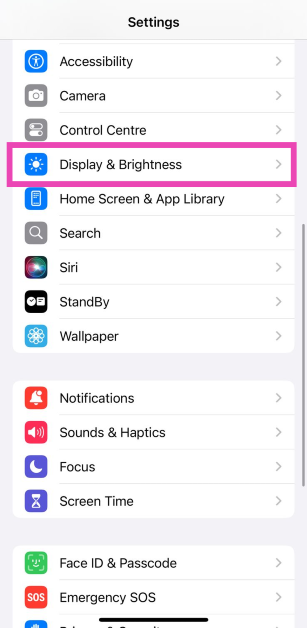
 Step 3:
 Step 4: