

 There are multiple occasions on which one might need to take a screenshot. You may be a professor who is explaining a procedure to their students digitally, or you may be a friend helping another friend or a family member navigate through their brand-new iPad and understand its functions, that too sitting at your home. Whatever the situation is, in case you’re not sure how to take a screenshot on an iPad, we’ve got your back. To tell you, taking a screenshot on an iPad is a cakewalk, irrespective of the model that you’re using. Here are the top 5 ways how to take a screenshot on your iPad in 2023.
In This Article
Take A Screenshot By Pressing Buttons On iPad
On iPad With A Home Button

If you own an iPad model with a home button, all you need to do is press and release the top button and the home button simultaneously. That’s it!
On Other iPad Models

If you own an iPad model that doesn’t have a home button, you have to press and release the top button and the volume button (either one) simultaneously.
Read also: How To Set Up And Use WhatsApp On iPad (2022)?
Using Apple Pencil

If you own an Apple Pencil and are a frequent user of the same, then this one may seem an even easier method to you. All you have to do is load the page you want to take a screenshot of, keep your pencil positioned at your iPad’s bottom left or right corner, and drag the corner towards the center. That’s it! But remember to keep your Apple Pencil fully charged and connected with your iPad before taking the screenshot.
Read also: Here is how to disable live text on your iPhone, iPad or Mac
Using Assistive Touch
Our final method of taking a screenshot on an iPad is for those who are not good with hand movements. Sometimes pressing buttons simultaneously or using the Apple Pencil can be tricky, and we totally understand. Fortunately, Apple also identified the issue and provided another way out of the situation. Through Assistive Touch, an option available within the Accessibility settings of your iPad, the gesture required to take a screenshot becomes quite easy.
Step 1: Go to Settings > Accessibility > Assistive Touch or simply Touch (depending on your iPad model) > Assistive Touch.
Step 2: Toggle on the Assistive Touch option.
Step 3: A button appears on the bottom right corner of the screen. Click on Double-Tap under the Custom Actions area.
Step 4: Scroll and find the screenshot option that appears next on the screen.
Step 5: Now, all you have to do is just open the page of which you have to take a screenshot, find the Assistive Touch button, and just double-tap it.
Use Siri
If you want to go hands-free, you can always use Siri to take a screenshot on your iPad. You may be wondering why you would ever need Siri to take a screenshot, but this method will come in handy when you’re driving or if the physical buttons are not working. To take a screenshot on your iPad, simply say “Hey Siri, take a screenshot” and Apple’s voice assistant will do the next.
Use a third-party app
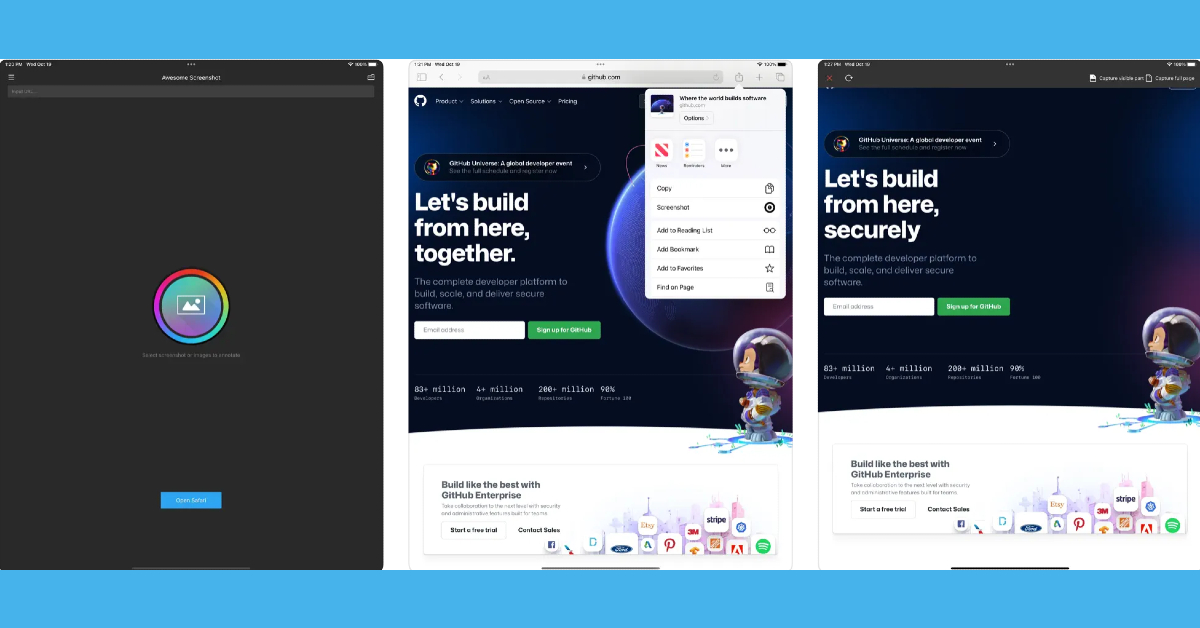
If you want to take a screenshot of an entire article that spans multiple pages, there are several third-party apps that can do it for you. Apps like WebCapture, Awesome Screenshot, and WebShot seamlessly integrate with Safari and are able to take legible full-page screenshots. These apps also have basic tools for cropping, annotations, and more.
Frequently Asked Questions (FAQs)
How do I take a screenshot on my iPad?
To take a screenshot on your iPad, simply press the side key and the volume key together. Older iPad versions allow a screenshot to be taken when the side key and home button are pressed simultaneously.
How do I take a screenshot on my iPad if its physical buttons are not working?
There are a couple of ways you can go about taking a screenshot on your iPad without relying on the physical buttons. You can ask Siri to take a screenshot for you, or go to settings and enable Assistive Touch. Once Assistive Touch has been enabled on your iPad, tap on it and select the screenshot option. If you have an Apple Pencil, drag it from the bottom left corner of the iPad to the centre to take a screenshot.
How do I capture an entire article or a long message in one screenshot?
Want to take a long screenshot that captures multiple pages? Tap the screenshot preview and select Full Page. You can also use third-party apps like WebShot, WebCapture, and Awesome Screenshot for this task.
Conclusion
So these are the top 5 ways using which you can easily take a screenshot on your iPad in 2023, irrespective of the model that you’re using. In case you know of any other way, do let us know in the comments section below.
For the latest gadget and tech news, and gadget reviews, follow us on Twitter, Facebook and Instagram. For newest tech & gadget videos subscribe to our YouTube Channel. You can also stay up to date using the Gadget Bridge Android App. You can find the latest car and bike news here.
