- Pinned Messages allow users to pin a particular message to the top of the chat.
- The feature works for both individual and group chats.
- Also one can pin any type of message (including text, emojis and polls).
- Additionally, users are permitted to pin one chat at a time though.
As we mentioned text messages can be pinned for a limited duration. WhatsApp right now allows users to pin a chat for 24 hours, 7 days and 30 days. Note that in group chats only Admins have the authority whether to allow other participants to Pin messages or keep it limited to admins only. WhatsApp is also making efforts to make its platform more safe for its users. Recently it rolled out the Secret Code feature to add another level of security to chats. The WhatsApp feature allows users to set a unique password that is different from a phone lock code. So when you set a password your chats will be hidden and inside a Locked Chats folder from the chat list. It can easily be done by a long press and one does not need to go through the chat settings to enable the secret code feature.introducing Pinned Messages 📌 now everyone can stay on top of a chat by keeping the important messages up top 🙌 pic.twitter.com/nDcsgoJyga
— WhatsApp (@WhatsApp) December 12, 2023


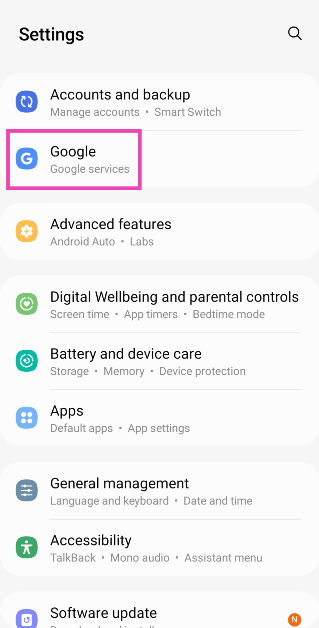
 Step 2:
 On your PC
Step 1:
On your PC
Step 1: Step 2:


 Step 1:


 Step 3:
 Step 4:
 Step 5:
 Step 6:
 Step 2:
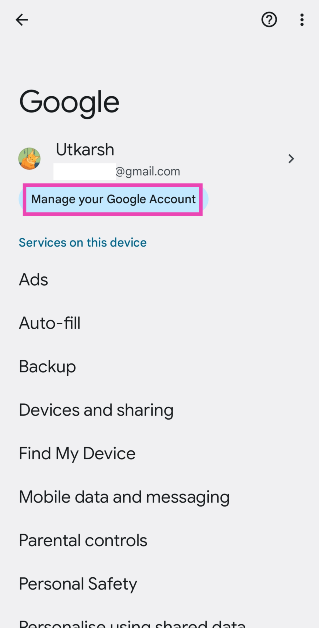 Step 3:
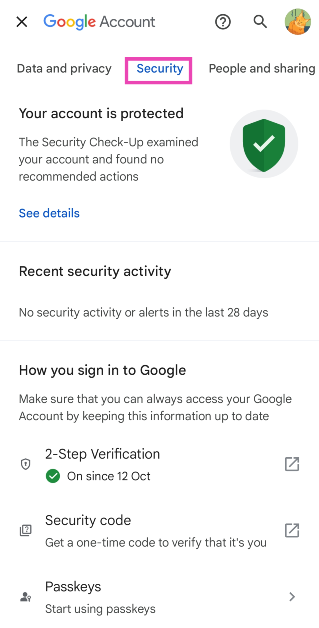 Step 4:
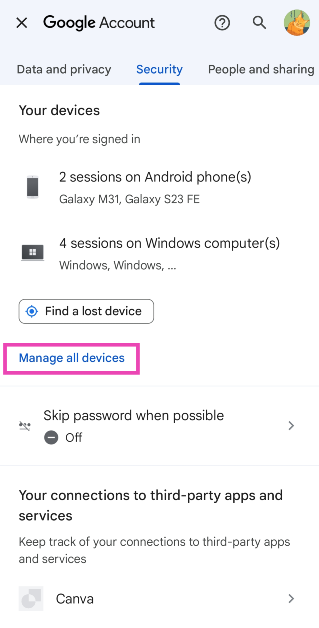 Step 5:
 Step 6: