In This Article
Why you should keep the apps on your phone updated
The apps on your phone are not immune to bugs and unexpected crashes. The good news is that app developers are constantly rolling out updates to patch these issues on time. As soon as users report a particular bug, it sets the wheels rolling and developers turn their attention to the issue at hand. Within a few days, the bug-free update is published for users to download. This is why updating the app is one of the first steps you should take to fix its erratic behaviour. Routine updates also elevate the security of the apps. This is particularly true for web browsers, instant messengers, and financial apps. Malicious entities are always on the prowl, looking for security flaws to pounce upon your data. Keeping your apps updated is one way to keep these entities at bay. Finally, app updates are also used to roll out new features and functionalities. Can’t find a feature that everyone is using on Facebook or WhatsApp? You’re probably using an older version of the app. Install the updated version to stay on top of all the new features.Manually update an Android app using Google Play Store
Step 1: Go to the Google Play Store on your Android device. Step 2: Hit the Search bar and enter the name of the app you want to update. Step 3: Go to the app’s page. Step 4: Hit Update.
Manually update all Android apps using Google Play Store
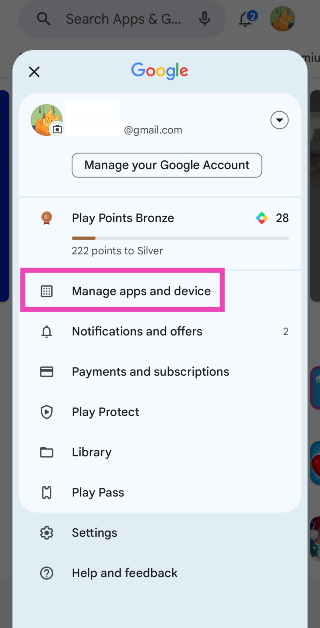
Step 1: Launch the Google Play Store on your Android phone. Step 2: Tap your profile picture at the top right corner of the screen. Step 3: Select Manage apps and device.
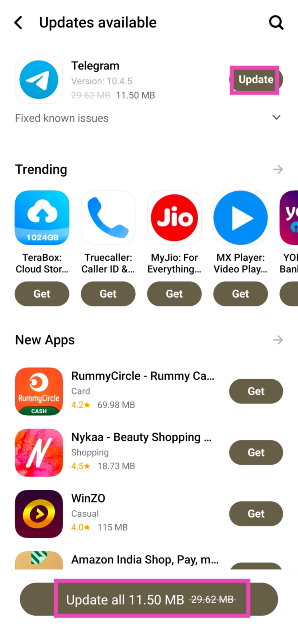
 Step 4: Tap on Updates available.
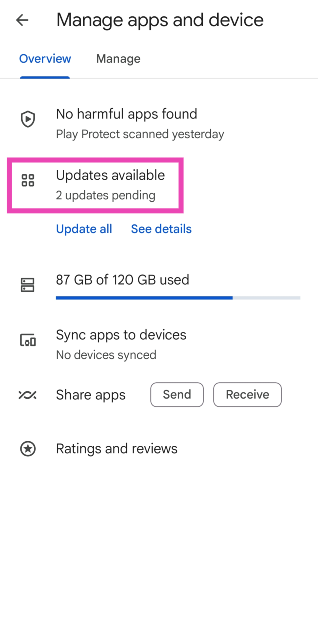 Step 5: Hit Update all.

Automatically update all apps on your Android device
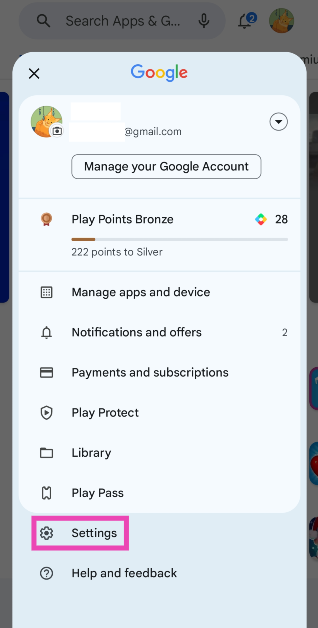
Step 1: Launch the Google Play Store on your Android phone. Step 2: Tap your profile picture at the top right corner of the screen.
Step 3: Go to Settings.
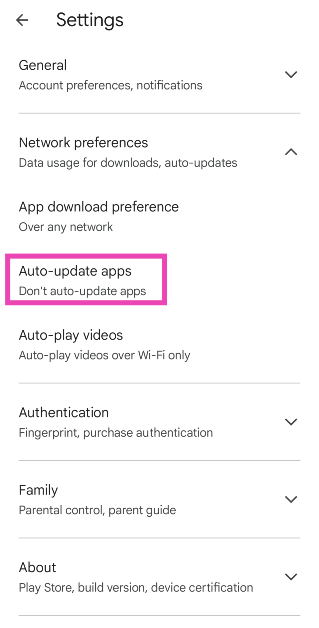
 Step 4: Tap on Network preferences.
 Step 5: Select Auto-update apps.
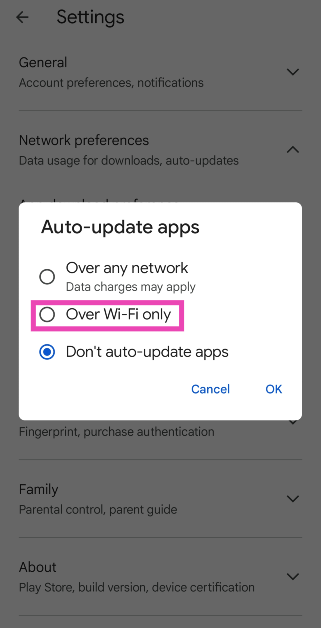
 Step 6: Tap on Over Wi-Fi only. You can also choose to update apps over mobile internet, but this option isn’t recommended since it ends up using a lot of mobile data.
Turn on auto-updates for a particular app
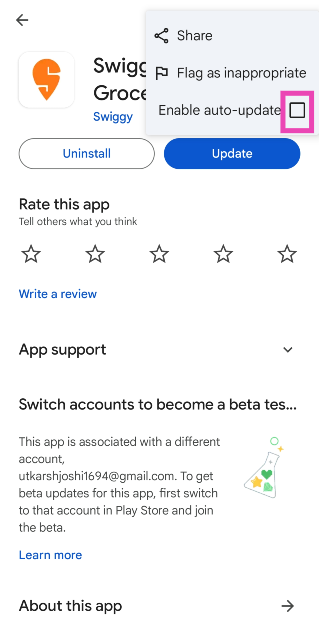
Step 1: Launch the Google Play Store on your Android device. Step 2: Hit the Search bar and enter the name of the app for which you want to turn on auto-updates. Step 3: Open the app’s page and hit the ellipses at the top right corner of the screen.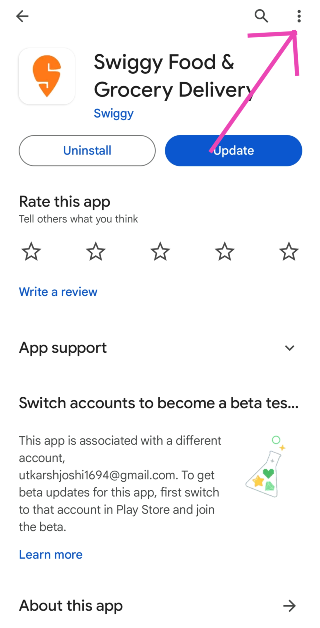 Step 4: Tap the checkbox for Enable auto-update.
 Read Also: How to view Dropbox File Activity and Event Logs
Update Android apps without using Google Play Store (Galaxy Store)
If you own a Samsung phone, here’s how you can update any app using the Galaxy Store. Step 1: Launch the Galaxy Store on your Samsung device. Step 2: Switch to the Menu tab.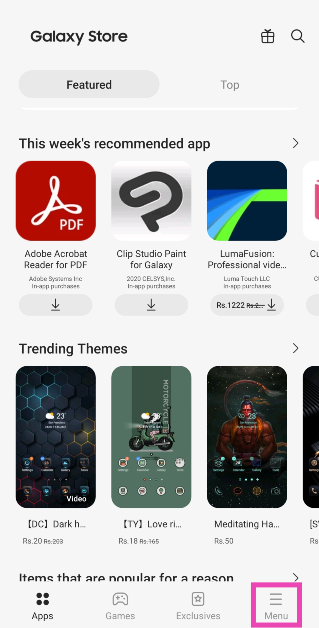 Step 3: Tap on Updates.
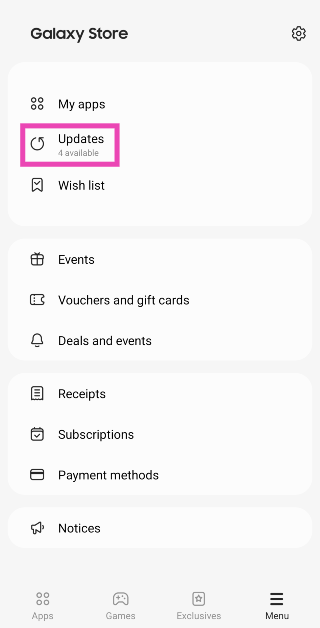 Step 4: Tap the refresh icon next to an app to update it or select Update all at the top right corner of the screen.

Update Android apps without using Google Play Store (V-Appstore)
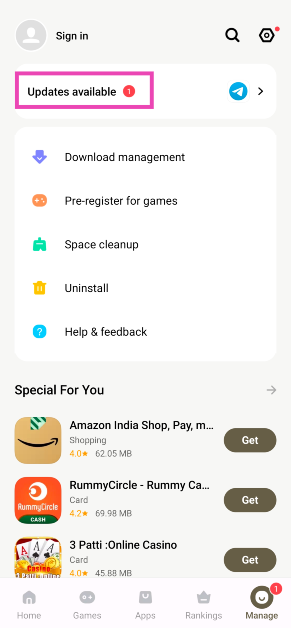
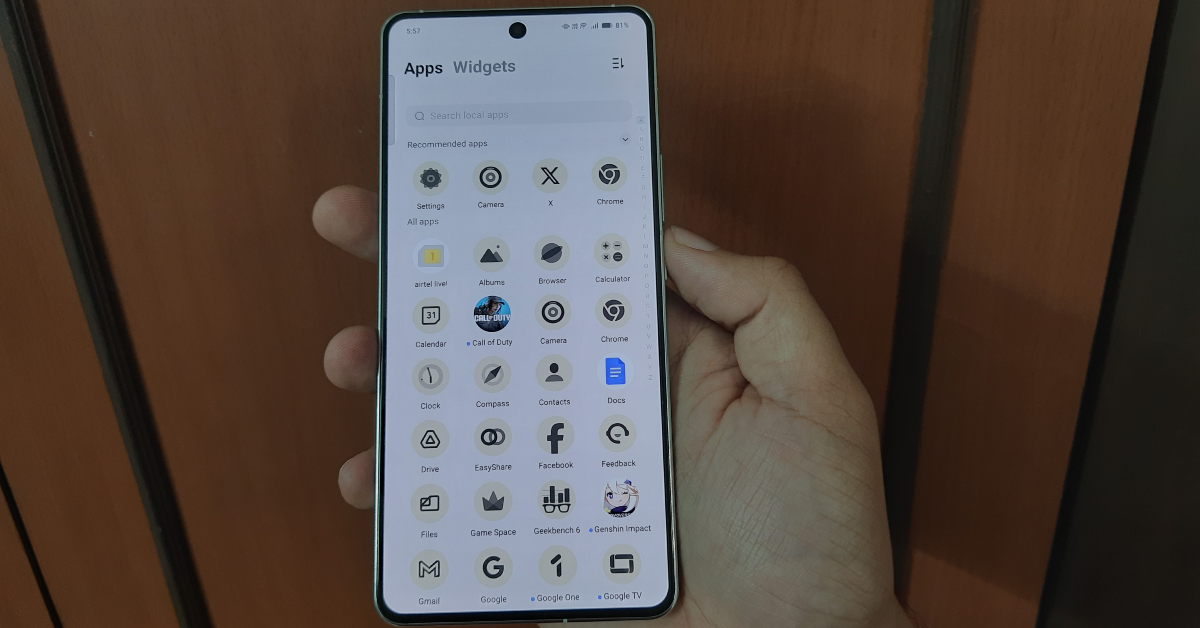
Vivo and iQOO users can update any app on their devices using the V-Appstore. Here’s how. Step 1: Launch the V-Appstore on your Vivo/iQOO phone. Step 2: Switch to the Manage tab. Step 3: Tap on Updates available.
 Step 4: Hit Update next to the app you want to update.
Update Android apps without using Google Play Store (Xiaomi Get Apps)
Here’s how Xiaomi, Redmi, and Poco users can update the apps on their phones using the Get Apps marketplace. Step 1: Go to the Get Apps marketplace on your Xiaomi/Redmi/Poco device. Step 2: Switch to the Me tab.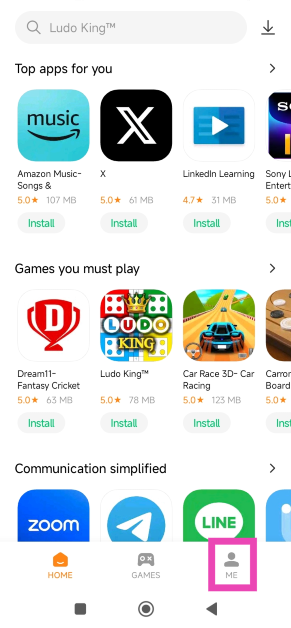 Step 3: Tap on Updates.
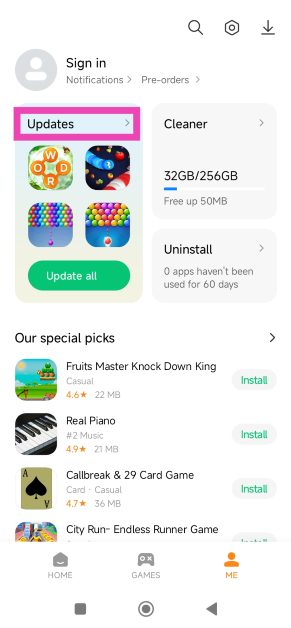 Step 4: Hit Update all.

Update Android apps without using Google Play Store (Third-party marketplace)
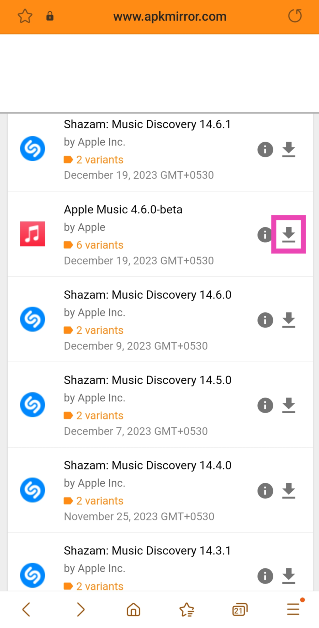
If you use a stock Android phone that doesn’t come with its app store, you can use a third-place marketplace as an alternative to the Google Play Store to update an app. Here’s how. Step 1: Open the web browser app on your Android smartphone. Step 2: Go to a trusted third-party app marketplace like APKMirror, Softonic, or F-Droid.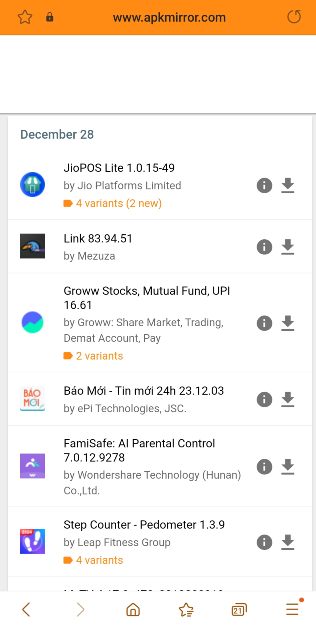 Step 3: Search for the app you want to update.
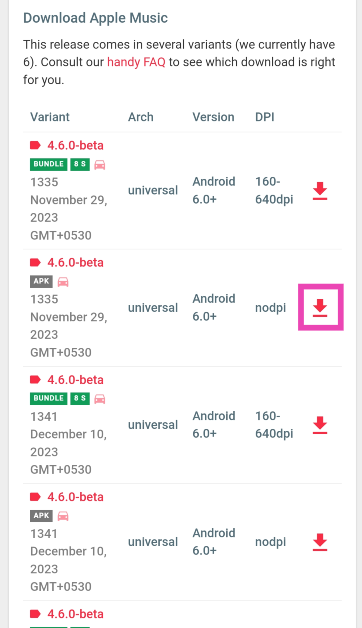
 Step 4: Download the latest version of the app from the list.
 Step 5: Open the APK file and allow third-party downloads from unknown sources.
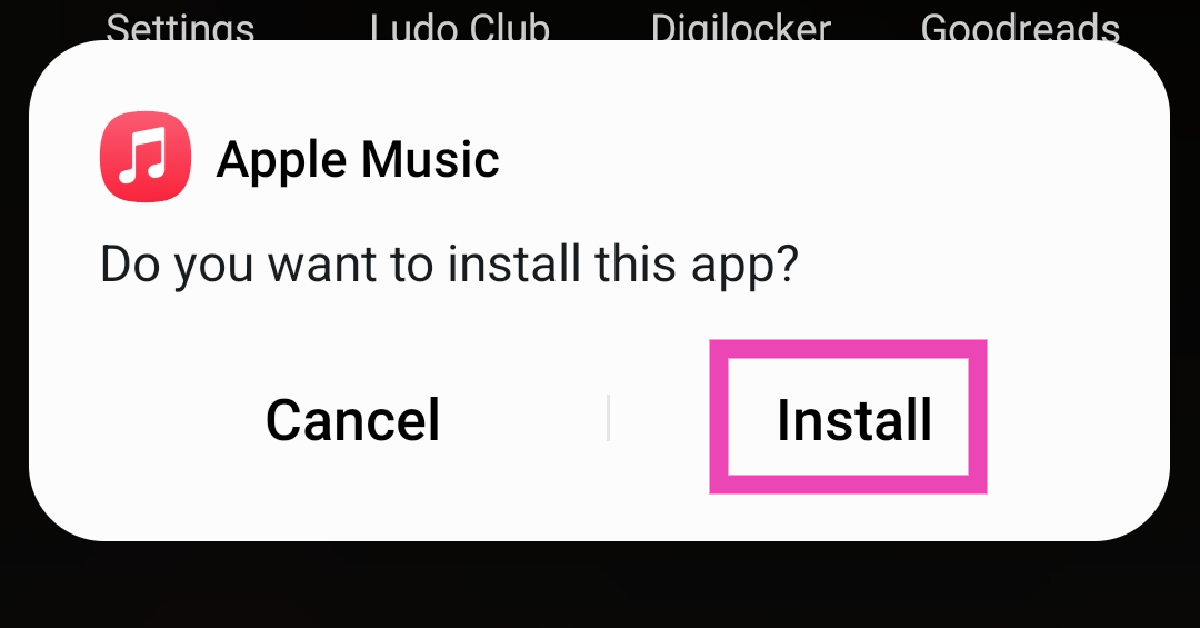 Step 6: Install the updated app on your Android phone.


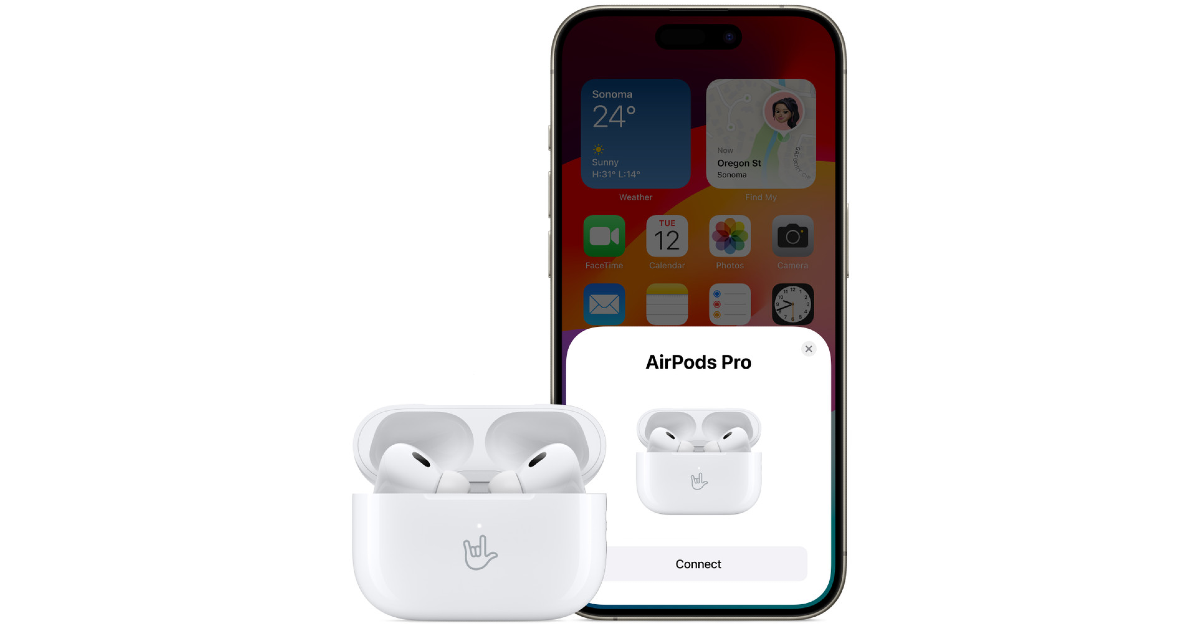
 If your AirPods are low on charge, their performance might take a hit. This is usually when minor discrepancies start arising on the microphone. Place the AirPods in their case to charge them. If there’s no battery left in the case, connect it to a charger. Once the AirPods have been fully charged, their performance will be restored.

 If your AirPods were recently exposed to water, it is possible that they may have suffered some damage. While AirPods are sweat-resistant, prolonged exposure to water has the potential to damage them. The wireless earbuds are not designed for showering or swimming. If you accidentally dipped the earbuds in water, use a clean cloth to dry them. Do not use a blow dryer to get rid of the water droplets. Let the earbuds air dry.
 Step 1:
 Step 1: Go to Settings and select Bluetooth.
Step 2: Hit the i icon next to your connected AirPods.
Step 3: If the Noise Cancellation setting is selected, tap the Off tile next to it.
Step 1: Go to Settings and select Bluetooth.
Step 2: Hit the i icon next to your connected AirPods.
Step 3: If the Noise Cancellation setting is selected, tap the Off tile next to it.
 Step 1:
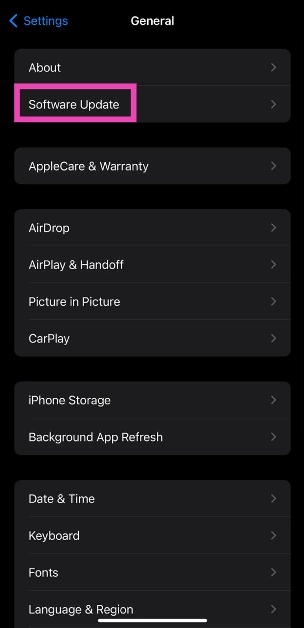
 If your AirPods’ firmware is outdated, it may start glitching unexpectedly. Apple routinely pushes out firmware updates for its TWS devices to get rid of any faults and bugs. These updates are installed automatically on the device. To check your AirPods’ firmware version, go to Settings>Bluetooth and tap the i icon next to the TWS. Tap on version to check the firmware details. Go to Apple’s official website to make sure that the firmware version of your AirPods matches the latest update pushed out by the company.
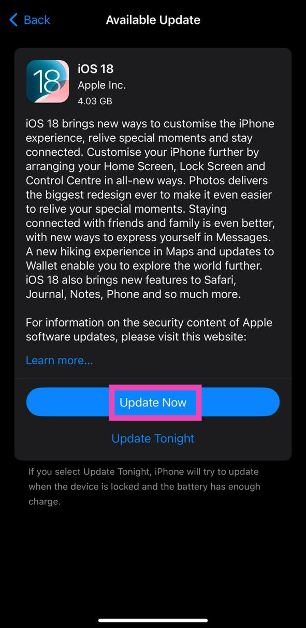
 Step 3: Tap on Software Update.
 Step 4: Hit Update Now.


 Key Specs
 Key Specs
 Key Specs
 Key Specs
 Key Specs
 Key Specs
 Key Specs
 Key Specs
")
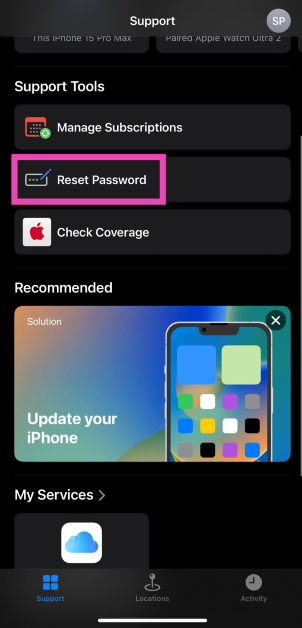
 Step 3:
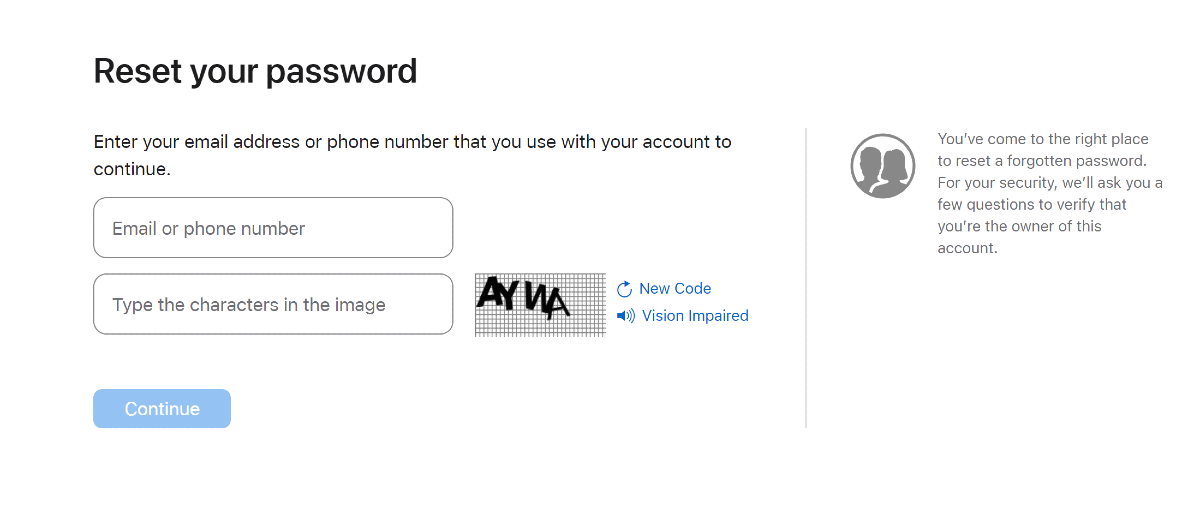 Step 4:
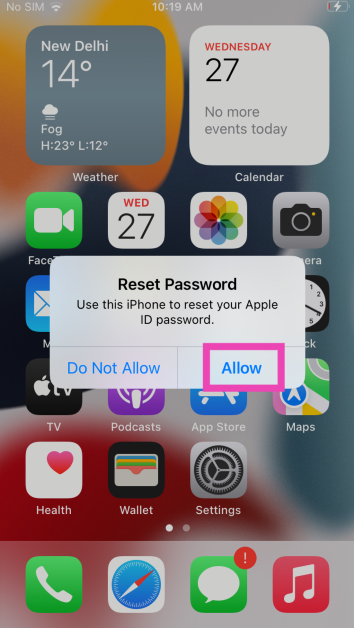 Step 7:
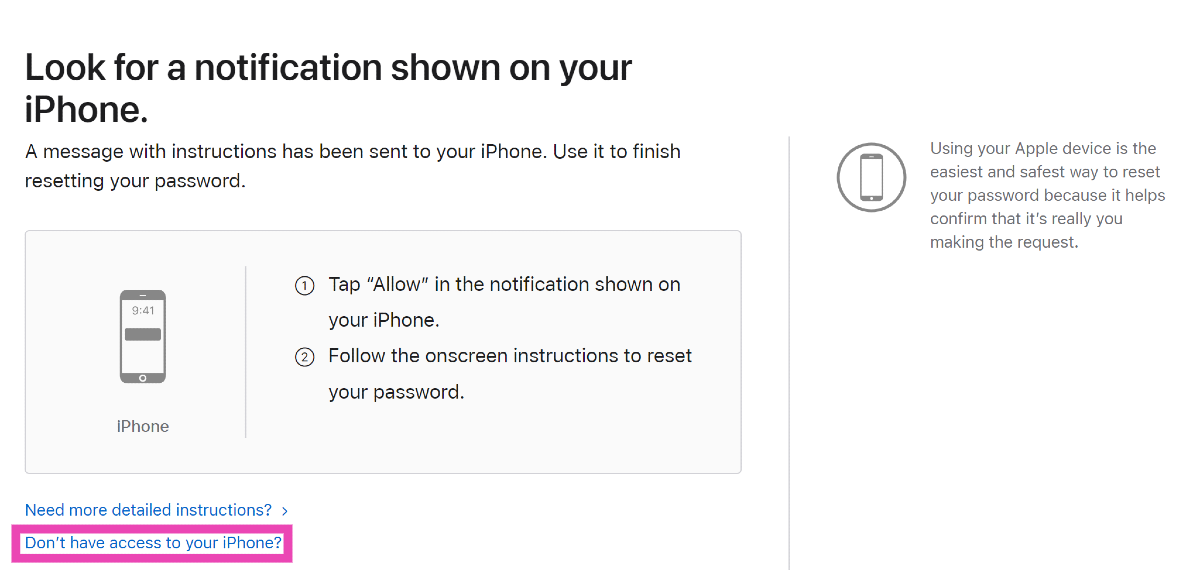 Step 3:
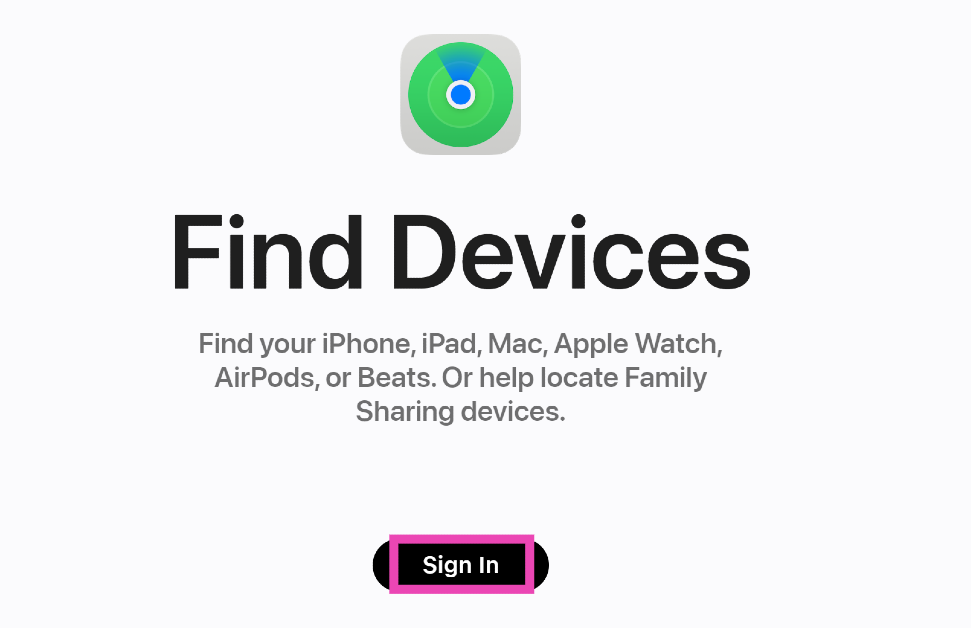
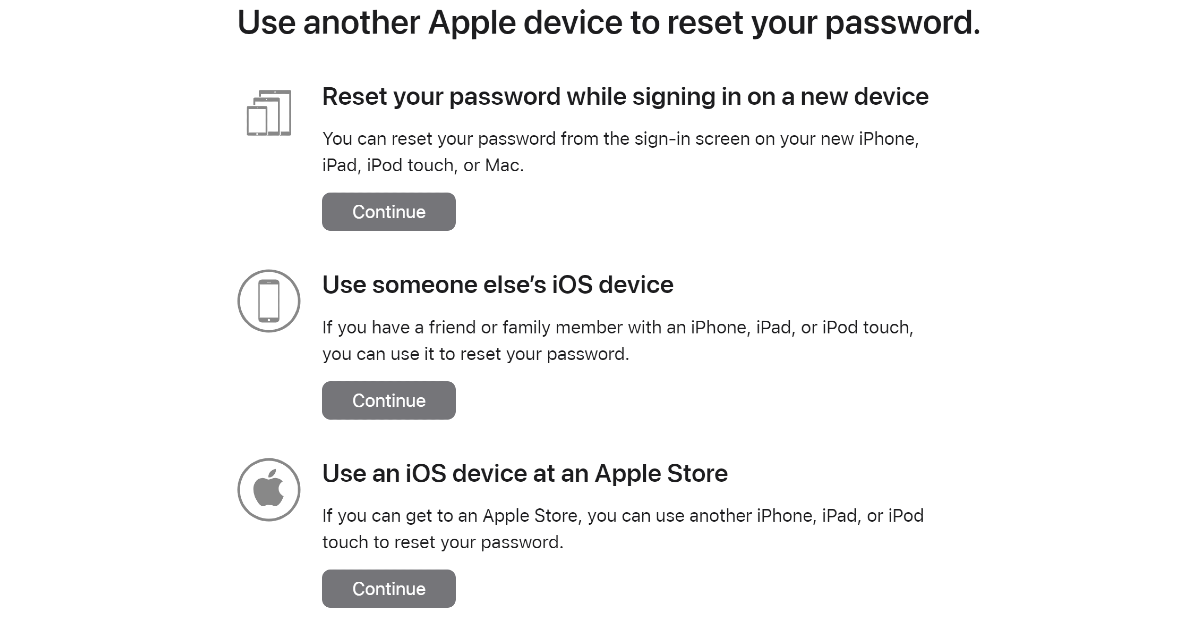 Step 4:
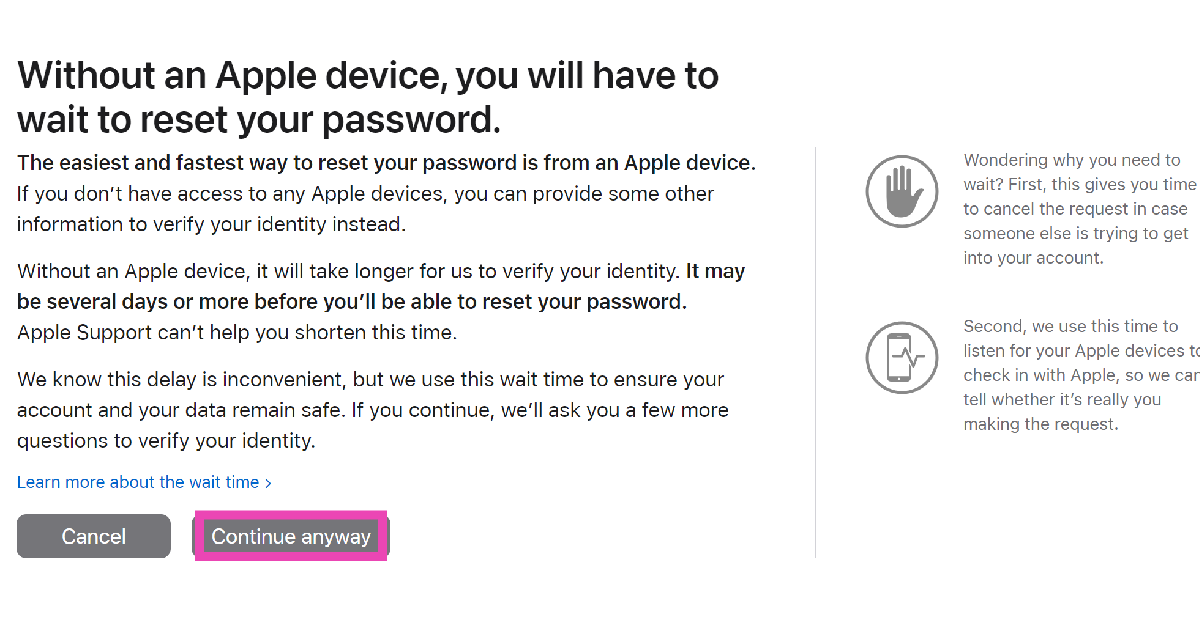 Step 6:
 Step 7:
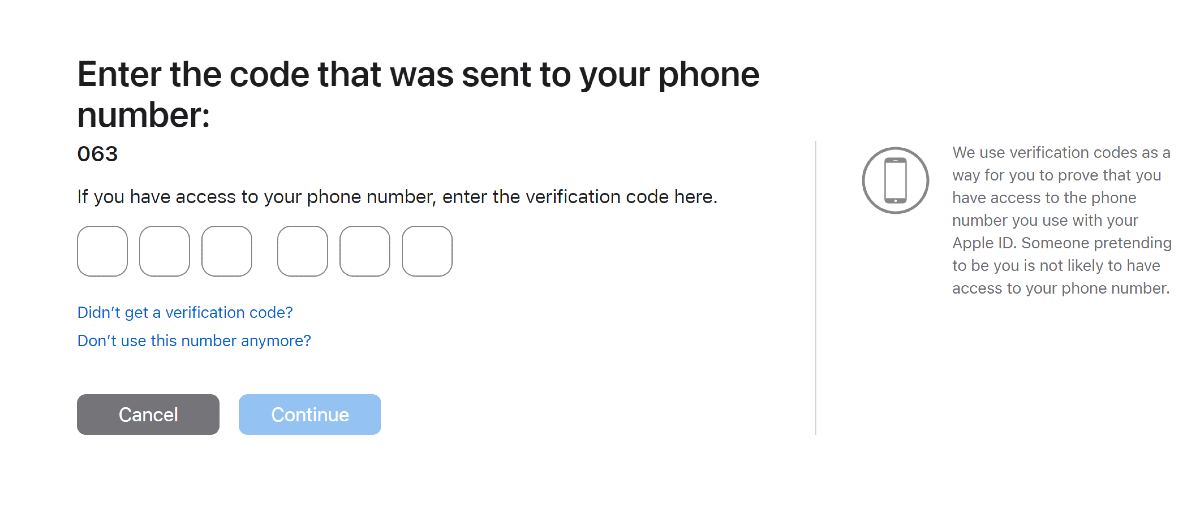 Step 8:
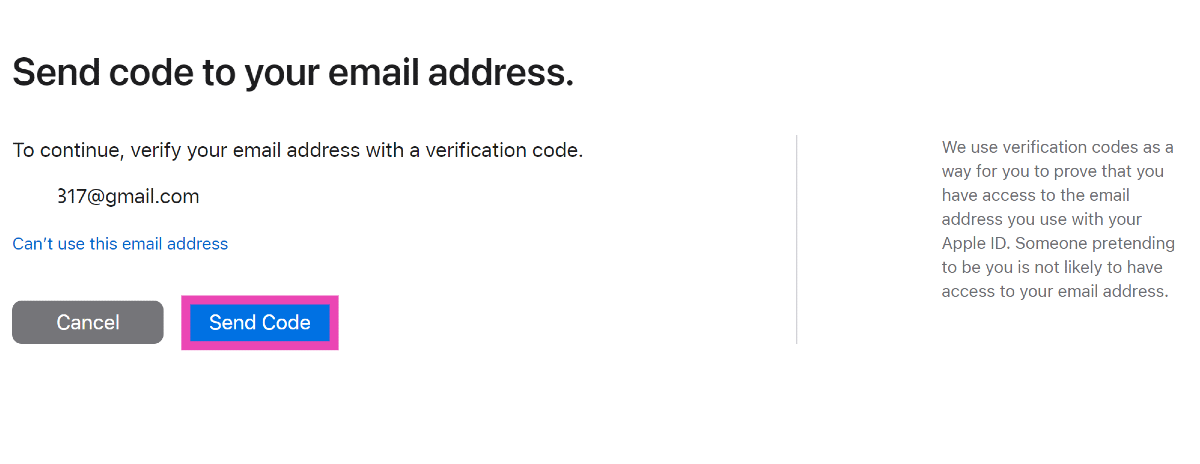 Step 9:
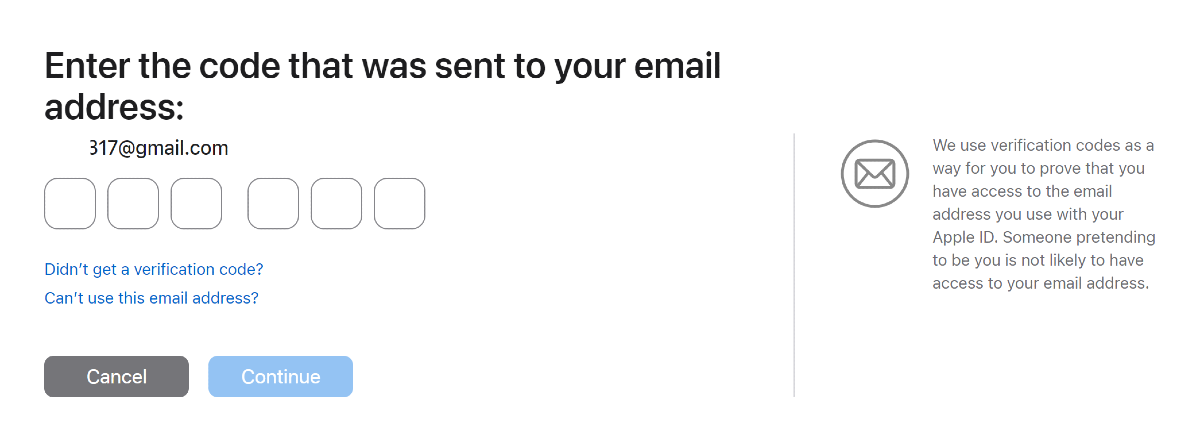
 Step 3:
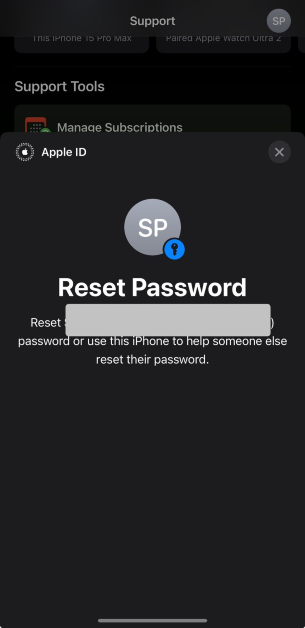
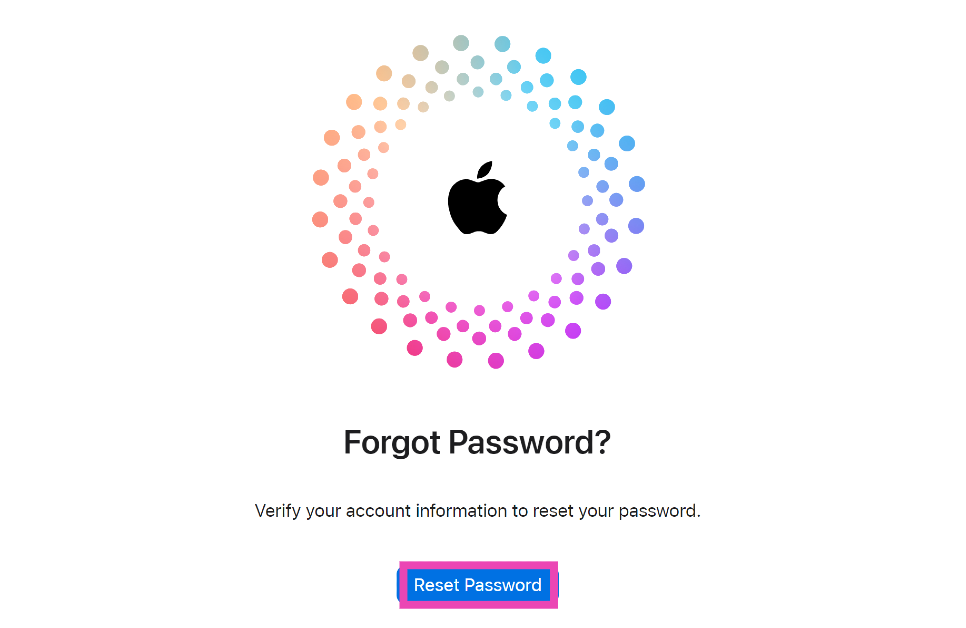
 Step 1:
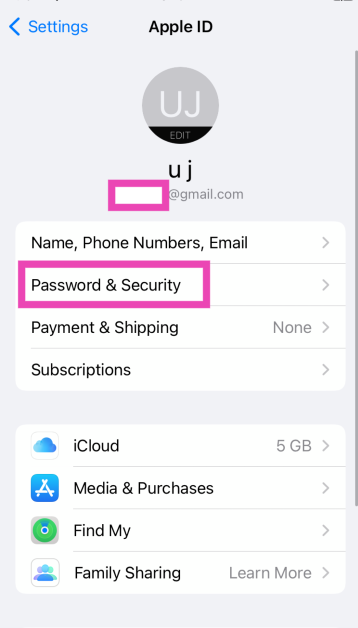 Step 4:
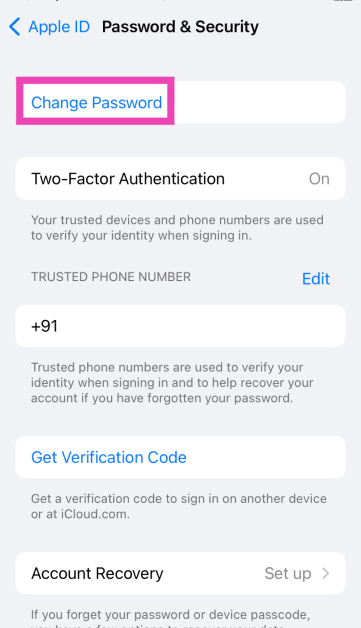 Step 5:


 Key Specs
 Key Specs
 Key Specs
 Key Specs
 Key Specs
 Key Specs
 Key Specs


![Fixed: the Disk Structure is Corrupted and Unreadable [2024]](https://www.gadgetbridge.com/wp-content/uploads/2023/12/dis-curruption-fixed-768x402.webp "Fixed: the Disk Structure is Corrupted and Unreadable [2024]")
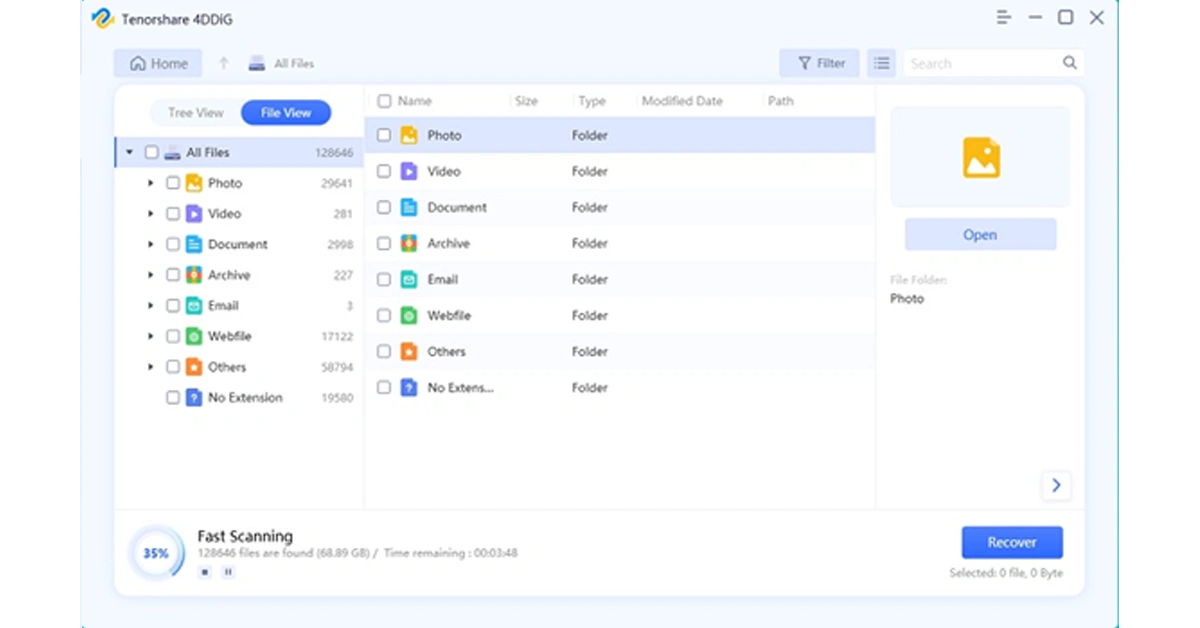
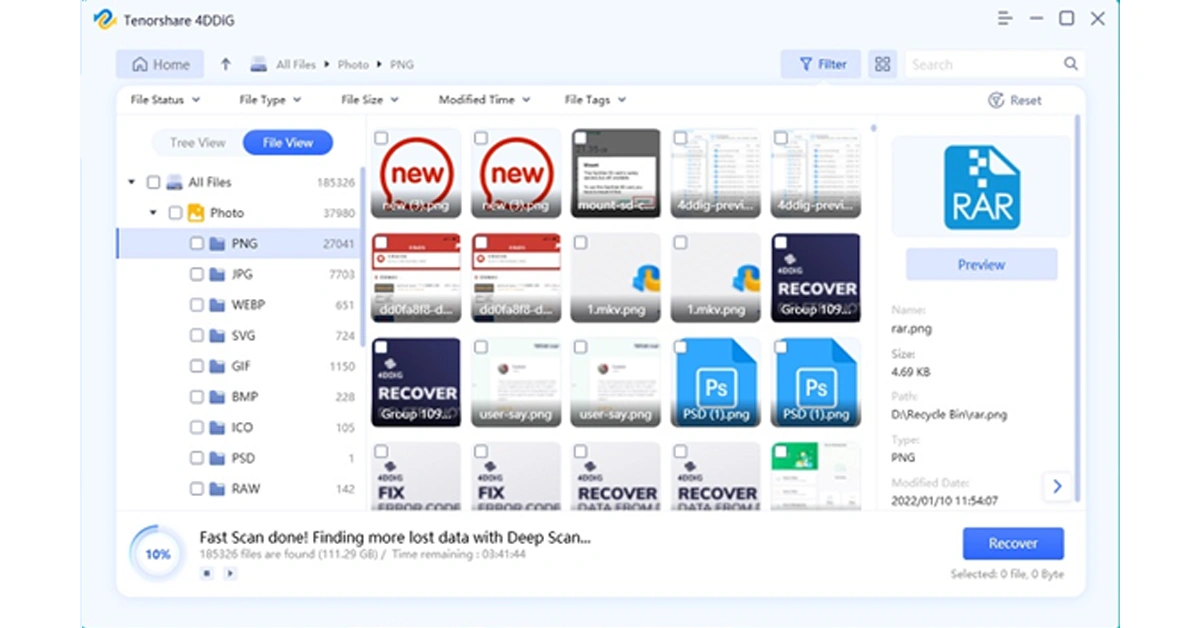
 Step 2: The tool will promptly start scanning for all lost files on the selected drive. During this process, you have the option to view files in either File View or Tree View. Additionally, you can pause or stop the scanning process once you’ve identified the necessary files.
 Step 3: Now, select the lost files and simply click on the “Recover” button. Remember to back up these files to a safe location.
 Currently, the software provider is hosting an exciting Christmas promotion. Anyone participating in the event has the chance to win free Amazon e-gift cards and a brand-new iPad.
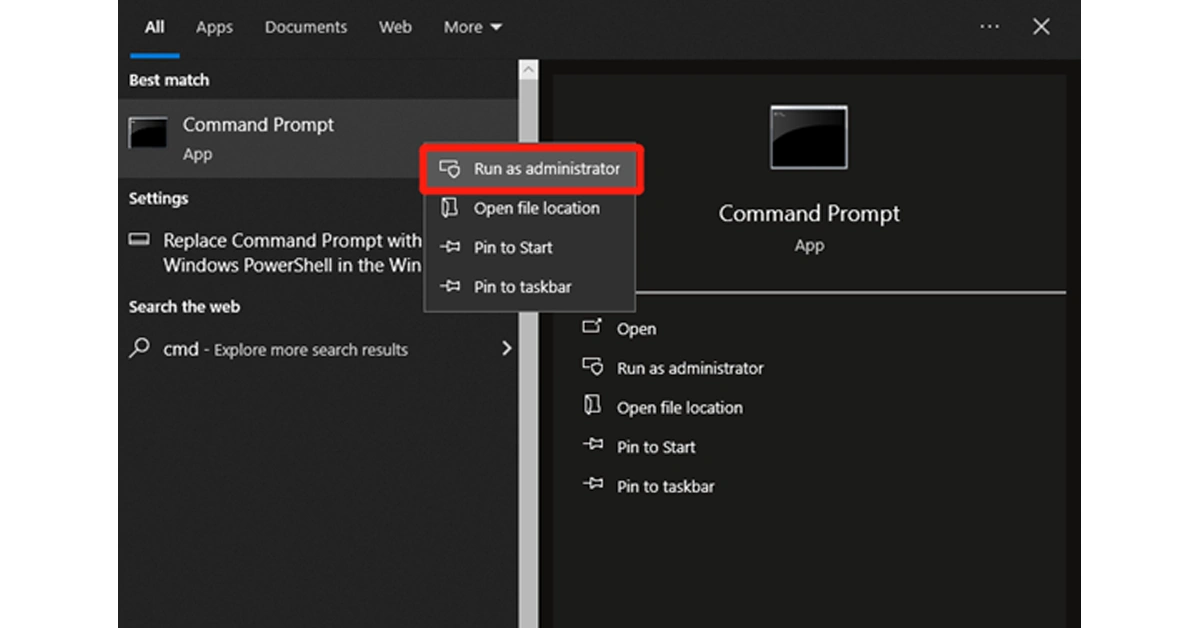 Step 2: Then, enter the “chkdsk /f /r X:” command and hit the Enter key. Remember to replace X: with your actual drive letter.
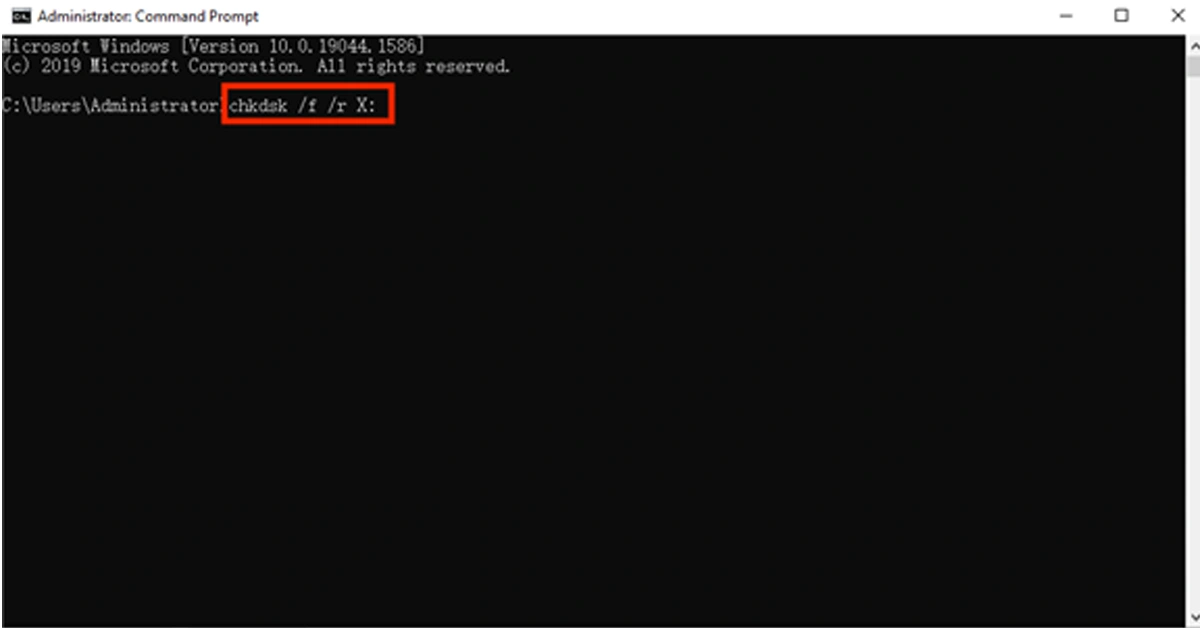 Step 3: If necessary, restart your computer to complete the repair process.

 Step 2:
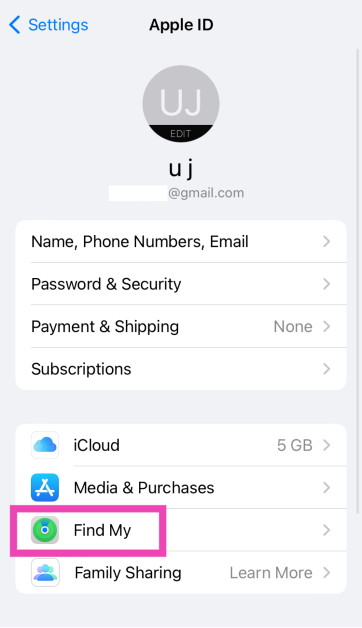 Step 3:
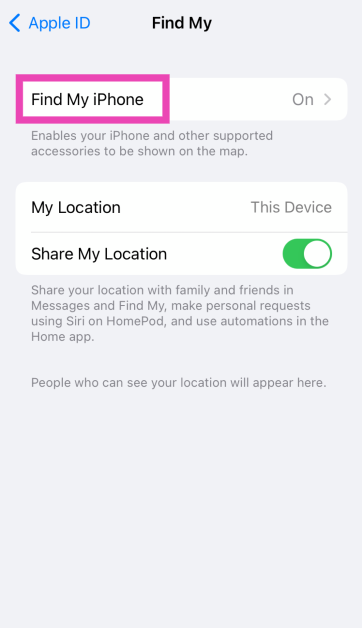 Step 4:
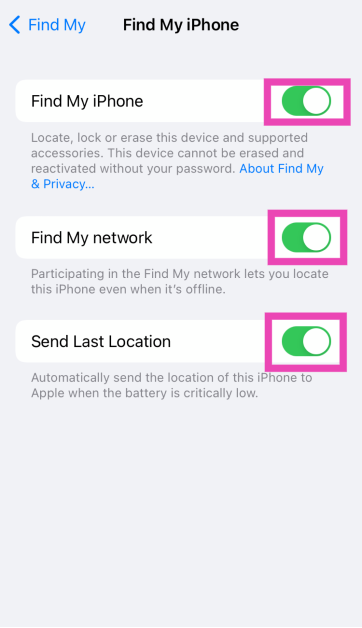
 Step 3:
 Step 4:


 Step 3:
 Step 4:
 Step 5:
 Step 5:
 Step 4: