Epson Unveils Cost-Effective EcoTank M1050 and M2050 Printers

Key Highlights

  • Achieves a high print speed of 18 images per minute (ipm).
  • Constructed using recycled plastic and features energy-efficient PrecisionCore Heat-Free Technology.
  • Rear feeding capability supports a variety of media sizes, including legal and specialty papers.

Epson has announced the launch of its latest Monochrome Single and Multi-function EcoTank printers, the EcoTank M1050 and M2050. These new models build on the success of their predecessors—EcoTank M100, M105, M200, and M205—offering enhanced features such as improved print speed, an integrated ink tank, and a compact design incorporating PrecisionCore print head technology.

Read Also: Epson EcoTank Monochrome M1120 Wi-Fi Ink Tank Printer Review

Designed for seamless wireless and Ethernet printing, the EcoTank M1050 and M2050 cater to a variety of media sizes through rear feeding and Automatic Document Feeder (ADF) support, significantly boosting office productivity. The incorporation of DURAbrite ET Pigment Ink ensures that users can expect sharp, water-resistant printouts, providing professional-quality results every time.

Siva Kumar, Senior General Manager at Epson India, remarked, “Epson’s M1050 and M2050 printers are precisely crafted to align seamlessly with the dynamic demands of modern offices. The compact design, integrated ink tank, and PrecisionCore print head address the diverse printing needs of businesses, ensuring efficient and reliable performance. Furthermore, the incorporation of PrecisionCore Heat-Free Technology not only enhances energy efficiency but also signifies Epson’s commitment to environmental sustainability.”

A standout feature of these new models is the enhanced print speed of 18 images per minute (ipm), setting a new standard in the industry. The rear feeding capability accommodates a variety of media sizes, including legal and speciality media, making these printers versatile for different office needs. Additionally, the input capacity of 100 A4 sheets reduces the need for constant reloading, supporting high-volume printing tasks.

M2050 Monochrome

Epson has also emphasized environmental sustainability in these new models. Each unit is constructed using recycled plastic, reflecting the company’s commitment to responsible manufacturing practices. The printers incorporate PrecisionCore Heat-Free Technology, which reduces energy consumption to just 14W during operation, making them an ideal choice for environmentally conscious businesses.

The compact design, improved print speed, and versatile rear feed paper path make the EcoTank M1050 and M2050 suitable for a wide range of sectors, including Small Office/Home Office (SOHO), Small and Medium-sized Businesses (SMB), Retail, Medical, and Government. The compact design is particularly beneficial for environments with limited space, such as home offices or smaller businesses.

Read Also: Top 5 Colour Deskjet Printers For Professional Use Under Rs 15,000

Key Features of the New EcoTank M1050 and M2050 Printers:

  • Low-Cost Monochrome Printing: Economical black-and-white printing solution.
  • Water-Resistant Pigment Ink: High yield of up to 6,000 pages.
  • Easy Refill Ink Bottles: Simplified refilling process.
  • Low Power Consumption: Operates on a basic UPS.
  • Wi-Fi and Ethernet Connectivity: Supports seamless network integration.
  • User-Friendly Operation: Managed through the Epson Smart Panel.
  • Compact Design: Ideal for limited space environments.
  • Replaceable Maintenance Box: Reduces downtime.
  • Rear Feeding Capability: Supports thicker media like legal paper.
  • 1-Year Warranty: Coverage for up to 50,000 pages, including the printhead.
  • Epson Heat-Free Technology: Enhances energy efficiency.

Epson’s latest EcoTank models continue to innovate and set new standards in the printing industry, combining cost-effectiveness, advanced technology, and sustainability to meet the evolving needs of businesses.

Price

Epson’s M1050 can be bought for Rs 14,999 and M2050 is priced at Rs 19,999.

Amazon is offering a huge discount on the iPhone 15

Amazon is offering a Rs 8,901 discount on the iPhone 15, bringing its price down to Rs 70,999. The deal is available for a limited time, so quick action is required to secure the deal, this is the ideal time to switch to the newest iPhone model because the e-commerce platform is also offering additional discounts, bank offers, and exchange benefits on the purchase of the phone. Keep on reading how to get the deal.

iPhone 15 was launched in India last September and is currently seeing a massive price drop after its release. It was originally priced at Rs 79,999 but is currently available on Amazon for Rs 70,999. The iPhone 15 is an exceptional choice for those looking to upgrade to Apple’s latest smartphones while saving money. However, the offer is subject to change or withdrawal.

iPhone 15 discount

If you want to save as much money as possible, you can reduce the cost to Rs 66,999 by using an SBI credit card. In a similar manner, the iPhone 15 is also available to ICICI credit cards for Rs 66,999, or they can choose to pay Rs 68,792 in instalments.

If you do not have an ICICI bank card then do not worry, you may replace your old devices for extra discounts through Amazon’s exchange programme. Customers can receive discounts of up to Rs 44,250 on the new iPhone model. Keep in mind that you can only get the best exchange deal depending on the condition of your device.

Also Read: Samsung Galaxy F55 5G powered by Snapdragon 7 Gen 1 SoC CPU launched in India

iPhone 15 specifications

The iPhone 15 is highlighted with a 6.1-inch Super Retina XDR OLED display. The display is protected with a Ceramic Shield for protection. The handset features an IP68 rating for dust and water protection. The A16 Bionic chip which powered Apple’s iPhone 14 Pro models last year, is found in the new iPhone 15.

Also Read: Poco Tablet alongside true wireless earphones and power bank to launch in India soon

The iPhone 15 has a 48-megapixel wide-angle camera as its main sensor with a 2um quad-pixel sensor and an f/1.6 aperture. Additionally, the device has a 12-megapixel ultra-wide camera with sensor-shift stabilisation and an f/1.6 aperture.

On the front, there is a 12-megapixel TrueDepth camera for selfies and video calls. The device features a USB Type-C port instead of the company’s exclusive Lightning connector.

iQOO Z9x 5G Review: The budget beast

The newly launched iQOO Z9x 5G is an affordable alternative to its midrange counterpart, Z9 (read our review of iQOO Z9 here). Priced at Rs 13,000, this smartphone boasts rock-solid specs like the Snapdragon 6 Gen 1 SoC, a 6.72-inch display with a refresh rate of 120Hz, 44W charging, and an IP64 rating. Since iQOO is Vivo’s subsidiary brand, the Z9x is similar to the latter’s T3x, at least on paper. Being an iQOO product, it carries the reputation of being a powerhouse. So, let’s dive into our review of the iQOO Z9x 5G and see if this is a no-brainer purchase in the budget category.

Read Also: Poco Tablet alongside true wireless earphones and power bank to launch in India soon

iQOO Z9x 5G Review: Design and Display

Here’s what you get inside the iQOO Z9x 5G retail package:

  • Smartphone
  • Clear plastic case
  • 44W power adapter
  • USB Type-A to Type-C cable
  • SIM ejector
  • Quick Start Guide
  • Warranty card

The Z9x is available in two colour variants – Storm Grey and Tornado Green. We used the former for this review.

iQOO Z9x 5G Review: Design and Display

Even though the Z9x is an affordable version of the Z9, it has a better design. The matte finish on the plastic back panel feels premium and goes well with the blue colour scheme. The quality of the plastic used in this back panel is quite superior to its peers. It doesn’t feel flimsy or cheap in any way. The square camera island with rounded corners is inspired by the company’s flagship smartphone, iQOO 12 (read our review of iQOO 12 here).

design

The alignment of the plastic frame with the outer bezel of the display is a little outdated. Dragging your finger on the frame, you can feel the two-step arrangement. The right edge of the frame houses the volume rocker keys and the side button. This side button also doubles up as the fingerprint scanner. The SIM tray is located on the left edge. The elusive 3.5mm headphone jack is placed on the bottom edge, along with the USB port, primary microphone, and the speaker grille. The earpiece also acts as the secondary speaker on this smartphone.

design

The 6.72-inch IPS LCD panel on the Z9x has a refresh rate of 120Hz. It can reach a peak brightness of 1,000 nits. The display remains bright and legible under direct sunlight. Surrounding the display are thin, uniform bezels. The selfie camera is housed in a punch-hole cutout. It is refreshing to see a budget smartphone getting rid of the waterdrop notch and chunky bezels. While it doesn’t have an under-display fingerprint scanner, the side-mounted scanner works like a charm.

iQOO Z9x 5G Review: Design and Display

We streamed media from major OTT platforms on the Z9x and were pleased by the vibrant, rich colours relayed on the LCD panel. Of course, the blacks aren’t as deep as they would be on an AMOLED display, but the overall viewing experience was satisfactory. The dual audio output is another aspect that pulls its weight in this regard. Most smartphones in this price category are still reliant on a single, bottom-firing speaker.

display

Another aspect where the iQOO Z9x pulls ahead of its peers is protection against water and dust. The smartphone has an IP64 rating, which makes it resistant to water splashes. You can take a call on the smartphone when it’s drizzling and not have to worry about any damage to the device.

iQOO Z9x 5G Review: Performance and Cameras

The iQOO Z9x 5G packs the Snapdragon 6 Gen 1 SoC under its hood. We’ve seen this processor carry out the heavy work in midrange devices, so it’s great to see it being added to a budget smartphone. The Z9x 5G is available in three RAM options, with a fixed 128GB internal storage: 4GB, 6GB, and 8GB. These variants are priced at Rs 13,000, Rs 14,500, and Rs 16,000 respectively.

geekbench

On the Geekbench 6 app, the Z9x scored 939 points in the single-core test and 2,819 points in the multicore test. The S6G1 chipset goes through everyday tasks like a breeze. Across the week-long review period, we did not experience a single jitter on the iQOO Z9x 5G, despite overloading it with tasks. The snappy touch response of the display coupled with the minimum loading time for apps makes the general usage experience very fun.

Being an iQOO smartphone, the Z9x also excels in gaming. We played games like Call of Duty Mobile and Asphalt 9 on this device and were quite impressed with its performance. The lags were kept to a minimum and frame drops were extremely rare. You can play COD Mobile on the Z9x with high graphics and a 60fps frame rate. The thermal management of this device is also impressive. We noticed the back panel get slightly warm after 40 minutes of gameplay.

apps

The Android 14-based Funtouch OS 14 offers a good software experience on the Z9x. There is a fair amount of bloatware on the smartphone, but it is inescapable on any budget device. We like the overall aesthetics of Funtouch OS 14 along with a varied range of customisation options. Privacy and security features like the hidden folder in the gallery, app encryption, and app hiding are a great addition to the software. To top it off, iQOO has promised 2 major OS upgrades and 3 years of security patches for the Z9x.

Budget smartphones aren’t known for having the biggest batteries or fast charging. The iQOO Z9x breaks this mould with its amazing battery performance. The massive 6,000mAh battery pack on this device can hold enough juice to power it for a day. If you’re more conservative with your usage, you can push the smartphone’s battery life to two days. During the review period, our average Screen On Time on the iQOO Z9x was 5 hours. We were left with a 20-25% charge at the end of each day. Having a big battery means that it can take longer to charge it. However, with 44W fast charging support, you can fully charge this smartphone in just over an hour.

The rear camera panel of the Z9x houses a 50MP primary shooter and a 2MP depth sensor. The ultrawide lens is missing from this arrangement. Since the smartphone is priced competitively, we don’t mind this exclusion too much, though even an entry-level ultrawide lens would have been nice.

outdoor shot

In bright outdoor conditions, the primary shooter takes good images that have good clarity and punchy colours. We were happy with the detail that the images managed to capture. The dynamic range and sharpness of shadows were also good. However, the camera has a tendency to overexpose the sky in daytime shots.

iQOO Z9x 5G Review: Performance and Cameras

iQOO Z9x 5G Review: Performance and Cameras

We didn’t have high hopes for the camera in limited lighting conditions, but it surprised us with an excellent performance. It did a great job of illuminating the subject and capturing the essential details while keeping the grain to a minimum. It feels like a benchmark performance for smartphones in this price range.

iQOO Z9x 5G Review: Performance and Cameras
Without Night Mode vs Night Mode
portrait mode
Portrait Shots

The edge detection in portrait shots is good, and the camera applies a good level of background blur. The 8MP selfie camera takes decent selfies but tends to brighten the skin of the subject and applies a smoothening effect on it.

Read Also: Top 8 ways to fix the ‘Emergency Calls Only’ error message on Android (2024)

Verdict

The iQOO Z9x 5G is in a league of its own in this price range. Its premium form factor, powerful performance, and versatile battery make it a very easy recommendation from us. An AMOLED panel would have been a great addition to the device, but the viewing experience offered by the smartphone makes up for it. The Z9x also impresses with its camera performance by shooting vivid and clear images in a range of lighting conditions.

iQOO Z9x 5G: Pros

  • Great form factor
  • Snappy performance
  • Good for gaming
  • Big battery and fast charging
  • Great for taking pictures in limited lighting
  • Affordable

iQOO Z9x 5G: Cons

  • IPS LCD panel instead of an AMOLED display

Samsung Galaxy F55 5G powered by Snapdragon 7 Gen 1 SoC CPU launched in India

Samsung today expanded its F-Series portfolio with the launch of Galaxy F55 5G in India. One of the smartphone’s greatest features is its design. You can get a vegan leather finish for less than Rs 30,000. Along with a 50-megapixel sensor, an sAMOLED screen, a Snapdragon 7 Gen 1 SoC CPU, and a 5,000mAh battery with fast charging capability, it also boasts a promising camera configuration.

Samsung Galaxy F55 5G price in India, sale details

Samsung Galaxy F55 5G price in India, sale details

Samsung Galaxy F55 5G has launched in India at Rs 26,999 for the 8GB RAM with 128GB storage option, whereas the price of the 8GB RAM with 256GB storage option will be available with a price tag of Rs 29,999. Lastly, the price of the 12GB RAM with 256GB storage is set at Rs 32,999. The device is offered in two colour variants available: Apricot Crush (with leather finish) and Raisin Black.

The device will be available for purchase via the company’s official website and Flipkart and across select retail stores from this evening at 7 PM.

Also Read: Poco Tablet alongside true wireless earphones and power bank to launch in India soon

Samsung Galaxy F55 5G specifications

Samsung Galaxy F55 5G specifications

Samsung Galaxy F55 5G has a 6.7-inch full-HD+ sAMOLED Plus screen with a resolution of 2,400 x 1080 pixels. The display features a refresh rate of 120Hz and a maximum brightness level of 1,000 nits. The handset is stuffed with Snapdragon 7 Gen 1 SoC with up to 12GB of RAM and up to 256GB of internal storage. The internal storage can be expanded via MicroSD card up to 1TB. It operates on One UI 6.0, which is based on the Android 14 out of the box. The phone is promised to come with four years of software upgrades and five years of security fixes. There is an in-display fingerprint sensor and Knox Security software.

The Samsung Galaxy F55 5G features a triple-rear camera setup led by a 50-megapixel primary sensor with optical image stabilisation OIS support. The camera system also includes an 8-megapixel ultra-wide-angle lens and a 2-megapixel macro lens. Up front, there is a 50-megapixel selfie camera.

Also Read: Nothing Phone 2a likely to come in new colour options

The mobile phone sports a 5,000mAh battery with 45W fast charging support. The handset has a 5G, 4G, Wi-Fi, GPS, Glonass, Beidou, Galileo, QZSS, NFC, and USB Type-C port.

Poco Tablet alongside true wireless earphones and power bank to launch in India soon

Xiaomi’s spin-off Poco has decided to broaden its range of offerings. It is getting ready for the launch of a tablet, power bank, and new Poco TWS. New Poco goods were hinted at by the Xiaomi sub-brand during the launch event of the Poco F6 5G. However, the company presented the Poco Pad in the global market last week alongside the Poco F6 and Poco F6 Pro smartphones. The Poco Tablet is powered by Snapdragon 7s Gen 2 SoC. It features an 8-megapixel rear and selfie camera. The tablet also comes with a 10,000mAh battery and quad speakers backed by Dolby Audio. Additionally, there is a 12.1-inch 2.5K display with 120Hz refresh rate and Dolby Vision support.

The company will soon introduce a new audio device, power bank and tablet in the country. Poco India Head Himanshu Tandon and the company’s Brand Marketing Head-AI, Varun Nair, confirmed the upcoming products during the Poco F6 5G launch event. Poco is yet to confirm the product names or the date of introduction. In India, Poco only offers a number of smartphones in addition to Poco Pods. The Poco Pods, which retailed for Rs 1,199, were first introduced in July of last year.

Also Read: Nothing Phone 2a likely to come in new colour options

Poco Pad specifications

Last week the firm introduced its first-ever tablet Poco Pad globally alongside the Poco F6 and Poco F6 Pro. It is made available in a single 8GB RAM with 256GB storage priced at $329 which translates to Rs 27,400.

Poco Pad specifications

The Poco Pad is equipped with a Snapdragon 7s Gen 2 SoC paired with a Qualcomm Adreno GPU. It is available with 8GB of LPDDR4x RAM, and 256GB of UFS 2.2 storage. The device runs on HyperOS with Android 14. The tablet flaunts a 12.1-inch 2.5K LCD screen with 2,560 x 1,600 pixels of resolution. The display also includes a 120Hz adaptive refresh rate, a 240Hz touch sampling rate and 600 nits of peak brightness. It has V Rheinland low blue light certification and Dolby Vision support. The screen comes with Corning Gorilla Glass 3 protection.

Also Read: Boat Nirvana Nebula and Nirvana Zenith TWS with Dolby Audio launched in India

The device has an 8-megapixel front and back camera. The quad-speaker system supports Dolby Atmos. It houses a 10,000mAh battery with support for 33W fast charging.

Top 11 ways to fix the ‘Emergency Calls Only’ error message on Android

0

You may have noticed the ‘Emergency Calls Only’ error message on your Android phone when it is outside of the network coverage area. When network reception is restored, the signal bars reappear on the screen. Things can get confusing when your phone displays the error message even when it is in a network-rich area. If you’re out of ideas, here are the top 11 fixes for this problem.

Read Also: How to disable AI Overview in Google Search?

Why is your phone displaying the ‘Emergency Calls Only’ error message

This error message can appear on your phone due to a number of reasons. Here are some of them:

  • Your phone is outside the network coverage area
  • The SIM card is not inserted
  • SIM card is not enabled
  • You’re using an outdated SIM card
  • Your phone’s data pack or talk time plan has expired
  • Incorrect network settings
  • Background software issues

Check if the SIM card is properly inserted

Here is a step by step guide on how to check how many sims are registered on your Aadhar card.

Your smartphone won’t show the network bars if there’s no SIM card inside it. Typically, this triggers the ‘No SIM’ error message, but some devices may choose to display ‘Emergency Calls Only’. Find a functional SIM card and insert it into the phone to restore connectivity. Sometimes, a knock on the phone can dislocate the SIM card inside. Pull out the SIM tray and place the SIM card in its proper position to resolve this issue.

Restart the phone

Restart Your Phone

A quick restart can fix any background issues that may be causing this error. Long-press the side key to reveal the power options and tap on ‘Restart’. If pressing the side key doesn’t trigger the power options, press the volume down/up key and side key together.

Enable the SIM card

Dual SIM smartphones give you the option to enable or disable a SIM card. Make sure your SIM is enabled to fix the ‘Emergency Calls Only’ error message on your Android phone. Here’s how.

Step 1: Go to Settings and select Network & internet.

Step 1: Go to Settings and select Network & internet.

Step 2: Tap on SIM card & mobile network.

Step 2: Tap on SIM card & mobile network.

Step 3: Select your SIM card.

Step 3: Select your SIM card.

Step 4: Turn on the toggle switch for Enable SIM card.

Step 4: Turn on the toggle switch for Enable SIM card.

Enable Roaming

Your phone relies on data roaming to stay connected to the network when you are travelling overseas. If data roaming isn’t enabled, it may cause the ‘Emergency Calls Only’ error to pop up. Here’s how you can fix it.

Step 1: Go to Settings and select Network & internet.

Step 1: Go to Settings and select Network & internet.

Step 2: Tap on SIM card & mobile network.

Step 2: Tap on SIM card & mobile network.

Step 3: Select your SIM card.

Step 3: Select your SIM card.

Step 4: Turn on the toggle switch for Roaming.

Step 4: Turn on the toggle switch for Roaming.

Select a network carrier manually

If you’re facing carrier issues, it is a good idea to select the strongest network manually. Here’s how.

Step 1: Go to Settings and select Network & internet.

Step 1: Go to Settings and select Network & internet.

Step 2: Tap on SIM card & mobile network.

Step 2: Tap on SIM card & mobile network.

Step 3: Select your SIM card.

Step 3: Select your SIM card.

Step 4: Turn off the toggle switch for Automatically select network.

Top 8 ways to fix the ‘Emergency Calls Only’ error message on Android (2024)

Step 5: Tap on Choose network.

Step 5: Tap on Choose network. Top 8 ways to fix the ‘Emergency Calls Only’ error message on Android (2024)

Step 6: Select a network from the list.

Change the network type

If you’re in an area that doesn’t support a 5G signal, change your network type to 3G or 2G. Here’s how.

Step 1: Go to Settings and select Mobile network.

Step 1: Go to Settings and select Mobile network.

Step 2: Tap on your SIM card.

Step 2: Tap on your SIM card.

Step 3: Hit Preferred network type.

Step 3: Hit Preferred network type. Top 10 ways to fix the ‘Emergency Calls Only’ error message on Android

Step 4: Select a network type.

Step 4: Select a network type. Top 10 ways to fix the ‘Emergency Calls Only’ error message on Android

Turn off Flight Mode

airplane mode

If your phone is in Flight Mode, it won’t receive network reception. It may display the ‘Emergency Calls Only’ message as well. Swipe down from the status bar and deselect the Airplane/Flight Mode tile to turn it off. You can also go to Settings>Network & internet and turn off the toggle switch for Airplane Mode.

Clear the SIM Toolkit’s cache

Step 1: Go to Settings and select Apps.

Step 1: Go to Settings and select Apps. 5 ways to stop an Android app from running in the background Top 10 ways to fix the ‘Emergency Calls Only’ error message on Android

Step 2: Tap on App management.

Step 2: Tap on App management. 5 ways to stop an Android app from running in the background Top 10 ways to fix the ‘Emergency Calls Only’ error message on Android

Step 3: Scroll down and select SIM Toolkit. If you can’t find SIM Toolkit, hit the ellipses in the top right corner of the screen and select Show system apps.

Step 3: Scroll down and select SIM Toolkit. If you can't find SIM Toolkit, hit the ellipses in the top right corner of the screen and select Show system apps. Top 10 ways to fix the ‘Emergency Calls Only’ error message on Android

Step 4: Tap on Storage usage.

Step 4: Tap on Storage usage. Top 10 ways to fix the ‘Emergency Calls Only’ error message on Android

Step 5: Hit Clear cache.

Step 5: Hit Clear cache. Top 10 ways to fix the ‘Emergency Calls Only’ error message on Android

Move to an area with better network coverage

There doesn’t need to be a complex underlying issue behind your phone displaying the ‘Emergency calls only’ message — it could just be that you’re in an area with poor network reception. The only way to fix this is by moving to an area with better reception. Preferrably, switch to an open, unhindered area where you can move around to get a better signal.

Reset Network Settings

Step 1: Go to Settings and General Management.

Step 1: Go to Settings and General Management. Top 8 Ways to Fix an Android Phone That Can't Make or Receive Calls Top 8 ways to fix the ‘Emergency Calls Only’ error message on Android (2024)

Step 2: Tap on Reset.

Step 2: Tap on Reset. Top 8 Ways to Fix an Android Phone That Can't Make or Receive Calls Top 8 ways to fix the ‘Emergency Calls Only’ error message on Android (2024)

Step 3: Select Reset mobile network settings.

Step 3: Select Reset mobile network settings. Top 8 Ways to Fix an Android Phone That Can't Make or Receive Calls Top 8 ways to fix the ‘Emergency Calls Only’ error message on Android (2024)

Step 4: Hit Reset settings.

Step 4: Hit Reset settings. Top 8 Ways to Fix an Android Phone That Can't Make or Receive Calls Top 8 ways to fix the ‘Emergency Calls Only’ error message on Android (2024)

Update your phone’s OS

Step 1: Go to Settings and select Software update.

Go to Settings and select Software update. 10 top ways to fix unable to answer calls on Android phone Top 8 ways to fix the ‘Emergency Calls Only’ error message on Android (2024)

Step 2: Tap on Download and install.

tap on download and install 10 top ways to fix unable to answer calls on Android phone Top 8 ways to fix the ‘Emergency Calls Only’ error message on Android (2024)

Step 3: Select Install now.

Select Install now. 10 top ways to fix unable to answer calls on Android phone Top 8 ways to fix the ‘Emergency Calls Only’ error message on Android (2024)

Frequently Asked Questions (FAQs)

What does the ‘Emergency Calls Only’ message on my phone mean?

When your phone doesn’t receive network reception, it displays the ‘Emergency Calls Only’ error instead of the signal bar. It means that you won’t be able to make calls or send texts using your phone.

How do I get rid of the ‘Emergency Calls Only’ error message?

Make sure your SIM is inserted and enabled, turn off flight mode, and enable data roaming if you’re overseas. This will fix the error message.

How do I make my phone’s network 4G only?

Go to Settings>Mobile network, select a SIM card, tap ‘Preferred mobile network’, and select 4G from the list.

How do I disable my SIM card?

Go to Settings>Mobile network, select a SIM card, and turn off the toggle switch next to ‘Enable’.

How do I reset my phone’s network settings?

Go to Settings>General Management>Reset>Reset mobile network settings and select ‘Reset settings’.

Read Also: How to use ‘Hum to Search’ to find a song on YouTube Music?

Conclusion

These are the top 11 ways to fix the ‘Emergency Calls Only’ error message on your Android smartphone. Sometimes, old SIM cards can become incompatible with your device and stop functioning. Go to your network provider’s nearest customer service centre and request a duplicate SIM for your device. If you have any other questions, let us know in the comments!

Nothing Phone 2a likely to come in new colour options

New colours for the Nothing Phone 2a, which debuted on March 5 both internationally and in India, are on the way. The Nothing Phone 2a, which debuted on March 5 both internationally and in India, will soon be available in new hues. The brand might have hinted at the new hues with a promotional teaser on Flipkart. The phone is presently offered in Black, White, and Blue colours; Blue is limited to India only.

Nothing Phone 2a was launched in two colour options White and Black in March this year. In April, the smartphone was unveiled by the firm in India in a third shade of blue. With this, the firm might introduce new colours for the Phone 2a. It’s possible that Nothing’s social media post hinted at the new colours. The display photos for the global Nothing X profile and the Nothing India profile have been changed to feature the text NOTHING (R), highlighted with dots in yellow, red, and black. This may indicate that additional colours for the phone—either a combination of red and yellow or just red—will be available soon. Keep in mind that the Nothing Phone 2a Community Edition, which will be available in July, is not the same as the newly hinted-at colour options.

https://x.com/nothingindia/status/1794362942307414381

We also stumbled upon a Flipkart teaser discovered by FoneArena indicating that new colour versions of the Phone 2a will soon be available.

Nothing Phone 2a likely to come in new colour options

The price of the Nothing Phone 2a starts at Rs 23,999 for 8GB RAM with 128GB storage. The price of the 8GB RAM with 256GB storage and 12GB RAM with 256GB storage is set at Rs 25,999 and Rs 27,999 respectively.

Also Read: Boat Nirvana Nebula and Nirvana Zenith TWS with Dolby Audio launched in India

The handset features a 6.7-inch FHD+ AMOLED 120Hz display with an adaptive refresh rate ranging from 30Hz to 120Hz. The phone comes with Corning Gorilla Glass 5 protection. The device is powered by MediaTek Dimensity 7200 Pro SoC paired with up to 12GB of RAM and up to 256GB of storage. The dual rear camera setup on the phone includes a 50-megapixel main camera (with OIS and EIS) and a 50-megapixel ultra-wide sensor. In addition to this, there is a 32-megapixel selfie camera. The handset runs on  Nothing OS 2.5 based on Android 14. It also packs a 5,000mAh with 45W fast charging technology.

Garena Free Fire Redeem Codes Today 27 May 2024: Here is how to claim them

Garena Free Fire is a battle royale game with regular awards and tournaments to keep players interested. If you play Garena Free Fire, you should be aware of the redeem codes that are released on a daily basis. However, because the battle royale game is banned in India, players from other countries can use the Free Fire Redeem codes daily. If you’re unfamiliar with the Garena Free Fire redeem codes or don’t know how to get them, we’ve put together a step-by-step guide to help you redeem them. Check out Garena Free Fire Redeem Codes for 27 May 2024.

The Free Fire redeem codes are a great way to get free stuff. These are 12-digit codes that contain alphabets and numbers, as well as an expiration date and time. Because the Garena FF redeem codes cannot be used more than once, you should hurry to the redemption page to claim your free reward before someone else does. To get a free reward, all you have to do is go to reward.ff.garena.com/en, which is the official redemption page. Also, keep an eye on this space for daily updates on Garena Free Fire redemption codes and rewards.

Also Read: Sennheiser Accentum Plus wireless headphones with Hybrid Adaptive Noise Cancellation launched

Garena Free Fire Redeem Codes Today 27 May 2024

5U2B8ZAF6H1WJ3TD
R7K5X3QJ2P9ZU8IB
G9L1N2W8XJZKY3QC
6U4F5V3D9M7H2Y1N
X7R8E5QD2Y9W6J1L
N3VJ1ZM8L5X2Q6CK
4XJ9T7K2YEGUDRFA
W3J5B1D9G7F6H2K4
H1K7J2L6M4N9D8B3
Y8J7K6L9M4N2B1D5
Q2R4T6Y8U1I5O7P3
E6R8T3Y5U7I1O9P2
ZL5WYBQXJ6R1ME9G
8A3QWZP4H7N6TJYB
V2UMN9C4X5EKP7HR
L8IKQ2W3GFSH1VCP
7YOJXG2ZQVTDW9N1
F6S7R4J5P1YH8X9T
2K7C5B4J6X8Z9G3F
D9F3G2H4J5K7L1M6

How to Get Free Fire Redeem Codes for Garena on 27 May 2024?

  • Visit the Garena Free Fire game’s official website at reward.ff.garena.com.
  • Use your Facebook, Google, VK, Apple ID, Huawei ID, or Twitter account to log in.
  • You’ll be taken to a valid redemption code (s)
  • Copy and paste the 12-digit redemption code into the text box.
  • On the screen, a dialogue box will appear.
  • ‘Ok’ should be selected.

Amazon Quiz Answers Today 27 May 2024: Participate to win Rs 500 Amazon Pay Balance

27 May 2024: New Amazon Quiz is now available. Customers from different parts of the country are participating in the daily quiz. The quiz starts at midnight today and will be live until 11:59 PM tonight. By successfully answering every question, participants in the quiz have the chance to win wonderful rewards. A Rs 500 Amazon Pay Balance is up for grabs to participants today.

One wrong answer could eliminate you from the quiz. You have a chance to win Rs 500 Amazon Pay Balance if you successfully answer every question. Users of the app only have the opportunity to take the quiz. Check Out 27 May 2024 Amazon Quiz Answers.

Amazon Quiz Today Prize: Rs 500 Amazon Pay Balance

Quiz Date: 27 May 2024

Daily Timing: 12 AM to 11:59 PM

Previous Amazon Quiz Winners Announcement: Today 12 PM Noon

Amazon Quiz Answers Today 27 May 2024: Win ₹ 500 Amazon Pay Balance

Question 1: Which team recently set the record for the highest chase in Indian Premier League history by successfully chasing a target of 262?

Answer: Punjab Kings

Question 2: The comedy movie ‘Ricky Stanicky’ stars which of these actors, also a big star in sports entertainment?

Answer: John Cena

Question 3: The famous monument, the Humayun’s Tomb was built in which century?

Answer: 16th century

Question 4: This is the famous Rathaus, located in which famous European capital?

Answer: Vienna

Question 5: Which of these famous guitarists was part of this iconic band?

Answer: Slash

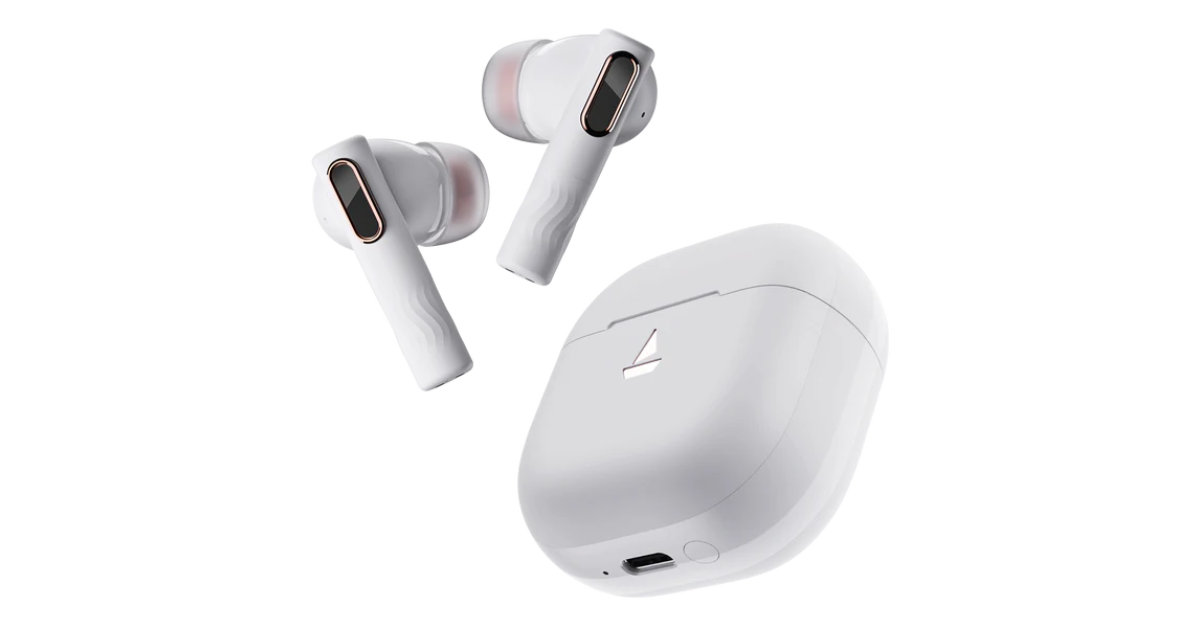
Also Read: Noise Buds Verve, budget TWS with up to 45 hours of playback launched in India

How To Play Amazon Quiz Today

Only app users are eligible to play the Amazon quiz every morning from 12 AM to 11:59 PM. The quiz is not available on the desktop. For those who are unaware of how to play the Amazon quiz, below are the steps, you can follow to take the quiz.

  • First, download the Amazon app from the Google Play Store or App Store or go here to download the Amazon App
  • Now fill in the required information through the Sign-Up option.
  • You need to log in to the Amazon app and scroll down on the home screen to find the Amazon Quiz banner.
  • Tap on the Amazon Quiz banner and tap on the Start button to start the Quiz.
  • Now you will get 5 questions and you need to answer them correctly. One wrong answer will eliminate you from the Quiz.
  • After answering all the questions correctly you are now eligible for a Lucky Draw.
  • The previous winner’s name will be announced today at 12 PM.

Amazon Daily Quiz Answers from the previous few days.

Here are all the answers from the previous 5 days of the Amazon Daily Quiz and Contest.

Amazon Quiz Answers Today 26 May 2024: Win ₹ 500 Amazon Pay Balance

Question 1: Which of these recently played ATP events has a court named after the legendary tennis player Rafael Nadal?

Answer: Barcelona Open

Question 2: The movie Road House sees Jake Gyllenhaal play the role of an ex UFC fighter. Which of these famous sportspeople also acts in the movie?

Answer: Conor Mcgregor

Question 3: What is the other name given to the swamp deer, the state animal of Madhya Pradesh?

Answer:  Barasingha

Question 4: In which of these cities in the USA is this famous museum located?

Answer: New York

Question 5: Which of these controversial media organizations was founded by this Australian editor and publisher?

Answer: Wikileaks

Amazon Quiz Answers Today 25 May 2024: Win ₹ 500 Amazon Pay Balance

Question 1: Which of these players won the Monte Carlo Masters tennis tournament in 2024, his 3rd triumph in that event in 4 years?

Answer: Stefanos Tsitsipas

Question 2: Which of these Amazon Prime shows shares its name with a 2005 Brad Pitt- Angelina Jolie movie?

Answer: Mr and Mrs Smith

Question 3: Which animal features on the election symbol of the Republican party in the USA?

Answer: Elephant

Question 4: These waterfalls span the border between the province of Ontario in Canada and which state in the USA?

Answer: New York

Question 5: Which of these famous architects designed this iconic monument in India?

Answer: Edwin Lutyens

Amazon Quiz Answers Today 24 May 2024: Win ₹ 500 Amazon Pay Balance

Question 1: Against which team did Sunrisers Hyderabad set a new record scoring 287 in an IPL match?

Answer: Royal Challengers Bengaluru

Question 2: Who plays the role of soldier Arun Katyal in the recently released movie ‘Yodha’?

Answer: Sidharth Malhotra

Question 3: Which of these famous rulers was born in the Shivneri Fort in Maharashtra in the 17th century?

Answer: Shivaji

Question 4: Name this famous church located in Europe

Answer: St. Peter’s Basilica

Question 5: This is the flag of which Caribbean country?

Answer: Barbados

Amazon Quiz Answers Today 23 May 2024: Win ₹ 500 Amazon Pay Balance

Question 1: Who recently became the youngest-ever winner of the FIDE Candidates?

Answer: Gukesh D

Question 2: Britney Spears’ song ‘Baby one more time’ was recently covered by Jack Black’s band Tenacious D for which movie?

Answer: Kung Fu Panda 4

Question 3: One of the ‘New Seven Wonders of the World’ Petra is located in which country?

Answer: Jordan

Question 4: This is the _____ beetle, named because of its resemblance to another animal. Fill in the blanks

Answer: Rhinoceros

Question 5: Who among these is the founder of this company?

Answer: Elon Musk

Amazon Quiz Answers Today 22 May 2024: Win ₹ 500 Amazon Pay Balance

Question 1: Pace sensation Mayank Yadav who won two Player of the Match awards in a row, represents which team in the IPL?

Answer: Lucknow Super Giants

Question 2: The series ‘Young Sheldon’, currently in its 7th season, shows the childhood of a character of which series?

Answer: The Big Bang Theory

Question 3: The Lira is the currency of which of these countries?

Answer:  Turkey

Question 4: This is a bust of which legendary German composer?

Answer:  Ludwig van Beethoven

Question 5: This is a self-portrait of which famous artist?

Answer: Vincent Van Gogh

Amazon Quiz Answers Frequently Asked Questions (FAQs)

Where can I check the previous winners? Did I win how to check?

You can head over to this link on your mobile or desktop to check the winners of the Amazon Daily Quiz Contest.

How to Play Amazon Daily Quiz or Contest?

We have written an explainer above, you can refer to that.

When are the winners of the Amazon Quiz and contest announced or declared?

The announcement of today’s Amazon quiz winner will take place Tomorrow. As for the Special Quiz and “Spin & Win” Contest, the winners will be declared once the Quiz Contest comes to an end. To find out who the lucky winner is, you can refer to the Amazon Quiz Winners List or visit the Amazon Winners tab in the Amazon App.

How to participate in the Daily Amazon Quiz?

That is very easy, just got to the Amazon app and scroll to the bottom of the page and you will find the Quiz section. Click on it (usually it is called the fun zone) and you can enter the Amazon Today Quiz Contest. 

Are there any other quizzes or contests running on Amazon daily?

Yes, there are many running on a daily basis. These range from spinning the wheel to answering the questions correctly. All are located in the Fun Zone. 

What are the criteria for selecting a winner in the Daily Amazon Quiz?

When a qualified player submits correct answers to all the questions, they will automatically be entered into a lucky draw. This draw will include all participants who answered all the questions correctly. Amazon randomly selects the final winners from the pool of eligible participants who gave the right answers.

Which Types of Questions are asked within Amazon Daily Quiz?

These are very simple and straightforward questions. These are mainly related to general knowledge. 

Where should I look for Amazon Daily Quiz answers?

You can bookmark this page as we will help you every day with the Amazon Daily Quiz. We bring you fresh answers every day for the Amazon Daily Quiz and Contest. 

What time does Amazon Announce previous winners?

The previous winner’s name will be announced today at 12 PM (noon).

The Fastest Tool to Transfer WhatsApp/WhatsApp Business/GBWhatsApp Data in 2024

The need for rapid data sharing has become pressing for applications like WhatsApp and its variants. These messaging platforms have revolutionized communication, enabling instant connections no matter where we are. However, as we share more and more data, the need for quicker data transfer grows.

Therefore, we must look for a powerful and efficient tool that helps you transfer all the data in these apps in the fastest way. This guide is here to help you find that WhatsApp transfer toolbox fulfilling all these aspects.

Part 1. What Essential Features You Should Look for in a WhatsApp Transfer Toolbox

While choosing a tool to transfer our valuable WhatsApp data, we should not go for any random one. There are some essential features that the tool must possess for a flawless and optimum transfer experience. This section will help you in this regard by highlighting some of those critical features:

  1. Comprehensive Data Transfer: The tool should be capable of transferring all types of WhatsApp data, including messages, photos, videos, and even group chats. It lets you ensure that no data stays behind or is lost from your app.
  2. Cross-Platform Compatibility: Ensure the toolbox can transfer data between different operating systems, such as Android and iOS, and vice versa. This flexibility is crucial if you switch between devices and other platforms.
  3. Speed and Efficiency: An optimum toolbox should offer fast transfer speeds without compromising the integrity of your data. By doing this, it can minimize downtime and make the process more convenient.
  4. Backup and Restore Functionality: The ability to back up your WhatsApp data before transferring it provides an extra layer of security. It should also offer easy restore options in case something goes wrong during the transfer.
  5. Compatibility with WhatsApp Variants: If you use different versions of WhatsApp, like WhatsApp Business or GBWhatsApp, ensure the toolbox supports these variants. This versatile compatibility allows you to have a seamless transfer regardless of the app version.

Part 2. Wondershare MobileTrans – Innovative and Blazing-Fast WhatsApp Transfer Tool of 2024

It is quite challenging to look for the most appropriate tool with all the mentioned essential features. The reason for this is the availability of a wide variety of tools over the internet, lacking the proper feature package. But there’s no need to worry because this guide introduces Wondershare MobileTrans, the lightning-fast tool for transferring all versions of WhatsApp data.

With this tool, you can transfer WhatsApp data from your devices even when switching across different operating systems within seconds. If you use WhatsApp Business or GBWhatsApp, the tool features full transfer access even to these variants for ease.

Key Features

  1. All Kinds of WhatsApp Messages: Using this efficient toolbox, you can transfer all kinds of messages whether personal or group ones.
  2. Media Transfer: This tool even lets you move media files including photos, videos, or audio from your every WhatsApp variant.
  3. Documents Migration: You can also migrate your documents or shared contacts in WhatsApp across different devices without losing anything.

Part 3. How to Use MobileTrans to Transfer WhatsApp/WhatsApp Business/GBWhatsApp Data

It does not matter whether you are using WhatsApp, WhatsApp Business, or GBWhatsApp; this excellent tool can manage them all. To learn how to transfer data from these apps, check out this detailed guide with step-by-step instructions:

Step 1. Run Wondershare MobileTrans and Select the Desired App

After downloading and installing the MobileTrans application on your system, run it to access its interface. There, go to the “WhatsApp Transfer” tab and select the type of variant that you are using. You will also be asked whether you want to transfer only data or merge the old and new WhatsApp data.

Step 2. Connect Both Smartphones and Hit Start

Connect your source and destination phones to your computer and let the software load all messages and media. Once all loaded, click the “Start” button to initiate the WhatsApp data transfer process. This tool even offers you the feature to flip between the source and destination devices.

Step 3. Disconnect Devices After Completion

After hitting the “Start” button, wait for the completion of the process without moving or touching the devices. After that, disconnect your attached devices and confirm the success of the data transfer.

Conclusion

In conclusion, there is a pressing need for an efficient tool that offers rapid data transfer for all the variants of WhatsApp. In this regard, this guide has highlighted some essential features you should consider when choosing the best transfer tool. As a bonus, we have shared insights about Wondershare MobileTrans, which meets all the standards of an optimum toolbox to transfer WhatsApp data.

Garena Free Fire Redeem Codes Today 26 May 2024: Here is how to claim them

Garena Free Fire is a battle royale game with regular awards and tournaments to keep players interested. If you play Garena Free Fire, you should be aware of the redeem codes that are released on a daily basis. However, because the battle royale game is banned in India, players from other countries can use the Free Fire Redeem codes daily. If you’re unfamiliar with the Garena Free Fire redeem codes or don’t know how to get them, we’ve put together a step-by-step guide to help you redeem them. Check out Garena Free Fire Redeem Codes for 26 May 2024.

The Free Fire redeem codes are a great way to get free stuff. These are 12-digit codes that contain alphabets and numbers, as well as an expiration date and time. Because the Garena FF redeem codes cannot be used more than once, you should hurry to the redemption page to claim your free reward before someone else does. To get a free reward, all you have to do is go to reward.ff.garena.com/en, which is the official redemption page. Also, keep an eye on this space for daily updates on Garena Free Fire redemption codes and rewards.

Also Read: Sennheiser Accentum Plus wireless headphones with Hybrid Adaptive Noise Cancellation launched

Garena Free Fire Redeem Codes Today 26 May 2024

Z2X3C4V5B6N7M8LK
POIUYTREWQASDFG7
GHJKL8ZXCVBNM4QW
2ASD3FG45H6J78K7
QWERTY7UIO8PASDF
ZXCVBNM1QW3ERTYU
4HJ8K9S3L2D7G6FA
4QWERTYUIO2PLKJH
VCXZ6LKJH7GFDSAQ
YU8I9O0P1Q2W3E4R
56789ASDFG12345H
JK6L8ZXCV9BNM0QW
RTYUIO7PLKJHGFDS
Q1W5E9R6T2Y0U8IO
P9O2I3U4Y6T7R8EW
X7C6V5B4N3M2LKJH
ASDFG6H7J8K9L0PO
6ASDFG7HJKL8ZXCV
NM2QW3ER45TY6UIO
LKJH8GFDSA7ZXCVB

How to Get Free Fire Redeem Codes for Garena on 26 May 2024?

  • Visit the Garena Free Fire game’s official website at reward.ff.garena.com.
  • Use your Facebook, Google, VK, Apple ID, Huawei ID, or Twitter account to log in.
  • You’ll be taken to a valid redemption code (s)
  • Copy and paste the 12-digit redemption code into the text box.
  • On the screen, a dialogue box will appear.
  • ‘Ok’ should be selected.

How to disable AI Overview in Google Search? Top 5 Ways

0

One of the important announcements made by Google at I/O 2024 was the introduction of AI Overview in search results. Google Search is the company’s flagship product and dominates its peers by a considerable margin. However, integrating AI with Google search results has not yielded the immediate success that the company was hoping for. Since the launch of AI Overview, users across the internet have been quick to point out its gaping flaws, which largely range from presenting biased results to straight-up misinformation. If you want the plain ol’ Google Search experience back, here’s how you can disable AI Overview. 

Read Also: How to use ‘Hum to Search’ to find a song on YouTube Music?

Is there a direct way to disable AI Overview?

To put it simply, no. Google, like other tech outfits, has gone all in on AI and is looking to fundamentally change how users get access to information on the internet. However, the search engine has added a helpful ‘web’ filter that removes AI-generated answers as well as videos and images from search results. Applying this filter displays text-based web results only.

If you don’t want to manually apply this filter every time you perform a Google Search, you can add it as a ‘site search’ entry in Chrome. This will automatically apply this filter every time you search for something using the browser’s address bar. Other web browsers like Microsoft Edge and Firefox also offer similar options.

Use the Web filter

Step 1: Go to the Google homepage and enter a search query.

Step 2: On the results page, click on More.

Step 2: On the results page, click on More.

Step 3: Select Web.

Step 3: Select Web.

Google will filter the text-based web results and remove AI overviews, videos, and other content from the page.

Apply the Web filter to your searches by default 

Selecting the web filter every time you search for something is cumbersome. Use this workaround to apply the filter by default on all your searches.

Step 1: Launch Google Chrome and go to Settings.

Step 2: Go to Settings. Top 2 ways to automatically translate web pages in Google Chrome? (2024)

Step 2: Select the Search engine tab in the sidebar.

Step 2: Select the Search engine tab in the sidebar.

Step 3: Click on Manage search engines and site search.

Step 2: Select the Search engine tab in the sidebar.

Step 4: Click on Add.

Step 4: Click on Add. How to disable AI Overview in Google Search?

Step 5: Give the site search entry a name. We prefer Gooogle with one extra O. Enter a trigger word for the shortcut in the second text field.

Step 5: Give the site search entry a name. We prefer Gooogle with one extra O. Enter a trigger word for the shortcut in the second text field. How to disable AI Overview in Google Search?

Step 6: In the ‘URL with %s in place of query’ enter https://www.google.com/search?q=%s&udm=14. Hit Add.

Step 7: Hit the ellipses next to the site search entry and select Make default.

Step 7: Hit the ellipses next to the site search entry and select Make default. How to disable AI Overview in Google Search?

Now, every time you search for a query, the results will be parsed through the web filter.

Filter AI Overview results from your search using the ‘-AI’ keyword

Filter AI Overview results from your search using the '-AI' keyword

Adding ‘-AI’ (without the quotes) at the end of your searches filters AI Overview from the results. This method is suitable for users who don’t want to disable AI Overview entirely, but need organic results for some searches.

Get rid of AI Overview in individual searches

If you don’t want to get rid of AI Overview altogether, but simply want to disable it for specific searches, we have the perfect trick for you. When you search a query on Google, add ‘&udm=14’ at the end of the link to the search results. The following page will be completely free of AI Overview.

Use ‘Bye Bye, Google AI’

Use 'Bye Bye, Google AI'

The ‘Bye Bye, Google AI’ Chrome extension gets rid of AI Overviews, Discussions, and Ads. Use this link to download it from the Chrome Web Store. Once installed, it gives you a list of items you might want to block. AI Overview is selected by default. The list also includes Sponsored Links, Shopping Blocks, People Also Ask, People Also Search For, and more.

Frequently Asked Questions (FAQs)

Are Google AI Overview results reliable?

Since its launch, the AI Overview has displayed incorrect and malicious results for some queries. Google is manually weeding out the incorrect results to refine the feature.

Can I turn off AI Overview in Google Search?

While there is no direct way to turn off AI Overview in Google Search, you can apply the ‘Web’ filter automatically on all your queries by using the ‘Site search feature’ in Chrome.

How do I get rid of AI Overview in search results?

Add ‘&udm=14’ at the end of the search results URL to get rid of AI Overview.

Is there an extension that disables AI Overview in Google?

The ‘Bye Bye, Google AI’ extension gets rid of AI Overview, Discussions, and Ads from your Google search results.

Why can’t I see AI Overview in my search results?

Google is rolling out AI Overview in a phased manner. It may take a few weeks for the feature to reach your device.

Read Also: How to Perform a Safety Check on Google Chrome? (2024)

Conclusion

This is how you can disable AI Overview in Google Search. As mentioned earlier, using the web filter weeds out videos and images from search results as well. What do you think of AI integration in web searches? Let us know in the comments!

How to use ‘Hum to Search’ to find a song on YouTube Music?

0

Google started testing the ‘Hum to Search’ feature for YouTube Music back in March. The tech giant has now started rolling out this feature on its music streaming app. ‘Hum to Search’ is similar to the ‘Search song’ option in Google Assistant. The idea is simple – you hum the rhythm or melody of a song, and Google will find matching results. So, let’s take a quick look at how you can use ‘Hum to Search’ to find a song on YouTube Music.

Read Also: How to Perform a Safety Check on Google Chrome? (2024)

How is ‘Hum to Search’ different from ‘Search song’ in Google Assistant?

If you’re an Android user, you must be familiar with the ‘Search Song’ feature in Google Assistant. This feature can be accessed in the Google app for Android or by triggering the Google Assistant. Unlike YouTube Music, Google’s ‘Song Search’ feature brings up multiple results that match your query. Each result displays its match percentage. Clicking on a result opens its Google search page.

On the other hand, YouTube Music brings up one accurate match for your query. This result can be opened in the YouTube Music app itself. You can add it to your playlist or download it for offline listening. Since Google is rolling out this feature in a phased manner, it may not be available for your device yet. Keep an eye out for it on the search page.

Use Hum to Search on YouTube Music


Step 1: Launch the YouTube Music app on your smartphone.

Step 2: Hit the search icon at the top right corner of the screen.

Step 2: Hit the search icon at the top right corner of the screen.

Step 3: Tap the wavelength symbol at the top right corner of the screen.

Step 3: Tap the wavelength symbol at the top right corner of the screen. How to use ‘Hum to Search’ to find a song on YouTube Music?

Step 4: Hum the song for 20-30 seconds.

Step 4: Hum the song for 20-30 seconds. How to use ‘Hum to Search’ to find a song on YouTube Music?

Step 5: Google’s AI algorithm will look up the song that matches the melody. The song title, along with the artist name, album name, and release year, will appear on the screen.

Step 5: Google’s AI algorithm will look up the song that matches the melody. The song title, along with the artist name, album name, and release year, will appear on the screen. How to use ‘Hum to Search’ to find a song on YouTube Music?

Step 6: You can choose to play the song or add it to your playlist. If this is not the song you were looking for, tap the waveform symbol at the bottom of the screen to perform another search.

Frequently Asked Questions (FAQs)

Where is the Hum to Search feature in YouTube Music?

Launch the YouTube Music app, tap the search icon, and then hit the waveform symbol. Hum the song for 20-30 seconds. Google will present the match on the following page.

How do I search for a song by humming it on my phone?

Launch the Google app, tap the microphone icon, and hit ‘Search song’ at the bottom of the screen to search for a song by humming its melody.

How do I create an AI playlist on YouTube Music?

Go to YouTube Music>Library>New>AI playlist, type your prompt, and hit Enter.

How do I delete my YouTube Music history?

Launch the YouTube Music app, tap your profile picture, go to ‘Manage watch history’, and tap on Delete>Delete all time.

How much does a YouTube Music subscription cost?

The YouTube Music subscription comes bundled with YouTube Premium. Prices for YouTube Premium start at Rs 129 per month.

Read Also: Top 2 ways to schedule a text message on Android? (2024)

Conclusion

This is how you can use ‘Hum to Search’ to find any song on YouTube Music. If you don’t use YouTube Music, you can check out this feature on Google Assistant. Third-party apps like Shazam and SoundHound also offer this feature. If you have any questions related to searching songs on your phone, let us know in the comments!

3 Ways to Perform a Safety Check on Google Chrome (PC and Mobile)

0

Maintaining your security on the internet can be an arduous task. Creating and routinely updating strong passwords, keeping the browser updated, clearing cookies, and using secure connections are some of the things you should do to ensure online safety. To help keep track of things, Google has introduced a ‘safety check’ for Chrome. Let’s take a look at what Safety Check is and how you can perform it on Google Chrome.

Read Also: Top 10 apps to download first on your new iPad Pro 2024

What is Safety Check on Google Chrome?

Think of Safety Check as a privacy and security dashboard for Google Chrome. It can be accessed from the browser’s settings. Safety Check keeps track of these vital elements of online security:

  • The Google Chrome version you’re using
  • Reused passwords
  • Safe browsing settings
  • Permissions granted to abusive and unused sites
  • Sites that send too many notifications

If there is any lapse in security, Safety Check will flag that issue and let you know on the dashboard itself. Of course, there are more steps you can take to strengthen your browser’s security, but this is a good entry point into the exercise.

Perform a Safety Check on Google Chrome (PC)

Step 1: Launch Google Chrome on your PC and hit the ellipses at the top right corner of the screen.

Step 1: Launch the Chrome web browser on your PC and hit the ellipses at the top right corner of the screen. Top 2 ways to automatically translate web pages in Google Chrome? (2024)

Step 2: Select Settings.

Step 2: Go to Settings. Top 2 ways to automatically translate web pages in Google Chrome? (2024)

Step 3: Switch to the Privacy and security tab.

Step 3: Switch to the Privacy and security tab.

Step 4: Click on Go to Safety Check.

Step 4: Click on Go to Safety Check.

Step 5: This is where you will be able to see the safety specs at a glance. Click on a security or privacy function to fix it.

Step 5: This is where you will be able to see the safety specs at a glance. Click on a security or privacy function to fix it.

Perform a Safety Check on Google Chrome (Android)

Step 1: Launch Google Chrome on your Android phone.

Step 2: Hit the ellipses in the top right corner of the screen.

Step 2: Hit the ellipses in the top right corner of the screen.

Step 3: Go to Settings.

Step 3: Go to Settings.

Step 4: Tap on Safety check.

Step 4: Tap on Safety check.

Step 5: Google Chrome will run a safety check. The problematic issues will be flagged. Tap on a flagged issue to view how it can be corrected.

Step 5: Google Chrome will run a safety check. The problematic issues will be flagged. Tap on a flagged issue to view how it can be corrected.

Perform a Safety Check on Google Chrome (iOS)


Step 1: Launch Google Chrome on your iPhone.

Step 2: Tap the ellipses in the bottom right corner of the screen.

Step 2: Tap the ellipses in the bottom right corner of the screen.

Step 3: Tap on Settings.

Step 3: Tap on Settings.

Step 4: Scroll down and select Safety Check.

Step 4: Scroll down and select Safety Check.

Step 5: Tap on Check Now.

Step 5: Tap on Check Now.

Step 6: Google Chrome will run a safety check, and the problematic issues will be flagged. Tap on an issue to view how it can be corrected.

Step 6: Google Chrome will run a safety check, and the problematic issues will be flagged. Tap on an issue to view how it can be corrected.

Frequently Asked Questions (FAQs)

How do I update Google Chrome?

Launch Google Chrome on your PC and hit the red icon at the top right corner of the screen to download the pending update. Once downloaded, restart Chrome.

How do I access Reading Mode on Chrome?

To enable Reading Mode in Google Chrome, right-click on any website and select ‘Open in reading mode’ from the list of options.

How do I view my saved passwords on Google Chrome?

To view your saved passwords on Chrome, hit the ellipses at the top right corner of the screen, hover the cursor over ‘Passwords and autofill’ and select ‘Google Password Manager’.

How do I run a safety check on Chrome for PC?

Launch Chrome on your PC, go to Settings>Autofill and passwords, and click on ‘Go to Safety check’.

How do I run a safety check on the Chrome app on my Android phone?

Go to Chrome, tap the ellipses, select Settings, and tap on ‘Safety check’.

Read Also: Acer Swift 14 AI Copilot+ PC with Snapdragon X Elite and Snapdragon X Plus platforms launched

Conclusion

This is how you can perform a basic safety check on Google Chrome. To maintain your anonymity on the internet, it is suggested that you use a VPN. Here are our picks for the best VPN apps around. If you have any other privacy suggestions, let us know in the comments!

Top 10 apps to download first on your new iPad Pro 2024

Launched earlier this month, the new iPad Pro is powered by the M4 chipset and is available in 11 and 13-inch sizes. Its large screen and support for Apple Pencil is what makes it the choice of many digital artists and content creators. To harness the power of the iPad’s specs and hardware, you need intelligent apps. The great thing is that, unlike its Android counterparts, the iPad has a diverse library of apps that are designed keeping its large screen in mind. So, without further ado, here are the top 10 apps you should download first on your new iPad Pro 2024.

Read Also: Vivo X Fold 3 Pro India launch confirmed to take place on June 6

Procreate

Download from the App Store

Procreate

Procreate is unanimously considered by artists to be the best drawing app for iPad. Its versatile and exhaustive list of tools caters to different forms of art like drawing, sketching, watercolour painting, oil painting, and more. You can find hundreds of handmade brushes on this app with over 100 customisable options for every brush. You can design your own custom brush using Brush Studio. However, what really cements Procreate’s position as the best digital art app is its intuitive interface which works seamlessly with Apple Pencil and brings a whole new level of accessibility to casual and professional artists alike. 

Notability

Download from the App Store

Notability

If you’re interested in taking notes on your iPad, Notability is a must-have app for the device. With Notability, you can write down notes with the help of the Apple Pencil, supplement them with audio, and even draw sketches. The app lets you import PDFs and annotate them as well. If you use your iPad as your primary note-taking device, Notability will help you organise the notes with customisable subjects and dividers. The precision and responsiveness of this app are second to none.

GoodNotes 6

Download from the App Store

GoodNotes 6

GoodNotes is one of the most popular digital notebook apps for iPad. What we like about this app is that it supports input from the keyboard as well as the Apple Pencil. You can have both kinds of input on one note. The customisation options offered by this app are also impressive. Not only can you change the style of pen but also the paper template with options like Ruled Paper, Blank Paper, Cornell Paper, and more to choose from. Another cool thing about GoodNotes is that it syncs your notes across all your devices using iCloud.

Adobe Illustrator

Download from the App Store

Adobe Illustrator

Adobe Illustrator is one of the best iPad Pro apps for designers and graphic artists. Its precision tools let you design logos, panels, and illustrative art with incredible accuracy. You can create vector lines, shapes, type, gradients, and effects with ease. There are over 18,000 fonts and 20+ colour books to choose from. On top of that, you can check out the tutorials and guides that are specially meant for creators. If you’re into designing posters and flyers rather than sketching and drawing, you will like Adobe Illustrator more than Procreate.

forScore

Download from the App Store

forScore

A famous app among musicians, forScore displays sheet music on your iPad. You can import music sheets from iCloud or use content providers like Musicnotes.com. forScore organises your library meticulously and makes it easy to search for any piece of music. While performing, you can prop your iPad up on a stand and use forScore in any orientation you prefer. You can connect a Bluetooth page turner if you don’t want to rely on touching the screen to change the page while playing music.

GoodLinks

Download from the App Store

GoodLinks

If you’re always running out of time to watch things sent to you by friends, use the GoodLinks app. Essentially a bookmarking app, GoodLinks saves links for later and syncs them across all your devices. The best part is that you don’t need to create an account. The app offers a clean reading experience with its built-in e-reader which gets rid of the clutter and ads from the saved articles. If your saved content gets too overwhelming, you can organise it with relevant tags.

Paprika

Download from the App Store

Paprika Top 10 apps to download first on your new iPad Pro 2024

The iPad is very useful in the kitchen, mostly because of its large screen which makes following recipes very easy. The Paprika app for iPad compiles all your recipes in one place, helps you create grocery lists, and plan your meals. Apart from downloading recipes from online sources, you can also add your own. You can save your favourite meal plans in the app and reuse them whenever necessary. Paprika also tracks your pantry items and makes it easy to view which ingredient you are running out of while shopping for groceries.

Adobe Lightroom

Download from the App Store

Adobe Lightroom Top 10 apps to download first on your new iPad Pro 2024

For all things related to photo editing, download the Adobe Lightroom app on your new iPad Pro. This AI-powered photo editing app is very accessible to beginners who may not be familiar with the exhaustive list of tools on offer. Lightroom has one-tap presets for filters for pictures, videos, and reels. With ‘Generative Remove’ you can harness the power of AI to remove unwanted objects from your pictures. On top of that, you can fix the lighting, exposure, contrast, and other elements with effective tools. Adobe Lightroom lets you edit and export images in HDR.

YouTube

Download from the App Store

YouTube Jump Ahead Top 10 apps to download first on your new iPad Pro 2024

This may seem like a no-brainer but YouTube should certainly be one of the first apps you download on your new iPad Pro. The biggest video-sharing platform in the world, YouTube prides itself on having the largest number of content creators. Its recent bite-sized video format, Shorts, is steadily gaining popularity, going up against the giants in TikTok and Instagram Reels. You can choose to get rid of the ads on the platform by buying a Premium subscription. This premium subscription also unlocks an ad-free YouTube Music experience.

Asphalt 9

Download from the App Store

Asphalt 9_ Legends (Free) Top 10 apps to download first on your new iPad Pro 2024

All that screen real estate on your new iPad Pro can be put to good use by playing the breathtaking Asphalt 9. This game has an incredible collection of cars from the major automakers in the world. Asphalt lets you customise your ride and upgrade its stats as you progress further in the game. There are 185 racing tracks for you to choose from in 17 real-world locations. The game supports single-player and multiplayer modes, with the option to create clubs as well.

Read Also: Best 5 Ways to Run Diagnostics on Windows (2024)

Conclusion

These are the top 10 apps you should download first on your new iPad Pro 2024. Most of the apps mentioned in this list are free to install. Some apps, like GoodLinks, demand a fee while others, like YouTube, offer premium subscriptions. Let us know which apps you love using on your iPad in the comments!

Garena Free Fire Redeem Codes Today 25 May 2024: Here is how to claim them

Garena Free Fire is a battle royale game with regular awards and tournaments to keep players interested. If you play Garena Free Fire, you should be aware of the redeem codes that are released on a daily basis. However, because the battle royale game is banned in India, players from other countries can use the Free Fire Redeem codes daily. If you’re unfamiliar with the Garena Free Fire redeem codes or don’t know how to get them, we’ve put together a step-by-step guide to help you redeem them. Check out Garena Free Fire Redeem Codes for 25 May 2024.

The Free Fire redeem codes are a great way to get free stuff. These are 12-digit codes that contain alphabets and numbers, as well as an expiration date and time. Because the Garena FF redeem codes cannot be used more than once, you should hurry to the redemption page to claim your free reward before someone else does. To get a free reward, all you have to do is go to reward.ff.garena.com/en, which is the official redemption page. Also, keep an eye on this space for daily updates on Garena Free Fire redemption codes and rewards.

Also Read: Sennheiser Accentum Plus wireless headphones with Hybrid Adaptive Noise Cancellation launched

Garena Free Fire Redeem Codes Today 25 May 2024

P9G2T3C5RA6L7M4H

F5J8AV9X3K2M7B1Q

Y6H4S7V2G1R9CA3M

Q8K9AD5G6R7V2X4B

R9X32G1N4B8K7M6Q

H3K8D7F2J6GNR5PQ

X9V2C4B7SKL3M6YH

S3C5B7V9J2KQ6R8Q

D4K6JQ8N9V2G1L5R

B7Q9R2M4X5C6QL8J

J6N8QR7G4V2X5C1D

Z5W1T8R9F7XD2K4S

L6J4N8M9Y2G1VPXQ

C7D2B4L5J6Q8R9XK

V2H6S7M8N1X42J3D

G7B4RQ6X8Q9L2C3N

N1M7Q9H3K4R5QJ8X

K2R4J6QD8G9L7N3V

How to Get Free Fire Redeem Codes for Garena on 25 May 2024?

  • Visit the Garena Free Fire game’s official website at reward.ff.garena.com.
  • Use your Facebook, Google, VK, Apple ID, Huawei ID, or Twitter account to log in.
  • You’ll be taken to a valid redemption code (s)
  • Copy and paste the 12-digit redemption code into the text box.
  • On the screen, a dialogue box will appear.
  • ‘Ok’ should be selected.

Best 5 Ways to Run Diagnostics on Windows (2024)

0

If you’re facing trouble with a certain component or function on your Windows PC, you can run a list of checks on it to diagnose the issue. Some of these tools are built into the system while others need to be downloaded from a third-party source. Before taking your PC to the authorised repair centre, you should run these checks to figure out what is wrong with the device. Here are the best 5 ways to run diagnostics on your Windows 10 or 11 PC.

Read Also: Vivo V30e Review: The best camera phone under Rs 30,000?

Before you begin

Windows PCs have a very versatile troubleshooter that can diagnose and suggest fixes for components like the keyboard, camera, and Bluetooth, to apps like the Windows Media Player. This troubleshooter can be found in the device settings. You can set the troubleshooter to run automatically every time your PC runs into a problem.

Apart from the troubleshooter, Windows 10/11 also has a diagnostic tool for the RAM. The native Performance Monitor tool does exactly what its name suggests. If you suspect that your PC’s general performance has started lagging, this tool will come in handy. If you notice a drop in the battery performance, you can check out the detailed stats using Command Prompt.

Use the Troubleshooter

Step 1: Go to Settings and switch to the System tab.

Step 1: Go to Settings and switch to the System tab.

Step 2: Scroll down and click on Troubleshoot.

Step 2: Scroll down and click on Troubleshoot.

Step 3: Click on Other trouble-shooters.

Step 3: Click on Other trouble-shooters.

Step 4: Hit Run next to the component you’re having trouble with.

Step 4: Hit Run next to the component you’re having trouble with.

Check your PC’s RAM

If you’re facing trouble with your PC’s RAM, you can run the Memory Diagnostic Tool to find out what’s wrong with it. Here’s how.

Step 1: Press Windows + R to launch the Run box.

Step 2: Type mdsched.exe and hit Enter.

Step 1: Press Windows + R to launch the Run box.

Step 3: You will be asked to restart your PC. Go through with the request.

Step 3: You will be asked to restart your PC. Go through with the request.

Step 4:  Windows will perform a RAM test on your  PC. You will be able to see the results when your PC starts up again.

Step 4: If Windows does not automatically load the results, right-click on the Start icon and select Event Viewer. How to Test Your Windows PC for Failing Hardware? Best 5 Ways to Run Diagnostics tools on Windows (2024)

Step 5: If  Windows does not automatically load the results, right-click on the Start icon and select Event Viewer.

Step 5: Expand the Windows Logs section in the side menu and select System. How to Test Your Windows PC for Failing Hardware? Best 5 Ways to Run Diagnostics tools on Windows (2024)

Step 6: Expand the Windows Logs section in the side menu and select System.

Step 7: Open the MemoryDiagnostic file.

Performance Monitor

performance monitor. How to Test Your Windows PC for Failing Hardware? Best 5 Ways to Run Diagnostics tools on Windows (2024)

The Windows Performance Monitor is a great tool to view real-time stats related to your PC’s performance and resources. Here’s how you can use it.

Step 1: Click the search box on the taskbar and type Performance Monitor. Open the app from the search results.

Step 2: You will be able to view the real-time system summary (memory usage, network usage, disk usage) on the first page itself.

Step 3: Use Reliability  Monitor to check the history of critical events.

Step 4: Click on Resource Monitor to check how system resources are being utilised.

Check the Battery Performance

A lot of people don’t know this but you can check your Windows PC and laptop’s battery health using Command Prompt. Here’s how.

Step 1: Click on the search bar at the bottom toolbar and search for Command Prompt.

Step 2: Right-click on the Command Prompt icon and select Run as Administrator.

Step 3: Type the following command and hit Enter.

powercfg /batteryreport

Step 4: Your laptop’s battery report will be saved to the System32 folder in the C drive. Locate the report and open it.

Step 4: Your laptop’s battery report will be saved to the System32 folder in the C drive. Locate the report and open it. Best 5 Ways to Run Diagnostics tools on Windows (2024)

Step 5: Check the original and current battery capacity under the Installed Batteries section.

Step 5: Check the original and current battery capacity under the Installed Batteries section. Best 5 Ways to Run Diagnostics tools on Windows (2024)

Use a third-party tool for the hard drive (CrystalDiskInfo)

Use CrystalDiskInfo to check your PC’s hard drive. How to Test Your Windows PC for Failing Hardware? Best 5 Ways to Run Diagnostics tools on Windows (2024)

If you suspect there’s something wrong with your PC’s hard drive, use the CrystalDiskInfo tool to run a diagnostic check. You can download this tool from the CrystalMark website. Once installed, launch the application and run its SMART test. SMART stands for Self-Monitoring, Analysis, and Reporting Technology. This test will check for faults in the hard drive’s spin-up time, seek time performance, seek error rate, and more.

Frequently Asked Questions (FAQs)

Does Windows 11 have a tool to check the RAM health?

Run the Memory Diagnostics Tool on Windows 11 to view your PC’s RAM health. You can search for this tool on the taskbar or trigger it by entering mdsched.exe in the command box.

How do I troubleshoot an issue on my Windows PC?

Go to Settings>System>Troubleshoot>Other trouble-shooters and click ‘Run’ next to the component you’re facing issues with.

Which is the best software to run a diagnostic check on my PC’s hard drive?

HDDScan, Seagate Seatools, Disk Checkup, and WinDFT are great tools to run a diagnostic check on your PC’s hard drive.

Read Also: Boat Nirvana Nebula and Nirvana Zenith TWS with Dolby Audio launched in India

Conclusion

These are the best 5 ways to run diagnostics on Windows 10 or 11. To stay on top of things and get the most out of your PC, use maintenance tools like CCleaner, Advanced SystemCare, and Total PC Cleaner. If you know any other important diagnostic tools, let us know in the comments!

Boat Nirvana Nebula and Nirvana Zenith TWS with Dolby Audio launched in India

Popular audio brand Boat has announced the launch of its brand new Nirvana Nebula and Zenith TWS series in India. Both the premium true wireless earbuds come with Dolby Audio. The Nirvana Zenith supports ANC up to 50dB whereas Nirvana Nebula has ANC up to 35dB. The earphones are claimed to provide up to 50 hours of battery life.

Boat Nirvana Nebula and Boat Nirvana Zenith price in India and sale details

The Nirvana Nebula has been launched with a price tag of Rs 2,999 whereas the price of the Boat Nirvana Zenith is set at Rs 3,999. Both the TWS will be available in Mystique Black and Celestial White colour variants. These can be purchased via the company’s official website, Amazon, Myntra, Flipkart and select offline stores in the country.

Boat Nirvana Nebula
Boat Nirvana Nebula

Also Read: Acer Swift 14 AI Copilot+ PC with Snapdragon X Elite and Snapdragon X Plus platforms launched

Boat Nirvana Nebula and Boat Nirvana Zenith specs, features

The Boat Nirvana Nebula and Zenith features Chrome and Rose Gold glass design. They come equipped with 11mm Deep Bass Drivers and the boAt Signature Sound along with Dolby Audio support. The devices support Active Noise Cancellation (ANC) technology, offering up to 35dB and 50dB respectively. With the help of HiFi Audio, a dual-core processor, and sophisticated Bluetooth v5.3, the Nirvana series produces sound with unmatched intensity, clarity, and precision. Google Fast Pair ensures uninterrupted audio passion sharing by making pairing and switching between devices simple. The audio devices have 6X Mics and AI ENx Technology.

Boat Nirvana Zenith
Boat Nirvana Zenith

Also Read: Vivo X Fold 3 Pro India launch confirmed to take place on June 6

Since every ear is different, boAt’s Adaptive EQ powered by Mimi customises the Nirvana series’ sound to fit your particular hearing profile, providing a customised audio experience.
Additionally, the Nirvana Nebula and Zenith TWS have an IPX5 rating for water and sweat resistance. They also deliver up to 50 hours of battery life. An hour of music playback can be obtained with just five minutes of charging. 

Acer Swift 14 AI Copilot+ PC with Snapdragon X Elite and Snapdragon X Plus platforms launched

Acer has released its first Copilot+ PC, the Swift 14 AI laptop, in conjunction with Microsoft and Qualcomm Technologies. This gadget, powered by the Snapdragon X Elite and Snapdragon X Plus platforms, includes one of the world’s fastest NPUs for laptops, allowing for on-device AI processing. It supports next-generation AI capabilities in Windows 11, such as Recall, Cocreator, Live Captions, Windows Studio Effects, and Auto Super Resolution.

Acer Swift 14 AI specifications

The Acer Swift 14 AI offers Snapdragon X Elite X1E-78-100 and Snapdragon X Plus X1P-64-100 processor options with Qualcomm Adreno GPU. The machine is available with up to 1TB PCIe Gen4 NVMe storage along with up to 32GB of dual-channel LPDDR5x RAM. The laptop operates on Windows 11. It features a 14.5-inch WQXGA IPS touch display with 2,560 x 1,600 pixels of resolution. The panel has a refresh rate of 120Hz and supports 100% sRGB color gamut. It is available with edge-to-edge touchscreen options and comes with TÜV Rheinland Eyesafe Certification 2.0 to help minimise the effects of harmful blue light without sacrificing colour accuracy.

Acer Swift 14 AI specifications

Also, there is a 1440p QHD IR webcam with a triple microphone array and privacy shutter that supports Acer’s suite of AI-boosted conferencing tools in Acer PurifiedView 2.0 and Acer PurifiedVoice 2.0. Acer QuickPanel, which automatically appears when the device’s webcam or microphone is turned on, makes it possible to quickly calibrate them. Users can access a library of AI functions on the device through the Experience Zone and AcerSense app for device management by using a dedicated key.

Also Read: Acer Swift 14 AI Copilot+ PC with Snapdragon X Elite and Snapdragon X Plus platforms launched

Windows Hello, which allows for safe and quick biometric and facial recognition login, is pre-installed on this Copilot+ PC. With speeds of up to 5.8 Gbps and minimal network latency of less than 2 ms, the device also features Wi-Fi 7 and BluetoothTM 5.4 connectivity. For further versatility, a variety of generous port alternatives are available, including two USB Type-C and two USB 3.2 Type-A ports.

AI capabilities include Recall, Cocreator, Live Captions, Windows Studio Effects, and Auto Super Resolution. Recall allows users to easily find everything they’ve seen on their PC by simply stating what information they remember. With an explorable timeline, users can simply scroll back in time to access previously used apps, documents, or messages. Live Captions with Live Translations provides automatic spoken captions and real-time translations of any live or pre-recorded video from 44 languages to English.

Also Read: Vivo X Fold 3 Pro India launch confirmed to take place on June 6

On the other hand, Visual or textual suggestions can now be utilised to co-create AI writings and images on the device using Cocreator. To give gamers the images they want without sacrificing performance, Auto Super Resolution instantly boosts a game’s graphical resolution and frame rate. Windows Studio Effects automatically adjusts lighting and muffles background noise during video calls. Additionally, it can be used to quickly activate three artistic filters on any video platform.

Acer Swift 14 AI Pricing and Availability

The Acer Swift 14 AI (SF14-11) will be available in North America in July, starting at USD 1,099, and in EMEA in June, starting at EUR 1,499.

Vivo X Fold 3 Pro India launch confirmed to take place on June 6

The Vivo X Fold 3 Pro India launch date is set for June 6, marking the company’s first foldable offering in India. The book-style foldable smartphone first launched in China in March, runs on Qualcomm’s Snapdragon 8 Gen 3 SoC. The book-style foldable includes Zeiss-branded cameras. It features an 8-inch inner foldable screen and a 5,700mAh battery. The Chinese edition runs Android 14 with OriginOS 4 and happens to come with Funtouch OS in India. The phone features an 8.03-inch 2K AMOLED display and a 6.53-inch AMOLED external display. The Vivo X Fold 3 Pro is expected to compete against the Galaxy Z Fold 5 and the OnePlus Open.

Vivo has officially announced the India launch date for Vivo X Fold 3 Pro. The upcoming foldable smartphone is scheduled to debut in the country on June 6. The device has also been listed on Flipkart which revealed the key highlights the key details of the smartphone.
The Vivo X Fold 3 Pro debuted in China in March of last year. The Indian variant of the Vivo X Fold X Fold 3 Pro may have similar specs to the international version.

In China, the X Fold 3 Pro costs CNY 9,999 (Rs 1,16,000) for 16GB RAM and 512GB storage.

Also Read: The Delhi High Court has issued guidelines on the sale of used and refurbished HDDs in India

The foldable phone sports an 8.03-inch primary 2K resolution E7 AMOLED display, a 6.53-inch AMOLED cover display, and a carbon fibre hinge. It comes preloaded with OriginOS 4, which is based on Android 14. The Snapdragon 8 Gen 3 SoC has a Vivo V3 photography chip. It includes up to 16GB of LPDDR5X RAM and up to 1TB of UFS4.0 storage.

Also Read: Poco F6 5G with 1.5K OLED display and Snapdragon 8s Gen 3 SoC launched in India

The X Fold 3 Pro features a triple camera arrangement for images and videos, including a 50-megapixel primary sensor and a 32-megapixel sensor on the outer and primary screens for selfies. The phone has a 5,700mAh battery with 100W wired and 50W wireless charging capabilities. 

Vivo V30e Review: The best camera phone under Rs 30,000?

Vivo added a new entry-level variant to its midrange V30 lineup earlier this month. The Vivo V30e separates itself from the rest of the lineup with its unique design but seeks to replicate the camera performance of the higher variants. Vivo has made some tradeoffs to keep the price in check, something we were eager to check when this smartphone crossed our desks. Now that we’ve been using the V30e as our daily driver for the last week, we can assess whether it pulls ahead of its peers in this price category. Here is our in-depth Vivo V30e review.

Read Also: How to create a custom route on Google Maps? (2024)

Vivo V30e Review: Design and Display

Here’s what you get inside the Vivo V30e retail box:

  • Smartphone
  • 44W power adapter
  • USB Type-A to Type-C cable
  • Clear plastic case
  • SIM ejector
  • Quick Start Guide
  • Warranty Guide

There are two colour options on offer – Silk Blue and Velvet Red. We used the latter for this review.

Vivo V30e Review: Design and Display

There is a stark difference in the design of the V30e compared to the rest of the lineup. The back panel features a dual matte and gloss finish. The glossy strip running along the right side of the panel has a criss-cross pattern. The round camera cutout is a stark departure from the sleek, rectangular camera panel of the V30 and V30 Pro. It reminds us of Vivo’s X series smartphones of yesteryears. Despite these changes, the V30e has a slim form factor.

design

The plastic frame houses the volume rocker and side button on its right edge and the SIM tray, primary microphone, USB port, and speaker grille on the bottom edge. Up top lies the secondary microphone. The V30e does not have a stereo speaker, nor does it use the earpiece as the secondary speaker. The left edge of the frame is completely keyless.

Vivo V30e Review: Design and Display

The Vivo V30e sports the familiar 6.78-inch curved AMOLED display. This panel can hit a maximum refresh rate of 120Hz and its peak brightness has been capped at 1,300 nits. The other two V30 variants can reach a peak brightness of 2,800 nits while watching HDR content. The touch response on the V30e is smooth and the under-display fingerprint scanner is quite snappy.

display

We used the Vivo V30e as our primary media-watching device throughout the review period. Even though the Netflix app does not have HDR capabilities on this device, the viewing experience was very good. We streamed media on major OTT platforms like Prime Video, Disney+ Hotstar, Netflix, and Sony Liv and were happy with the detailed, vibrant images presented on the screen. The lack of a stereo audio output is certainly not ideal, but the primary speaker can reach a high level of volume.

display

Interestingly, the V30e has an IP64 rating, which is a slight upgrade from the IP54-rated V30 and V30 Pro. The smartphone was unfazed by water splashes when we used it in the rain. Water resistance against major dips still remains an issue for Vivo’s midrange offerings.

Vivo V30e Review: Performance and Cameras

Powering the Vivo V30e is the Snapdragon 6 Gen 1 SoC. There are two storage variants on offer – 128GB and 256GB. The latter fetches Rs 30,000. Both variants come with 8GB of RAM. On the Geekbench 6 test, the V30e scored 935 points in the single-core test and 2,720 points in the multi-core test. Meanwhile, the V30 Pro scored 1,155 and 3,384 points respectively.

Vivo V30e Review: Performance and Cameras

The V30e handles everyday tasks with expertise. We did not experience any jitters or lags while loading multiple apps at once. Tasks like video calling, instant messaging, social media browsing, and media streaming were completed without any staggering issues.

Overall, the Snapdragon 6 Gen 1 is a decent chipset, but it falls slightly short when it comes to gaming. We played titles like Call of Duty Mobile and BGMI on the V30e. Our gameplay was marred by the odd frame drop and inconvenient lag. On the bright side, the smartphone did well to keep its internal temperature in check even though we used it during peak summer. The back panel got slightly warm after 30 minutes of gameplay, but we were able to continue the gaming session for another 30 minutes without any significant drop in performance.

apps

Moving on, the OS duties on the Vivo V30e are handled by Android 14 out of the box. Vivo’s Funtouch 14 OS is still a mixed bag. We like it for its diverse range of customisation options; you can apply attractive effects to the charging animation, fingerprint scanner, screen lock, and even the weather and music apps. We also like the dynamic wallpapers that change their appearance as you get closer to your step goal. The privacy options for hiding and locking apps are quite handy as well. The default gallery app has a hidden folder too.

The downside of Funtouch OS is the bloatware and ads that come along with it. The V-Appstore and Browser apps routinely push ads disguised as notifications. The native browser app pushing fullscreen ads in its interface ensured that we switched to Chrome right away. While you can delete the bloatware from the device and limit the spam notifications, the out-of-the-box software experience does not make a good impression.

The 5,500mAh battery pack on the V30e is larger than the rest of the lineup. The smartphone easily lasts a full day on a full charge. During the week-long review period, our daily tasks on the Vivo V30e included video calling, social media browsing, instant messaging, photography, and gaming. After a day of heavy use, we were left with a 20-30% charge on the device. With more conservative usage, you can push its battery life to 1.5-2 days. The smartphone supports 44W charging and can be fully charged in under 90 minutes.

The camera performance is the strongest suite of Vivo’s V Series smartphones, and the V30e does not disappoint in this regard. The rear camera array on this smartphone comprises a 50MP Sony IMX882 primary sensor and an 8MP ultrawide lens. We like that Vivo has not included a depth or macro sensor for the ‘third lens’ gimmick. The circular Aura Light in the rear camera dial also doubles as the flash.

primary camera

Pictures taken with the 50MP primary shooter live up to the V Series’ reputation. The images are vibrant and pack punchy colours. Even though it lacks Zeiss tuning like its Pro variant, the camera performance of the two smartphones is not too different. In outdoor conditions with optimum daylight, the V30e produces excellent pictures with good dynamic range and sharpness.

Vivo V30e Review: Performance and Cameras
Primary lens vs Ultrawide lens
Vivo V30e Review: Performance and Cameras
Ultrawide lens

The 8MP ultrawide lens produces good results as well, but there is a visible shift in the colour profile. Images taken with this sensor appear softer and a little washed. It is a good standalone lens but it fades in comparison to the primary shooter. This is pretty common for smartphones in this price range.

Vivo V30e Review: Performance and Cameras
Without Night Mode vs Night Mode

We were surprised by the V30e’s performance in limited lighting as this is one aspect where smartphones in this category often fail to impress. The V30e, however, crushed the results, thereby proving to be a versatile camera smartphone. We particularly liked the accuracy of the colour tone that it assigned to the subject in limited lighting. Turning on the Night Mode smoothens the images but it tends to over-brighten the subject in some situations.

camera
Portrait Shots

Portrait shots taken with the Vivo V30e are sharp and focused. The smartphone does a good job of separating the subject from the background. You also get all the portrait styles and filters that Vivo is known for. The Aura Light plays a pivotal role in filling the shadows and illuminating the subject while taking portrait shots in limited lighting. The front-facing 50MP camera takes vibrant selfies and can record 4K videos.

Read Also: Poco F6 5G with 1.5K OLED display and Snapdragon 8s Gen 3 SoC launched in India

Conclusion

In our opinion, the Vivo V30e is the best camera smartphone you can buy under Rs 30,000. It lives up to the V Series reputation by producing vibrant images in all kinds of lighting conditions. The slim form factor and curved display of the smartphone are incredible assets that are rarely seen in this price range. The Snapdragon 6 Gen 1 SoC is a good processor for everyday use, but if you’re interested in full-throttle gaming, there may be better options for you.

Vivo V30e: Pros

  • Slim form factor
  • Curved AMOLED display
  • Aura Light
  • Excellent camera performance

Vivo V30e: Cons

  • Lacks a secondary speaker
  • Bloatware

How to create a custom route on Google Maps? (2024)

0

If you’re embarking on a road trip with your friends, you probably want to hit a lot of places on the way instead of simply driving directly to your location. If you’re not familiar with the route, it can be easy to lose your way. Luckily, you can customise your route on Google Maps and ensure that you’re always on the right path. The good thing is that you can save the customised map offline and not have to rely on internet access to use it. Let’s take a look at how you can create a custom route on Google Maps and access it on your phone.

Read Also: The Delhi High Court has issued guidelines on the sale of used and refurbished HDDs in India

Can you create a custom route on Google Maps for Android?

Google’s special My Maps tool can be accessed on Android, but it is not possible to create a new map or edit an existing one on your smartphone. If you simply want to add a few stops on the way to your destination, the regular navigation feature on Google Maps is well-equipped to handle that.

My Maps can be created and edited on a PC only. They can be saved offline and shared with other users. You can also embed a ‘My Map’ on your website. The diverse customisation options on My Maps allow you to mark specific locations, change the route, add text, videos, images, and more.

Create a custom route on Google Maps (PC)

Step 1: Go to Google Maps and click on Saved in the sidebar.

Step 1: Go to Google Maps and click on Saved in the sidebar.

Step 2: Switch to the Maps tab and click on Create Map.

Step 2: Switch to the Maps tab and click on Create Map.

Step 3: Click on Untitled map and give your map a name and description.

Step 3: Click on Untitled map and give your map a name and description.

Step 4: Click on the Add directions icon below the search bar.

Step 4: Click on the Add directions icon below the search bar.

Step 5: Select the mode of transportation.

Step 5: Select the mode of transportation.

Step 6: Enter your departure point in Box A and destination in Box B.

Step 7: The default route will be displayed on the map. Click on any spot on the route and drag it to your preferred location to change it.

Step 7: The default route will be displayed on the map. Click on any spot on the route and drag it to your preferred location to change it. How to create a custom route on Google Maps? (2024)

Step 8: You can also click on Add Destination in the layer box and add a location to your map.

Step 8: You can also click on Add Destination in the layer box and add a location to your map. How to create a custom route on Google Maps? (2024)

Step 9: Use the toolbar below the search bar to add lines and shapes to your map.

Access your custom map on your smartphone

Step 1: Launch the Google Maps app on your smartphone.

Step 2: Switch to the Saved tabs.

Step 2: Switch to the Saved tabs. How to create a custom route on Google Maps? (2024)

Step 3: Tap on Maps.

Step 3: Tap on Maps. How to create a custom route on Google Maps? (2024)

Step 4: Select the map you just created.

Step 4: Select the map you just created. How to create a custom route on Google Maps? (2024)

Frequently Asked Questions (FAQs)

How do I create a custom map on Google Maps?

Open Google Maps on your PC, go to Saved>Maps>Create Map, enter the departure and destination points, and then drag the route to your preferred location.

Can I create a custom map on Google Maps for Android?

Google does not offer the option to create a custom map on My Maps for Android yet.

Can I access a custom map on the Google Maps app?

Launch the Google Maps app, go to the Saved tab, tap on Maps, and then select your custom map.

Read Also: Top 2 ways to schedule a text message on Android? (2024)

Conclusion

This is how you can create a custom map on Google Maps. You can share the link to the custom map with your friends or embed it on your website. As of now, there is no way to create a custom map on Android, but you can access it on your phone once you have created it using Google Maps on your PC.

The Delhi High Court has issued guidelines on the sale of used and refurbished HDDs in India

Guidelines regarding the sale of refurbished and used hard disk drives (HDDs) have been established by the Delhi High Court. According to HC’s directions, the original manufacturer’s name must be prominently displayed on the packaging, without misleading customers into believing they are purchasing the real product. The court issued the directives while handling a series of lawsuits brought by Seagate Technology LLC and Western Digital Technologies Inc. against several companies selling reconditioned HDDs.

The Delhi High Court has released directions on the resale of refurbished and used hard drives (HDDs). The court mandated that packaging have to clearly state the name of the original manufacturer while preventing deceiving the consumer into believing they are purchasing the original product. The device must clearly say that there is no warranty or service from the manufacturer, according to a mandate from the court.

Also Read: Poco F6 5G with 1.5K OLED display and Snapdragon 8s Gen 3 SoC launched in India

When selling refurbished HDDs, companies should adhere to the guidelines on brochures, manuals, websites, e-commerce listings, and advertisements. The directives were issued by the court in the midst of addressing several lawsuits that Western Digital Technologies Inc. and Seagate Technology LLC had filed against various companies that sold refurbished hard drives.

While used equipment is sold and destroyed worldwide, consignments of these end-of-life HDDs are repaired by various entities and sold to customers, according to Seagate and Western Digital. They also claimed that their HDDs remain functioning after a certain amount of time but become unusable.

According to what was said, various importers bring end-of-life HDDs into India, where they are resold to refurbishers who take off any branding such as Seagate or Western Digital. Then they clean and repackage the HDDs under their own brands, and offer them for sale as refurbished goods with an extended two-year warranty. These refurbished HDDs are said to be used for either assembled desktops or surveillance cameras.

“Seagate and WD allege that these end-of-life HDDs could not be sold as refurbished products since the removal of their brand name from the product amounted to impairment, which was not permitted as per Sections 30(3) and 30(4) of the Trade Marks Act, 1999 (“Trade Marks Act”).”

Plaintiffs’ counsel further claimed that the products were unique in that the Printed Circuit Board (“PCB”) colour and the silver plates on the HDDs were shaped differently. As a result, even in the absence of the manufacturer’s label, an industry insider could easily identify the manufacturer of the HDDs.

However, according to the Delhi High Court, Seagate and Western Digital were unable to produce any documentation that would have required them to follow any rules for the importation of used HDDs and equipment into India.

Also Read: AI Audio: Nothing rolls out ChatGPT integration across all Nothing and CMF by Nothing audio products

Note that these suits were filed by Seagate Technology LLC (“Seagate”) and
Western Digital Technologies Inc. (“WD”) against Daichi International (“Daichi”), Consistent Infosystems Pvt. Ltd.(“Consistent”), Geonix International Pvt. Ltd. (“Geonix”) and Cubicor Information Systems Pvt. Ltd. (“Cubicor”).

Directions issued by the Delhi High Court for the sale of used Hard Disk Drives:

(i)Packaging to identify the source of the product: Packaging in
which the refurbished product is sold, will clearly indicate that the
HDD is manufactured by the concerned plaintiffs (Seagate or WD
as the case may be). This may be displayed in a manner not to
deceive the customer that the sale itself is of the original Seagate
or WD i.e. it should be clear, but not dominating the packaging.

(ii) Reference to the original manufacturer is to be made through
their word mark and not the device mark: Reference to the
plaintiffs should be through their word marks as in “Seagate” or
“WD”, as the case may be. Defendant shall not use plaintiffs’
logos, in order to not cause any deception to the consumer.

(iii) Packaging must specify that there is no original manufacturer’s
warranty: A clear statement must be made to the effect that there
is no manufacturers’ warranty or service by (Seagate or WD, as
the case may be) on this product.

(iv) Packaging must specify that the product is “Used and
Refurbished’: A prominent statement on the front of packaging to
the effect that the product is “Used and Refurbished” by the
concerned defendants (Consistent or Geonix or Daichi, as the case
may be)

(v) Statement as to extended warranty by the Refurbisher: A clear
and prominent message that the warranty or service of specified
years is being provided by the concerned defendants (Consistent
or Geonix or Daichi, as the case may be), along with customer
care details and contacts.

(vi) Packaging must reflect an accurate description of the features:
An accurate, truthful, precise description of features and purpose
of the refurbished product, without any misleading, half-truth,
deceptive, ambiguous statements (which could potentially mis-CS(COMM) 67/2024 and other connected matters 64 of 65
inform the consumer as to the features of the product and the
purposes for which it could be used).

(vii) All of the above should also be complied with by the defendants
on promotional literature, website, e-commerce listings,
brochures and manuals.

Garena Free Fire Redeem Codes Today 24 May 2024: Here is how to claim them

Garena Free Fire is a battle royale game with regular awards and tournaments to keep players interested. If you play Garena Free Fire, you should be aware of the redeem codes that are released on a daily basis. However, because the battle royale game is banned in India, players from other countries can use the Free Fire Redeem codes daily. If you’re unfamiliar with the Garena Free Fire redeem codes or don’t know how to get them, we’ve put together a step-by-step guide to help you redeem them. Check out Garena Free Fire Redeem Codes for 24 May 2024.

The Free Fire redeem codes are a great way to get free stuff. These are 12-digit codes that contain alphabets and numbers, as well as an expiration date and time. Because the Garena FF redeem codes cannot be used more than once, you should hurry to the redemption page to claim your free reward before someone else does. To get a free reward, all you have to do is go to reward.ff.garena.com/en, which is the official redemption page. Also, keep an eye on this space for daily updates on Garena Free Fire redemption codes and rewards.

Also Read: Sennheiser Accentum Plus wireless headphones with Hybrid Adaptive Noise Cancellation launched

Garena Free Fire Redeem Codes Today 24 May 2024

Z6X8C0IV2B4N6M8L

Y3L9K7W2X4R6T8ZI

D2E4F6G8H0J14K3A

FFD8E2F7G3H9J4K1

F1G3H5J7K9L1MI3N

Q1W3E5RH7T9Y2U4I

O6P8HL0K2J4H6G8F

X2Z4C6V8B0N1MH3

H5J7K9L16M3N5B7V

T9Y1U3I5O7P96L2K

F6HYGR67HY6RYHQ9

S5A7Q9WI1E3R5T7Y

FIKJHR65HYR56G53

V7B9N1M34C5X7Z9Q

FFU3V9W5X1Y6Z2A7

G4F6D86S0A2Q4W6E

N8B0V2C4X6Z8M61Q

J3K5LI7M9N1B3V5C

P7IO9I1U3Y5T7R9E

W2E4R6T8Y0U2II4O

I5O74P9L1K3J5H7G

R9T1Y3U5I7O9P42S

A3S5D74F9G1H3J5K

M7N9B1V3C5X7ZZ9L

How to Get Free Fire Redeem Codes for Garena on 24 May 2024?

  • Visit the Garena Free Fire game’s official website at reward.ff.garena.com.
  • Use your Facebook, Google, VK, Apple ID, Huawei ID, or Twitter account to log in.
  • You’ll be taken to a valid redemption code (s)
  • Copy and paste the 12-digit redemption code into the text box.
  • On the screen, a dialogue box will appear.
  • ‘Ok’ should be selected.


Poco F6 5G with 1.5K OLED display and Snapdragon 8s Gen 3 SoC launched in India

Xiaomi’s spin-off Poco has updated its portfolio with the launch of a brand-new smartphone in India. Poco F6 5G powered by Qualcomm’s Snapdragon 8s Gen 3 SoC is the latest offering by the company. The phone comes with a 1.5K OLED display which supports a refresh rate of 120Hz. Moreover, it features a 50-megapixel dual rear camera setup and a 20-megapixel OV20B front camera. The smartphone also sports a 5,000mAh battery with 90W fast charging support.

Poco F6 5G price in India, sale details

Poco F6 5G price in India, sale details

Poco F6 5G price in India starts at Rs 29,999 for the 8GB RAM with 256GB storage. Whereas the price of 12GB RAM with 256GB storage is set at Rs 31,999 and the top of the line 12GB RAM with 512GB internal storage option comes with a price tag of Rs 33,999. The phone comes in two colours Black and Titanium.

The device will be available for purchase via Flipkart in the country starting May 29.

Also Read: Vivo Y200 Pro 5G with Snapdragon 695 SoC launched in India

Poco F6 5G specifications

In terms of specs, Poco F6 5G is equipped with the Qualcomm Snapdragon 8s Gen 3 SoC with up to 12GB of LPPDDR5x RAM and up to 512GB UFS 4.0 storage. The phone is shipped with HyperOS with Android 14 and is promised to come with 3 years of software updates and 4 years of security fixes.

The handset is highlighted with a 6.67-inch 1.5K AMOLED display with 1,220×2,712 pixels of resolution. The panel comes with support for a 120Hz refresh rate and 446 ppi pixel density. The screen also offers 2,400 nits peak brightness along with HDR10+, Dolby Vision, and Widevine L1 support. It also includes Corning Gorilla Glass Victus protection.

Also Read: AI Audio: Nothing rolls out ChatGPT integration across all Nothing and CMF by Nothing audio products 

Poco F6 5G features a dual rear camera setup that includes a 50-megapixel 1/1.9-inch Sony IMX882 sensor with OIS and EIS support and an 8-megapixel Sony IMX355 ultra-wide angle camera. There is a 20-megapixel OV20B front-facing camera for taking selfies and video calling.

The smartphone is backed by a 5,000mAh battery with support for 90W fast charging. For thermal control, Poco’s Iceloop cooling technology is integrated into the phone. The hybrid dual stereo speakers on the Poco F6 5G are certified for Hi-Res and enable Dolby Atmos. Its construction is splash- and dust-resistant, rated IP64. It features face unlock in addition to having an in-display fingerprint sensor for authentication.