The Pixel 8a would cost in India between Rs 1,000 and Rs 2,000 more
Artificial intelligence (AI)-related technologies are also anticipated to be included.
Google Pixel 8a has been leaked several times in the past however the company hasn’t made an official announcement about it yet. More leaks about the Pixel phone have now appeared online. Previously it was seen on the Bluetooth Special Interest Group (SIG) certification page and then four possible colours for the phone were suggested by leaked images. Before its release, the price of the Google Pixel 8a has been leaked. Keep on reading to learn more.Google Pixel 8a is expected to be unveiled by the company at its yearly Google I/O 2024 event next month. Details of the alleged smartphone have been leaked multiple times in recent weeks. Online sightings of the rumoured Pixel 8a price indicate that consumers may need to shell out a little more money to buy it. According to PassionateGeekz, the 128GB storage model of the Pixel 8a will cost CAD 708.99, or roughly Rs 42,830, in Canada, where the phone was listed by a store. The 256GB variation will cost CAD 792.99, or around Rs 47,900. The identity of the Canadian vendor who carried both Pixel 8a models was withheld by the media. The price of the Pixel 8a could increase by much to Rs 2,000 in India this year.Renders of the forthcoming phone, indicating all four colour variants, have been made public by Android Headlines ahead of its official release. The phone could come in the following colourways: Bay, Mint, Obsidian, and Porcelain, according to the rumour.In terms of design, rumour claims that the Pixel 8a will resemble the Pixel 8. The back panel is expected to feature a matte texture finish. The Google Pixel 8a is anticipated to include a 6.1-inch FHD+ 90Hz display. It will likely use the same Tensor G3 processor that debuted in the Pixel 8. Additionally, it may come equipped with a 4,500mAh battery. A 64-megapixel primary camera and a 13-megapixel ultrawide sensor should be included in terms of cameras. According to earlier reports, the Pixel 8a will be powered by the sameTensor G3 chipset that powers the Pixel 8 and Pixel 8 Pro. A 6.1-inch full-HD+ OLED display with a resolution of 1,080 x 2,400 pixels is expected to be part of it. The panel could support a refresh rate of 120 Hz and have a maximum HDR brightness of 1,400 nits.It is probably going to include two cameras on the back: a 13-megapixel ultra-wide angle lens and a 64-megapixel primary camera with optical image stabilisation (OIS). It is rumoured to have a 13-megapixel front-facing camera for recording videos and capturing selfies.Some AI (artificial intelligence)-related capabilities are also anticipated for the Pixel 8a.
For a lot of users, setting up a wallpaper for their desktops isn’t a random choice. If you like to put an effort into the way your desktop looks, you probably want to view it all the time. The good news is that you can make the windows on your screen see-through to view the desktop. Today, we bring you the top 5 ways to make windows transparent in a Windows 10/11 PC or laptop.Read Also:Top 10 Free Proxy Sites to Unblock Websites (2024)
What is the transparency effect on Windows?
Your Windows 10/11 PC has a native transparency effect which can be customised using personalisation settings. This effect uses the main colours of your desktop wallpaper to create a background effect for the window panels. These colours can also be used to accentuate the taskbar, start menu, and title bars. The transparency effect is turned on by default for window panels. To apply it to the taskbar and start menu as well, go to Settings>Personalisation>Colours and turn on the relevant toggle switches. You can also choose any colour of your choice for the transparency effect.Even though it is called a ‘transparency’ effect, it does not make the window panels entirely see-through. If you want to get rid of the opacity of the windows on the screen, you will need to install third-party software for your PC or laptop. Here are some of our favourites.
WindowTop
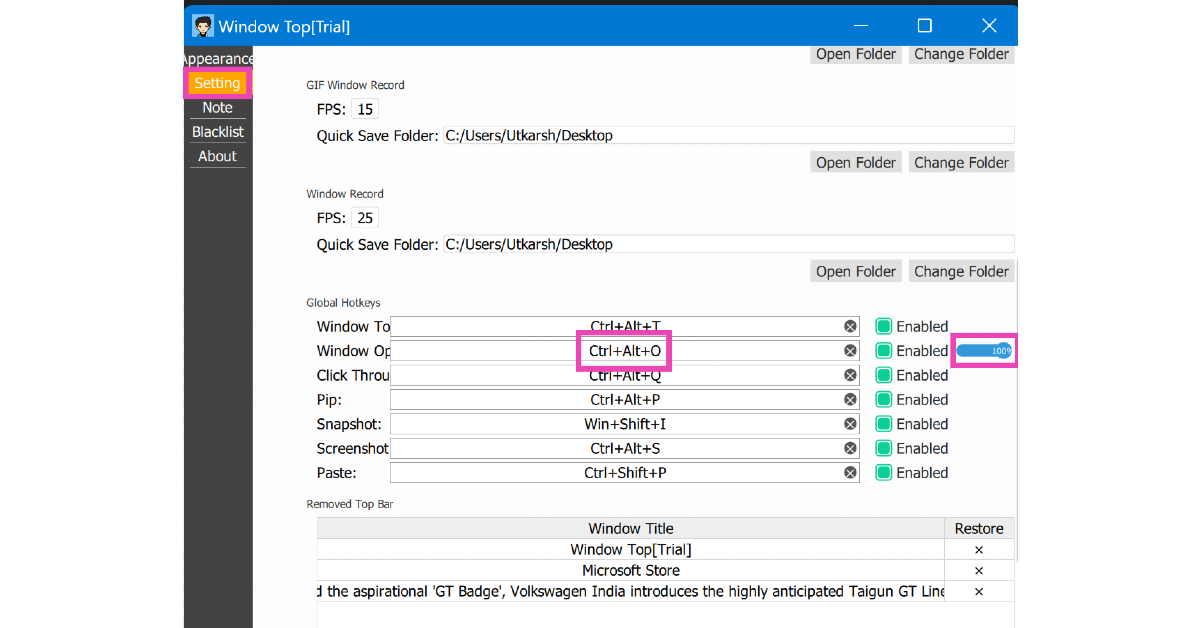
Step 1:Download the WindowTop app from the Microsoft Store.Step 2:Launch the WindowTop app on your PC.Step 3: Switch to the Settings tab and take note of the keyboard shortcut for transparency. By default, this shortcut is Ctrl + Alt + O, but you can change it to something else.Step 4: Use the slider next to the keyboard shortcut to adjust the transparency level.Step 5: Press the keyboard shortcut to make any window transparent on your PC or laptop.
Glass2k
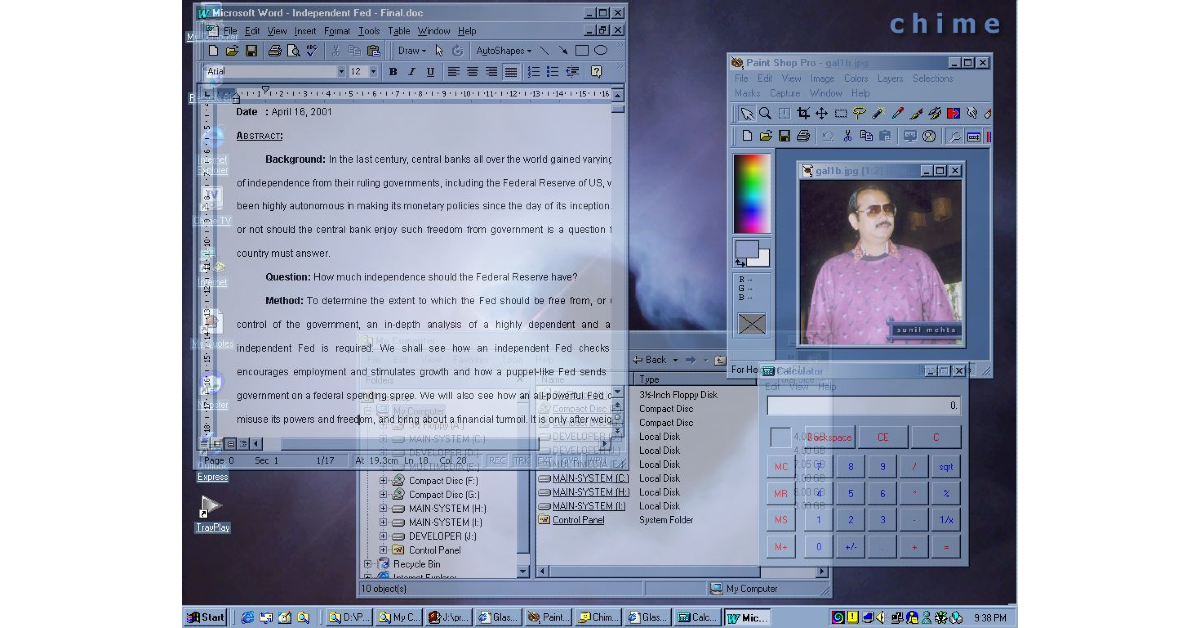
The ol’ reliable Glass2k software still remains one of the best ways to make windows transparent on your Windows 10 or 11 PC. This software has been around since the days of Windows XP but works fine on Windows 10/11 as well. After installing Glass2k on your PC, access its settings from the taskbar. Using the settings menu, you can create a keyboard shortcut to make your windows transparent. The software lets you decide the transparency level as well. You can go back to opaque windows any time by right-clicking on Glass2k’s icon in the taskbar and selecting ‘Exit’.Download Glass2k from Softpedia
Vitrite
One of the simplest tools to make windows transparent on your Windows 10/11 PC or laptop is Vitrite. You can download this tool for free from Softonic. Once installed, Vitrite lets you choose from 9 transparency levels. Press Ctrl + Shift + (any number from 1 to 9) to make a window transparent. Level 1 offers the most transparency while Level 9 is almost opaque. To remove the transparency effect, press Ctrl + Shift + 0. Vitrite also lets you pin a window on top of other windows.Download from Softonic
Peek Through
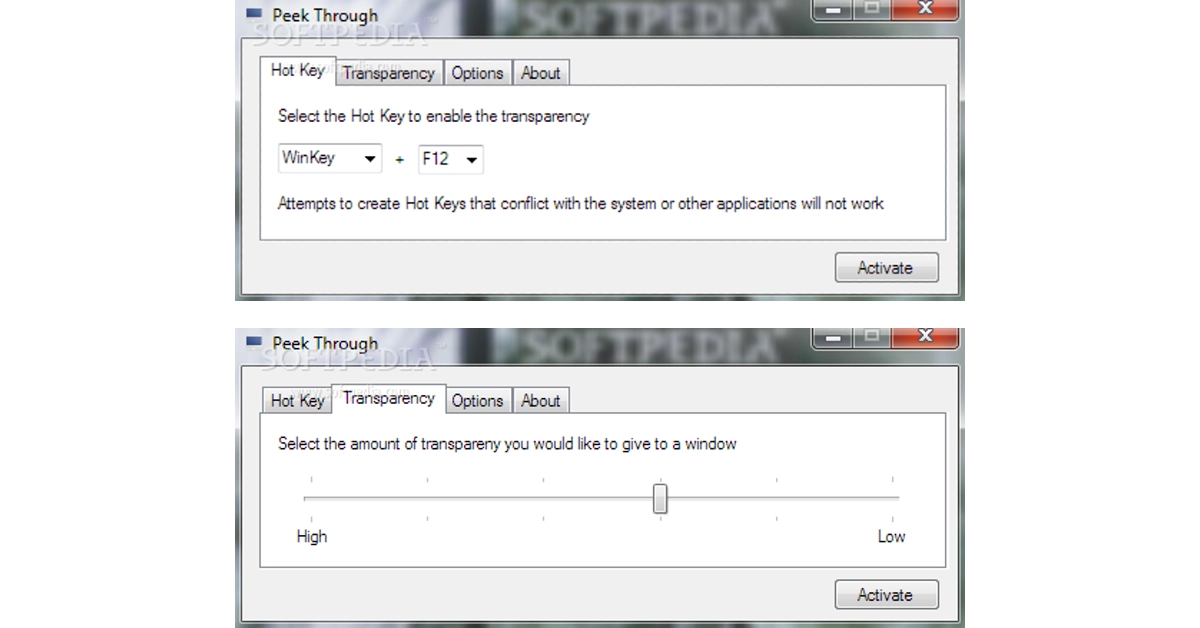
Peek Through is another great tool to make windows transparent on your Windows 10/11 PC or laptop. You can download this software for free from Softpedia. Upon launching Peek Through, the software asks you to set up a hotkey for the transparency effect. You can use this hotkey at any given time to apply the transparency effect to a window. Use the ‘Transparency’ tab to set a level for the effect. You can also set this software to run on startup.Download from Softpedia
Make the taskbar transparent using TranslucentTB
The TranslucentTB app on the Microsoft Store is an easy solution to make your taskbar see-through. When you run the app, it makes the taskbar transparent automatically. Despite its transparency, the taskbar lucidly displays all the icons and minimised apps. The great thing about this app is that it runs automatically when you start your PC. This means that you are always greeted with a transparent taskbar.
Download from Microsoft Store
Frequently Asked Questions (FAQs)
Is there a native way to make windows transparent on a Windows 10/11 PC or laptop?
There is no native way to make the windows transparent on your PC. However, you can use tools like WindowTop, Glass2k, and Peek Through for this task.
What is the transparency effect on Windows?
Windows’ transparency effect uses the primary colours of the wallpaper to create a colourful background for the start menu, taskbar, windows, and title bars.
What is the keyboard shortcut for transparent windows on WindowTop?
The default keyboard shortcut for transparent windows on WindowTop is Ctrl + Alt + O.
Can I make the taskbar transparent on my Windows PC?
There is no native way to make the taskbar transparent on your Windows PC. You can use the TranslucentTB app to carry out this task.
These are the top 5 ways to make windows transparent in a Windows 10/11 PC or laptop. If there is any other tool you like to use for this effect, let us know in the comments! The tools we have mentioned in this list are either free to use or offer a free trial version.
Boult Audio, a homegrown consumer technology brand, has a great selection of TWS earbuds. We just reviewed the new Boult Z40 Ultra earphones and were rather pleased with the audio quality considering the cost. They provide 10mm drivers with BoomX Technology, feature low-latency gaming mode with a maximum latency of 45ms, and deliver up to 32dB of active noise cancellation (ANC). They also include dual pairing capabilities and an IPX5 designation for water resistance. They are providing a lot at this price, but the important question is how well they work. After using them for more than a month, this is our review.
Boult Z40 Ultra Review: Design
The case features a dual glossy and matte appearance and is entirely composed of high-quality plastic. It features horizontally positioned LEDs that light up in green to indicate the amount of battery life left, as well as the Boult logo on the front. The Z40 Ultra has a metallic rim and a premium finish.You should have no problem putting the tiny, pebble-shaped charging case into your pocket while not in use. The earbuds’ plastic casing is resilient enough to withstand unintentional falls. The buds and case are of nice quality, however, handle them carefully as they are somewhat slippery.The Boult Z40 Ultra charging case is built without buttons. The glossy side attracts a lot of scratches. While the matte finish helps cover up any scratches. For charging the case, there is a USB-C port at the bottom. In the package, Boult includes a USB-C cable.The budget-friendly earphones have four colour options: Black, Beige, Blue, and Brown. The colour option we have for testing is black.As you can see, the earbuds are firmly planted into the respective slots on the left and right. The earbuds’ housing contains magnets that hold them in place.The earbuds are shaped like a stem and fit well in the ear canal. They come with silicone ear tips that slide right into the canal. For a snug fit, these come with an additional pair of ear tips. Furthermore, it features a dusty mauve flat touch panel for music control and playback pause. The earphones are quite light and cosy to wear for long periods. However the earbuds are not very comfortable to wear while you sleep, and if you use them for a long time, you might get pain and irritation in your ears. The device’s IPX5 classification protects it from water splashes, so you can use it anytime, even in the gym or when working out in the rain.Also Read:Samsung Galaxy S22 price dropped again, now available at this price in India
Boult Z40 Ultra Review: Performance
BoomX-enabled 10mm drivers are included with the Z40 Ultra. The snug fit provides excellent noise cancellation when conversing on the phone or enjoying music. You may personalise your audio experience using 3EQ modes- HIFI, Rock, and Bass settings. The user can adjust the volume on their mobile as there are no options for volume control on the earbuds.This one allows for the full range of frequencies to be heard without the need for further effort, unlike most others where the bass is too high and the treble, mids, and volume automatically diminish. The whole listening experience is outstanding. Moreover, the loudness is accurately adjusted, neither too high nor too low.Even though these aren’t made solely for gaming, we tested them to see if they work well for gaming. With its ultra-low 45ms latency and Combat Gaming Mode, the Z40 Ultra gives you an edge over others. There was not much audio lag when playing intensive games like Call of Duty. However, latency is not an issue with light games.By eliminating background noise during calls, Boult Z40 Ultra’s 32 dB active noise cancellation technology in the Zen Quad Mic ENC offers crystal-clear calls even in the noisiest of settings. The Z40 Ultra has a four-mic setup that makes it easy to capture the words you speak. According to Boult, AI technology is integrated into these buds. AI-driven intelligent speech processing is incorporated into the company’s Sonic Core Dynamics solution for optimal noise cancellation and low power consumption. Prism Voice PLC is another AI tool that guarantees lag-free chats, immersive game interaction, and improved call quality for smooth virtual meetings.Also Read:OnePlus 11R 5G Solar Red Variant now available in 8GB RAM with 128GB storage option Bluetooth connectivity is really good. The Boult Z40 Ultra headphones support Bluetooth 5.3 and have a wireless range of roughly 10 metres. But perform flawlessly within a 20 to 24-foot radius when there are obstructions. You may easily switch between two devices with a single swipe thanks to Dual Device Pairing’s ease.According to Boult, a single charge of the Z40 Ultra can provide up to 100 hours of playback time. To guarantee that the user can always carry the earphones while travelling, it also features a Type-C connector for fast charging. For longer use without the need for frequent recharging, the 100-hour playtime makes it perfect for everyday commuting or long journeys.
Verdict
The ANC offered at this price range is sufficient to judge Boult Z40 Ultra’s performance, and the answer is that it functions and isn’t a gimmick. However, the battery will run out faster with the ANC. They successfully filter out outside noises with 32dB Active Noise Cancellation, resulting in a rich audio experience.Packed with a stylish design, the Boult Audio Z40 Ultra Truly Wireless Earbuds offer an amazing range of features. If you’re on a tight budget and want a high-quality product in this price range, just go for it.Price:Rs 1,999
Most public networks in schools and universities use firewalls to block social media websites like Facebook and Instagram. You can bypass these filters using a VPN on your laptop or smartphone. This is an easy process, but some users may not want to download a VPN app just to access one website. In this case, users can employ proxy sites on their web browsers to unlock their desired content. Here are our picks for the top 10 free proxy sites to unblock websites on any network.Read Also:Samsung Galaxy S22 price dropped again, now available at this price in India
TurboHide
TurboHide is a reliable proxy site that lets you bypass any firewall restrictions, allowing you to visit websites that are blocked by your school, college, or organisation. On top of that, TurboHide also removes cooking, scripts, and objects, and encrypts the URL. To preserve your anonymity, this proxy website hides your IP address and browser history as well.
ProxySite
ProxySite is another great website you can use to access websites that are blocked on your network. Using this website, you can even view content which is geo-locked or withheld in your country. One of the advantages of using ProxySite is that it offers SSL encryption even if the website you are visiting doesn’t support it. ProxySite also offers a VPN service at $9.99 per month.
KProxy
KProxy has been around since 2005 and remains one of the best proxy sites for bypassing filters and browsing anonymously. It encrypts the connection between your browser and the target server to keep the data safe. You can use this website at your workplace, school, university, or any organisation that uses firewalls to limit users’ access to certain websites. KProxy is also available as an extension for Google Chrome.
Proxify
Founded in 2003, Proxify has been around for more than 20 years. You need to sign up to the website to use its services. Once logged in, you can Proxify to hide your IP address and browse websites which are geo-locked in your area. You can also use it to verify advertising campaigns, conduct competitive intelligence, and research your competitors. Once the free trial expires, you can subscribe to Proxify for Rs 10,000/month.
CroxyProxy
You can use CroxyProxy’s free services to mask your IP address and visit websites over an encrypted connection. This website specialises in offering proxy support for YouTube. Using CroxyProxy, you will not notice any considerable drop in buffering speeds. The media playback is satisfactory as well. CroxyProxy’s premium subscription is priced at just $3.50/month and it gives you access to faster servers and an ad-free experience.
VPNBook
VPNBook is a VPN service that also offers a free web proxy portal. You can choose from US, UK, or Canada proxy server locations while using the service. VPNBook overcomes any firewall on your network and gives you access to blocked websites with ease. It also offers 256-bit SSL encryption and hides your IP address while browsing the web.
Proxyium
Proxyium is one of our favourite free proxy sites to unblock content on the Internet. Its simple layout is incredibly easy to use and its fast proxy servers ensure that you don’t see a drop in performance or speed. To access a blocked website using Proxyium, simply enter its URL in the address bar and hit Go. You can choose a proxy server based on the speed using the drop-down menu next to the address bar.
PlainProxies
PlainProxies is another easy-to-use proxy site for unfettered web access. You don’t need to create an account to create this service. Simply enter the URL in the address box and hit ‘Browse’. PlainProxies also offers an effective data-scraping tool with its premium subscription priced at €99/month. As a part of this subscription, you get 1 month of proxies, 250 concurrent connections, 1TB bandwidth, and access to over 100 locations.
4everproxy
4everproxy has dedicated proxy servers for web browsing and video streaming. All connections made using 4everproxy are secured by TSL. This service hides your IP address while browsing the web and deletes the proxy sessions 2 hours after closing the browser. You can also choose to connect to a website using multiple proxy servers. Its premium subscription (priced at $9.95/month) lets you access all server locations, increases the available bandwidth, clears your logs, and more.
DontFilter
DontFilter has a no-nonsense that gets the job done with ease. There are no distractions on the website. All you need to do is enter the URL in the address box and hit Go. Clicking on ‘options’ lets you select whether you want to encrypt the page, allow cookies, remove scripts, and more. DontFilter works for most websites that are blocked by your school or workplace. You can also use it to watch YouTube videos that are not available for your location.Read Also:Xiaomi Handheld Garment Steamer to launch in India on April 23
Conclusion
These are the top 10 free proxy sites that you can use to unlock websites that are blocked in your school, university, workplace, or country. When you are connected to a proxy server, a drop in speed is expected. If you don’t want it to affect video buffering, connect to specialised proxy servers for YouTube.
The Samsung Galaxy S22 is now nearly 50% less expensive on Flipkart.
Flipkart is providing additional bank discounts on the smartphone.
Samsung Galaxy S22 was launched in India last year.
Samsung has revised the price of Galaxy S22 in India again. The device is now less expensive than the Galaxy S23 FE after receiving a massive discount on Flipkart. Since its introduction in the year 2022, the phone has seen several price reductions. The last price drop it received was in December 2023 during a sale. The online store is providing fantastic discounts on smartphone purchases.The Samsung Galaxy S22 is currently available on Flipkart for the lowest price ever— Rs 36,999 for the 8GB RAM with 128GB storage—after receiving a massive reduction. When the Samsung Galaxy S22 was first introduced, it cost Rs 72,999.Also Read:OnePlus 11R 5G Solar Red Variant now available in 8GB RAM with 128GB storage option
Samsung Galaxy S22 specifications
The Samsung Galaxy S22 comes with a 6.1-inch full-HD+ Dynamic AMOLED 2X display with an adaptive refresh rate 120Hz refresh rate that can be lowered to 10Hz. The display has been protected with Gorilla Glass Victus+ and an Armor Aluminium chassis. The smartphone runs on Android 12 and One UI 4.1. Under its hood, there is an octa-core Snapdragon 8 Gen 1 SoC and 8GB of RAM, with up to 256GB of internal storage.Also Read:Xiaomi Handheld Garment Steamer to launch in India on April 23The Galaxy S22 is highlighted with a triple rear camera system for optics. The camera module is equipped with a 50MP main dual-pixel wide-angle sensor, an f/1.8 aperture, and autofocus. There is also a 12MP ultra-wide-angle camera with an f/2.2 aperture and a 120-degree field of view, as well as a 10MP telephoto lens with an f/2.4 aperture (3x optical zoom and OIS). There is also a 10MP selfie camera with an f/2.2 aperture (80 degrees of FoV).The Galaxy S22 packs a 3,700mAh, and it supports 25W fast charging, 15W wireless charging, and Wireless PowerShare for reverse wireless charging.
Garena Free Fire is a battle royale game with regular awards and tournaments to keep players interested. If you play Garena Free Fire, you should be aware of the redeem codes that are released on a daily basis. However, because the battle royale game is banned in India, players from other countries can use the Free Fire Redeem codes daily. If you’re unfamiliar with the Garena Free Fire redeem codes or don’t know how to get them, we’ve put together a step-by-step guide to help you redeem them. Check out Garena Free Fire Redeem Codes for 22 April 2024.The Free Fire redeem codes are a great way to get free stuff. These are 12-digit codes that contain alphabets and numbers, as well as an expiration date and time. Because the Garena FF redeem codes cannot be used more than once, you should hurry to the redemption page to claim your free reward before someone else does. To get a free reward, all you have to do is go to reward.ff.garena.com/en, which is the official redemption page. Also, keep an eye on this space for daily updates on Garena Free Fire redemption codes and rewards.Also Read: Sennheiser Accentum Plus wireless headphones with Hybrid Adaptive Noise Cancellation launched
As we all know, messages have become one of the most common ways to communicate and store important information. However, sometimes, we accidentally delete important messages that we still wish we had access to. Don’t worry because there is good news for such users with similar issues. If you have deleted a text message on your Android device, it can be recovered with the right tool.
In this guide, we will discuss how to recover deleted messages on Android without a backup. Ensure that you read this guide to the end to recover your deleted messages on your Android device.
Are Deleted Text Messages Gone Forever?
Android Phones, such as Samsung Galaxy, offer a space where recently deleted messages are stored for 30 days before they are permanently deleted from the device. This space is known as the Recycle Bin or Trash Folder. If you have recently deleted messages and want to retrieve them, you can easily recover them from the Recycle Bin.
However, if your message is permanently deleted, then it’s hard to recover them, especially when you don’t have any backup to recover lost data. So how do I retrieve deleted messages on Android if permanently deleted? The answer is simple: by using a third-party recovery tool. In the below section, we have introduced one of the data recovery tools available online.
How to Recover Deleted Messages on Android without Backup?
Looking for a reliable Android Recovery Program? Then look no further because we have just the right tool for you. iToolab RecoverGo Android – Android Data Recovery is one of the best tools to recover permanently deleted messages from Android devices. The best part of this tool is that no matter what kind of data you have lost from your Android device it can easily find data and restore it, such as lost or deleted photos, messages, contacts, videos, call logs and more. It also allows you to restore WhatsApp/WhatsApp Business messages without backup.
Further, this tool also allows you to download and restore Backups from Google Drive. RecoverGo Android offers an easy-to-use interface, which is best for non-tech and beginner users. It is compatible with over 6,000+ Android phones and tablets, including the latest version.
Key Features:
Offers a fast scan and recovers lost data from Android devices directly. No backup is required.
Allows you to download and restore backup from Google Drive.
Offers a high success rate of up to 90%
Easy-to-use interface, which is easy to navigate and operate
Here is how to use iToolab RecoverGo Android to recover permanently deleted messages from Android devices:
Install and launch RecoverGo Android on your PC and connect your Android device to your computer via a USB cable. Once your Android device is successfully connected, select the Recover Deleted Data from the Device option.
Follow the below image instructions to put your Android device into USB debugging Mode.
After that, all the supported file types will appear on your screen. Select the files and click on the Scan button to start scanning.
The scanning process will take time to finish. We recommend leaving your phone unlocked until it is complete.
Once the process is complete, you will see the amount of data that this tool recovers from your device.
Now, choose the messages option and select the messages you want to recover. Click on the Recover button.
Other Frequently Asked Questions about Deleted Text Messages on Android
If you have more questions about deleted text messages on Android, the following questions will clear all your doubts.
1. How to Retrieve Deleted Text Messages on Android from Recycle Bin?
As we have mentioned above, Samsung Galaxy Phones offer a space where recently deleted messages are stored for 30 days. After 30 days the message is permanently deleted from the Recycle Bin. Here is how to retrieve deleted text messages from Recycle Bin on Android:
Launch the Message App on your Phone.
Tap the three-dot menu available in the upper right corner.
Select and open Recycle Bin.
All the deleted messages will appear on your screen.
Select the deleted messages that you want to restore on your Android device.
Once selected, choose the restore button available at the bottom.
Navigate back to your Inbox and check if the restored message is available in your inbox.
2. How to Find Deleted Messages on Android from Google Drive Backup?
Google Drive is a cloud storage service integrated with the Android system. It allows you to easily back up your messages, App data, contacts, and call history. To find the deleted messages on Android from Google Drive Backup, follow the below instructions:
Launch the Message App on your Android device.
Tap on the three-dot menu available in the upper right corner.
Select the Archived option.
Choose the messages you want to recover
Now tap on the up arrow icon available at the top.
If your Google Drive backup is activated, you will find all deleted messages. If your backup is inactive, you must rely on a third-party data recovery app.
Conclusion
In this guide we have mentioned the steps on how to check deleted text messages on Android. Text messages are an essential part of our lives; these text messages store important information about our personal or professional lives. However, accidents do happen; if you have accidentally deleted an important message from your Android device, then don’t worry. After reading this guide, you will learn how to retrieve it.
Apart from that, we have introduced a tool named iToolab RecoverGo Android. This tool allows users to easily recover different types of data, such as messages, contacts, videos and more. The best part of this tool is that it doesn’t require a backup to restore messages.
Garena Free Fire is a battle royale game with regular awards and tournaments to keep players interested. If you play Garena Free Fire, you should be aware of the redeem codes that are released on a daily basis. However, because the battle royale game is banned in India, players from other countries can use the Free Fire Redeem codes daily. If you’re unfamiliar with the Garena Free Fire redeem codes or don’t know how to get them, we’ve put together a step-by-step guide to help you redeem them. Check out Garena Free Fire Redeem Codes for 21 April 2024.The Free Fire redeem codes are a great way to get free stuff. These are 12-digit codes that contain alphabets and numbers, as well as an expiration date and time. Because the Garena FF redeem codes cannot be used more than once, you should hurry to the redemption page to claim your free reward before someone else does. To get a free reward, all you have to do is go to reward.ff.garena.com/en, which is the official redemption page. Also, keep an eye on this space for daily updates on Garena Free Fire redemption codes and rewards.Also Read: Sennheiser Accentum Plus wireless headphones with Hybrid Adaptive Noise Cancellation launched
At its Xiaomi Smarter Living 2024 event, the company will present a handheld garment steamer in India.
The device was launched in China this month.
The dedicated landing page has revealed the design and key specs of the upcoming steamer.
Xiaomi has officially confirmed that on April 23 the company will introduce its handheld garment steamer in India. On the day the firm will be hosting the Xiaomi Smarter Living 2024 event where it will also be introducing some more home appliances including personal technology products. The steamer is made for quickly and simply getting rid of wrinkles. The steamer is ideal for both hanging and flat ironing.Xiaomi has started to tease its handheld garment steamer that will make its debut on April 23 alongside Robot Vacuum Cleaner S10. Alongside these products, the company has also confirmed to release Redmi Pad SE and Buds 5A.The landing page verifies the key specs of the Xiaomi handheld garment steamer. It has a simple design with a monochromatic colour scheme. The clothes steamer can be used both vertically and horizontally and is suitable for all types of fabrics. It is said to have a maximum steam rate of 24g/min. It provides a steam power burst of up to 1300W.Also Read:OnePlus 11R 5G Solar Red Variant now available in 8GB RAM with 128GB storage optionNote that the device was launched in China earlier this month. The steamer comes with a 2000W power output. It has a 300kPa pump pressure and can continuously produce 36g of steam per minute at 130°C. With a high temperature, it can successfully get rid of 99.99% of bacteria and mites from clothing while also removing wrinkles. Additionally, it has two free-switching steam modes that may be switched between 22 g/min and 36 g/min, depending on the kind of clothing.Also Read:Nothing Phone 2 Gets NothingOS 2.5.5 Update, Brings ChatGPT Integration, and MoreThe Xiaomi garment steamer has a 2.3L huge water tank allowing it to steam continuously for up to 60 minutes.The Xiaomi Garment Steamer was introduced in China at 299 yuan which translates to Rs 3,515.
More variants of the OnePlus 11R will now be available in a new Solar Red colour option. For those who are unaware the device was launched last year and this colourway was only limited to the top-of-the-line model but the company is making it more accessible for the buyers as it will be available in the base variant as well. Nevertheless, its cost exceeds that of the current colour options.The OnePlus 11R 5G Solar Red colour variation will be available in a base 8GB RAM with 128GB storage priced at Rs 35,999 which is 3,000 higher than the existing options. The phone was introduced last year in Galatic Silver and Sonic Black versions in addition to the new Solar Red colour. At present, their cost is Rs 32,999. 18GB RAM with 512GB storage combination was the only one with this Solar Red colour option.
OnePlus 11R specifications
The OnePlus 11R’s 6.74-inch Full-HD+ curved AMOLED display has a 2772 x 1240 pixel resolution. The dynamic adaptive refresh rate of the screen goes from 40Hz to 120Hz. It also has 450 ppi and a 1,450-nit maximum brightness. The display’s touch response rate can reach 1000Hz. The OnePlus 11R is powered by the Snapdragon 8+ Gen 1 5G CPU, up to 16GB of RAM, and up to 256GB of internal storage.Also Read: Nothing Phone 2 Gets NothingOS 2.5.5 Update, Brings ChatGPT Integration, and MoreThe OnePlus 11R has a triple rear camera setup that includes a 50MP Sony IMX890 primary sensor. Together with another 4 cm macro camera with a 120-degree ultra-wide lens and an 8 Megapixel ultra wide-angle sensor. The device lacks optical zooming capabilities but has a 10x digital zoom. The OnePlus 11R’s rear camera is shake-free and supports both electronic and optical image stabilisation, allowing it to record videos in 4K quality at 30 frames per second. The 16MP front camera is located in a notch at the top of the display.The device has 5G, 4G, Wi-Fi, Bluetooth 5.3, NFC, GPS, and other connectivity options. The OnePlus 11R’s 5,000mAh battery supports 100W SUPERVOOC flash fast charging.
The ChatGPT integration to Nothing Phone is part of the NothingOS 2.5.5 upgrade.
The Phone 2’s home screen now has additional ChatGPT widgets and the AI app needs to be upgraded from the Play Store.
The camera app now has an HDR switch for the Photo and Portrait Modes.
Recently launched Nothing Ear and Nothing Ear A have ChatGPT integration. The company has not expanded the AI feature to last year’s Nothing Phone 2. The ChatGPT integration comes with the latest NothingOS 2.5.5 Update that also brings other enhancements like UltraXDR along with bug fixes.Nothing has pushed out its latest software update-NothingOS 2.5.5 for the Nothing Phone 2, the firm announced in a community post. This release includes bug fixes and other enhancements along with ChatGPT integration.This release includes bug fixes and other enhancements along with ChatGPT integration. Users must install the most recent version of ChatGPT from the Play Store. The latest update has enabled the Nothing X app with a new gesture control to initiate audio chats with ChatGPT for Nothing Ear and Nothing Ear A.It is stated that additional Nothing audio devices will soon have this feature. “Coming soon to our other audio products.”Additionally, NothingOS 2.5.5 has included new ChatGPT widgets that allow users to quickly access ChatGPT in various settings right from their home screen. Besides that, a button to paste the content directly into a new ChatGPT conversation appears on the screenshot and clipboard.Also Read:Samsung Galaxy F15 5G new 8GB RAM with 128GB storage launched in IndiaNothing has also revealed that with the new software upgrade, the Camera now supports Ultra XDR. To set, head to Camera settings > Ultra XDR. Additionally, the camera app’s Photo and Portrait Modes now have an HDR switch that can be turned on or off using the settings at the top. NothingOS 2.5.5 also gets you a RAM Booster feature. This can be set by going to Settings > System > RAM Booster. Recorder widget for effortless audio recording on the go. The Ring Mode option in Quick Settings for easier sound management has also been added.In addition, the company has unveiled a new Battery widget to more effectively track power consumption. Glyph Interface Debug Mode has been added to the developer options.Also Read:Nothing Unveils Ear and Ear (a) Earbuds With Cutting-Edge ChatGPT IntegrationsApart from camera improvements and other system updates NothingOS also brings more improvements and bug fixes. The company has improved system stability, NFC functionality, and Wi-Fi connection stability. Animations have been improved for more seamless widgets and app launches, enhanced responsiveness while using Quick Settings for Bluetooth setup and optimised volume settings to make interactions more intuitive. The clarity of the album cover display in the Music Player widget has also been enhanced.Nothing has fixed issues when switching SIM cards with the Data during call feature enabled. Resolved flickering when launching apps from Quick Settings on the lock screen. Other issues like flickering issues on the AOD interface, the disappearance of lock screen widgets after ending screen share in certain scenarios, abnormal lock screen wallpaper display when swiping-to-unlock is interrupted, widget display issue which showed Bluetooth as being off when a watch was connected, frequent refreshing and flickering when setting Wi-Fi in the Quick Settings widget have all been fixed.
Garena Free Fire is a battle royale game with regular awards and tournaments to keep players interested. If you play Garena Free Fire, you should be aware of the redeem codes that are released on a daily basis. However, because the battle royale game is banned in India, players from other countries can use the Free Fire Redeem codes daily. If you’re unfamiliar with the Garena Free Fire redeem codes or don’t know how to get them, we’ve put together a step-by-step guide to help you redeem them. Check out Garena Free Fire Redeem Codes for 20 April 2024.The Free Fire redeem codes are a great way to get free stuff. These are 12-digit codes that contain alphabets and numbers, as well as an expiration date and time. Because the Garena FF redeem codes cannot be used more than once, you should hurry to the redemption page to claim your free reward before someone else does. To get a free reward, all you have to do is go to reward.ff.garena.com/en, which is the official redemption page. Also, keep an eye on this space for daily updates on Garena Free Fire redemption codes and rewards.Also Read: Sennheiser Accentum Plus wireless headphones with Hybrid Adaptive Noise Cancellation launched
Samsung Galaxy F15 5G now comes in a new 8GB RAM with 128GB storage option. The company today introduced the new variant which will be available alongside previously available models. The device was launched in India last month in two different configurations. The phone features a 6.5-inch AMOLED display. It runs on Android 14 with One UI 5 out of the box. The device boasts a massive 6,000mAh battery.
Samsung Galaxy F15 5G new varaint pricing and sale details
Samsung Galaxy F15 5G will be available in a new 8GB RAM with 128GB storage priced at Rs 15,999. The device also comes in two more varaint 4GB RAM with 128GB storage and 6GB RAM with 128GB storage priced at Rs 12,999 and Rs 14,999 respectively. It comes in Ash Black, Groovy Violet, and Jazzy Green colours.Galaxy F15 5G may be purchased for an effective price of Rs 11,999, Rs 13,499, and Rs 14,999 with bank discounts or an upgrade bonus worth Rs 1,000. The new varaint along with the other two options can now be purchased via the company’s official website and Flipkart in the country.Also Read:WhatsApp introduced new chat filters to keep chats organised
Samsung Galaxy F15 5G specifications
The Galaxy F15 5G has a full-HD+ Super AMOLED display of 6.5 inches. The refresh rate on the screen is 90 Hz. The triple rear camera setup of the Samsung Galaxy F15 5G has a 50-megapixel primary sensor, a 5-megapixel secondary sensor, and a 2-megapixel lens. There is a 13-megapixel front-facing camera for selfies.Also Read:Vivo V30e to launch in India on May 2: Specs revealedIt comes with One UI 5.0, which is based on Android 14. The phone is supposed to receive five years of security updates in addition to four years of OS upgrades. A MediaTek Dimensity 6100+ octa-core SoC with up to 8GB of RAM and 128GB of internal storage powers it.The 6,000mAh battery powering the Galaxy F15 5G supports 25W wired fast charging.
Earlier last month Vivo introduced the Vivo V30 series in India that includes Vivo V30 and V30 Pro. The company is now planning to expand the family with the addition of a new smartphone- Vivo V30e. Vivo today announced the launch date of the upcoming phone. In addition to this, it also revealed the design of the smartphone along with the key features and colour choices. Keep on reading to know more about the upcoming device.The Vivo V30e will soon be available in India. The India launch date is set for May 2 at noon. The handset’s design had been hinted at by the firm earlier. Vivo has now unveiled the phone’s essential features, colour choices, and overall design. The upcoming phone will be available alongside the Vivo V30 and V30 Pro models in the Vivo portfolio.Also read:WhatsApp introduced new chat filters to keep chats organisedThe smartphone’s key details are now displayed on the Vivo India microsite. The company has revealed that the smartphone will come in two colourways- Velvet Red and Silk Blue. The device has a dual pattern design with a vertically oriented patterned stripe extending down the right side of the rear panel. On the right side of the phone are the volume rockers and a power button. With a 5,500mAh battery, the phone is also said to be the slimmest in its class. The phone is 7.69 mm thick.A sizable round camera module is seen in the upper left corner of the phone’s rear. It houses an Aura Light unit in addition to two camera sensors. The camera unit includes a 50-megapixel Sony IMX882 portrait sensor with a 50mm prime focal length and 2x optical zoom.It has thin bezels and a 50-megapixel AI-backed front camera hole-punch with autofocus in the middle of the top.Also Read:Amazon Music introduced Maestro, a new playlist generator powered by AI
Vivo V30, Vivo V30 Pro specification
The 6.78-inch curved 1.5K AMOLED screens on the Vivo V30 and Vivo V30 Pro have a refresh rate of 120Hz. The MediaTek Dimensity 8200 chipset powers the Pro variant, while the Snapdragon 7 Gen 3 SoC powers the standard model. FunTouchOS 14, an Android 14-based OS, is also pre-installed on the phones. Vivo has included 5,000mAh batteries with support for 80W wired fast charging via USB Type-C connections in the Vivo V30 and Vivo V30 Pro models.The Vivo V30 has two 50-megapixel sensors: one with an ultra-wide-angle lens and support for optical image stabilisation (OIS), and the other with an Aura Light flash unit. The Vivo V30 Pro also includes a 50-megapixel portrait camera. The 50-megapixel selfie camera is featured on both variants.
Knowing how to access your WiFi router’s settings is integral to customising the network according to your needs. If want to change the WiFi password, block certain devices from a network, set up parental guidelines, check the internet speed, or troubleshoot the device logging into the router’s management portal is the first thing you should do. So, let’s look at the top 3 ways to connect to your home router as an administrator.Read Also:Top 2 Ways to clear Outlook cache in Windows 10 or 11 (2024)
Before you begin
While logging into the router management portal, you need to know the username and password of your device. If you are logging into the portal for the first time, use the default credentials. Take a look at your router and go through the information on its stickers to find the login credentials.If you can’t find the login information on the router, try a combination of the most popular usernames and passwords. These include admin/password, admin/admin, sysadmin/password, etc. For a more detailed list of default usernames and passwords, download the All Router Admin app.Once you have gained access to the router’s management portal, you can change the network password, set up a device limit, impose parental controls, view router history, and do a whole lot of other tasks.
Connect to your home router as an administrator using its IP address
The simplest way to access your home router’s firmware is by logging into its web portal using its IP address. To find the IP address of your router, go to Command Prompt and type ‘ipconfig’. The IP address will appear in the ‘IPv6 Address’ field. Copy this address and paste it into your web browser’s address box to access the login portal. If you can’t find the IP address, simply paste 192.168.1.1, since this works for most routers.If you are logging into the router’s portal for the first time, enter ‘admin’ as the username or ‘password’ or ‘admin’ as the password. If you changed your login credentials in the past, use them to log in and access the router’s firmware.
Access the login gateway on your smartphone
Step 1: Go to Settings and select Connections.Step 2: Tap on WiFi.Step 3: Tap the gear icon next to the connected network.Step 4: Select Manage Router.Step 5: This will lead you to the router’s management portal. Log in using the appropriate credentials.
Use your router’s official mobile app
Most modern routers have a dedicated companion app. OEMs like Netgear, TP-Link, and Linksys allow users to remotely access the admin functions of their routers using the companion apps. Once you have logged into the app using the proper credentials, you can view the devices connected to your network, change the network password, and set up different connection bands. You can also check your internet’s speed, set up parental controls, and share the WiFi connection with guests.
Use a third-party app
If your home router does not have a companion app, use a third-party app like All Router Admin. This app has a large database of home routers and their default usernames and passwords. Go through the list to find your router model and copy its credentials. Hit the blue router icon in the app to access the login portal and paste the credentials in their relevant fields.
Frequently Asked Questions (FAQs)
How do I connect to my home router as an administrator?
Enter 192.168.1.1 (or your router’s IP address) in your web browser and hit Enter. Provide the login credentials and hit Enter again. You will be redirected to the admin page of your router.
How do I change my home router’s password?
Log into the router’s web portal, go to WiFi Setup>WiFi Settings and enter the new password in the ‘Pre-shared Key’ field.
What is my router’s username and password?
By default, your router’s username and password are set to ‘admin’ and ‘password’/’admin’. You can use the All Router Admin app to find the login credentials of your router’s model.Read Also:Best 3 Ways to Compare Two Folders in Windows 10 or 11? (2024)
Conclusion
These are the top 3 ways to connect to your home router as an administrator. If you know any other way to access the router’s firmware, let us know in the comments. While you’re here, read this article to learn how you can check your WiFi router’s history on your Android smartphone.
Dubai-based smart wearable brand Endefo has announced the new True Wireless Earbuds (TWS) series in India. The TWS series includes three models Enbuds Aero, Enbuds Opel and Enbuds Active Pro. In addition to the audio devices, the company has also introduced a Wireless Pro 10 wireless power bank. The new product line of Enbuds comes with advanced functionalities such as AI ENC MIC and Smart Touch Control. The TWS earbuds also include IPX5 water resistance and Bluetooth connectivity.
Pricing and availability
The price of the Endefo Enbuds series in India starts at Rs 3,999 and goes up to Rs 4499. The audio device will be available for purchase via almost 2,000 retail locations in India, including Sangeetha Mobiles, Supreme Paradise, Lot Mobile, Nandilath Digital, Ideal Home Appliances, Easy Store, Gulf Own Digital, Image Mobiles, and Computers, as well as Endefo’s website.
Endefo Enbuds Aero: Rs 4,499
Enbuds Opel: Rs 3,999
Enbuds Active Pro: Rs 1,999
Wireless Powerbank Pro: Rs 3,999
Endefo Enbuds Aero
Endefo Enbuds AeroEndefo Enbuds Aero features 13mm speakers for rich sound. It comes with AI ENC microphones for crystal-clear calls and Smart Touch Control for simple navigation. It guarantees a smooth connection with Bluetooth 5.3 and the BT5616 chipset. The device has IPX5 water resistance and compatibility with Siri and Google Assistant. With 280mAh battery life and 35mAh buds, the earphones are claimed to provide up to 120 hours of standby and 30 hours of music playback.
Endefo Enbuds Opel
Endefo Enbuds OpelEnbuds Opel offers an AB5656C processor and Bluetooth version 5.3. With a 400mAh charging case and a 40mAh battery in each bud, users may enjoy longer usage periods of up to 120 hours on standby, 45 hours of music playback, and 6–8 hours of call time. In addition to the 13mm driver, the earphones have AI Environmental Noise Cancellation (ENC) that improves audio clarity. These are compatible with Android and iOS devices. It also provides support for voice assistants like Siri and Google Assistant. There is Smart Touch Control and a Hall sensor feature offering intuitive navigation and usability.Also Read:Amazon Music introduced Maestro, a new playlist generator powered by AI
Endefo Enbuds Active Pro
Endefo Enbuds Active ProEnbuds Active Pro is powered by a BT5616 processor and Bluetooth version 5.0. It comes with a 12mm driver and Omni Directional Mic. Users may enjoy up to 120 hours of standby time and 25 hours of audio playback with 30mAh buds and a 230mAh case. Smart Touch Control for simple navigation and Google Assistant and Siri compatibility are also available on the device. IPX5 water resistance, these earbuds are ideal for outdoor activities.Also Read:WhatsApp introduced new chat filters to keep chats organised
Endefo Wireless Powerbank Pro 10
The Wireless Powerbank Pro 10 is a portable, multipurpose power bank for on-the-go charging equipped with 10000mAh capacity and dual Type-C wired and wireless charging functionality. It can provide quick 20W PD wired and 15W wireless charging. Its multi-layered chipset protection, defences against short circuits, overvoltage, overcurrent, and over-discharge.
If you ever come across a weird glitch or error in Outlook, one of the first things you should do to resolve it is clear the app’s cache. On an Android phone, this is a very easy task that doesn’t take more than a few seconds. However, the same cannot be said about a Windows PC. Users often struggle to find the ‘clear cache’ option on their Windows devices. So, without further ado, let’s take a look at the top 4 ways to clear Outlook’s cache on a Windows 10 or 11 PC or laptop.Read Also:Best 3 Ways to Compare Two Folders in Windows 10 or 11? (2024)
What does clearing Outlook’s cache do?
If you’re worried that clearing Outlook’s cache will delete the app’s data and remove all your emails and contacts, you can rest easy. Clearing the cached memory does not interfere with the app’s data. All your emails and contacts will remain intact.A cache is a temporary memory that stores the files which are accessed the most by an app. For example, Outlook may store prompt suggestions, search history, and other commonly used files. It is not uncommon for these files to get corrupted and lead to weird malfunctions within the app. Sometimes, the cache becomes very large and causes the app to slow down instead of speeding it up. In these cases, deleting the files in the cache becomes necessary.If deleting the cache files resolves the issues you are facing with Outlook, you can try repairing the app. Go to Settings>Apps, hit the ellipses next to Outlook and select Advanced Options. Scroll down and select Repair. You can also try logging out and logging back in to get rid of any temporary account-related issues.
Clear Outlook’s cache in Windows 10 or 11
Step 1: Press Windows Key + R to launch the Run box.Step 2: Paste the following command and hit Enter:
%localappdata%\Microsoft\Outlook\RoamCache
Step 3: In the folder that appears on the screen, select all the files and delete them.Microsoft Outlook’s cache will be cleared.
Clear Auto-Complete Cache in Outlook (classic)
Step 1: Launch Outlook (classic) on your Windows PC or laptop.Step 2: In the File tab, click on Options.Step 3: Switch to the Mail tab.Step 4: Deselect ‘Use Auto-Complete List to suggest names while typing in the To, Cc, and Bcc lines’. Click on Empty Auto-Complete List as well.Step 5: Hit OK.
Clear Outlook (classic)’s cache from Account Settings
Step 1:Launch the Outlook (classic) app on your Windows PC.
Step 2: Go to File and select Account Settings.
Step 3: Click on Account Settings in the drop-down menu.
Step 4: Go to the Data Files tab and select your account.
Step 5: Click on Open File Location.
Step 6: Open the RoamCache folder.
Step 7: Close Outlook and delete all the files in the RoamCache folder.
Clear Outlook (new)’s cache
Step 1: Press Windows + R to launch the Run box.
Step 2: Type the following command and hit Enter:
olk.exe –devtools
Step 3: Go to the Applications tab in the DevTools window.
Step 4: Expand the Local Storage category from the sidebar and select Outlook.
Step 5: Hit Clear.
Step 6: Expand the Cookies category from the sidebar and select Outlook. Hit Clear.
Bonus Tip: Reset Outlook’s data
Step 1: Go to Settings and select Apps from the sidebar.
Step 2: Click on Installed apps.
Step 3: Hit the ellipses next to Outlook.
Step 4: Go to Advanced options.
Step 5: Scroll down and hit Reset.
Frequently Asked Questions (FAQs)
How do I clear Outlook’s cache on my Windows PC?
Press Windows Key + R, enter %localappdata%\Microsoft\Outlook\RoamCache, and delete all the files in the folder that appears on the screen.
How do I delete Outlook’s Auto-Complete cache?
Launch Outlook, go to File>Options>Mail, and deselect the ‘Use Auto-Complete List to suggest names while typing in the To, Cc, and Bcc lines’ option.
How do I clear Outlook’s app data?
Go to Settings>Apps>Installed apps, hit the ellipses next to Outlook and select Advanced Options. Hit Reset to clear its data.
How do I clear Outlook (new)’s cache?
Press Windows + R and enter olk.exe –devtools in the Run box. Go to Applications>Local Storage, select Outlook, and hit ‘Clear’.
How do I clear Outlook’s cache from account settings?
These are the top 4 ways to clear Outlook’s cache on a Windows 10 or 11 PC or laptop. Once the cache has been cleared, Outlook will rebuild it for faster functioning. It is recommended that you delete the cache every couple of weeks to make sure corrupted files do not cause weird glitches in the app. Check out this article to learn how to clear Steam’s download cache.
Keeping your PC organised can be a gargantuan task if you deal with a large volume of files on a regular basis. While this isn’t a big deal, it can throw a wrench in things while you’re trying to back up your data. While creating a backup, it is important to note that you don’t copy duplicate files. An unorganised drive often contains several duplicates. In this situation, you can quickly compare the contents of two folders before adding them to your backup. Today, we bring you the top 3 ways to compare two folders in your Windows 10 or 11 PC or laptop. Read Also:New Google Maps and Search updates coming for sustainable travel
Which method should you use?
There are three ways you can go about comparing two folders on your PC or laptop. Each method has its own advantages.Using Properties: This is the easiest way to compare two folders, but it does not give a lot of details about them. You will also need to manually scan the attributes you are looking for. Using this method, you can compare the date of creation, size, contents, and location of the two folders.Using Command Prompt: This method gives you a list of files that are unique in each folder. If a file is present in both folders, you can sort them by date of creation using this method.Using WinMerge: Perhaps the most thorough way of comparing any two (or three) folders, WinMerge highlights the unique files in the two folders and lists their date of creation. Results that are highlighted in grey are present in only one of the two folders. The identical files are left unhighlighted.
Compare two folders in Windows 10/11 using Properties
The easiest way to compare two folders in Windows 10/11 is by viewing their properties. Right-click a folder and select ‘Properties’ from the menu. Now, go to the location of the second folder, right-click on it, and select ‘Properties’ again. Place the two boxes side by side to compare the attributes of the two folders.
Use Command Prompt to compare two folders in Windows 10/11
Step 1: Right-click on the first folder and select Copy as path.Step 2: Launch Notepad and paste the path.Step 3: Right-click on the second folder and select Copy as path.Step 4:Paste the path in Notepad.Step 5: Launch Command Prompt as administrator and type robocopy. Hit Enter.Step 6: Paste the two folder paths separated by a space and followed by /L /NJH /NJS /NP /NS. Hit Enter.
Use WinMerge to compare two folders in Windows 10/11
WinMerge is a great third-party open-source tool to compare two folders on your Windows PC or laptop. As the name suggests, WinMerge lets you merge the contents of two discrete folders. You can also use this tool to compare up to three folders. Here’s how.Step 1: Download and install WinMerge from its official website.Step 2: Click on File and select Open.Step 3: In the ‘1st file or folder’ field, click on Browse and select the folder you wish to compare.Step 4: Repeat Step 3 for the second and third folders as well.Step 5: Click the check box for Read-only under every folder.Step 6: Type *.* in the Folder: Filter field.Step 7: Hit Compare.
Frequently Asked Questions (FAQs)
How do I compare two folders in Windows 10/11?
Launch WinMerge on your PC, go to File>Open, enter the locations of the two folders in their respective fields, select ‘Read-only’, and hit ‘Compare’.
How do I compare two folders using Command Prompt?
Copy the paths of the two folders and paste them into Notepad. Launch Command Prompt and enter ‘robocopy’. Paste the two file paths in Command Prompt, and add /L /NJH /NJS /NP /NS next to them. Hit enter to compare the folders.Read Also:Acer Launches AI-Powered Predator Helios Gaming Laptops In India
Conclusion
These are the top 3 ways to compare any three folders on Windows 10 or 11. If you know any other way to carry out this task, let us know in the comments! While you’re here, read this article to learn all the different ways to take a screenshot on your Windows 11 PC or laptop.
Equipped with 14th-gen Intel Core HX processors and NVIDIA GeForce RTX 4080 graphics for top-tier performance.
Features AI-driven enhancements like noise reduction and Purified View for an immersive gaming and communication experience.
Stylish design with customizable RGB lighting and advanced security features for both aesthetics and protection.
Acer has unveiled its latest innovations, the Predator Helios 16 and Predator Helios Neo gaming laptops, marking the company’s first foray into AI-enabled gaming technology. Starting at ₹149,999, these laptops blend cutting-edge hardware with advanced AI functionalities to cater to both gamers and professionals.
Unmatched Performance and Innovation
The Predator Helios series is powered by the 14th-generation Intel Core HX processors and features up to NVIDIA GeForce RTX 4080 graphics cards. This combination delivers exceptional computational power and graphics performance, making these laptops ideal for demanding gaming and creative tasks.
Read Also:Acer Predator Helios 16 gaming laptop with up to 13th Gen Intel
Enhanced Gaming Experience with AI Technology
A standout feature of the new Predator series is its AI integration, which enhances the gaming experience with several innovative functionalities:
AI-Assisted Noise Reduction: Leveraging a third microphone, the laptops ensure crystal-clear communication by filtering out background noise.
Purified View: An AI-driven webcam enhances video calls with background blur, eye contact improvements, and automatic framing, making it perfect for both professional and personal interactions.
Nvidia DLSS 3.5: This technology boosts rendering speeds and image quality, enabling more immersive and realistic gaming environments.
Design and Aesthetics
The Predator Helios 16 introduces a visually striking 7-zone RGB Infinity Mirror, adding to the aesthetic appeal with dynamic lighting effects. The laptops also feature a customizable RGB lighting system, including a dynamic Predator logo, adding a touch of personalization and style.
Sudhir Goel, Chief Business Officer at Acer India, expressed enthusiasm about the launch, stating, “Introducing the AI-ready Predator Helios series represents a significant step in our commitment to high-performance gaming. These laptops are not just about power but also about elevating user experience through innovative AI capabilities.”
Read Also:Acer Predator Helios Neo 16 with 13th Gen Intel Core i5 and i7 CPUs
Security and Connectivity
Acer has also prioritized security and connectivity:
Advanced Security: The laptops are equipped with Firmware TPM, BIOS passwords, HDD passwords, and a Kensington lock slot to ensure data security.
Enhanced Connectivity: Features such as Killer DoubleShot Pro, USB Type-C with Thunderbolt 4, and Wi-Fi 7 ensure high-speed connectivity and data transfer capabilities.
Pricing and Availability
The Predator Helios 16 is priced at Rs 199,999, while the Predator Helios Neo starts at Rs 149,999. Both models are now available across Acer exclusive stores, its online store, and major retailers like Amazon, Croma, Flipkart, Vijay Sales, as well as other multi-brand outlets.
Users will be able to find messages faster with the new chat filters.
The chat list will display a selection of three filters: All, Unread, and Groups options at the top.
New Chat Filters are being released by WhatsApp to help with message organisation. As per the instant messaging app, it should be easy to find the relevant chat on WhatsApp quickly and smoothly without having to browse through the complete chat list.WhatsApp users can now quickly identify the important chats thanks to the latest upgrade which introduces new chat filters to avoid making you go through your entire inbox for that reason. All WhatsApp users are expected to receive the Chat Filters in the upcoming weeks as they roll out.WhatsApp, owned by Meta, published a blog post announcing the release of Chat Filters which said, “Opening WhatsApp and finding the right conversation should feel quick, seamless, and simple. As people increasingly do more on WhatsApp, it’s more important than ever before to be able to get to your messages fast. That’s why today we’re launching new Chat Filters so you can do that without having to scroll through your full inbox.”WhatsApp’s Chat Filters function provides three filters- All, Unread, and Groups choices to make message browsing more effective. The chat list will have them at the top.Also Read:New Google Maps and Search updates coming for sustainable travelAll: The default view of all your messages.Unread: You may see which conversations you need to catch up on or respond to by using the Unread option. To help you prioritise your responses, it displays messages that you have either marked as unread or not opened.Groups: That being said, the Groups tab will compile all of your group chats into one location, which will make it simpler to locate your preferred ones—be they related to organising your upcoming trip or discussing your monthly family dinner. Additionally, this will display Communities’ subgroups.Also Read:Amazon Music introduced Maestro, a new playlist generator powered by AI“We believe filters will make it easier for people to stay organized and find their most important conversations and help navigate through messages more efficiently. We’ll continue to build more options to help you focus on what matters most. These are starting to roll out to users today, and will be available to everyone in the coming weeks,” the company stated.
Garena Free Fire is a battle royale game with regular awards and tournaments to keep players interested. If you play Garena Free Fire, you should be aware of the redeem codes that are released on a daily basis. However, because the battle royale game is banned in India, players from other countries can use the Free Fire Redeem codes daily. If you’re unfamiliar with the Garena Free Fire redeem codes or don’t know how to get them, we’ve put together a step-by-step guide to help you redeem them. Check out Garena Free Fire Redeem Codes for 19 April 2024.The Free Fire redeem codes are a great way to get free stuff. These are 12-digit codes that contain alphabets and numbers, as well as an expiration date and time. Because the Garena FF redeem codes cannot be used more than once, you should hurry to the redemption page to claim your free reward before someone else does. To get a free reward, all you have to do is go to reward.ff.garena.com/en, which is the official redemption page. Also, keep an eye on this space for daily updates on Garena Free Fire redemption codes and rewards.Also Read: Sennheiser Accentum Plus wireless headphones with Hybrid Adaptive Noise Cancellation launched
Spotify launched a tool under beta version last week that allows users to create custom playlists using artificial intelligence (AI). Following Spotify, Amazon Music has also released Maestro, an AI-powered playlist creator.Amazon Music unveiled a tool Maestro driven by artificial intelligence (AI) that can make playlists in response to text commands. The feature is similar to Spotify’s new AI Playlist feature in beta. Currently in beta testing, the company via blog post said, “Today, Amazon Music announces a new feature that uses AI technology to make it easier and way more fun to build playlists you want, when you want. Meet Maestro: An AI playlist generator that helps you create any playlist you can think of—plus all the ones you can’t. This feature is rolling out in beta to a small number of U.S. customers on all tiers of Amazon Music.”You can choose from a list of suggested prompts, or you can go with something short (or lengthy), and utilise emojis, emotions, activities, or sounds. With Maestro’s emoji knowledge, users can type a string of emojis into a prompt and the AI will still generate an appropriate playlist. You can save it, share it with friends to listen to, and they can create their own to share back.Also Read:New Google Maps and Search updates coming for sustainable travelAmazon Music is rolling out Maestro to a limited number of American users of Free, Prime, and Unlimited Amazon Music in beta via iOS and Android mobile apps. While Prime members and ad-supported customers can listen to 30-second playlist previews before saving, Amazon Music Unlimited users can listen to their playlists instantly and store them for later. “We plan to expand access to more customers over time,” the company said.Also Read:Noise introduced Sound Master speaker with 360° audio technology in India
How to use Maestro in Amazon Music?
Download the latest version of the Amazon Music mobile app
Customers who are in the beta will see Maestro either on their home screen or when they tap the plus sign where they usually create a new playlist
Google Maps users can locate alternatives to driving and flying thanks to new capabilities added to Maps and Search. With new updates to features in GoogleMaps and Search users will be able to find public transit and walking routes, see alternatives to air travel and better understand the estimated emissions of flights.The blog post said, “When it comes to travelling and commuting, we want people to have the right information to make more sustainable choices. With new updates to features in Maps and Search, you can find convenient public transit and walking routes, see alternatives to air travel and better understand the estimated emissions of flights.”Google Maps has introduced a function that, if travel times are comparable and practical, shows public transit or walking suggestions next to driving routes. According to the company, in the upcoming weeks, this will be accessible in more than fifteen global locations, including Amsterdam, Barcelona, London, Montreal, Paris, Rome, and Sydney.Also Read:Vivo T3x 5G with Snapdragon 6 Gen 1 SoC launched in IndiaAdditionally, Google Maps is adding support for buses and expanding a feature in Search that aids in finding information on long-distance train routes. Users will be able to easily view schedules, ticket costs, and links to complete your booking. As of now long-distance bus routes in 15 countries and trains in 38 nations can use this service.According to Google in the coming months, users will also be able to see train route suggestions when using Google Flights, so it’s easy to find the more sustainable option no matter where you begin your search.Also Read:Noise introduced Sound Master speaker with 360° audio technology in IndiaMoreover, Using Google Flights users can already filter by lower-emitting choices and view anticipated emissions for almost every flight in the search results.“These estimates are powered by the Travel Impact Model (TIM), a methodology we published in 2022 for predicting per-passenger flight emissions. To make this information even more accessible, TIM estimates are now also available through a developer API that allows any app or website to display flight emissions, as well as a Google Sheets add-on and a calculator on the TIM website,” the company stated.
Nothing launches two new earbuds with premium sound and a distinctive new yellow design.
Advanced ChatGPT integration offers direct AI access via simple pinch gestures.
Enhanced audio streaming, superior noise cancellation, and longer battery life are key features.
In a significant expansion of its audio product line, Nothing announced the launch of two innovative wireless earbuds, the Nothing Ear and Nothing Ear (a), during its Q1 Community Update in Tokyo, Japan. These launches are complemented by the introduction of industry-first ChatGPT integrations, enhancing the functionality of its audio and smartphone offerings.
Revolutionizing Audio with Nothing Ear and Nothing Ear (a)
Nothing’s latest products, developed through three years of meticulous design and engineering refinement, are poised to redefine the audio experience for both audiophiles and casual listeners. The new lineup includes the Nothing Ear, designed with high-fidelity sound quality in mind, and the Nothing Ear (a), targeted at users seeking a versatile daily audio solution. In simplifying its product range, Nothing shifts focus from mere numbers to the actual user experience and product quality.
Carl Pei, CEO and Co-Founder of Nothing, emphasized the integration of ChatGPT technology as a transformative step for the company, signaling ongoing innovations and a commitment to user feedback.
Read Also: Nothing Phone (2a) Review: Ticks all the right boxes
Technical Superiority and Design Excellence
The Nothing Ear preserves the brand’s signature transparent design while introducing enhancements like a custom 11 mm dynamic driver and improved airflow mechanics for clearer sound. It supports high-resolution audio codecs like LHDC 5.0 and LDAC, providing a superior listening experience. The earbuds also feature advanced noise-cancelling capabilities, including Smart ANC and Adaptive ANC, which adjust cancellation levels based on environmental noise, providing up to 45 dB of noise reduction.
On the other hand, Nothing Ear (a) offers a playful, visually striking design in a new yellow color, symbolizing transparency and purity. It also boasts improved bass performance and is Hi-Res Audio Certified, ensuring a crisp, detailed audio output.
Both models include enhanced battery life, fast charging capabilities, and Clear Voice Technology for clearer calls. The intuitive pinch controls facilitate easy switching between tracks and noise cancellation modes.
Seamless Integration with ChatGPT
A major highlight of Nothing’s announcement is the integration of ChatGPT into both its earbuds and smartphone operating systems. This feature allows users to interact directly with ChatGPT through a simple pinch gesture, enabling instant access to information and functionalities. This integration is part of Nothing’s broader strategy to leverage AI to enhance user experiences across its device ecosystem.
Read Also:Nothing rolls out latest OS update, brings discreet call recording for Nothing Phone 2a
Availability and Pricing
The Nothing Ear is priced at INR 11,999, with sales beginning on April 29, while the Nothing Ear (a) is set at INR 7,999, available from April 22. Both products will be offered at discounted launch prices on Flipkart, alongside availability at Croma and Vijay Sales.
In conclusion, Nothing’s latest product launches and ChatGPT integrations mark a significant step in its mission to blend cutting-edge technology with user-centric design, setting new standards in the consumer technology space.
With the introduction of Sound Master, a premium speaker, Noise has entered the home audio industry. The audio device offers a 360° audio deep bass experience. The Noise Sound Master offers 100-watt high-octane bass. It also comes with eight treble radiators, four bass radiators, and a subwoofer support.Sound Master’s superior fabric mesh finish adds a touch of refinement and beauty to its overall design complementing any environment, making Sound Master a perfect blend of style and functionality.Sound Master has intuitive touch controls that make track skipping, volume changes, and music library navigation simple. It also allows users to take calls straight through the speaker thanks to a built-in microphone. True Wireless Stereo (TWS) connectivity is available on the audio device. For big parties or movie evenings, pairing two Sound Master speakers together produces a larger soundstage. Sound Master promises to bring music to life with rich details and deep bass thanks to its 100-watt high-octane bass. A subwoofer, four bass radiators, and eight treble radiators work together to provide this potent performance. Sound Master’s 360° audio technology raises the standard by uniformly distributing sound across the room.Also Read:Vivo T3x 5G with Snapdragon 6 Gen 1 SoC launched in IndiaThe Noise Sound Master features Bluetooth 5.3 technology, so you can connect to your devices with the speaker and experience no lag. Moreover, NFC technology enables instant connection by only tapping your NFC-capable device.According to the company, the audio device has a long-lasting 12,000 mAh battery that can run the device for up to 12 hours straight on a single charge. This makes it ideal for long parties or marathon sessions of personal listening.In terms of pricing Noise Sound Master will be available for purchase via the company’s official website at Rs 9,999.Amit Khatri , Co-founder of Noise said, “We have constantly been on a mission to redefine consumers’ journeys with meaningful innovation that not just resonates with them seamlessly but also fulfils their rising lifestyle needs. Sound Master signifies this commitment and is a step towards levelling the bar of audio experience. The amalgamation of defined audio solutions and striking aesthetics will certainly bring a fresh experience for the ones looking to add a premium home audio product.”


 Step 4: Use the slider next to the keyboard shortcut to adjust the transparency level.
Step 5: Press the keyboard shortcut to make any window transparent on your PC or laptop.
Step 4: Use the slider next to the keyboard shortcut to adjust the transparency level.
Step 5: Press the keyboard shortcut to make any window transparent on your PC or laptop.
 The ol’ reliable Glass2k software still remains one of the best ways to make windows transparent on your Windows 10 or 11 PC. This software has been around since the days of Windows XP but works fine on Windows 10/11 as well. After installing Glass2k on your PC, access its settings from the taskbar. Using the settings menu, you can create a keyboard shortcut to make your windows transparent. The software lets you decide the transparency level as well. You can go back to opaque windows any time by right-clicking on Glass2k’s icon in the taskbar and selecting ‘Exit’.
Download Glass2k from Softpedia
The ol’ reliable Glass2k software still remains one of the best ways to make windows transparent on your Windows 10 or 11 PC. This software has been around since the days of Windows XP but works fine on Windows 10/11 as well. After installing Glass2k on your PC, access its settings from the taskbar. Using the settings menu, you can create a keyboard shortcut to make your windows transparent. The software lets you decide the transparency level as well. You can go back to opaque windows any time by right-clicking on Glass2k’s icon in the taskbar and selecting ‘Exit’.
Download Glass2k from Softpedia
 One of the simplest tools to make windows transparent on your Windows 10/11 PC or laptop is Vitrite. You can download this tool for free from Softonic. Once installed, Vitrite lets you choose from 9 transparency levels. Press Ctrl + Shift + (any number from 1 to 9) to make a window transparent. Level 1 offers the most transparency while Level 9 is almost opaque. To remove the transparency effect, press Ctrl + Shift + 0. Vitrite also lets you pin a window on top of other windows.
Download from Softonic
One of the simplest tools to make windows transparent on your Windows 10/11 PC or laptop is Vitrite. You can download this tool for free from Softonic. Once installed, Vitrite lets you choose from 9 transparency levels. Press Ctrl + Shift + (any number from 1 to 9) to make a window transparent. Level 1 offers the most transparency while Level 9 is almost opaque. To remove the transparency effect, press Ctrl + Shift + 0. Vitrite also lets you pin a window on top of other windows.
Download from Softonic
 Peek Through is another great tool to make windows transparent on your Windows 10/11 PC or laptop. You can download this software for free from Softpedia. Upon launching Peek Through, the software asks you to set up a hotkey for the transparency effect. You can use this hotkey at any given time to apply the transparency effect to a window. Use the ‘Transparency’ tab to set a level for the effect. You can also set this software to run on startup.
Download from Softpedia
Peek Through is another great tool to make windows transparent on your Windows 10/11 PC or laptop. You can download this software for free from Softpedia. Upon launching Peek Through, the software asks you to set up a hotkey for the transparency effect. You can use this hotkey at any given time to apply the transparency effect to a window. Use the ‘Transparency’ tab to set a level for the effect. You can also set this software to run on startup.
Download from Softpedia
 The TranslucentTB app on the Microsoft Store is an easy solution to make your taskbar see-through. When you run the app, it makes the taskbar transparent automatically. Despite its transparency, the taskbar lucidly displays all the icons and minimised apps. The great thing about this app is that it runs automatically when you start your PC. This means that you are always greeted with a transparent taskbar.
Download from Microsoft Store
The TranslucentTB app on the Microsoft Store is an easy solution to make your taskbar see-through. When you run the app, it makes the taskbar transparent automatically. Despite its transparency, the taskbar lucidly displays all the icons and minimised apps. The great thing about this app is that it runs automatically when you start your PC. This means that you are always greeted with a transparent taskbar.
Download from Microsoft Store

 You should have no problem putting the tiny, pebble-shaped charging case into your pocket while not in use. The earbuds’ plastic casing is resilient enough to withstand unintentional falls. The buds and case are of nice quality, however, handle them carefully as they are somewhat slippery.
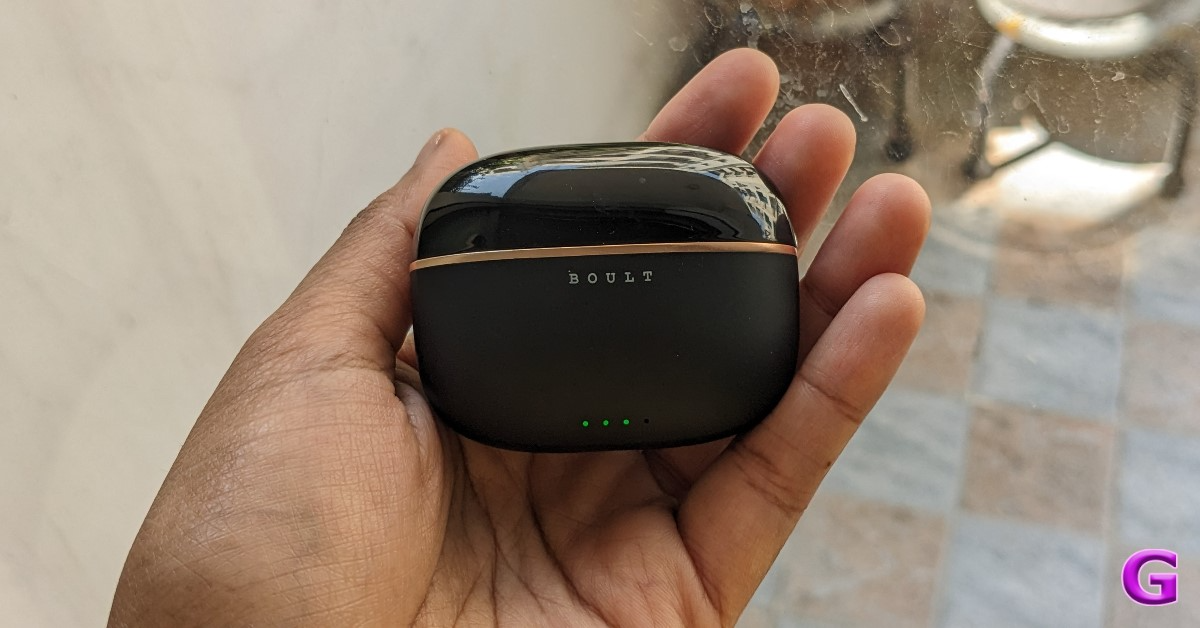 The Boult Z40 Ultra charging case is built without buttons. The glossy side attracts a lot of scratches. While the matte finish helps cover up any scratches. For charging the case, there is a USB-C port at the bottom. In the package, Boult includes a USB-C cable.
The budget-friendly earphones have four colour options: Black, Beige, Blue, and Brown. The colour option we have for testing is black.
The Boult Z40 Ultra charging case is built without buttons. The glossy side attracts a lot of scratches. While the matte finish helps cover up any scratches. For charging the case, there is a USB-C port at the bottom. In the package, Boult includes a USB-C cable.
The budget-friendly earphones have four colour options: Black, Beige, Blue, and Brown. The colour option we have for testing is black.
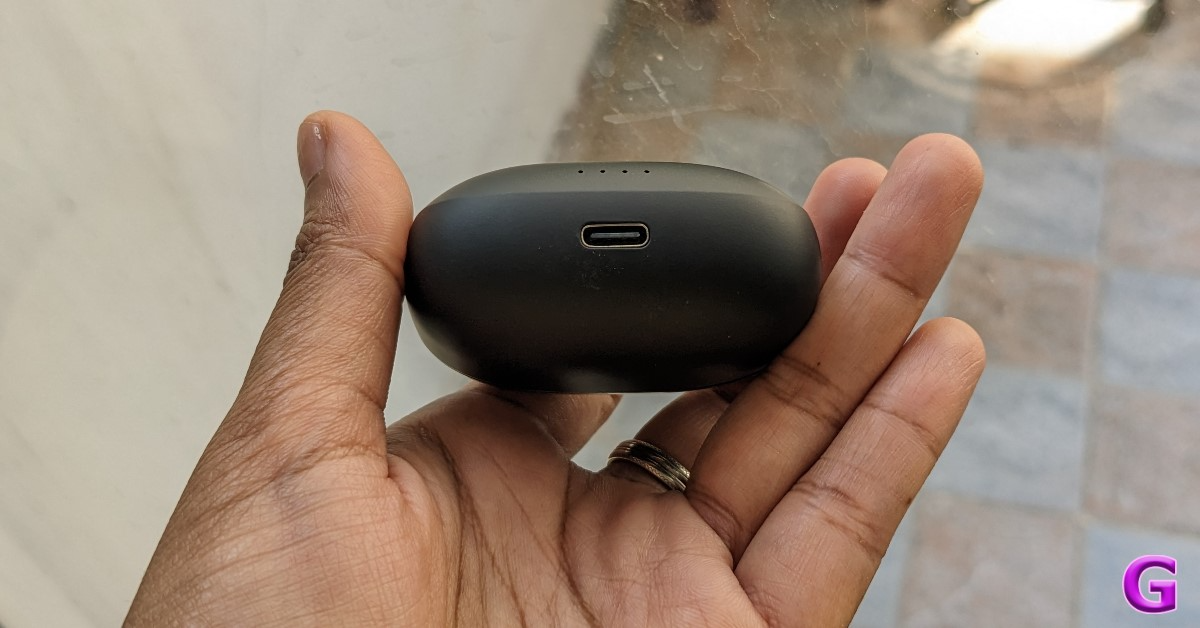 As you can see, the earbuds are firmly planted into the respective slots on the left and right. The earbuds’ housing contains magnets that hold them in place.
The earbuds are shaped like a stem and fit well in the ear canal. They come with silicone ear tips that slide right into the canal. For a snug fit, these come with an additional pair of ear tips. Furthermore, it features a dusty mauve flat touch panel for music control and playback pause. The earphones are quite light and cosy to wear for long periods.
As you can see, the earbuds are firmly planted into the respective slots on the left and right. The earbuds’ housing contains magnets that hold them in place.
The earbuds are shaped like a stem and fit well in the ear canal. They come with silicone ear tips that slide right into the canal. For a snug fit, these come with an additional pair of ear tips. Furthermore, it features a dusty mauve flat touch panel for music control and playback pause. The earphones are quite light and cosy to wear for long periods.
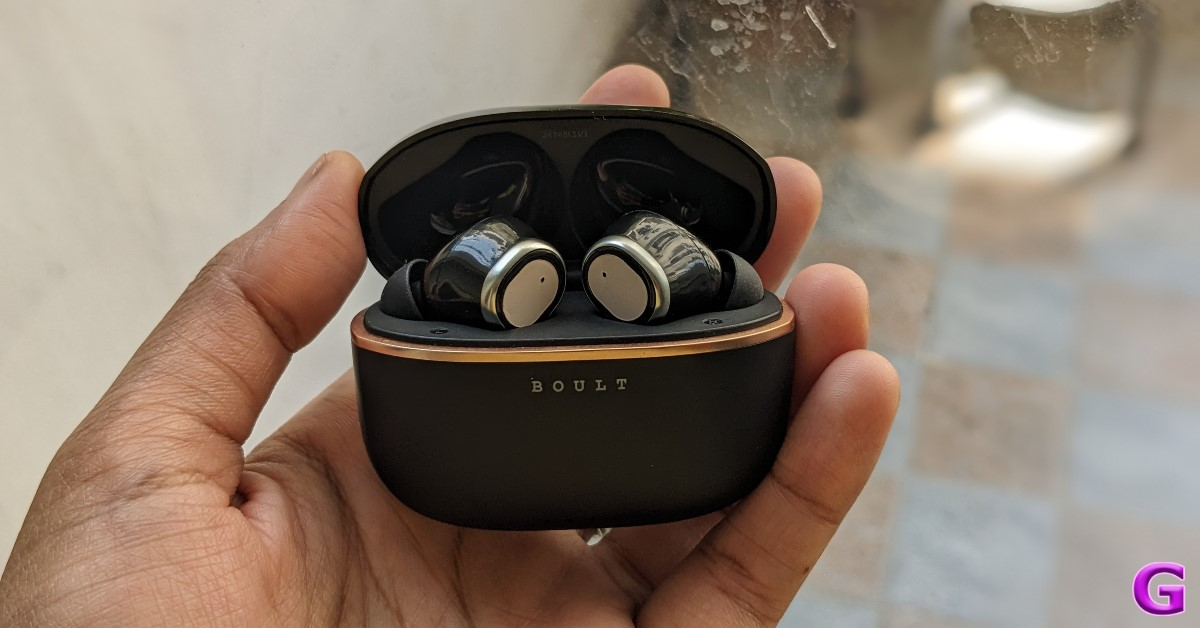 However the earbuds are not very comfortable to wear while you sleep, and if you use them for a long time, you might get pain and irritation in your ears. The device’s IPX5 classification protects it from water splashes, so you can use it anytime, even in the gym or when working out in the rain.
Also Read: Samsung Galaxy S22 price dropped again, now available at this price in India
However the earbuds are not very comfortable to wear while you sleep, and if you use them for a long time, you might get pain and irritation in your ears. The device’s IPX5 classification protects it from water splashes, so you can use it anytime, even in the gym or when working out in the rain.
Also Read: Samsung Galaxy S22 price dropped again, now available at this price in India
 This one allows for the full range of frequencies to be heard without the need for further effort, unlike most others where the bass is too high and the treble, mids, and volume automatically diminish. The whole listening experience is outstanding. Moreover, the loudness is accurately adjusted, neither too high nor too low.
Even though these aren’t made solely for gaming, we tested them to see if they work well for gaming. With its ultra-low 45ms latency and Combat Gaming Mode, the Z40 Ultra gives you an edge over others. There was not much audio lag when playing intensive games like Call of Duty. However, latency is not an issue with light games.
This one allows for the full range of frequencies to be heard without the need for further effort, unlike most others where the bass is too high and the treble, mids, and volume automatically diminish. The whole listening experience is outstanding. Moreover, the loudness is accurately adjusted, neither too high nor too low.
Even though these aren’t made solely for gaming, we tested them to see if they work well for gaming. With its ultra-low 45ms latency and Combat Gaming Mode, the Z40 Ultra gives you an edge over others. There was not much audio lag when playing intensive games like Call of Duty. However, latency is not an issue with light games.
 By eliminating background noise during calls, Boult Z40 Ultra’s 32 dB active noise cancellation technology in the Zen Quad Mic ENC offers crystal-clear calls even in the noisiest of settings. The Z40 Ultra has a four-mic setup that makes it easy to capture the words you speak. According to Boult, AI technology is integrated into these buds.
AI-driven intelligent speech processing is incorporated into the company’s Sonic Core Dynamics solution for optimal noise cancellation and low power consumption. Prism Voice PLC is another AI tool that guarantees lag-free chats, immersive game interaction, and improved call quality for smooth virtual meetings.
Also Read: OnePlus 11R 5G Solar Red Variant now available in 8GB RAM with 128GB storage option
Bluetooth connectivity is really good. The Boult Z40 Ultra headphones support Bluetooth 5.3 and have a wireless range of roughly 10 metres. But perform flawlessly within a 20 to 24-foot radius when there are obstructions. You may easily switch between two devices with a single swipe thanks to Dual Device Pairing’s ease.
By eliminating background noise during calls, Boult Z40 Ultra’s 32 dB active noise cancellation technology in the Zen Quad Mic ENC offers crystal-clear calls even in the noisiest of settings. The Z40 Ultra has a four-mic setup that makes it easy to capture the words you speak. According to Boult, AI technology is integrated into these buds.
AI-driven intelligent speech processing is incorporated into the company’s Sonic Core Dynamics solution for optimal noise cancellation and low power consumption. Prism Voice PLC is another AI tool that guarantees lag-free chats, immersive game interaction, and improved call quality for smooth virtual meetings.
Also Read: OnePlus 11R 5G Solar Red Variant now available in 8GB RAM with 128GB storage option
Bluetooth connectivity is really good. The Boult Z40 Ultra headphones support Bluetooth 5.3 and have a wireless range of roughly 10 metres. But perform flawlessly within a 20 to 24-foot radius when there are obstructions. You may easily switch between two devices with a single swipe thanks to Dual Device Pairing’s ease.
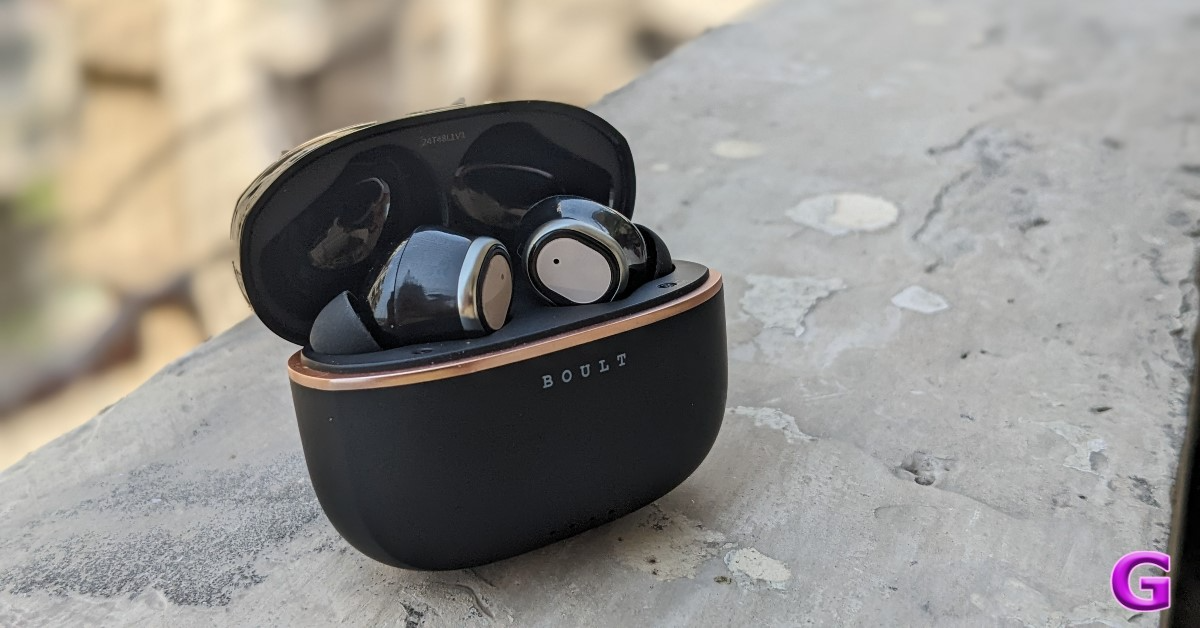 According to Boult, a single charge of the Z40 Ultra can provide up to 100 hours of playback time. To guarantee that the user can always carry the earphones while travelling, it also features a Type-C connector for fast charging. For longer use without the need for frequent recharging, the 100-hour playtime makes it perfect for everyday commuting or long journeys.
")
 KProxy has been around since 2005 and remains one of the best proxy sites for bypassing filters and browsing anonymously. It encrypts the connection between your browser and the target server to keep the data safe. You can use this website at your workplace, school, university, or any organisation that uses firewalls to limit users’ access to certain websites. KProxy is also available as an extension for Google Chrome.
 You can use CroxyProxy’s free services to mask your IP address and visit websites over an encrypted connection. This website specialises in offering proxy support for YouTube. Using CroxyProxy, you will not notice any considerable drop in buffering speeds. The media playback is satisfactory as well. CroxyProxy’s premium subscription is priced at just $3.50/month and it gives you access to faster servers and an ad-free experience.
 Proxyium is one of our favourite free proxy sites to unblock content on the Internet. Its simple layout is incredibly easy to use and its fast proxy servers ensure that you don’t see a drop in performance or speed. To access a blocked website using Proxyium, simply enter its URL in the address bar and hit Go. You can choose a proxy server based on the speed using the drop-down menu next to the address bar.
 PlainProxies is another easy-to-use proxy site for unfettered web access. You don’t need to create an account to create this service. Simply enter the URL in the address box and hit ‘Browse’. PlainProxies also offers an effective data-scraping tool with its premium subscription priced at €99/month. As a part of this subscription, you get 1 month of proxies, 250 concurrent connections, 1TB bandwidth, and access to over 100 locations.
 DontFilter has a no-nonsense that gets the job done with ease. There are no distractions on the website. All you need to do is enter the URL in the address box and hit Go. Clicking on ‘options’ lets you select whether you want to encrypt the page, allow cookies, remove scripts, and more. DontFilter works for most websites that are blocked by your school or workplace. You can also use it to watch YouTube videos that are not available for your location.
Read Also: Xiaomi Handheld Garment Steamer to launch in India on April 23
DontFilter has a no-nonsense that gets the job done with ease. There are no distractions on the website. All you need to do is enter the URL in the address box and hit Go. Clicking on ‘options’ lets you select whether you want to encrypt the page, allow cookies, remove scripts, and more. DontFilter works for most websites that are blocked by your school or workplace. You can also use it to watch YouTube videos that are not available for your location.
Read Also: Xiaomi Handheld Garment Steamer to launch in India on April 23
 TurboHide is a reliable proxy site that lets you bypass any firewall restrictions, allowing you to visit websites that are blocked by your school, college, or organisation. On top of that, TurboHide also removes cooking, scripts, and objects, and encrypts the URL. To preserve your anonymity, this proxy website hides your IP address and browser history as well.
 ProxySite is another great website you can use to access websites that are blocked on your network. Using this website, you can even view content which is geo-locked or withheld in your country. One of the advantages of using ProxySite is that it offers SSL encryption even if the website you are visiting doesn’t support it. ProxySite also offers a VPN service at $9.99 per month.
 KProxy has been around since 2005 and remains one of the best proxy sites for bypassing filters and browsing anonymously. It encrypts the connection between your browser and the target server to keep the data safe. You can use this website at your workplace, school, university, or any organisation that uses firewalls to limit users’ access to certain websites. KProxy is also available as an extension for Google Chrome.
 Founded in 2003, Proxify has been around for more than 20 years. You need to sign up to the website to use its services. Once logged in, you can Proxify to hide your IP address and browse websites which are geo-locked in your area. You can also use it to verify advertising campaigns, conduct competitive intelligence, and research your competitors. Once the free trial expires, you can subscribe to Proxify for Rs 10,000/month.
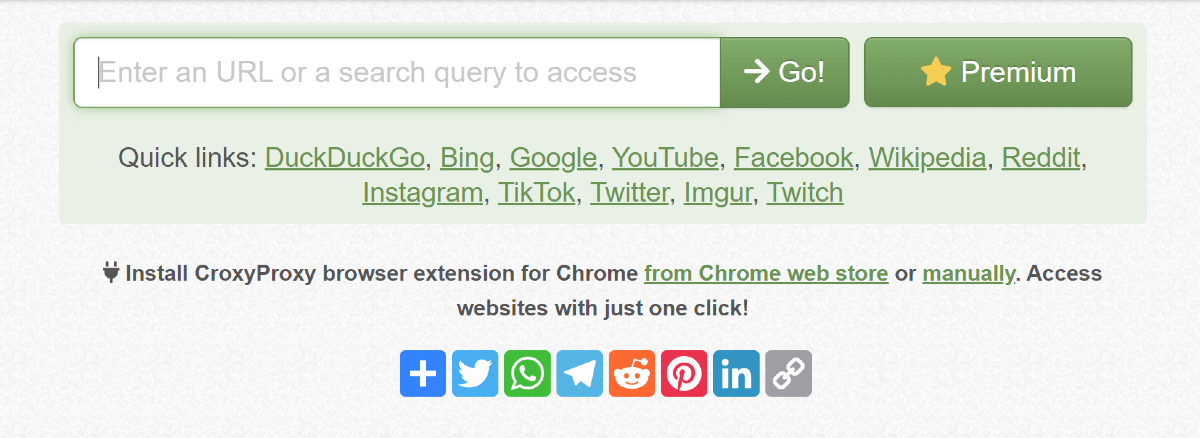 You can use CroxyProxy’s free services to mask your IP address and visit websites over an encrypted connection. This website specialises in offering proxy support for YouTube. Using CroxyProxy, you will not notice any considerable drop in buffering speeds. The media playback is satisfactory as well. CroxyProxy’s premium subscription is priced at just $3.50/month and it gives you access to faster servers and an ad-free experience.
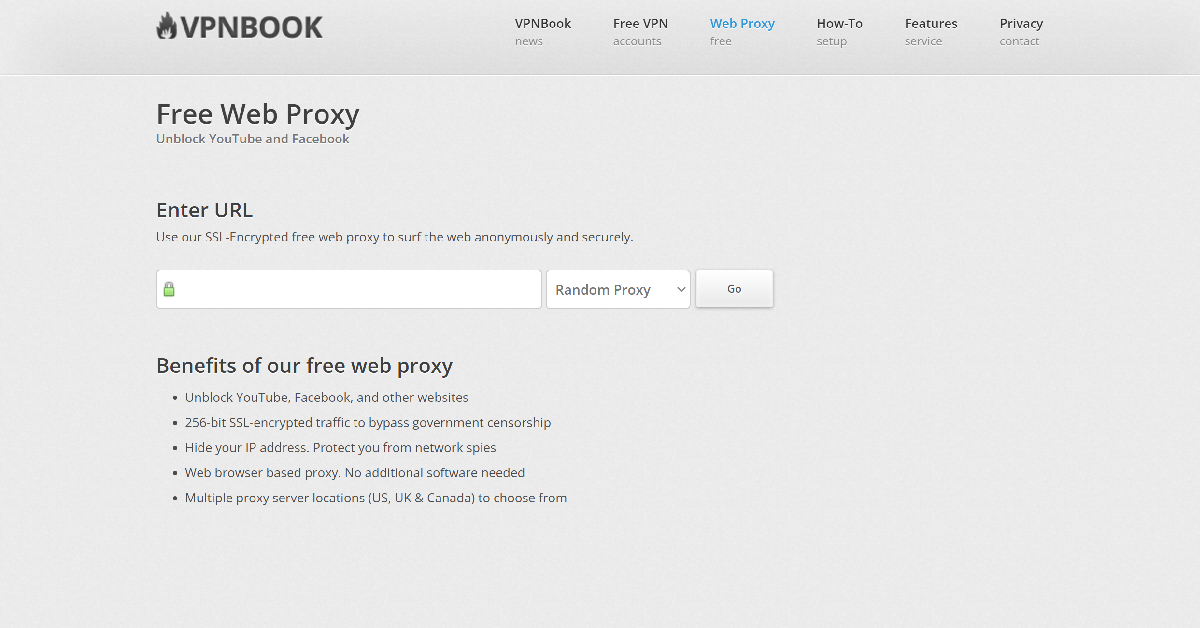 VPNBook is a VPN service that also offers a free web proxy portal. You can choose from US, UK, or Canada proxy server locations while using the service. VPNBook overcomes any firewall on your network and gives you access to blocked websites with ease. It also offers 256-bit SSL encryption and hides your IP address while browsing the web.
 Proxyium is one of our favourite free proxy sites to unblock content on the Internet. Its simple layout is incredibly easy to use and its fast proxy servers ensure that you don’t see a drop in performance or speed. To access a blocked website using Proxyium, simply enter its URL in the address bar and hit Go. You can choose a proxy server based on the speed using the drop-down menu next to the address bar.
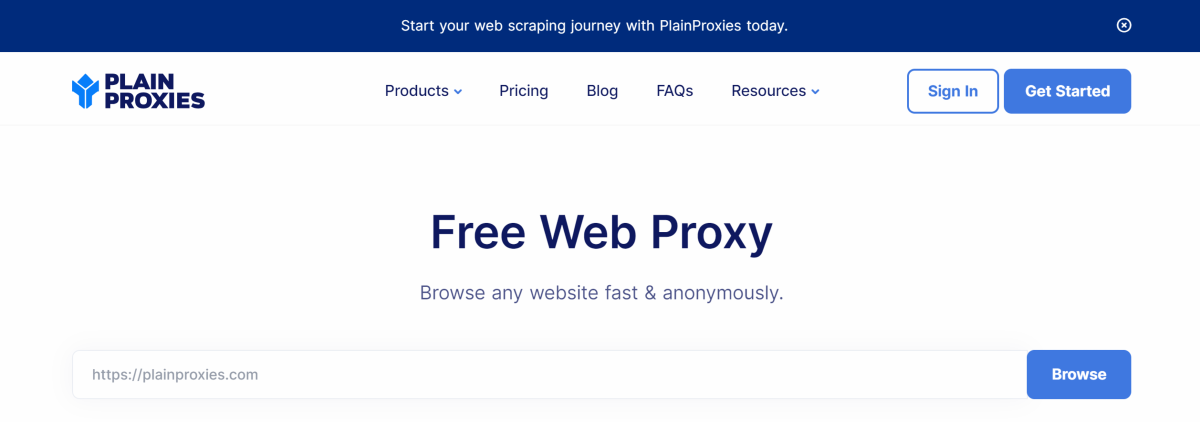 PlainProxies is another easy-to-use proxy site for unfettered web access. You don’t need to create an account to create this service. Simply enter the URL in the address box and hit ‘Browse’. PlainProxies also offers an effective data-scraping tool with its premium subscription priced at €99/month. As a part of this subscription, you get 1 month of proxies, 250 concurrent connections, 1TB bandwidth, and access to over 100 locations.
 4everproxy has dedicated proxy servers for web browsing and video streaming. All connections made using 4everproxy are secured by TSL. This service hides your IP address while browsing the web and deletes the proxy sessions 2 hours after closing the browser. You can also choose to connect to a website using multiple proxy servers. Its premium subscription (priced at $9.95/month) lets you access all server locations, increases the available bandwidth, clears your logs, and more.
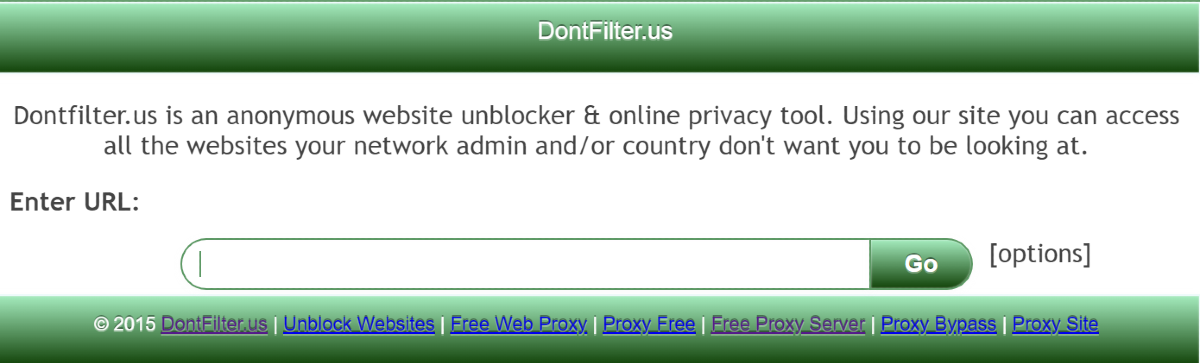 DontFilter has a no-nonsense that gets the job done with ease. There are no distractions on the website. All you need to do is enter the URL in the address box and hit Go. Clicking on ‘options’ lets you select whether you want to encrypt the page, allow cookies, remove scripts, and more. DontFilter works for most websites that are blocked by your school or workplace. You can also use it to watch YouTube videos that are not available for your location.
Read Also: Xiaomi Handheld Garment Steamer to launch in India on April 23
DontFilter has a no-nonsense that gets the job done with ease. There are no distractions on the website. All you need to do is enter the URL in the address box and hit Go. Clicking on ‘options’ lets you select whether you want to encrypt the page, allow cookies, remove scripts, and more. DontFilter works for most websites that are blocked by your school or workplace. You can also use it to watch YouTube videos that are not available for your location.
Read Also: Xiaomi Handheld Garment Steamer to launch in India on April 23


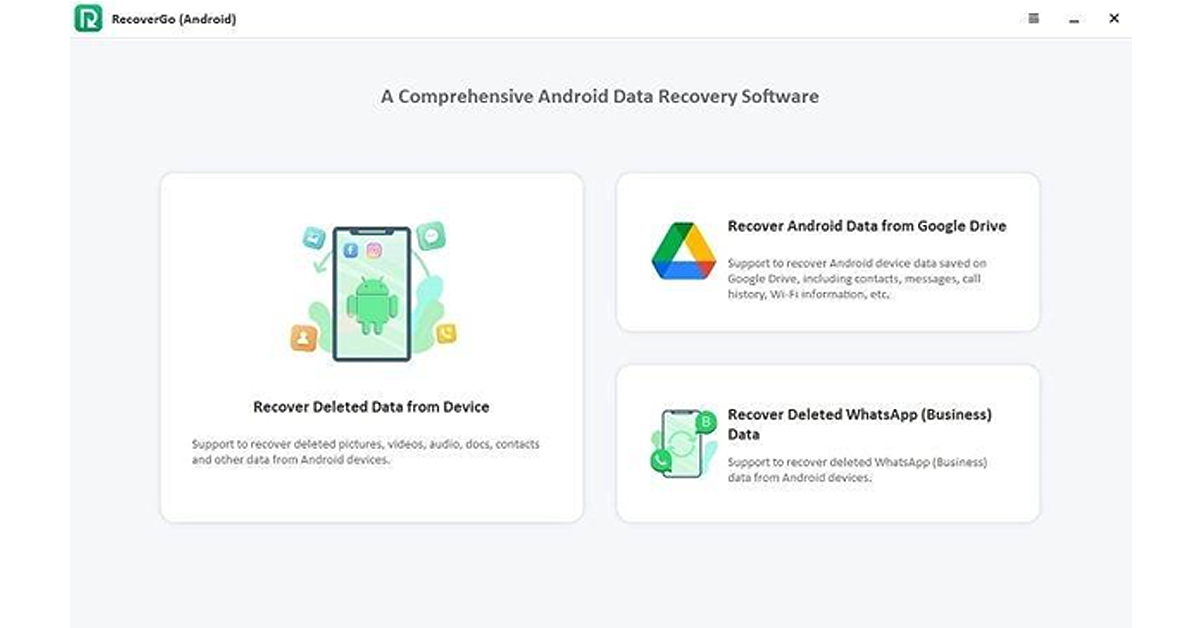
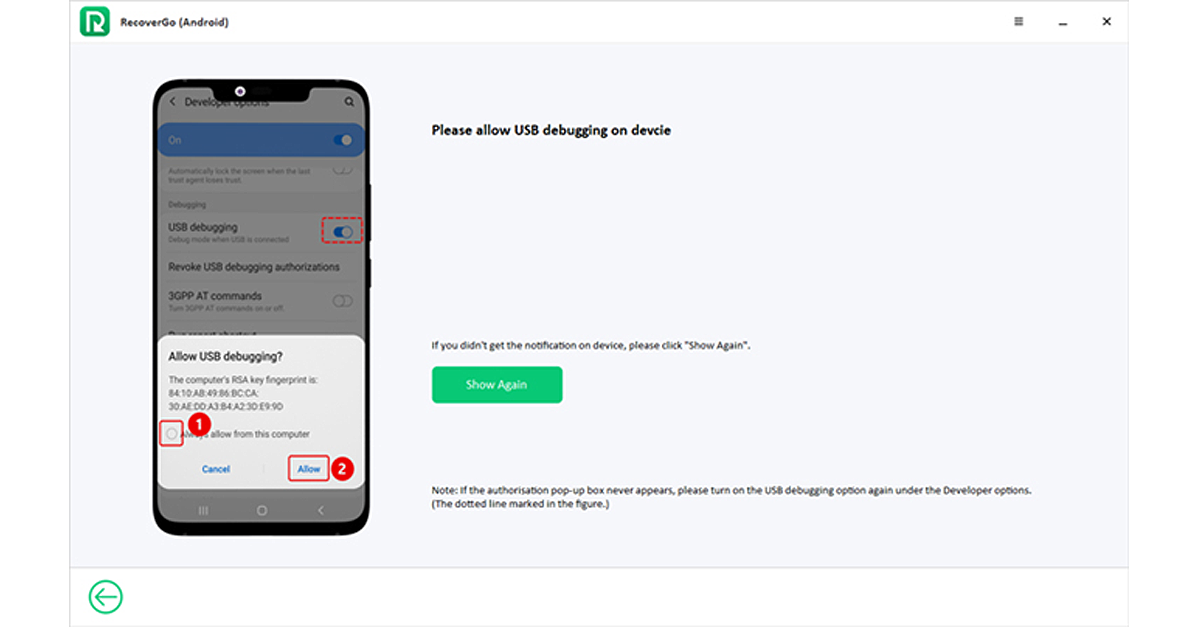
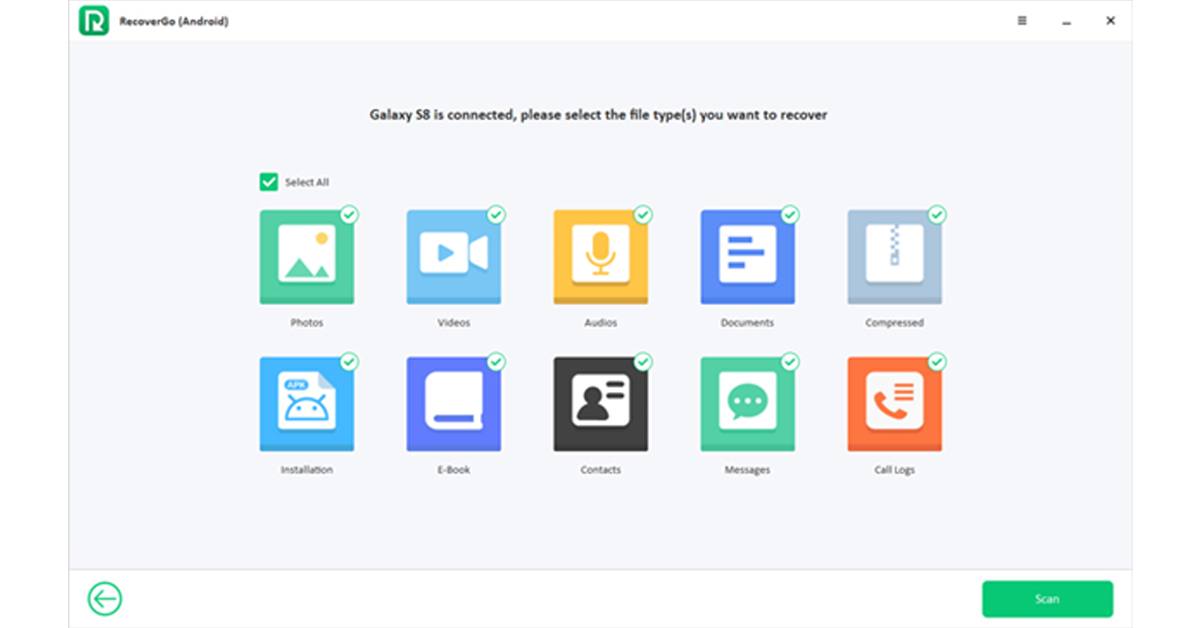
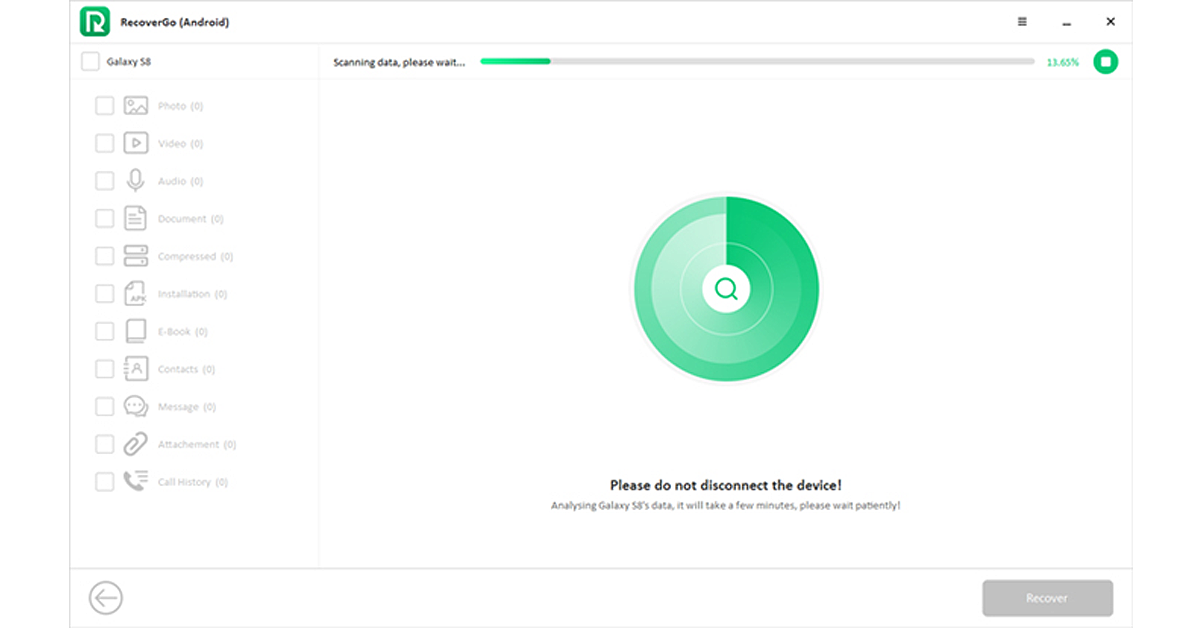
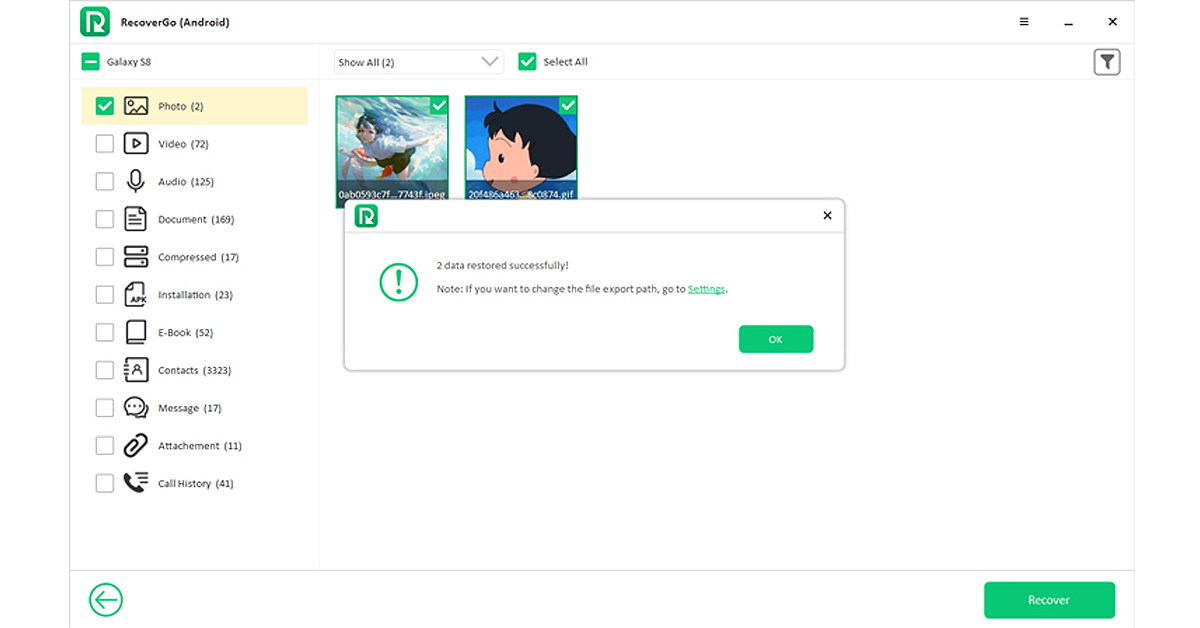


 Galaxy F15 5G may be purchased for an effective price of Rs 11,999, Rs 13,499, and Rs 14,999 with bank discounts or an upgrade bonus worth Rs 1,000. The new varaint along with the other two options can now be purchased via the company’s official website and Flipkart in the country.
Also Read: WhatsApp introduced new chat filters to keep chats organised
Galaxy F15 5G may be purchased for an effective price of Rs 11,999, Rs 13,499, and Rs 14,999 with bank discounts or an upgrade bonus worth Rs 1,000. The new varaint along with the other two options can now be purchased via the company’s official website and Flipkart in the country.
Also Read: WhatsApp introduced new chat filters to keep chats organised

")
 Step 2: Tap on WiFi.
 Step 3: Tap the gear icon next to the connected network.
 Step 4: Select Manage Router.
 Step 5: This will lead you to the router’s management portal. Log in using the appropriate credentials.
 The simplest way to access your home router’s firmware is by logging into its web portal using its IP address. To find the IP address of your router, go to Command Prompt and type ‘ipconfig’. The IP address will appear in the ‘IPv6 Address’ field. Copy this address and paste it into your web browser’s address box to access the login portal. If you can’t find the IP address, simply paste 192.168.1.1, since this works for most routers.
If you are logging into the router’s portal for the first time, enter ‘admin’ as the username or ‘password’ or ‘admin’ as the password. If you changed your login credentials in the past, use them to log in and access the router’s firmware.
The simplest way to access your home router’s firmware is by logging into its web portal using its IP address. To find the IP address of your router, go to Command Prompt and type ‘ipconfig’. The IP address will appear in the ‘IPv6 Address’ field. Copy this address and paste it into your web browser’s address box to access the login portal. If you can’t find the IP address, simply paste 192.168.1.1, since this works for most routers.
If you are logging into the router’s portal for the first time, enter ‘admin’ as the username or ‘password’ or ‘admin’ as the password. If you changed your login credentials in the past, use them to log in and access the router’s firmware.
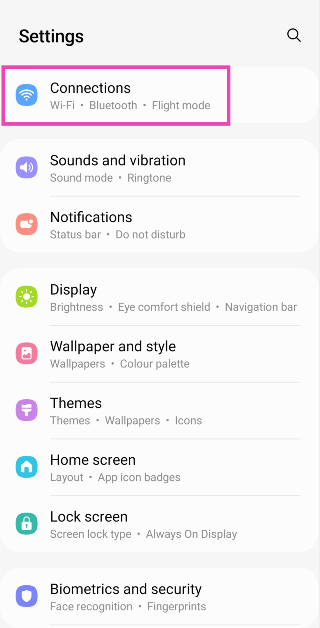 Step 2: Tap on WiFi.
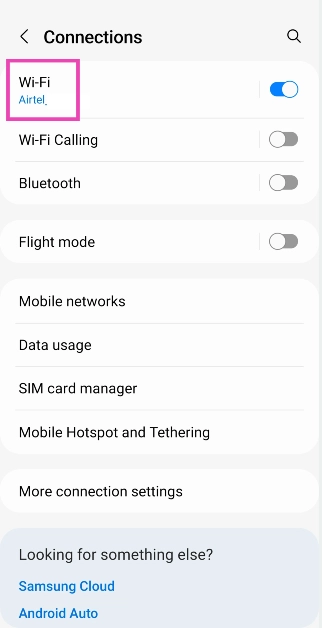 Step 3: Tap the gear icon next to the connected network.
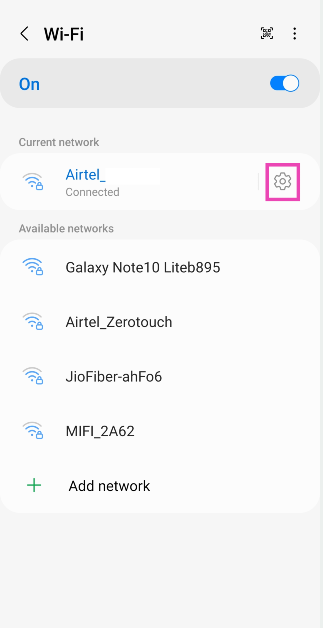 Step 4: Select Manage Router.
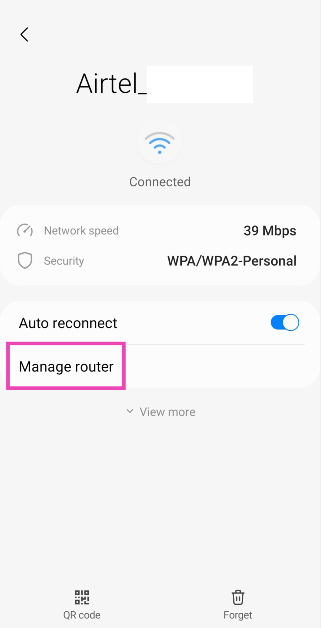 Step 5: This will lead you to the router’s management portal. Log in using the appropriate credentials.
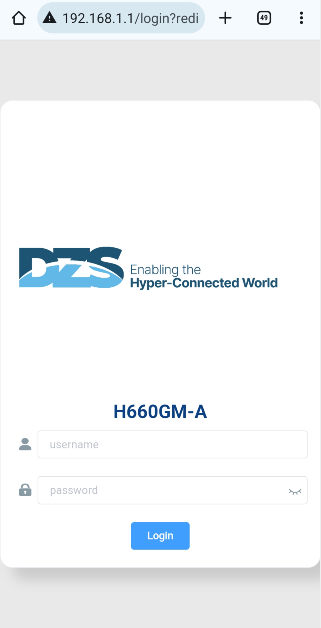
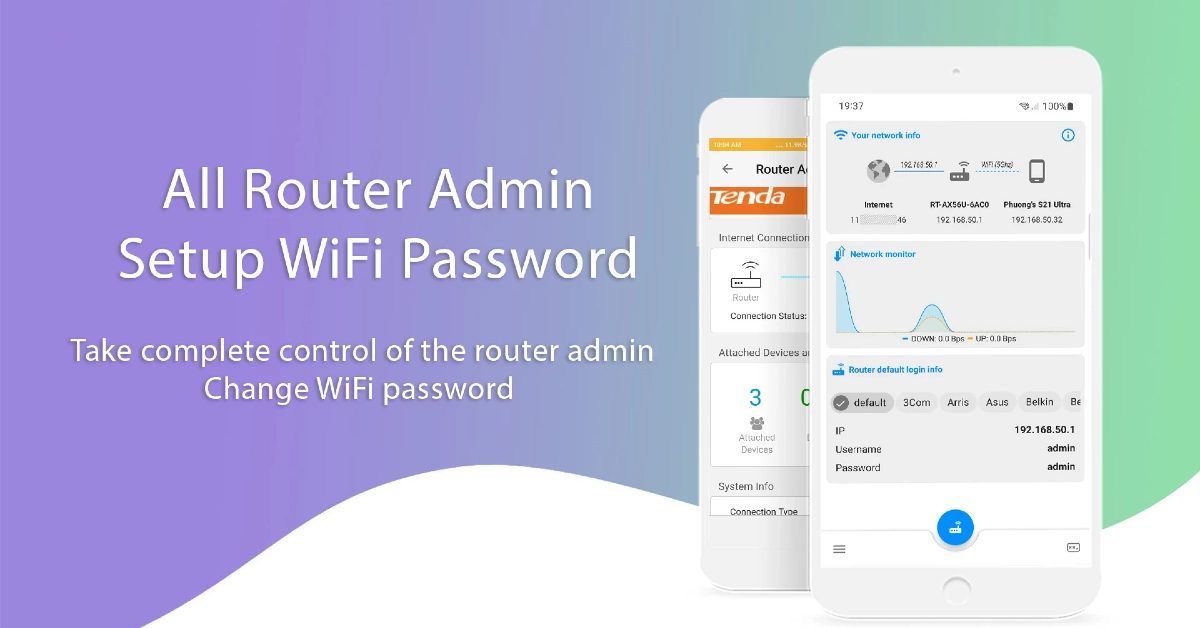 If your home router does not have a companion app, use a third-party app like All Router Admin. This app has a large database of home routers and their default usernames and passwords. Go through the list to find your router model and copy its credentials. Hit the blue router icon in the app to access the login portal and paste the credentials in their relevant fields.
 series and a Wireless Powerbank in India: Details inside")
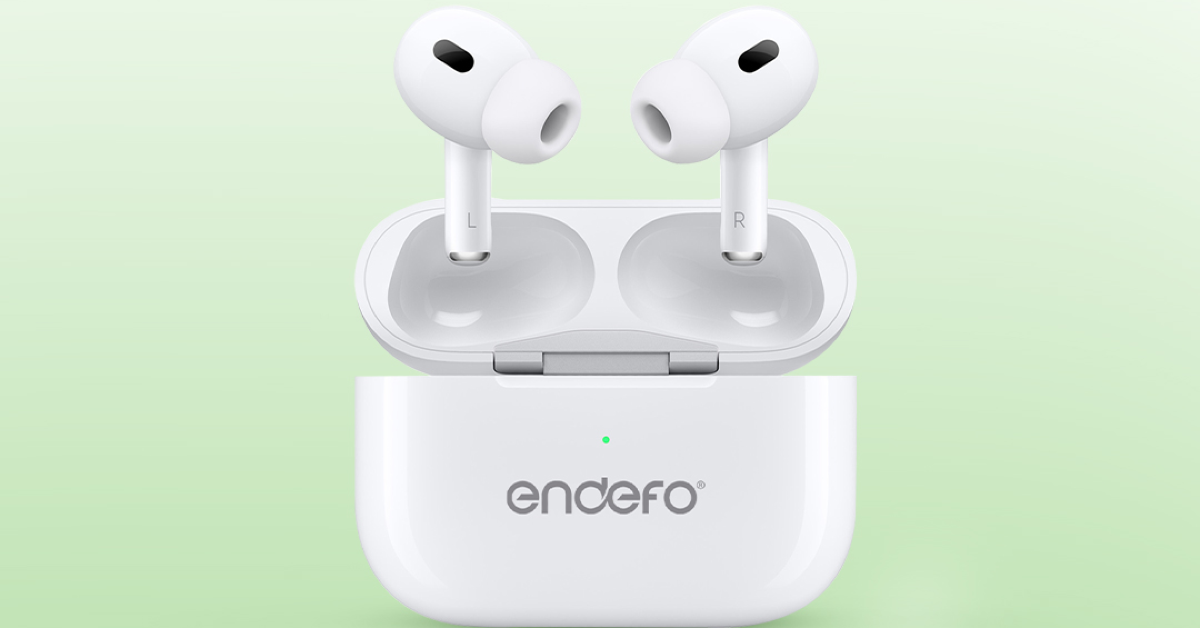

 The Wireless Powerbank Pro 10 is a portable, multipurpose power bank for on-the-go charging equipped with 10000mAh capacity and dual Type-C wired and wireless charging functionality. It can provide quick 20W PD wired and 15W wireless charging. Its multi-layered chipset protection, defences against short circuits, overvoltage, overcurrent, and over-discharge.
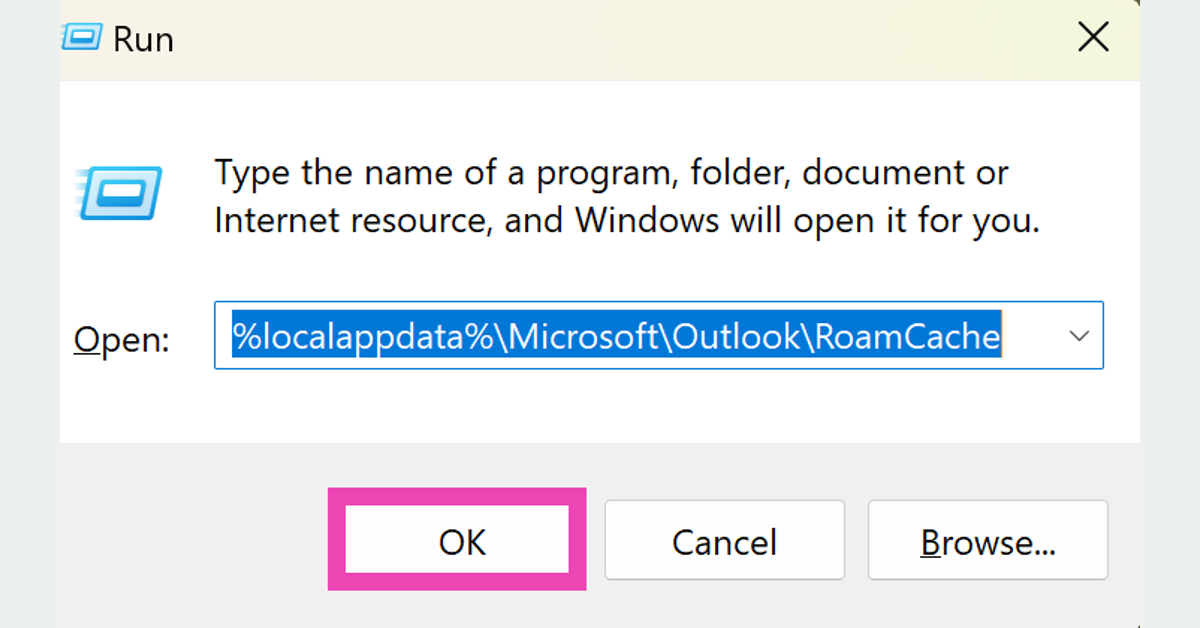 Step 3: In the folder that appears on the screen, select all the files and delete them.
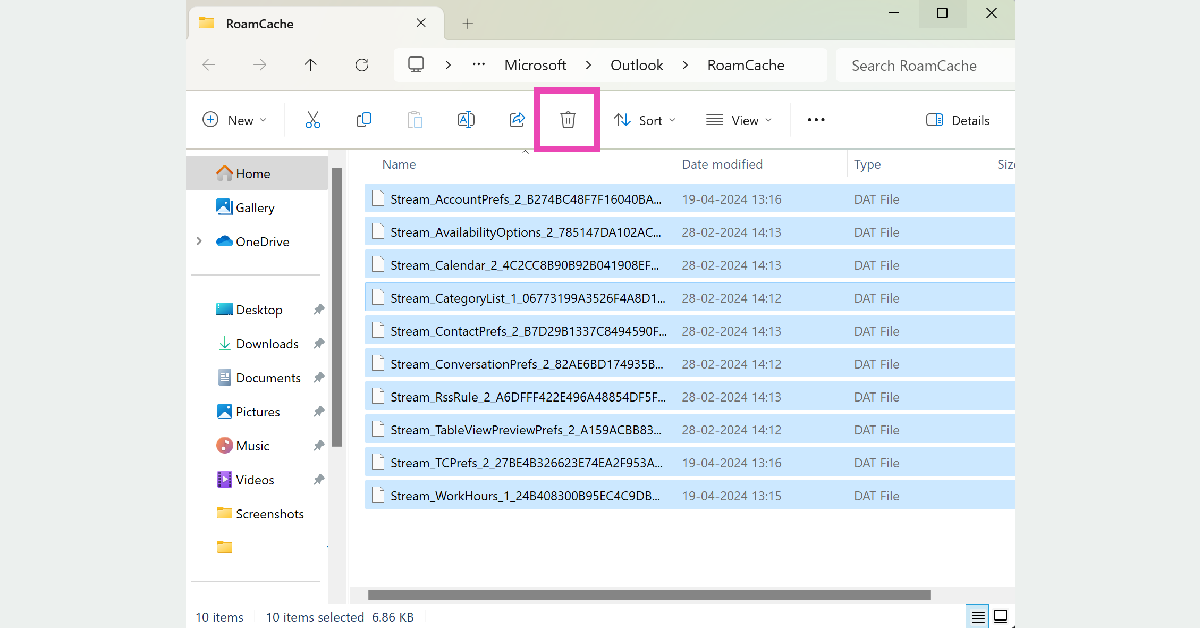 Microsoft Outlook’s cache will be cleared.
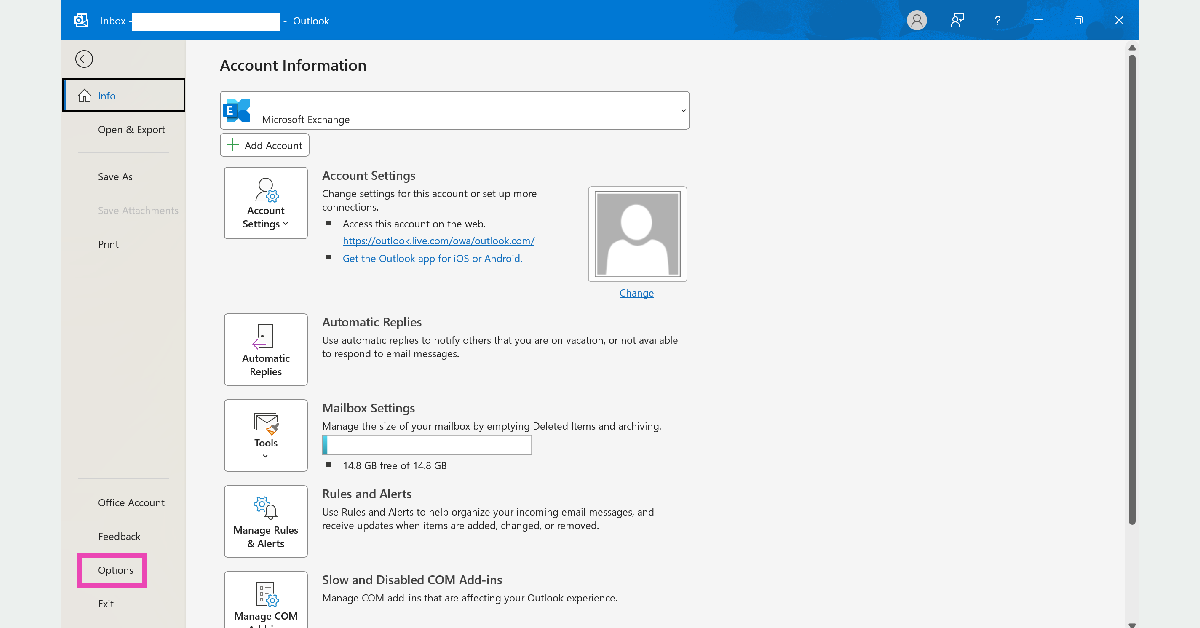 Step 3: Switch to the Mail tab.
Step 4: Deselect ‘Use Auto-Complete List to suggest names while typing in the To, Cc, and Bcc lines’. Click on Empty Auto-Complete List as well.
Step 3: Switch to the Mail tab.
Step 4: Deselect ‘Use Auto-Complete List to suggest names while typing in the To, Cc, and Bcc lines’. Click on Empty Auto-Complete List as well.
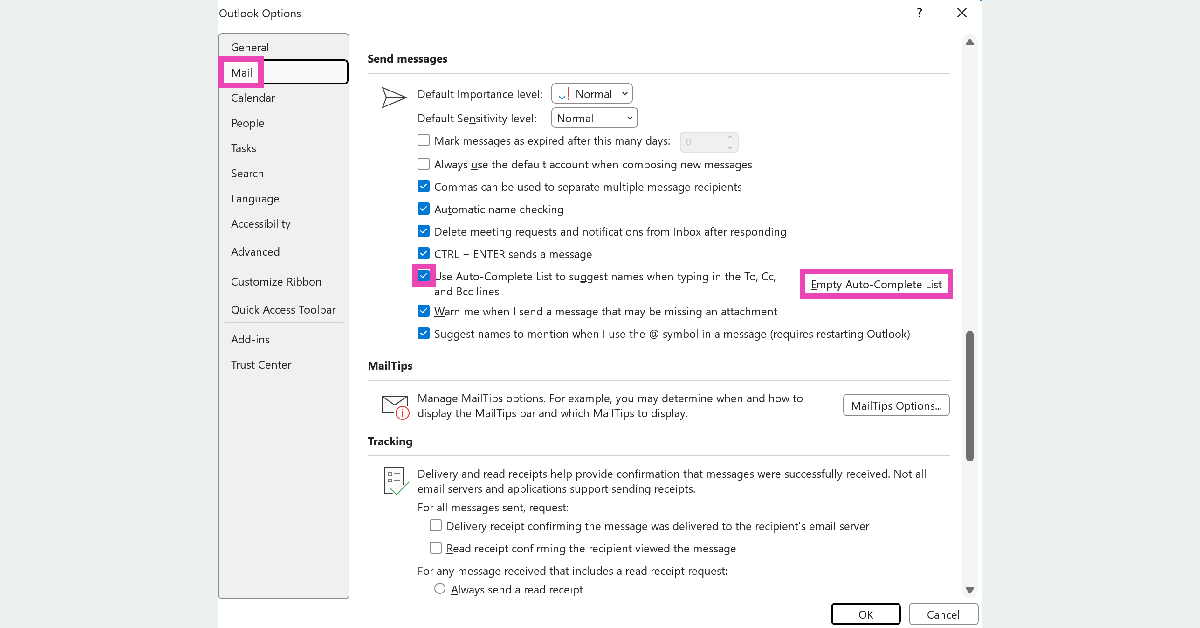 Step 5: Hit OK.
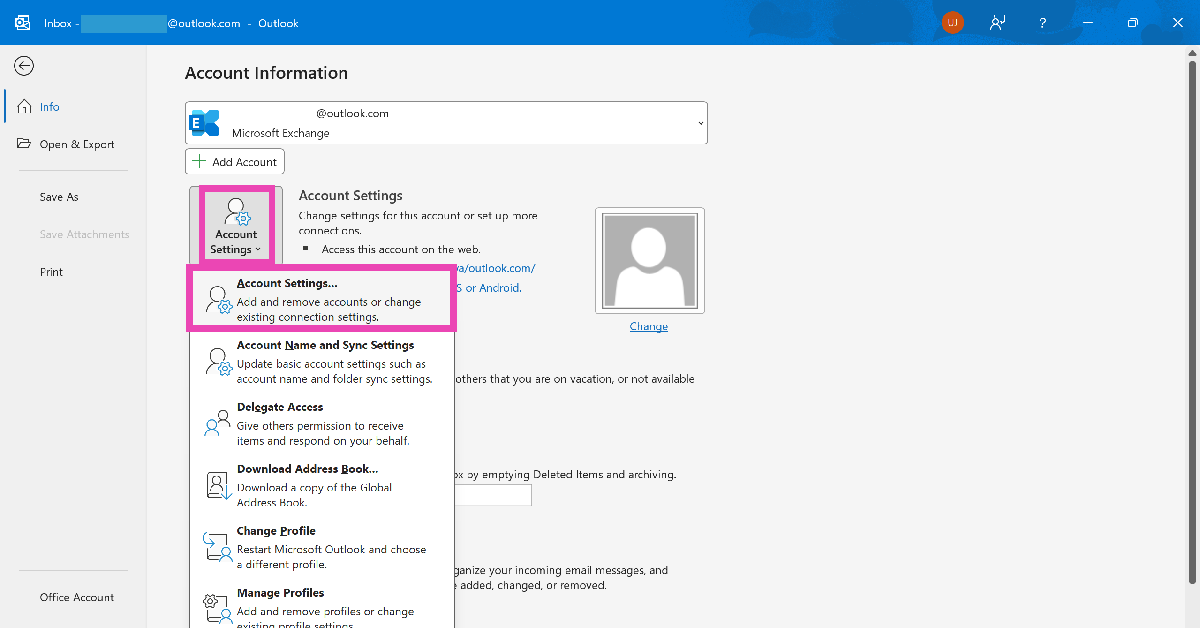 Step 3: Click on Account Settings in the drop-down menu.
Step 4: Go to the Data Files tab and select your account.
Step 5: Click on Open File Location.
Step 3: Click on Account Settings in the drop-down menu.
Step 4: Go to the Data Files tab and select your account.
Step 5: Click on Open File Location.
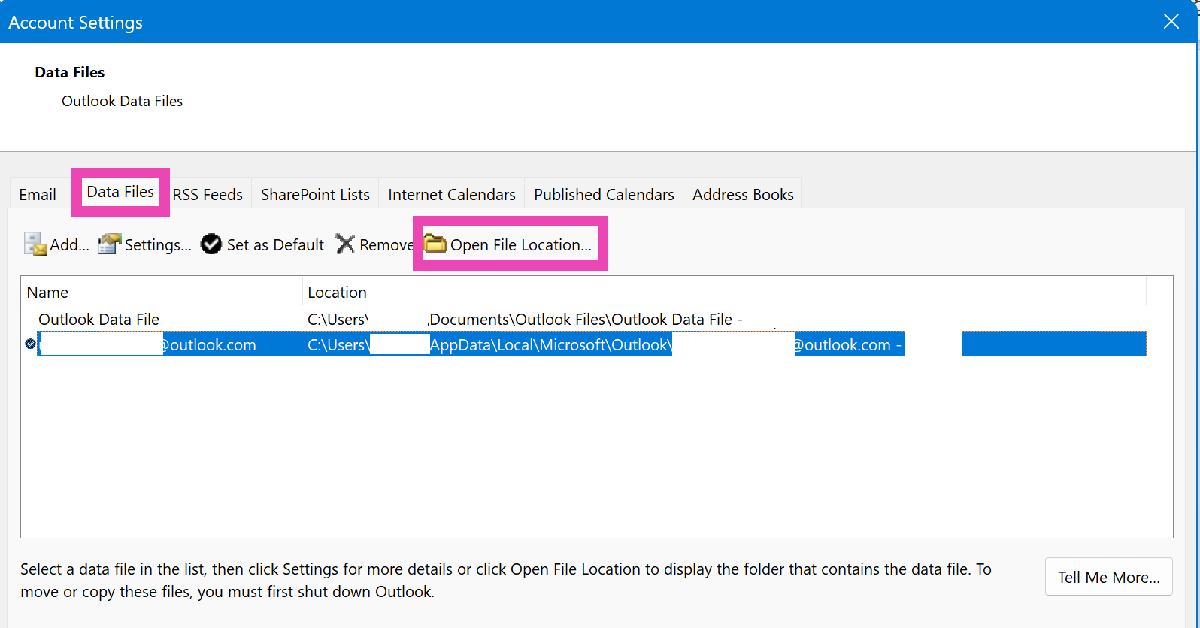 Step 6: Open the RoamCache folder.
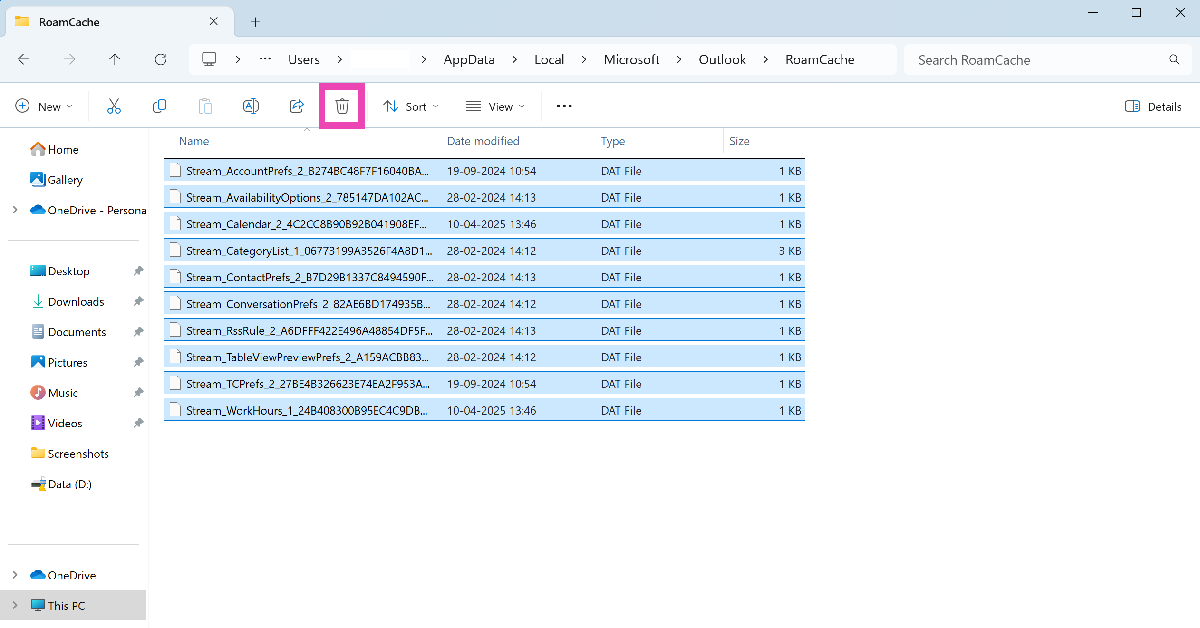 Step 7: Close Outlook and delete all the files in the RoamCache folder.
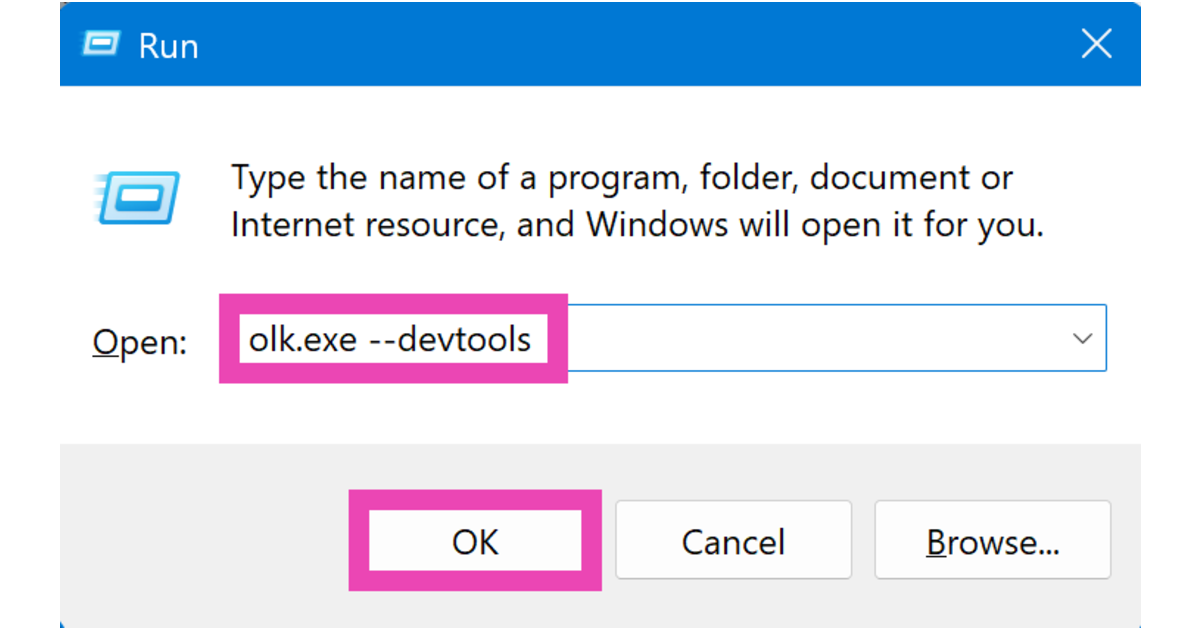 Step 3: Go to the Applications tab in the DevTools window.
 Step 4: Expand the Local Storage category from the sidebar and select Outlook.
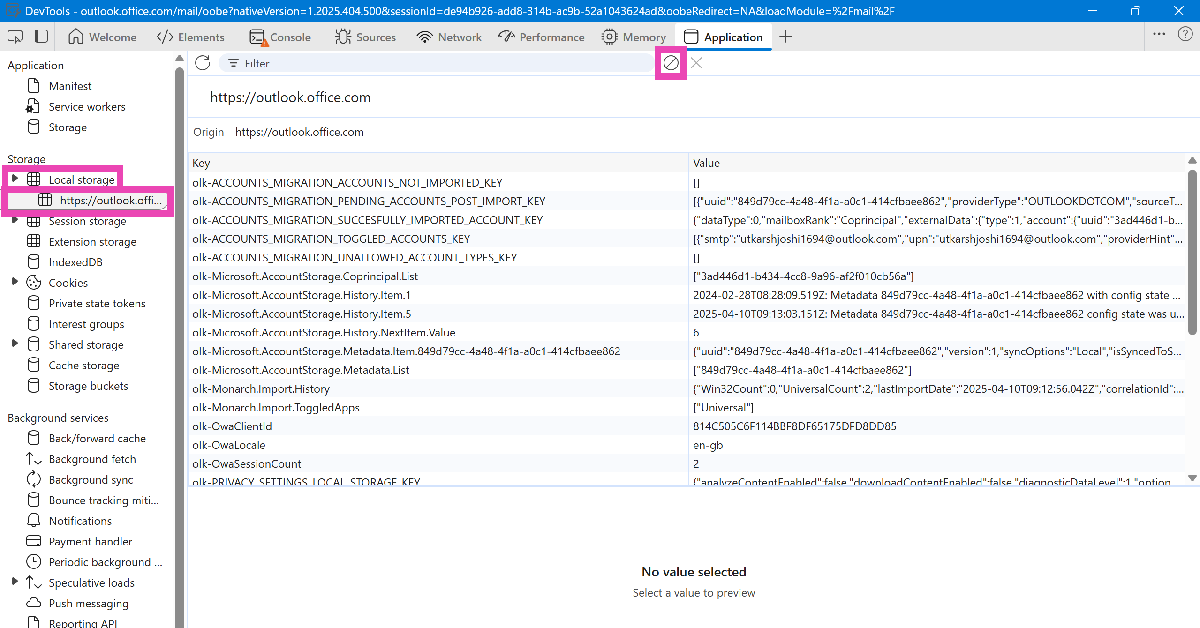 Step 5: Hit Clear.
Step 6: Expand the Cookies category from the sidebar and select Outlook. Hit Clear.
Step 5: Hit Clear.
Step 6: Expand the Cookies category from the sidebar and select Outlook. Hit Clear.
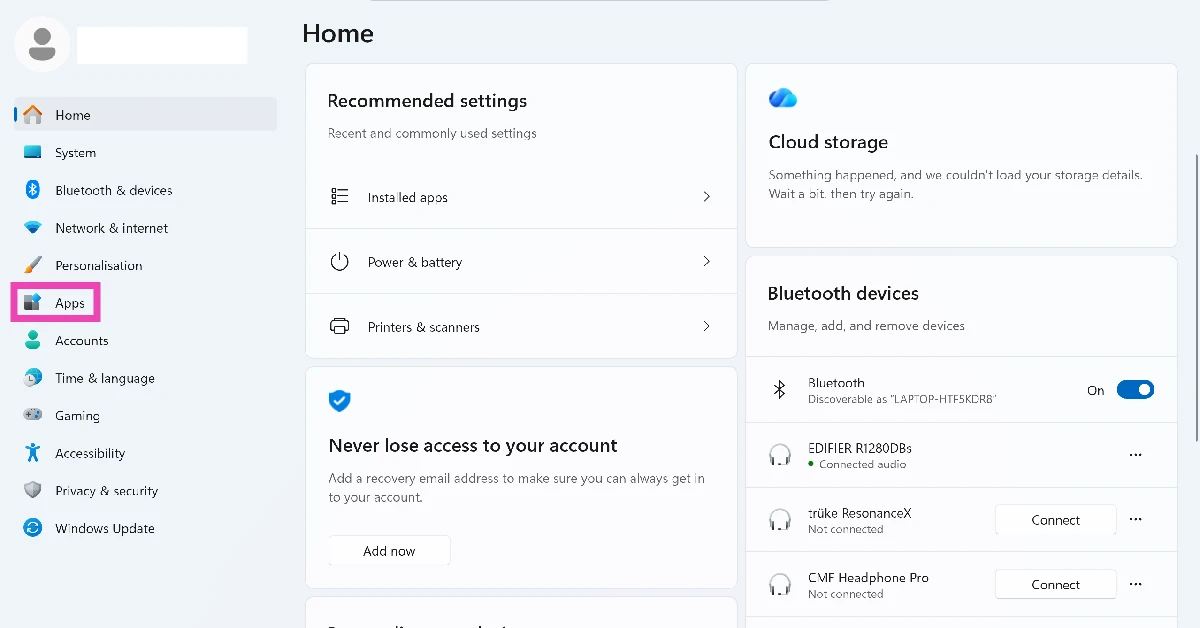 Step 2: Click on Installed apps.
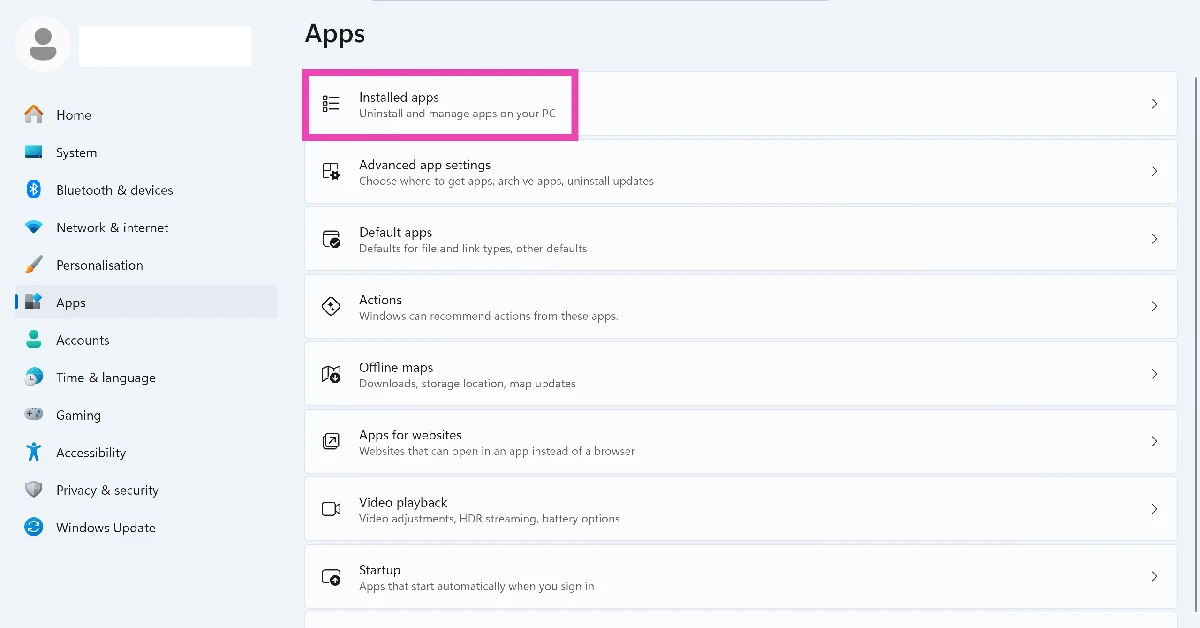 Step 3: Hit the ellipses next to Outlook.
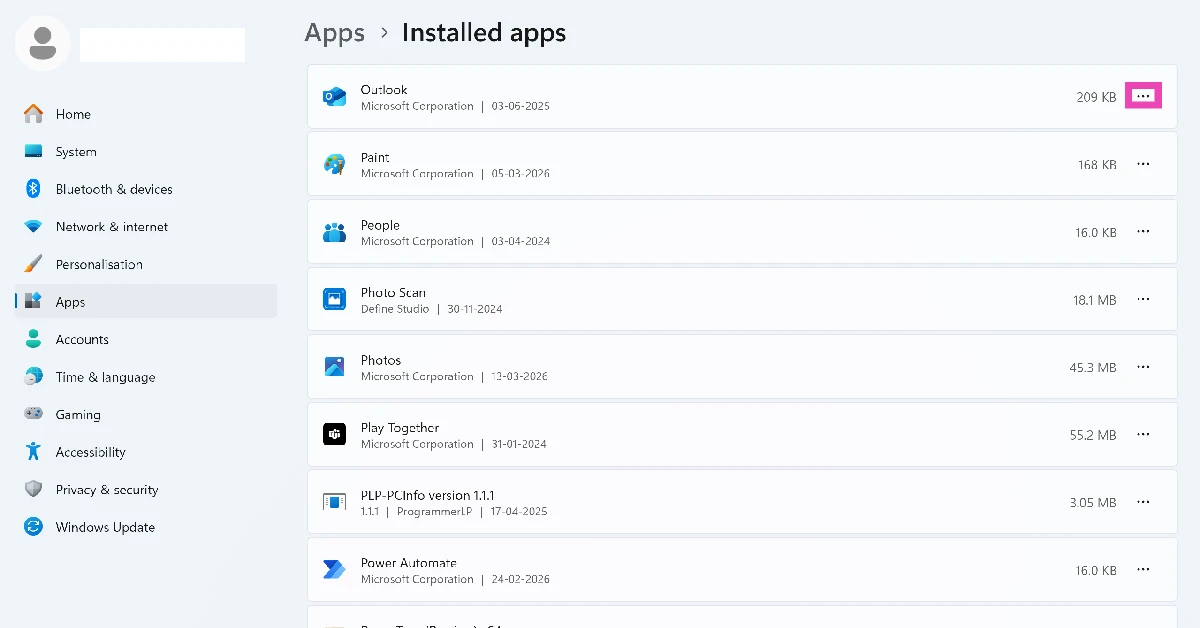 Step 4: Go to Advanced options.
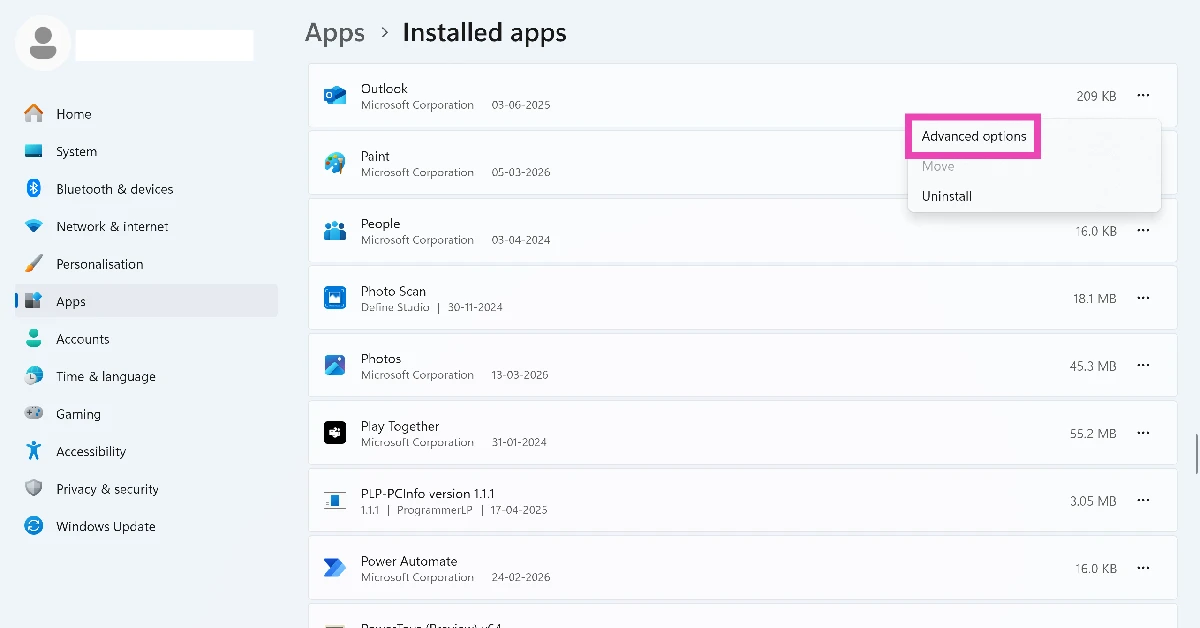 Step 5: Scroll down and hit Reset.
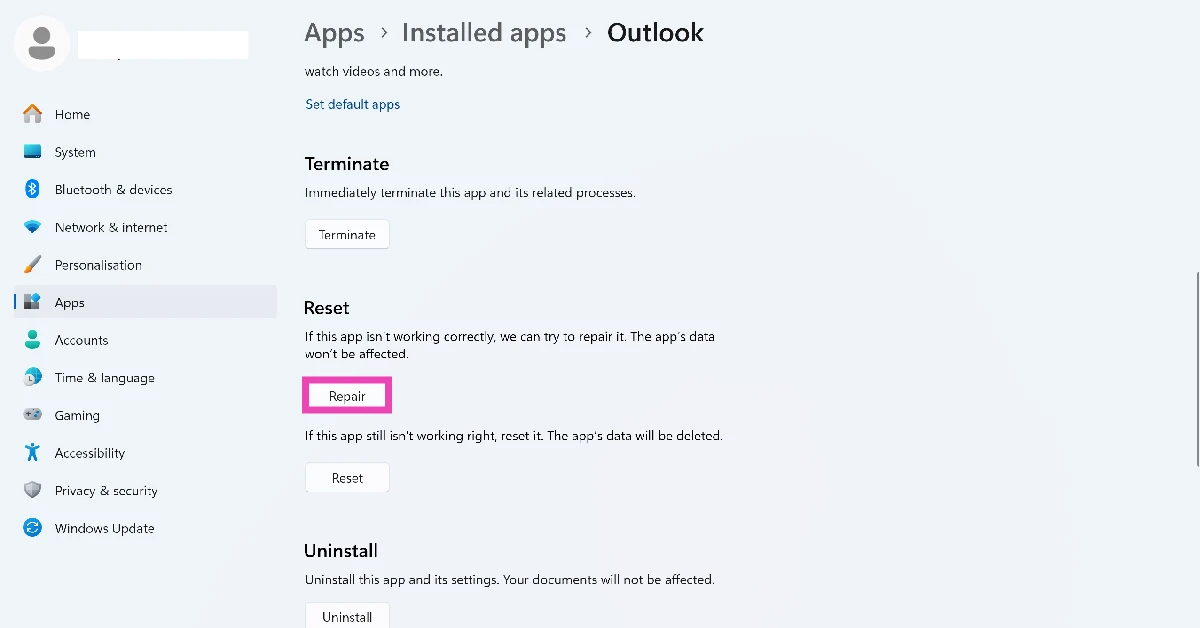
")
 Step 1: Right-click on the first folder and select Copy as path.
Step 2: Launch Notepad and paste the path.
Step 3: Right-click on the second folder and select Copy as path.
Step 4: Paste the path in Notepad.
Step 5: Launch Command Prompt as administrator and type robocopy. Hit Enter.
Step 6: Paste the two folder paths separated by a space and followed by /L /NJH /NJS /NP /NS. Hit Enter.
Step 1: Right-click on the first folder and select Copy as path.
Step 2: Launch Notepad and paste the path.
Step 3: Right-click on the second folder and select Copy as path.
Step 4: Paste the path in Notepad.
Step 5: Launch Command Prompt as administrator and type robocopy. Hit Enter.
Step 6: Paste the two folder paths separated by a space and followed by /L /NJH /NJS /NP /NS. Hit Enter.
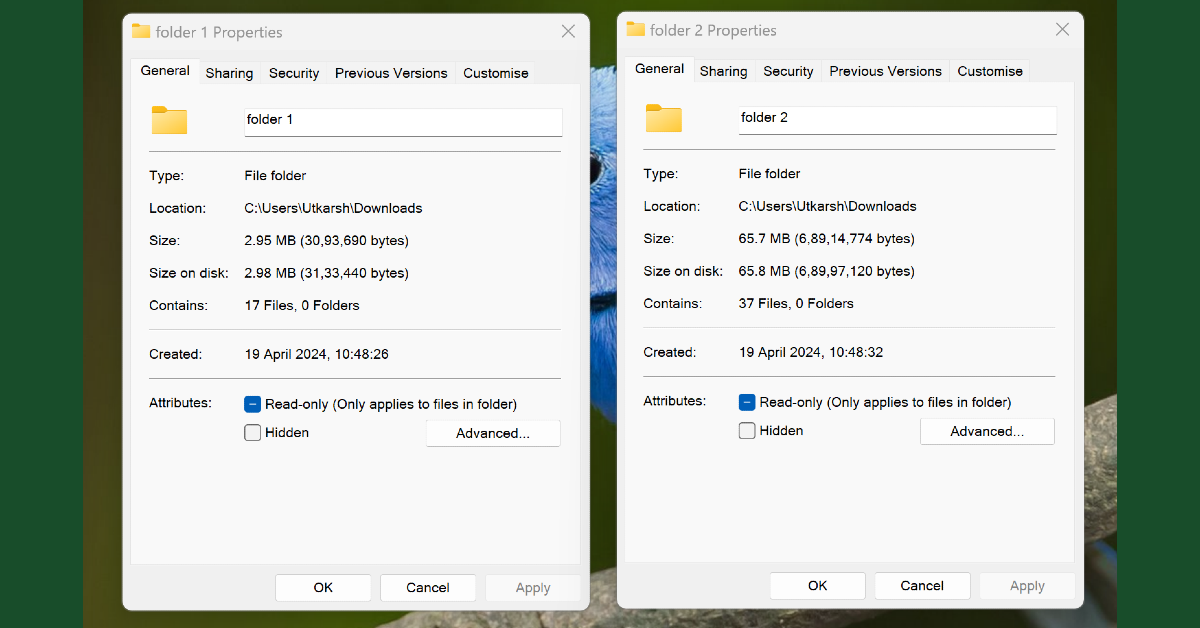 The easiest way to compare two folders in Windows 10/11 is by viewing their properties. Right-click a folder and select ‘Properties’ from the menu. Now, go to the location of the second folder, right-click on it, and select ‘Properties’ again. Place the two boxes side by side to compare the attributes of the two folders.
 Step 1: Right-click on the first folder and select Copy as path.
Step 2: Launch Notepad and paste the path.
Step 3: Right-click on the second folder and select Copy as path.
Step 4: Paste the path in Notepad.
Step 5: Launch Command Prompt as administrator and type robocopy. Hit Enter.
Step 6: Paste the two folder paths separated by a space and followed by /L /NJH /NJS /NP /NS. Hit Enter.
Step 1: Right-click on the first folder and select Copy as path.
Step 2: Launch Notepad and paste the path.
Step 3: Right-click on the second folder and select Copy as path.
Step 4: Paste the path in Notepad.
Step 5: Launch Command Prompt as administrator and type robocopy. Hit Enter.
Step 6: Paste the two folder paths separated by a space and followed by /L /NJH /NJS /NP /NS. Hit Enter.
 WinMerge is a great third-party open-source tool to compare two folders on your Windows PC or laptop. As the name suggests, WinMerge lets you merge the contents of two discrete folders. You can also use this tool to compare up to three folders. Here’s how.
Step 1: Download and install WinMerge from its official website.
Step 2: Click on File and select Open.
Step 3: In the ‘1st file or folder’ field, click on Browse and select the folder you wish to compare.
Step 4: Repeat Step 3 for the second and third folders as well.
Step 5: Click the check box for Read-only under every folder.
Step 6: Type *.* in the Folder: Filter field.
Step 7: Hit Compare.
WinMerge is a great third-party open-source tool to compare two folders on your Windows PC or laptop. As the name suggests, WinMerge lets you merge the contents of two discrete folders. You can also use this tool to compare up to three folders. Here’s how.
Step 1: Download and install WinMerge from its official website.
Step 2: Click on File and select Open.
Step 3: In the ‘1st file or folder’ field, click on Browse and select the folder you wish to compare.
Step 4: Repeat Step 3 for the second and third folders as well.
Step 5: Click the check box for Read-only under every folder.
Step 6: Type *.* in the Folder: Filter field.
Step 7: Hit Compare.


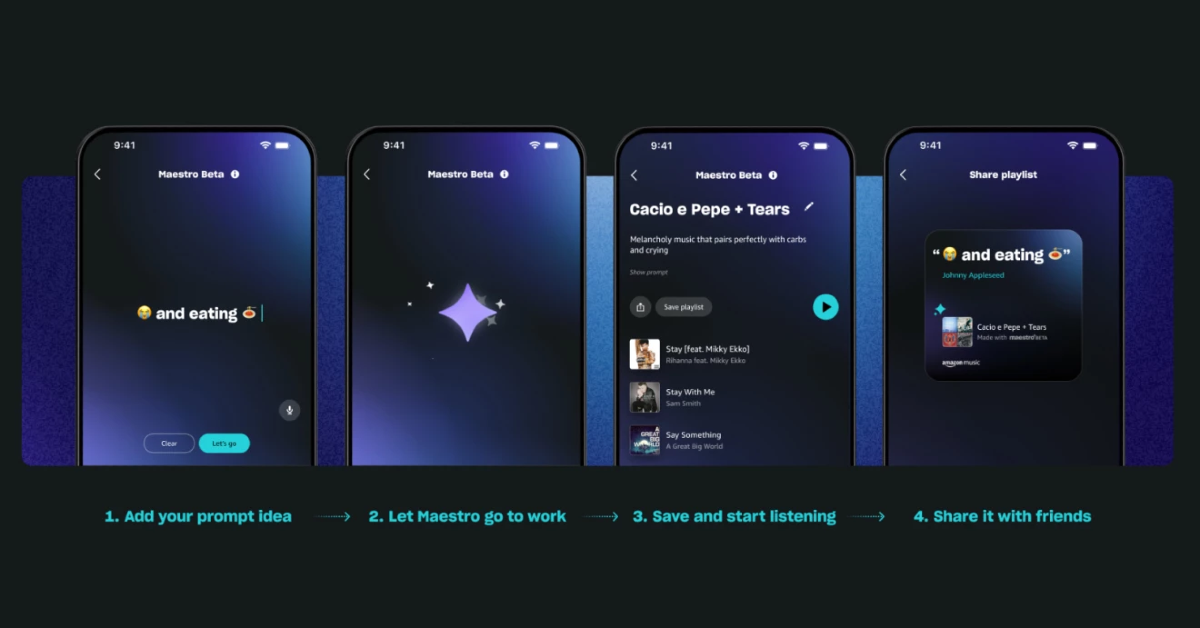 Also Read: Noise introduced Sound Master speaker with 360° audio technology in India

 Earbuds With Cutting-Edge ChatGPT Integrations")

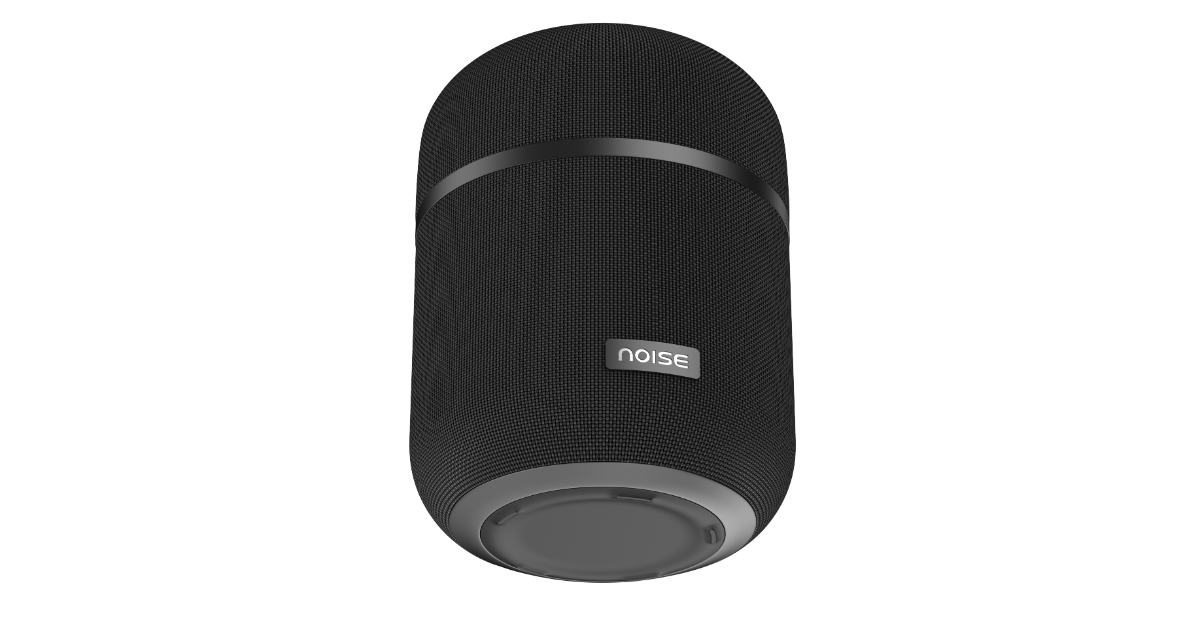 Sound Master has intuitive touch controls that make track skipping, volume changes, and music library navigation simple. It also allows users to take calls straight through the speaker thanks to a built-in microphone. True Wireless Stereo (TWS) connectivity is available on the audio device. For big parties or movie evenings, pairing two Sound Master speakers together produces a larger soundstage. Sound Master promises to bring music to life with rich details and deep bass thanks to its 100-watt high-octane bass. A subwoofer, four bass radiators, and eight treble radiators work together to provide this potent performance. Sound Master’s 360° audio technology raises the standard by uniformly distributing sound across the room.
Also Read: Vivo T3x 5G with Snapdragon 6 Gen 1 SoC launched in India
The Noise Sound Master features Bluetooth 5.3 technology, so you can connect to your devices with the speaker and experience no lag. Moreover, NFC technology enables instant connection by only tapping your NFC-capable device.
According to the company, the audio device has a long-lasting 12,000 mAh battery that can run the device for up to 12 hours straight on a single charge. This makes it ideal for long parties or marathon sessions of personal listening.
In terms of pricing Noise Sound Master will be available for purchase via the company’s official website at Rs 9,999.
Sound Master has intuitive touch controls that make track skipping, volume changes, and music library navigation simple. It also allows users to take calls straight through the speaker thanks to a built-in microphone. True Wireless Stereo (TWS) connectivity is available on the audio device. For big parties or movie evenings, pairing two Sound Master speakers together produces a larger soundstage. Sound Master promises to bring music to life with rich details and deep bass thanks to its 100-watt high-octane bass. A subwoofer, four bass radiators, and eight treble radiators work together to provide this potent performance. Sound Master’s 360° audio technology raises the standard by uniformly distributing sound across the room.
Also Read: Vivo T3x 5G with Snapdragon 6 Gen 1 SoC launched in India
The Noise Sound Master features Bluetooth 5.3 technology, so you can connect to your devices with the speaker and experience no lag. Moreover, NFC technology enables instant connection by only tapping your NFC-capable device.
According to the company, the audio device has a long-lasting 12,000 mAh battery that can run the device for up to 12 hours straight on a single charge. This makes it ideal for long parties or marathon sessions of personal listening.
In terms of pricing Noise Sound Master will be available for purchase via the company’s official website at Rs 9,999.
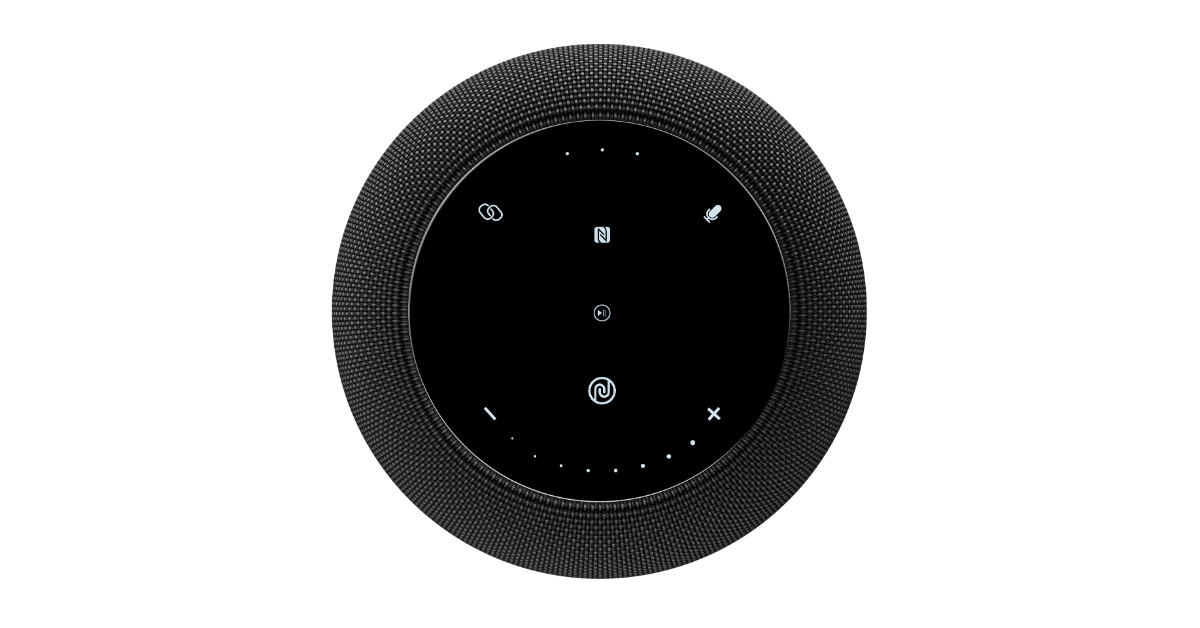 Amit Khatri , Co-founder of Noise said, “We have constantly been on a mission to redefine consumers’ journeys with meaningful innovation that not just resonates with them seamlessly but also fulfils their rising lifestyle needs. Sound Master signifies this commitment and is a step towards levelling the bar of audio experience. The amalgamation of defined audio solutions and striking aesthetics will certainly bring a fresh experience for the ones looking to add a premium home audio product.”