Earlier this year, Snapchat introduced its AI chatbot for Snapchat+ subscribers. The chatbot was later rolled out for non-subscribers as well. The overall reception to My AI has been quite lukewarm, as many Snapchat users don’t find it to be quite helpful. The allegations of accessing users’ current location, didn’t help My AI’s popularity either. The chatbot is an average tool to kill some time at best and a potential threat to your privacy at worst. Did we mention that it can view all your Snapchat Stories by default? If you’re dont with My AI, here are the top 5 ways to remove it on Snapchat.
Read Also: The Impact of Digital Innovation on Japan’s Yen Currency Strength
In This Article
Can My AI be permanently deleted from Snapchat?
Simply put, My AI cannot be deleted from Snapchat. At best, Snapchat+ subscribers can unpin it from the ‘Chats’ section of the app or remove their conversation with the chatbot altogether. If the ‘out of sight, out of mind’ approach doesn’t work for you, you can clear the data from your past conversations with the AI as well.
Regular Snapchat users will be disappointed to know that they cannot unpin or remove My AI from the ‘Chat’ tab. The chatbot will be the first thing you see when you swipe right from the camera page. Another alarming thing about My AI is that it can view your Snapchat Story. If you’re very particular about your data, this may bother you. Luckily, My AI’s access to your story can be removed from ‘Privacy Settings’ on its profile page. You don’t need to be a Snapchat+ subscriber to do this. Non-subscribers can also clear their past conversational data with My AI. However, if you’ve @mentioned My AI in other conversations, you will need to delete them manually.
Remove My AI from your Snapchat chat feed

If you are a Snapchat+ subscriber, here’s how you can remove the My AI bot from your chat feed.
Step 1: Launch the Snapchat app on your phone and swipe right to access the chat feed.
Step 2: Long press the My AI chat.
Step 3: Tap on Chat Settings.
Step 4: Select Clear from Chat Feed.
Remove AI from Snapchat chat feed using Settings

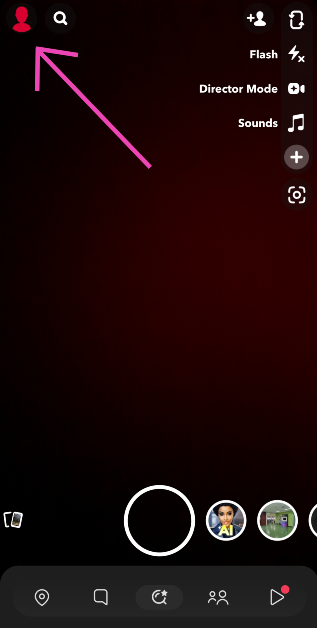
Step 1: Launch the Snapchat app on your phone and tap on your Bitmoji at the top left corner of the screen.
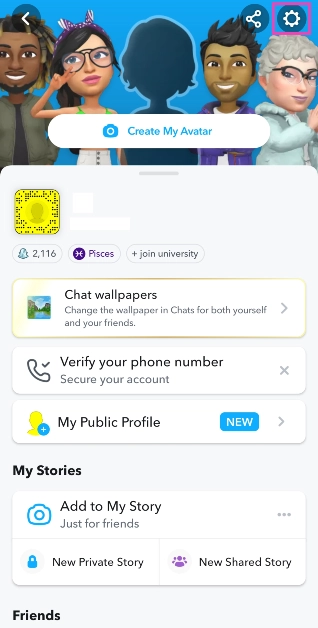
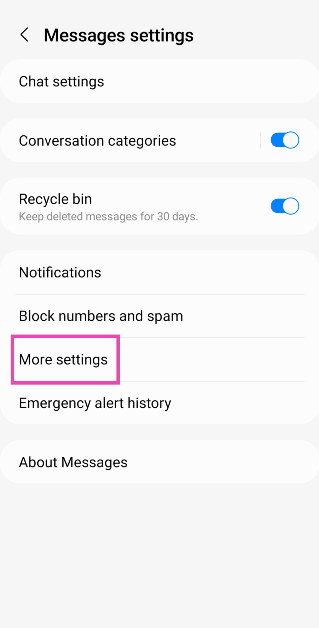
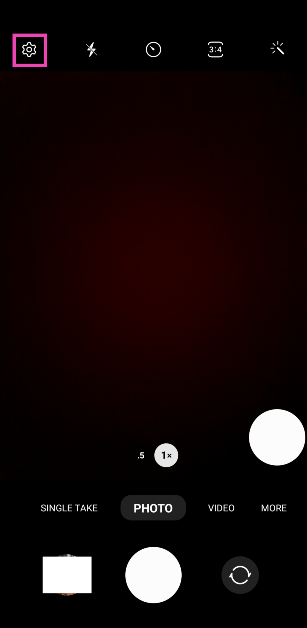
Step 2: Hit the gear icon at the top right corner of the screen to access Settings.
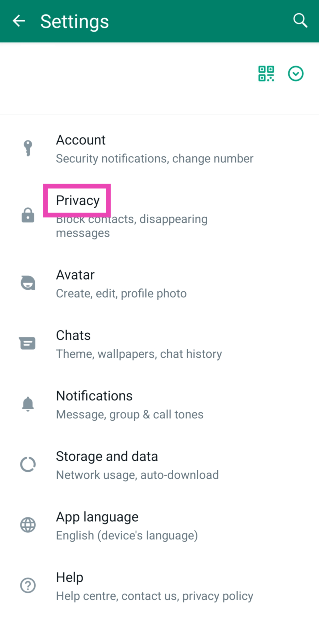
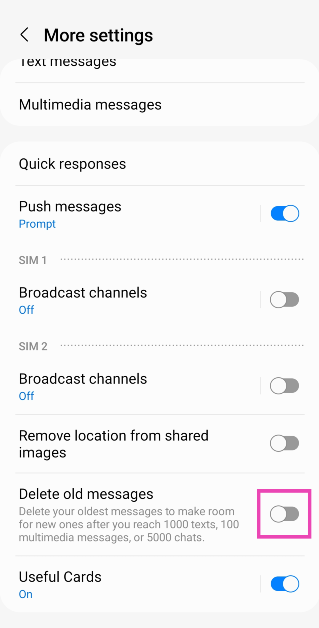
Step 3: Scroll down and select Clear Data under Privacy Controls.
Step 4: Hit Clear Conversations and tap the cross icon next to My AI.
Step 5: Confirm your selection in the popup box.
Read Also: Best 5 ways to fix ‘Phone Screen Turning Green’
Unpin My AI from your Chat feed

If you want to keep the chatbot around but don’t want it as the first conversation in your chat tab, follow these steps to unpin it.
Step 1: Launch the Snapchat app on your device and tap your Bitmoji at the top left corner of the screen.
Step 2: Hit the Snapchat+ banner on your profile.
Step 3: Turn off the toggle switch next to My AI. The AI chatbot will be unpinned from your chat tab.
Unpin My AI using the popup menu

Step 1: Launch the Snapchat app on your device and swipe right to access the chat page.
Step 2: Long press the My AI chat.
Step 3: Hit Chat Settings and select Unpin Conversation.
Not a Snapchat+ subscriber? Clear your My AI data
If you’re not a Snapchat+ subscriber, you can still clear the data from your past conversations with My AI. Here’s how.
Step 1: Launch the Snapchat app on your phone and tap your Bitmoji at the top left corner of the screen.
Step 2: Hit the gear icon at the top right corner of the screen to access Settings.
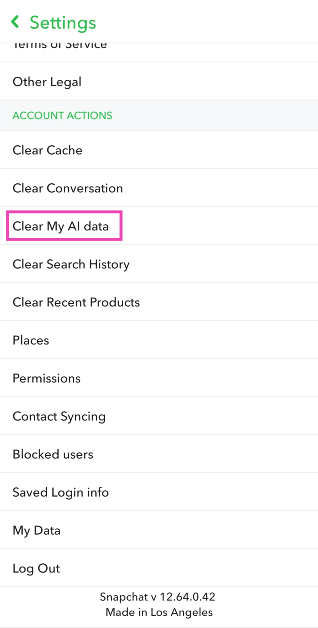
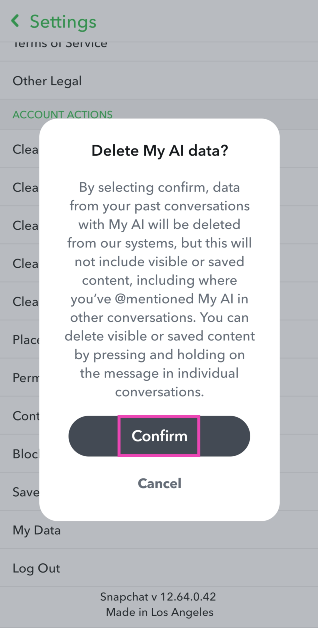
Step 3: Scroll down and select Clear My AI Data.
Step 4: Confirm your selection in the popup box.
Frequently Asked Questions (FAQs)
How do I remove My AI on Snapchat?
My AI cannot be permanently deleted on Snapchat. However, if you’re a Snapchat+ subscriber, you can remove it from the chat tab by long-pressing it and selecting Chat Settings>Clear from Chat Feed.
How do I remove My AI from Snapchat if I don’t have a Snapchat+ subscription?
If you’re not a Snapchat+ subscriber, you can clear your conversational data with My AI by going to Settings>Clear My AI Data.
Is Snapchat’s My AI bot a risk to my privacy?
Since it cannot be removed from your account, My AI is ever-present on your profile. Your conversations with the chatbot are retained and used to suggest personalised ads, which many see as a risk to privacy.
Read Also: Comparison: iQoo 12 Vs iQoo 11
Conclusion
These are the top 5 ways to remove My AI on Snapchat. If you want to be sure that the chatbot doesn’t have access to your location, you can remove the ‘location’ permission from Snapchat altogether. Go to Settings>Apps>Snapchat and tap on the app’s permission list. If you see ‘Location’ in the list, tap on it to rescind it. Snapchat claims that the chatbot does not collect new location data. If the app doesn’t have access to your location, My AI will not be able to give you location-based results.


 laptop with Intel Core Ultra 9 CPU launched")