Why should you know the model name/number of your laptop?
Your laptop’s model name is one of its distinguishing attributes. Knowing its name isn’t a requirement for everyday tasks, but it does come in handy in situations such as these.- If you’re reselling your laptop.
- While updating the laptop’s drivers.
- Searching for internal components online.
- Trying to find compatible accessories.
- Looking up solutions to certain issues.
Find your laptop’s model name or number from System Information (Windows)
Step 1: Type ‘System Information’ in the search bar and open the first result that pops up.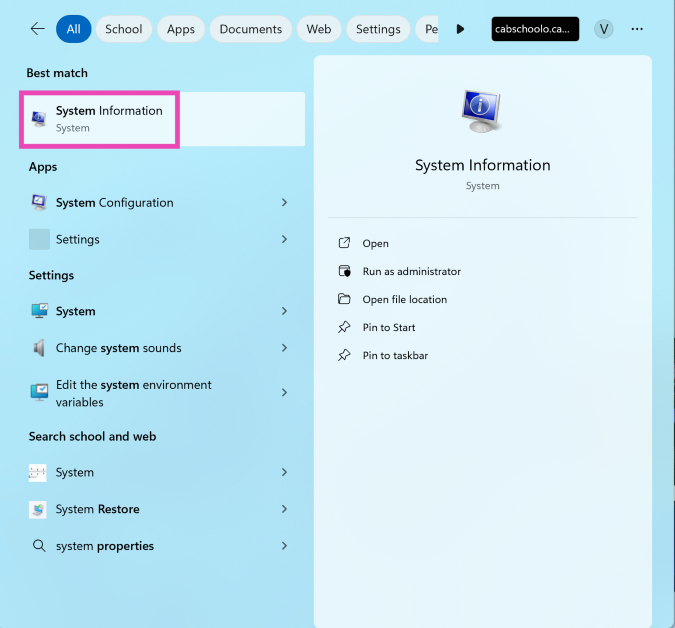 Step 2: Make sure you’re on the System Summary tab.
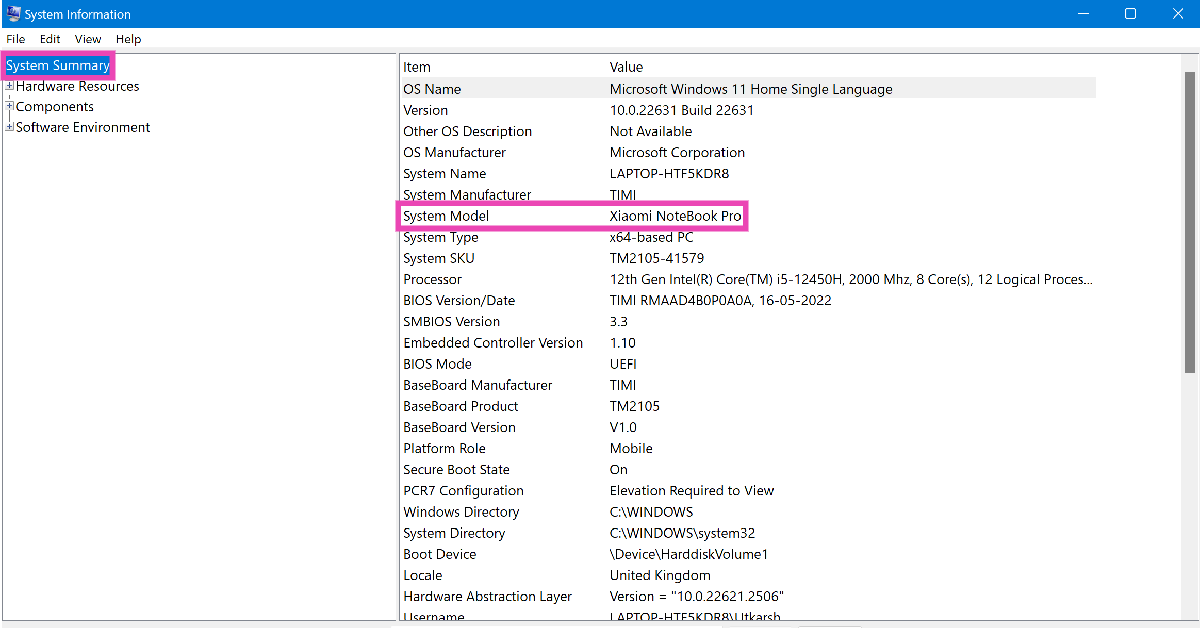 Step 3: Your laptop’s model name/number will be listed next to the System Model category.
Find your laptop’s model name or number using Settings (Windows)
Step 1: Launch the Settings app on your laptop. Step 2: Switch to the System tab.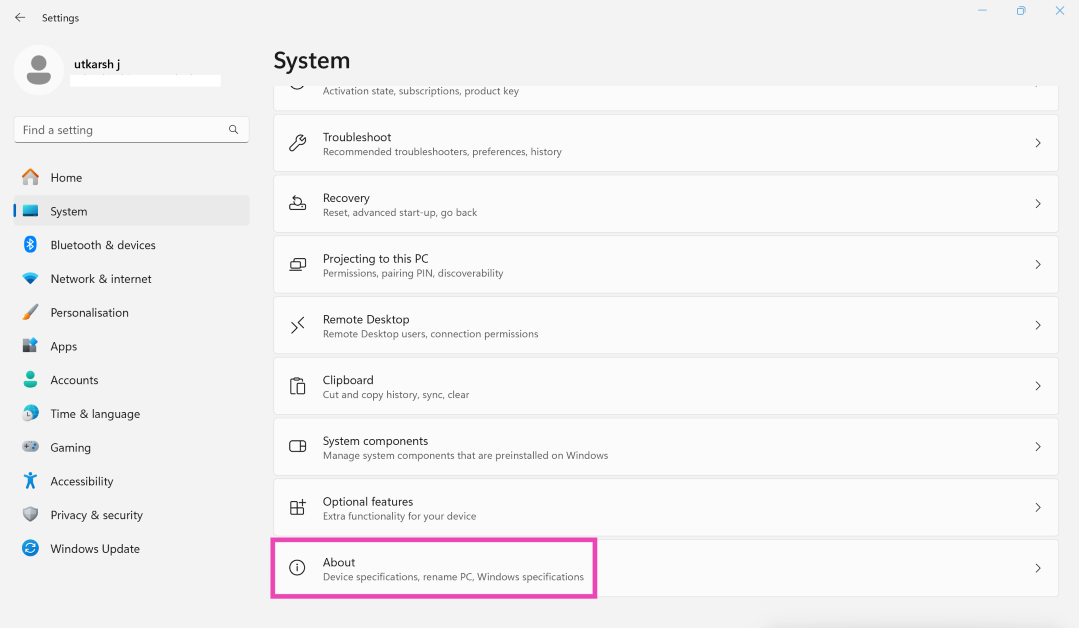 Step 3: Scroll down and hit About.
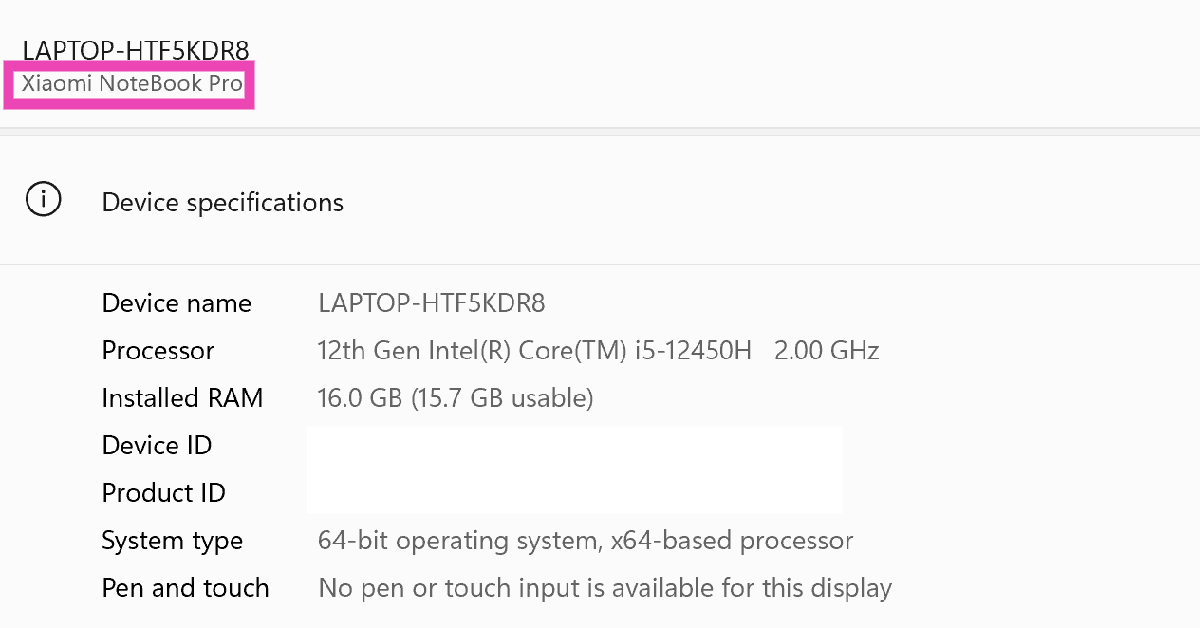
Step 4: Your laptop’s model name/number will be listed at the top of the screen.
Step 3: Scroll down and hit About.
Step 4: Your laptop’s model name/number will be listed at the top of the screen.
 You can also trigger this page by right-clicking on the Windows icon in the taskbar and selecting ‘System’.
Use Command Prompt to find your laptop’s model name/number (Windows)
 Step 1: Use the search box to find Command Prompt.
Step 2: Right-click on the Command Prompt tile and select Run as administrator.
Step 3: Type the follow command and hit Enter:
Step 1: Use the search box to find Command Prompt.
Step 2: Right-click on the Command Prompt tile and select Run as administrator.
Step 3: Type the follow command and hit Enter:
wmic csproduct get name
The model name will appear on the screen.Use the native management tool (Windows)
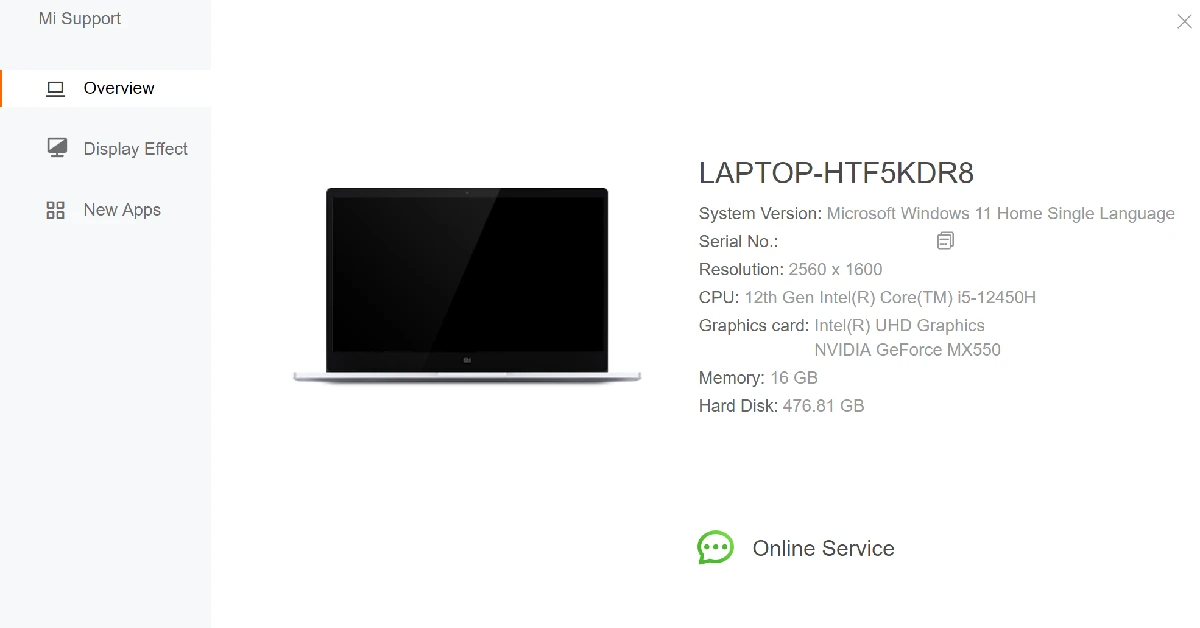 Almost every Windows laptop has a native management tool designed by its manufacturer. Search for the manufacturer name in the taskbar, and the app will pop up in the results. Open this management app and go to the ‘Overview’ section. This is where you’ll find the essential details about your laptop.
Use the DirectX Diagnostic Tool (Windows)
Step 1: Press Windows + R to open the Run box. Step 2: Type dxdiag and hit Enter.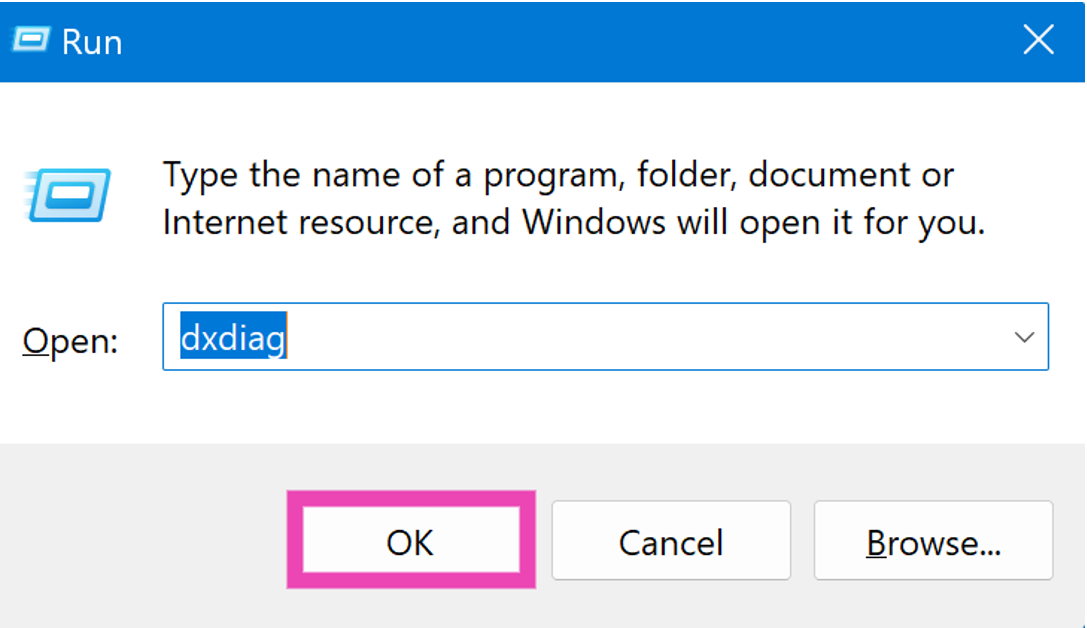 Step 3: Allow internet access to the program.
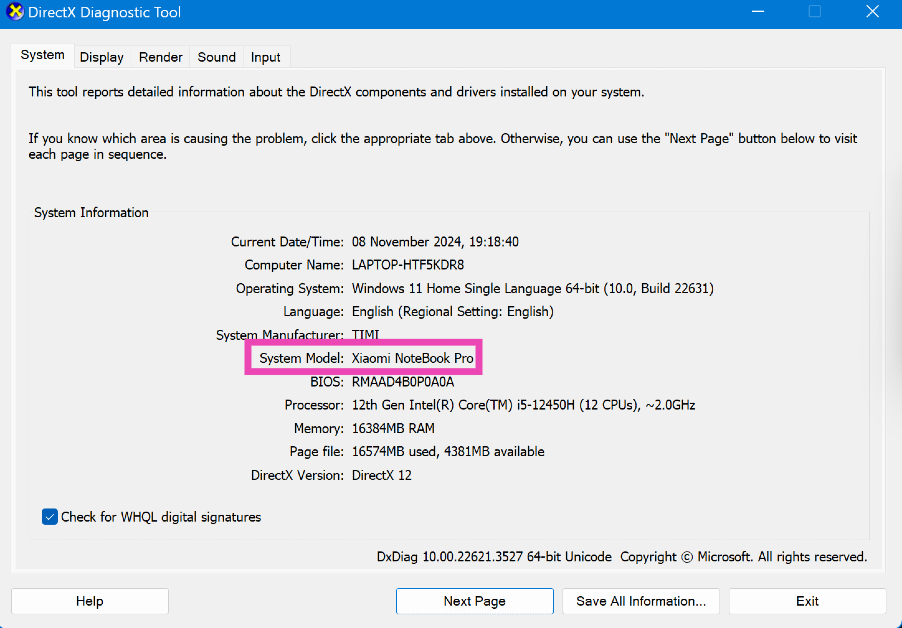
Step 4: Check your laptop’s model name/number next to System Model.
Step 3: Allow internet access to the program.
Step 4: Check your laptop’s model name/number next to System Model.
Use Windows Powershell
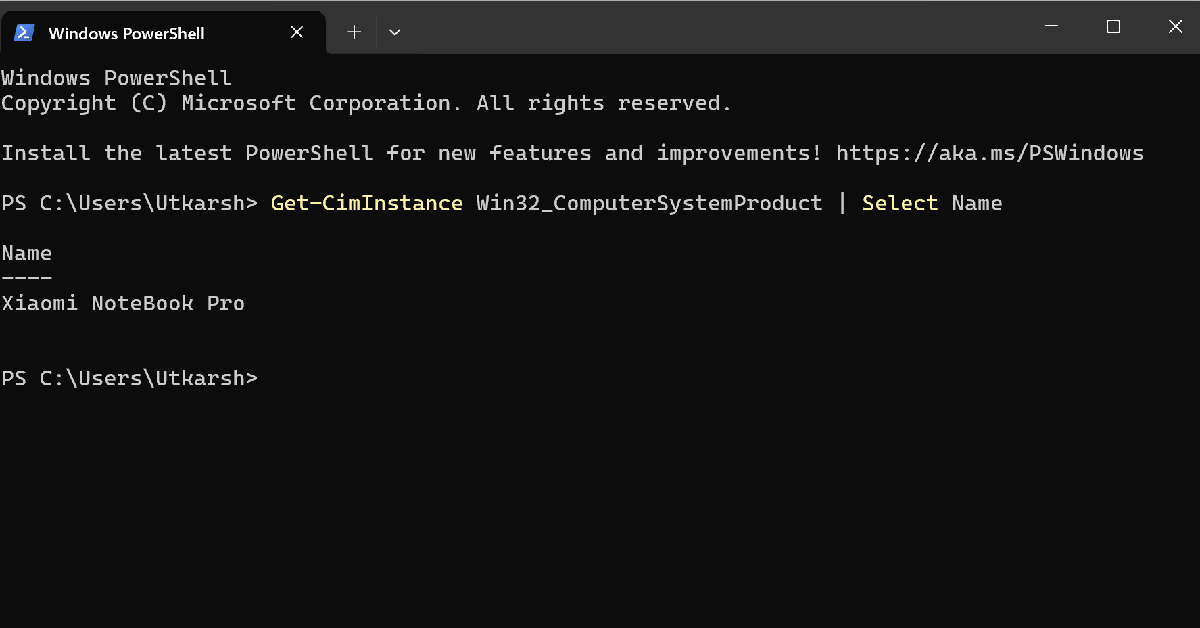 Step 1: Use the search box to open Windows Powershell as administrator.
Step 2: Type the following command and hit Enter:
Step 1: Use the search box to open Windows Powershell as administrator.
Step 2: Type the following command and hit Enter:
Get-CimInstance Win32_ComputerSystemProduct | Select Name
Use BIOS
Step 1: Restart your laptop and wait for the boot screen to load. Step 2: Long-press the hotkey to enter BIOS. Depending on your laptop, this hotkey could be F1, F2, F10, DEL, or ESC. Step 3: Go to the System Information category to find your laptop’s model name/number.Go to the About section (MacBook)
 Step 1: Hit the Apple menu and select About This Mac. The model name will appear on the screen.
Step 2: Copy the serial number on the screen.
Step 3: Go to https://checkcoverage.apple.com/ and paste the serial number to find the specific model name.
Step 1: Hit the Apple menu and select About This Mac. The model name will appear on the screen.
Step 2: Copy the serial number on the screen.
Step 3: Go to https://checkcoverage.apple.com/ and paste the serial number to find the specific model name.
Use System Information (MacBook)
 Step 1: Press the Option key and click on the Apple menu.
Step 2: Select System Information.
Step 3: Select Hardware from the sidebar.
Step 4: The model name will appear on the main page. To get the specific model number, copy the serial number.
Step 5: Go to https://checkcoverage.apple.com/ and paste the serial number to find the specific model name.
Step 1: Press the Option key and click on the Apple menu.
Step 2: Select System Information.
Step 3: Select Hardware from the sidebar.
Step 4: The model name will appear on the main page. To get the specific model number, copy the serial number.
Step 5: Go to https://checkcoverage.apple.com/ and paste the serial number to find the specific model name.


 From a technical standpoint, the film is a marvel. The production team includes Iconoclast Content, Inc., with VFX by Electric Theater Collective and animation by Analog Studio. Matias Boucard’s cinematography captures every spin, and the editing by Final Cut LA Inc. stitches together a seamless visual experience. It’s clear Apple aimed for more than mere product promotion here—they sought an emotional connection.
Read Also:
From a technical standpoint, the film is a marvel. The production team includes Iconoclast Content, Inc., with VFX by Electric Theater Collective and animation by Analog Studio. Matias Boucard’s cinematography captures every spin, and the editing by Final Cut LA Inc. stitches together a seamless visual experience. It’s clear Apple aimed for more than mere product promotion here—they sought an emotional connection.
Read Also: 


")
 Step 1:
 Step 1:


")


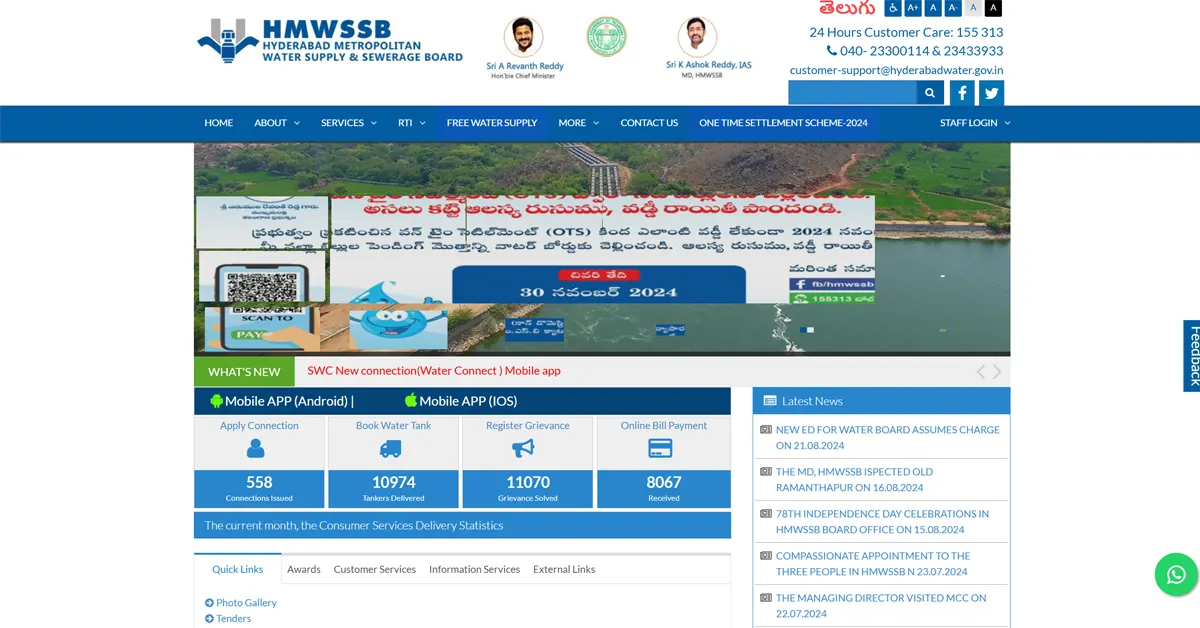
 The issue, which seems to be limited to links associated with Google News, raises concerns about security vulnerabilities in government-managed websites. The primary website,
 While it’s unclear who might be behind the attack or how long this redirect has been active, it’s a stark reminder of the vulnerabilities that can exist in public resources, even those managed by government agencies. When trusted platforms like HMWSSB’s water website are exposed to threats, it can damage public trust and potentially misuse information.


")


")
 Step 1: Launch
 ")
 Step 1: Install