Logitech Signature Slim Combo MK950 Review: Good additions to your office desk

Last month, Logitech launched the ‘Signature Slim’ keyboard and mouse combo in India. Currently, the MK950 combo is available for Rs 12,995 on Amazon, Rs 1,000 lower than its launch price. Designed in the mould of the MX Series, the Signature Slim Combo is a great pairing for office and home users alike. It ditches the bells and whistles, taking a performance-oriented approach. Here is our review of the Logitech Signature Slim Combo MK950 after having used it for a couple of weeks. Read Also: Amazon Kindle not charging? Here are 9 fixes (2024)

Logitech Signature Slim Combo MK950 Review: Design

Here’s what you get inside the Signature Slim Combo retail box:
  • Logitech K950 keyboard (2 AAA batteries inside)
  • Logitech M750 mouse (1 AA battery inside)
  • USB Bolt receiver
  • User Documentation
The combo is available in two colour variants – Graphite and Off-white. Logitech Signature Slim Combo MK950 Review: Design 
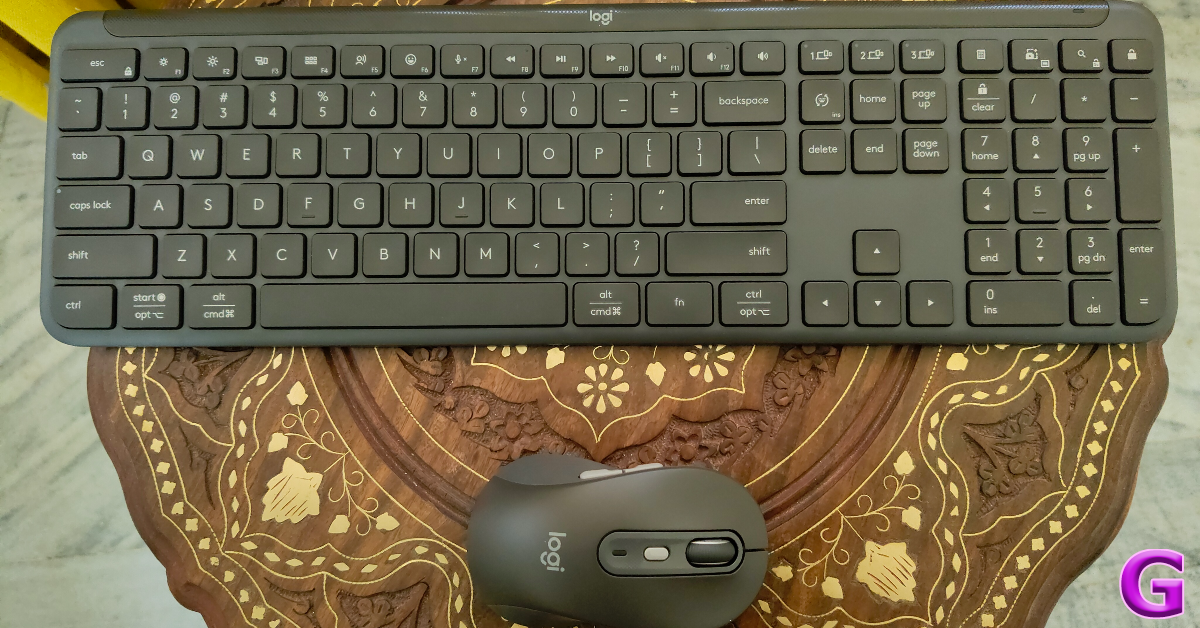
The K950 keyboard has a plastic shell but it is very robust. Weighing 685g, it makes its presence felt. As the name suggests, it rocks a slim form factor, which is something we like in membrane keyboards. The strength of its chassis is undoubtedly its biggest asset. 
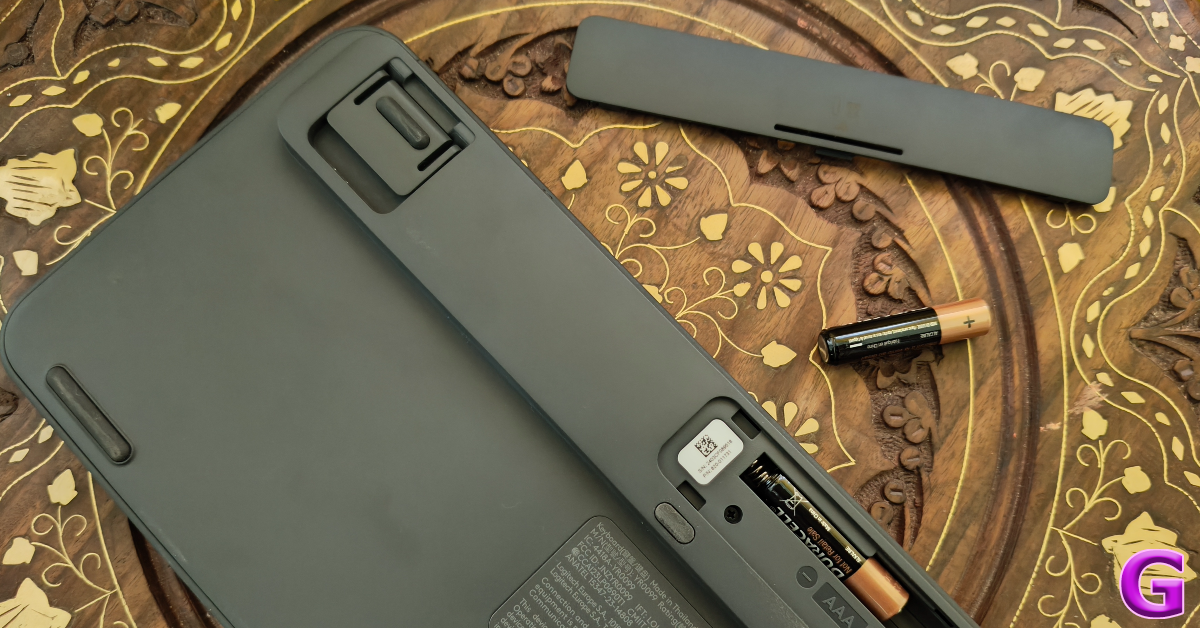
As mentioned earlier, the Slim Combo takes design inspiration from Logitech’s MX Series. The heavy top bar has a lot of weight to it, which keeps the keyboard firmly in place along with the help of the rubber feet. There are adjustable legs on the bar, which can elevate the keyboard at an 8-degree typing angle. The power switch is positioned at the top edge of the device. design 
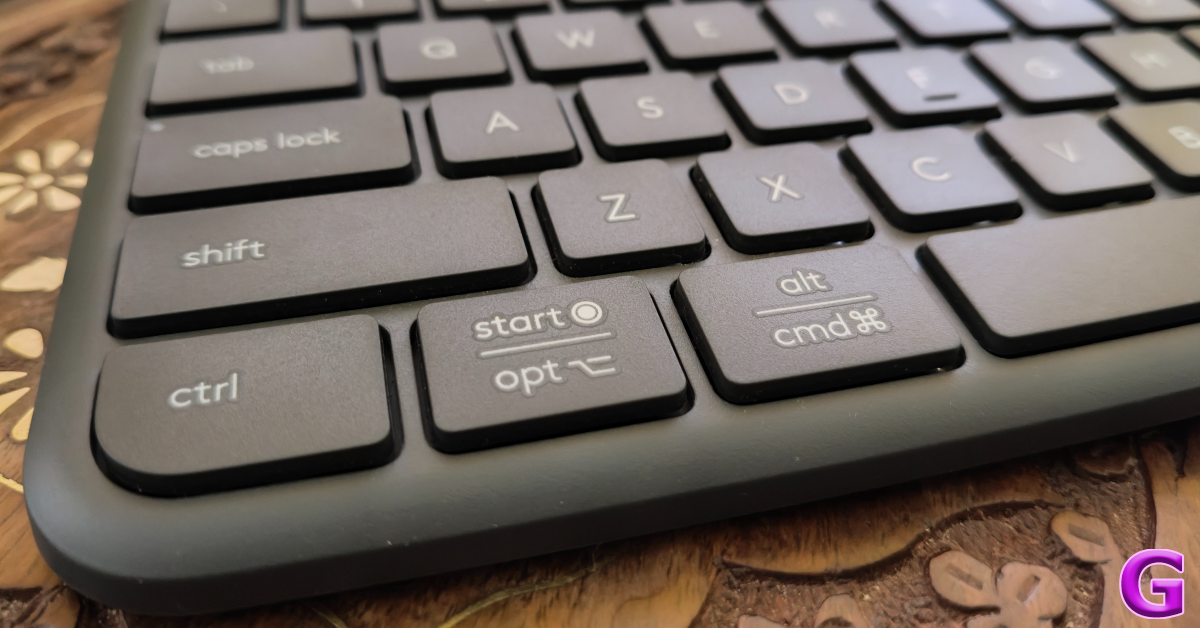
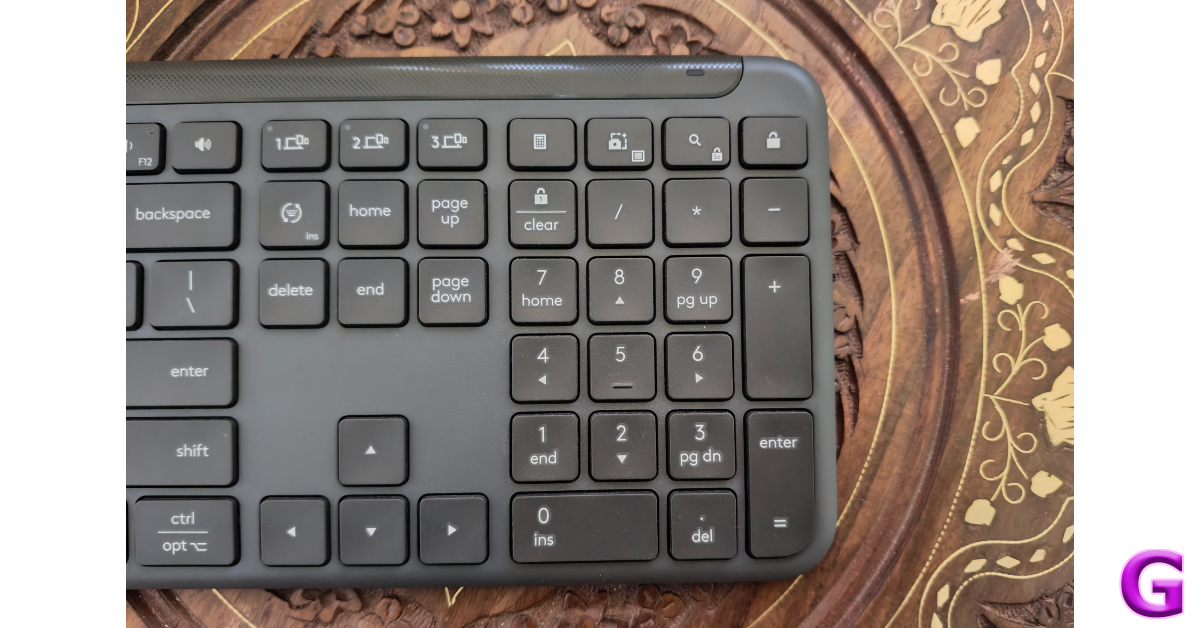
The K950 keyboard has a full set of keys, including dedicated media keys and the vertical numpad. Like the MX Keys S, the K950 has a single-line Enter key and two long Shift keys. The Start and Alt keys serve as the Opt and Cmd keys for Mac users and are labelled accordingly. The keycaps are finished in a matte texture, which feels nice to use. What we like about the keycaps is that they do not have deep indentations like the MX Keys S. Logitech Signature Slim Combo MK950 Review: Design Moving on, the M750 wireless mouse on the Logitech Signature Slim combo weighs 101.3g with the AA battery and receiver inside. Its build quality is sturdy and premium, something you expect from a Logitech product. The bottom panel has four rubber feet, an optical sensor, a device pairing button, and a power switch. The rubber texture along the sides of the mouse offers a nice grip. However, people with large hands may find the M750 a little too compact. design The left side of the mouse houses the ‘back’ and ‘forward’ buttons. This makes the mouse more suited for right-handed users. Up top lie the rubber scroll wheel and a customisable button. This button changes the DPI setting by default. The glossy finish on this button offers a nice contrast to the rubber scroll wheel. Unlike the MX Anywhere 3S mouse, there is no ‘Magspeed’ option for the scroll wheel.

Logitech Signature Slim Combo MK950 Review: Performance

Connecting the two devices to your PC is as easy as it gets. Once you turn on the wireless mouse and keyboard, you will see a prompt on your PC to pair them via Bluetooth. You can also use the Logi Bolt receiver provided in the box to connect the two devices to your PC. The K950 and M750 can pair with a maximum of 3 devices at one time. The keyboard has three dedicated keys for switching the connection. Each key has a small LED notification light that lets you know which device you’re connected to. To switch the connection on the mouse, you need to turn it around and press the pairing key. Logitech Signature Slim Combo MK950 Review: Performance Designed for office use, the wireless keyboard and mouse in the Logitech Signature Slim Combo have a very muted response. The keys on the membrane keyboard have a little travel and do not create a distraction to other people in a shared working space. The keys are not backlit, so you will need to rely on external lighting while using it at night. What the K950 gets right is the flow of typing. Its design, tilt, and keycaps are carefully crafted to ensure a seamless typing experience. mouse The clicks on the M750 wireless mouse are entirely muted. We had to focus very hard to hear the clicks even in pin-drop silence. As mentioned earlier, this mouse is ideal for people with small or medium-sized hands. As someone with large hands, the M750 felt too small for a palm grip. Fingertip and claw grip yielded much better results. The mouse tracks well on different kinds of surfaces including, wood, glass, and fabric. The lack of Magspeed scrolling is a bit of a letdown, but not a dealbreaker. The M750 uses the Logitech Advanced Optical Sensor with a nominal value of 1,000 DPI. You can set its sensitivity anywhere between 400 – 4,000 DPI at increments of 100 DPI. mouse 
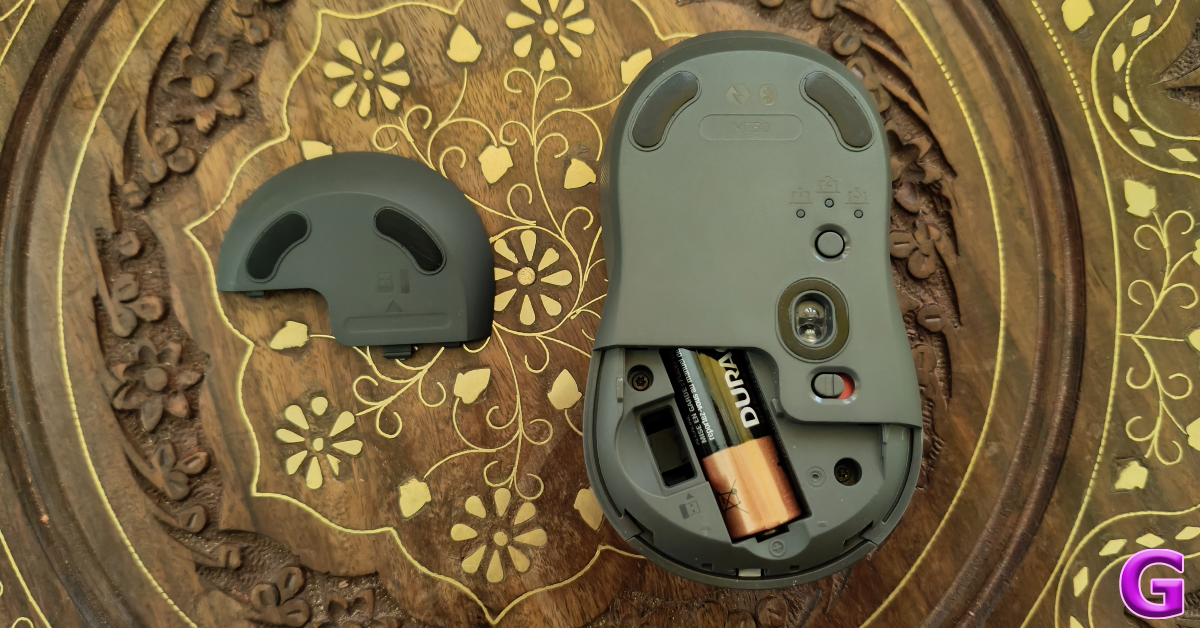
Logitech claims a battery life of 36 months on the K950 and 24 months on the M750. We only had the Signature Slim Combo for a couple of weeks so we cannot verify these claims. Both devices use non-rechargeable batteries. Since AA and AAA batteries are easy to find, power backup is not an issue on either device. The Logitech Signature Slim Combo can be customised using the Logi+ Options app. This app is the heart and soul of Logitech’s computer peripherals and one of the reasons why we rate the brand so highly. On the K950 keyboard, you can use Logi+ Options to customise the F-keys to carry out tasks like launching the browser, opening a particular app, streaming music, and much more. Logitech Signature Slim Combo MK950 Review: Performance The Smart Actions are intelligently designed to carry out a set of tasks for a particular scenario. You can use a pre-set template or create your own. For example, if you’re taking a break at work, you can use Smart Actions to minimise Google Chrome and launch Spotify with an assigned button. You can customise the DPI switcher key on the M750 mouse to carry out a Smart Action as well. If AI is your thing, this button can also trigger ChatGPT whenever you want. Read Also: WhatsApp testing zoom control feature for the camera

Verdict

The Logitech Signature Slim Combo is a no-nonsense package that cuts through the frills and enhances office productivity. The graphite variant that we used for this review has a rock-solid build despite using 62% post-consumer recycled material for the keyboard and 61% for the mouse. The muted response on the keys and clicks makes the two devices perfect for use in shared working spaces. The Logi+ Options app ensures that the premium hardware is backed by intelligent software. The only downside of the combo is the lack of backlights on the keyboard.

Logitech Signature Slim Combo MK950: Pros

  • Solid hardware
  • Seamless design
  • Perfect for office use
  • Logi+ Options support

Logitech Signature Slim Combo MK950: Cons

  • No backlighting on the keyboard 
  • The mouse is a bit small for large hands

Amazon Kindle not charging? Here are 11 fixes

0
Kindles are known for their versatile battery life. Even with consistent usage, your Kindle demands charging only once a week. If you’re moderate with your usage, you can push its battery life to a couple of weeks with ease. Since Kindles don’t require frequent charging, it can be puzzling when they refuse to charge at all. If you’re looking for a solution to a similar problem, you have landed on the right page. Here are the top 11 ways to fix the ‘Amazon Kindle not charging’ issue. Read Also: Top 4 Ways to Turn On Your Android Phone’s Flashlight Without Waking Up The Screen

Why is your Amazon Kindle not charging?

If your Kindle refuses to charge, it could be due to one of the following reasons.
  • The power adapter or charging cable is damaged.
  • Your Kindle’s charging port is dysfunctional due to the collection of dust and grime.
  • The Kindle isn’t receiving enough wattage to charge properly.
  • Background software issues are preventing the Kindle from charging.
  • The Kindle’s battery is bricked and needs to be replaced.

Inspect the power adapter and cable

Check the power adapter and USB cable If your Kindle is not charging, the most likely culprit behind it is the charging cable. Make sure you are using the correct cable and inspect it for any damage. Use it to charge your smartphone. If it works on your phone, the fault does not lie with it. Additionally, make sure the power adapter is functional as well.

Use a power outlet instead of a PC

Delete corrupted files from your Kindle If you’re using your PC or laptop to charge your Kindle, move to a power outlet instead. While PCs don’t cause any issues, the charging speed takes a hit. If your Kindle is drained of battery, it may appear like it is not charging if it is connected to a PC. Use a wall outlet to charge it at a quicker pace.

Check the power outlet

Charge your Kindle If you don’t find any fault in the charger, check the power outlet. It is possible that the charger isn’t able to draw enough power from the wall outlet. Connect it to another socket and see if your Kindle starts charging. If it doesn’t, move on to other fixes in this list.

Clean the charging port

kindle Dust, grime, and lint can collect inside the charging port of the Kindle over time, causing malfunctions with charging. This can also lead to the connector not fitting into the port. Gently scrape the visible grime from the port using a small brush. Use a pair of tweezers to pull out the larger pieces of lint. Blow some air into the port and gently knock your Kindle against the desk to let out the dust.

Remove the case

Connect the charger to a wall outlet Counterfeit cases can partially cover the charging port or exert pressure on the charger when it is connected to the device. If you suspect that is the case with your Kindle, remove its case and try charging it again.

Check the temperature

Update your Kindle Coloursoft 
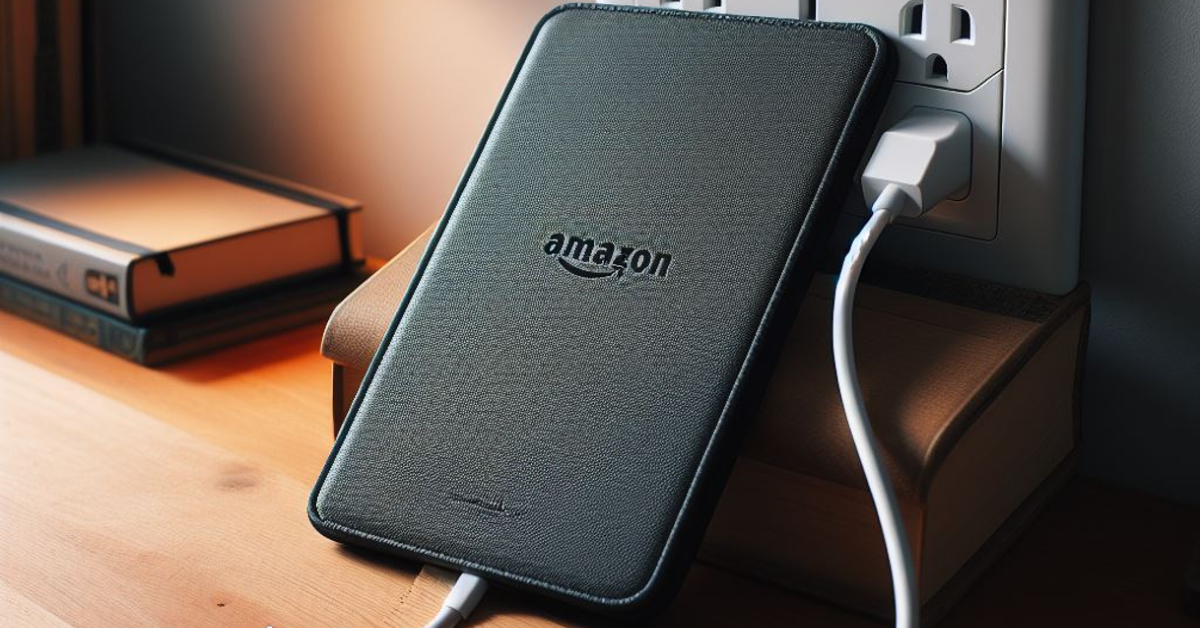
If your Kindle has been lying under the sun or next to a window for too long, its internal temperature may rise rapidly. When the internal temperature crosses a certain threshold, certain essential tasks are suspended until the device cools down. To aid the cooling of the device, the charging duties are suspended too. Make sure your Kindle has reached normal temperature before plugging in its charger.

Restart your Kindle

Kindle 2022 review: Design and Display Amazon Kindle not charging? Here are 9 fixes (2024) If a background software issue is the reason why your Kindle isn’t charging, restart the device. Here’s how. Step 1: Tap the screen to reveal the toolbar. Step 2: Tap on the downward arrow at the top of the screen. Step 3: Tap on All Settings. Step 4: Select Device Options. Step 5: Hit Restart and confirm your selection.

Force restart your Kindle

Kindle Paperwhite 12th-Gen (2025) Review: Design and Display If the LED indicator shows that your Kindle is charging, but it won’t wake up, it is time to perform a force restart. You can do this by long-pressing the power button for 40 seconds. Make sure your Kindle has been charging for an optimum period of time before you force restart it.

Update the OS

Kindle 2022 review: Design and Display Amazon Kindle not charging? Here are 9 fixes (2024) Step 1: Tap the screen to reveal the toolbar. Step 2: Tap on the downward arrow at the top of the screen. Step 3: Tap on All Settings. Step 4: Select Device Options. Step 5: Tap on Advanced Options. Step 6: Select Update your Kindle. If this option is unselectable, it means your Kindle is already updated to the latest software version.

Reset your Kindle

Amazon Kindle not charging? Here are 9 fixes (2024) If nothing works, it is time to give your Kindle a factory reset. This will erase all the data from the device, so make sure you back up all your books on another device or cloud storage. Step 1: Tap the screen to reveal the toolbar. Step 2: Tap on the downward arrow at the top of the screen. Step 3: Tap on All Settings. Step 4: Select Device Options. Step 5: Tap on Reset. Step 6: Confirm your selection in the pop-up box.

Visit an authorised service centre

If the charging issue persists even after performing a factory reset on your Kindle, you need to contact Amazon Customer Support or visit an authorised service centre. If your Kindle is still under warranty, you can get it repaired for free as long as the damage is not caused by water or physical impact.

Frequently Asked Questions (FAQs)

How do I fix my Kindle if it isn’t charging?

Make sure the charger and cable are not damaged, and clean the charging port of the device. Use a wall outlet instead of a PC to charge your Kindle.

How do I restart my Kindle?

Touch the screen, hit the downward arrow, go to All Settings>Device Options>Restart and confirm your selection.

How do I perform a factory reset on my Kindle?

Hit the downward arrow in the toolbar, go to All Settings>Device Options>Reset, and hit ‘Confirm’.

How much does a Kindle cost in India?

The entry-level Kindle variant is priced at Rs 10,000 in India.

How do I update my Kindle’s OS?

Go to All Settings>Device Options>Advanced Options, and hit ‘Update your Kindle’. Read Also: WhatsApp testing zoom control feature for the camera

Conclusion

These are the top 11 ways to fix your Amazon Kindle if it isn’t charging. If your Kindle refuses to turn on, read this article for possible fixes. If you found this article helpful, let us know in the comments!

WhatsApp testing zoom control feature for the camera

WhatsApp has started to roll out an iOS 24.9.10.75 version update. Under the update, a camera zoom control feature is being rolled out by WhatsApp, and select beta testers can test it out now. It seems like WhatsApp is working to enhance the camera experience by introducing new features aimed at enhancing user convenience and providing users with easier methods to share and record video. WhatsApp is working on the development of zooming in and out when using the iOS in-app camera to take pictures and record videos. According to a report by WABetaInfo, WhatsApp is currently rolling out a zoom control function for the camera after installing the most recent WhatsApp beta for iOS 24.9.10.75 update, which is accessible on the TestFlight app. Also Read: Is CMF by Nothing’s debut phone a low-cost model? As shown in the shared screenshot some of the beta testers are able to play with a new button that allows iPhone users to smoothly adjust the zoom level. Prior to the changes, WhatsApp users for iOS were able to swipe up or down while holding their finger on the camera button in order to adjust the zoom level while recording, which could have produced inaccurate results.
WhatsApp is working on the development of zooming in and out when using the iOS in-app camera to take pictures and record videos.
Image Courtesy: WABetaInfo
With the new iOS camera zoom control feature users now have more control over creating photo and video content, therefore making it simpler to adjust the zoom without stopping the recording. Also, it eliminates the need for users to struggle with the camera button to adjust the zoom—just a simple touch. This will give users more control over the zoom level, improving precision by enabling them to get the exact shot they want. Also Read: Amazon Fire TV Stick 4K with 4K Ultra HD streaming launched in India As per the report, the zoom control feature for the camera is only accessible to some beta testers who install the latest update of WhatsApp beta for iOS from the TestFlight app, and it’s rolling out to more people over the coming days.

Garena Free Fire Redeem Codes Today 10 May 2024: Here is how to claim them

Garena Free Fire is a battle royale game with regular awards and tournaments to keep players interested. If you play Garena Free Fire, you should be aware of the redeem codes that are released on a daily basis. However, because the battle royale game is banned in India, players from other countries can use the Free Fire Redeem codes daily. If you’re unfamiliar with the Garena Free Fire redeem codes or don’t know how to get them, we’ve put together a step-by-step guide to help you redeem them. Check out Garena Free Fire Redeem Codes for 10 May 2024. The Free Fire redeem codes are a great way to get free stuff. These are 12-digit codes that contain alphabets and numbers, as well as an expiration date and time. Because the Garena FF redeem codes cannot be used more than once, you should hurry to the redemption page to claim your free reward before someone else does. To get a free reward, all you have to do is go to reward.ff.garena.com/en, which is the official redemption page. Also, keep an eye on this space for daily updates on Garena Free Fire redemption codes and rewards. Also Read: Sennheiser Accentum Plus wireless headphones with Hybrid Adaptive Noise Cancellation launched

Garena Free Fire Redeem Codes Today 10 May 2024

HIOO0LKMNBVCX S45TGHJU7YTFVBYTEVE DRTT5RE2SQ234R FVGHY6T5RFVGBH NJKIUY6ZQ21QSX CDE3E4RFGVBNH FGYUI8PL0OIJUH YQ2WS3EDRCTYG BHUNHINKI98UY YT65YHBHJIKOLK M4LPOIUYHGFCXS

How to Get Free Fire Redeem Codes for Garena on 10 May 2024?

  • Visit the Garena Free Fire game’s official website at reward.ff.garena.com.
  • Use your Facebook, Google, VK, Apple ID, Huawei ID, or Twitter account to log in.
  • You’ll be taken to a valid redemption code (s)
  • Copy and paste the 12-digit redemption code into the text box.
  • On the screen, a dialogue box will appear.
  • ‘Ok’ should be selected.
For the latest gadget and tech news, and gadget reviews, follow us on TwitterFacebook and Instagram. For newest tech & gadget videos subscribe to our YouTube Channel. You can also stay up to date using the Gadget Bridge Android App. You can find the latest car and bike news here.

Amazon Fire TV Stick 4K with 4K Ultra HD streaming launched in India

The newest member of the Fire TV family Amazon Fire TV Stick 4K has made its debut in India. The latest streaming device comes with several noteworthy enhancements like Ultra HD picture quality, Dolby Vision, HDR10+, and Dolby Atmos audio for cinematic 4K entertainment. It is said to have nearly 30% more power than its previous generations which allows for speedy app launches, and smooth navigation. 12,000+ entertainment, news, sports, and other apps are available through the Appstore for the Fire TV Stick 4K

Amazon Fire TV Stick 4K price in India, sale details

Amazon Fire TV Stick 4K price in India is set at Rs 5,999. The streaming device is only available in matte black and is currently up for pre-orders on the e-commerce platform. The streaming device will be available for purchase on May 13. When it goes on sale, the Fire TV Stick 4K will also be available for purchase through Croma, Reliance Digital, and Vijay Sales, in addition to Amazon.

Amazon Fire TV Stick 4K specs, features

The new Amazon Fire TV Stick 4K is powered by its 1.7 GHz quad-core processor and supports Wi-Fi 6 compatible router, 5GHz and 2.4GHz Wi-Fi bands to allow customers to stream content at varying internet frequencies. Also Read: Comparison: Google Pixel 8a Vs Pixel 8 The content streaming device by Amazon streams 4K Ultra HD content and supports HDR10+. In addition, Dolby Vision and Dolby Atmos audio are included. The all-new Fire TV Stick 4K also includes a low-power mode that saves energy when a device enters standby or sleep mode when it is not in use. Amazon Fire TV Stick 4K specs, features A variety of TVs that are compatible with the Fire TV Stick 4K can be operated by using the bundled Alexa Voice Remote to control specific features like volume and power. There are now buttons specifically for apps on the updated Alexa Voice Remote. Consumers may easily locate, access, and control content by voice. Additionally, users may create an “Alexa Home Theatre” by using the Alexa app to wirelessly link their Fire TV Stick 4K to their Echo smart speakers. Also Read: Is CMF by Nothing’s debut phone a low-cost model? Access to more than a million films and TV series episodes can be had with the most recent Fire TV 4K Stick thanks to the App Store’s 12,000+ apps, which include well-known titles like Netflix, Prime Video, Disney+ Hotstar, Zee5, and Jio Cinema. Additionally, there is a vast selection of content available for streaming on Disney+ Hotstar and Netflix, as well as Prime Video Amazon Originals including Made in Heaven, Mirzapur, Panchayat, Aspirants, and Family Man. Users will also be able to access free or paid content on websites like MX Player, YouTube, and MiniTV. Additionally, they can use the DTH set-top box on their home screen to access live channels including Colours, Zed, Sony, Star, Discovery, News18, DD National, and more.

Discover the 5 Most Unique Slot Machine Systems

Slot machines have been a beloved fixture in casinos around the world for decades, captivating players with their flashing lights, enticing themes and the promise of instant riches. However, what many casual gamblers may not realize is that there’s more to spinning those reels than mere chance. In this article we delve into the fascinating world of slot machine betting systems, strategies designed to maximize your chances of winning and enhance your gaming experience. But before we dive into the specifics of particular betting systems, let’s take a moment to understand the concept. Betting systems are structured approaches to wagering that aim to provide players with a methodical way of betting, ultimately influencing the outcomes of their bets. Discover the secrets of slot machine betting systems in the Twin Win Demo. While slot machines are often seen as games of pure luck, these systems introduce an element of strategy into the mix, offering players a sense of control over their gambling:
Betting System Description
The Martingale System A progressive betting strategy where you double your bet after each loss to recoup previous losses and make a profit
The Fibonacci System Based on the Fibonacci sequence, this system involves adjusting your bets according to a mathematical pattern
The Paroli System A positive progression system where you increase your bets after winning, aiming to ride winning streaks
The Labouchere System A complex strategy involving a predetermined sequence of bets to reach a target profit
The Kelly Criterion A method to determine the optimal size of bets based on perceived edge and bankroll size
As we explore each of these intriguing systems in detail, you’ll gain insights into how they work and their potential advantages and disadvantages. Whether you’re a seasoned slot player or a curious newcomer, understanding them can add a new dimension to your casino experience, making each spin of the reels more exciting and strategic.

The Martingale Betting System

The Martingale betting system, a time-honored strategy originally developed for casino games like roulette, can be adapted for use with slot machines, albeit with some unique considerations. In this system players begin by placing an initial wager, and if they experience a loss, they double their bet on the subsequent spin. This doubling of bets continues after each loss until a win is achieved, at which point the player reverts to their initial bet size and restarts the process. When applying the Martingale system to slot machines, players are drawn to its simplicity and the structured approach it offers to their betting strategy. The allure lies in the potential to recover previous losses with a single win, which can be exhilarating. However, it’s essential to weigh the pros and cons before embracing this system in slot machine play:
Advantages Disadvantages
Provides a straightforward and easy-to-understand strategy for players Doesn’t alter the fundamental odds of winning on a slot machine, making long-term profitability uncertain
Offers a sense of control and discipline in managing bets Demands a substantial bankroll to endure potential extended losing streaks, posing financial risks
Can result in significant short-term gains if a winning spin occurs Many casinos impose betting limits, impacting system’s effectiveness in the face of reaching those limits
While the Martingale system can provide an adrenaline rush and the allure of quick winnings, it should be embraced cautiously. Players should be aware of the potential for significant losses if luck does not favor them, and they must exercise responsible bankroll management when using this strategy in the world of slot machine gambling.

The Fibonacci Betting System

Bringing a touch of mathematical elegance to the world of slot gaming, the Fibonacci betting system introduces players to a distinctive approach rooted in the renowned Fibonacci sequence. As slot enthusiasts explore this intriguing strategy, it’s crucial to weigh the unique advantages and accompanying disadvantages that come with its application in slot gaming:
Pros Cons
Implements a structured and systematic betting method, promoting discipline and control   Does not alter the inherent odds of winning on a slot machine, making long-term profitability uncertain
Offers a relatively conservative betting strategy, reducing the risk of rapid and significant losses Progress in recovering losses may be slower compared to more aggressive betting systems
Encourages responsible bankroll management, contributing to a sustainable and enjoyable gaming Depends heavily on a sequence of wins to offset losses, which may not always align with expectations
The allure of the Fibonacci system in slot gaming lies in its methodical approach and risk management. By incrementally adjusting bets following losses and decreasing them after wins, guided by the Fibonacci sequence, players can extend their gaming sessions while maintaining a sense of control and strategy. However, it is vital to approach this system with a realistic perspective. The Fibonacci system does not alter the fundamental odds of winning on a slot machine, and its success hinges on a sequence of wins to offset losses, an outcome that remains uncertain. Players should embrace this unique system thoughtfully, always exercising responsible bankroll management to maximize its potential and enhance their gaming experience.

The Paroli Betting System

When embracing the Paroli system in slot machine betting, players embark on a distinct journey. They initiate their gameplay with an initial bet, and the strategy dictates that they only increase their wager after a victorious spin. Unlike some other systems that aggressively chase losses, the Paroli system aims to ride the waves of success by allowing profits to accumulate. When the player decides to take their winnings or faces a setback, they revert to their initial bet size. The merits of the Paroli system in slot gaming lie in its ability to maximize profits during winning streaks and its inherent discipline in managing bets. This structured approach not only fosters responsible gaming habits but also encourages effective bankroll management. Nevertheless, it’s imperative to acknowledge the system’s limitations, including its inability to alter the underlying odds of winning on a slot machine and the potential for abrupt ends to winning streaks.

The Labouchere Betting System

The Labouchere system is a structured betting strategy that centers around the creation of a numerical sequence, where each number represents a specific bet size. Players craft their unique sequences, guided by their profit objectives. The primary objective of this strategy is to eliminate all numbers in the sequence through winning bets, ultimately reaching the desired profit target. Bets are placed equal to the sum of the first and last numbers in the sequence. When a bet is successful, these numbers are crossed off, and in the event of a loss the sum of the lost bet is appended to the end of the sequence. The process continues until the entire sequence is cleared, culminating in the achievement of the profit goal. When applied to the world of slot machine gambling, the Labouchere system requires players to adapt their numerical sequence to match the bets placed on each spin. The sequence is meticulously designed based on the player’s bankroll and profit aspirations. In practice, players adhere to the strategy’s rules by wagering sums equivalent to the first and last numbers in their sequence. The Labouchere system not only encourages prudent bankroll management but also steers players toward their profit objectives. While the Labouchere system offers a structured and methodical approach to slot machine betting, its effectiveness and potential caveats deserve thoughtful consideration. This strategy empowers players to set clear profit targets and manage their bankrolls sensibly. However, it does not alter the fundamental odds of winning on a slot machine, and strict adherence to the sequence can prove challenging amidst the unpredictability of slot gaming.

The Kelly Criterion Betting System

The Kelly Criterion is a mathematical formula designed to optimize the size of a series of bets, ultimately maximizing expected wealth over time. It hinges on two critical components: the player’s advantage or edge and the odds presented by the casino. The outcome is expressed as a percentage, indicating the portion of the player’s bankroll to wager on a specific bet. When applied to the world of slot machines, the Kelly Criterion involves evaluating the player’s perceived edge, which may encompass factors such as payout rates, game volatility and bonus features. Once the edge is assessed, the formula can be effectively employed to calculate the ideal bet size for each spin. Utilizing the Kelly Criterion in slot machine betting offers a host of advantages. It presents a systematic and mathematically sound approach to betting, enhancing the potential for sustained profitability. By optimizing bet sizes based on the player’s edge, it encourages responsible bankroll management and strategic decision-making. However, it’s crucial to be mindful of potential considerations, including the challenge of accurately gauging one’s edge within the inherently unpredictable landscape of slot gaming. Overestimating the edge can lead to overly aggressive betting, while underestimating it may result in missed opportunities for maximizing returns.

Final Thoughts

While different betting systems can infuse excitement and strategy into your gameplay, it’s paramount to maintain a commitment to responsible gambling. Slot machines are fundamentally games of chance, and no strategy can alter the chance of winning. Understanding the mechanics and odds of the games you engage with is vital for making informed decisions. We encourage you to explore and experiment with various betting strategies as you enjoy slot machines. Each system brings its own flavor to your gaming sessions, and the choice of which to employ depends on your tastes and targets. Whether you seek a methodical approach, mathematical precision or a flexible strategy, these systems provide intriguing avenues for exploration. In the grand scheme of things, slot machine gambling should serve as a source of entertainment and enjoyment. While betting systems can enhance your experience, remember to gamble responsibly, set limits and never wager more than you can comfortably afford to lose. Armed with a solid grasp of the odds and a willingness to delve into different strategies, you can maximize your slot machine adventures while savoring the thrill of the game.

Samsung Galaxy F55 5G with triple rear cameras to launch in India on May 17

Samsung is expanding its F-series in India and today it officially announced the launch date of its upcoming smartphone Galaxy F55 5G. Not only this the South Korean firm has also revealed the price range and colour options of the device. Keep on reading to learn more about the smartphone. Samsung Galaxy F55 5G India launch is set to take place on May 17. The upcoming phone is rumoured to be a rebranded variant of the Samsung Galaxy C55 5G which launched in China last month. In addition to revealing the launch, the firm has also hinted at the price of the smartphone. As per the poster image, the price of Galaxy F55 5G will start at Rs 30,000 in India. The company has not revealed the exact pricing instead the poster image included “starting at Rs 2X999” Samsung Galaxy F55 5G with triple rear cameras to launch in India on May 17 The firm has also confirmed the Flipkart availability for F55 5G. In addition, the smartphone will be sold through Flipkart, Samsung.com, and a few other retail locations as soon as it launches in India. There will be two colour variants available: Apricot Crush and Raisin Black. Also Read: Is CMF by Nothing’s debut phone a low-cost model? The teaser indicates that the upcoming smartphone will have three vertically arranged cameras on the back panel. The phone will have a stitched design and an orange vegan leather finish. It is anticipated that the Samsung Galaxy F55 5G, a redesigned Galaxy C55 5G, will debut in India. According to the company’s teaser, the Samsung Galaxy F55 5G and the Galaxy C55 5G have a similar design. The Orange phone model that was released in China is even similar in terms of colour options. The Samsung Galaxy F55 5G is expected to come with a 6.7-inch full-HD+ sAMOLED Plus screen. The display is speculated to have a refresh rate of 120Hz and a maximum brightness level of 1,000 nits. Also Read: Comparison: Google Pixel 8a Vs Pixel 8 An anticipated Snapdragon 7 Gen 1 SoC will power the smartphone with 8GB of RAM, and up to 256GB of storage. It may run on One UI 6.0, which is based on Android 14. Moreover, the Galaxy F55 5G will support 25W wired fast charging and will pack a 5,000mAh battery. Moreover, the triple rear camera setup is said to include a 50-megapixel main camera sensor with optical image stabilisation (OIS) support. The system may also include an 8-megapixel ultra-wide angle lens and a 2-megapixel macro lens. A 50-megapixel sensor on the front for selfies and video calls is also expected.

Is CMF by Nothing’s debut phone a low-cost model?

Key Highlights
  • CMF’s new smartphone is likely to be called CMF Phone 1.
  • Anticipated to be an economical entry-level phone, the CMF Phone 1 may be less expensive than the Nothing Phone 2a.
It may come in three different colour variants and is rumoured to have a plastic body. Nothing’s sub-brand CMF is planning to expand and is speculated to enter the smartphone market soon. The firm is now preparing to release its first smartphone although there is no official information about the alleged CMF phone. A report has surfaced that discloses the CMF smartphone’s price and a few of its specs. Check out the details below. Although the name, cost, and specifications of the CMF smartphone are being leaked, no official information about the device has been released as of yet. As per a report, the upcoming phone from CMF by Nothing is apparently going to be named the CMF Phone 1. The CMF Phone 1 may cost approximately Rs 12,000 in India. That means the rumoured phone would be significantly less expensive than Nothing’s most affordable smartphone Nothing Phone 2a. Also Read: Comparison: Google Pixel 8a Vs Pixel 8 It is rumoured that the CMF Phone 1 will have a plastic body and Gorilla Glass protection on the display. The device is likely to be offered in three colour options: orange, white, and black. Also Read: Meta brings AI-powered image and text generation tools for businesses to create ad creatives  In terms of specifications, the alleged CMF smartphone is anticipated to feature a 6.5-inch display. It may come equipped with a MediaTek Dimensity 5G chipset. The Phone 1 by CMF is likely to be a stripped-down version of Nothing OS and will offer four years of security updates and three years of OS updates. It is probably going to have a single back camera. It is supposed to have a 33W charging-capable 5,000mAh battery.

Comparison: Google Pixel 8a Vs Pixel 8

Recently Google introduced its new A-Series phone, Pixel 8a in India. The smartphone and Pixel 8 have a lot in common, which is why they seem so similar. If you are confused, we have done a detailed comparison below between the Pixel 8a and its more expensive sibling Pixel 8 to help you understand which one is the better buy.

Display

Pixel 8a: 6.1-inch Super Actua display (120Hz refresh rate) Pixel 8: 6.2-inch FHD+ Actua display (Adaptive refresh rate ranging between 60Hz and 120Hz)

Processor

Pixel 8a: Google Tensor G3 chip Pixel 8: Google Tensor G3 SoC

Rear camera(s)

Pixel 8a: Dual rear camera system with a 64-megapixel main lens and a 13-megapixel ultrawide lens Pixel 8: 50MP Octa PD sensor with f/1.68 and 12 MP ultrawide camera with an auto-focus

Selfie camera

Pixel 8a: 13-megapixel sensor Pixel 8: 10.5-megapixel Dual PD sensor Also Read: Meta brings AI-powered image and text generation tools for businesses to create ad creatives

RAM and storage

Pixel 8a: 8GB RAM with 128GB storage/8GB RAM with 256GB storage Pixel 8: 8GB RAM with 128GB storage/8GB RAM with 128GB storage

Battery

Pixel 8a: 4,492mAh battery Pixel 8: 4,485mAh battery

Operating system

Pixel 8a: Android 14 Pixel 8: Android 14

Price

Pixel 8a: Rs 52,999 Pixel 8: Rs 75,999

Our Take

Both the Pixel phones are shipped with Android 14 out of the box and are promised to offer 7 years of software and security support. Though there is a slight size difference, the Super Actua displays on both devices support a 120Hz refresh rate. However, the display on the flagship Pixel 8 has an adaptive refresh rate that switches between 60Hz and 120Hz based on the content being played.  In addition, the display appears premium with thinner bezels than the 8a. The Pixel 8a boasts a display made of Corning Gorilla Glass 3. In contrast, the Corning Gorilla Glass Victus display of the Pixel 8 is stronger and less prone to scratches. Also Read: Apple discontinued iPad (9th gen); iPad (10th gen) gets a price cut Whereas the Pixel 8a is rated IP67, the Pixel 8 boasts IP68 dust and water resistance. The Google Tensor G3 chip and Titan M2 security co-processor are the same processors found in the Pixel 8 and Pixel 8a. Both Google phones contain Pixel-only AI functions, although the 8a lacks some of the flagship phone’s capabilities. Over that, Magic Eraser, Photo Unblur, Real Tone, Face Unblur, Panorama, Manual White Balancing, Locked Folder, Night Sight, Top Shot, Portrait Mode, Portrait Light, Motion Auto Focus, Frequent Faces, Dual exposure controls, Live HDR+, and Ultra HDR are among the camera AI tools shared by both devices. Macro Focus, Best Take, and Magic Editor are absent on 8a. In terms of cameras, the Pixel 8a’s front and back cameras have higher resolution sensors than the Pixel 8 PD sensor, but the latter’s larger sensor size allows it to capture more light, producing images that are clearer, crisper, and more detailed. There isn’t much difference in the batteries, although the Pixel 8 has a slightly larger battery and features the Battery Share feature. Apart from the cameras, build quality, and the absence of a few Pixel-only features, the Pixel 8a and Pixel 8 are nearly identical. However, the two have a significant price difference. If you’re on a limited budget, we advise you to choose the less costly Pixel 8a.

Garena Free Fire Redeem Codes Today 9 May 2024: Here is how to claim them

Garena Free Fire is a battle royale game with regular awards and tournaments to keep players interested. If you play Garena Free Fire, you should be aware of the redeem codes that are released on a daily basis. However, because the battle royale game is banned in India, players from other countries can use the Free Fire Redeem codes daily. If you’re unfamiliar with the Garena Free Fire redeem codes or don’t know how to get them, we’ve put together a step-by-step guide to help you redeem them. Check out Garena Free Fire Redeem Codes for 9 May 2024. The Free Fire redeem codes are a great way to get free stuff. These are 12-digit codes that contain alphabets and numbers, as well as an expiration date and time. Because the Garena FF redeem codes cannot be used more than once, you should hurry to the redemption page to claim your free reward before someone else does. To get a free reward, all you have to do is go to reward.ff.garena.com/en, which is the official redemption page. Also, keep an eye on this space for daily updates on Garena Free Fire redemption codes and rewards. Also Read: Sennheiser Accentum Plus wireless headphones with Hybrid Adaptive Noise Cancellation launched

Garena Free Fire Redeem Codes Today 9 May 2024

S45TGHJU7YTFVBYTEVE NJKIUY6ZQ21QSX CDE3E4RFGVBNH YQ2WS3EDRCTYG BHUNHINKI98UY DRTT5RE2SQ234R FVGHY6T5RFVGBH HIOO0LKMNBVCX YT65YHBHJIKOLK M4LPOIUYHGFCXS

How to Get Free Fire Redeem Codes for Garena on 9 May 2024?

  • Visit the Garena Free Fire game’s official website at reward.ff.garena.com.
  • Use your Facebook, Google, VK, Apple ID, Huawei ID, or Twitter account to log in.
  • You’ll be taken to a valid redemption code (s)
  • Copy and paste the 12-digit redemption code into the text box.
  • On the screen, a dialogue box will appear.
  • ‘Ok’ should be selected.
For the latest gadget and tech news, and gadget reviews, follow us on TwitterFacebook and Instagram. For newest tech & gadget videos subscribe to our YouTube Channel. You can also stay up to date using the Gadget Bridge Android App. You can find the latest car and bike news here.

Meta brings AI-powered image and text generation tools for businesses to create ad creatives

For advertisers looking to assist with comprehensive image and text development, Meta has launched enhanced generative AI tools. Additionally, the company has introduced new tools and services that help businesses improve the efficacy of their ads. These services include developing creative variations, automating certain parts of the ad creation process, or increasing credibility and engagement through Meta Verified. Meta is launching a new suite of artificial intelligence (AI) tools to assist businesses and enhance the ad creation process. The second and third generations of Meta’s Llama (Large Language Model Meta AI) AI models fuel its new AI features. Meta’s AI will let users create images and text for advertisements.

Generative AI: Image Generation

For the first time, you can use text overlay to generate full image variations based on your original ad creative. This expands on the ability to create different backgrounds for product shots and magnify images to fit larger surfaces. This feature has already begun to roll out and in the coming months, users will also be able to provide text prompts to help us better tailor the creative variations we offer to you. Also Read: Apple discontinued iPad (9th gen); iPad (10th gen) gets a price cut Furthermore, users will also be able to add text overlay to photos, and advertisers can select from a dozen of the most well-liked font typeface alternatives. There will also be an image expansion feature that will allow you to easily modify creative assets to match various aspect ratios across various surfaces. This will be functional with text overlays on your advertisements and is accessible on Reels and Feed on Facebook and Instagram.

Generative AI: Text Generation

The Text Generation tool allows you to make variations for both the ad headline and the core content. Meta is also testing the ability for the generated text to reflect your brand’s voice and tone, by highlighting key selling points based on your previous campaigns and text input. As per the company, these upgrades are driven by advertiser requests for a more broadened selection of text selection that better reflects their brand and key selling elements. Also Read: Google Pixel 8a launched in India at this price: Deets inside This feature will soon be built with Meta Llama 3, the next generation of our large language models, which will enable new capabilities and enhance ad performance. The company has released these updated generative AI features and global availability is expected by the end of the year.

Top 6 Ways to Turn On Your Android Phone’s Flashlight Without Waking Up The Screen

0
Smartphones have completely eliminated the need for torchlights, at least in everyday use. If you’re embarking on a hike, you should think about purchasing a powerful flashlight, but if you need to navigate your way around a dark room, you don’t need a torch on you at all times, as long as you have a phone on you. Android smartphones even let you adjust the intensity of the light by long-pressing its tile. However, what’s more important than intensity is the accessibility of the torch function on your phone. Today, we bring you the top 6 ways to turn on your Android phone’s flashlight without waking up the screen. Read Also: WatchOut WearPods Review: Best of both worlds?

Before you begin

There are multiple ways you can go about toggling the flashlight on your smartphone. All Android devices have a handy tile for the torch in the Quick Settings Menu. If you want easier access, you can add a flashlight widget to your home screen. In scenarios where you need to use the torch urgently and don’t have the time to unlock the phone, you can use the lock screen icon for the flash. However, this still requires you to wake the screen of your device. Turning on the flashlight without disturbing the screen is a very niche demand, but your Android smartphone is natively equipped to handle that. The side button on Samsung devices can be customised to turn on the torch. The Quick Tap option on Pixel smartphones lets you turn it on by double or triple-tapping the back of the phone. If you own some other smartphone, you can always use Google Assistant or a third-party app for this task.

Customise the side button on Samsung

Step 1: Go to Settings and select Advanced features. Step 1: Go to Settings and select Advanced features. Step 2: Tap on Side button. Step 2: Tap on Side button. Step 3: Turn on the toggle switch for Double press and select Open app. Step 3: Turn on the toggle switch for Double press and select Open app. Step 4: Hit the settings icon next to Open app and select Torch. Step 4: Hit the settings icon next to Open app and select Torch.

Use Quick Tap on Google Pixel smartphones

Step 1: Go to Settings and select System. Step 1: Go to Settings and select System. Step 2: Tap on Gestures. Step 2: Tap on Gestures. Step 3: Select Quick Tap to start actions. Step 3: Select Quick Tap to start actions. Step 4: Turn on the toggle switch for Quick Tap. Step 4: Turn on the toggle switch for Quick Tap. Step 5: Select Toggle torch. Step 5: Select Toggle torch. Step 6: Double-tap your phone’s back to check if it works.

Enable the shake gesture

  1. Go to Settings.
  2. Scroll down and select Shortcuts & accessibility. shortcuts and accessibility How to turn on your Android phone’s flashlight by shaking it
  3. Tap on Smart Motion. Tap on Smart Motion. How to turn on your Android phone’s flashlight by shaking it
  4. Turn on the toggle switch next to Shake for flashlight. Turn on the toggle switch next to Shake for flashlight. How to turn on your Android phone’s flashlight by shaking it

Use Google Assistant

Step 1: Open the Google app, tap your profile picture, and select Settings. Step 1: Open the Google app, tap your profile picture, and select Settings. Step 2: Tap on Google Assistant. Step 2: Tap on Google Assistant. Top 4 Ways to Turn On Your Android Phone's Flashlight Without Waking Up The Screen Step 3: Select Lock screen. Step 3: Select Lock screen. Top 4 Ways to Turn On Your Android Phone's Flashlight Without Waking Up The Screen Step 4: Turn on the toggle switch for Assistant responses on lock screen. Step 4: Turn on the toggle switch for Assistant responses on lock screen. Top 4 Ways to Turn On Your Android Phone's Flashlight Without Waking Up The Screen Step 5: When your phone is locked, say ‘Hey Google, turn on the flashlight’.

Customise the Shortcut button

Some midrange and premium smartphones come with an additional key to toggle the sound profile, click a picture, and do a whole bunch of other tasks. You can customise to trigger the flashlight as well. Here’s how.
  1. Go to Settings.
  2. Tap on Shortcuts & accessibility. shortcuts and accessibility Top 6 Ways to Turn On Your Android Phone's Flashlight Without Waking Up The Screen
  3. Select Shortcut button. Select Shortcut button. Top 6 Ways to Turn On Your Android Phone's Flashlight Without Waking Up The Screen
  4. Choose an action. Select Shortcut button. Top 6 Ways to Turn On Your Android Phone's Flashlight Without Waking Up The Screen
  5. Swipe through the functions on the screen until you land on Flashlight. Select Shortcut button. Top 6 Ways to Turn On Your Android Phone's Flashlight Without Waking Up The Screen

Use the Shake Flashlight app

  1. Download the Shake Flashlight app from the Google Play Store.
  2. Launch the app and make sure the box next to Stop shake detection says On. Launch the app and make sure the box next to Stop shake detection says On.
  3. Use the slider at the bottom of the screen to set your preferred shake intensity.
  4. Shake your phone in a chopping motion to turn on the flashlight. Some phones may not register this motion when they’re locked. Press the side button and carry out the gesture again to bring the flashlight to life.
  5. Shake your phone again to turn off the flashlight.

Frequently Asked Questions (FAQs)

How do I use back tap on my Samsung phone?

Install the Good Lock app on your Samsung smartphone and download the RegiStar module. Now, tap on ‘Back tap’ and turn on its toggle switch. Use the customisation settings to assign your desired actions.

How do I use back tap on a Google Pixel smartphone?

Go to Settings>System>Gestures>Quick Tap, turn on its toggle switch, and select your desired action.

How do I turn on the flashlight on my Android smartphone without waking up its screen?

Samsung users can customise the side button to trigger the flashlight when pressed twice. Pixel users can do the same with the back panel of their phone using ‘Quick Tap’. For other OEMs, you can use a third-party app like Shake Flashlight. Read Also: Apple discontinued iPad (9th gen); iPad (10th gen) gets a price cut

Conclusion

These are the top 6 ways to turn on the flashlight on your Android smartphone without waking up its screen. The Google Assistant method will work on every Android device, regardless of the OEM. If you’re aware of any other methods that can carry out this task, let us know in the comments!

WatchOut WearPods Review: Best of both worlds?

You may remember WatchOut as the smart wearable brand that made an appearance in Season 2 of Shark Tank India. The brand is known for wearables that cater to different age demographics. Its smartwatch for kids is focused on parental control and two-way communication. The ‘Guardian’ smartwatch for senior citizens offers GPS live tracking as well as round-the-clock health tracking. For Gen Z, WatchOut offers an exciting fusion device called ‘WearPods’ which converges wireless earbuds and a smartwatch into one device. If you remember Huawei’s Watch Buds from last year you will know exactly what we’re talking about. What works for WearPods is its pricing. You can get your hands on this piece of tech for just Rs 5,000. We’ve been using the WatchOut WearPods for the last week and here is our comprehensive review of the device. Read Also: Apple discontinues iPad (9th gen); iPad (10th gen) gets a price cut

WatchOut WearPods review: Design and Display

Here’s what you get inside the WatchOut WearPods retail box:
  • Smartwatch with earbuds
  • Charging/data transfer cable
  • Screen protector
  • User manual and warranty card booklet
For a tech outfit that’s new to the market and putting out its first fusion product, WatchOut has nailed the design of the WearPods. Given the nature of the product, it wasn’t going to be sleek and compact. WatchOut has used this to its advantage and given the smartwatch a ‘rugged’ look. The squarish dial is undeniably thick, housing the earbuds on the right edge of the frame. Since it is made out of plastic, the smartwatch is not as heavy as it looks. There are two textured buttons on the left corners of the dial. The Military Green colour variant of the WatchOut WearPods we used for this review adds to its ‘rugged’ aesthetic. The wearable is also available in Orange Army and Black Commando shades. WatchOut WearPods: Design and Display The earbuds are firmly locked in their cutouts with powerful magnets. Even after shaking and yanking the smartwatch with immense force, the earbuds remained in place. Surprisingly, they are easy to pull out, which speaks to the ingenious design of the device. The ‘bullet’ earbuds are compact and fit nicely in the ear. The earbuds have no ear-specific design, meaning you can insert either earbud on any side. design The 1.93-inch HD display has a resolution of 240 x 296p. This display is bright enough for outdoor use. However, when it comes to the touch response, it leaves a little more to be desired. While using the touch gestures, it felt like the watch always needed to catch up. Perhaps an AMOLED panel would have been the better choice. There is also a 0.75W speaker on this smartwatch, located on the bottom frame of the dial. It is optimum for audio calls, but not the best for listening to music. display The silicone straps of the smartwatch are comfortable and do not cause any annoying itches. Wearing the smartwatch while working out did not present any issues whatsoever. The strap remained secure and the smartwatch and earbuds were unfazed by excessive sweat.

WatchOut WearPods review: Performance

The WatchOut WearPods are equipped with an array of features, some more reliable than others. The smartwatch can track your heart rate, blood oxygen, blood sugar, and blood pressure. While the heart rate and blood oxygen measurements were on point, we wouldn’t recommend relying on anything but medical-grade equipment for blood pressure and sugar readings. WatchOut WearPods: Performance The smartwatch also supports over 100 exercises and workout routines. You can use it to track everything from hikes and runs to bench presses and push-ups. Before starting an exercise you can set a time or calorie target on the watch. As is the case with every smartwatch, the calorie-burning of this device should also be taken with a grain of salt. performance Moving on, the wireless earbuds that come along with the device offer a decent listening experience and a passable audio output, but they lack the clarity offered by other TWS devices in this price range. We were expecting this as the WearPods are limited by their compact form factor and the nature of the device. The overall output seems a little tinny and lacks details. This is largely due to the small audio drivers inside the earbuds. performance If we take the functionality aspect into account, we’d say the WearPods get the job done in style. If minimalism and tech convergence are your biggest priority, then this is the ideal device for you. The smartwatch has a built-in GPS and an internal memory of 4GB. If you’re going on a run and don’t want to take your smartphone along with you, this smartwatch will take care of all the essential things. Its inbuilt GPS will track your run and you will be able to enjoy your local library of music using the WearPods. WatchOut WearPods: Performance The WatchOut WearPods also support Bluetooth calling. You can make and accept calls using the smartwatch and channel the audio output through the earbuds or the built-in speakers. The call quality was fine in an indoor setting, but we switched to our smartphone in noisy surroundings. app You can access the health and fitness data on your smartwatch using the V Band companion app for WearPods. This app has a good collection of dial faces and wallpapers for the watch. The downside is that you can’t store multiple watch faces on the watch itself. Another underrated feature of this app is the ‘Receipt code’, which binds your UPI QR Code to the watch so you don’t have to open the payment app to access it. app While the app handles the basics very well, WatchOut needs to work on its UI. If we hadn’t used the QR code on the watch to download this app, we would be very sceptical of its legitimacy. Upper case and lower case letters are used seemingly at random throughout the app’s interface and the text does not align with the layout in some pages. We also spotted a few typos on the app. We hope the company patches these errors with a swift update. Ending things on a good note, the battery life of the WatchOut WearPods is very versatile. The smartwatch is equipped with a 400mAh battery pack and the earbuds have additional 35mAh batteries inside them. We were able to get more than 5 hours of playtime out of the earbuds in one go. The smartwatch lasted us an entire week with frequent TWS use, Bluetooth calling, and regular fitness tracking. Read Also: How to send files using Quick Share? (2024)

Verdict

As a sum of its parts, the WatchOut WearPods is a wonderful product. For Rs 5,000, it is a bargain. Sure, the audio quality of the WearPods may not match up to its standalone TWS rivals, but we highly rate its functionality and ease of access. The option to store music on the smartwatch and listen to it using the WearPods is a nice touch. Paired with the built-in GPS, it reduces your dependence on your smartphone while running or working out.

WatchOut WearPods: Pros

  • Good design
  • Comfortable fit
  • Built-in GPS
  • 4GB internal memory for music
  • Versatile battery

WatchOut WearPods: Cons

  • Average audio output
  • V Band app needs work

Apple discontinued iPad (9th gen); iPad (10th gen) gets a price cut

0
Apple on Tuesday introduced the new iPad Air and iPad Pro in India and other markets. Immediately after the launch, the company drastically reduced the price of the iPad (10th generation). At the same time, Apple has officially made the decision to stop selling the well-liked iPad (9th generation). So in case you’re considering purchasing a new tablet, now is the best time. Here are the pricing details:

iPad (10th generation) price in India

iPad (10th generation) price in India After the price reduction, the iPad (10th generation) is available at a starting price of Rs 34,900, which is Rs 5,000 down from its original price of Rs 39,900 for the base 64GB model. On Flipkart, the same model will be available for Rs 32,999. The price of the 256GB is currently Rs 47,999. The tablet features a 0.9-inch multi-touch IPS LED display. The screen has a resolution of 2360×1640, a peak brightness of 500 nits, and a pixel density of 264 ppi. The tablet is powered by a hexa-core A14 Bionic chipset. It runs on iPadOS 17. The iPad (10th generation) comes with a 12-megapixel rear camera and a 12-megapixel ultra-wide-angle selfie camera. Additionally, it has a USB-C port and a 28.6-watt-hour lithium polymer battery. Also Read: Toshiba C450ME QLED TV series with Dolby Vision and Dolby Atmos support launched in India

iPad (9th generation) price in India

iPad (9th generation) price in India   Apple has officially discontinued the iPad (9th generation), which arrived in 2021. With the Rs 10,000 discount, Apple has brought down the starting price of the 64GB variant to Rs 34,900. On Flipkart, the same model is presently selling for Rs 25,999, while the 256GB model is available for Rs 38,999 on Amazon and Flipkart.  Also Read: Google Pixel 8a launched in India at this price: Deets inside The iPad (9th generation) has a 10.2-inch Retina display with a resolution of 2,160 x 1,620. The Apple tablet is driven by an A13 Bionic chip with 64GB or 256GB of storage options. Using iPadOS, you may edit and share photographs, run multiple apps at once, and use the Apple Pencil to write in any text field using Scribble. 

Google Wallet Makes Its Debut in India, Elevating Daily Convenience for Users

0
Key Highlights
  • Google Wallet launches in India, centralizing access to essentials like boarding passes and loyalty cards.
  • Partners with major brands like PVR, INOX, and Air India to enhance functionality.
  • Enables storage of event tickets, travel passes, and use of phones as corporate badges
Google has launched the Google Wallet app in India, introducing a new level of ease and security for managing daily essentials such as boarding passes, loyalty cards, and more. This strategic move aims to refine the Android user experience through increased convenience and seamless integration of services. Google Wallet serves as a centralized platform where users can safely store and quickly access important digital items like event tickets, public transport passes, and gift cards. In its commitment to enhancing user interactions, Google has collaborated with over 20 leading Indian brands, including PVR & INOX, Air India, Indigo, and Flipkart, to enrich the Wallet’s functionality.
Ram Papatla, GM & India Engineering Lead for Android at Google, emphasized the significance of this development: “Launching Google Wallet in India is a milestone that brings sophisticated, user-friendly experiences to Android users across the country. By partnering with top local brands, we offer a versatile solution for securely managing essential items from boarding passes to loyalty cards, right at your fingertips.”
Read Also: Samsung Home Loyalty Program with Flipkart announced 

Google Wallet integrates various features to streamline daily activities:

  • Event and Movie Tickets: Users can add tickets from cinemas like PVR and INOX directly into their Wallets.
  • Travel Made Easy: Airline passengers can store mobile boarding passes, with added functionalities for Pixel users to include passes by simply capturing a screenshot.
  • Loyalty and Gift Cards: Partnerships with retailers like Flipkart and Dominos allow users to save and redeem loyalty points and gift cards effortlessly.
  • Public Transit: Google Wallet supports ticket storage for services like Kochi Metro and Hyderabad Metro, simplifying public transit usage.
  • Workplace Access: Android users can use their phones as corporate badges, thanks to collaborations with system integrators like Wavelynx.
  • Digital Documentation: The app can digitize any document that contains a barcode or QR code, making it easier to manage various passes and receipts.
  • Automatic Ticket Sync: Event confirmations from Gmail, such as movie or train tickets, will automatically populate in Google Wallet if smart personalization is enabled.
As Google Pay continues to handle payment-related needs, Google Wallet expands its utility by focusing on non-financial daily essentials, setting a new standard for digital wallet functionality in India. This launch not only represents a significant step forward for Google in the Indian market but also demonstrates its ongoing commitment to enhancing the connectivity and functionality of Android devices globally.

How to send files using Quick Share? (2024)

0
Google has renamed Android’s ‘Nearby Share’ feature to ‘Quick Share’ and started rolling it out to selected devices. You may remember Quick Share as Samsung’s file-sharing feature. You can use it to send files among Android, Windows, and ChromeOS devices. If you’re accustomed to Nearby Share, it won’t take you any time to adapt to the new feature. Today, we show you how to send files using Quick Share. Read Also: Google Pixel 8a launched in India at this price: Deets inside

Before you begin

Here are the requirements your devices need to meet before using Quick Share:
  • The two devices must be within 5 metres (16 feet) of each other.
  • Both devices must have Bluetooth and WiFi enabled.
  • The devices should be running Android 6+, ChromeOS 91+, and 64-bit Windows 10+.
  • ARM devices are not supported by Quick Share.

Here’s how you can send files using Quick Share

Step 1: Open the file you want to share and hit the Share icon at the bottom of the screen. Step 1: Open the file you want to share and hit the Share icon at the bottom of the screen. Step 2: Tap on Quick Share. Step 2: Tap on Quick Share. Step 3: Hit Continue. Step 3: Hit Continue. Step 4: Make sure Bluetooth is turned on. Step 4: Make sure Bluetooth is turned on. Step 5: Turn on Quick Share from the Quick Settings Menu on the target device. Step 5: Turn on Quick Share from the Quick Settings Menu on the target device. Step 6: In the ‘Who can share with you’ popup, select Everyone. Step 6: In the ‘Who can share with you’ popup, select Everyone. Step 7: On the device sharing the file, tap the name of the target device. Step 7: On the device sharing the file, tap the name of the target device. Step 8: Hit Accept on the target device. Step 8: Hit Accept on the target device. The file will be transferred within seconds.

Frequently Asked Questions (FAQs)

What happened to Nearby Share on Android?

Earlier this year, Android renamed its ‘Nearby Share’ file-sharing feature to ‘Quick Share’.

How do I turn on Quick Share on my Android phone?

Swipe down from the status bar to reveal the Quick Settings Menu, tap on Quick Share, and select ‘Everyone’.

How do I send a file via Quick Share?

Open the file, hit the ‘Share’ icon, tap on ‘Quick Share’, and select the target device. Read Also: Toshiba C450ME QLED TV series with Dolby Vision and Dolby Atmos support launched in India

Conclusion

This is how you can send files from your Android smartphone using Quick Share. You can use Quick Share to send files to your Chromebook and Windows PC as well. As this feature is still being rolled out in phases, it may not be available on your device or in your country.

Google Pixel 8a launched in India at this price: Deets inside

Key Highlights
  • Pixel 8a is now available for pre-orders in India.
  • The device features a 120 Hz Super Actua display.
  • The Pixel phone comes with a Tensor G3 SoC and AI features.
Google has officially announced the launch of its most affordable smartphone in the Pixel 8 Series, the Pixel 8a. The newly launched device is a successor to the Pixel 7a, powered by a Tensor G3 SoC with Gemini AI out of the box, similar to the Pixel 8 and Pixel 8 Pro phones. The smartphone has an updated design that incorporates Google’s Super Actua display. However, it retains the same camera setup as its predecessor.

Google Pixel 8a price in India, sale details

The Google Pixel 8a price in India is set at:
  • 8GB RAM with 128GB storage: Rs 52,999
  • 8GB RAM with 256GB storage: Rs 59,999
Google’s A-series smartphones will come in four colour options: limited edition Aloe, Bay, and the classic Obsidian and Porcelain options. The device will go on sale on May 14 (the day when Google I/O begins) at 6:30 a.m. via Flipkart in the country. The Pixel 8a is currently available for pre-order in India. Google Pixel 8a price in India, sale details The annual developers’ conference, Google I/O, is often when the Google Pixel ‘A’ series devices are introduced. Unexpectedly, this is the very first time Google has released a Pixel product without hosting a launch event. The dates for Google I/O 2024 are set for May 14–16. Launch and pre-order offers for Google’s Pixel 8a in India include: • Bank offer of Rs 4,000 and 12-month no-cost EMI, available with select bank cards • Exchange bonus of Rs 9,000 on select smartphone models • Pre-order offer: Purchase Pixel Buds A-Series at Rs 999 with the purchase of Pixel 8a anytime during the pre-order period. 

Google Pixel 8a specifications

The Google Pixel 8a comes with rounded corners, a matte back, a polished aluminium frame, and a glass-like polycarbonate rear panel. It is highlighted with a 6.1-inch Super Actua display, which is said to be 40 per cent brighter than the Pixel 7a’s. It now supports a faster 120Hz refresh rate and is protected with Corning Gorilla Glass 3 layering. Also Read: Apple launched 2024 models of iPad Air and iPad Pro, M4 chipset also introduced Under the hood, there is the Google Tensor G3 chip and the Titan M2 security chip. The chipset offers AI-powered tools like Best Take, Magic Editor, Audio Magic Eraser, and more. Gemini, Google’s built-in AI assistant, allows users to type, talk, and add images for various tasks. Parents and guardians can easily establish digital ground rules, manage privacy settings, set screen time limits, and share locations.  Google Pixel 8a price in India, sale details The phone runs on Android 14 out of the box and will receive seven years of software support, including security updates and Android OS upgrades. The smartphone also features a dual rear camera system with a 64-megapixel main lens and a 13-megapixel ultrawide lens, as well as a 13-megapixel front-facing camera. Pixel 8a also includes Super Res Zoom up to 8x and features like Magic Eraser, Night Sight, and Photo Unblur. Also Read: Toshiba C450ME QLED TV series with Dolby Vision and Dolby Atmos support launched in India In terms of connectivity, there is Wi-Fi 6, Bluetooth 5.3, NFC, a USB Type-C port, and GPS. The handset packs a 4,492mAh battery, along with 18W wired charging and 7.5W Qi wireless charging support.

Garena Free Fire Redeem Codes Today 8 May 2024: Here is how to claim them

Garena Free Fire is a battle royale game with regular awards and tournaments to keep players interested. If you play Garena Free Fire, you should be aware of the redeem codes that are released on a daily basis. However, because the battle royale game is banned in India, players from other countries can use the Free Fire Redeem codes daily. If you’re unfamiliar with the Garena Free Fire redeem codes or don’t know how to get them, we’ve put together a step-by-step guide to help you redeem them. Check out Garena Free Fire Redeem Codes for 8 May 2024. The Free Fire redeem codes are a great way to get free stuff. These are 12-digit codes that contain alphabets and numbers, as well as an expiration date and time. Because the Garena FF redeem codes cannot be used more than once, you should hurry to the redemption page to claim your free reward before someone else does. To get a free reward, all you have to do is go to reward.ff.garena.com/en, which is the official redemption page. Also, keep an eye on this space for daily updates on Garena Free Fire redemption codes and rewards. Also Read: Sennheiser Accentum Plus wireless headphones with Hybrid Adaptive Noise Cancellation launched

Garena Free Fire Redeem Codes Today 8 May 2024

FJ7L5EV4S8T3R62U FG9P3M2F6Y1A7B5E FW8U4IE2X3ZN5Q9D FH1R9C6G2O8J4E5T FS3Y6DEEQ1B4LK9M FC2WE9Q5V1XA3FRH FM6F8GR7T2B5ES9J FW3X6EY9Z4A7TB1C FD8E2F5G1HGT6I3J FFN7O4P1Q6R9S2T5 FL4Z1ED9N7H3PY8I FQ5O2X6K9J1C8W4G FB3C5D8E2S1F7G4H FI9J2KE6L3MTTN5O FP4Q7R1S5TTT9E2V

How to Get Free Fire Redeem Codes for Garena on 8 May 2024?

  • Visit the Garena Free Fire game’s official website at reward.ff.garena.com.
  • Use your Facebook, Google, VK, Apple ID, Huawei ID, or Twitter account to log in.
  • You’ll be taken to a valid redemption code (s)
  • Copy and paste the 12-digit redemption code into the text box.
  • On the screen, a dialogue box will appear.
  • ‘Ok’ should be selected.
For the latest gadget and tech news, and gadget reviews, follow us on TwitterFacebook and Instagram. For newest tech & gadget videos subscribe to our YouTube Channel. You can also stay up to date using the Gadget Bridge Android App. You can find the latest car and bike news here.

Toshiba C450ME QLED TV series with Dolby Vision and Dolby Atmos support launched in India

Japanese tech brand Toshiba announced the launch of an all-new C450ME QLED TV series in the Indian market. The latest Toshiba QLED TV lineup comes with Dolby Vision and Dolby Atmos support. It is equipped with REGZA Engine ZR for stunning picture quality and has advanced 4K upscaling technology.

Toshiba C450ME QLED TV price in India, sale details

Toshiba C450ME QLED TV will be available in India at a starting price of Rs 26,999 for the 43-inch 43C450ME. The 55-inch 55C450ME will be offered at Rs 37,999, the 50-inch 50C450ME will be priced at Rs 32,999. The 43-inch and 50-inch models will be available starting May 7, with the 55-inch model to follow soon after. The Television will be available for purchase via all leading e-commerce platforms in the country.

Toshiba C450ME QLED TV specifications, features

Toshiba C450ME QLED TV features a sleek, ultra-thin bezel design and is available in three different sizes 55-inch, 50-inch and 43-inch. The television is equipped with Toshiba TV’s exclusive REGZA Engine ZR technology, which allows it to fully utilise 4K resolution. The device offers a vivid and lifelike colour spectrum thanks to Quantum Dot Color technology which also improves delicate undertones to vibrant colours, making for an immersive and engrossing watching experience. The AI-driven 4K upscaling engine on Toshiba TV makes sure that even non-4K content appears fantastic by carefully examining and refining each frame. Also Read: Apple presents the 2024 Pride Collection, the new Apple Watch Pride Edition Braided Solo Loop, and more The QLED TV supports Dolby Vision and HDR 10+ Decoding to provide stunning visuals. Along with REGZA Power Audio the C450ME QLED TV has Dolby Audio, Dolby Atmos, and DTSX technologies to produce crisp, clear, and perfectly balanced sound. The Game Mode on it offers optimised rendering capabilities and minimal input lag. Game Mode includes gaming features like VRR (Variable Refresh Rate), eARC, and ALLM (Auto Low Latency Mode). Also Read: Apple launched 2024 models of iPad Air and iPad Pro, M4 chipset also introduced As per the company with built-in voice assistants like Alexa and VIDAA Voice, customers can easily control their TV and stream content while having a seamless and user-friendly experience thanks to the VIDAA operating system. The OS offers a wide array of global and local entertainment options, including Netflix, Prime Video, Apple TV, YouTube, Disney+Hotstar, JIO Cinema, Zee5, and more. In terms of connectivity, Toshiba C450ME QLED TV includes HDMI, Bluetooth, Dual Band 2.4G+5G, and USB Media Player options

How to use a boarding pass on your smartwatch?

0
If you own a WearOS smartwatch, you should check out what Google has in store for you. If you’re used to scanning the boarding pass from your phone, you can now use your smartwatch for the task. The process is seamless and does not take much of your time. Not only does this work for boarding passes but any ticket with a QR code. So, let’s take a look at how you can access and use a boarding pass on your smartwatch. Read Also: Apple launched 2024 models of iPad Air and iPad Pro, M4 chipset also introduced

Before you begin

For this method to work, you need the Google Wallet app. Google Wallet can store your credit/debit cards, boarding passes, movie tickets, and more. If your phone has NFC, you can use the Google Wallet app to make payments with a single tap. Whenever you receive a ticket or a pass in your email, it is automatically added to the Wallet, given you are logged into Gmail and Wallet using the same account. If the boarding pass or ticket does not show up in your Wallet, you can always add it manually. Once it has been added to the Wallet app, you can access it on your WearOS smartwatch. The entire process is seamless and does not require a lot of effort. The only catch is that Google Wallet is available only in limited countries right now.

Add a boarding pass to your Google Wallet

Add a boarding pass to your Google Wallet Step 1: Open the boarding pass on your phone and take a screenshot. Step 2: In the pop-up menu of the screenshot, tap on Add to wallet. This feature only appears if Google Wallet is installed and activated on your phone. Step 3: If you want to edit any information, do it on the next page. Hit Save when you’re done. The boarding pass will be saved to your Google Wallet.

Use a boarding pass on your smartwatch

Google Pixel Watch 2 with improved heart rate sensor and Fitbit features launched in India Step 1: Launch the Wallet app on your smartphone. Step 2: Tap on the boarding pass. This will display its QR code. Step 3: Let the QR code reader scan your watch.

Frequently Asked Questions (FAQs)

Can I scan my boarding pass using my smartwatch?

If you have the Google Wallet app on your smartwatch, you can use it to access and scan your boarding pass while boarding a flight.

How do I add a boarding pass to Google Wallet?

To add a boarding pass to Google Wallet, simply take a screenshot of it on your phone and tap the ‘Add the wallet’ option at the bottom right corner of the screen.

Is the Google Wallet app available in India?

Google Wallet is not available in India yet. Some users have spotted the app in Google Play Store but the tech giant has not revealed any plans for its launch yet. Read Also: How to stack similar photos together in Google Photos?

Conclusion

This is how you can access and use your boarding pass using your smartwatch. This method also works for other QR-code-based passes and tickets. If you can’t get this method to work, make sure your smartphone is NFC-enabled.

Apple launched 2024 models of iPad Air and iPad Pro, M4 chipset also introduced

  • iPad Air gets an M2 processor and iPad Pro comes with an M4 chipset.
  • The Air comes with support for Magic Keyboard and Apple Pencil.
  • The tablets will be available in 11-inch and 13-inch variants.
The wait is over for the Apple fans who were eagerly waiting for the company to introduce new iPad models. The company unveiled brand new iPad Air and iPad Pro models today at its Let Loose Event. The iPad Pro is powered by the most recent M4 chip, while the iPad Air has a new Retina Display and is powered by an M2 chipset. The new iPads come in 11- and 13-inch sizes and are compatible with the Apple Pencil and Magic Keyboard. The price of the iPad Air with an 11-inch screen starts at $599, whereas the 13-inch model price is set at $799. The pre-order window is now open from today, with availability starting next week. It comes in the following colour options: blue, purple, space grey, and starlight. The starting price of the 11-inch iPad Air model with Wi-Fi connectivity and 128GB of storage in India is Rs 59,900. For Rs 79,990, you can also buy it in the Wi-Fi + Cellular version. Whereas, the 13.9-inch iPad Air model’s Wi-Fi and Wi-Fi + Cellular versions cost Rs 74,900 and Rs 94,900 respectively. The recently unveiled iPad Air will go on sale in international regions, including India, on May 15. Pre-orders for the iPad Pro series in the US are open now, with prices ranging from $999 to $1,299 for the base model. The new 11-inch and 13-inch iPad Pro will be available in silver and space black finishes in 256GB, 512GB, 1TB, and 2TB configurations. The 11-inch iPad Pro starts at Rs 99900 for the Wi-Fi model, and Rs 119900 for the Wi-Fi + Cellular model. The 13-inch iPad Pro starts at Rs 129900 for the Wi-Fi model, and Rs 149900 for the Wi-Fi + Cellular model. Additional technical specifications, including nano-texture glass options, are available at apple.com/in/store.

iPad Air specs, features

  iPad Air specs, features The all-new iPad Air sports a 10.9-inch and a 13-inch Liquid Retina (LCD) display. An octa-core M2 processor with a Neural Engine for on-device AI workloads powers it. The tablet comes pre-installed with iPadOS 17. It has a 12-megapixel ultra-wide angle forward-facing camera with a landscape orientation. A 12-megapixel wide-angle camera with image stabilisation and support for Smart HDR is also located on the back. Additionally, the camera can capture videos in 4K quality at up to 60 frames per second or in slow motion at up to 1080p at up to 240 frames per second. The device supports Apple’s Centre Stage technology, which automatically changes the camera angle as you walk, in addition to FaceTime.

iPad Pro specs, features

iPad Pro specs, features iPad Pro comes with an Ultra Retina XDR display. The device, which is the thinnest Apple product that utilises two OLED panels called “Tandem OLED” to attain 1000 nits of brightness and a peak brightness of 1600 nits, will be available in two sizes: an 11-inch display (5.3 mm thin) and a 13-inch model (5.1 mm thin). The M4 chipset, which supports up to 2TB of storage, powers the system faster. The chipset, according to the company, is built on a second-generation 3nm process and features a 10-core GPU with ray-tracing capabilities. In addition to this, it has a totally redesigned display engine that can give up to four times quicker performance than the M2 chip. According to the company, the newest M4 chipset, which has the capacity to separate the NPU unit in its architecture, will also offer AI features for the new iPad Pro. The device comes pre-installed with iPadOS 17. The tablet has a dual rear camera arrangement with a LiDAR scanner and a 12-megapixel primary and 10-megapixel ultra-wide angle camera. A 12-megapixel ultra-wide-angle camera with Centre Stage support has been included on the front for taking selfies and making video calls. For improved performance, the new iPad Pro is supported with Logic Pro and Final Cut Pro 2. According to Apple, rendering in Final Cut Pro is greatly sped up by the new M4 chip. It can reach speeds up to twice that of the M1 chip. Additionally, users can connect and preview up to four cameras at once with the new live multicam mode. For recording footage, the Final Cut Camera app can be used independently as a camera app. Apple has also introduced the Magic Keyboard, which has haptic feedback. It also comes with an adjustable screen brightness. The latest model offers a trackpad with haptic feedback, an aluminium palm rest, and a function row. The redesigned Magic Keyboard keeps its essential functions while sporting a leaner design approach. The new Apple Pencil Pro, on the other hand, has motion sensors, personalised interactions, and Find My. The iPad Air is compatible with the new Apple Pencil Pro as well.

How to stack similar photos together in Google Photos?

0
If you take multiple shots of the same scene or subject, your photo gallery probably looks redundant. Swiping through similar images while looking at the pictures from a particular event takes the fun out of it. In a bid to resolve this problem and declutter your image library, the tech giant has introduced the ‘Photo Stacks’ feature in its native Photos app. This feature organises your photo gallery by clubbing similar pictures together. Here is how you can enable or turn on Photo Stacks in Google Photos.  Read Also: How to summarise incoming messages using Android Auto? (2024)

How does it work?

When you create a stack in the Photos app, it goes through your photo gallery and groups similar images together. A stack has a special icon that resembles two squares paired together. Tapping on the image with the stack icon reveals the rest of the images. You can change the image that appears as the cover for the stack. You can also remove the pictures in the stack if you want to free some storage space. If you don’t want the images in a particular stack to be grouped together, instead of turning off the feature you can open the stack, hit the ellipses and select ‘Unstack’.

Enable Photo Stacks in Google Photos

Step 1: Launch the Google Photos app on your Android smartphone. Step 2: Hit your profile picture at the top right corner of the screen. Step 2: Hit your profile picture at the top right corner of the screen. Step 3: Tap on Photo settings. Step 3: Tap on Photo settings. Step 4: Select Preferences. Step 4: Select Preferences. Step 5: Tap on Stack similar photos. Step 5: Tap on Stack similar photos. Step 6: Turn on the toggle switch for Stack similar photos. Step 6: Turn on the toggle switch for Stack similar photos.

Frequently Asked Questions (FAQ)

How to turn on Photo Stacks in Google Photos?

Launch the Google Photos app, tap on your profile picture, go to Photo settings>Preferences>Stack similar photos and turn on its toggle switch.

What does Photos Stacks do?

The ‘Photos Stacks’ feature in Google Photos organises your photo library by stacking similar images together.

What is the photo limit for a single stack?

One stack of images in Google Photos can hold up to 100 pictures. Read Also: MediaTek Introduces Its New Dimensity 9300+ Chip: Elevating Smartphone AI Capabilities And Gaming Performance

Conclusion

This is how you can enable or turn on Photo Stacks in Google Photos. This feature will declutter your photo library and make it easier to browse. If you can’t find this feature on your phone, update the Google Photos app and try again. Since this feature is being rolled out in phases, it is possible it may reach your device at a later date.

Apple presents the 2024 Pride Collection, the new Apple Watch Pride Edition Braided Solo Loop, and more

Apple has announced today the release of a new watch face, dynamic iOS and iPadOS wallpapers, and a new Apple Watch Pride Edition Braided Solo Loop. These announcements are part of Apple’s efforts to support global movements to safeguard and promote equality for LGBTQ+ communities. Apple is introducing a new Apple Watch Pride Edition Braided Solo Loop, which will be available for order starting on May 22. In addition to this, a matching watch face and dynamic iOS and iPadOS wallpapers will be available in an upcoming software update. According to the company, for the first time, users may personalise the Pride watch face and backgrounds to feature a range of colours that symbolise the diversity and vitality of LGBTQ+ communities. Also Read: LG CineBeam Q laser projector with 4K UHD picture quality launched in India Apple says that it will continue to support LGBTQ+ advocacy groups through this Pride Collection, whose work is bringing about positive change. These groups include the Human Rights Campaign, a global advocacy group that works to ensure that all LGBTQ+ people are treated as full and equal citizens, and ILGA World, a global federation dedicated to advancing the rights of LGBTQ+ people worldwide. Encircle, Equality Texas, Equality North Carolina, GLSEN, Equality Federation, the National Centre for Transgender Equality, PFLAG, SMYAL, and The Trevor Project are among the other advocacy groups that Apple sponsors. The new Pride Edition Braided Solo Loop, which comes with a laser-etched lug that reads “PRIDE 2024,” reflects the beauty and strength of LGBTQ+ communities with a bright, fluorescent design influenced by several pride flags. Whereas pink, light blue and white tones stand for transgender and nonbinary people, while black and brown represent black, Hispanic, and Latino groups as well as those affected by HIV/AIDS. The iPad, iPhone, and Apple Watch now have vibrant, symbolic colours for the new Pride Radiance watch face and iOS and iPadOS wallpapers.  Also Read: Apple Event “Let Loose” today: Here is how to watch the event live The Pride Edition Braided Solo Loop will be priced at Rs 9500 and available for purchase at Apple Store locations starting on May 22 in the United States and Canada and May 23 in other countries. Buyers can order it at apple.com/in. Apple Watch SE and Apple Watch Series 4 or later are compatible with the 41mm and 45mm Pride Edition Braided Solo Loop. Soon, watchOS 10.5, iOS 17.5, and iPadOS 17.5 users will be able to download the new Pride Radiance watch face and wallpapers. The matching Pride Radiance watch face can be downloaded through the Apple Watch app, on the Apple Store app, or at apple.com/in.

How to summarise incoming messages using Android Auto? (2024)

0
Initially, showcased at the launch event of the Samsung Galaxy S24 Series, the AI summarisation feature for incoming messages on Android Auto is finally being rolled out to Android users. As the name suggests, this feature shortens long incoming messages, making them easily digestible while driving. Google Assistant reads these messages aloud so you don’t have to divert your attention from the road. Check out how you can use Google Assistant to summarise incoming messages on Android Auto. Read Also: LG CineBeam Q laser projector with 4K UHD picture quality launched in India

How do AI summaries for incoming messages work on Android Auto?

AI summaries are not a new thing on the Android platform. Samsung’s Galaxy AI can summarise web pages, voice notes, and regular text notes. Google’s new summarisation feature also relies on AI to create a shortened version of the incoming texts. Addressing privacy concerns around the issue, the tech giant has confirmed that this feature doesn’t log messages or summaries and the data isn’t used to train the Large Language Model (LLM). As is the case with most AI-based tools, there is some room for error in the text summaries generated by Google Assistant. The good news is that they will get better with time. Google also plans on rolling out this feature on other devices that support the Assistant. As of now, it is only available on Android Auto for selected devices in certain countries.

Enable AI summaries for incoming messages in Android Auto

  10 best apps compatible with Android Auto How to summarise incoming messages using Android Auto? (2024) Google Assistant on Android Auto prompts you to opt-in for AI summaries the first time you receive a text message that is over 40 words. Tapping ‘Yes’ will enable AI summaries on the device and the Assistant will read out the condensed version of the text message while you’re driving. If you ignored this prompt or accidentally hit ‘No’ on it, you can enable the feature from Android Auto settings. Here’s how. Step 1: Tap the Settings icon at the bottom left corner of the screen. Step 2: Under Notifications, turn on the toggle switch for Message Summary. Once you receive a message, tap ‘Play Aloud’. Google notes that “If there’s only one long message or multiple messages from the same sender or the group, the messages are summarized automatically when you tap Play aloud. Otherwise, the Assistant reads the message without summarization.”

Frequently Asked Questions (FAQs)

How do I enable AI summaries for incoming messages in Android Auto?

Hit the settings icon, then turn on the toggle switch for ‘Message Summary’ under Notifications.

Why can’t I see the AI summary feature on my device?

As of now, this feature is only available for certain devices in a handful of countries. It is being rolled out in phases so it may take some weeks or even months to be available on your device.

Why is Google Assistant not summarising my incoming messages on Android Auto?

The AI summary feature only works on incoming text messages that are over 40 words. Read Also: Top 10 Tech Gifts for Mother’s Day 2024

Conclusion

This is how you can summarise incoming text messages using Google Assistant on Android Auto. If you don’t like this feature, you can disable it from the Notifications section in Android Auto settings. If there’s anything else you’d like to know, ask us in the comments!

LG CineBeam Q laser projector with 4K UHD picture quality launched in India

LG Electronics new CineBeam Q (HU710PB) projector has debuted in India. The LF projector was introduced at the 5th Smart Home Expo at Jio World Convention Center, Mumbai. The smart portable laser projector comes with a compact design. It operates on LG’s webOS platform and has a 3-channel RGB laser system.

LG CineBeam Q (HU710PB) projector price in India

The LG CineBeam Q (HU710PB) projector was launched in India at Rs 165,000. The laser projector from LG will be available for purchase via retail and online platforms across the nation, including LG.com and the LG Pro AV store. The company is also offering a warranty of two years on the product. LG CineBeam Q (HU710PB) projector price in India

LG CineBeam Q (HU710PB) projector features

The LG CineBeam Q (HU710PB) projector is a clever, portable laser projector with a small, sleek form factor. Despite its small size, the projector is calibrated to produce 4K UHD (3840 x 2160) picture quality and can project video onto screens as large as 304.8 cm (120 inches). In addition to this, the smart portable projector from LG makes use of laser light source technology, which ensures a contrast ratio of 450,000:1. The projector also has a 3-channel RGB laser system, which improves the brightness and clarity of the images it projects. Users may easily access popular streaming services, including Netflix, Disney+, Prime Video, and YouTube, with LG’s webOS platform. The projector also supports AirPlay 2 and Miracast for sharing content from smartphones and tablets. LG CineBeam Q (HU710PB) projector features The LG CineBeam Q comes with a plethora of handy features, such as auto-screen adjustment and webOS integration. In terms of connectivity, it includes support for screen sharing, mirroring, Bluetooth, AirPlay, HDMI, and USB Type-C. In addition, the projector’s 360-degree rotating handle makes it easy to carry anywhere and lets users easily move between indoor and outdoor environments. Also Read: Apple Event “Let Loose” today: Here is how to watch the event live Commenting on the launch, Mr. Yoojae Kim, Vice President and Director, Division Leader, Business Solutions, said, “As young Indians lead dynamic lifestyles, the need for portable entertainment solutions has never been more crucial. The LG CineBeam Q perfectly aligns with this demand, offering portability without compromising on performance. Whether it’s transforming a dorm room into a personal cinema, hosting movie nights with friends, or taking outdoor gatherings to the next level, it seamlessly adapts to our on-the-go lifestyle. Its portability ensures that the magic of cinema is no longer confined within four walls. We are confident that the LG CineBeam Q will become an indispensable part of every Indian household, offering boundless entertainment possibilities for the entire family.”