


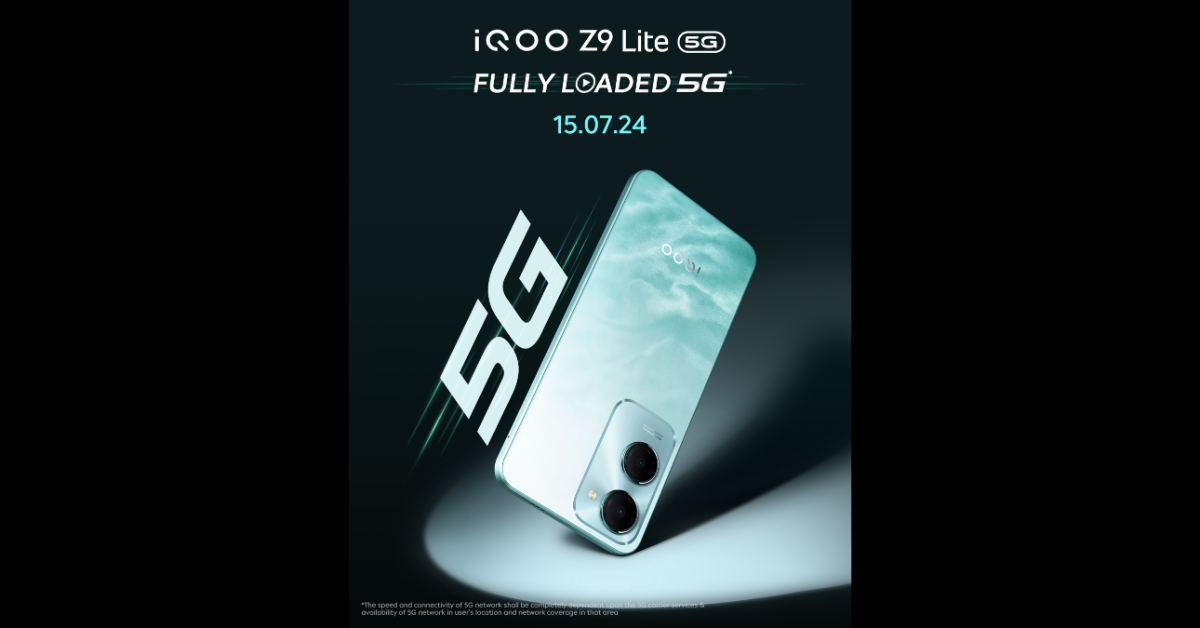
 The iQoo Z9 Lite 5G features a back panel with a marble-like finish, similar to the Vivo T3 Lite 5G. In addition to this, a rectangular camera module with two camera sensors and an LED flash can be seen on the top left corner of the smartphone.
As mentioned earlier, the iQoo Z9 Lite, rumoured to be a rebranded version of the Vivo T3 Lite 5G which debuted in the country on June 27. If the reports are accurate, the Vivo T3 Lite 5G and the iQoo Z9 Lite will have comparable specs.
Also read: Best tablets under Rs 30000 in India right now
The iQoo Z9 Lite 5G features a back panel with a marble-like finish, similar to the Vivo T3 Lite 5G. In addition to this, a rectangular camera module with two camera sensors and an LED flash can be seen on the top left corner of the smartphone.
As mentioned earlier, the iQoo Z9 Lite, rumoured to be a rebranded version of the Vivo T3 Lite 5G which debuted in the country on June 27. If the reports are accurate, the Vivo T3 Lite 5G and the iQoo Z9 Lite will have comparable specs.
Also read: Best tablets under Rs 30000 in India right now

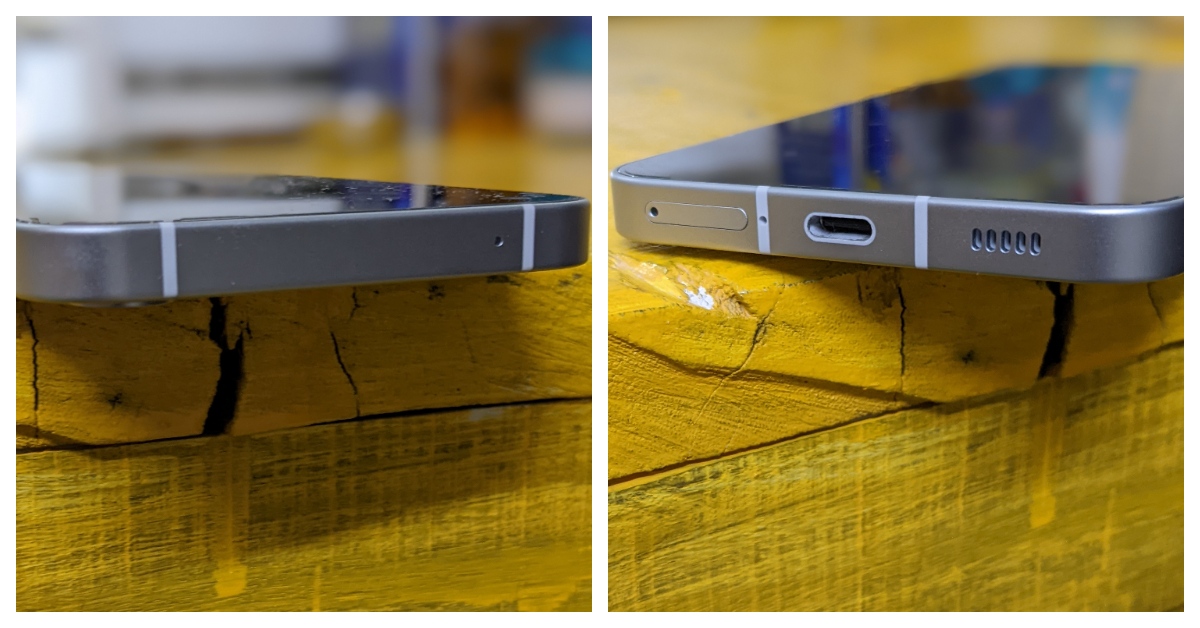
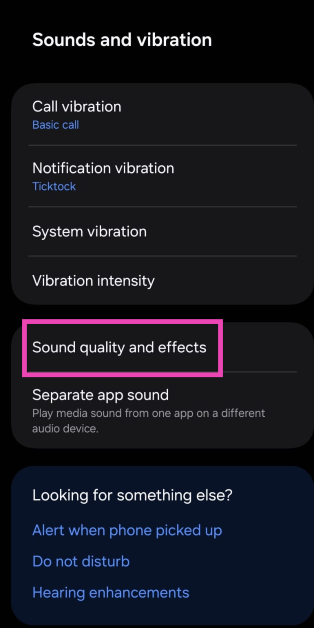
 It is important to know the position of the speaker grille on your phone. This grille houses the primary speaker and is generally located on the bottom edge of the device. If you own an entry-level or a lower midrange smartphone, it is likely that this is the only source of audio output on your device. Upper midrange and flagship phones have a secondary speaker on the top edge as well. On some devices, the earpiece may double up as the secondary speaker.
If your phone is struggling to produce a loud audio output, always make sure that the primary speaker is pointing towards you. This will focus the audio on you and will limit the loss in intensity to the surroundings.
It is important to know the position of the speaker grille on your phone. This grille houses the primary speaker and is generally located on the bottom edge of the device. If you own an entry-level or a lower midrange smartphone, it is likely that this is the only source of audio output on your device. Upper midrange and flagship phones have a secondary speaker on the top edge as well. On some devices, the earpiece may double up as the secondary speaker.
If your phone is struggling to produce a loud audio output, always make sure that the primary speaker is pointing towards you. This will focus the audio on you and will limit the loss in intensity to the surroundings.
 If your phone took a dip or was exposed to water splashes, its audio output must have taken a hit. When water droplets settle on the speaker’s membrane, it vibrates at a lower frequency, leading to a lower output. Use a third-party app like Dry Speaker to remove the moisture from the speaker grille on your phone.
Accumulation of dirt and grime on the speaker’s membrane can also cause a drop in audio intensity. Use a needle to unsettle the dirt from the speaker. Be careful that you’re gentle with the needle or you’ll end up permanently damaging the membrane. The idea is to scrape the dirt particles from the grille. Once that’s done, tap your phone gently on a solid surface to remove the unsettled particles.
If your phone took a dip or was exposed to water splashes, its audio output must have taken a hit. When water droplets settle on the speaker’s membrane, it vibrates at a lower frequency, leading to a lower output. Use a third-party app like Dry Speaker to remove the moisture from the speaker grille on your phone.
Accumulation of dirt and grime on the speaker’s membrane can also cause a drop in audio intensity. Use a needle to unsettle the dirt from the speaker. Be careful that you’re gentle with the needle or you’ll end up permanently damaging the membrane. The idea is to scrape the dirt particles from the grille. Once that’s done, tap your phone gently on a solid surface to remove the unsettled particles.
 If you’re looking for an easy hack to make your Android phone’s speaker louder, an empty bowl should do the trick. Place your phone inside the bowl, but make sure the speaker grille isn’t pressing against its surface. This will create an acoustic chamber that will heighten the volume of the audio output. You can also fashion a box out of an empty paper towel bowl by making a cutout wide enough to rest your phone.
 Step 3: Turn on the toggle switches for Dolby Atmos and Dolby Atmos for gaming.
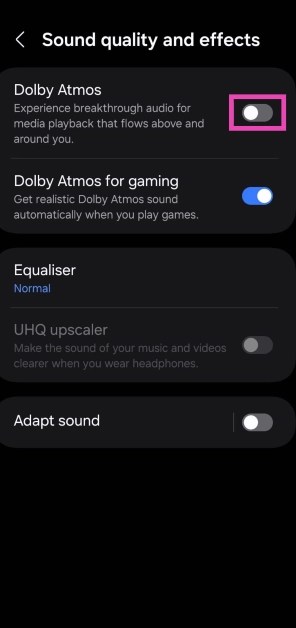 You can also enable this feature from the Quick Settings Menu on your Android phone.
Step 3: Tap on Equaliser.
You can also enable this feature from the Quick Settings Menu on your Android phone.
Step 3: Tap on Equaliser.
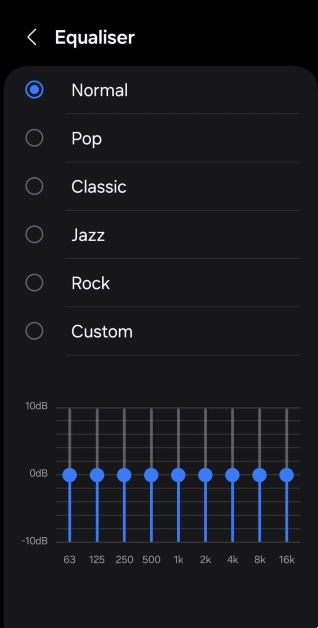
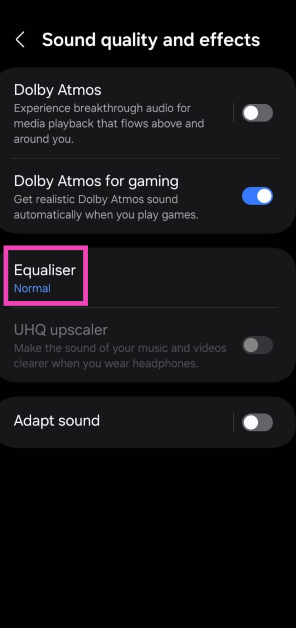 Step 4: Select one of the presets or create a customised profile.
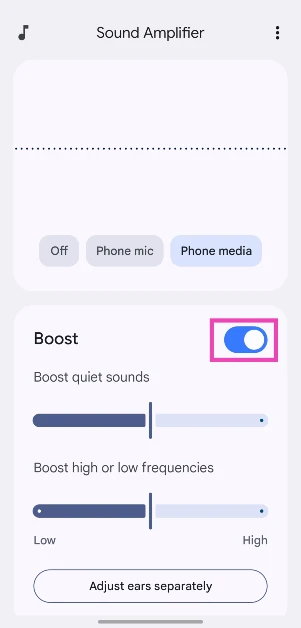
 Step 4: Turn on the toggle switch next to Boost and use the sliders to boost quiet sounds and specific frequencies.
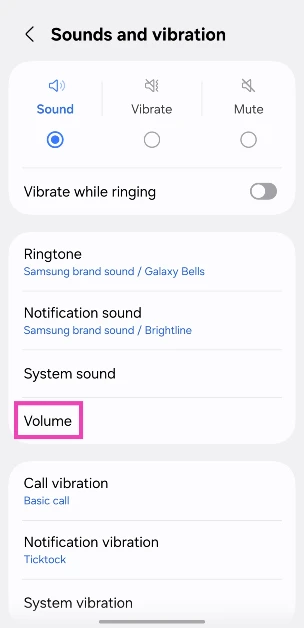
 Step 2: Tap on Volume.
 Step 3: Hit the ellipses in the top right corner of the screen.
 Step 4: Tap on Media volume limit.
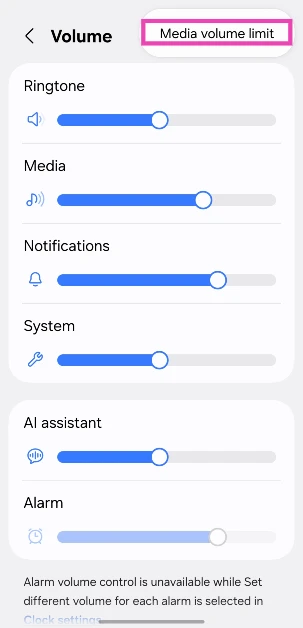 Step 5: Turn on the toggle switch and use the slider to set a new custom limit.


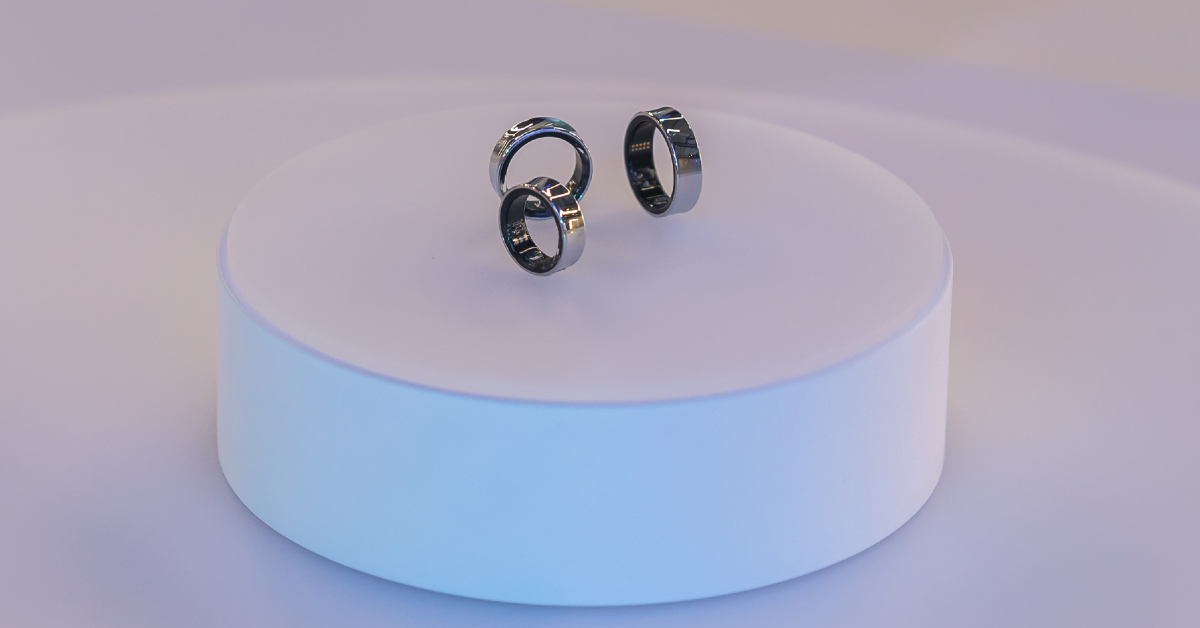 What will be interesting to see is if the Galaxy Ring can functionally replace a smartwatch. From what we know so far, the Galaxy Ring will carry an ECG sensor, a SpO2 sensor, and a PPG sensor. If the performance of these sensors is close to Samsung’s 3-in-1 BioActive sensors on its Galaxy smartwatches, the company may have a winner in its hands.
Samsung also has an advantage in terms of app support. The Samsung Health app that caters to the Galaxy smartwatches will also incorporate the Galaxy Ring. A recent APK teardown of the app shed light on the range of features it will offer for the upcoming wearable. These include stress and heart rate measurement, period prediction, snore detection, skin temperature measurement, and more. The ring will offer comprehensive sleep analysis, keeping a record of the user’s movements, heart rate, respiratory rate, and sleep latency.
What will be interesting to see is if the Galaxy Ring can functionally replace a smartwatch. From what we know so far, the Galaxy Ring will carry an ECG sensor, a SpO2 sensor, and a PPG sensor. If the performance of these sensors is close to Samsung’s 3-in-1 BioActive sensors on its Galaxy smartwatches, the company may have a winner in its hands.
Samsung also has an advantage in terms of app support. The Samsung Health app that caters to the Galaxy smartwatches will also incorporate the Galaxy Ring. A recent APK teardown of the app shed light on the range of features it will offer for the upcoming wearable. These include stress and heart rate measurement, period prediction, snore detection, skin temperature measurement, and more. The ring will offer comprehensive sleep analysis, keeping a record of the user’s movements, heart rate, respiratory rate, and sleep latency.
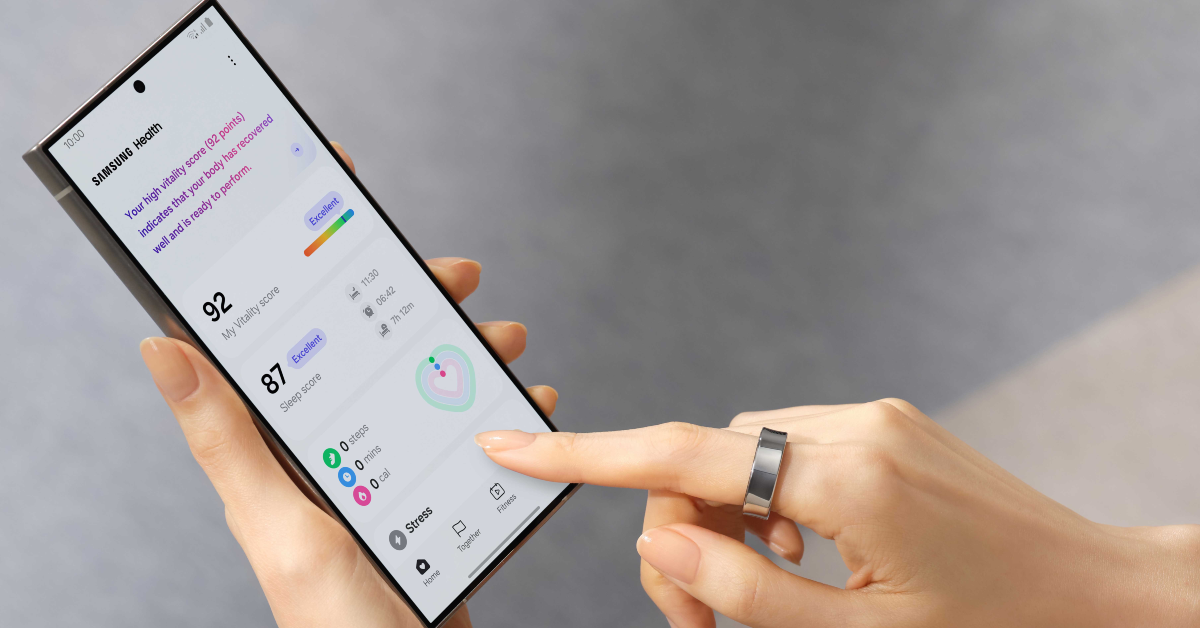 The Samsung Health app will also assign a ‘Vitality’ score to users based on their workouts and sleep performance. It will be interesting to see whether the app will allow you to compare your score with your friends and maintain a leaderboard.
The battery capacity of the ring will depend on its size. The smaller variants will pack a 17mAh battery. The highest-size variants will have a 22mAh battery pack. A midsize 18.5mAh battery unit will cover the middle variants. Samsung claims that the ring can last up to 9 days on a full charge. Recent leaks suggest that the ring will come in a TWS-like charging case.
The Samsung Health app will also assign a ‘Vitality’ score to users based on their workouts and sleep performance. It will be interesting to see whether the app will allow you to compare your score with your friends and maintain a leaderboard.
The battery capacity of the ring will depend on its size. The smaller variants will pack a 17mAh battery. The highest-size variants will have a 22mAh battery pack. A midsize 18.5mAh battery unit will cover the middle variants. Samsung claims that the ring can last up to 9 days on a full charge. Recent leaks suggest that the ring will come in a TWS-like charging case.
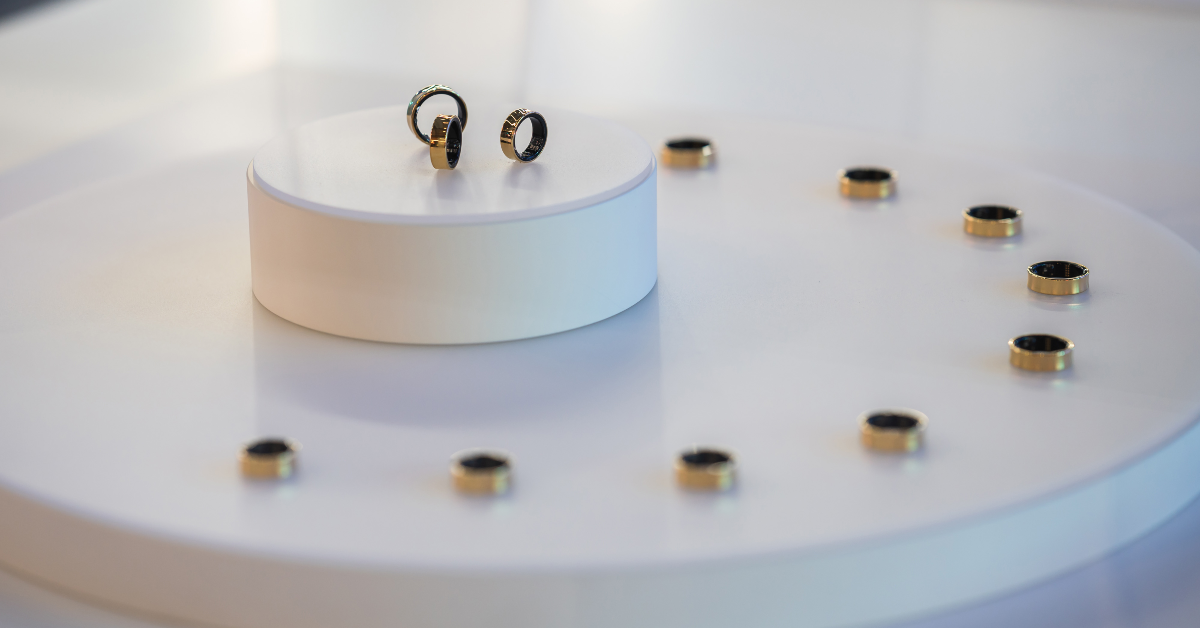 The Samsung Galaxy Ring will be available in three colour options – Silver, Black, and Gold. The company has kept a tight lid on the pricing of the ring so far. Its closest competitor, the Oura Ring, starts at $300 (~ Rs 25,000). Expect the Galaxy Ring to be priced slightly higher than that.
Read Also: Google Pixel 9: What to expect from Google’s upcoming flagship smartphones
The Samsung Galaxy Ring will be available in three colour options – Silver, Black, and Gold. The company has kept a tight lid on the pricing of the ring so far. Its closest competitor, the Oura Ring, starts at $300 (~ Rs 25,000). Expect the Galaxy Ring to be priced slightly higher than that.
Read Also: Google Pixel 9: What to expect from Google’s upcoming flagship smartphones

 Xiaomi Pad 6 comes with an 11-inch 2.8K IPS LCD screen that supports refresh rates of up to 144Hz (30Hz, 48Hz, 50Hz, 60Hz, 90Hz, 120Hz, and 144Hz depending on the playing content). Under the hood, there is a Snapdragon 870 SoC. Pad 6 also includes a front-facing 8-megapixel camera with a 105-degree field of view and a 13-megapixel back camera. Additionally, the tablet has an 8,840mAh battery that supports 33W cable charging and takes 100 minutes to recharge fully.
Price starts at Rs 26,999
Buy Here
Xiaomi Pad 6 comes with an 11-inch 2.8K IPS LCD screen that supports refresh rates of up to 144Hz (30Hz, 48Hz, 50Hz, 60Hz, 90Hz, 120Hz, and 144Hz depending on the playing content). Under the hood, there is a Snapdragon 870 SoC. Pad 6 also includes a front-facing 8-megapixel camera with a 105-degree field of view and a 13-megapixel back camera. Additionally, the tablet has an 8,840mAh battery that supports 33W cable charging and takes 100 minutes to recharge fully.
Price starts at Rs 26,999
Buy Here
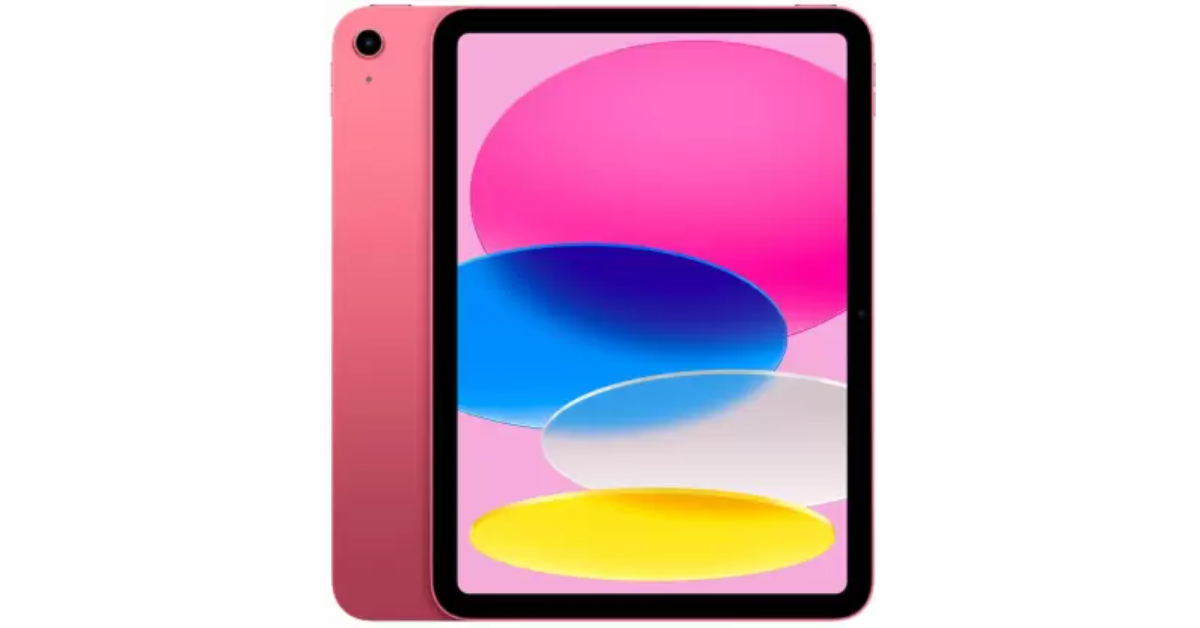 If you may slightly raise your budget, you should consider the 10th generation iPad. Apple’s tablet features a 10.9-inch multi-touch IPS LED display with a resolution of 2360×1640 pixels and a peak brightness of 500 nits. The device comes with Apple Pencil 1st gen support. It is powered by A14 Bionic chipset and runs on iPadOS 17.
Price: 34,900
Buy Here
Also read: Samsung Galaxy Ring likely to bring biomonitoring functions like skin temperature measurement and more
If you may slightly raise your budget, you should consider the 10th generation iPad. Apple’s tablet features a 10.9-inch multi-touch IPS LED display with a resolution of 2360×1640 pixels and a peak brightness of 500 nits. The device comes with Apple Pencil 1st gen support. It is powered by A14 Bionic chipset and runs on iPadOS 17.
Price: 34,900
Buy Here
Also read: Samsung Galaxy Ring likely to bring biomonitoring functions like skin temperature measurement and more
 Samsung Galaxy Tab S6 Lite features a 10.4-inch WUXGA TFT display. The device is powered by an octa-core processor. It comes with an 8-megapixel rear camera with auto-focus and can record videos in 1080p at 30fps. On the front, there is a 5-megapixel selfie camera housed inside a punch-hole design display. The tablet also packs a 7,040mAh battery that delivers video playback time of up to 13 hours. Additionally, the Tablet is supported by an S Pen with a 0.7mm tip and is 7.03 grams in weight.
Price starts at Rs 24,999
Buy Here
Samsung Galaxy Tab S6 Lite features a 10.4-inch WUXGA TFT display. The device is powered by an octa-core processor. It comes with an 8-megapixel rear camera with auto-focus and can record videos in 1080p at 30fps. On the front, there is a 5-megapixel selfie camera housed inside a punch-hole design display. The tablet also packs a 7,040mAh battery that delivers video playback time of up to 13 hours. Additionally, the Tablet is supported by an S Pen with a 0.7mm tip and is 7.03 grams in weight.
Price starts at Rs 24,999
Buy Here
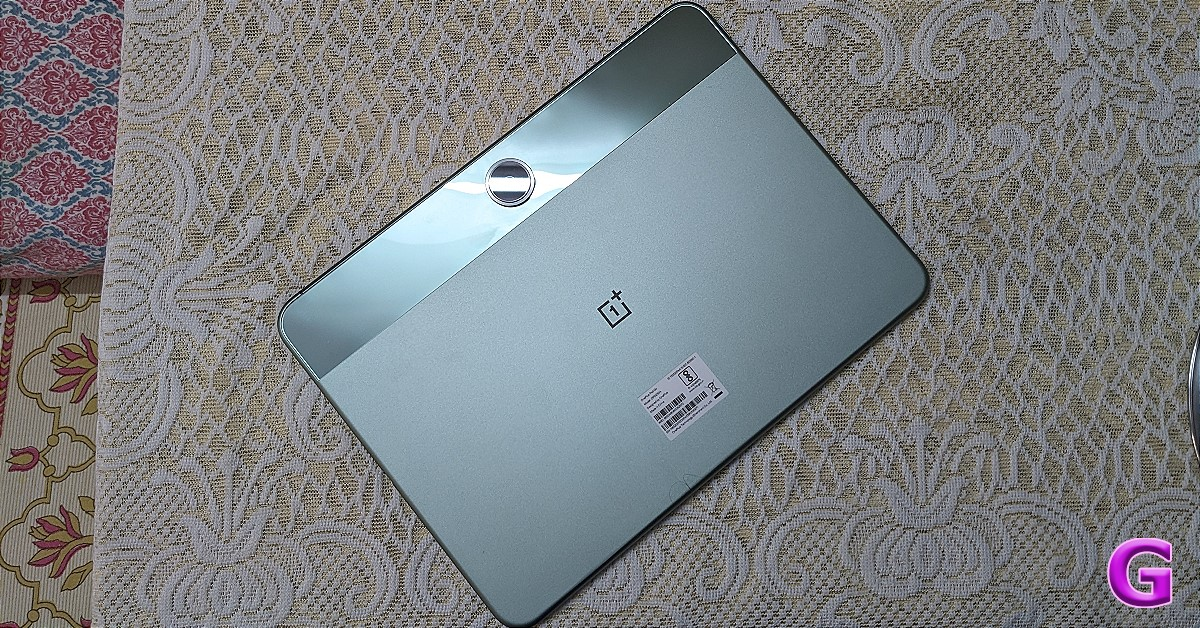 The OnePlus Pad Go LTE version is next on the list. The device comes with an 11.35-inch 2.4K LCD display with a 90Hz refresh rate, a touch sampling rate of 180Hz, and a peak brightness of 400nits. The tab is powered by a MediaTek Helio G99 SoC paired with 8GB of LPDDR4X RAM and storage options of up to 256GB on UFS 2.2. It runs on Android 13-based OxygenOS 13.2. There is an 8-megapixel rear camera with EIS support and another 8-megapixel sensor on the front for video callings.
OnePlus Pad Go boasts an 8,000mAh battery and supports 33W SUPERVOOC charging.
Price starts at Rs 19,999
Buy Here
Also Read: Oppo Reno 12 5G Series India launch date tipped ahead of the official announcement
The OnePlus Pad Go LTE version is next on the list. The device comes with an 11.35-inch 2.4K LCD display with a 90Hz refresh rate, a touch sampling rate of 180Hz, and a peak brightness of 400nits. The tab is powered by a MediaTek Helio G99 SoC paired with 8GB of LPDDR4X RAM and storage options of up to 256GB on UFS 2.2. It runs on Android 13-based OxygenOS 13.2. There is an 8-megapixel rear camera with EIS support and another 8-megapixel sensor on the front for video callings.
OnePlus Pad Go boasts an 8,000mAh battery and supports 33W SUPERVOOC charging.
Price starts at Rs 19,999
Buy Here
Also Read: Oppo Reno 12 5G Series India launch date tipped ahead of the official announcement
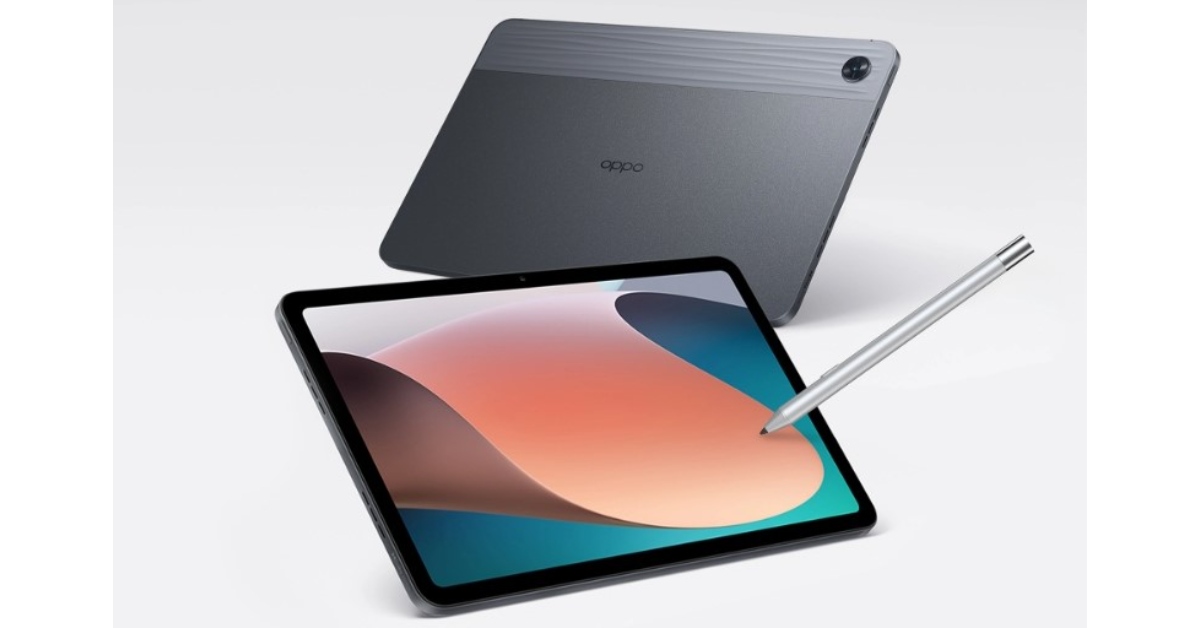 Oppo Pad Air is highlighted with a 10.36-inch display. The device runs on Android 12 with ColorOS 12.1 for Pad on top. An octa-core 6nm Snapdragon 680 SoC, and an Adreno 610 GPU power the tablet. Oppo Pad Air includes a single 8-megapixel camera sensor with an f/2.0 lens on the back. It has a 5-megapixel front-facing camera sensor with an f/2.2 lens for selfies and video calls. In addition to this, there is a 7,100mAh battery that comes with 18W charging support.
Price starts at Rs 14,999
Buy Here
Oppo Pad Air is highlighted with a 10.36-inch display. The device runs on Android 12 with ColorOS 12.1 for Pad on top. An octa-core 6nm Snapdragon 680 SoC, and an Adreno 610 GPU power the tablet. Oppo Pad Air includes a single 8-megapixel camera sensor with an f/2.0 lens on the back. It has a 5-megapixel front-facing camera sensor with an f/2.2 lens for selfies and video calls. In addition to this, there is a 7,100mAh battery that comes with 18W charging support.
Price starts at Rs 14,999
Buy Here
 Redmi Pad has a 10.61-inch display with a peak brightness of 400 nits and a refresh rate of 90Hz. A MediaTek Helio G99 SoC with up to 6GB of RAM powers the tablet. In addition, Redmi Pad has an 8-megapixel camera that can record films and images at a resolution of 1080p. For selfies and video chats, it has an 8-megapixel front-facing camera with a 105-degree field of vision. The Redmi tablet has an 8,000mAh battery that supports 18W rapid charging.
Price starts at Rs 13,499
Buy Here
Redmi Pad has a 10.61-inch display with a peak brightness of 400 nits and a refresh rate of 90Hz. A MediaTek Helio G99 SoC with up to 6GB of RAM powers the tablet. In addition, Redmi Pad has an 8-megapixel camera that can record films and images at a resolution of 1080p. For selfies and video chats, it has an 8-megapixel front-facing camera with a 105-degree field of vision. The Redmi tablet has an 8,000mAh battery that supports 18W rapid charging.
Price starts at Rs 13,499
Buy Here 


")
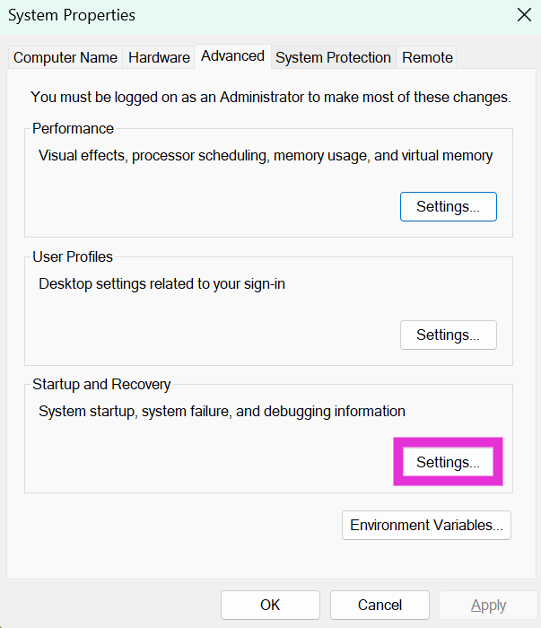
 Step 3: Switch to the Advanced tab and click on Settings in the Startup and Recovery section.
 Step 4: Uncheck the box for Automatic Restart in the System Failure category.
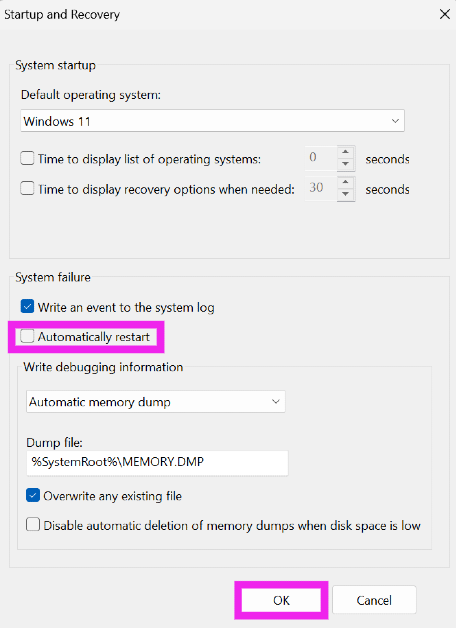 Step 5: Hit OK.
 Step 3: You will be asked to restart your PC. Go through with the request.
 Step 4: Windows will perform a RAM test on your PC. You will be able to see the results when your PC starts up again.
 Step 5: If Windows does not automatically load the results, right-click on the Start icon and select Event Viewer.
 Step 6: Expand the Windows Logs section in the side menu and select System.
Step 7: Open the MemoryDiagnostic file.
Step 6: Expand the Windows Logs section in the side menu and select System.
Step 7: Open the MemoryDiagnostic file.
 Apart from the RAM, run additional checks for components like the battery, CPU, and hard drive. Oftentimes, failing hardware is the reason why your PC gets stuck in a boot loop. There are a bunch of checks you can run at home to check which component is causing the PC to restart. Read this article for more information.
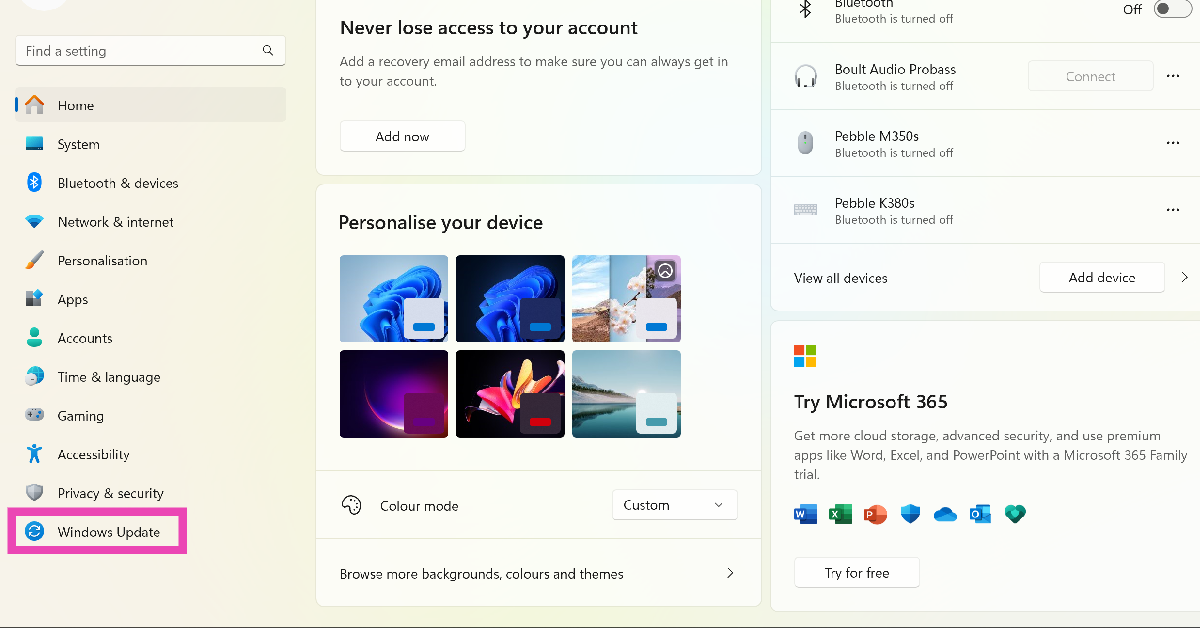 Step 2: Click on Check for updates.
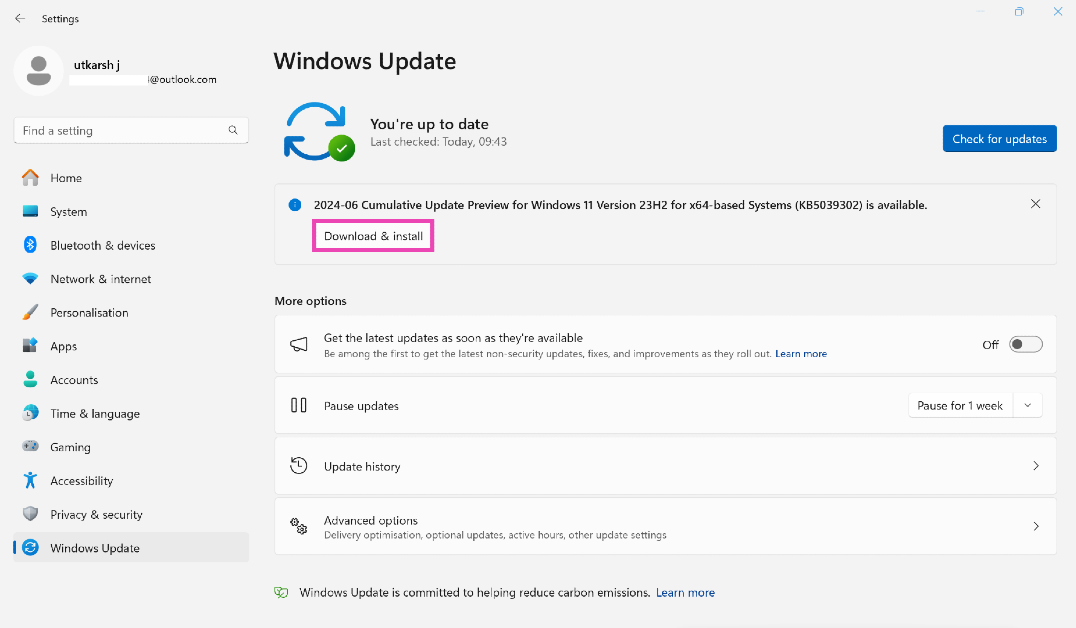 Step 3: Select Download and install.
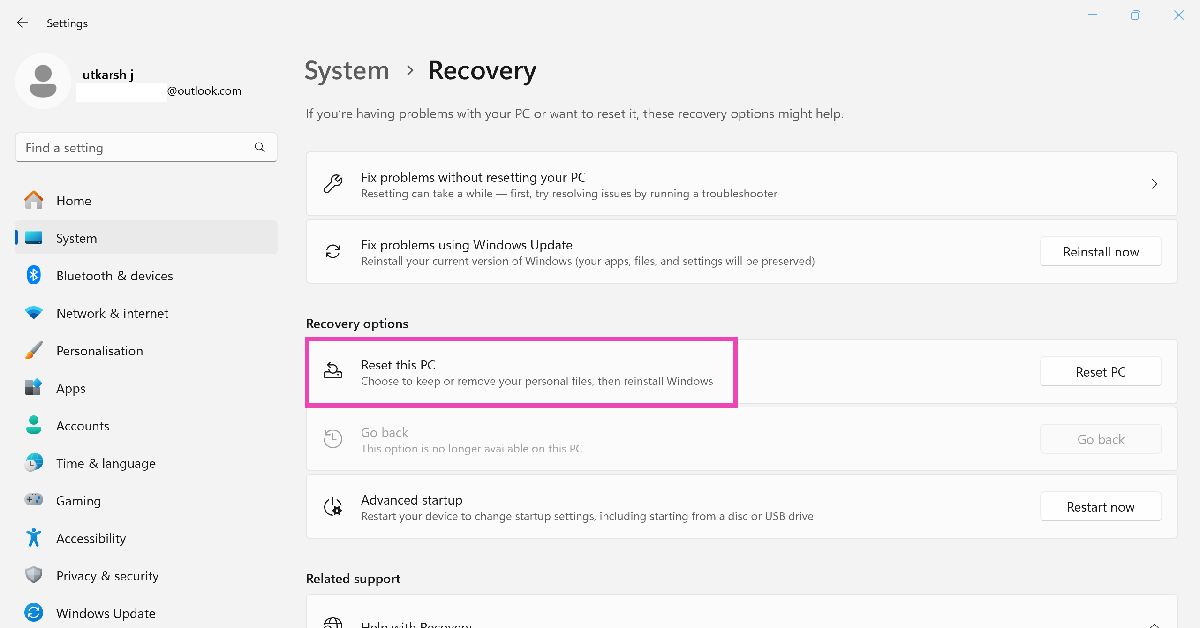
 Step 3: In the following window, click on Reset PC.
 Step 4: You will be presented with two options. You can choose to keep your personal files and remove apps & settings or remove all of your personal files, apps, and settings. Choose the option you want.
 Step 5: Select how you would like to reinstall Windows. You can choose between Cloud download or Local download.
Step 6: After you’ve made your choice, click on next to confirm your selection and then click on reset to begin the factory reset process.
It will take some time for your PC to reset and for Windows 11 to get reinstalled. After the process is complete, your PC will restart.
Step 5: Select how you would like to reinstall Windows. You can choose between Cloud download or Local download.
Step 6: After you’ve made your choice, click on next to confirm your selection and then click on reset to begin the factory reset process.
It will take some time for your PC to reset and for Windows 11 to get reinstalled. After the process is complete, your PC will restart.

")
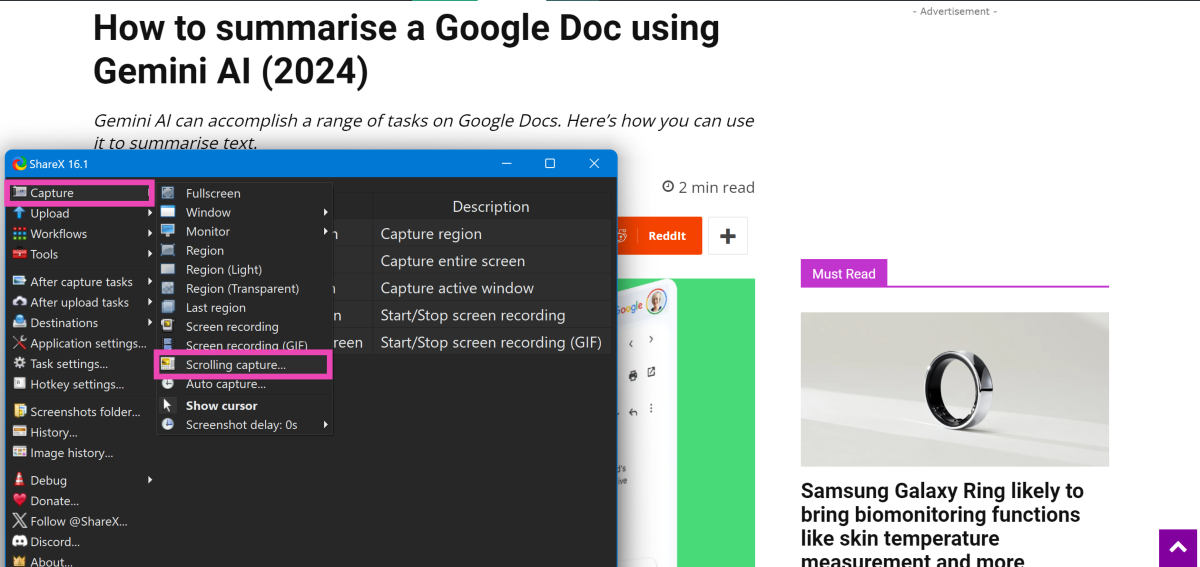 Step 5: Select the window you wish to capture and start scrolling.
Step 6: Finish taking the screenshot when you reach the end of the page.
Step 5: Select the window you wish to capture and start scrolling.
Step 6: Finish taking the screenshot when you reach the end of the page.
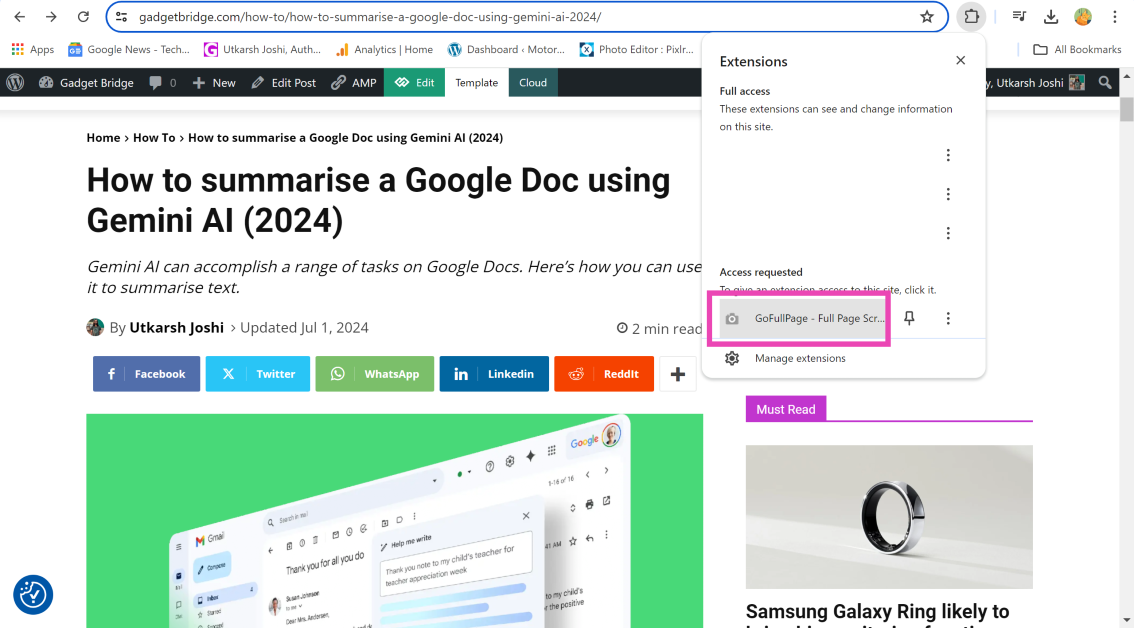 Step 4: The extension will take a screenshot of the webpage and open it in a new tab.
 Step 5: Hit the downward arrow icon to save the screenshot. You can also choose to save the screenshot as a PDF.
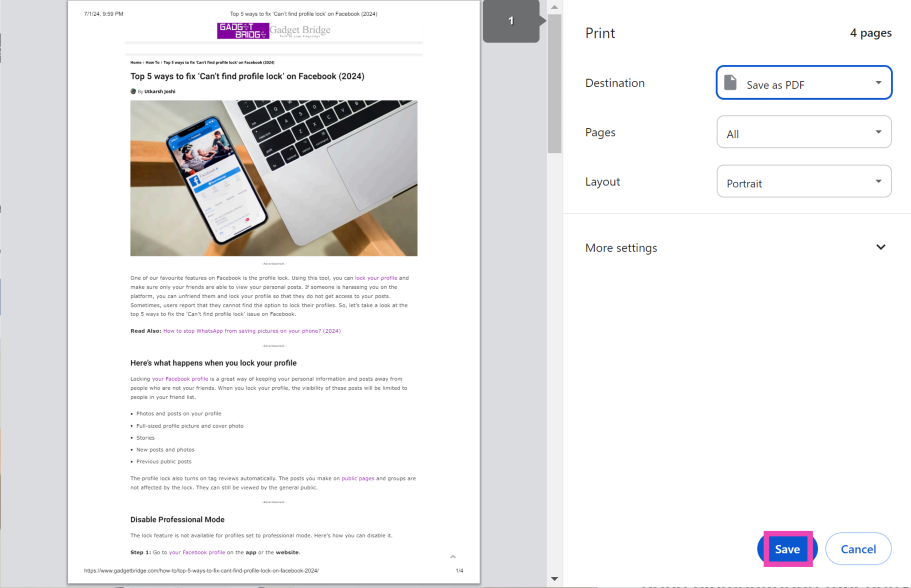
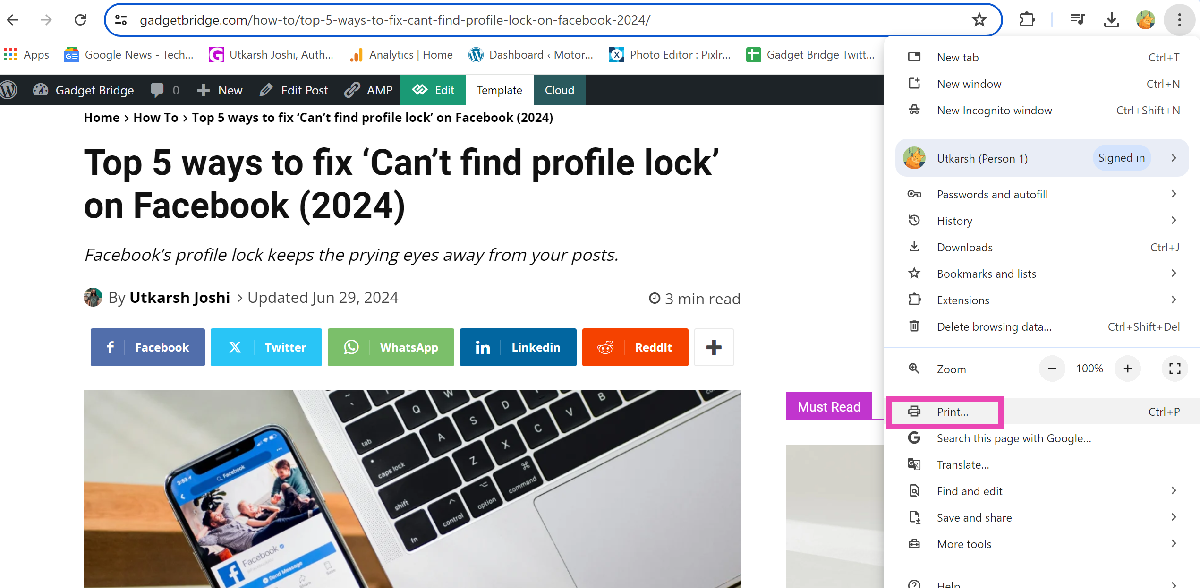 Step 3: From the Destination dropdown menu, select Save as PDF.
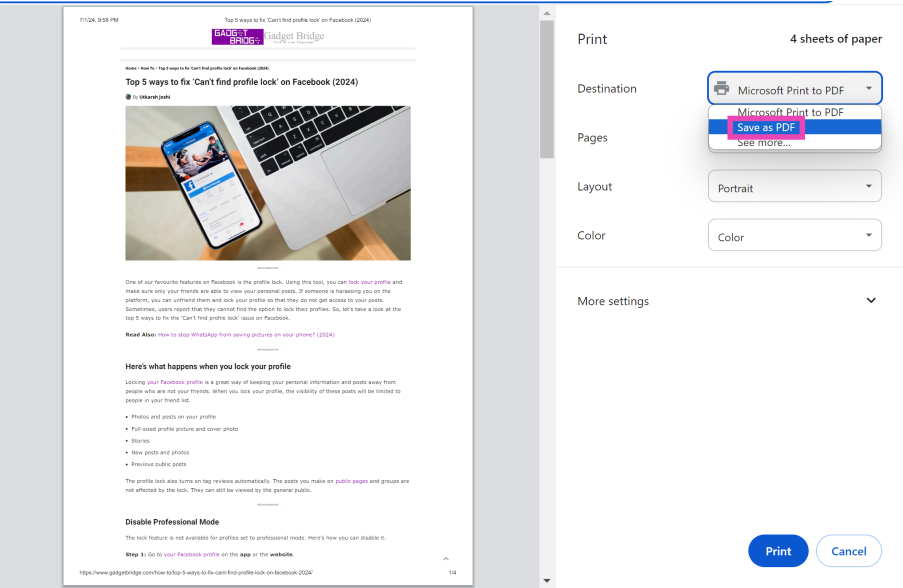 Step 4: Hit Save.


")
 Step 1: Go to Google Docs on your PC and open the document you want to summarise.
Step 2: Highlight the section of text that you want to summarise. Press Ctrl + A if you want to summarise the entire document.
Step 3: Click on the Help me write option on the left side of the page.
Step 4: Select Summarise from the drop-down menu.
Step 5: Go through the AI-generated summary and make sure it is relevant to the original text. If you’re not happy with the result, hit Retry.
Step 6: Select Replace to accept the new text, Insert to add new text, and Close to keep the original text.
Apart from summarising the text, you can use Gemini AI to rephrase your document, add more text to it, format it into bullet points, and even enter a custom prompt to carry out a specific task.
Step 1: Go to Google Docs on your PC and open the document you want to summarise.
Step 2: Highlight the section of text that you want to summarise. Press Ctrl + A if you want to summarise the entire document.
Step 3: Click on the Help me write option on the left side of the page.
Step 4: Select Summarise from the drop-down menu.
Step 5: Go through the AI-generated summary and make sure it is relevant to the original text. If you’re not happy with the result, hit Retry.
Step 6: Select Replace to accept the new text, Insert to add new text, and Close to keep the original text.
Apart from summarising the text, you can use Gemini AI to rephrase your document, add more text to it, format it into bullet points, and even enter a custom prompt to carry out a specific task.


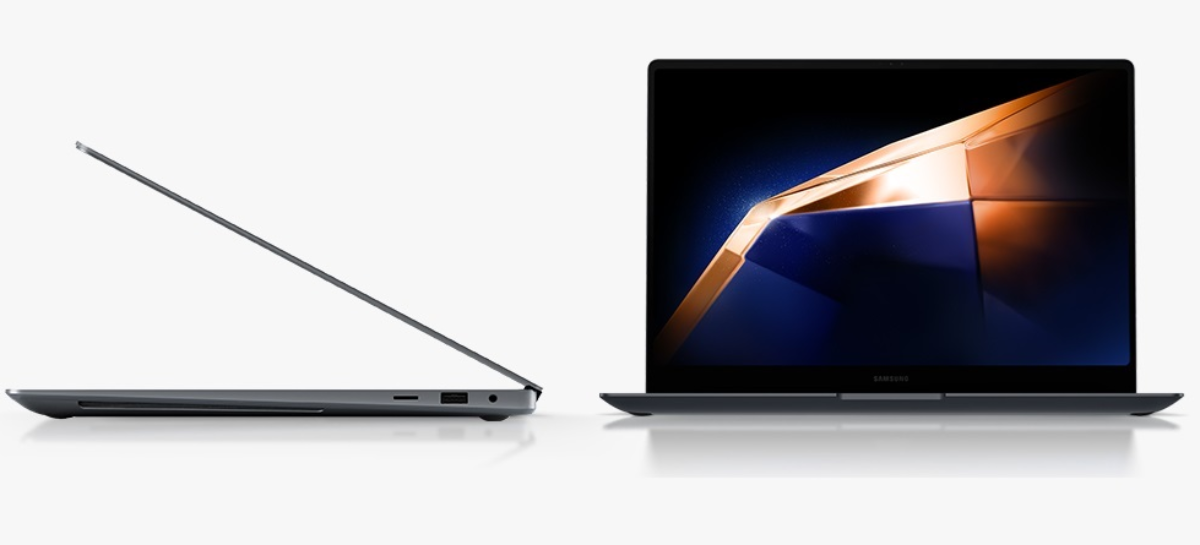 As far as pricing is concerned, In India the Samsung Galaxy Book 4 Ultra with Intel Core Ultra 7 CPU (16GB of RAM and an Nvidia GeForce RTX 4050 GPU) will retail at Rs 2,33,990. Whereas the model with Intel Core Ultra 9 CPU (GeForce RTX 4070 GPU and 32GB RAM) will come with a price tag of Rs 2,81,990. The laptop is available in a shade called Grey.
The device can be purchased via the Samsung e-store and Croma.
Also read: 110 new languages added to Google Translate, Awadhi and Marwadi also included
As far as pricing is concerned, In India the Samsung Galaxy Book 4 Ultra with Intel Core Ultra 7 CPU (16GB of RAM and an Nvidia GeForce RTX 4050 GPU) will retail at Rs 2,33,990. Whereas the model with Intel Core Ultra 9 CPU (GeForce RTX 4070 GPU and 32GB RAM) will come with a price tag of Rs 2,81,990. The laptop is available in a shade called Grey.
The device can be purchased via the Samsung e-store and Croma.
Also read: 110 new languages added to Google Translate, Awadhi and Marwadi also included


")
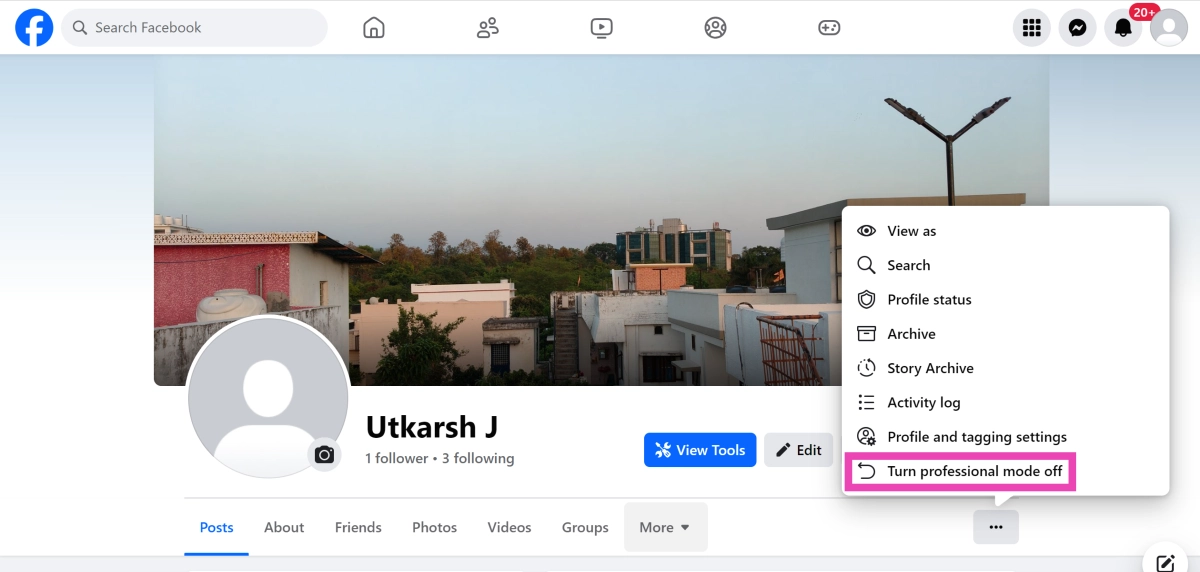
 Step 3: Select Turn professional mode off.
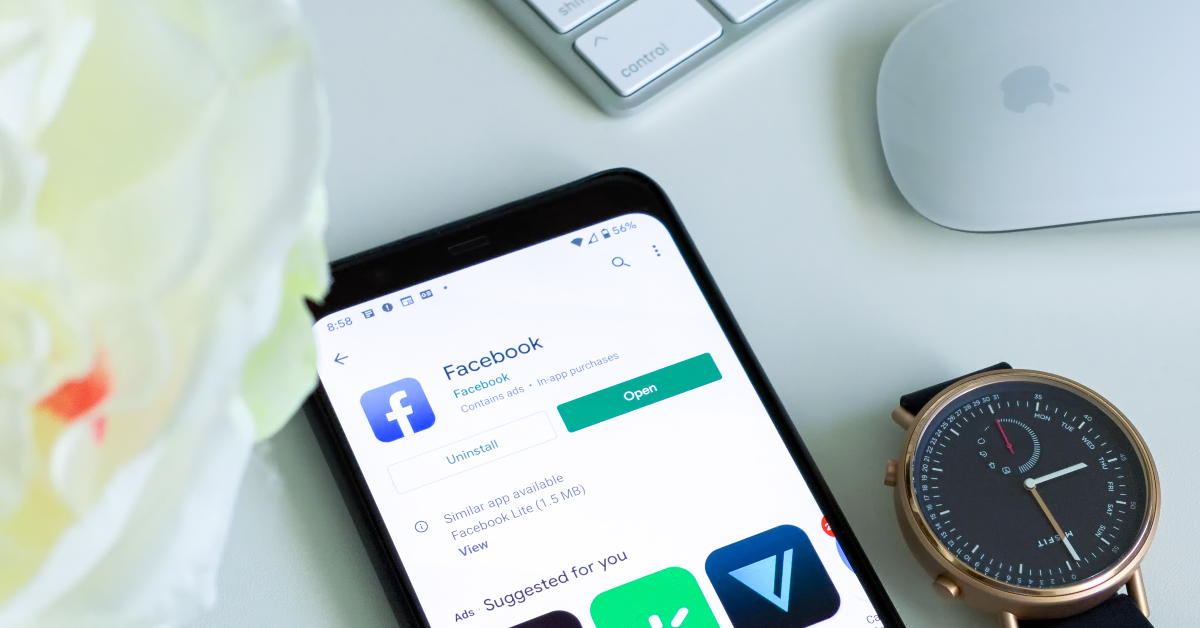 If you’re using an older version of the Facebook app on your smartphone, chances are that it does not have the profile lock feature on it. Go to the Google Play Store, search for Facebook, open its page, and hit ‘Update’.
 If you’re unable to lock your profile due to an account-related issue, log out of Facebook and then log back in. This will refresh your account and you will likely find the missing profile lock option. If this doesn’t work, move on to the next method.
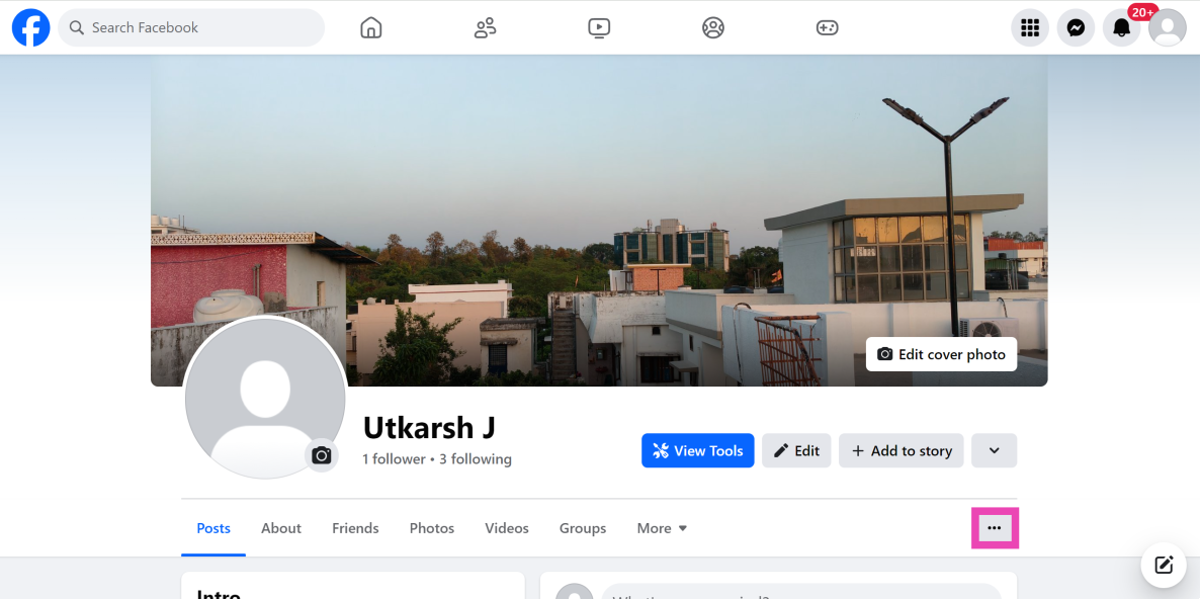
 Facebook only lets you lock your main profile on the platform. You will not find this option for additional profiles you have created. Your public pages cannot be locked either. Hit your profile icon at the top right corner of the screen and move to your main profile if you want to lock it.
 Facebook’s profile lock feature is not available for all countries just yet. While the platform is slowly rolling out this feature in different regions, you can still use it without having to wait. Install a VPN app or software on your device and change your location to a place where the profile lock feature is active. Once that’s done, you will be able to use the feature on your profile.

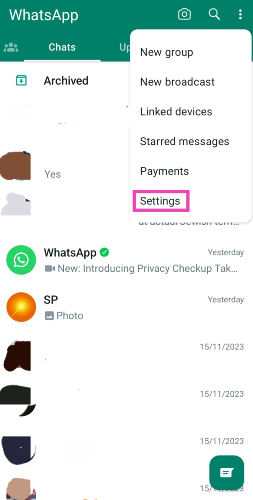
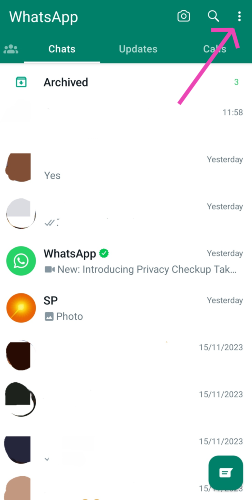 Step 2: Tap on Settings and select Chats.
 Step 3: Turn off the toggle switch for Media visibility.
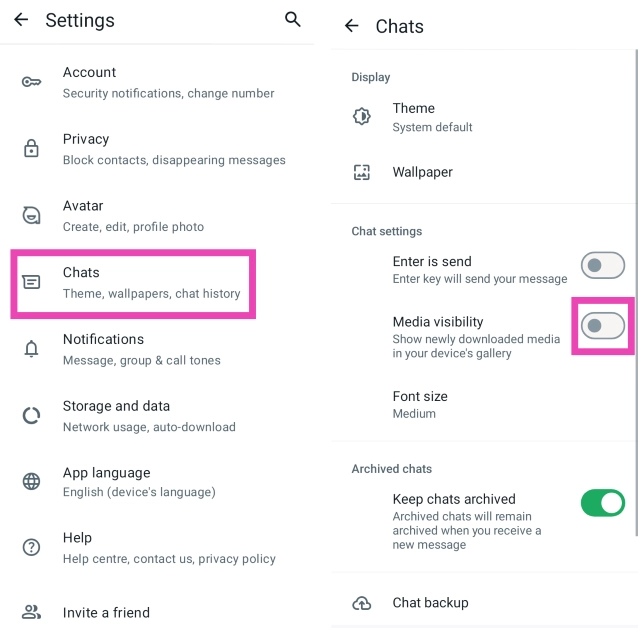 Step 2: Tap on Settings and select Storage and data.
Step 3: Go to the Media auto-download section and select No media for all three categories (When using mobile data, When connected on WiFi, When roaming).
Step 2: Tap on Settings and select Storage and data.
Step 3: Go to the Media auto-download section and select No media for all three categories (When using mobile data, When connected on WiFi, When roaming).


")
 Step 1: Launch the Phone app on your smartphone and switch to the Voicemail tab.
Step 2: Hit the ellipses and tap on trash. This step may vary depending on the smartphone. Locate the trash folder for voicemail on your phone.
Step 3: Go through the list of deleted voicemails and tap Undelete or Restore next to the one you want to retrieve.
Step 1: Launch the Phone app on your smartphone and switch to the Voicemail tab.
Step 2: Hit the ellipses and tap on trash. This step may vary depending on the smartphone. Locate the trash folder for voicemail on your phone.
Step 3: Go through the list of deleted voicemails and tap Undelete or Restore next to the one you want to retrieve.
 Step 1: Launch the visual voicemail app on your phone.
Step 2: Hit the hamburger menu icon at the top left corner of the screen.
Step 3: Tap on Deleted Messages.
Step 4: Select the voicemail you want to restore and hit the checkmark icon to retrieve it.
Step 1: Launch the visual voicemail app on your phone.
Step 2: Hit the hamburger menu icon at the top left corner of the screen.
Step 3: Tap on Deleted Messages.
Step 4: Select the voicemail you want to restore and hit the checkmark icon to retrieve it.
 Some network providers offer the option to recover deleted voicemails after calling the service. Go to the dialer app on your phone and long-press the 1 key to call your voicemail. If that doesn’t connect you to your voicemail, enter your voicemail number and ring it. Follow the automated instructions to recover the deleted voicemail. These instructions will vary among different carriers and network providers.


