In This Article
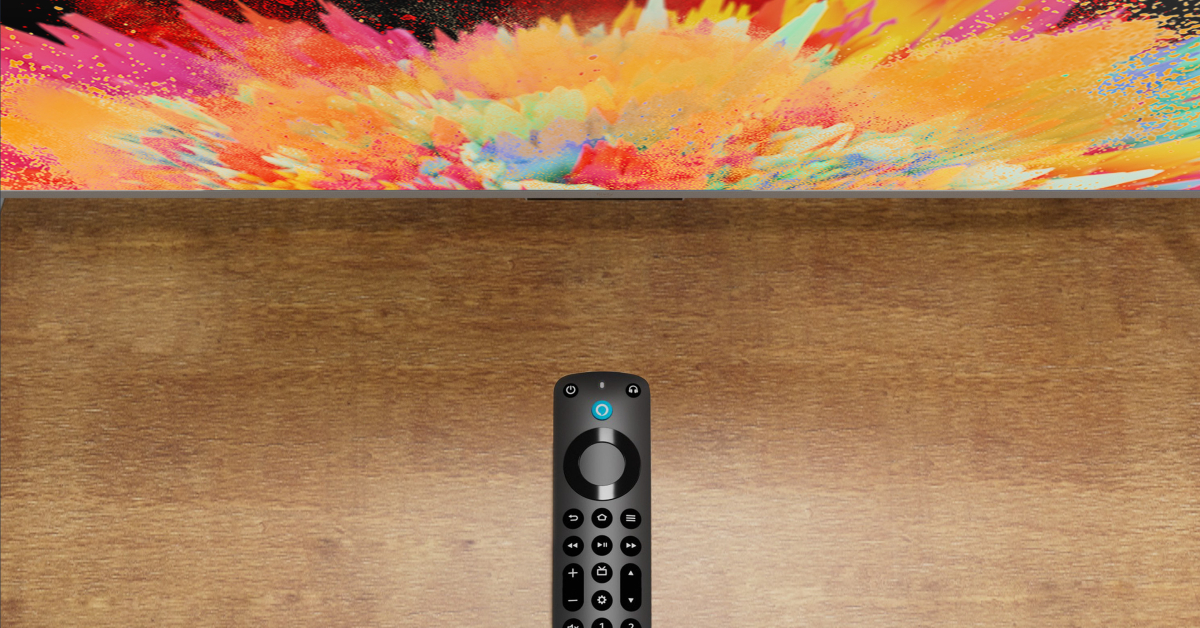
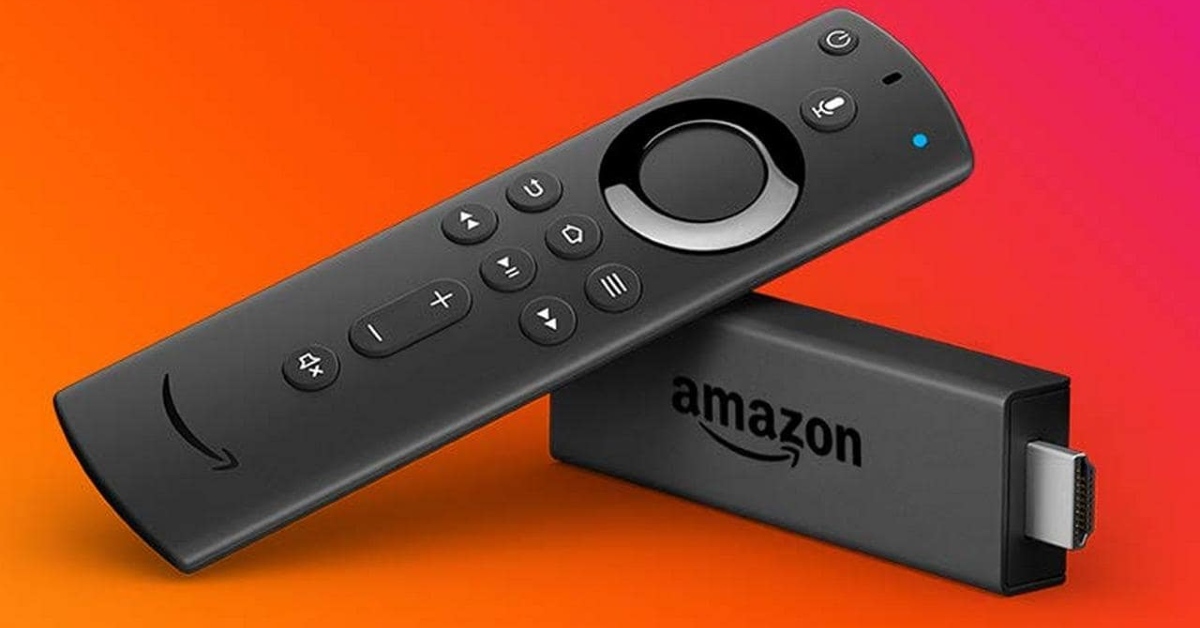
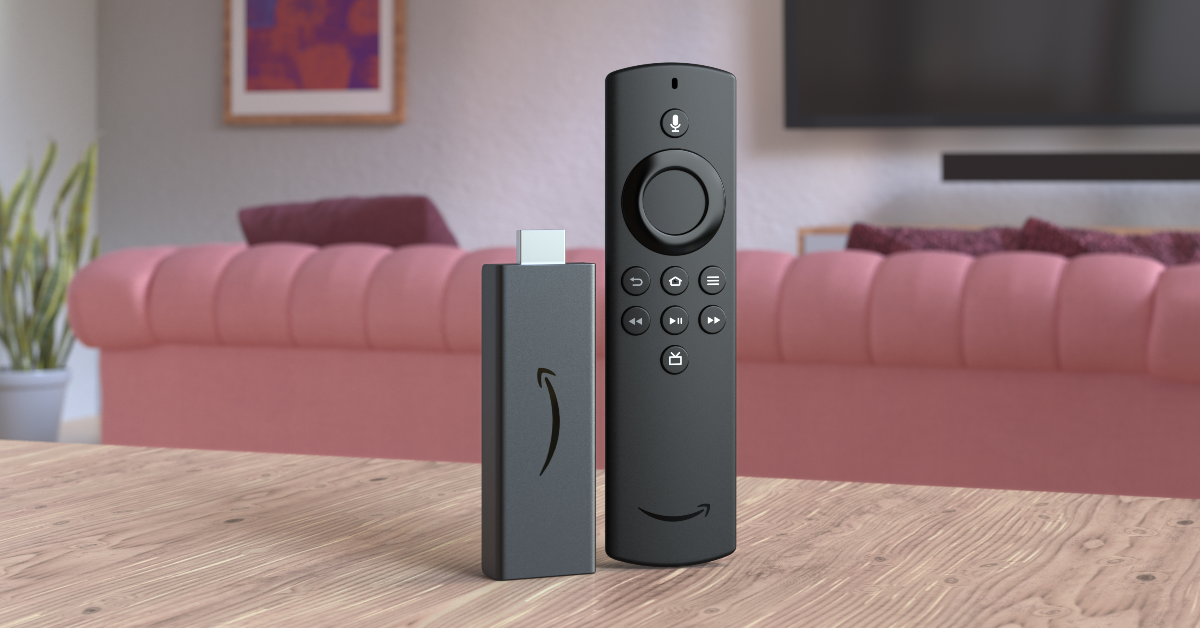
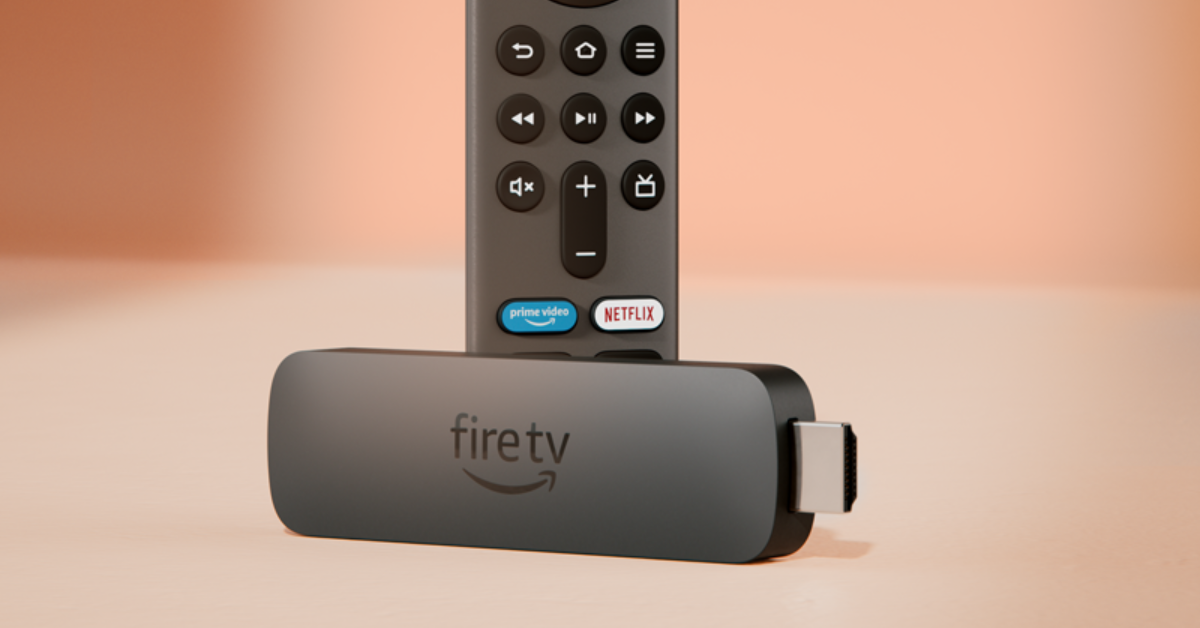
Reasons why your Firestick remote isn’t working
Figuring out why your Firestick remote isn’t working is quite easy. Here are the usual suspects: Drained batteries: The most common reason behind non-functional remotes is a drained set of batteries. Typically, you can see this coming due to a fall in accuracy and inconsistent performance. Functional range: It goes without saying that the remote needs to be in the functional range to work with your Firestick device. If you’re in a large hall, you need to move closer to the device to use the remote. Obstructions in the path: Moved new furniture into the room recently? Maybe a couch or a lamp is blocking the path of the signal. Electrical interference: Other electronic gadgets and electrical devices can mess with the signal emitted from the remote. Compatibility issues: New remote refuses to work with the Firestick? Perhaps it isn’t compatible with your model of the streaming hardware. Hardware issues: Physical damage to the remote can keep it from working properly.Troubleshoot the remote
Step 1: Press the Rewind and Right buttons simultaneously for three seconds. Step 2: Press the Menu button. If the notification light turns green, it means you are in troubleshooting mode. Step 3: Press any button on the remote. Observe the colour of the notification light.- Red (slow blink): The batteries inside the remote are running out of charge.
- Red (fast blink): Reset the remote.
- Orange: Remote isn’t paired with Fire TV.
- White: Fire TV is either turned off or unresponsive. Restart it.
- Blue: The remote is working fine, the issue lies with Fire TV.
Replace the batteries
 The most likely reason that your Amazon Firestick remote isn’t working is the lack of charge in its batteries. The Firestick ships with a pair of Amazon AAA batteries that are meant to be inserted into the remote. These are non-rechargeable batteries, meaning, you will need to replace them with another pair once they run out of charge. Get a pair of AAA batteries and make sure they are inserted correctly. If the remote still doesn’t function, move on to the other fixes.
Unpair and re-pair the remote to the Firestick
 One of the best ways of fixing any accidental glitches on your Amazon Firestick remote is by unpairing and re-pairing it to the Fire TV. To unpair the remote, simply press the Home and Back buttons simultaneously for 10 seconds. To re-pair the remote, press the Home button for 10 seconds. Try using the remote on the Fire TV after the re-pairing process has finished. It will most likely start working again.
Restart the Firestick
 Maybe the problem does not lie with the remote but the Firestick itself. To fix this problem, simply restart the Firestick. Switch off the power to the TV and unplug the Firestick from the display. After a few seconds, plug it back in and turn on the power to the TV. Any background issues with the Firestick will be resolved.
Make sure you’re in the functional distance
 Unlike a traditional remote, the Fire TV remote uses a Bluetooth connection to relay the controls over to the TV. The Firestick acts as a buffer that receives the signal and forwards it to the TV. A Bluetooth connection means a larger functional range for the remote. It also means you don’t need to point it directly to the TV to use the controls. Even with a few obstructions in its path, the remote works just fine.
However, one thing you need to consider here is the functional range offered by the Bluetooth remote. Even though the range is supposed to be 30 feet on paper, it is actually much lower than that in practice. Move closer to the Firestick and check whether the range is an issue.
Unlike a traditional remote, the Fire TV remote uses a Bluetooth connection to relay the controls over to the TV. The Firestick acts as a buffer that receives the signal and forwards it to the TV. A Bluetooth connection means a larger functional range for the remote. It also means you don’t need to point it directly to the TV to use the controls. Even with a few obstructions in its path, the remote works just fine.
However, one thing you need to consider here is the functional range offered by the Bluetooth remote. Even though the range is supposed to be 30 feet on paper, it is actually much lower than that in practice. Move closer to the Firestick and check whether the range is an issue.
Remove electronic devices near the Firestick
 Sometimes, electronic devices and gadgets placed near the Firestick can cause interference, which leads to the remote not working. If there are multiple devices near the Firestick, turn them off one by one to figure out which one is causing the interference. The devices you need to look out for are Bluetooth/smart speakers, microwaves, phones, laptops, and more.
Check if the remote is compatible with the Firestick
 If you recently bought a new remote for your Amazon Firestick, you need to make sure it is compatible with the streaming device. Yes, even official remotes can be incompatible with some models. Go to the listing page of the remote and read the fine print to figure out if it is compatible with your Amazon Firestick.
Reset the Firestick remote
 Step 1: Unplug your Amazon Firestick from your TV. Wait for 60 seconds.
Step 2: Press and hold the left navigation button + menu button + back button for 12 seconds.
Step 3: Release the buttons after 12 seconds and wait for 5 seconds.
Step 4: Remove the batteries from the remote.
Step 5: Plug the Firestick into your TV and turn it on. The screen will say ‘Remote not detected‘.
Step 6: Place the batteries in the remote.
Step 7: Press the Home button on the remote. If you see the blue light, it means that the remote is paired with the Firestick.
Step 8: If the remote can’t pair with the streaming hardware, press and hold the Home button for 10 seconds.
Step 1: Unplug your Amazon Firestick from your TV. Wait for 60 seconds.
Step 2: Press and hold the left navigation button + menu button + back button for 12 seconds.
Step 3: Release the buttons after 12 seconds and wait for 5 seconds.
Step 4: Remove the batteries from the remote.
Step 5: Plug the Firestick into your TV and turn it on. The screen will say ‘Remote not detected‘.
Step 6: Place the batteries in the remote.
Step 7: Press the Home button on the remote. If you see the blue light, it means that the remote is paired with the Firestick.
Step 8: If the remote can’t pair with the streaming hardware, press and hold the Home button for 10 seconds.
Reset the Firestick
 If everything fails, reset the Firestick to factory settings. This will log you out of all your accounts and clear all your personal data and settings on the device.
Step 1: Remove the expandable storage from the Firestick.
Step 2: Press and hold the back button and right navigation button together for 10 seconds.
Step 3: Select Factory Reset on the TV screen. If you keep pressing the two buttons, the device will reset automatically.
If everything fails, reset the Firestick to factory settings. This will log you out of all your accounts and clear all your personal data and settings on the device.
Step 1: Remove the expandable storage from the Firestick.
Step 2: Press and hold the back button and right navigation button together for 10 seconds.
Step 3: Select Factory Reset on the TV screen. If you keep pressing the two buttons, the device will reset automatically.
Use the Firestick remote app
 If your Fire TV remote refuses to work, you can control the TV using your smartphone until you get a replacement control. Check out this article for the top 6 Firestick remote apps for Android. Our pick of the lot is the official Amazon Fire TV Remote app. This app offers all the essential controls for your Fire TV along with voice search and a QWERTY keyboard for input. For the Fire TV remote app to work, your smartphone and Firestick should be connected to the same WiFi network.


 Step 4:
 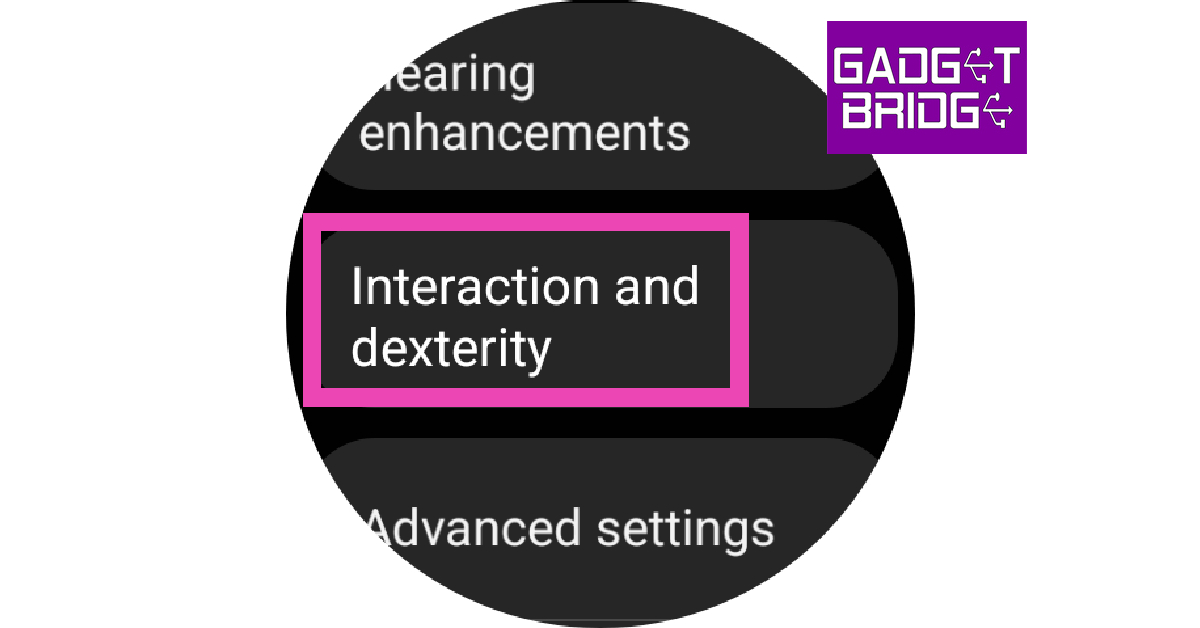 Step 5:
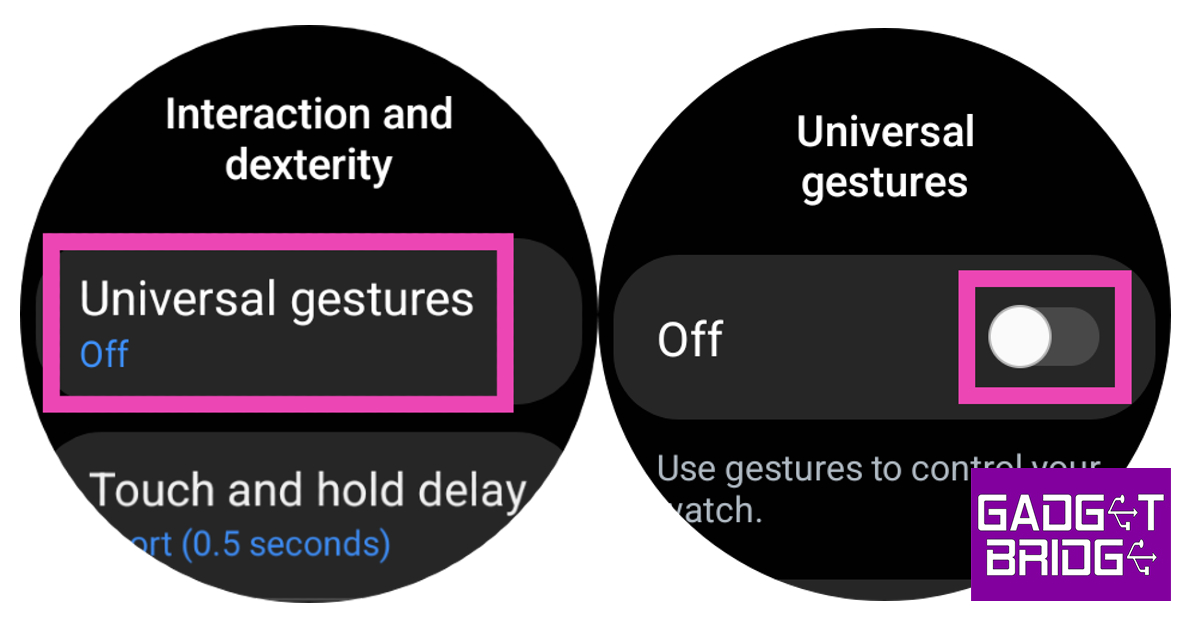 Step 6:
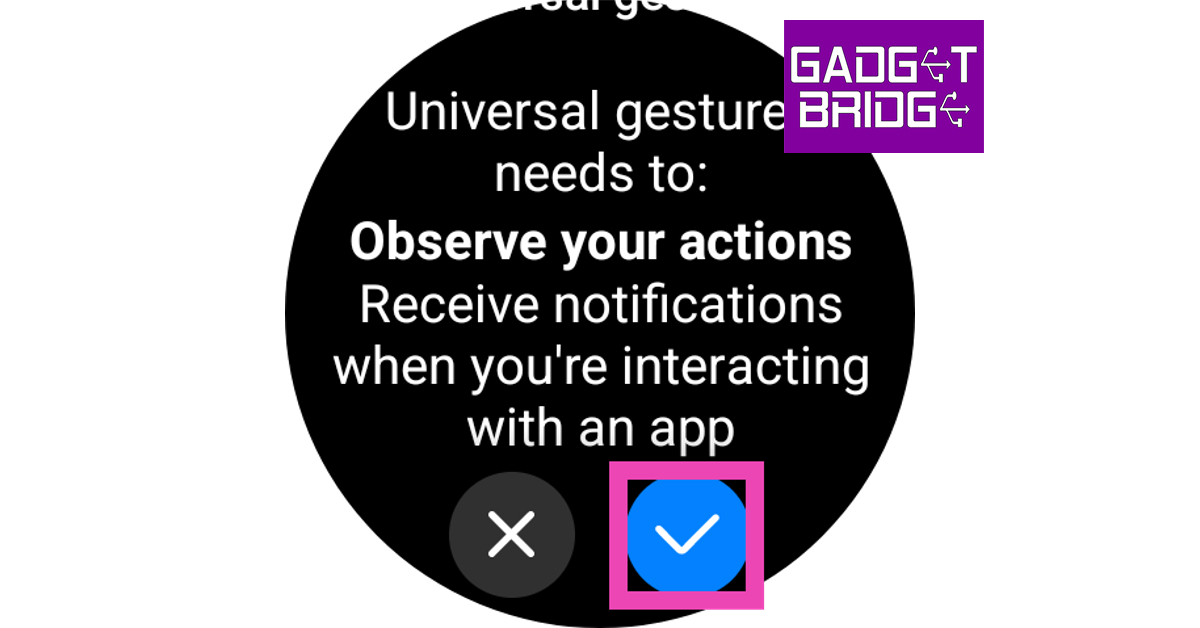 Step 7:


 Writing long notes in a notebook is physically exhausting. Also, typing on a screen for long hours is uncomfortable and hectic. It would help if you had a wireless keyboard to give you freedom when typing for long hours for your academic assignments.
The K480 is an ergonomic wireless keyboard that multi-functions with your smartphone and tablet. Also, it can connect with any Bluetooth-enabled device for external keyboard support. It features a cradle that holds in place your phone or tablet at the right angle to read and type without a fuss.
The keyboard’s water-resistant design can survive small incidents like water spills while working. It is a reliable and sturdy option for students looking for a durable typing partner at school.
Joby GorillaPod – $41
Picture lovers and digital artists love spending on their gadgets, whether for a simple selfie or a professional photo shoot during graduation or school trips. Hence, it would help to have a sturdy and reliable tripod to keep your camera or phone in place.
The Joby GorillaPod is one of the most reliable devices within a student’s budget. It comes with a flexible and tight grip that allows users to secure their professional camera equipment to any surface.
For precise angles, the device features a 360-degree rotation bed with a 90-degree title and bubble to level your device. It is versatile and allows students to mount lights, mics, or monitors.
Anker 313 Power Bank – $29
Running out of charge while on campus is a terrible experience. It would help to have a reliable and durable power bank to keep your phone or tablet on. Moreover, this device is highly useful during long school trips or holidays.
The Anker 313 10,000MAH power bank is a reliable portable charger on the market. It features two input ports that can handle both USB-A and USB-C functions.
It hosts a Voltage Boost technology that detects and delivers a tailored charge up to 12W. Moreover, you can use the trickle-down charging feature to charge all your low-power devices.
Blue Light Blocking Glasses – $15
Blue light is known to have damaging effects on the eye. Overexposure to blue light causes eye problems. Digital eye strain continues to cause dry eyes and blurred vision. This is a common problem for students after facing screens for hours.
Blue light-blocking glasses are a good gadget in your toolbox to protect your eyes from the effects of harsh light. These glasses remove any visual discomfort or fatigue from long hours of exposure.
It reduces eye strain to give you a comfortable time when browsing your screen. Moreover, the devices are lightweight with a nylon frame for comfortability and durability. Plus, it gives a sleek, stylish, and professional look while studying or playing video games.
BXCLCK Digital Alarm Clock – $15
The olden days saw a standard alarm clock on the nightstand. The BXCLCK is more than your normal alarm clock.
It is a digital alarm clock that hosts a range of features for student’s use. It has a charging station for wireless phone charging with its 15W fast wireless charger. Now, you can power your devices easily while sleeping.
In addition, the digital alarm clock also features a nighttime mode that reduces the display light for a soothing sleep experience. It has a snooze function to get that extra minutes of sleep before waking up.
Writing long notes in a notebook is physically exhausting. Also, typing on a screen for long hours is uncomfortable and hectic. It would help if you had a wireless keyboard to give you freedom when typing for long hours for your academic assignments.
The K480 is an ergonomic wireless keyboard that multi-functions with your smartphone and tablet. Also, it can connect with any Bluetooth-enabled device for external keyboard support. It features a cradle that holds in place your phone or tablet at the right angle to read and type without a fuss.
The keyboard’s water-resistant design can survive small incidents like water spills while working. It is a reliable and sturdy option for students looking for a durable typing partner at school.
Joby GorillaPod – $41
Picture lovers and digital artists love spending on their gadgets, whether for a simple selfie or a professional photo shoot during graduation or school trips. Hence, it would help to have a sturdy and reliable tripod to keep your camera or phone in place.
The Joby GorillaPod is one of the most reliable devices within a student’s budget. It comes with a flexible and tight grip that allows users to secure their professional camera equipment to any surface.
For precise angles, the device features a 360-degree rotation bed with a 90-degree title and bubble to level your device. It is versatile and allows students to mount lights, mics, or monitors.
Anker 313 Power Bank – $29
Running out of charge while on campus is a terrible experience. It would help to have a reliable and durable power bank to keep your phone or tablet on. Moreover, this device is highly useful during long school trips or holidays.
The Anker 313 10,000MAH power bank is a reliable portable charger on the market. It features two input ports that can handle both USB-A and USB-C functions.
It hosts a Voltage Boost technology that detects and delivers a tailored charge up to 12W. Moreover, you can use the trickle-down charging feature to charge all your low-power devices.
Blue Light Blocking Glasses – $15
Blue light is known to have damaging effects on the eye. Overexposure to blue light causes eye problems. Digital eye strain continues to cause dry eyes and blurred vision. This is a common problem for students after facing screens for hours.
Blue light-blocking glasses are a good gadget in your toolbox to protect your eyes from the effects of harsh light. These glasses remove any visual discomfort or fatigue from long hours of exposure.
It reduces eye strain to give you a comfortable time when browsing your screen. Moreover, the devices are lightweight with a nylon frame for comfortability and durability. Plus, it gives a sleek, stylish, and professional look while studying or playing video games.
BXCLCK Digital Alarm Clock – $15
The olden days saw a standard alarm clock on the nightstand. The BXCLCK is more than your normal alarm clock.
It is a digital alarm clock that hosts a range of features for student’s use. It has a charging station for wireless phone charging with its 15W fast wireless charger. Now, you can power your devices easily while sleeping.
In addition, the digital alarm clock also features a nighttime mode that reduces the display light for a soothing sleep experience. It has a snooze function to get that extra minutes of sleep before waking up.

 Step 3: Swipe left

 Step 2:
 Step 3:
 Step 4:
 Step 5:
 Step 6:
 Step 7:
 Step 5: Select
  Step 6:
 Step 7:
  Step 8: Confirm
 Step 3:
 Step 4:
 Step 5:
 Step 3:
 Step 3:
 Step 4:
 Step 5:
 Step 3:
")
 Step 3:
 Step 4:
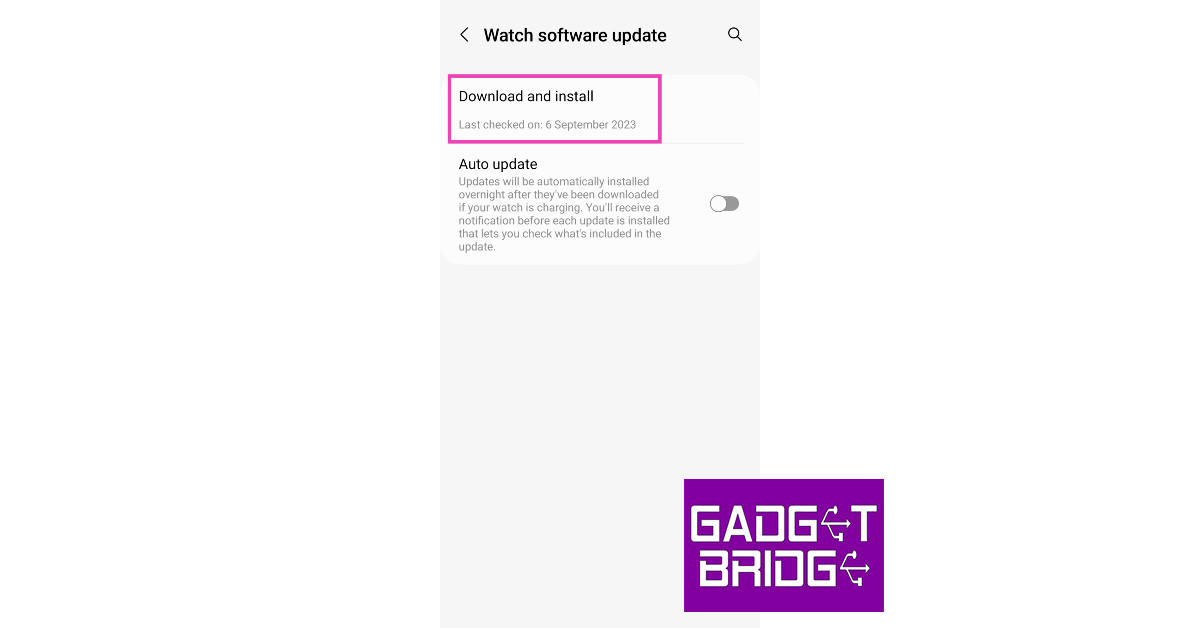 Step 5:
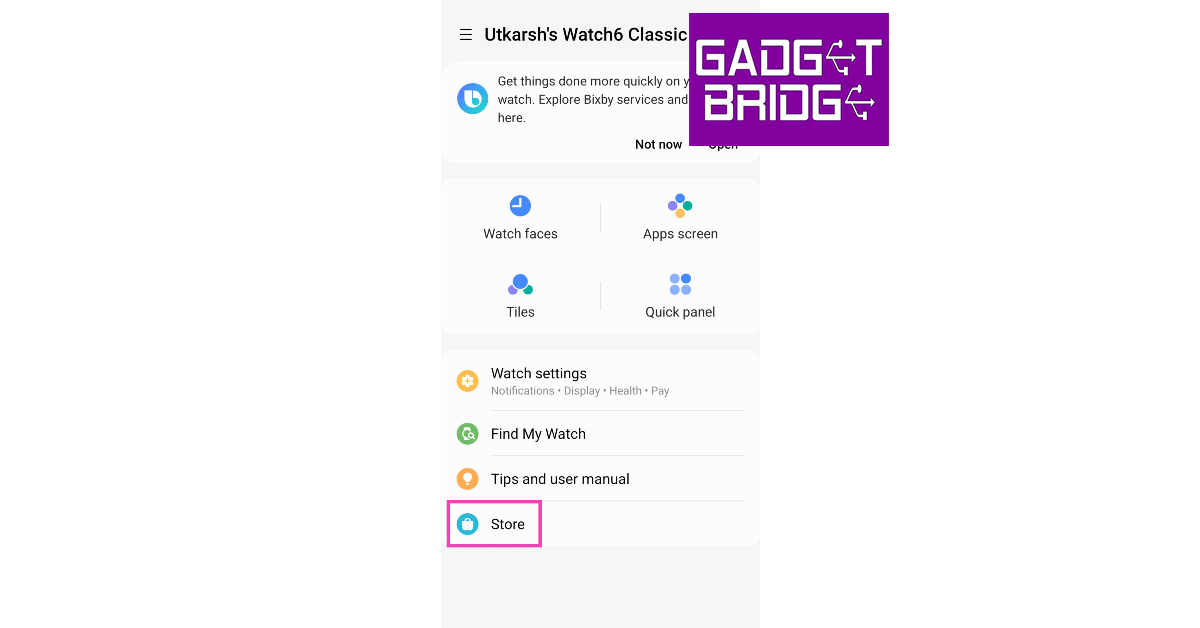 Step 3:
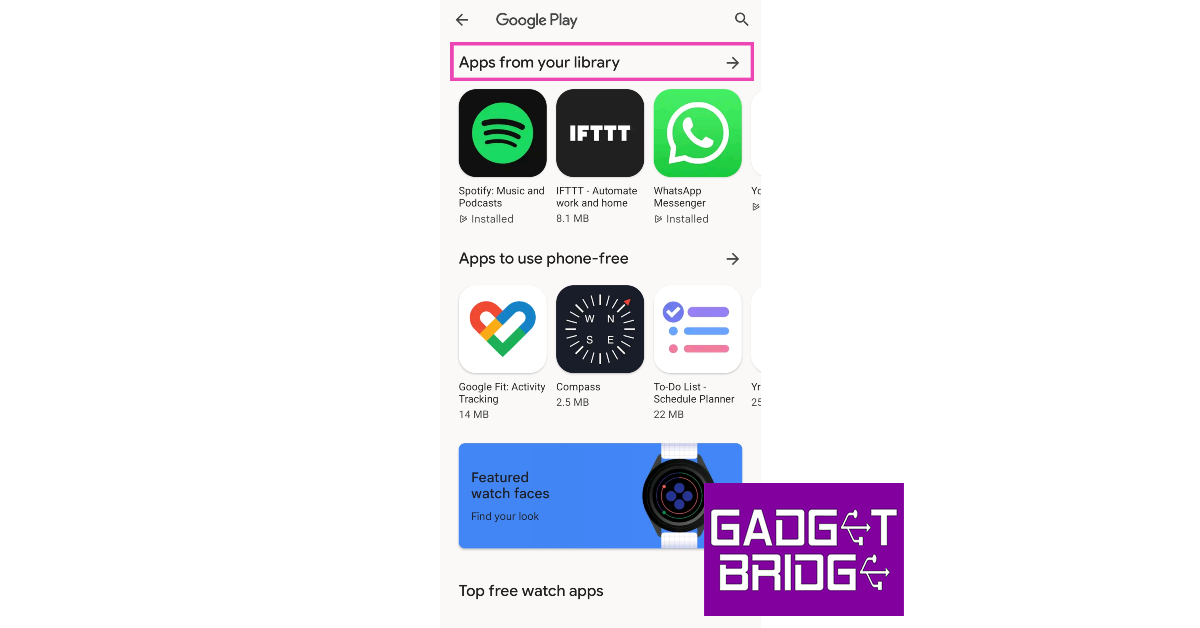 Step 4:
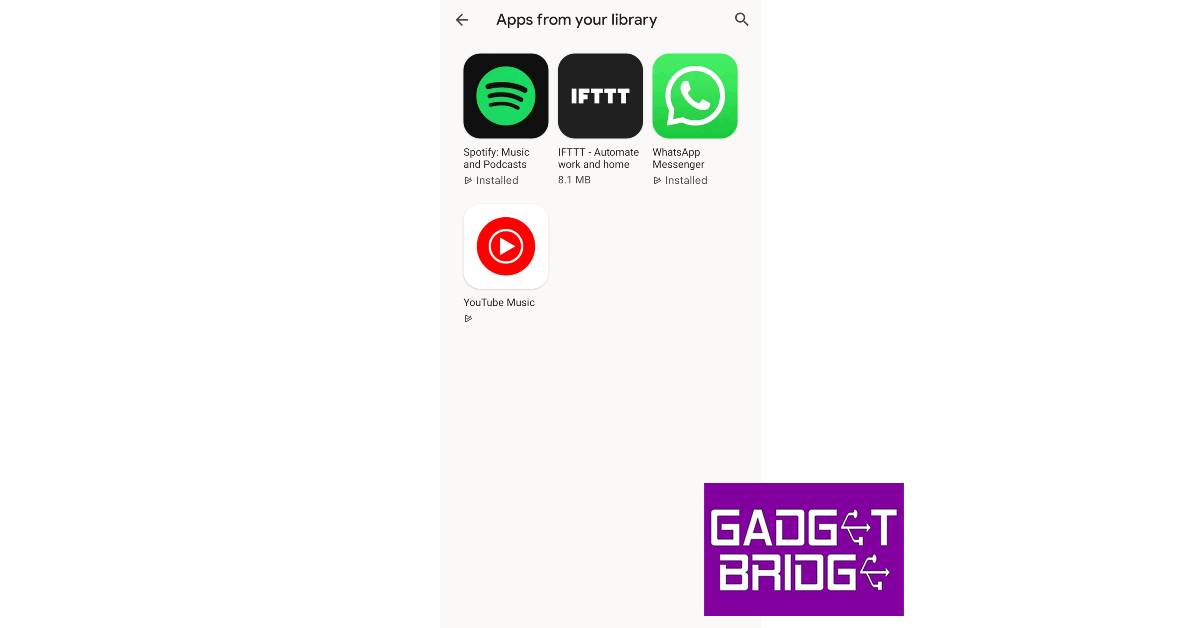 Step 5: Update
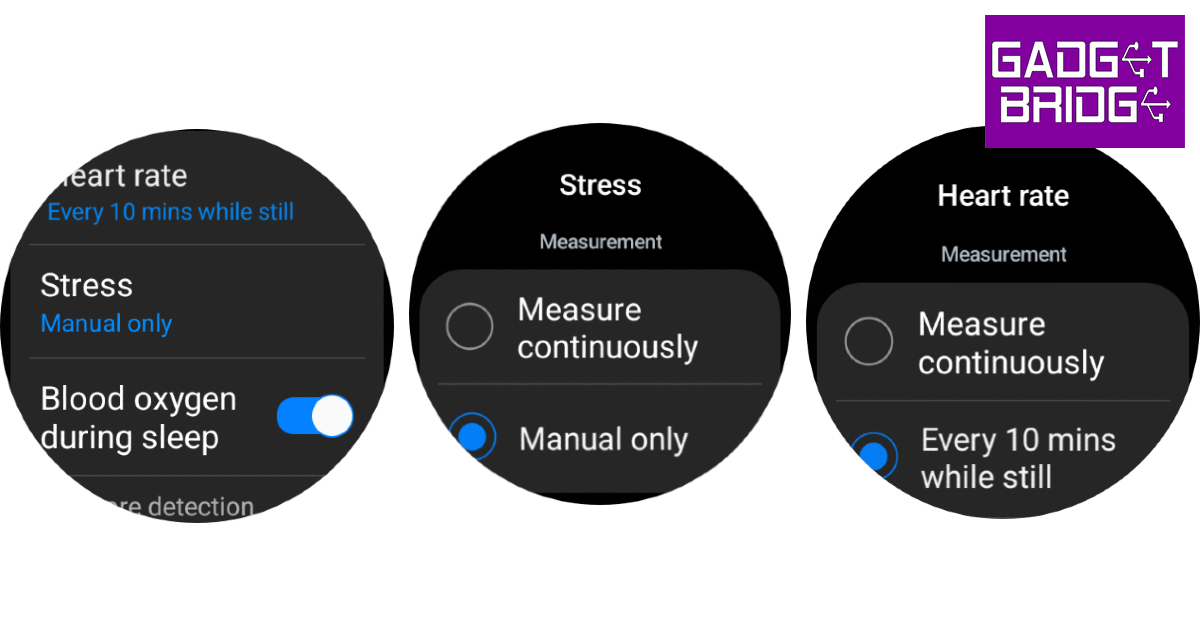
 Step 3:
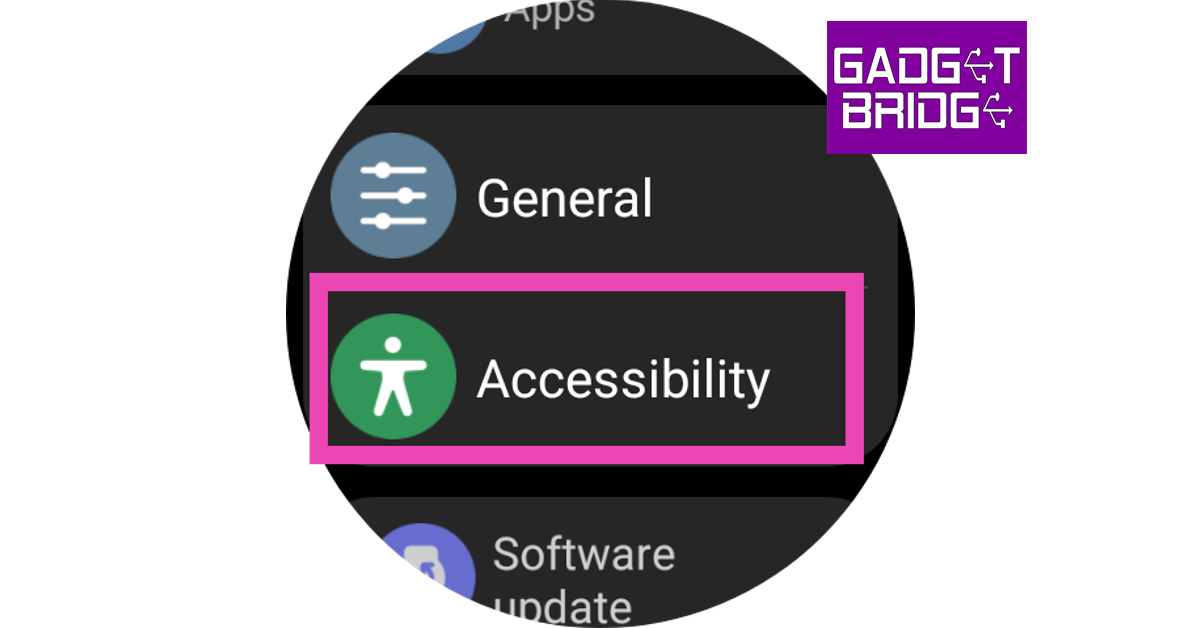
 Step 1: Unlock your Galaxy Watch and swipe down to access the Quick Settings Menu.
Step 2: Hit the Settings tile.
Step 3: Tap on Display.
Step 4: Turn off the toggle switch next to Raise wrist to wake.
Step 1: Unlock your Galaxy Watch and swipe down to access the Quick Settings Menu.
Step 2: Hit the Settings tile.
Step 3: Tap on Display.
Step 4: Turn off the toggle switch next to Raise wrist to wake.
 Step 1: Unlock your Galaxy Watch and swipe down to access the Quick Settings Menu.
Step 2: Hit the Settings tile.
Step 3: Tap on Display.
Step 4: Select Screen timeout.
Step 5: Set the duration to 15 seconds.
Step 1: Unlock your Galaxy Watch and swipe down to access the Quick Settings Menu.
Step 2: Hit the Settings tile.
Step 3: Tap on Display.
Step 4: Select Screen timeout.
Step 5: Set the duration to 15 seconds.
 Step 1: Unlock your Galaxy Watch and swipe down to access the Quick Settings Menu.
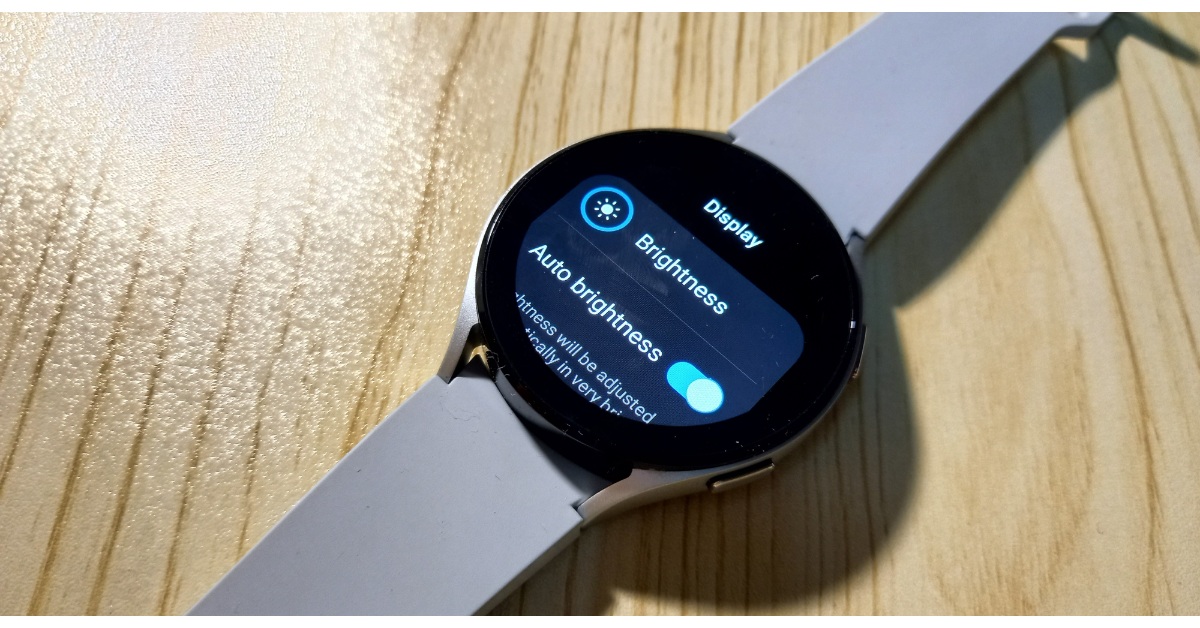
Step 2: Hit the Brightness tile.
Step 3: Use the slider to reduce the brightness.
Step 1: Unlock your Galaxy Watch and swipe down to access the Quick Settings Menu.
Step 2: Hit the Brightness tile.
Step 3: Use the slider to reduce the brightness.
 Step 1: Unlock your Galaxy Watch and swipe down to access the Quick Settings Menu.
Step 2: Hit the Settings tile.
Step 3: Tap on Sounds and vibration.
Step 4: Tap on Vibration.
Step 5: Select Short under Vibration duration.
Step 6: Select Light under Vibration intensity.
Step 1: Unlock your Galaxy Watch and swipe down to access the Quick Settings Menu.
Step 2: Hit the Settings tile.
Step 3: Tap on Sounds and vibration.
Step 4: Tap on Vibration.
Step 5: Select Short under Vibration duration.
Step 6: Select Light under Vibration intensity.
 Step 4:
 Step 5:


 Step 2:
 Step 3:
 Step 4:
 Step 5:
 Step 6:
 Step 2:
  Step 3:
 Step 4:
  Step 5:
 Step 6:
 Step 7:
 Step 8:
 Step 11:
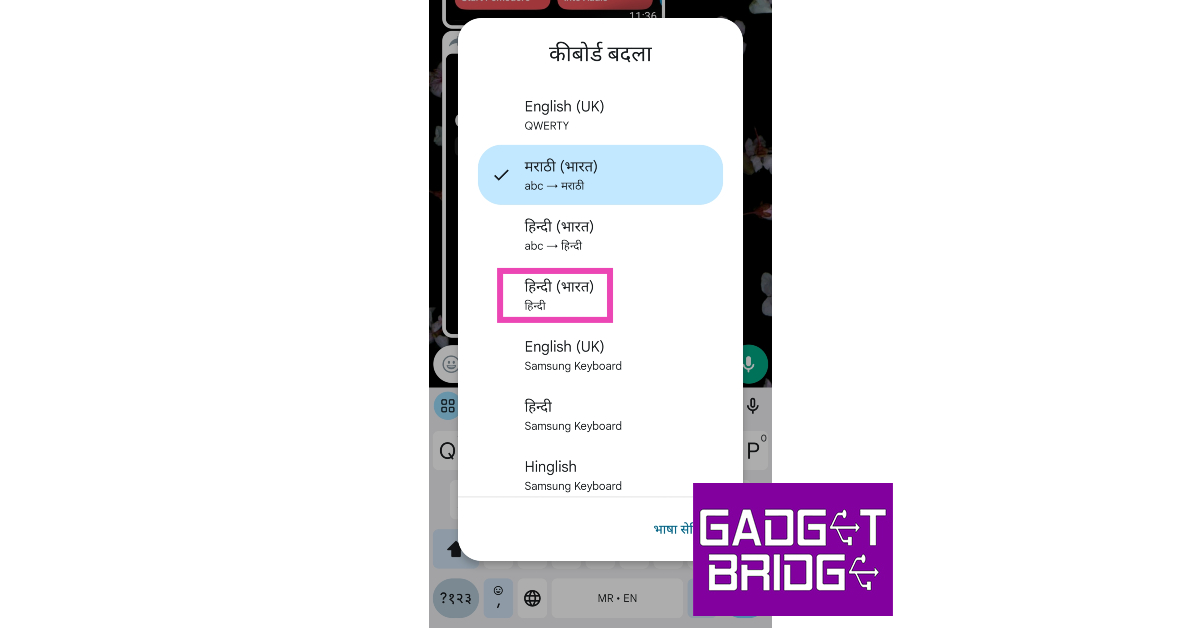
")
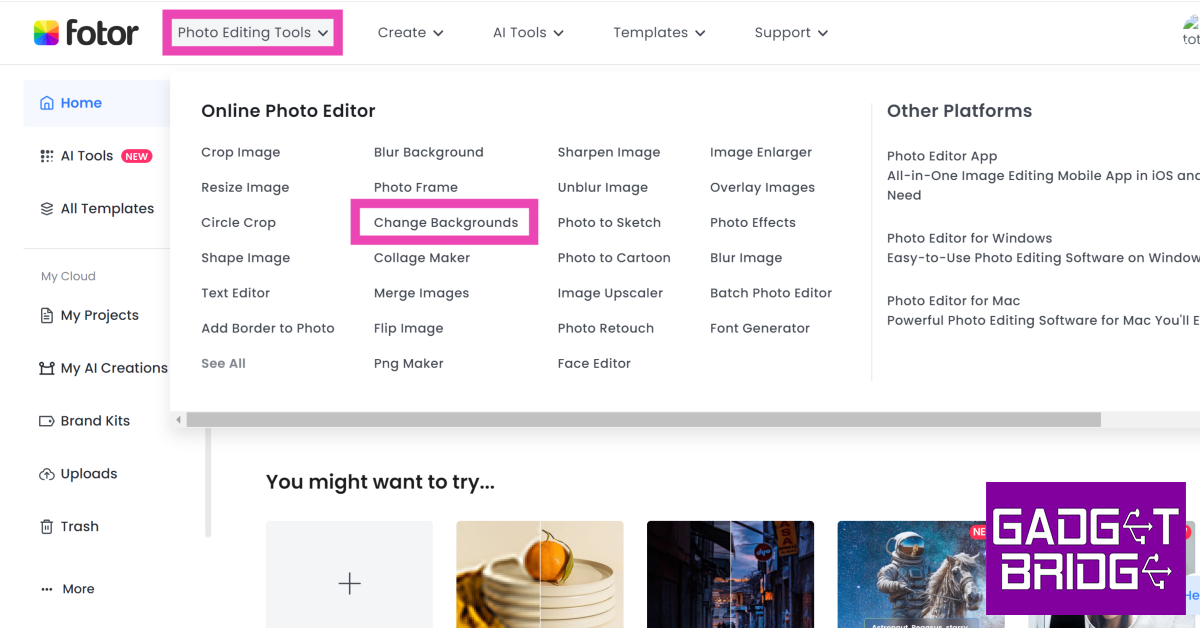 Step 3:
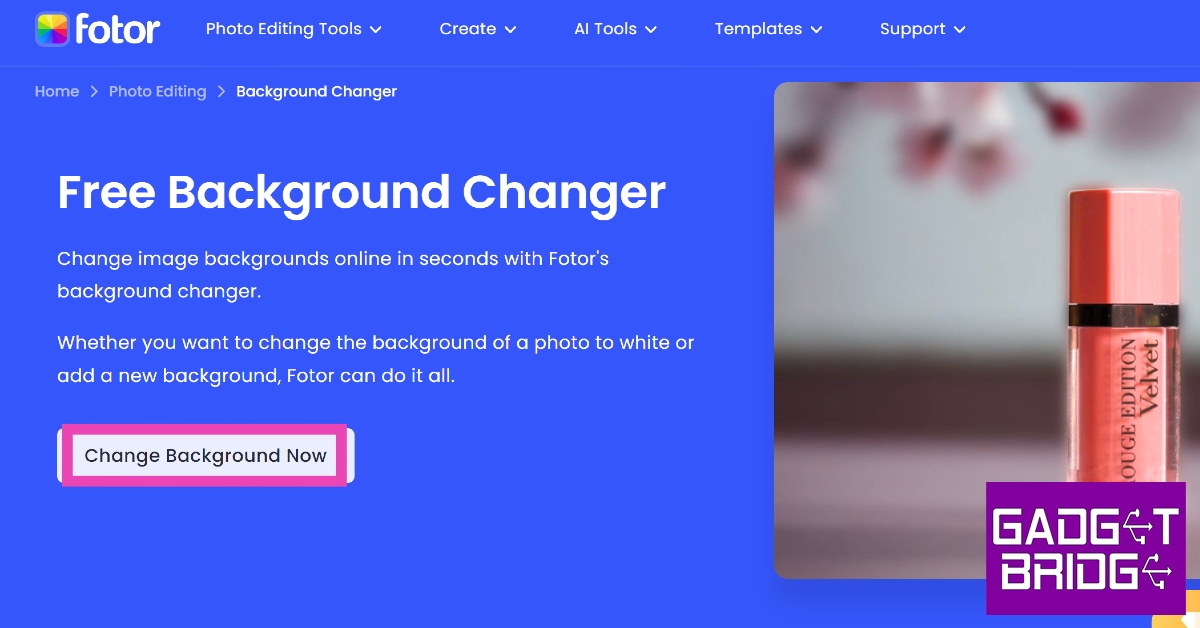 Step 4: Upload
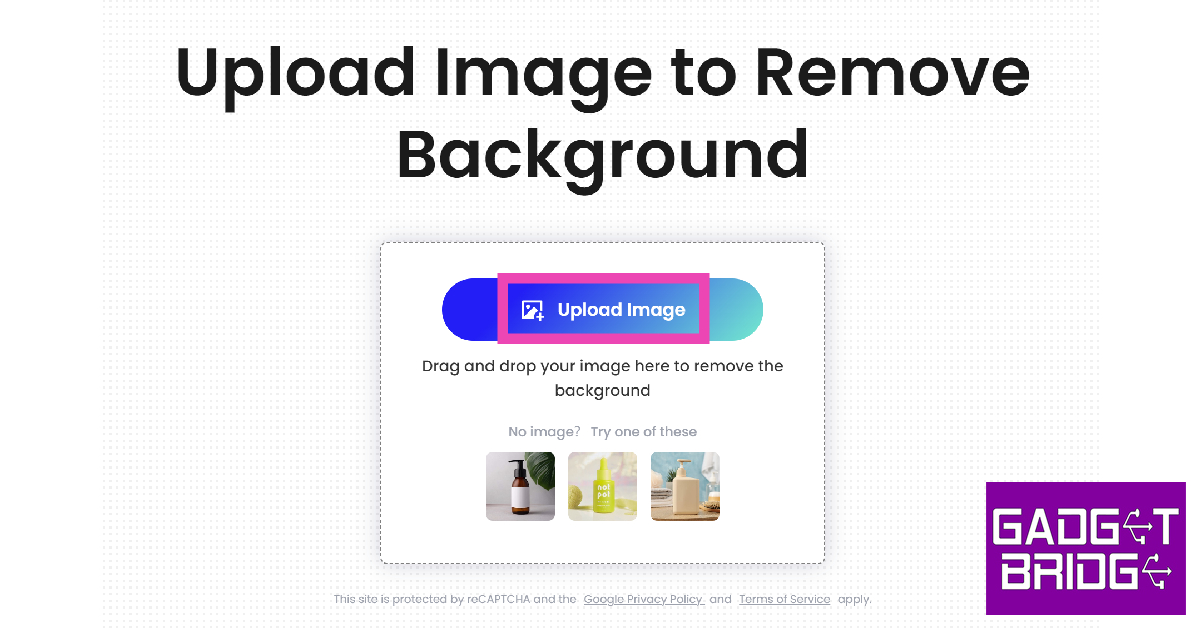 Step 5:
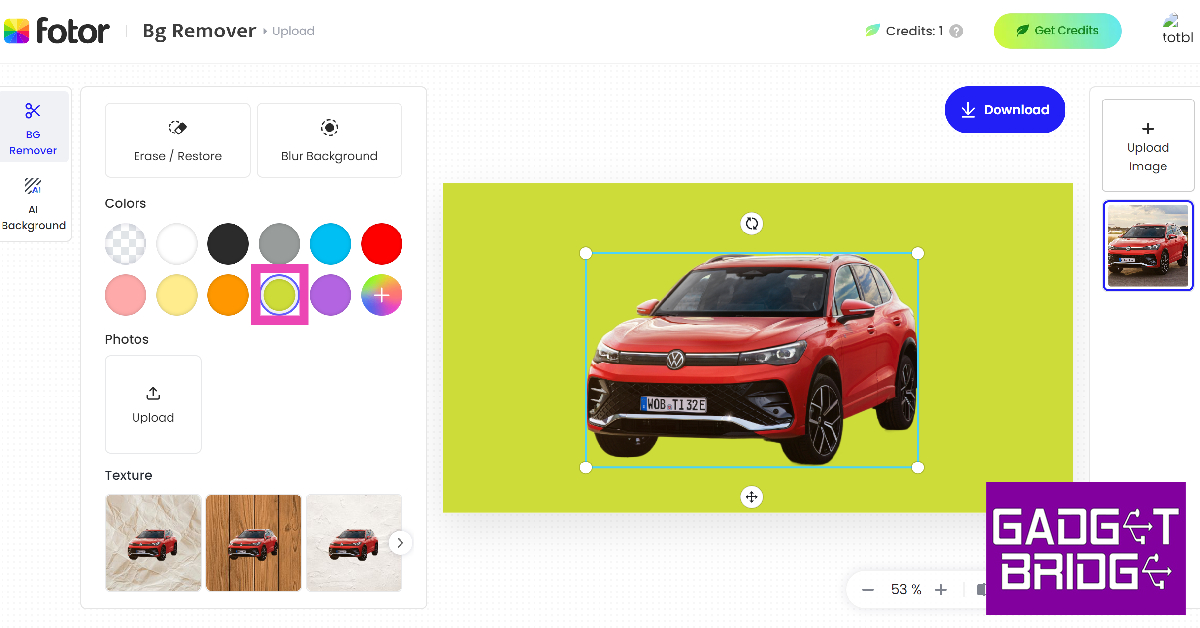 Step 7:
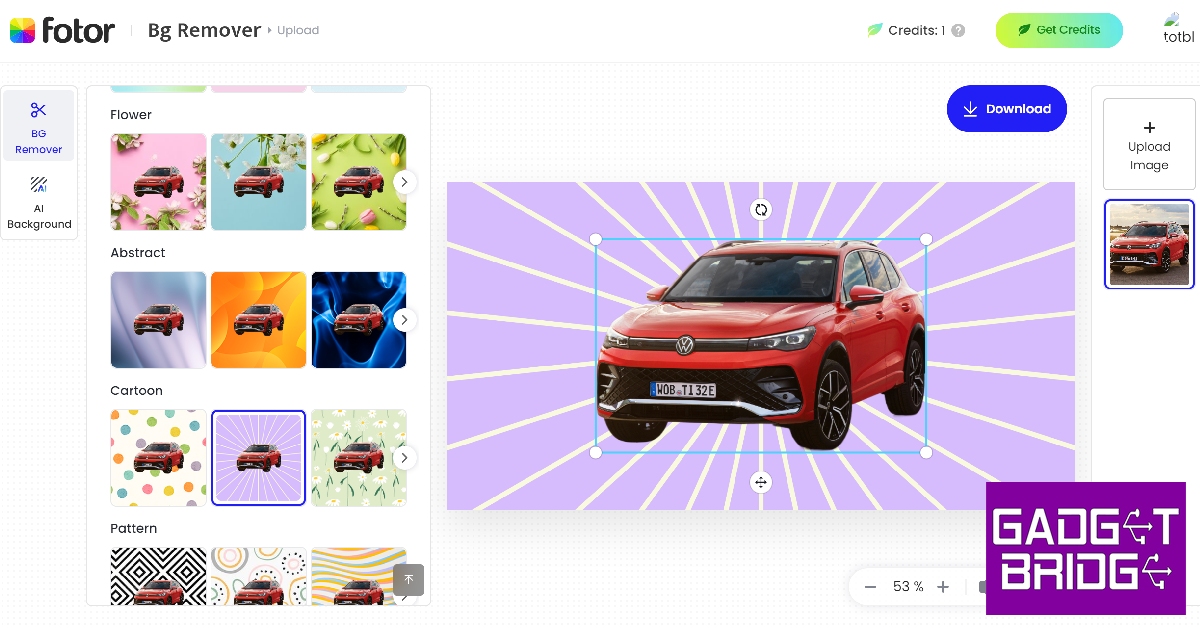 Step 8:
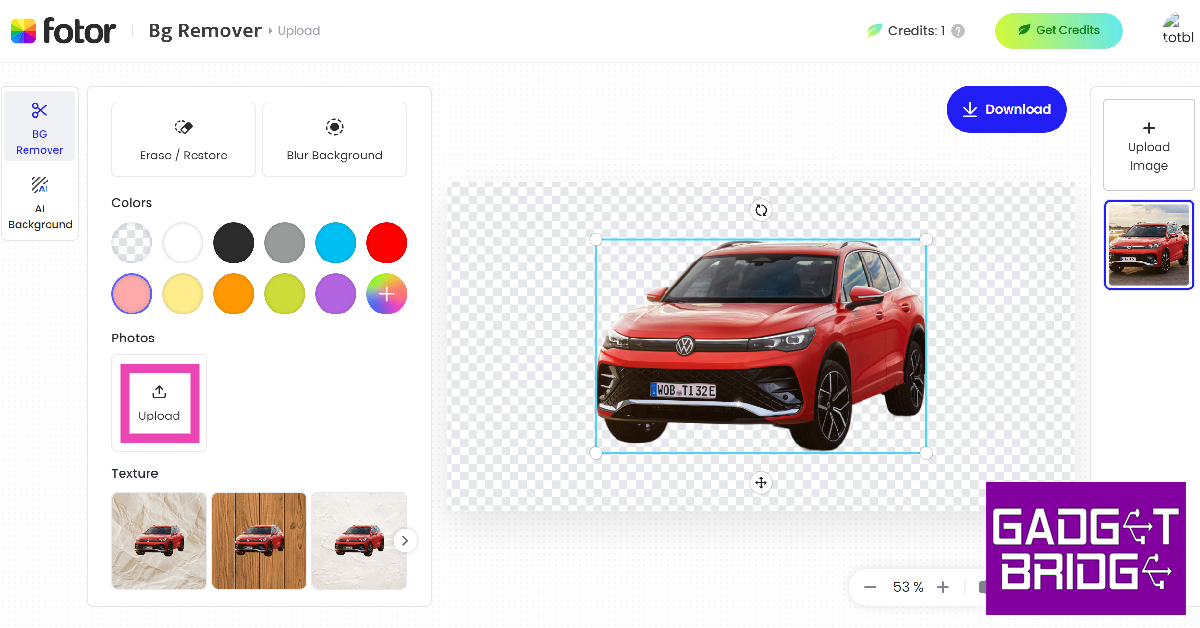 Step 9: Upload
 Step 3:
 Step 5:
 Step 6:
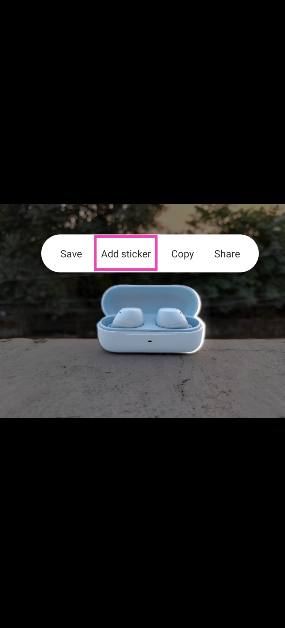
 Step 4: Tap Add Sticker in the pop-up menu.
 Step 5: Open the image that you wish to set as the background.
Step 6: Hit Edit at the bottom of the screen.
Step 5: Open the image that you wish to set as the background.
Step 6: Hit Edit at the bottom of the screen.
 Step 7: Scroll through the tools and select Stickers.
 Step 8: Select the sticker you just created.
 Step 9: Adjust its size and place it in the ideal spot.
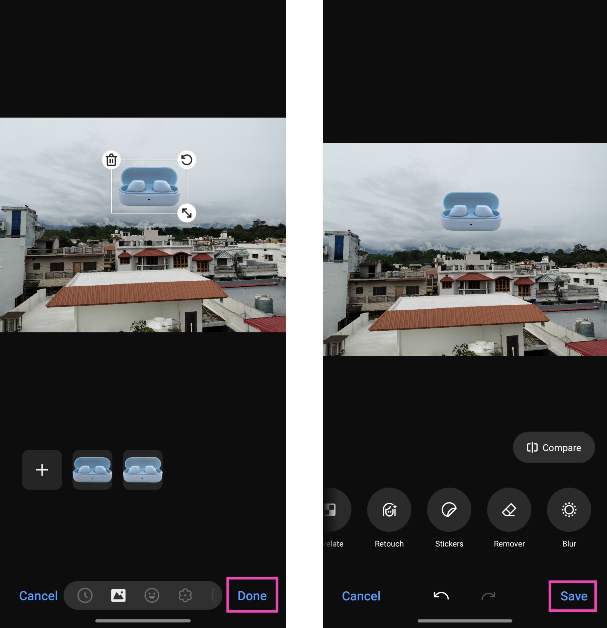 Step 10: Hit Save.
 Step 1: Launch the Instagram app and tap on Create Story in the top left corner of the screen.
Step 2: Take a picture or upload an image from your phone’s gallery.
Step 3: Tap the Stickers icon and select Backdrop.
Step 4: Hit Next.
Step 5: Enter a prompt for the background.
Step 6: Instagram will generate a new background based on your prompt. If you like it, hit Next.
Step 7: Follow the remaining steps to upload the image as your story.
Step 1: Launch the Instagram app and tap on Create Story in the top left corner of the screen.
Step 2: Take a picture or upload an image from your phone’s gallery.
Step 3: Tap the Stickers icon and select Backdrop.
Step 4: Hit Next.
Step 5: Enter a prompt for the background.
Step 6: Instagram will generate a new background based on your prompt. If you like it, hit Next.
Step 7: Follow the remaining steps to upload the image as your story.