- Google Pixel 8 Series was launched in India four months ago.
- The company introduced both the devices in three colour options.
- Both smartphones are equipped with Tensor G3 SoC.


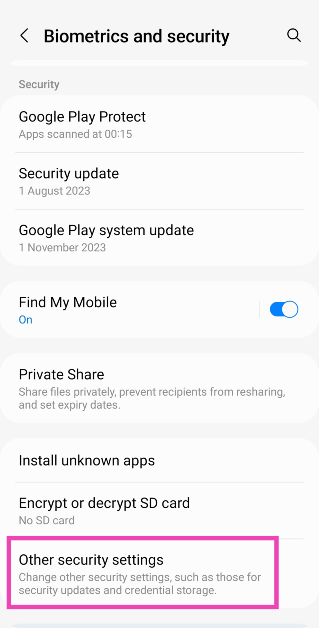
 Step 2: Tap on Other security settings.
 Step 3: Turn on the toggle switch for Pin windows.
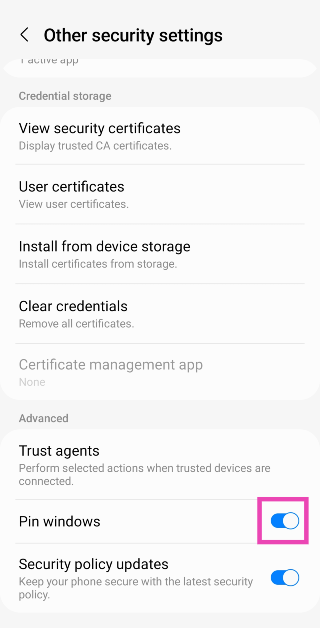 Step 4: Open the app that you want to pin to the screen.
Step 5: Go to Recent apps and tap the app’s icon.
Step 6: Select Pin this app.
Step 4: Open the app that you want to pin to the screen.
Step 5: Go to Recent apps and tap the app’s icon.
Step 6: Select Pin this app.
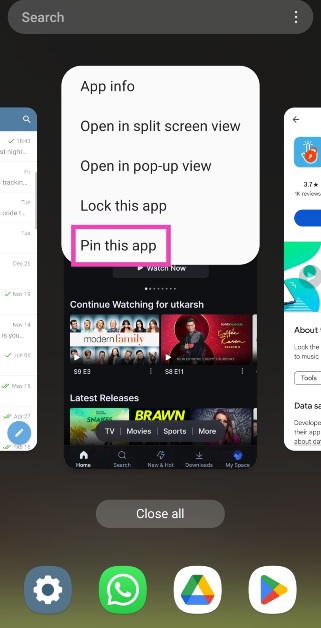 Step 7: To unpin the app, press and hold the back and recent buttons. You will be asked for your lock screen PIN.
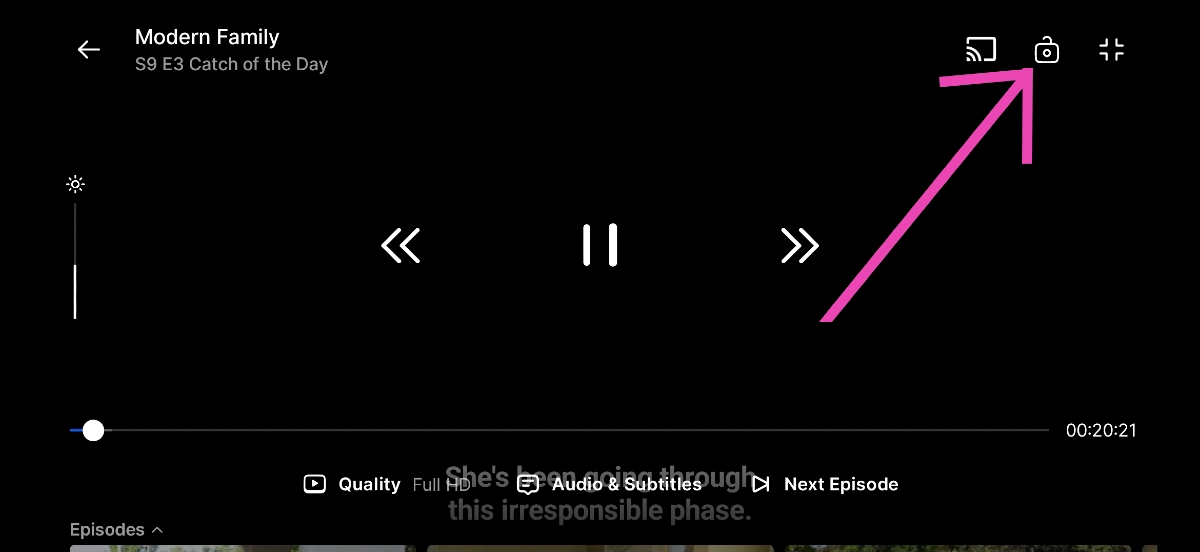 Most of the popular OTT apps like Netflix, Hotstar, Prime Video, etc. have a display lock button that disables the touchscreen while playing the media. This eliminates accidental touches and allows you to focus on the video. To enable this option, look for the lock icon in the media player. To unlock the screen, hit the lock icon again.
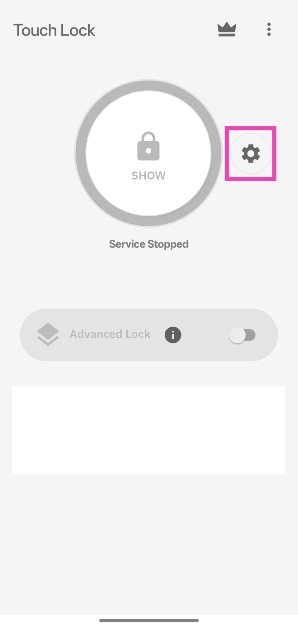
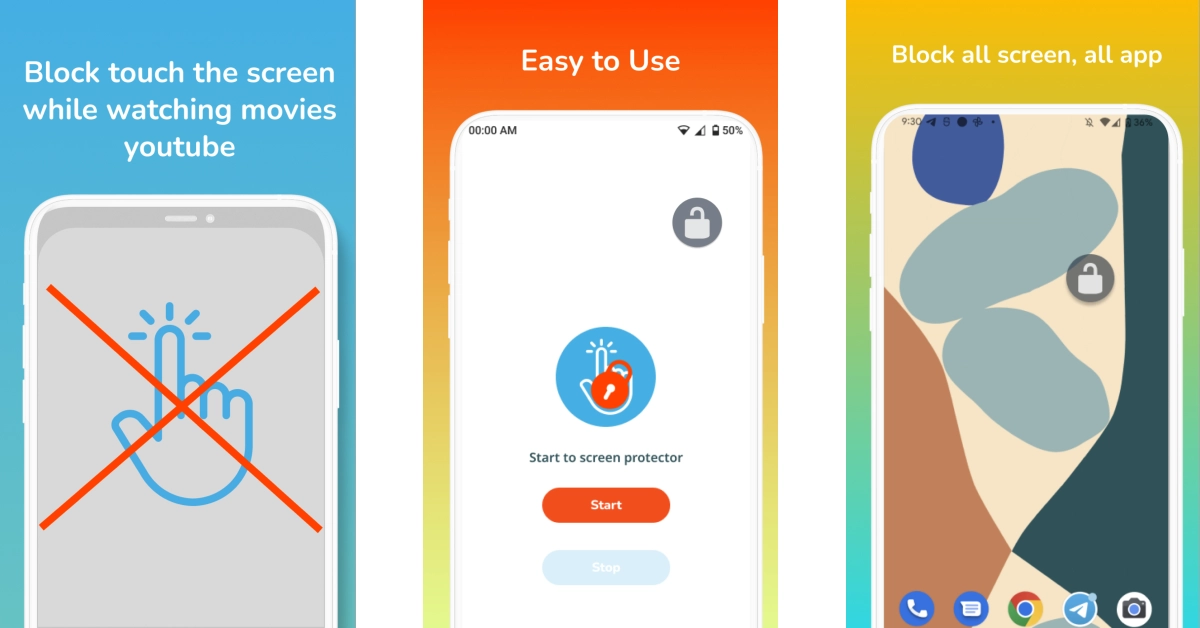 If a streaming app does not have a native display lock button, you can always use a third-party app to achieve the same result. The Disable Touch Screen app by Firefly-Team works seamlessly on OTT apps like Sony Liv, Netflix, Hotstar, and others. You can also use it for streaming platforms like Twitch and YouTube. Once the app is installed, launch it and hit the start button. Then go to the app you wish to pin and hit the lock button.
 Step 3: Go back to Touch Lock and hit the settings icon.
 Step 4: Select whether you want to lock the entire screen or a part of it.
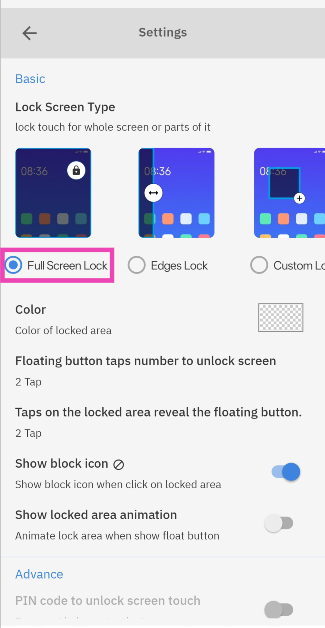 Step 5: Go back and tap on Show.
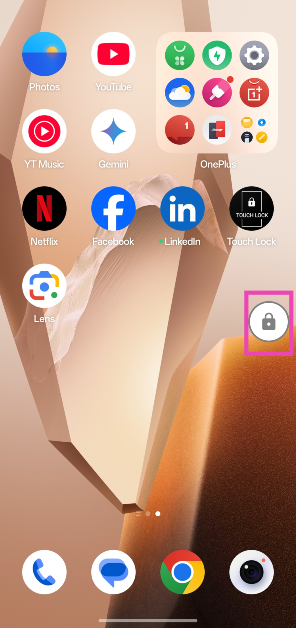
 Step 6: Go to the app or screen that you wish to lock.
Step 7: Hit the lock icon.
Step 6: Go to the app or screen that you wish to lock.
Step 7: Hit the lock icon.
 Step 8: Your phone’s touchscreen will be disabled. To enable the touchscreen, double-tap the display and then double-tap the lock icon.
 Step 1: Go to Settings and select Accessibility.
Step 2: Tap on Interaction and Dexterity.
Step 3: Go to Interaction Control and enable it.
Step 4: Launch an app and press the side + volume up buttons to lock the display.
Step 5: Press the side + volume up buttons again to enable the display.
Step 1: Go to Settings and select Accessibility.
Step 2: Tap on Interaction and Dexterity.
Step 3: Go to Interaction Control and enable it.
Step 4: Launch an app and press the side + volume up buttons to lock the display.
Step 5: Press the side + volume up buttons again to enable the display.
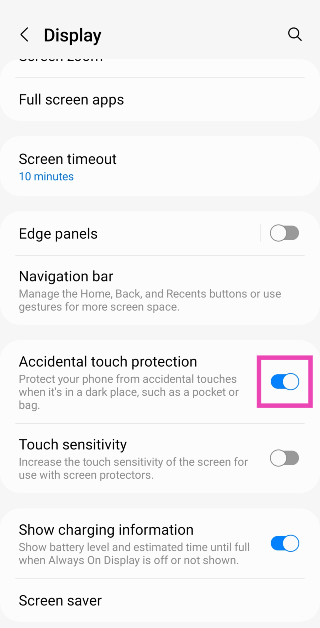
 Step 2: Turn on the toggle switch for Accidental Touch Protection.

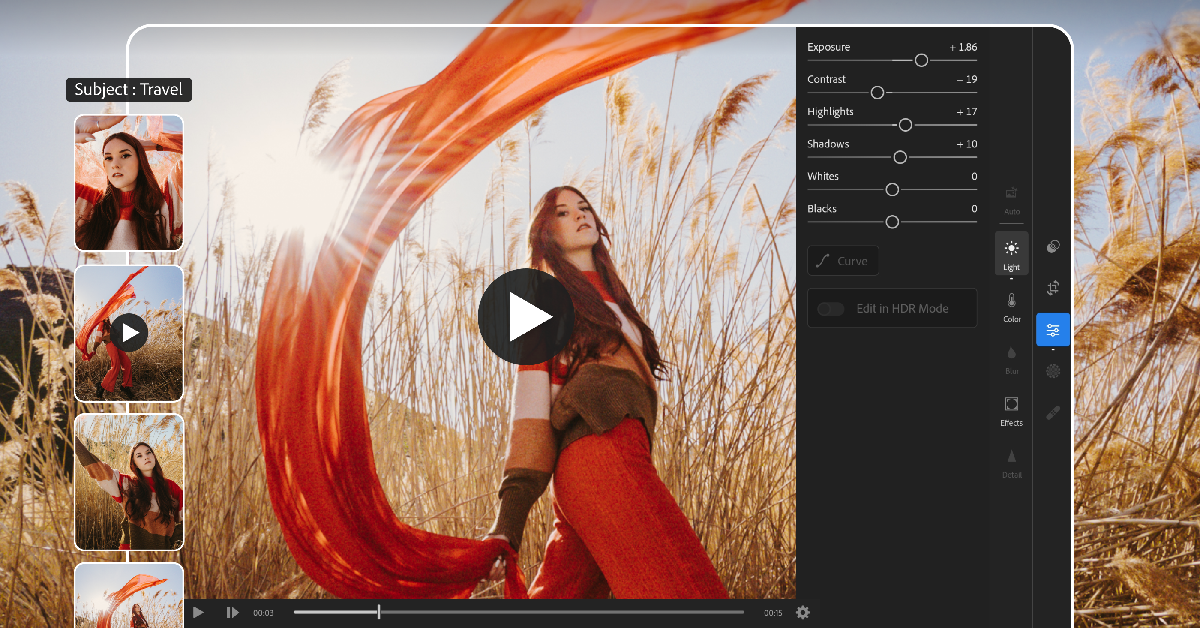 Adobe Lightroom is one of the best photo and video editing apps you can download on your new OnePlus 12. Bringing a new level of accessibility to the average user, Adobe Lightroom has tons of one-touch active filters along with handy tools like retouch, blur, object remover, and more. Seasoned users can use the Lightroom app to edit the exposure, highlights, shadows, contrast, and more using sliders. The app gives you full control over how the photo or video looks, by allowing you to change the hue, colour saturation, luminance, and more. Content creators will enjoy the Reel Maker available on the app!
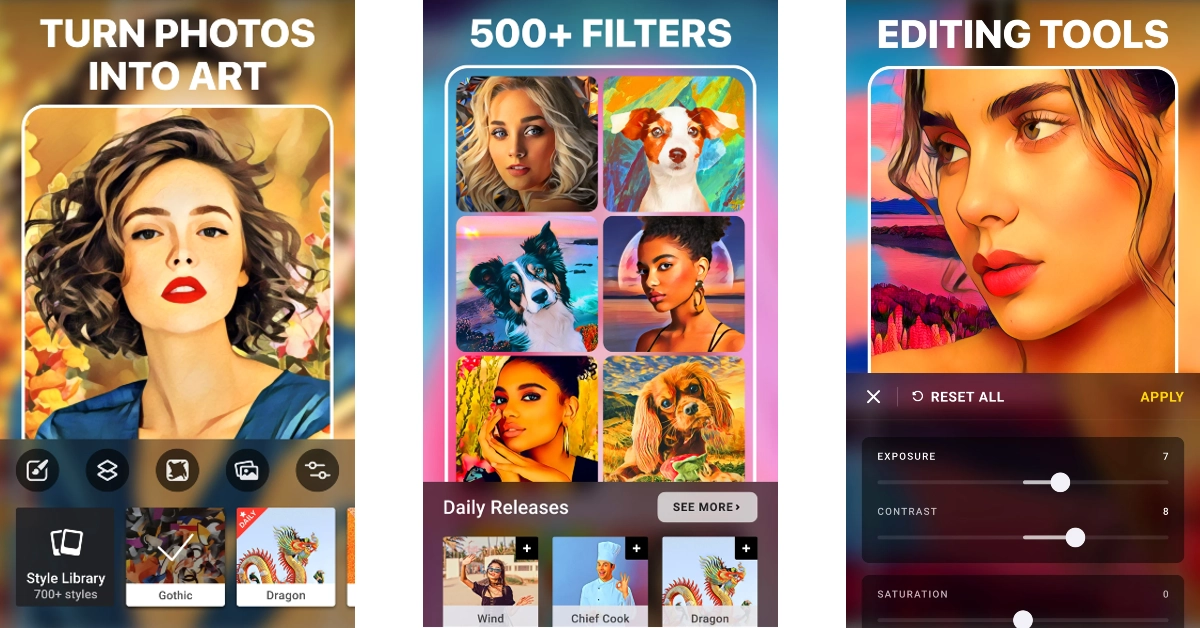 If you don’t want to focus on the intricate elements of photo editing but want an app that will take care of them for you instead, download Prisma. This editing app uses fun filters to transform your images into something that belongs in an art gallery. There are more than 500 filters in Prisma’s art gallery which cover different painting styles and art periods. To keep things fresh, the app releases a new filter every day. Once the filters have been applied to your photos, you can tweak minor elements like exposure, sharpness, contrast, and more.
 IFTTT is one of our favourite automation apps which you should definitely download on your new OnePlus 12. Once you’ve mapped out your daily routine, you can use IFTTT to program your smartphone and other smart devices to behave accordingly. The app offers thousands of pre-built automation, but you can always create one that is tailored to your needs. For example, you can use IFTTT to automatically turn off all the lights in your house and play your commute playlist on Spotify as soon as you get out of your house and into your car.
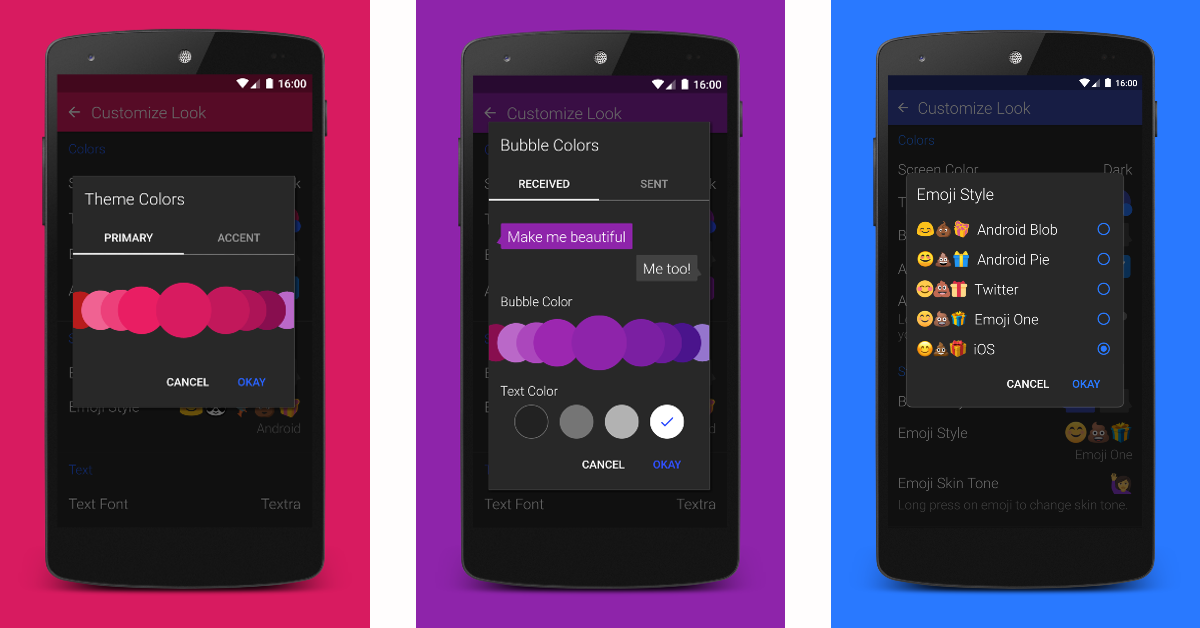 Not a fan of Google Messages or your OEM’s stock SMS app? You should try Textra. This app lets you customise your texting experience with over 180 design themes, multiple bubble types and colours, fonts, text sizes, screen modes, and more. One of our favourite things about the app is that it lets you choose which emoji pack you want to use. If you’re an Android user with iPhone users as friends, you can simply switch to the iOS emoji pack. Textra also supports Reactions (or Tapbacks) received from iOS devices. Instead of seeing a message notifying you about the reaction, you will see the emoji reaction.
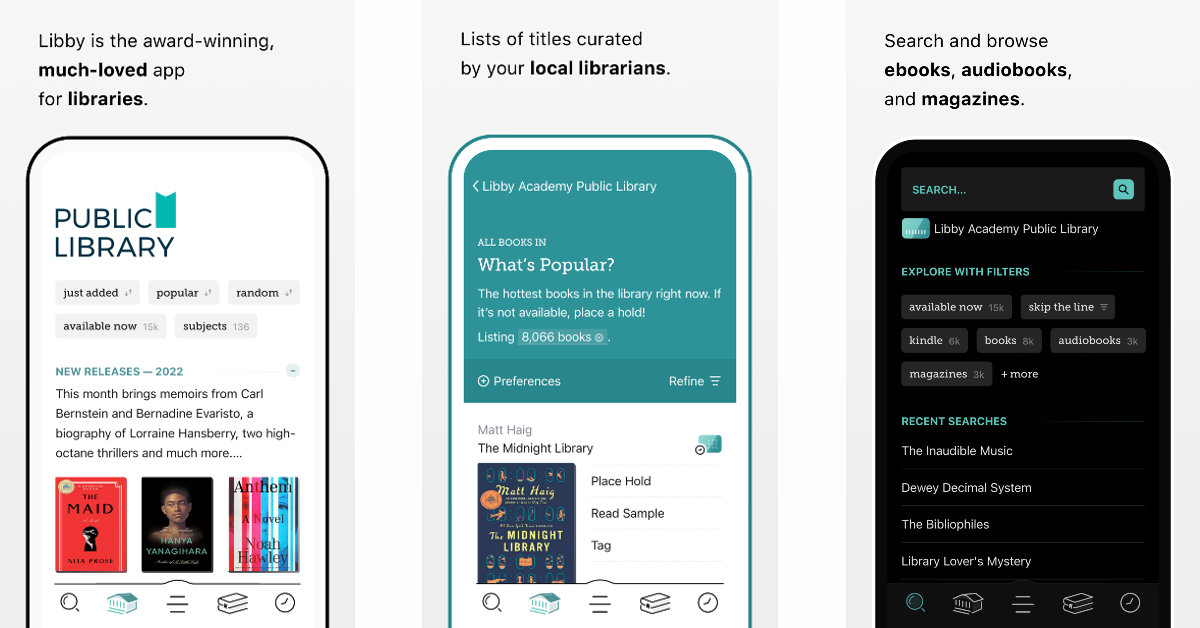 Libby unlocks millions of free ebooks and audiobooks with just your public library card. Once you have signed up for the app, you can explore book catalogues across different libraries and dive into your favourite genres. You will save an incredible amount of money using Libby. The app has a great ebook reader that lets you adjust the text size, background colour, book design, and more. The audiobook reader is equipped with basic controls like speed up/slow down, sleep timer, bookmarks, and more.
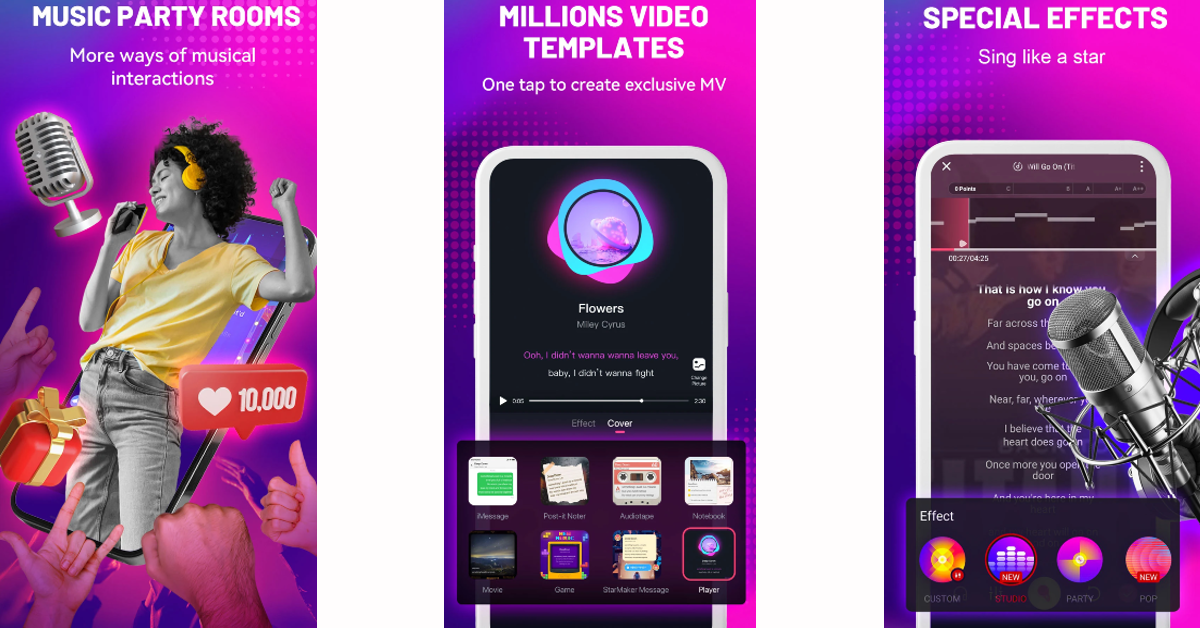 Here’s a fun app for your OnePlus 12 that will help you kill a lot of free time. With over 100 million downloads and 50 million active users, StarMaker is one of the most popular karaoke apps around. The app is loaded with millions of songs across genres like pop, hip-hop, folk, rock, and more. In true karaoke fashion, it provides backing music with rolling lyrics, but it doesn’t stop at that. You can record the songs and edit the recording using professional filters. You can then share your recording across different social media platforms.
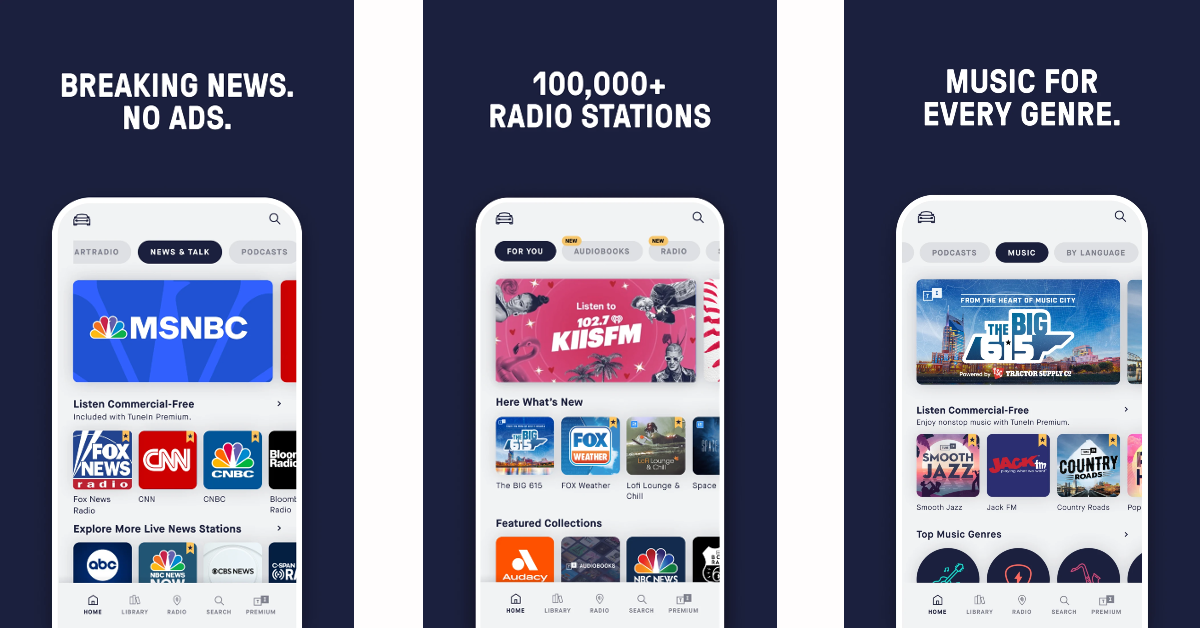 Podcasts and music streaming are the norm these days, but they do not match up to the fun of tuning into a radio station and being treated to a variety of music artists. TuneIn Radio seeks to recreate that experience with over 100,000 global stations. You can listen to your local radio station or tune into an exclusive channel that plays a certain genre of music. TuneIn Radio also features comprehensive sports content including live commentary from all the popular leagues like the NFL, MLB, NHL, and more.
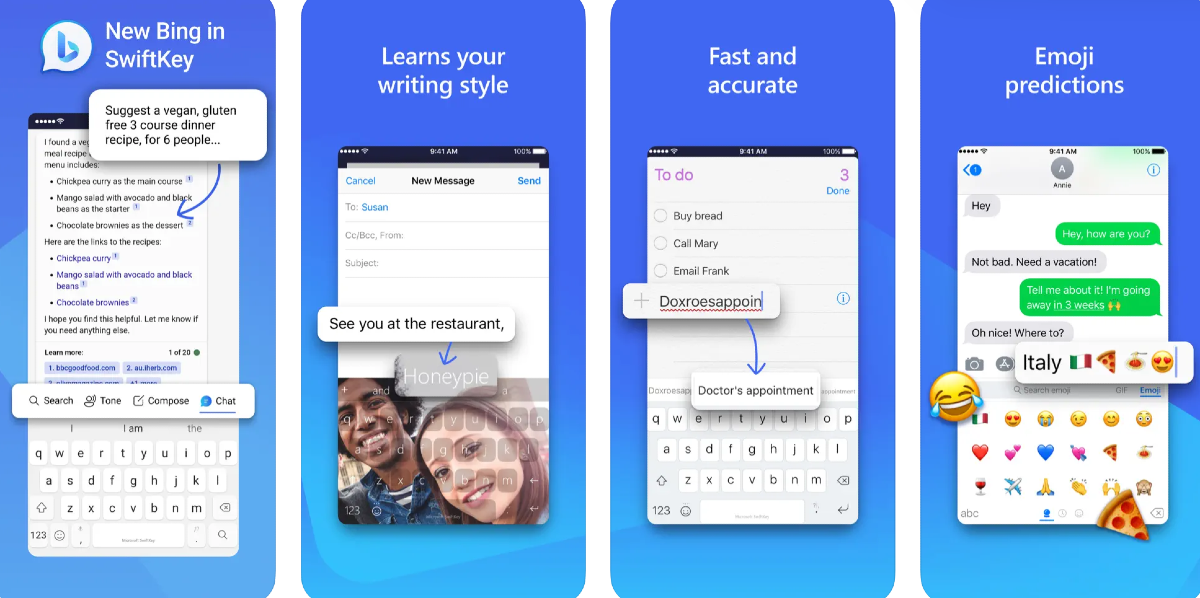 Microsoft is all aboard the AI revolution, bringing Bing AI integration into its most popular services. Our favourite implementation of this AI integration has to be on the SwiftKey keyboard. By making the chatbot accessible on the keyboard itself, Microsoft has completely changed the game. Now, you don’t need to leave the chat window to search for something on the web. You can just get Bing AI to do it. Don’t know how to respond to a text you received from a friend or colleague? Simply ask Bing AI for possible replies and change their tone using an appropriate filter from the keyboard.
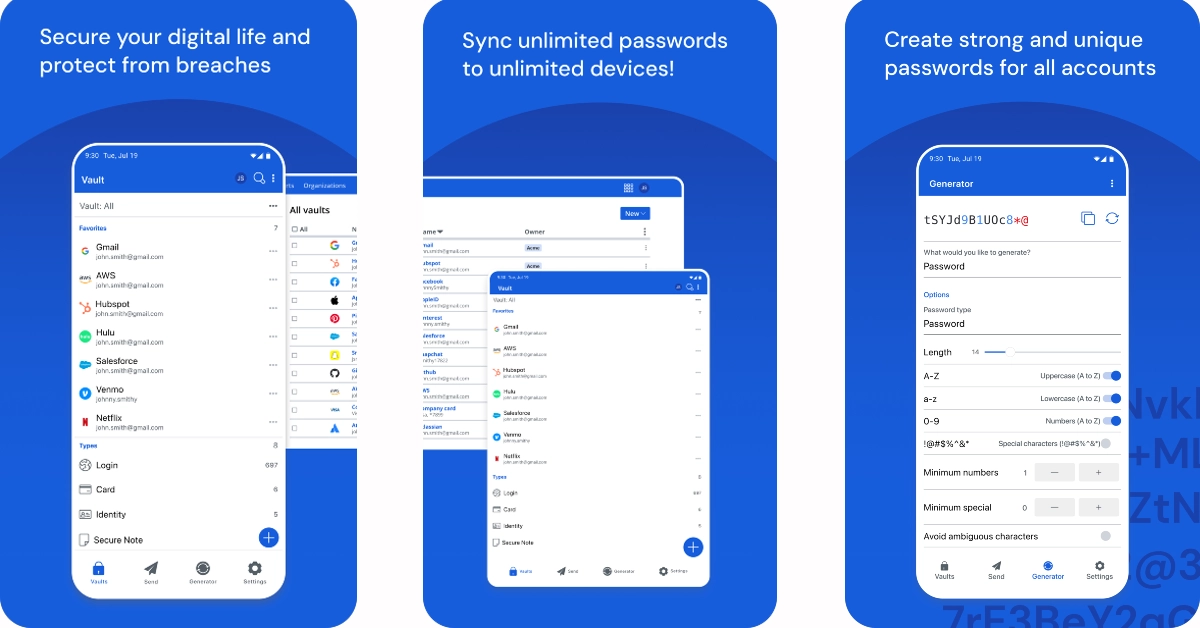 Bitwarden lies in the upper echelon of password-storing apps, making it a very easy recommendation for your new OnePlus 12. You can save a password either manually on the app or with a quick tap whenever you log into your account. Bitwarden’s autofill feature makes sure you never have to type your password again. This is crucial because using the app’s password generator, you can set a long string as your password. Without needing to remember what it is, you can get Bitwarden to autofill it for you across all your devices, whenever you want. All passwords stored in Bitwarden are end-to-end encrypted and can only be accessed by you.
 Using machine learning and large language models, ChatGPT has completely changed the AI chatbot game. It took some time for ChatGPT to get an Android app of its own (after some terrible knock-offs and underwhelming offshoots), but now that it’s here it is incredibly fun to use. You can choose to have a conversation with the chatbot or make it write a piece of code for you. You can get the chatbot to perform creative tasks like writing an essay or poem (in any style you fancy) or seek its help in everyday tasks like coming up with a recipe from the list of ingredients in your fridge.
 This smart alarm clock tracks your sleep across the night and wakes you up gently when you are in the light sleep stage. A harsh alarm tone that wakes you up abruptly can put you in a bad mood right away. Sleep as Android is similar to being woken up with a gentle cerebral hug. To make sure you don’t go back to sleep, you can set a puzzle to turn off the alarm clock. The app is compatible with IFTTT, Smartlight, Google Fit, and other fitness and smart apps.
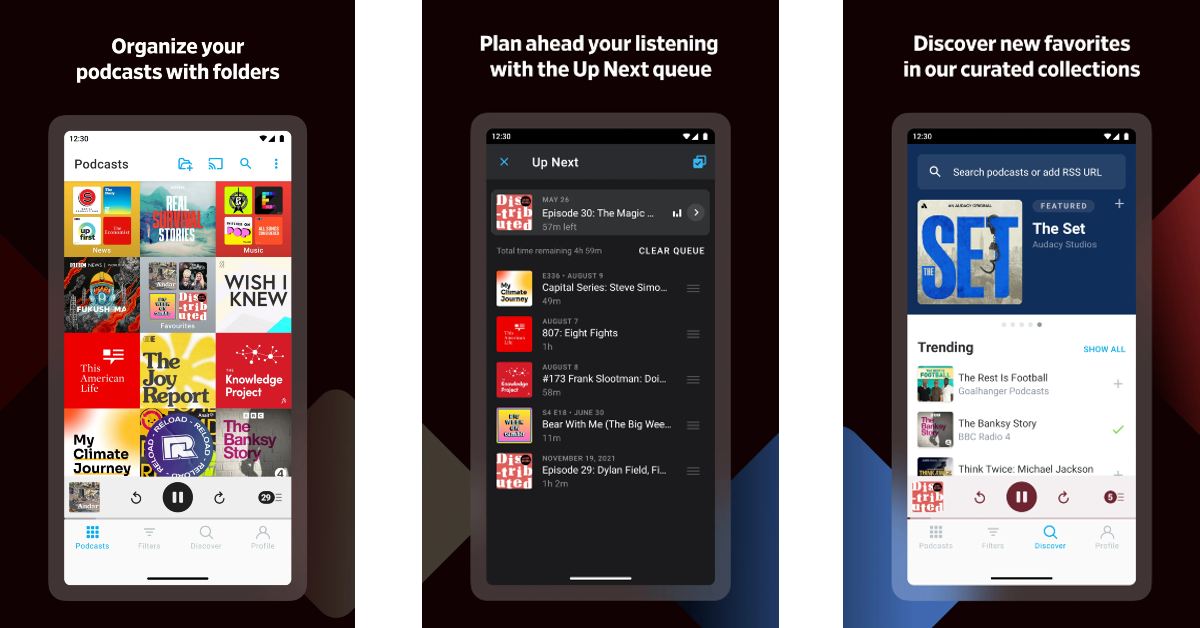 If you like listening to podcasts at work or during your commute, you should give Pocket Casts a try. This podcast player makes it easy to skip ads and skip forward with just a few taps. It also has a very handy sleep timer that shuts the app after a certain period of inactivity. If you are a speed listener, you can use this app to control the playback speed and trim all the pauses and silent periods from the podcast. Lastly, Pocket Casts implements the Material design philosophy which makes it very easy on the eyes.
Read Also: App updates stuck on pending? Try these 7 fixes
If you like listening to podcasts at work or during your commute, you should give Pocket Casts a try. This podcast player makes it easy to skip ads and skip forward with just a few taps. It also has a very handy sleep timer that shuts the app after a certain period of inactivity. If you are a speed listener, you can use this app to control the playback speed and trim all the pauses and silent periods from the podcast. Lastly, Pocket Casts implements the Material design philosophy which makes it very easy on the eyes.
Read Also: App updates stuck on pending? Try these 7 fixes

 The price of the OnePlus Buds 3 has also been tipped ahead of the January 23 launch. The audio device is likely to come with a price tag of Rs 10,499.
The gadgets will be available for purchase on OnePlus.in, Amazon, and retail stores across the country as soon as they are officially released.
The price of the OnePlus Buds 3 has also been tipped ahead of the January 23 launch. The audio device is likely to come with a price tag of Rs 10,499.
The gadgets will be available for purchase on OnePlus.in, Amazon, and retail stores across the country as soon as they are officially released.
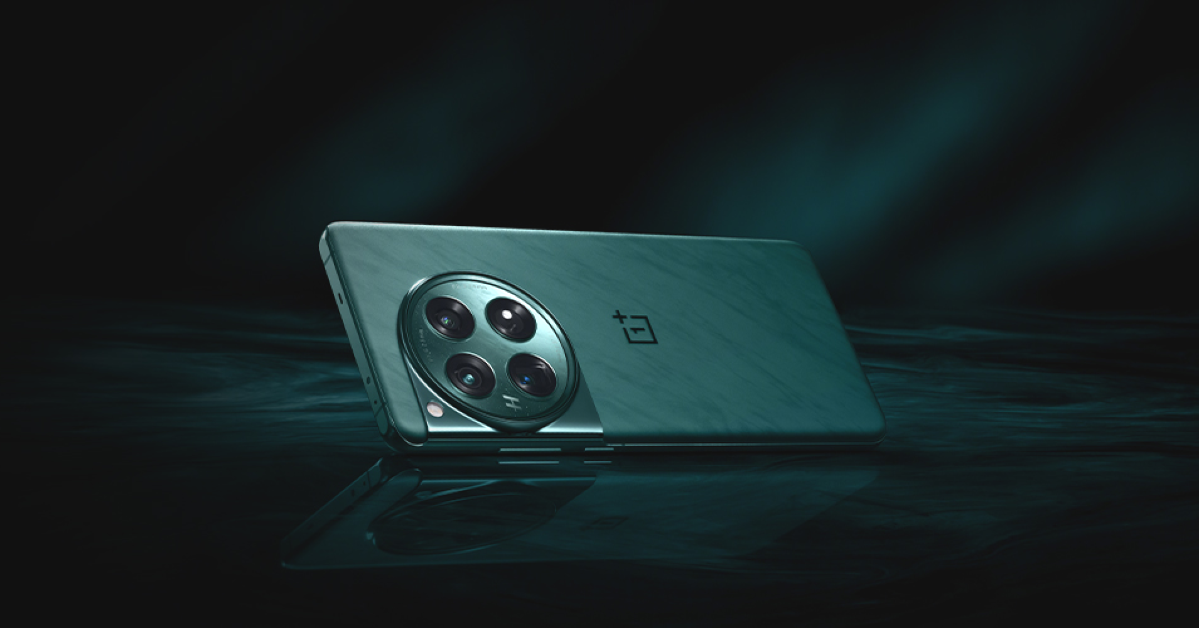 OnePlus 12R is targeted at gamers and is a successor of the OnePlus 11R. The device will be available in two colour options Cool Blue and Iron Gray. The Cool Blue has a glossy finish with a light, fresh appearance, while Iron Gray has a matte feel to give a sophisticated and strong feeling. The gaming smartphone will also feature a similar coloured matte metal frame giving a more premium feel. OnePlus 12R has the iconic OnePlus Alert Slider located in its new home on the left of the phone.
Also Read: Samsung Galaxy S24 series in India received 2.5 lakh pre-orders in India in just three days
OnePlus has officially revealed that the OnePlus Buds 3 will offer 44 hours of playback time. With a quick charge of 10 minutes, it will deliver 7 hours of battery life.
Apart from this, the device will be offered in two colour options- Metallic Grey and Splendid Blue. The specs of the OnePlus Buds 3 India model is expected to be similar to Chinese variants.
OnePlus 12R is targeted at gamers and is a successor of the OnePlus 11R. The device will be available in two colour options Cool Blue and Iron Gray. The Cool Blue has a glossy finish with a light, fresh appearance, while Iron Gray has a matte feel to give a sophisticated and strong feeling. The gaming smartphone will also feature a similar coloured matte metal frame giving a more premium feel. OnePlus 12R has the iconic OnePlus Alert Slider located in its new home on the left of the phone.
Also Read: Samsung Galaxy S24 series in India received 2.5 lakh pre-orders in India in just three days
OnePlus has officially revealed that the OnePlus Buds 3 will offer 44 hours of playback time. With a quick charge of 10 minutes, it will deliver 7 hours of battery life.
Apart from this, the device will be offered in two colour options- Metallic Grey and Splendid Blue. The specs of the OnePlus Buds 3 India model is expected to be similar to Chinese variants. 

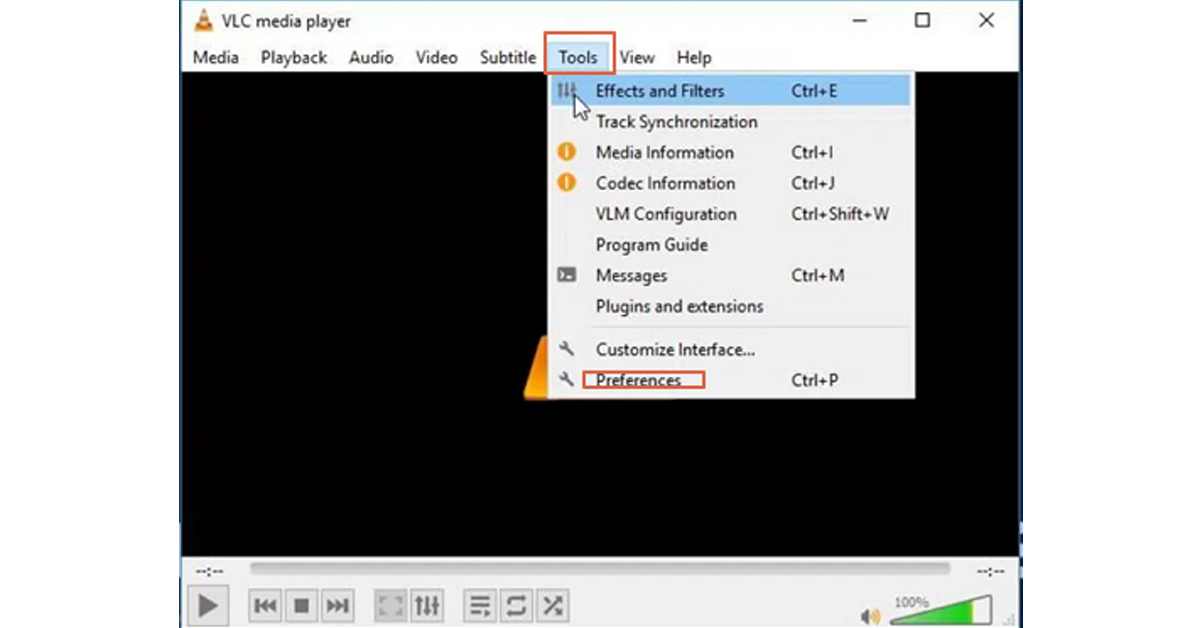
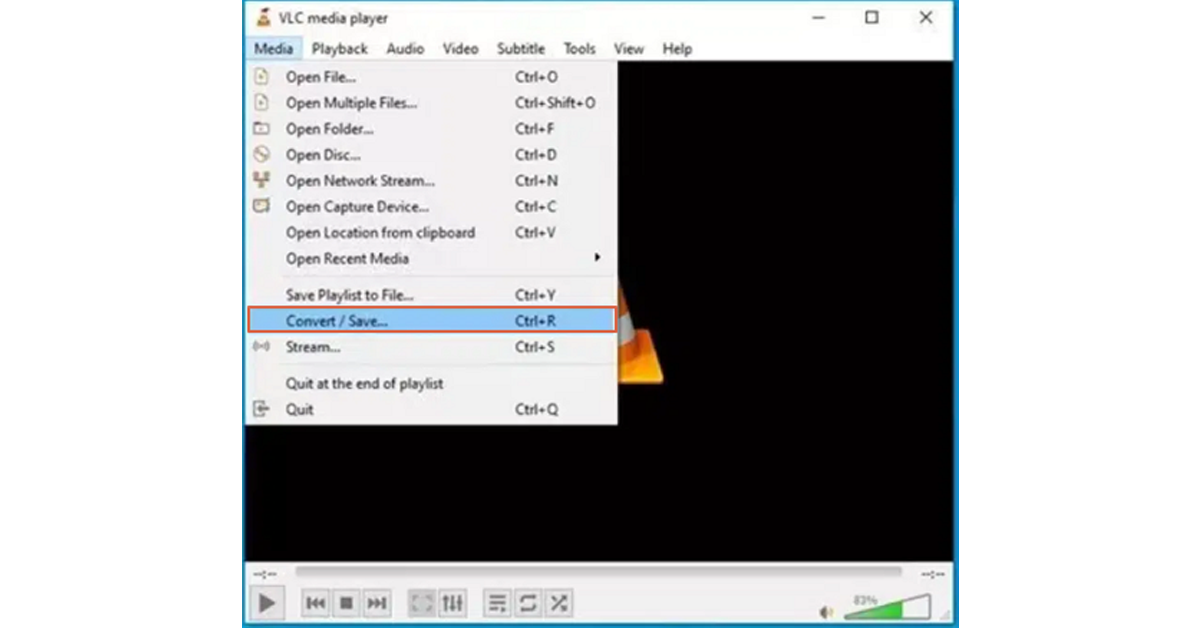 Step 2. In the next screen, choose a destination folder and tap the “Start” button. Proceed to Tools>Preferences.
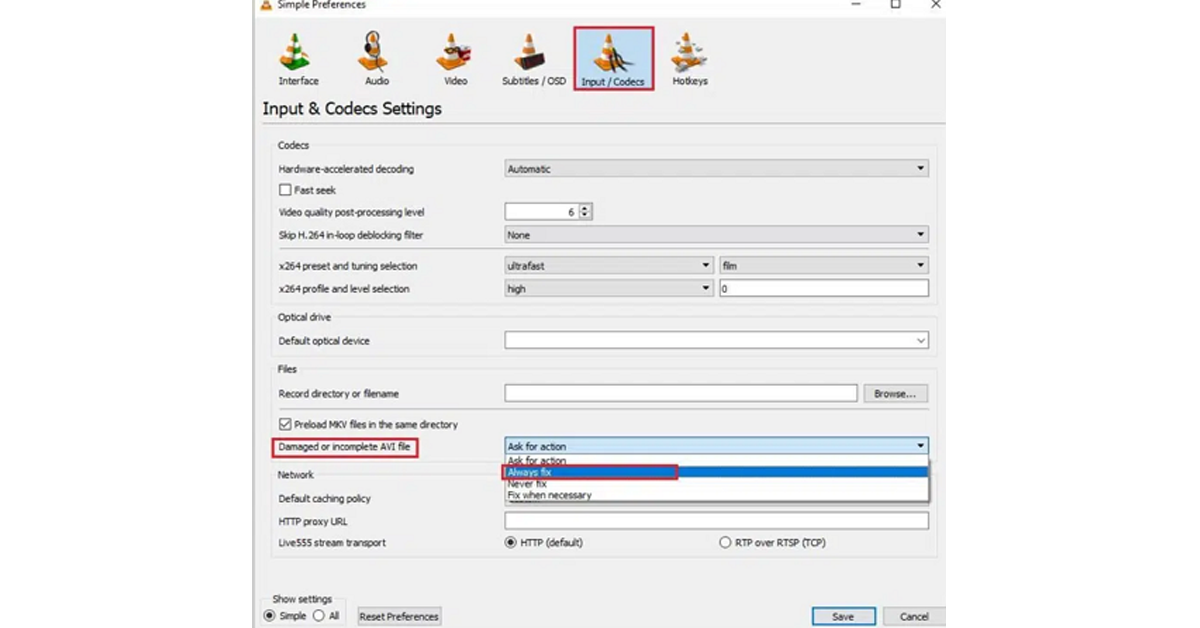
 Step 3. In the subsequent Preferences window, choose the “Always Fix” option beside the “Damaged or Incomplete AVI”. Finally, hit “Save” to save your repair file.
 Play the file to see whether it is repaired or not.
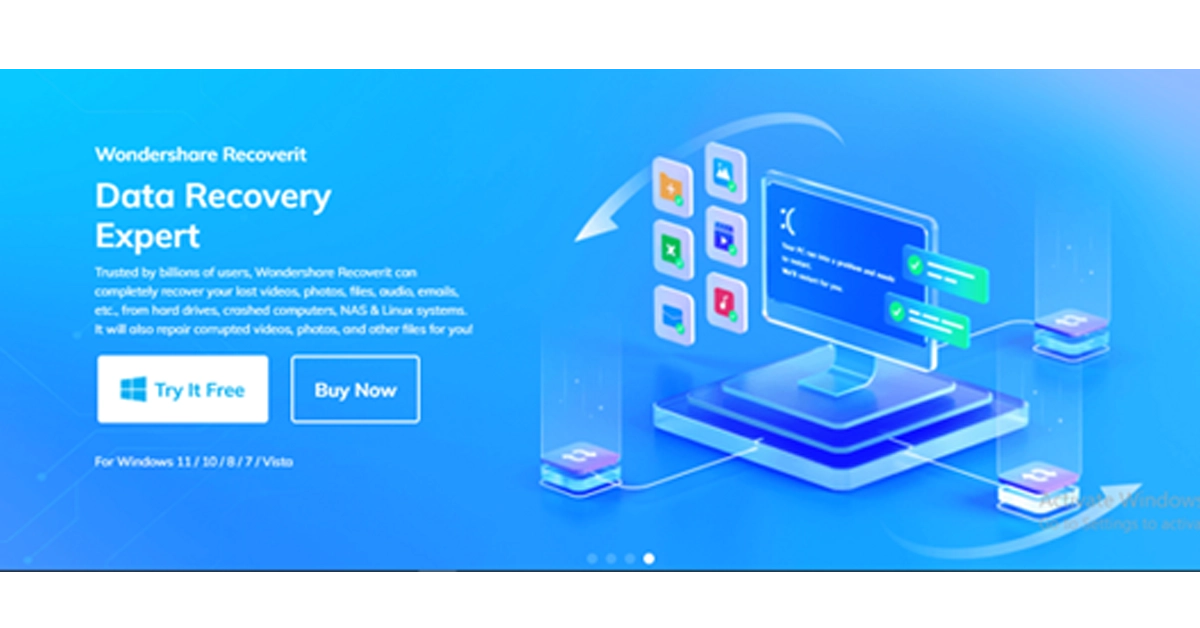 Unlike other tools, Wondershare Recoverit Enhanced Video Recovery can search and recover inconsistent video fragments and restore them with enhanced video quality! The beauty of Wondershare Recoverit Enhanced Video Recovery is that it supports the recovery of myriads of video formats, is easy to use, is compatible with popular systems, and boosts amazing recovery success.
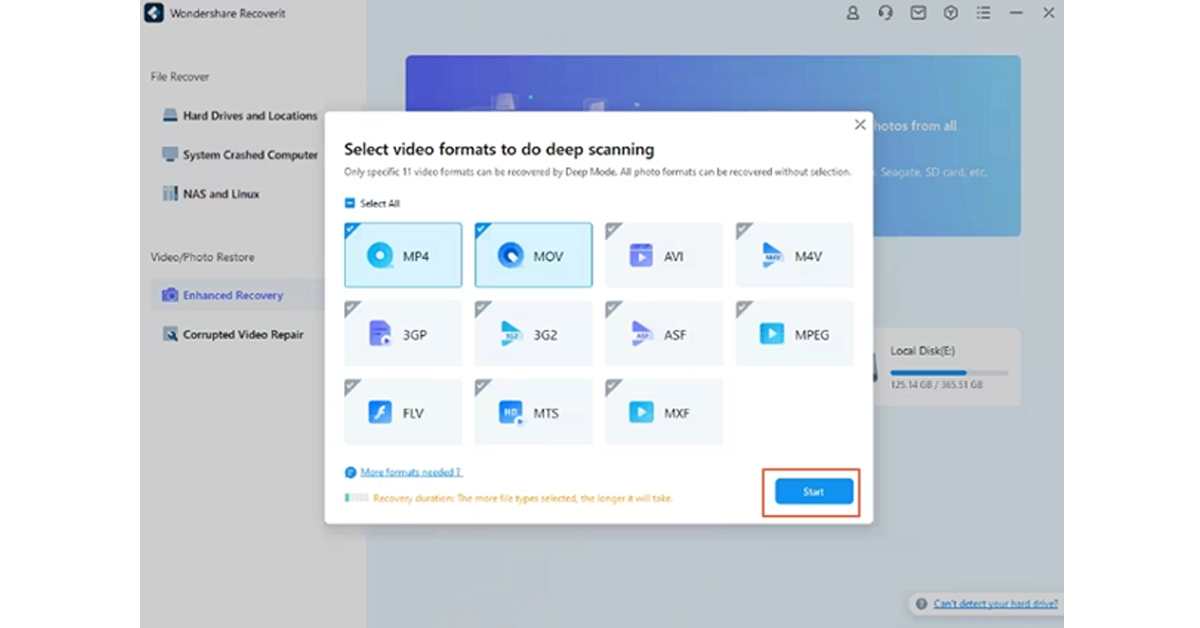
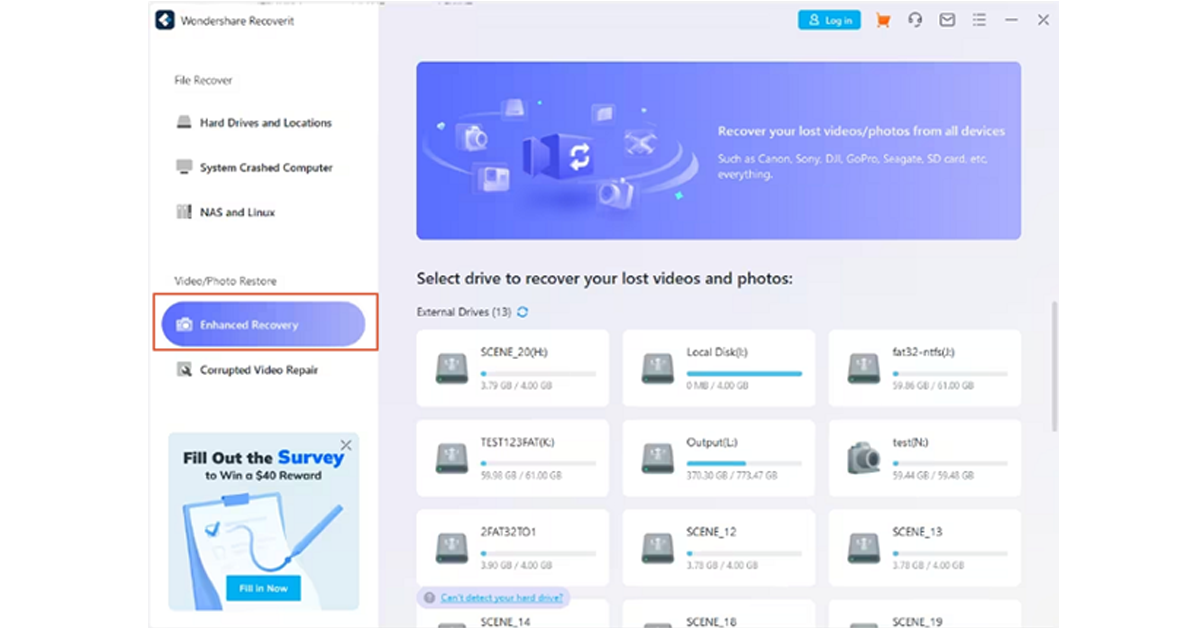 Step 2. Once you choose the desired disk, Wondershare Recoverit will ask you to select the video format. You can select more than one video format and click the “Start” button to allow the program to initiate the deep scan process.
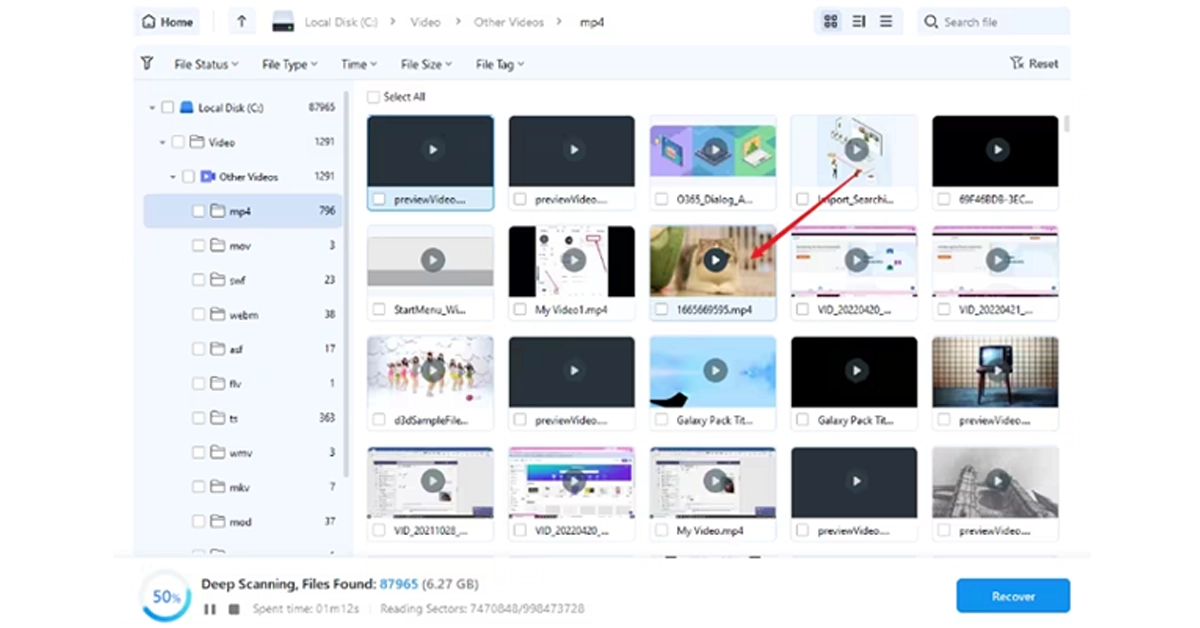
 Step 3. When the deep scan is completed, you should see the list of video files recovered. You can click the “Preview” button to confirm whether your unplayable or inaccessible videos have been recovered.
 Step 4. Finally, select these videos and hit the “Recover” button. This will open a new window on your computer to allow you to save the recovered files. Make sure you choose a convenient and safe location.

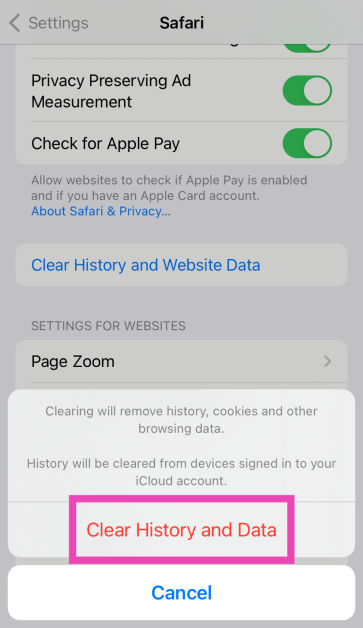
 Step 2: Scroll down and tap on Clear History and Website Data.
 Step 3: Confirm your selection in the popup box.
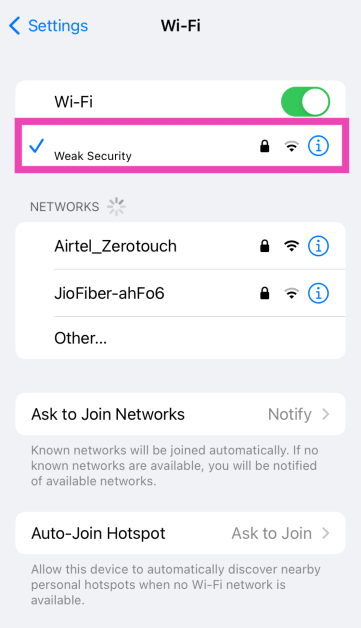
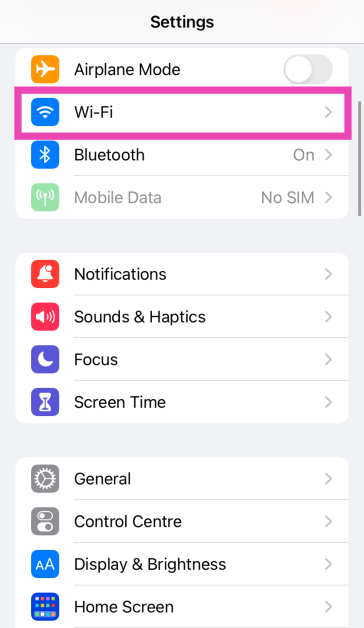 Step 2: Hit the i icon next to the connected WiFi network.
 Step 3: Tap on Configure DNS.
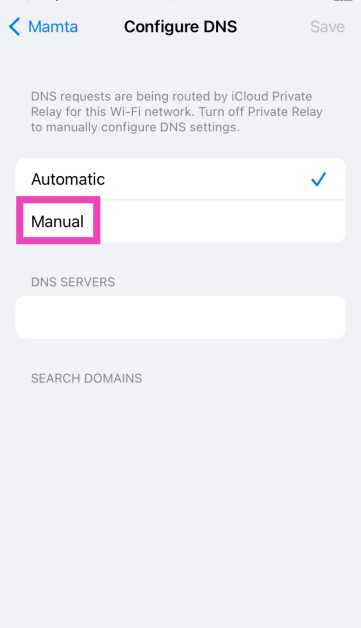
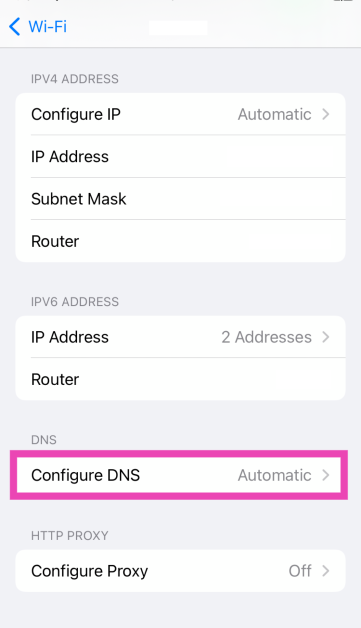 Step 4: Select Manual.
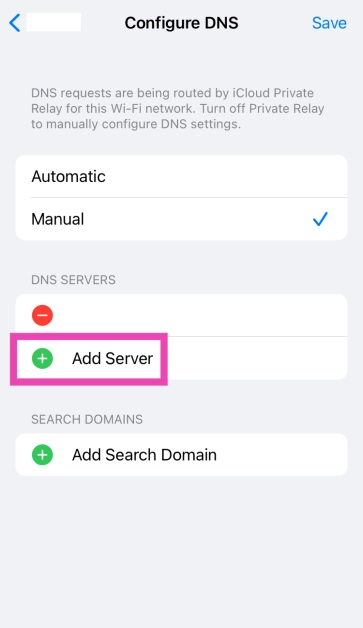
 Step 5: Tap on Add Server.
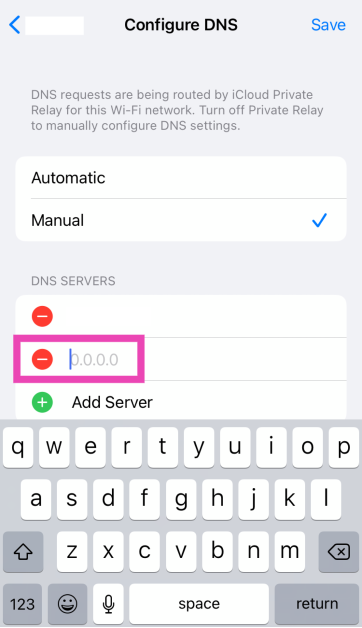
 Step 6: Enter the address of your preferred server.
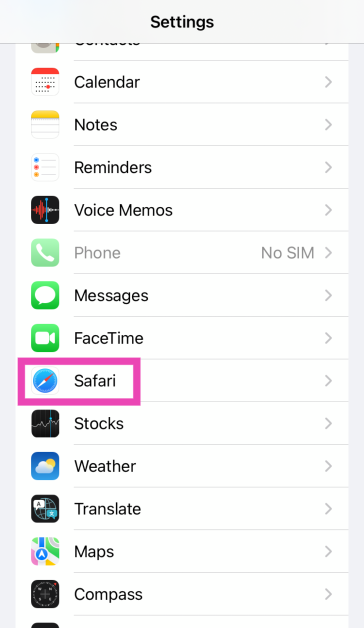
 The Private Browsing tab in Safari can circumvent local cache and DNS issues. If you’re having trouble loading a web page on the browser, switch to the private tab to resolve the issue. Tap the Tabs icon in the bottom right corner of the screen and switch to the Private tab. Once you’re in Private mode, open a new tab and load the web page again.
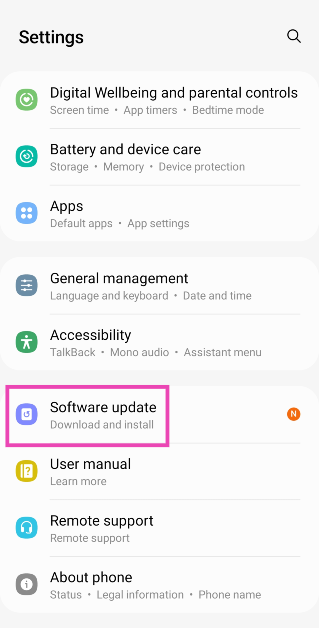
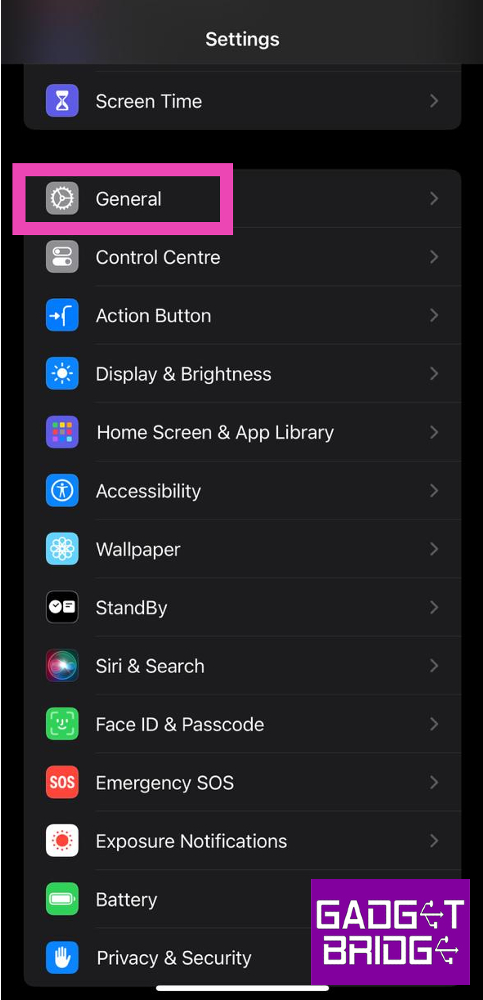 Step 3: Select Software Update.
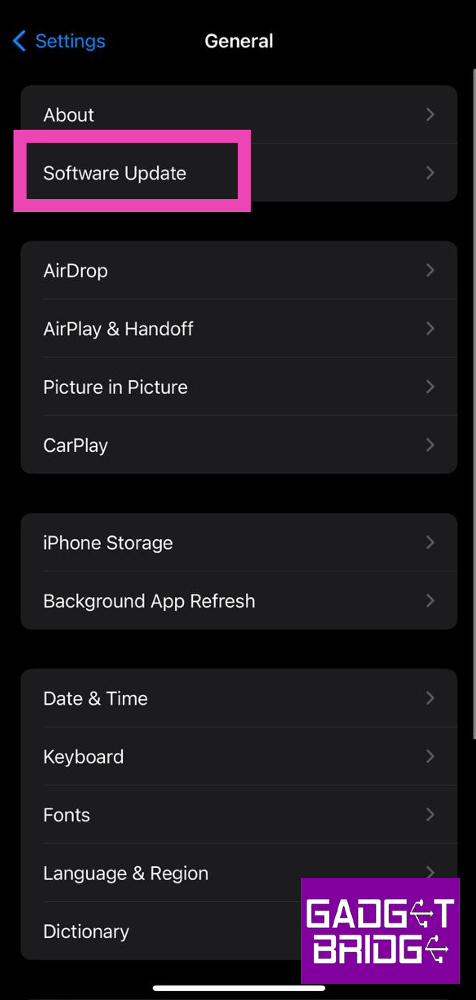 Step 4: Tap on Download and Install.


 The T08 mini projector has dimensions of 4.69 x 5.28 x 8.6 inches. Its tube-like design makes it easy to tuck away in your luggage or backpack while travelling. The circular platform uses two hinges to hold the device. Adjusting the position of the projector requires no effort whatsoever. The front and rear ends of the projector are covered with a mesh grille. The area surrounding the lens up front is used as an air inlet. The fan at the rear expels the warm air out of the device. Even when it is running at full force, the sound created by this fan does not amount to a distraction.
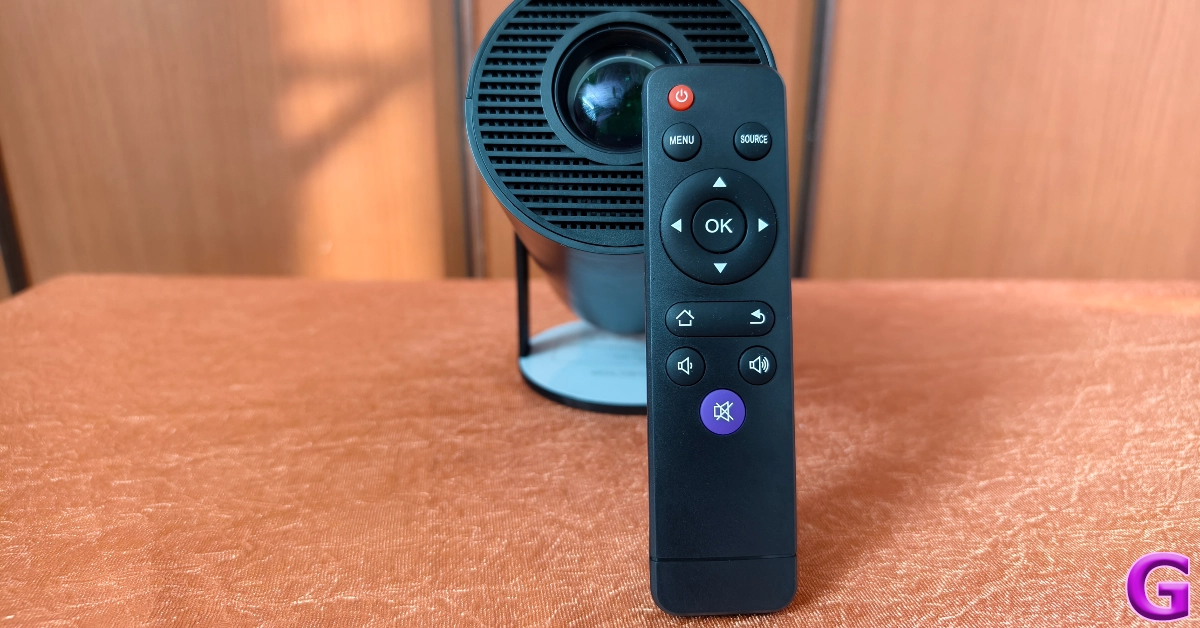
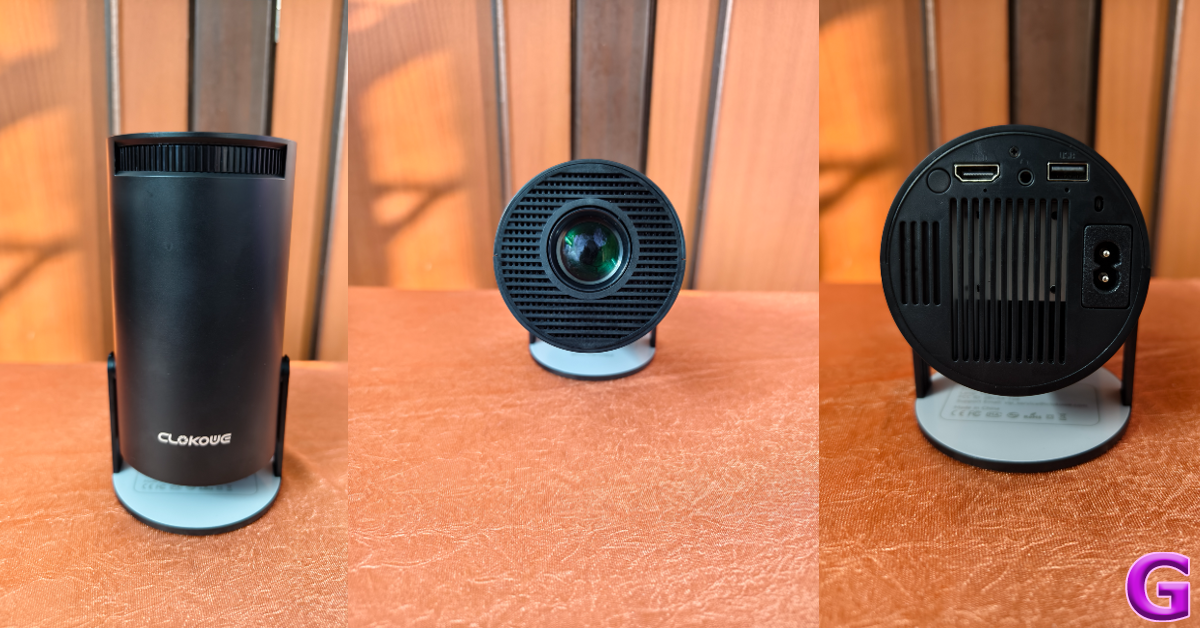 The rear panel of the projector houses the power button, an HDMI port, a 3.5mm headphone port, a USB port, and the power input. There are no media controls on the projector. The only way to control the playback is through the remote. A 3W speaker is integrated into the device, and you can also pair it with your home speaker via a 3.5mm headphone jack (not included in the box) or a Bluetooth connection. There is a scroll wheel up top to focus the image on the screen.
 Once propped up on a flat surface, the Clokowe T08 mini projector can be rotated up to 180 degrees. Automatic keystone correction ensures that you always get a rectangular picture on the screen. If you’re feeling adventurous, you can even point the projector to the ceiling. The build of the device is all plastic but it does not feel flimsy at all. Weighing just over 500 grams, you can easily carry it around with you. Even though we didn’t test it for any falls, the device can take a few knocks.
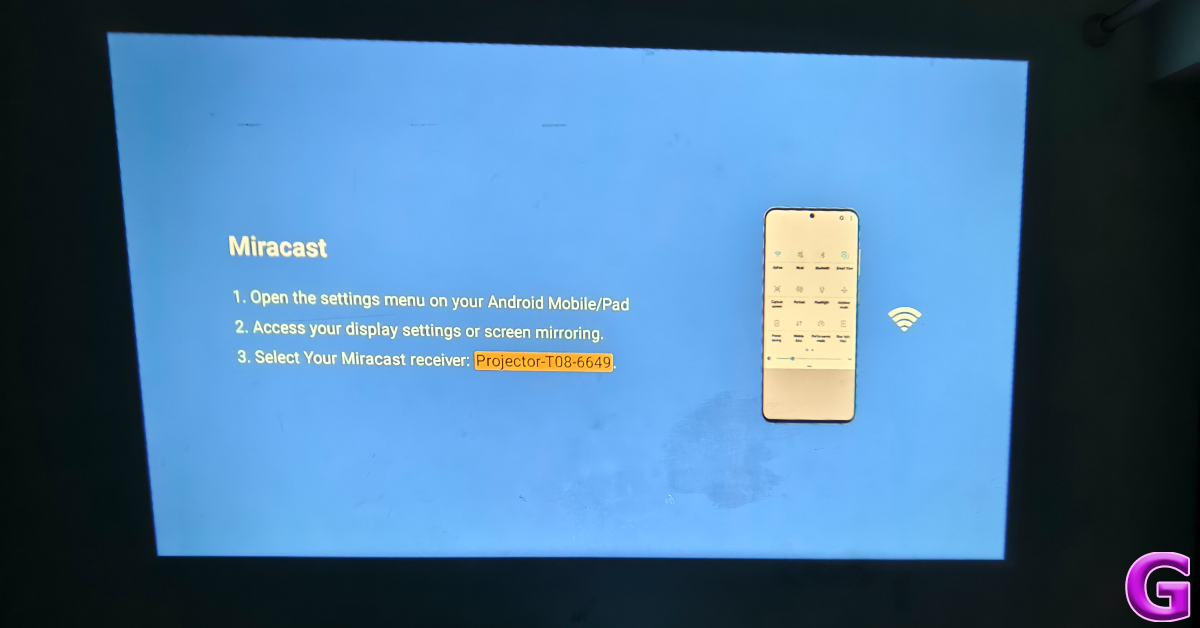
 There are three ways you can go about connecting the projector to your device. The easiest is an HDMI connection using the cable provided in the box. If your device does not have an HDMI port, you can wirelessly cast its display using Miracast (Android), AirPlay (iOS), or DLNA (Windows). Lastly, you can connect a USB drive directly to the projector and play the content within it.
Screen mirroring from your Android/iOS/Windows device requires connecting the projector to your home WiFi network first. The Bluetooth connection only supports audio output and not video input. The projector’s interface is simple and accessible, making it easy for the user to connect their device and carry out the basic functions.
There are three ways you can go about connecting the projector to your device. The easiest is an HDMI connection using the cable provided in the box. If your device does not have an HDMI port, you can wirelessly cast its display using Miracast (Android), AirPlay (iOS), or DLNA (Windows). Lastly, you can connect a USB drive directly to the projector and play the content within it.
Screen mirroring from your Android/iOS/Windows device requires connecting the projector to your home WiFi network first. The Bluetooth connection only supports audio output and not video input. The projector’s interface is simple and accessible, making it easy for the user to connect their device and carry out the basic functions.
 The Clokowe T08 offers a maximum projection display size of 200 inches, but while reviewing the device, we found a 100-inch display size to be ideal. The picture quality loses some detail when you push the display size to 200 inches. Once you have placed the projector at an optimum display from the screen, you can use its manual scroll wheel to focus the image.
The native resolution on offer here is 720p. While it is a far cry from 4K resolution, we were happy with the image quality, especially when you take the price of the projector into account.
The Clokowe T08 offers a maximum projection display size of 200 inches, but while reviewing the device, we found a 100-inch display size to be ideal. The picture quality loses some detail when you push the display size to 200 inches. Once you have placed the projector at an optimum display from the screen, you can use its manual scroll wheel to focus the image.
The native resolution on offer here is 720p. While it is a far cry from 4K resolution, we were happy with the image quality, especially when you take the price of the projector into account.
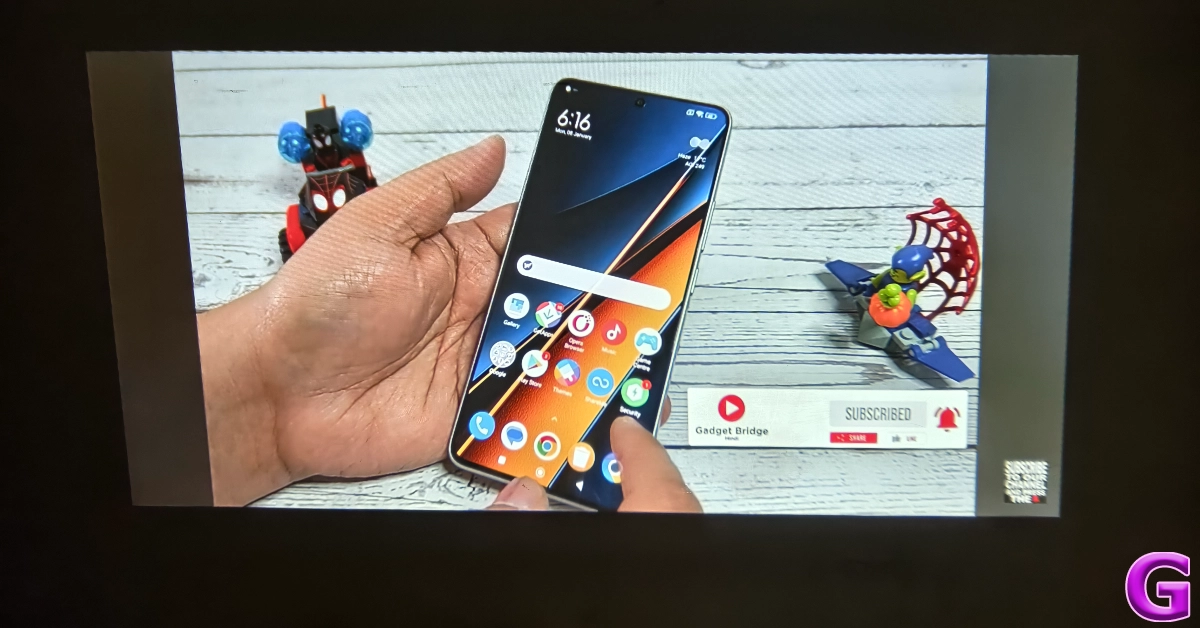
 The colour richness and contrast levels produced by the projector were very good. We did notice a little blurriness around the edges, but it did not prove to be a distraction while watching videos. We were quite surprised by the lack of any perceptible latency. After playing a couple of Call of Duty Mobile sessions, were happy with how the T08 performed.
 The 3W speaker on the projector is certainly not up to the task, but given it is a portable projector, we can let this one slide. The audio output is coarse and low in intensity. Luckily, you can connect your headphones or speakers using a 3.5mm audio jack or a wireless Bluetooth connection. It goes without saying, but you need to create a pitch-dark environment to enjoy the footage projected by this device. The image brightness isn’t powerful enough to overcome the daylight seeping in through a window.
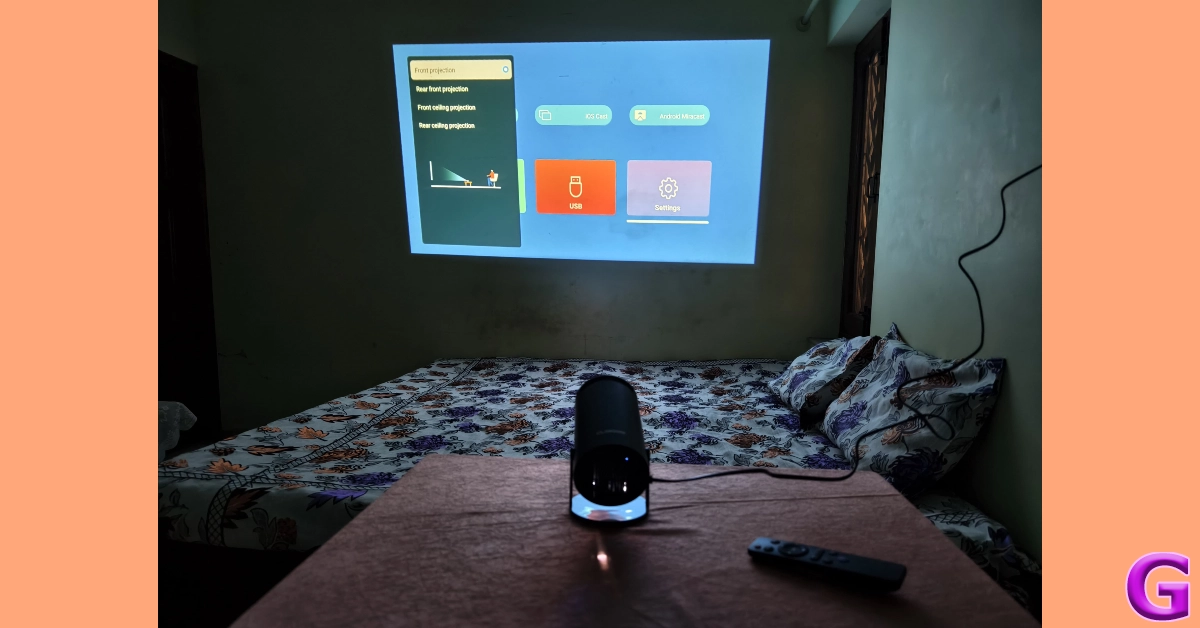
 As we mentioned earlier, the Clokowe T08 offers automatic keystone correction, which means no matter the angle of the projector, it will cast a perfect rectangle display on the screen. You can also manually control the keystone from the device settings. The projector settings also let you change the aspect ratio and offer multiple projection modes.
Read Also: Capture Button on the iPhone 16 series likely to offer zoom adjustment
As we mentioned earlier, the Clokowe T08 offers automatic keystone correction, which means no matter the angle of the projector, it will cast a perfect rectangle display on the screen. You can also manually control the keystone from the device settings. The projector settings also let you change the aspect ratio and offer multiple projection modes.
Read Also: Capture Button on the iPhone 16 series likely to offer zoom adjustment

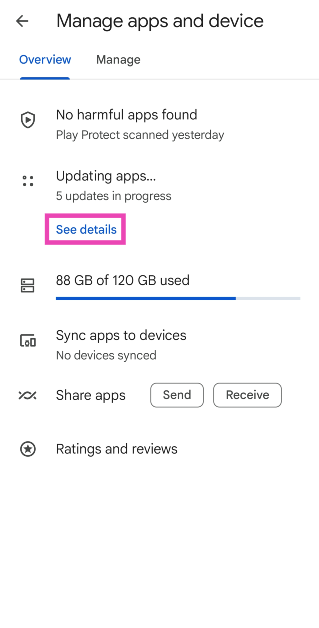
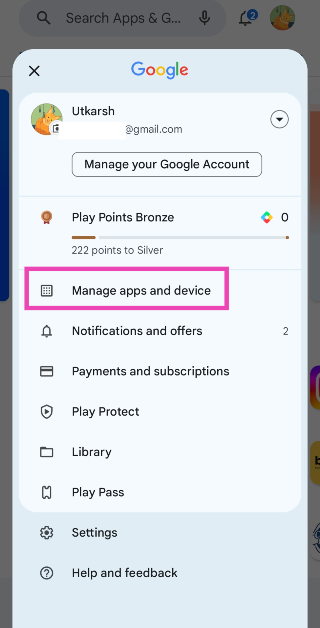 Step 3: Hit See details under Updating apps.
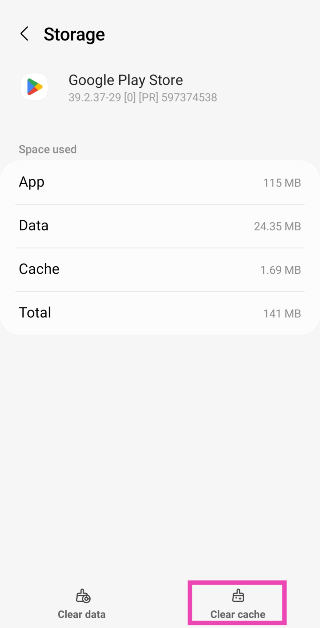
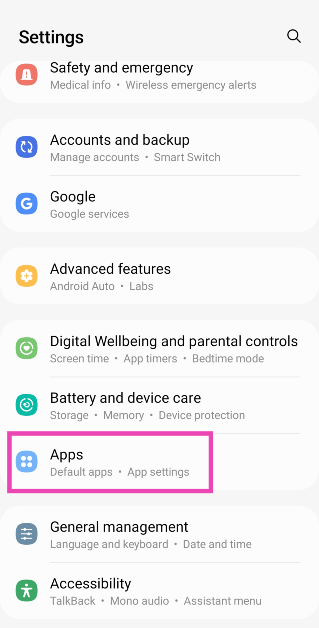 Step 2: Tap on Google Play Store.
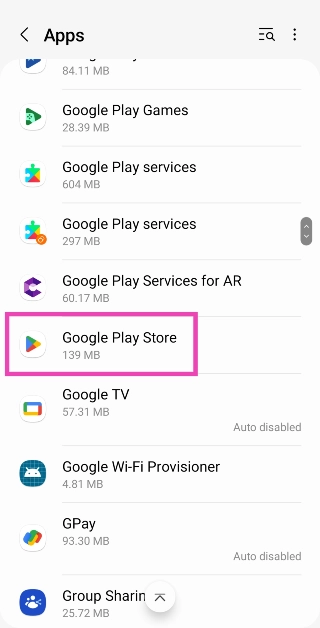 Step 3: Select Storage.
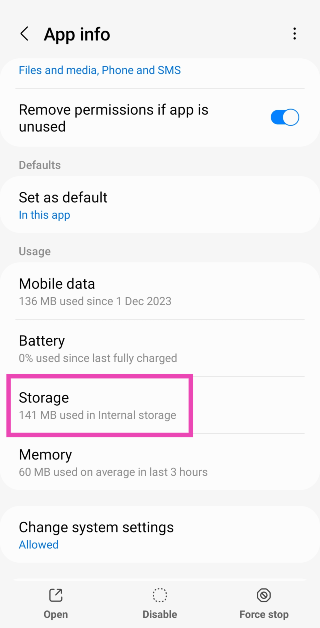 Step 4: Hit Clear Cache.
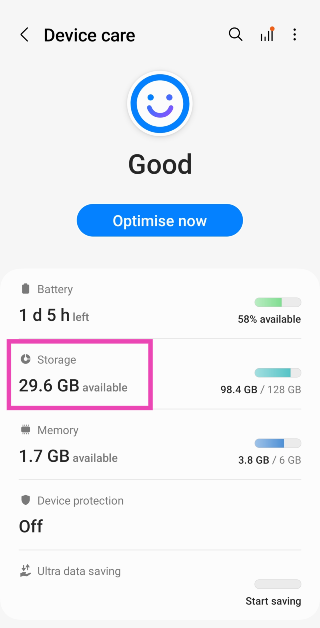
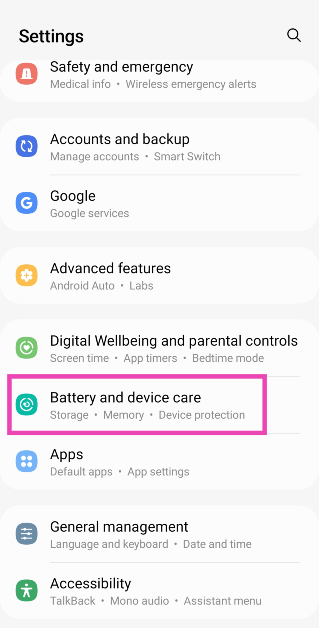 Step 2: Tap on Storage.
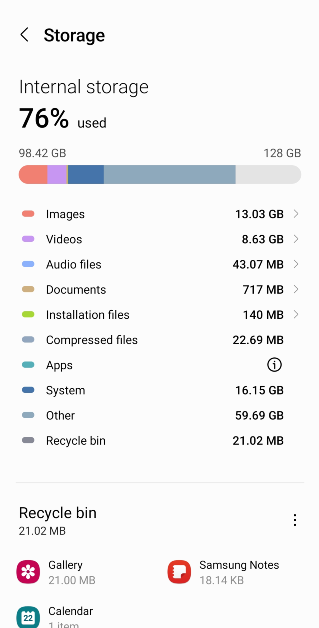
 Step 3: Go through the large files on your device and delete the ones you no longer use.
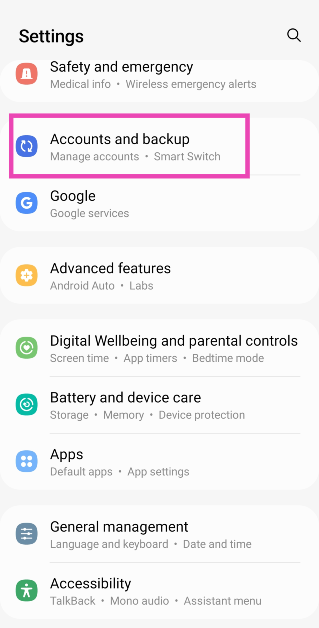 Step 2: Tap on Manage accounts.
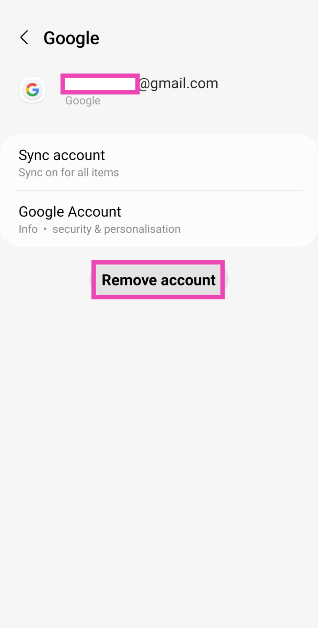
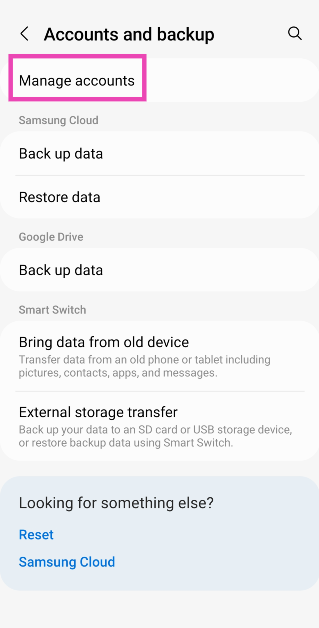 Step 3: Select your Google account.
 Step 4: Tap on Remove account.
 Step 5: Launch the Google Play Store app.
Step 6: Hit Sign in.
Step 7: Enter your Google account credentials and log in.
Step 3: Tap on Updating apps/See details.
Step 5: Launch the Google Play Store app.
Step 6: Hit Sign in.
Step 7: Enter your Google account credentials and log in.
Step 3: Tap on Updating apps/See details.
 Step 4: Select Cancel all or hit the cross sign next to the update you want to cancel.

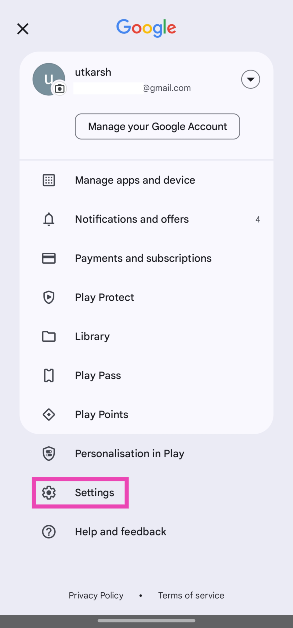
 Step 2: Tap on Settings.
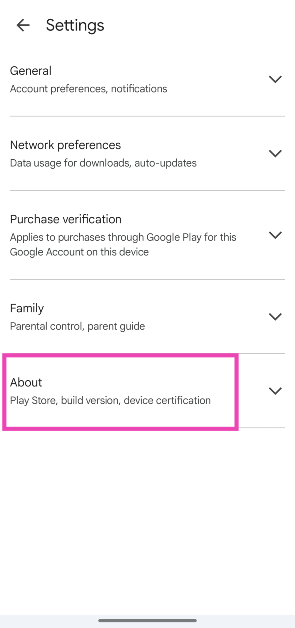
 Step 3: Tap on About.
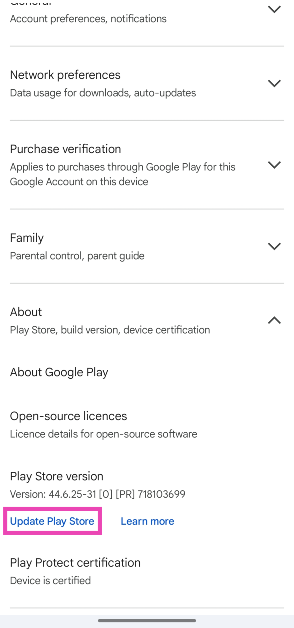
 Step 4: Hit Update Play Store.
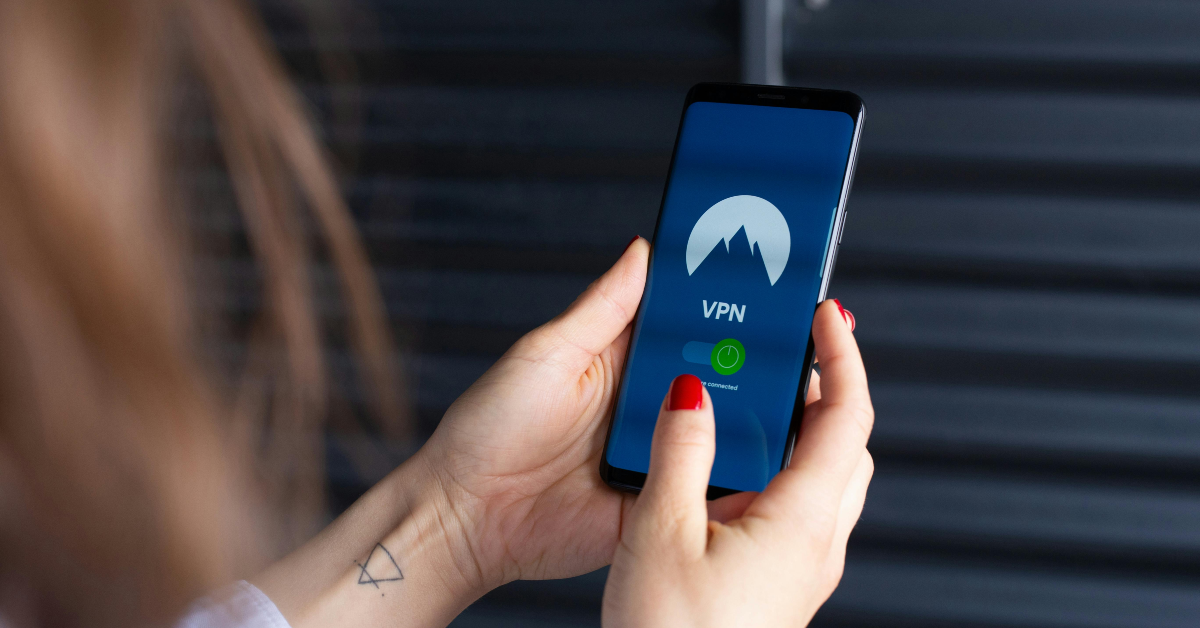 Sometimes, using a VPN to download and update apps can create unexpected issues. Apps that are geo-locked may not get updated if you are connected to a VPN server in a different location. This may cause the update to get stuck on pending. To fix this, launch the VPN app and hit ‘Disconnect’. Once the update is downloaded, connect the VPN again.
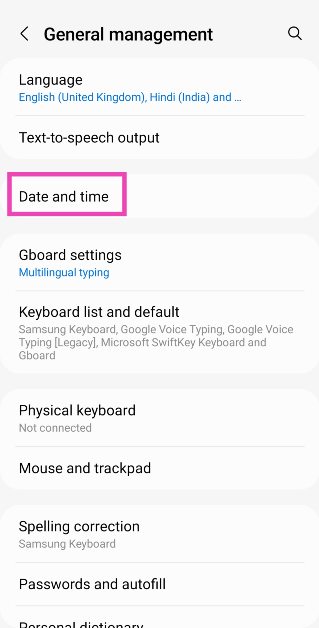
 Step 2: Tap on Date and time.
 Step 3: Turn on the toggle switch for Automatic date and time.

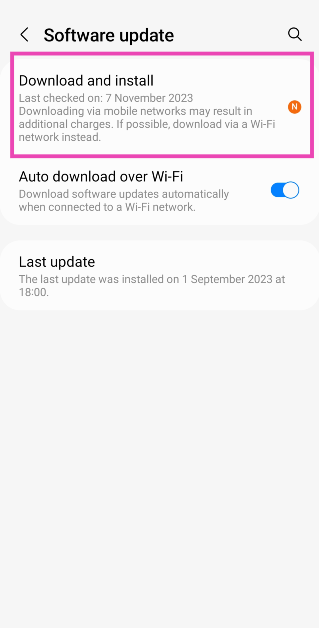
 Step 2: Tap on Download and install.
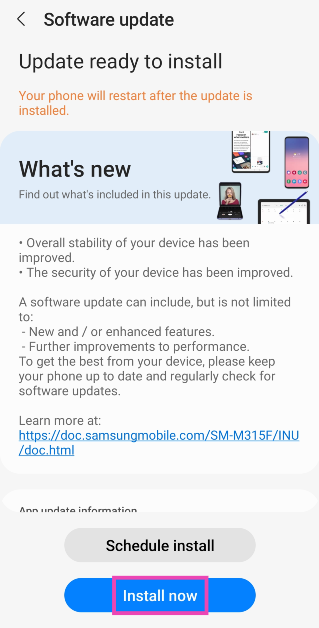
 Step 3: Select Install now.
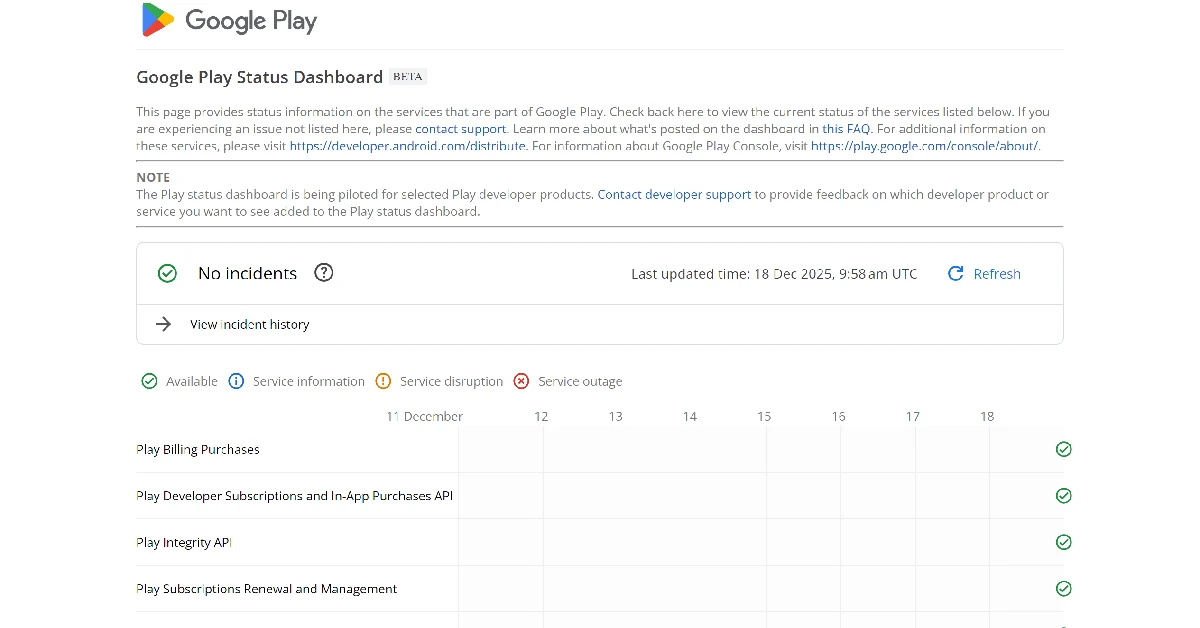 If none of the fixes mentioned above worked for you, it is highly probable that the Play Store is experiencing a server outage. Go to the Google Play Status Dashboard to confirm whether that is the case. While it does not mention the Play Store, you can get an idea of its server status by checking other Play services.


 Reportedly, Samsung will launch its next smartphone, the Galaxy XCover 7, in India soon. The device has been listed on the device support page in the country, suggesting an imminent launch.
In November last year, the phone was also spotted listed with a model number on the BIS certification site in the country. However, the phone was announced on January 10 in Korea and is confirmed to go on sale later this month.
Reportedly, Samsung will launch its next smartphone, the Galaxy XCover 7, in India soon. The device has been listed on the device support page in the country, suggesting an imminent launch.
In November last year, the phone was also spotted listed with a model number on the BIS certification site in the country. However, the phone was announced on January 10 in Korea and is confirmed to go on sale later this month.

 As per the pre-order page, the headset will now come in the following models:

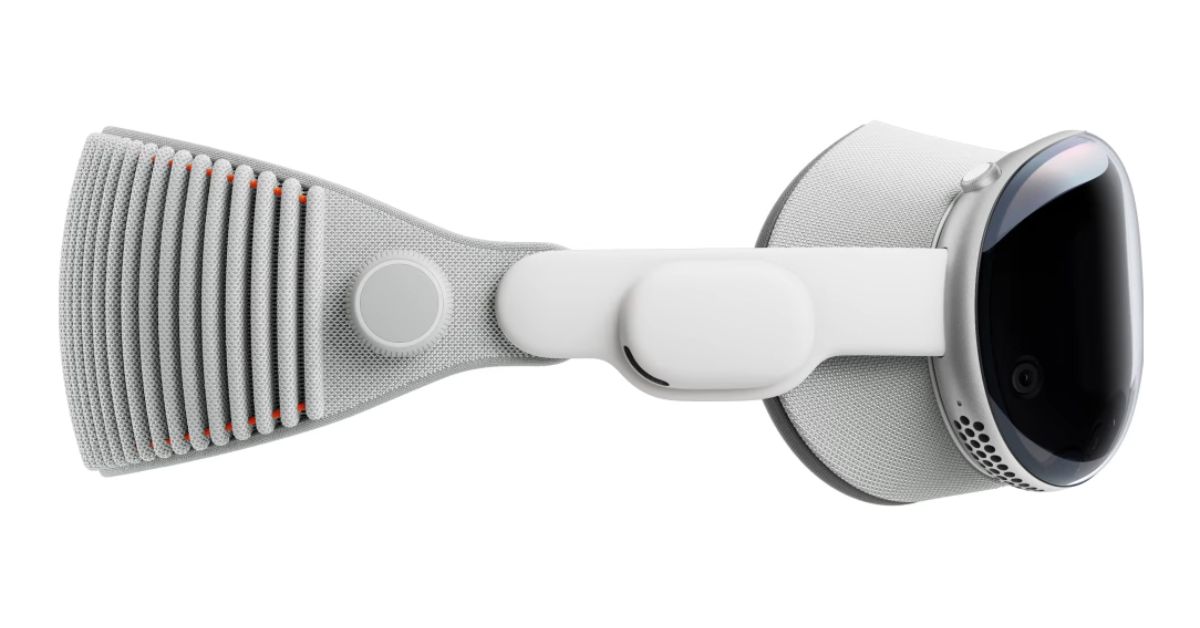 The Vision Pro’s external battery provides up to 2 hours of use and all-day use when plugged in. The Speakers produce rich Spatial Audio while keeping you aware of your surroundings while being close to your ears. The Apple Vision Pro features a custom micro‑OLED display system with 23 million pixels. To provide personalised sound and allow you to hear your surroundings, dual-driver audio pods are placed next to each ear. Vision Pro uses audio ray tracing to examine the acoustic characteristics of your room, including the actual materials. You can see the surroundings thanks to a pair of high-resolution cameras that transfer more than one billion pixels per second to the displays.
Also Read: Capture Button on the iPhone 16 series likely to offer zoom adjustment
It operates on VisionOS which supports amazing spatial experiences and is built on the framework of macOS, iOS, and iPadOS. It can be controlled with your eyes, hands, and voice. Simply glance at an element, tap your fingers collectively to select it, and then type using the on-screen keyboard or voice recognition.
The Vision Pro’s external battery provides up to 2 hours of use and all-day use when plugged in. The Speakers produce rich Spatial Audio while keeping you aware of your surroundings while being close to your ears. The Apple Vision Pro features a custom micro‑OLED display system with 23 million pixels. To provide personalised sound and allow you to hear your surroundings, dual-driver audio pods are placed next to each ear. Vision Pro uses audio ray tracing to examine the acoustic characteristics of your room, including the actual materials. You can see the surroundings thanks to a pair of high-resolution cameras that transfer more than one billion pixels per second to the displays.
Also Read: Capture Button on the iPhone 16 series likely to offer zoom adjustment
It operates on VisionOS which supports amazing spatial experiences and is built on the framework of macOS, iOS, and iPadOS. It can be controlled with your eyes, hands, and voice. Simply glance at an element, tap your fingers collectively to select it, and then type using the on-screen keyboard or voice recognition. 


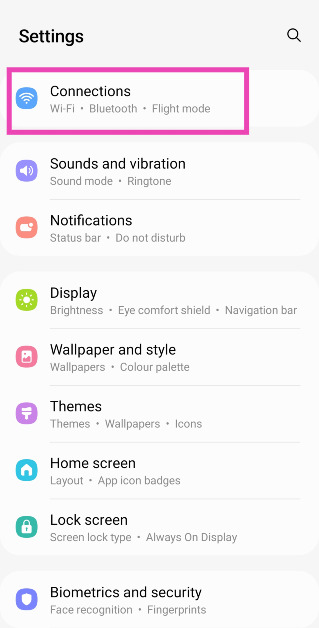 Step 2: Tap on SIM card manager.
 Step 3: This is where you’ll your SIM 1 and SIM 2 phone numbers.

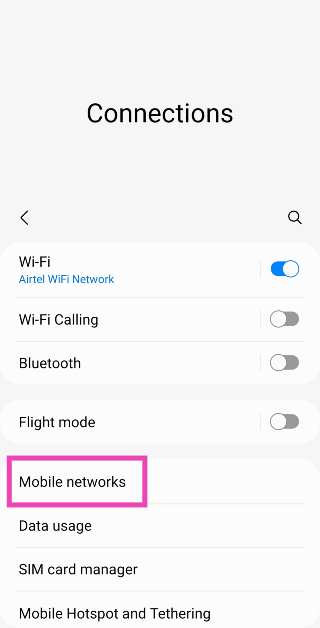
 Every network provider has a unique USSD code that lets you view your talk time and data balance. Once you dial this code, the resulting popup box contains all the major details related to your number. You can even recharge your number and view offers associated with it. At the top of this popup box, you will find your phone number. Here are the USSD codes from major network providers to view your number.
Airtel: *121#
Jio: *1#, *2#, or call 1299 to get a message with your number in it
Vi: *199#
Every network provider has a unique USSD code that lets you view your talk time and data balance. Once you dial this code, the resulting popup box contains all the major details related to your number. You can even recharge your number and view offers associated with it. At the top of this popup box, you will find your phone number. Here are the USSD codes from major network providers to view your number.
Airtel: *121#
Jio: *1#, *2#, or call 1299 to get a message with your number in it
Vi: *199#
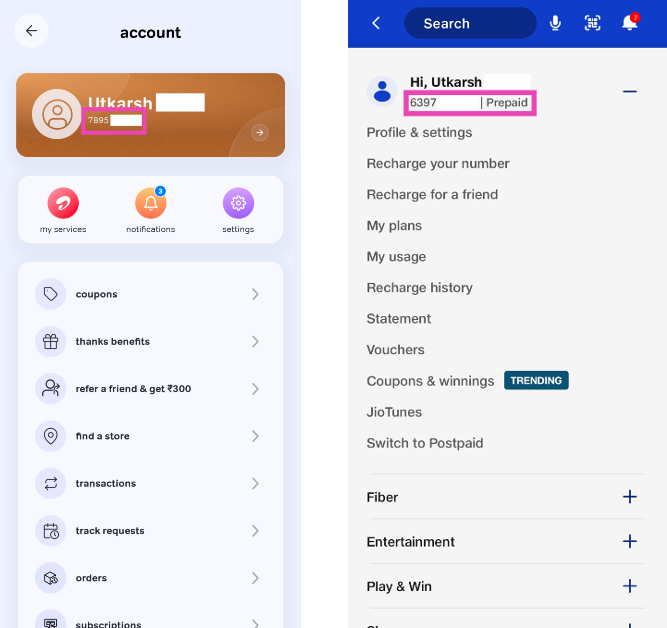 You can also find your phone number using the official app of your network provider. This app can also be used to recharge your phone, buy a data pack, and manage your account. Here’s what you need to do to find out your phone number. Airtel users have the Airtel Thanks app, while Jio subscribers can use MyJio to find their phone number. Upon launching the app, go to your profile to view your phone number.
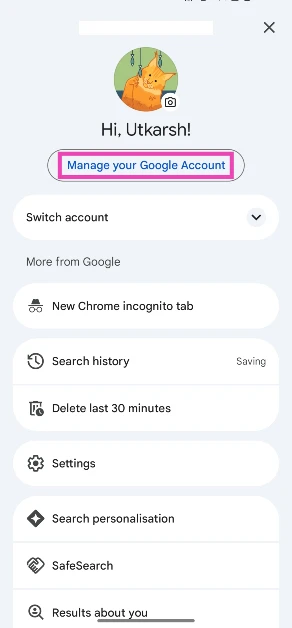
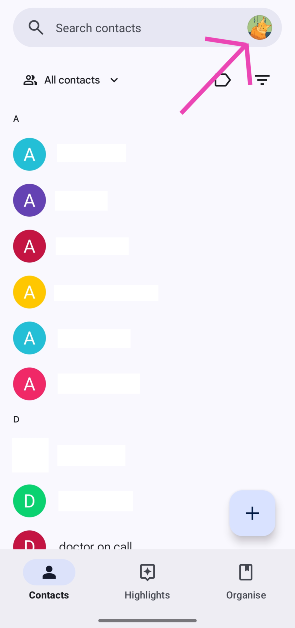
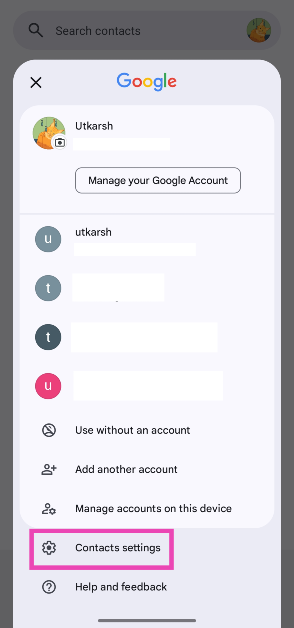
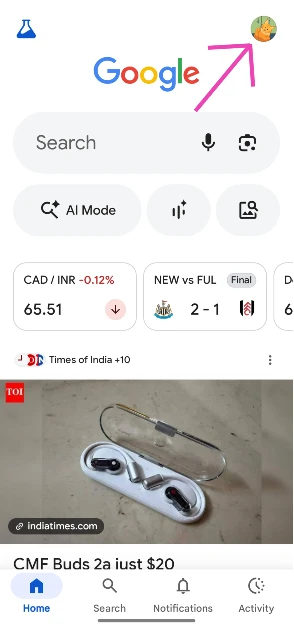 Step 3: Tap on Manage your Google Account.
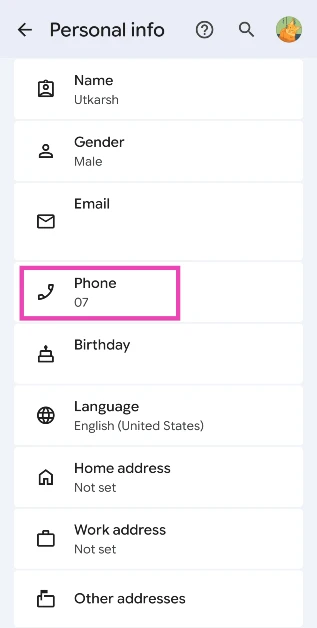
 Step 4: Go to Personal info.
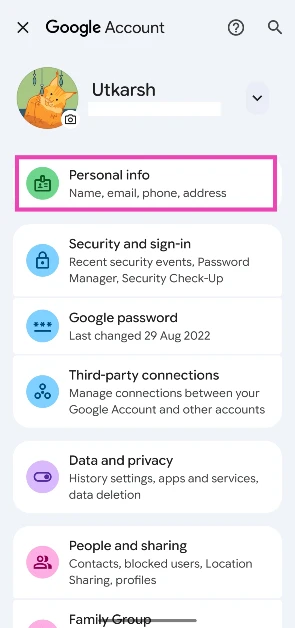 Step 5: Scroll down to the Phone section to view your phone number.
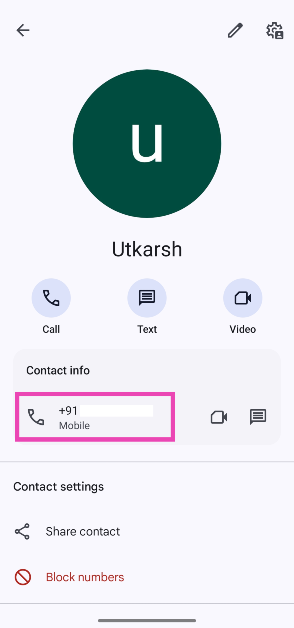
 Step 3: Tap on Your info.
 Step 4: Your phone number will be displayed under Contact Info.
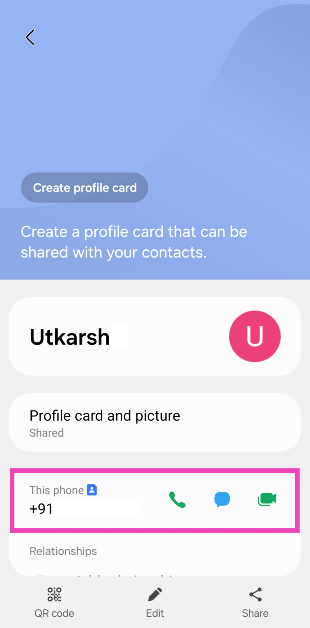
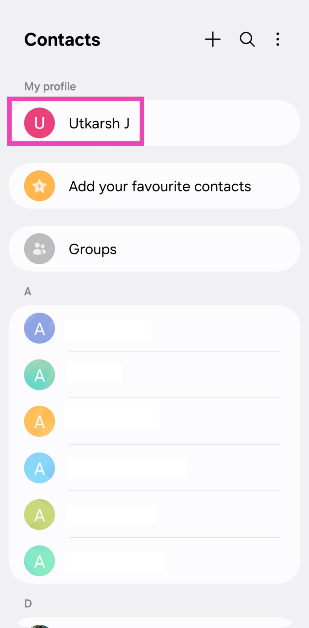 Step 3: Your phone number will be listed under This phone.


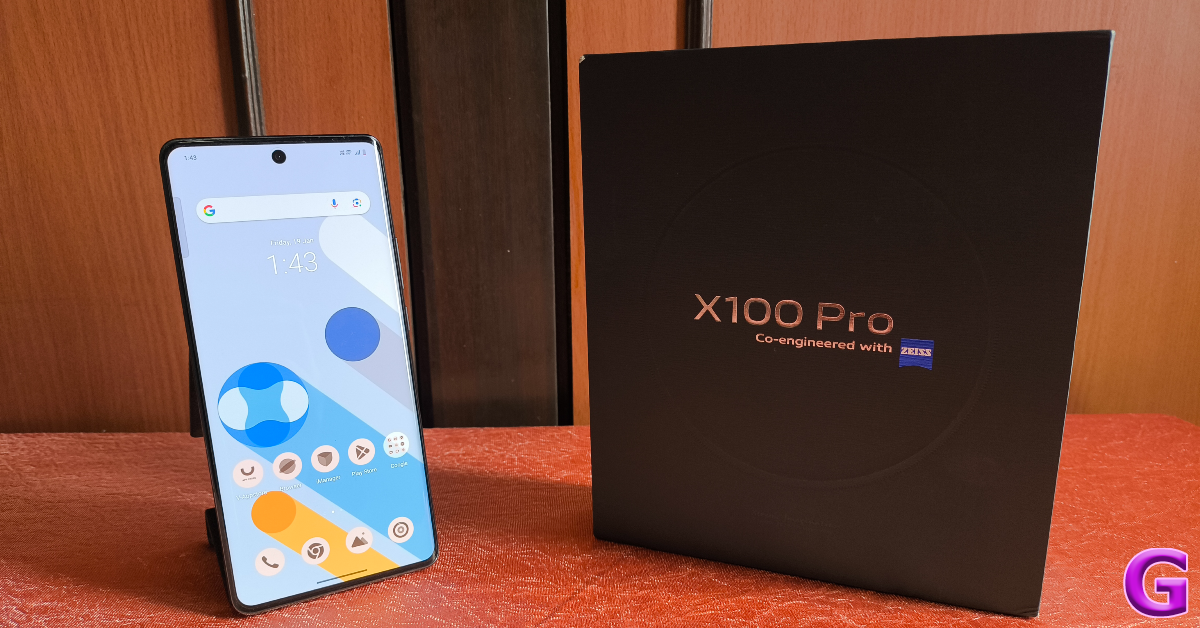
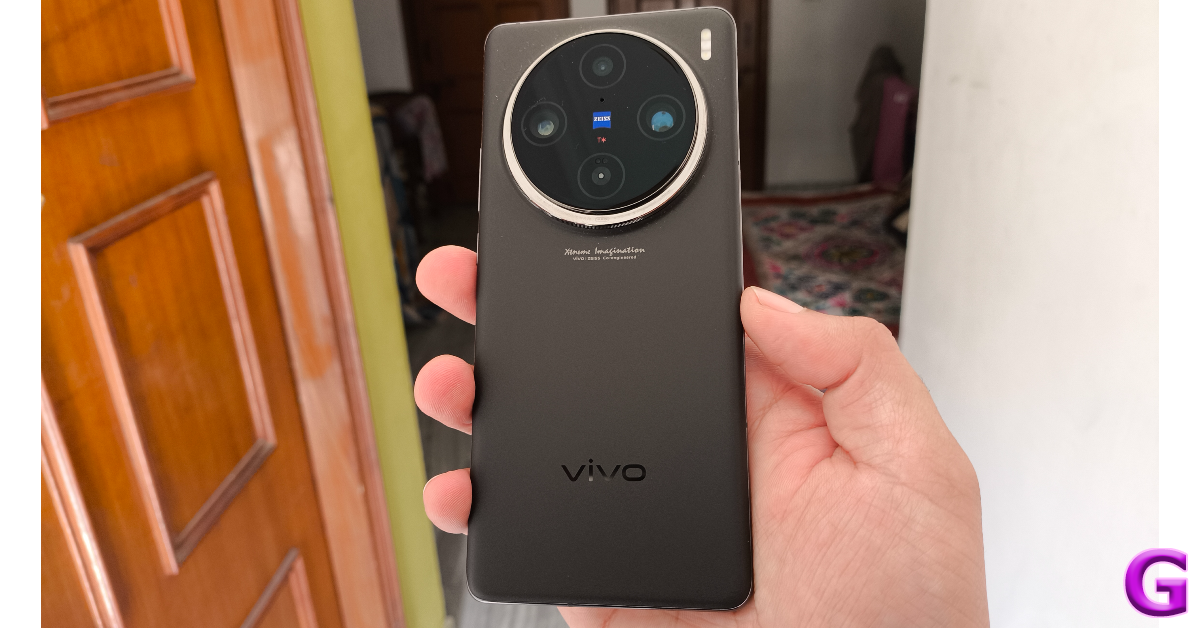
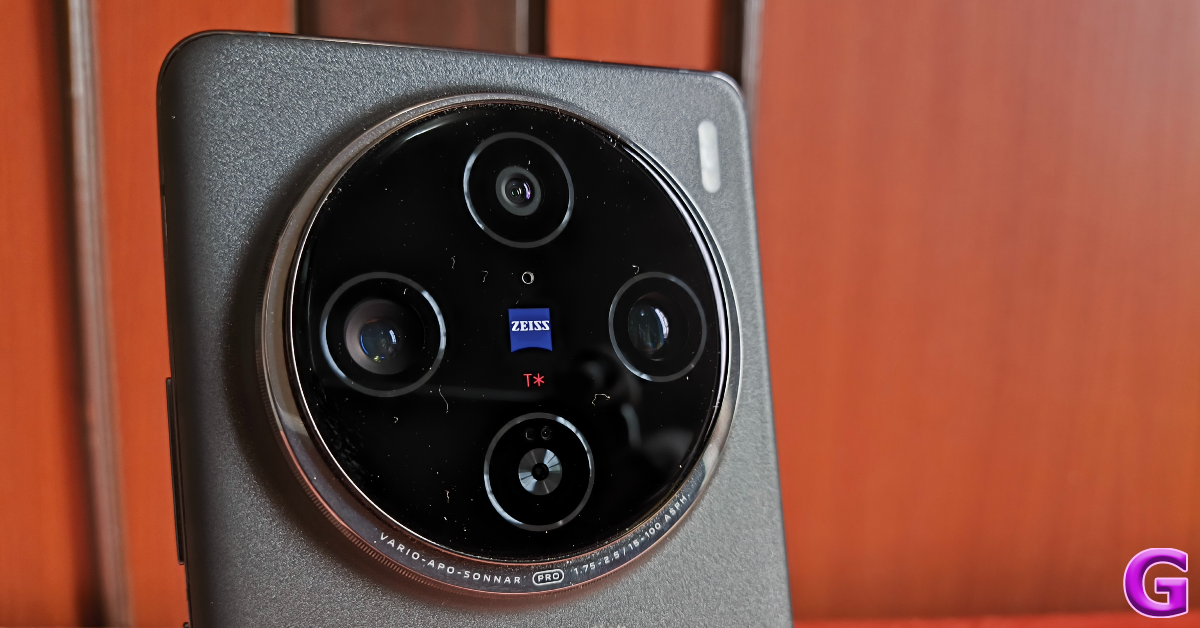 The circular camera cutout that made its debut in the Vivo X80 Pro has been perfected on the X100 Pro. Instead of being aligned to the left of the back panel, it is now positioned centrally. The Zeiss branding which was previously found on the side of the camera panel is now positioned within it. A stainless steel ring with a ridged perimeter forms the frame of the two-step cutout, giving the smartphone its distinct ‘camera’ look. This feels like the final form of the camera design, after two steady years of evolution.
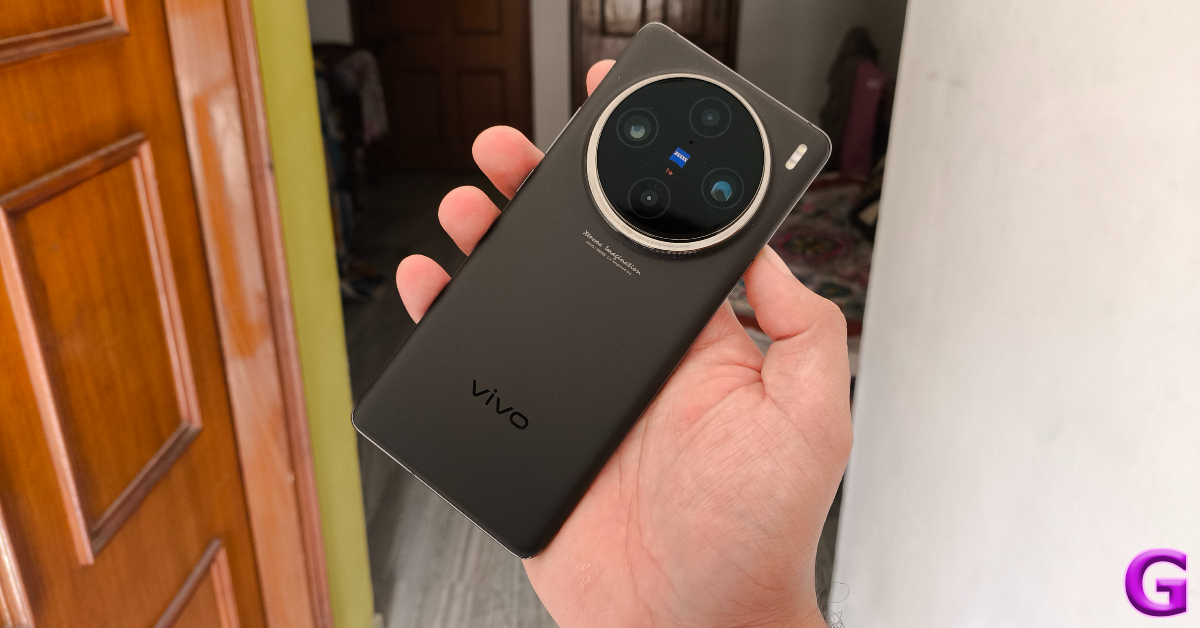 We used the Asteroid Black colour variant of the Vivo X100 Pro for this review. The smartphone is also available in Startail Blue and Sunset Orange shades. The matte black finish on our model made it a bit slippery, but on the bright side, there were no fingerprints to be found on the glass back panel. The smartphone weighs 225g, which is pretty standard for flagship devices, but if you’re making the switch from a midrange or budget phone, you will clearly feel the difference.
 The aluminium frame has curved edges to accommodate the curved AMOLED display. The volume rocker keys and the power button are positioned on the right edge while the IR blaster and secondary microphone make their way to the top of the phone. The bottom edge houses the SIM tray, primary microphone, USB Type-C port, and speaker grille. The left edge has been left keyless.
 Vivo X100 Pro’s 6.78-inch LTPO curved AMOLED display offers a maximum refresh rate of 120Hz and a peak brightness of 3,000 nits. Needless to say, the smartphone is perfectly legible under direct sunlight. The refresh rate is set to ‘Smart Switch’ (adaptable) by default, but you can lock it at 60Hz or 120Hz from device settings. While you’re there, you can also select the ideal colour profile for yourself and regulate the colour temperature of the screen.
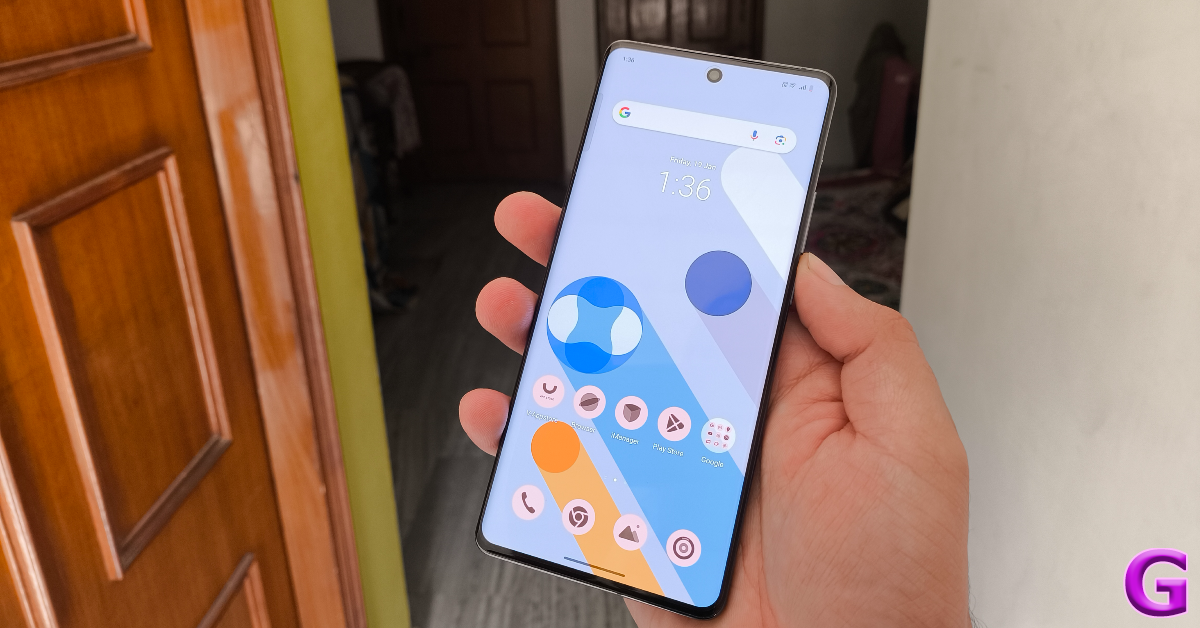 Scrolling and navigation on this 120Hz AMOLED display is as smooth as it can get. The display is only slightly curved towards the edges, so the accidental touches are kept to a minimum. We are not super fond of curved panels, but we really enjoyed our time with this one. The overall touch reception is quite snappy. Even the slightest flicks get registered with ease. The bezels around the display have been kept to a minimum, giving you more screen real estate. Up top, the selfie camera lies inside a punch-hole cutout. The under-display optical scanner is positioned a bit lower than we would have liked and isn’t the fastest one around, but it does a good job on the device.
 Watching HD movies and videos on this 1,260 x 2,800p display proved to be a remarkable experience. The deep blacks are astonishing and the contrasting vivid colours are punchy and fun. The curved nature of the display does not diminish the viewing angles in any way. You can hold the smartphone in any posture and still get well-composed images that truly ‘pop’. While binge-watching videos, the top-heavy nature of the smartphone can make it fatiguing to hold, but you can easily prop it against a solid surface.
Vivo X100 Pro is rated IP68 for water and dust resistance. This means it can easily survive water splashes and even small dips. Vivo claims the smartphone can remain unscathed after submerging to 1.5m for up to 30 minutes.
Watching HD movies and videos on this 1,260 x 2,800p display proved to be a remarkable experience. The deep blacks are astonishing and the contrasting vivid colours are punchy and fun. The curved nature of the display does not diminish the viewing angles in any way. You can hold the smartphone in any posture and still get well-composed images that truly ‘pop’. While binge-watching videos, the top-heavy nature of the smartphone can make it fatiguing to hold, but you can easily prop it against a solid surface.
Vivo X100 Pro is rated IP68 for water and dust resistance. This means it can easily survive water splashes and even small dips. Vivo claims the smartphone can remain unscathed after submerging to 1.5m for up to 30 minutes.
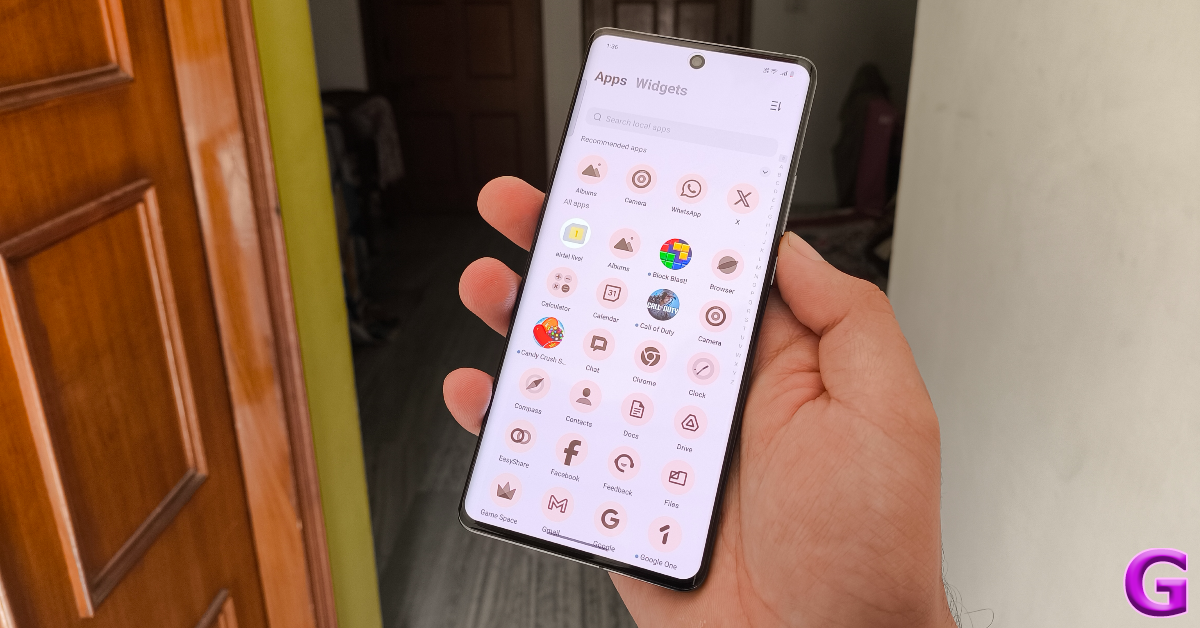
 As soon as we got the Vivo X100 Pro for review, we transferred all our apps to the smartphone and loaded a dozen of them to check its RAM performance. The device did not take any time to load the apps after a period of inactivity. We were able to pick things up right where we left off. Basic tasks like instant messaging, web browsing, video calling, navigation, and media playback present no problems whatsoever. Since this is a camera smartphone, we tried editing the videos we shot on it and were delighted to see how easily it crushed every task.
Vivo X100 Pro is not a gaming smartphone. But when you’re paying Rs 90,000 for a device, you expect a high standard on every front. With that in mind, we played titles like Call of Duty Mobile, Genshin Impact, and Asphalt 9 on the device. Even after an hour of gaming, the internal temperature of the smartphone did not rise to a point where we had to put it down to cool off. The surrounding temperature is also a contributing factor here (we are in the thick of winter, after all), but all things considered, the X100 Pro does a good job of thermal management. The V3 chip is a nice addition to the smartphone, as it does its part in bringing smoothness to the gameplay and handling demanding graphics.
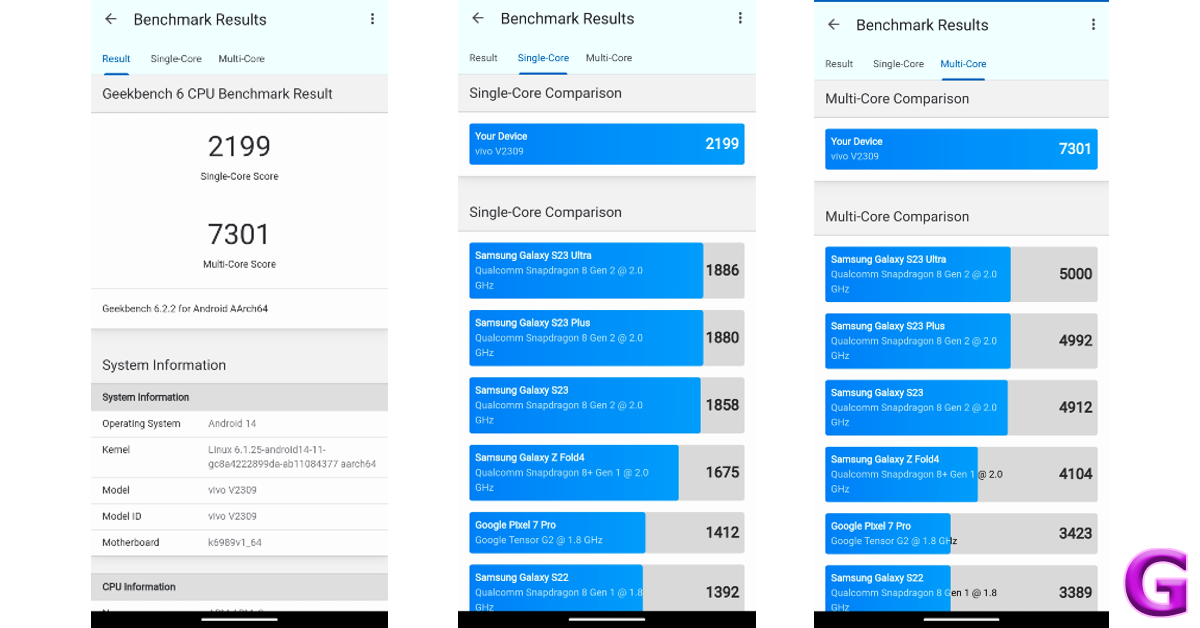
In the Geekbench 6 CPU benchmark, the Vivo X100 Pro scored 2,199 points in the single-core test and 7,301 points in the multi-core test. In comparison, the iQOO 12, powered by the Snapdragon 8 Gen 3 SoC, scored 2,219 and 6,696 points respectively.
As soon as we got the Vivo X100 Pro for review, we transferred all our apps to the smartphone and loaded a dozen of them to check its RAM performance. The device did not take any time to load the apps after a period of inactivity. We were able to pick things up right where we left off. Basic tasks like instant messaging, web browsing, video calling, navigation, and media playback present no problems whatsoever. Since this is a camera smartphone, we tried editing the videos we shot on it and were delighted to see how easily it crushed every task.
Vivo X100 Pro is not a gaming smartphone. But when you’re paying Rs 90,000 for a device, you expect a high standard on every front. With that in mind, we played titles like Call of Duty Mobile, Genshin Impact, and Asphalt 9 on the device. Even after an hour of gaming, the internal temperature of the smartphone did not rise to a point where we had to put it down to cool off. The surrounding temperature is also a contributing factor here (we are in the thick of winter, after all), but all things considered, the X100 Pro does a good job of thermal management. The V3 chip is a nice addition to the smartphone, as it does its part in bringing smoothness to the gameplay and handling demanding graphics.
In the Geekbench 6 CPU benchmark, the Vivo X100 Pro scored 2,199 points in the single-core test and 7,301 points in the multi-core test. In comparison, the iQOO 12, powered by the Snapdragon 8 Gen 3 SoC, scored 2,219 and 6,696 points respectively.
 Moving on to the software, the Android 14-based Functouch 14 OS does a good job on Vivo’s flagship smartphone. We like the extensive set of Dynamic Effects that the Funtouch OS provides for screen transitions, phone unlock, fingerprint icon, charging, USB insertion, and ambient light notifications. The smartphone also has a ‘Simple Mode’, that covers the home screen with tiles for all the essential functions and increases the font size. The bloatware has been kept to a minimum, but it still isn’t a good look on a smartphone that costs Rs 90,000.
Supplying the smartphone with its juice is a 5,400 mAh Li-Ion battery pack. This battery pack is composed of 2 individual cells. A battery capacity of 5,400 mAh is new for flagships, but Vivo X100 Pro is still a one-day phone. This isn’t a complaint by any means, as we got a steady 6-7 hours of screen time out of it until it hit the 20% threshold. On more conservative usage, we were able to push the screen time to more than 10 hours. Vivo ships a 120W charging brick with the X100 Pro even though its wired charging support is capped at 100W. It took a little over half an hour to fully charge the smartphone.
Moving on to the software, the Android 14-based Functouch 14 OS does a good job on Vivo’s flagship smartphone. We like the extensive set of Dynamic Effects that the Funtouch OS provides for screen transitions, phone unlock, fingerprint icon, charging, USB insertion, and ambient light notifications. The smartphone also has a ‘Simple Mode’, that covers the home screen with tiles for all the essential functions and increases the font size. The bloatware has been kept to a minimum, but it still isn’t a good look on a smartphone that costs Rs 90,000.
Supplying the smartphone with its juice is a 5,400 mAh Li-Ion battery pack. This battery pack is composed of 2 individual cells. A battery capacity of 5,400 mAh is new for flagships, but Vivo X100 Pro is still a one-day phone. This isn’t a complaint by any means, as we got a steady 6-7 hours of screen time out of it until it hit the 20% threshold. On more conservative usage, we were able to push the screen time to more than 10 hours. Vivo ships a 120W charging brick with the X100 Pro even though its wired charging support is capped at 100W. It took a little over half an hour to fully charge the smartphone.
 Let’s talk about what the Vivo X100 Pro does best – cameras and photography. The massive camera cutout at the back of the smartphone houses three 50MP sensors for the wide, ultrawide, and floating telephoto lenses. On the left side of the panel lies the Zeiss 1-inch main camera which gets the Sony IMX989 sensor. The ultrawide camera is positioned at the top while the Zeiss APO floating telephoto camera is placed to its right. The new generation of Zeiss T* coating reduces reflectance from the lenses and brings new clarity to the images.
 The 1-inch primary shooter is an absolute delight to use. In daylight conditions, the camera captures accurate colours and the V3 chip does a solid job of processing the images. Most of the shots we captured were taken in overcast conditions (you can thank the January winter for that) and the smartphone did well to expose the sky perfectly. The colours were tuned perfectly, doing justice to the scene in front of us.
 We were happy with the dynamic range produced in the images. The shadows were detailed and the dimly lit parts of the scene were processed without being overblown by artificial brightness. This is largely due to the 1-inch sensor which captures a lot of light and doesn’t rely too heavily on photoprocessing. A similar performance is replicated in limited lighting, where the Vivo X100 Pro performs brilliantly even without the Night Mode turned on. We were surprised by the sharpness of images taken at night and the way the natural colour of objects was produced in the resulting images.


 earphones with 12 hours of playback launched in India")