- Google introduced Lens in Maps and Live View Walking Navigation to its mapping service in India.
- The company will also enable fuel-efficient routing for the users in the country.
- Google Maps also added Address Descriptors.


 For this method to work, two-step authentication needs to be activated on your account.
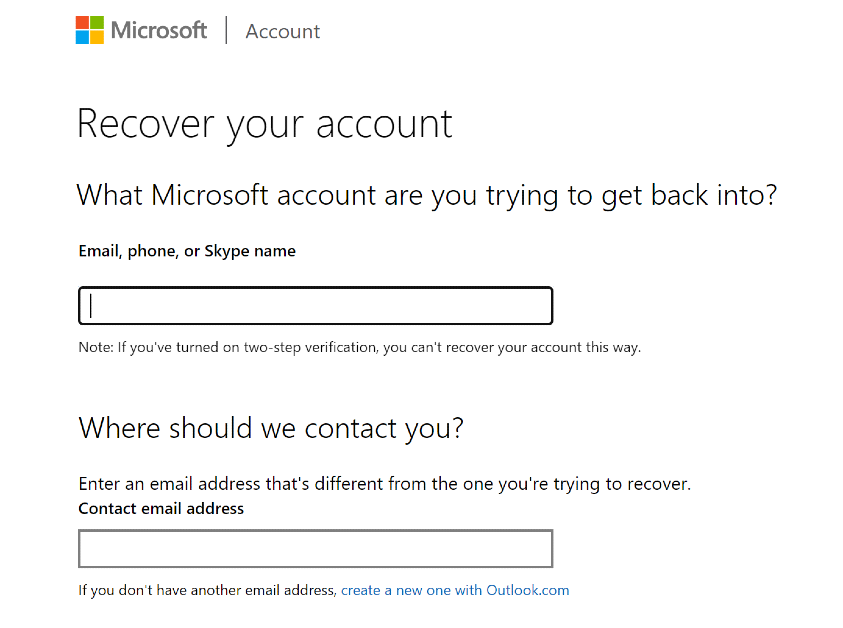
Step 1: Launch the web browser on your PC and go to this page to access the Microsoft Account Recovery Form.
Step 2: Enter your Hotmail email address in the first field and your current email in the second field.
Step 3: Enter the CAPTCHA and hit Next.
Once you have submitted all the details, Microsoft will let you know the recovery process within the next 24 hours.
For this method to work, two-step authentication needs to be activated on your account.
Step 1: Launch the web browser on your PC and go to this page to access the Microsoft Account Recovery Form.
Step 2: Enter your Hotmail email address in the first field and your current email in the second field.
Step 3: Enter the CAPTCHA and hit Next.
Once you have submitted all the details, Microsoft will let you know the recovery process within the next 24 hours.
 You can access your old Hotmail account by linking it to Outlook. Here’s how.
Step 1: Launch Microsoft Outlook on your PC.
Step 2: Click on File and select Add Account under Account Information.
Step 3: Enter your Hotmail email address and password.
Your Hotmail account will be linked to Outlook. You can access it from the sidebar.
Read Also: Top 5 Easy Ways to Access the Clipboard on Your iPhone
You can access your old Hotmail account by linking it to Outlook. Here’s how.
Step 1: Launch Microsoft Outlook on your PC.
Step 2: Click on File and select Add Account under Account Information.
Step 3: Enter your Hotmail email address and password.
Your Hotmail account will be linked to Outlook. You can access it from the sidebar.
Read Also: Top 5 Easy Ways to Access the Clipboard on Your iPhone
 Step 1: On your PC, log into your Gmail account.
Step 2: Hit the gear icon at the top right corner of the screen and select See all settings.
Step 3: Switch to the Accounts and Import tab.
Step 4: Click on Import from another address.
Step 5: Sign into your Hotmail account and follow the onscreen instructions to import your emails.
It will take some time to load all of your Hotmail emails, but once the process is finished, you will be able to access them from the sidebar.
Step 1: On your PC, log into your Gmail account.
Step 2: Hit the gear icon at the top right corner of the screen and select See all settings.
Step 3: Switch to the Accounts and Import tab.
Step 4: Click on Import from another address.
Step 5: Sign into your Hotmail account and follow the onscreen instructions to import your emails.
It will take some time to load all of your Hotmail emails, but once the process is finished, you will be able to access them from the sidebar.

 Step 3: Tap and hold any empty spot on the note.
Step 4: Hit Paste in the popup menu.
Step 3: Tap and hold any empty spot on the note.
Step 4: Hit Paste in the popup menu.
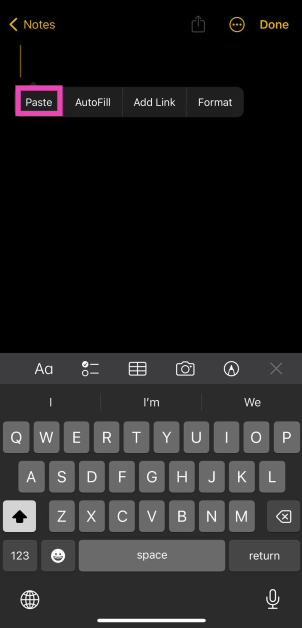 The clipboard’s content will be pasted into the note.
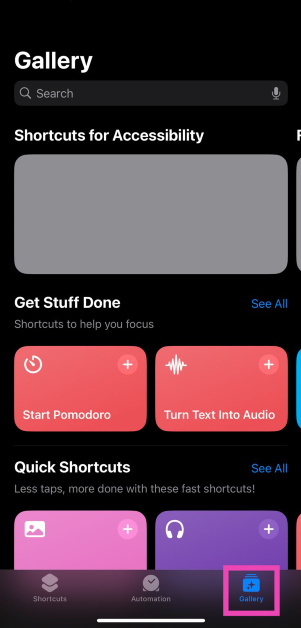 Step 2: Search for the ‘Adjust Clipboard’ shortcut.
Step 3: Hit the plus icon on the shortcut’s tile to add it.
Step 2: Search for the ‘Adjust Clipboard’ shortcut.
Step 3: Hit the plus icon on the shortcut’s tile to add it.
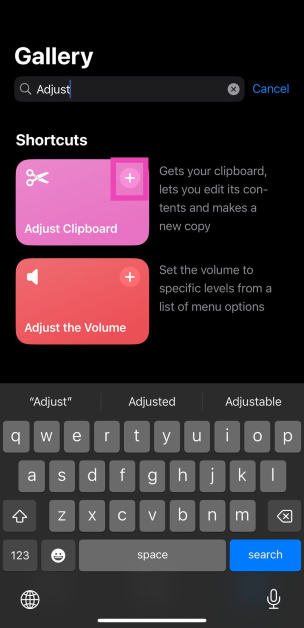 Step 4: Now, go back to the Shortcuts tab and select My Shortcuts.
Step 5: Select the Adjust Clipboard shortcut to view the contents of your iPhone’s clipboard and edit them.
Read Also: Top 3 Ways to Recover and Access Your Old Hotmail Account
Step 4: Now, go back to the Shortcuts tab and select My Shortcuts.
Step 5: Select the Adjust Clipboard shortcut to view the contents of your iPhone’s clipboard and edit them.
Read Also: Top 3 Ways to Recover and Access Your Old Hotmail Account
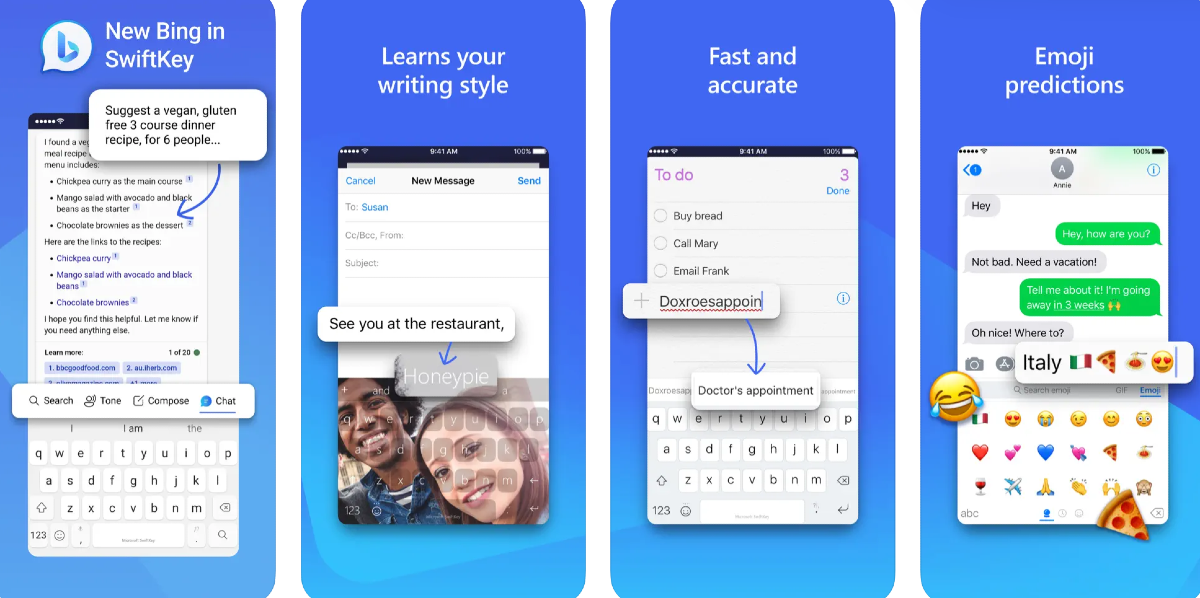 The Microsoft SwiftKey Keyboard has a very handy button to access the clipboard at any given time. Here’s how you can use it.
Step 1: Install the Microsoft SwiftKey Keyboard app from the App Store.
Step 2: Go to Settings and select General.
Step 3: Select Keyboard, then go to Keyboards>Add New Keyboard.
Step 4: Select Microsoft SwiftKey. Allow it full access.
Step 5: Launch an app that triggers the keyboard.
Step 6: Hit the globe icon at the bottom and switch to SwiftKey.
Step 7: Tap the plus icon and select the clipboard emoji to view its contents.
Step 8: You can save multiple entries to the clipboard and delete them from this section.
The Microsoft SwiftKey Keyboard has a very handy button to access the clipboard at any given time. Here’s how you can use it.
Step 1: Install the Microsoft SwiftKey Keyboard app from the App Store.
Step 2: Go to Settings and select General.
Step 3: Select Keyboard, then go to Keyboards>Add New Keyboard.
Step 4: Select Microsoft SwiftKey. Allow it full access.
Step 5: Launch an app that triggers the keyboard.
Step 6: Hit the globe icon at the bottom and switch to SwiftKey.
Step 7: Tap the plus icon and select the clipboard emoji to view its contents.
Step 8: You can save multiple entries to the clipboard and delete them from this section.
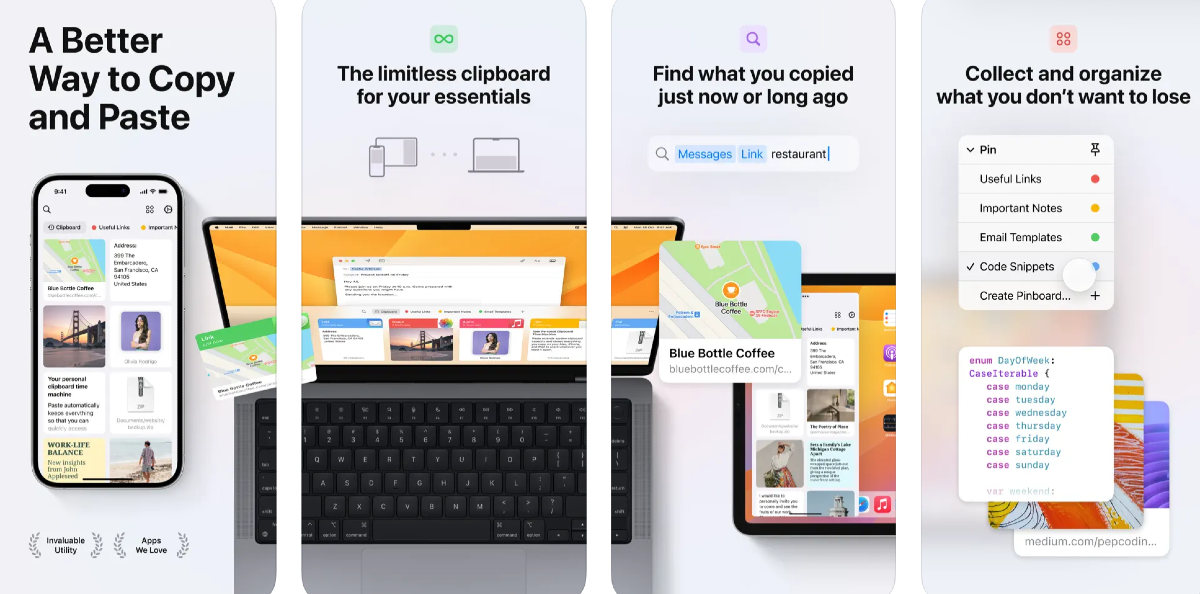 Paste is a brilliant third-party app to manage and sync the clipboard across all your Apple devices. Here’s how you can use it on your iPhone.
Step 1: Download and install Paste from the App Store.
Step 2: Launch the app and tap the ellipses at the top right corner of the screen.
Step 3: Select Settings.
Step 4: Turn on the toggle switches for ‘When App Becomes Active’ and ‘When Keyboard Becomes Active’.
Since iOS restricts app background access to your clipboard, you will need to open Paste whenever you want it to record the contents of the clipboard. Every time you copy content from a new app, Paste will ask for the appropriate permission. To view all the content you have posted to the app, simply tap on ‘Clipboard History’.
Paste is a brilliant third-party app to manage and sync the clipboard across all your Apple devices. Here’s how you can use it on your iPhone.
Step 1: Download and install Paste from the App Store.
Step 2: Launch the app and tap the ellipses at the top right corner of the screen.
Step 3: Select Settings.
Step 4: Turn on the toggle switches for ‘When App Becomes Active’ and ‘When Keyboard Becomes Active’.
Since iOS restricts app background access to your clipboard, you will need to open Paste whenever you want it to record the contents of the clipboard. Every time you copy content from a new app, Paste will ask for the appropriate permission. To view all the content you have posted to the app, simply tap on ‘Clipboard History’.

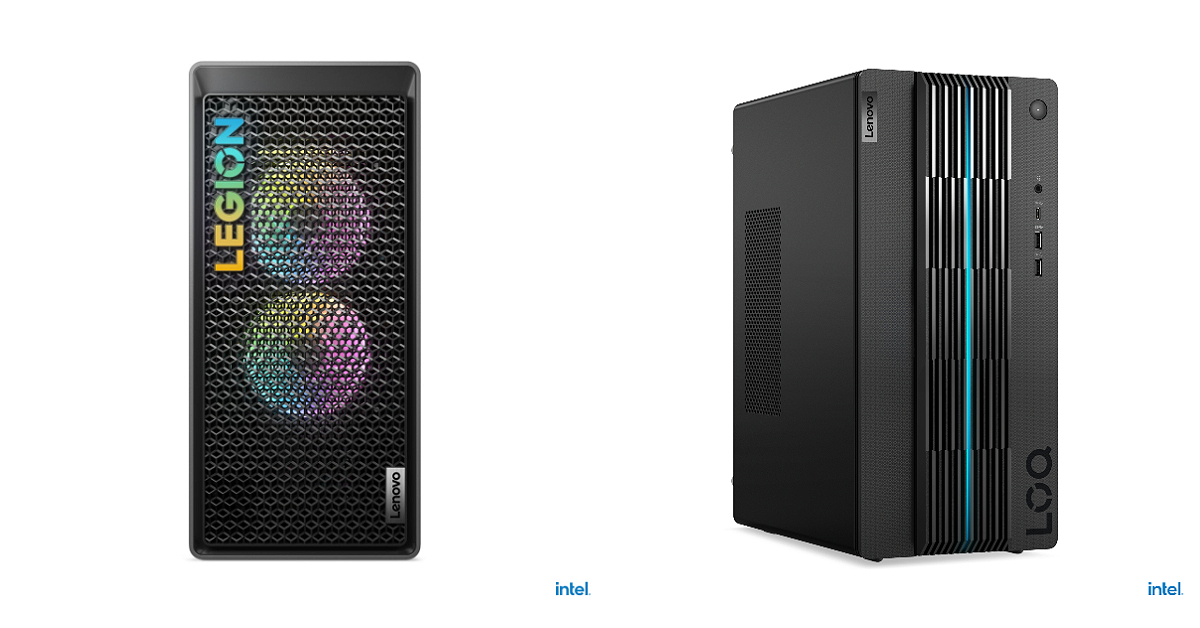 Both desktops come integrated with Lenovo Vantage offering customisation and adjustment options for better performance via an all-in-one suite of tools that includes overclocking controls, AI performance tuning, and a real-time performance dashboard.
The gaming machines are shipped with Lenovo Premium Care and Accidental Damage Protection services, that can be availed while purchasing the device. With Premium Care, new users receive personalised hardware and software assistance from expert technicians, ensuring prompt and efficient resolutions to any technical issues that may arise.
Both desktops come integrated with Lenovo Vantage offering customisation and adjustment options for better performance via an all-in-one suite of tools that includes overclocking controls, AI performance tuning, and a real-time performance dashboard.
The gaming machines are shipped with Lenovo Premium Care and Accidental Damage Protection services, that can be availed while purchasing the device. With Premium Care, new users receive personalised hardware and software assistance from expert technicians, ensuring prompt and efficient resolutions to any technical issues that may arise.
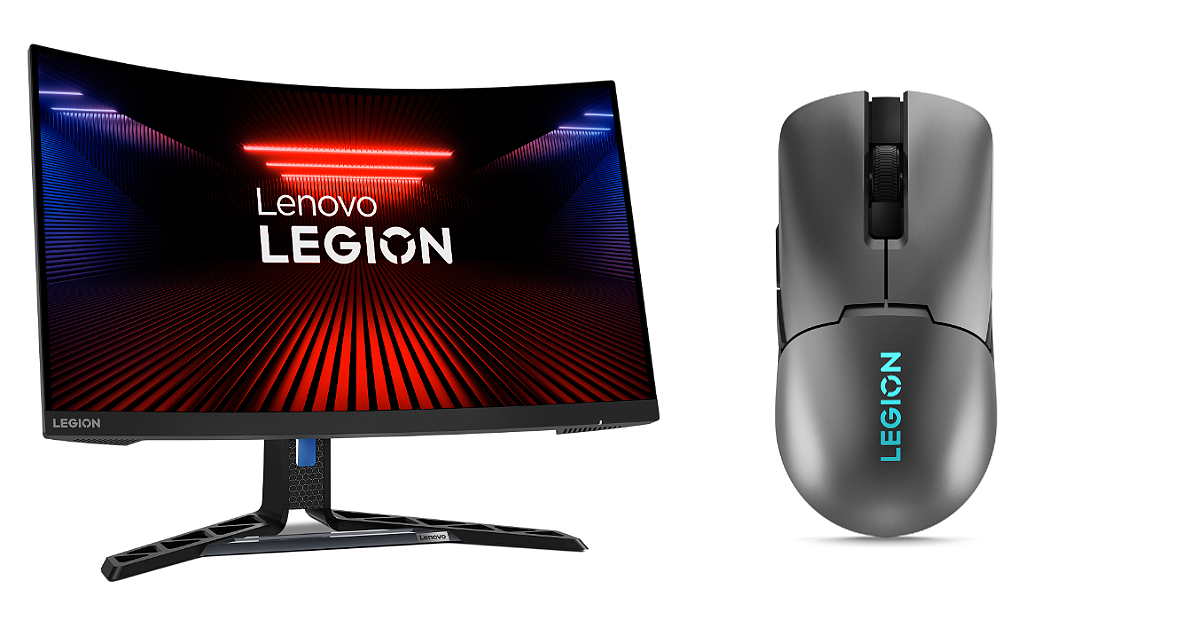 The Lenovo Legion R27fc is a 27-inch monitor featuring a VA FHD, Curved display. The screen supports a refresh rate of 280Hz and a 99% sRGB colour gamut. The monitor has a 3-side NearEdgeless design that boasts two 3W speakers to provide immersive audio, completing the overall gaming experience. It has a 0.5ms MPRT.
On the other hand, the Lenovo Legion M600s Wireless Gaming Mouse has a Pixart 3370 sensor offering 19,000 DPI, 400 IPS, and 40g of acceleration. The device takes two hours to charge which provides 70 hours of battery life (lights off). Whereas a 10-minute quick charge provides 10 additional hours. In addition to this, there are sub-1ms lossless wireless via 2.4GHz, low-latency Bluetooth, or wired USB-C.
The Lenovo Legion R27fc is a 27-inch monitor featuring a VA FHD, Curved display. The screen supports a refresh rate of 280Hz and a 99% sRGB colour gamut. The monitor has a 3-side NearEdgeless design that boasts two 3W speakers to provide immersive audio, completing the overall gaming experience. It has a 0.5ms MPRT.
On the other hand, the Lenovo Legion M600s Wireless Gaming Mouse has a Pixart 3370 sensor offering 19,000 DPI, 400 IPS, and 40g of acceleration. The device takes two hours to charge which provides 70 hours of battery life (lights off). Whereas a 10-minute quick charge provides 10 additional hours. In addition to this, there are sub-1ms lossless wireless via 2.4GHz, low-latency Bluetooth, or wired USB-C. 
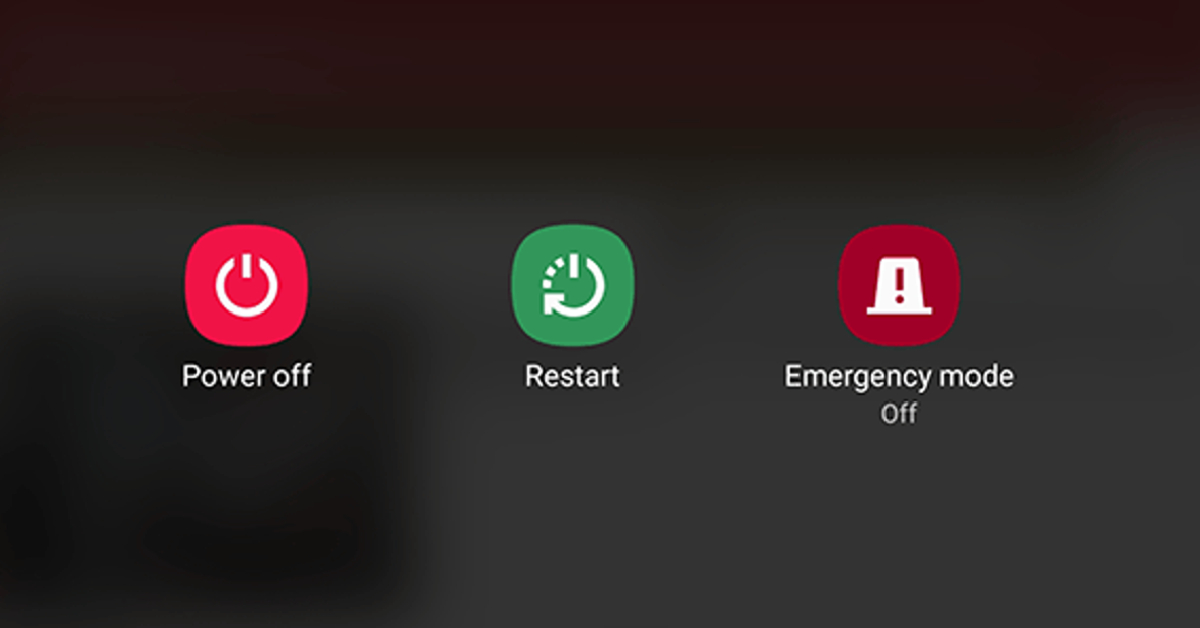 If the green tinting on your phone’s screen is caused by a background glitch in the software, a simple reboot should fix it. Restarting your phone is the first step you should take while fixing any issue. Press and hold the side key and select ‘Restart’ from the power options. If long pressing the side key triggers the voice assistant on your device, press and hold the volume up key and side key simultaneously. You can also access the power menu by tapping the power icon from the notification shade.
Read Also: Top 5 Easy Methods to Remove My AI on Snapchat
If the green tinting on your phone’s screen is caused by a background glitch in the software, a simple reboot should fix it. Restarting your phone is the first step you should take while fixing any issue. Press and hold the side key and select ‘Restart’ from the power options. If long pressing the side key triggers the voice assistant on your device, press and hold the volume up key and side key simultaneously. You can also access the power menu by tapping the power icon from the notification shade.
Read Also: Top 5 Easy Methods to Remove My AI on Snapchat
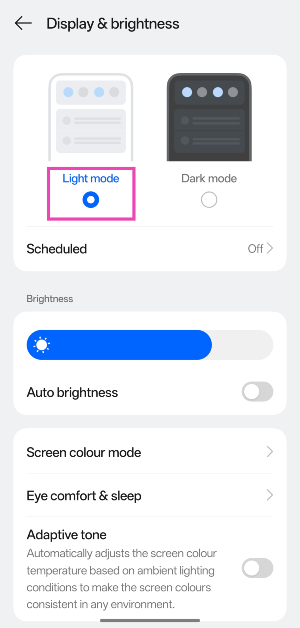
 Step 2: Tap on Light mode.
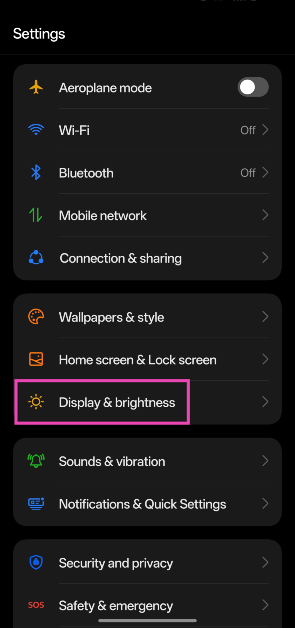
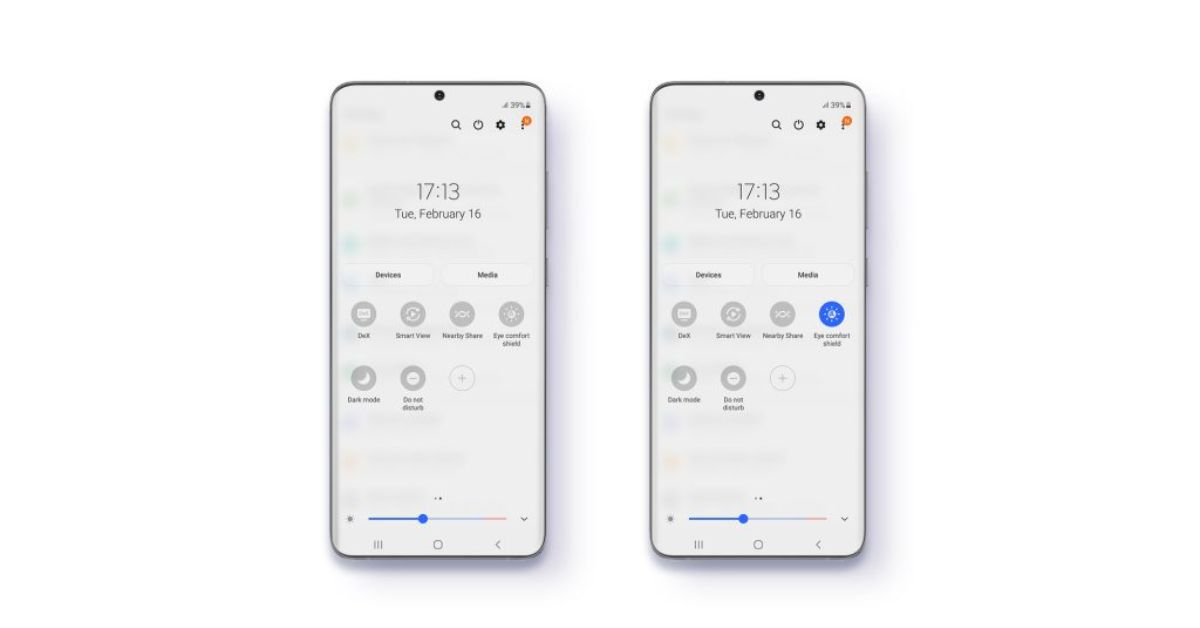 Android phones have a blue light filter which adds a warmer shade to the display and reduces the stress it exerts on the eyes. Sometimes, this filter can malfunction and create a green tint on the screen. Turn off the blue light filter from the Quick Settings Menu by tapping the ‘Eye Comfort’ tile.
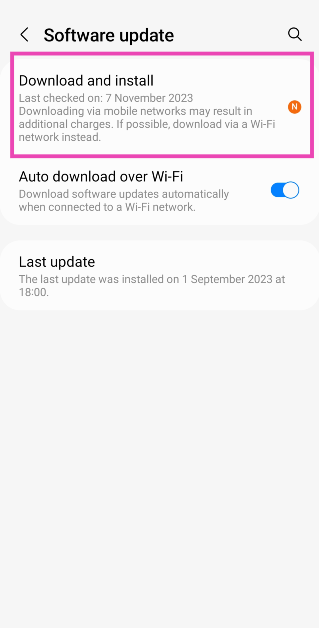
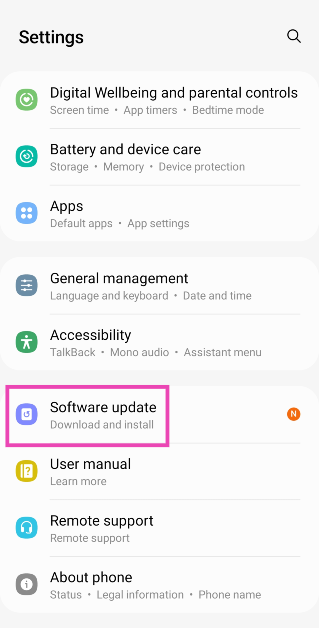 Step 2: Tap on Download and install.
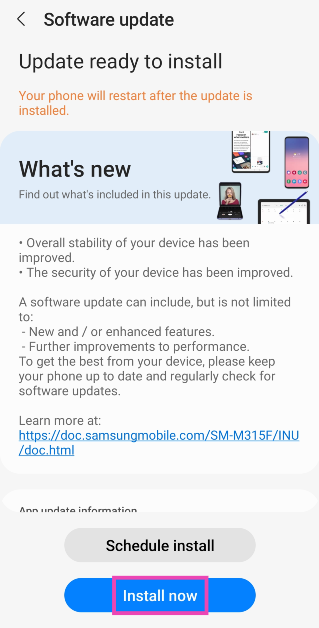
 Step 3: Select Install now.
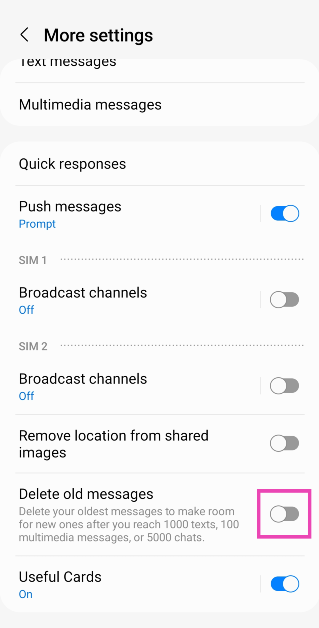
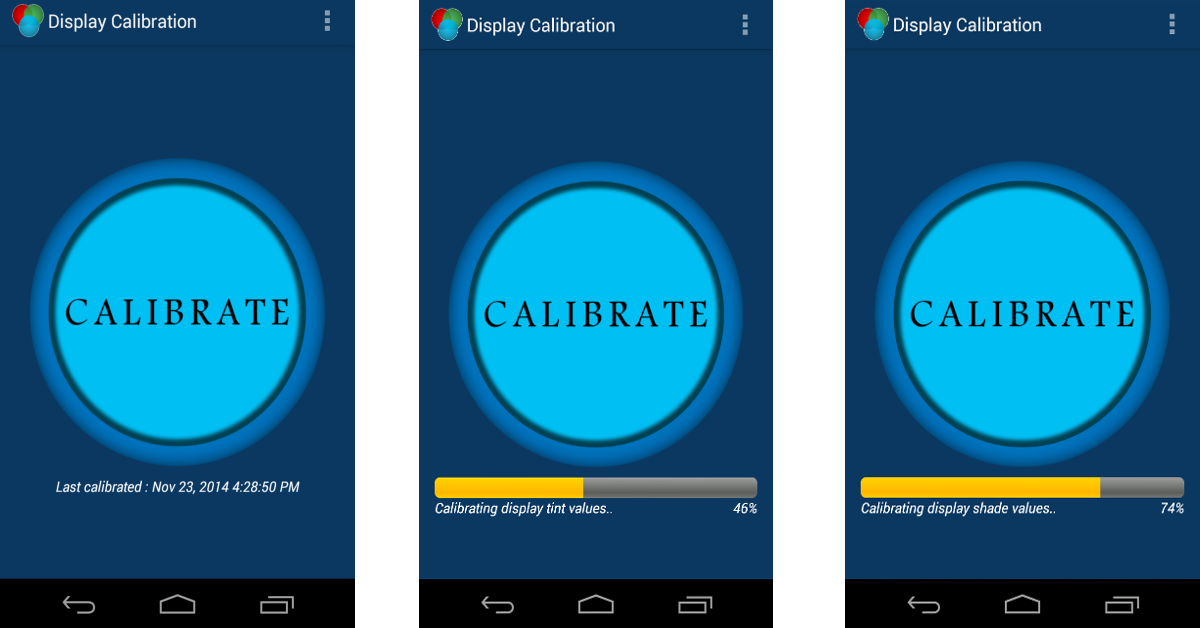 If you notice the green tint covering the entire screen, it could be due to a poorly calibrated display. You can recalibrate it using a third-party app like Display Calibration by RedPi Apps. Once you launch the app, hit the Calibrate button. The app will calibrate the tint and shade values on your display and restore balance to it.
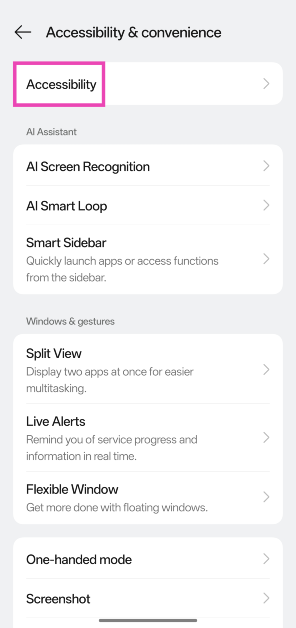
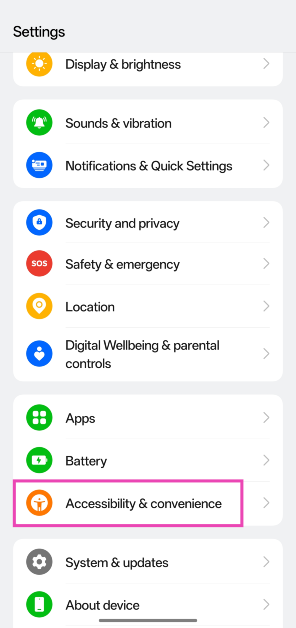 Step 2: Select Accessibility.
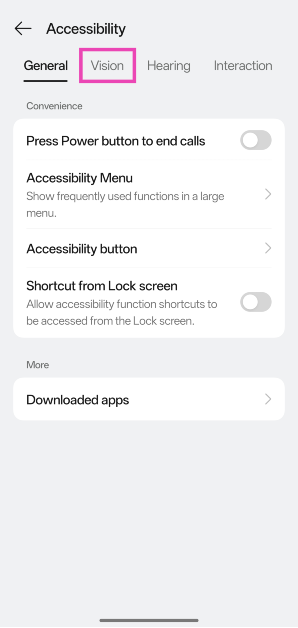
 Step 3: Switch to the Vision tab.
 Step 4: Tap on Colour vision enhancement.
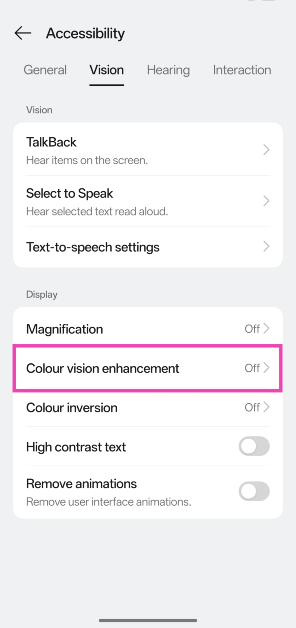 Step 5: Turn on the toggle switch.
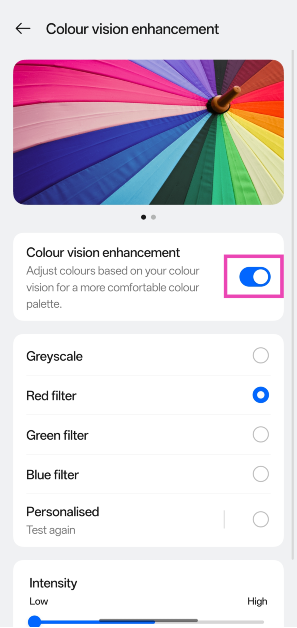 Step 6: Choose your preferred colour filter.
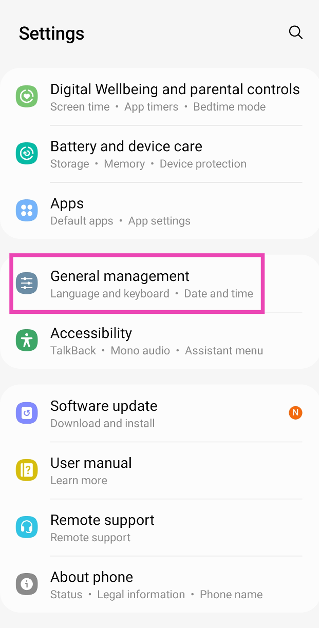 Step 2: Tap on Reset.
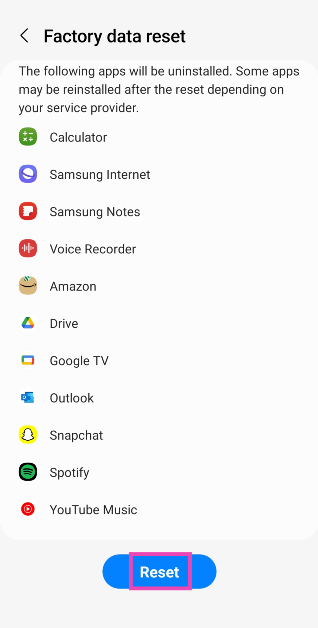
 Step 3: Select Factory data reset.
 Step 4: Scroll down and tap on Reset.

")
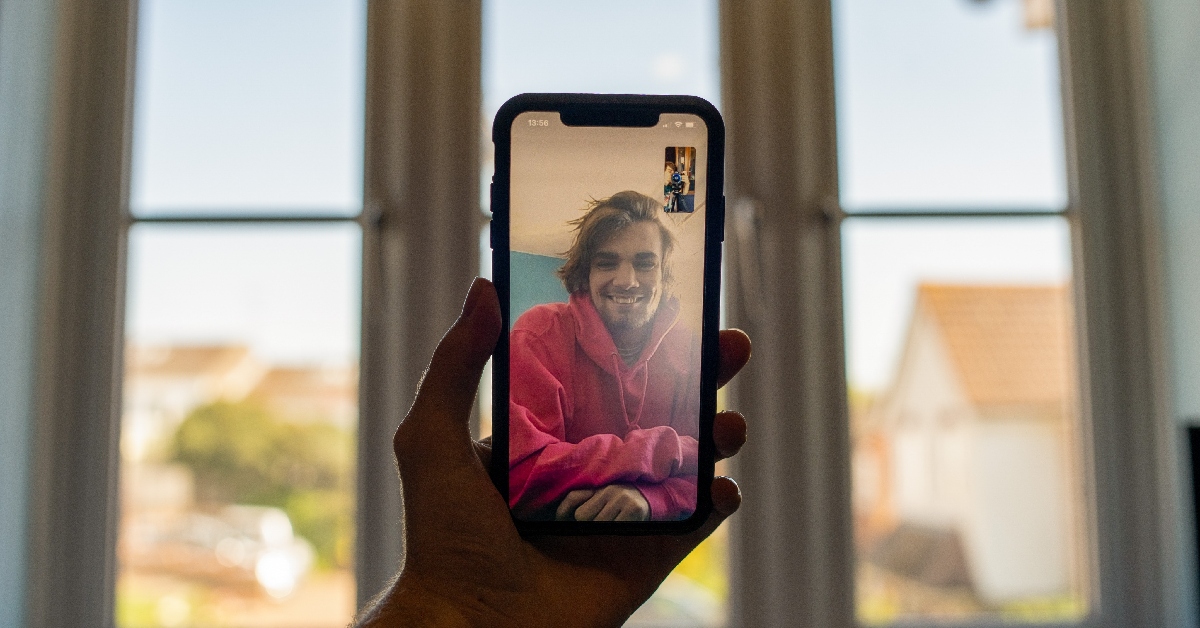
 Immensely popular on both platforms, WhatsApp manages to bridge the ecosystem divide perfectly. This year, the Meta-owned instant messenger added ‘screen sharing’ to its arsenal, allowing users to display their phone or desktop’s screen on a video call. The new landscape orientation makes it easier to view presentations on the video call while holding your phone horizontally. Another thing we like about video calling on WhatsApp is its picture-in-picture mode, which contracts the recipient’s video feed into a small box, so you can browse your phone with ease. If either recipient does not have WhatsApp, they can still join a call created using a ‘call link’.
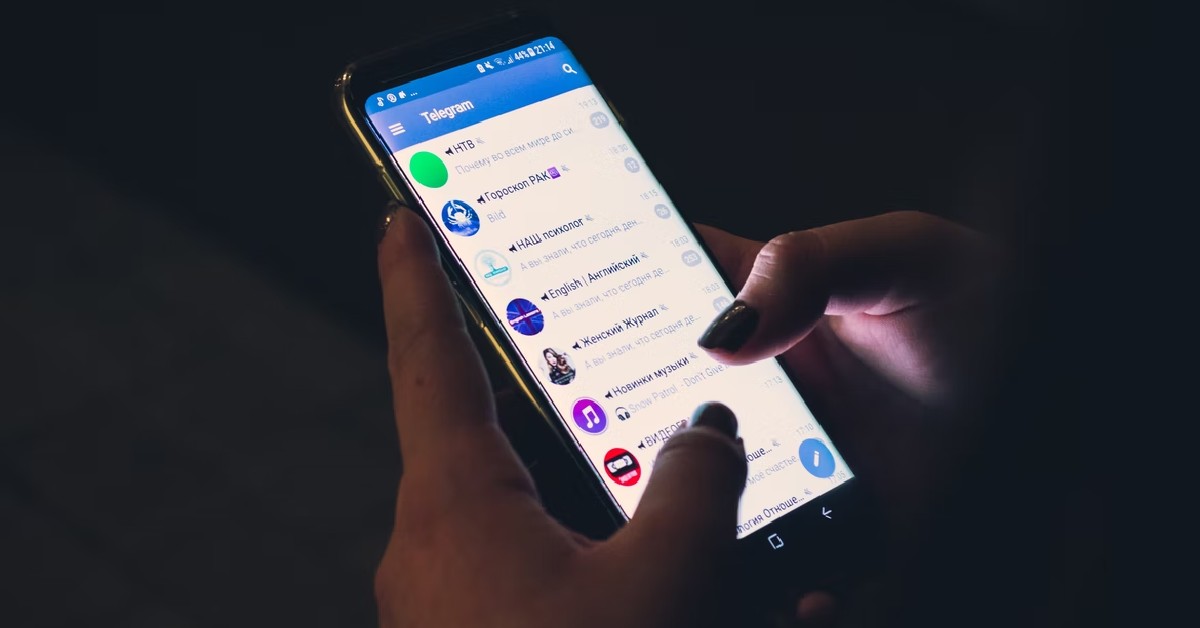 Telegram is the closest instant messaging app that comes close to matching WhatsApp’s popularity. One of the better aspects of using Telegram is that you don’t need to share your phone number with the recipient to call them. While the app does require your phone number at the time of registration, it can later be substituted for a username as your profile’s identifier. Video calling on Telegram is a smooth and secure process, especially with end-to-end encryption onboard. Like WhatsApp, you can also share your phone’s screen with the recipient on a video call.
 Facebook Messenger is a great way to overcome platform barriers and get talking easily. If you’re on Facebook, you’re probably already used to having Messenger as your primary messaging app. Apart from standard video calling features, Messenger also has a ‘Watch Together’ option that lets you watch Facebook videos with your friends. You can also make the call more fun, by using live face filters, stickers, and more.
 Instagram may be new to the video calling game, but it gets the basics right and brings a lot of flair to the table. Like Facebook, you can use effects and face filters on a video call on Instagram. The call window shrinks in size when you go back to your feed, allowing you to browse the app while also staying on call. Apart from mutual followers, you can initiate a video call with anyone you have a DM thread with. If someone’s DM is sitting in the ‘Requests’ folder, they won’t be able to call you.
 Intended primarily for online gaming communities, Discord has also found its way into other online niches, clubs, and communities, and has grown tremendously in size over the years. If you’re looking for a platform where you can watch a movie with a group of friends, Discord is the name that should come up first. The call stability on Discord is one of our favourite aspects of the entire experience. Since the platform is designed to host video calls with a large number of participants, you don’t need to worry about your call dropping out of the blue.
 Google Meet is the ideal app for hosting virtual meetings, online classes, seminars, and more. Once a meeting is created, participants can join using the meeting code. Google Meet allows you to record a meeting, blur your background (or change it entirely), or apply a live face filter. Features like screen sharing and whiteboard are crucial when it comes to recreating the environment of a physical meeting or classroom online. The Google Meet app comes pre-installed on most Android phones as a part of the Google package. iPhone users will need to install it from the App Store and log in using their Google Account.
 Ending this list is a rather surprising entry because it may be the reason why you looked up this article in the first place. Facetime operates within Apple’s ecosystem, which means it isn’t available on the Google Play Store. You’d think that it is impossible for a video call to take place between an iPhone and an Android phone on Facetime, but that is not the case. Calls created using Facetime’s ‘call link’ allow Windows and Android users to join in as well, albeit with limited functions. Once an Android user clicks on a Facetime link, the call opens up on a webpage and they are put in a waiting room until the call creator lets them in. Once they’re in, they can perform basic functions like mute/unmute, camera on/off, camera toggle, and fullscreen toggle.


 Since you can’t install the official Netflix app on your MacBook, your next best option is to create an app icon for its website on your laptop’s home screen. Clicking on this shortcut will take you to the website. Here’s how you can do it.
Step 1: Launch the Chrome browser on your MacBook and go to the official Netflix website.
Step 2: Hit the ellipses at the top right corner of the screen.
Step 3: Take your cursor to More Tools and select Create Shortcut.
Step 4: Give the web app a name and hit Create.
Step 5: Go back to the home screen. You will find the icon for the web app on the dock.
Since you can’t install the official Netflix app on your MacBook, your next best option is to create an app icon for its website on your laptop’s home screen. Clicking on this shortcut will take you to the website. Here’s how you can do it.
Step 1: Launch the Chrome browser on your MacBook and go to the official Netflix website.
Step 2: Hit the ellipses at the top right corner of the screen.
Step 3: Take your cursor to More Tools and select Create Shortcut.
Step 4: Give the web app a name and hit Create.
Step 5: Go back to the home screen. You will find the icon for the web app on the dock.
 Step 1: Launch Microsoft Edge on your MacBook and go to the official Netflix website.
Step 2: Click on the ellipses at the top right corner of the screen.
Step 3: Move the cursor to Apps and click on Install This Site as an App.
Step 4: Give the web app a name and click on Create.
The web app can accessed from the dock on the home screen.
Step 1: Launch Microsoft Edge on your MacBook and go to the official Netflix website.
Step 2: Click on the ellipses at the top right corner of the screen.
Step 3: Move the cursor to Apps and click on Install This Site as an App.
Step 4: Give the web app a name and click on Create.
The web app can accessed from the dock on the home screen.
 PlayCover is a brilliant open-source app to run iOS apps and games on your MacBook. Here’s how you can use it to install Netflix.
Step 1: Download PlayCover from GitHub.
Step 2: Move the downloaded file to the Applications folder and install it on your MacBook.
Step 3: Download the decrypted IPA version of Netflix using ARM Converter or Decrypt.
Step 4: Launch PlayCover and click on Import IPA.
Step 5: Select the file you just downloaded.
Step 6: PlayCover will install Netflix on your MacBook.
PlayCover is a brilliant open-source app to run iOS apps and games on your MacBook. Here’s how you can use it to install Netflix.
Step 1: Download PlayCover from GitHub.
Step 2: Move the downloaded file to the Applications folder and install it on your MacBook.
Step 3: Download the decrypted IPA version of Netflix using ARM Converter or Decrypt.
Step 4: Launch PlayCover and click on Import IPA.
Step 5: Select the file you just downloaded.
Step 6: PlayCover will install Netflix on your MacBook.

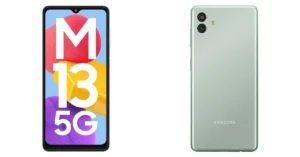 The Samsung Galaxy M13 5G has a 6.5-inch HD+ display with a refresh rate of 90Hz, Gorilla Glass 3 protection and a 400 nit brightness. The device runs on One UI 4 based on Android 12.0 and is powered by a MediaTek Dimensity 700 SoC. The Samsung Galaxy M13 5G has a dual rear camera arrangement with a 50-megapixel primary sensor and a 2-megapixel secondary sensor for pictures and videos. For taking selfies and making video calls, there is a 5-megapixel front camera. The smartphone has a 5,000mAh battery that can be charged at 15W.
 The Samsung Galaxy M14 5G is shipped with One UI 5 based on top of Android 13 out of the box. Under the hood, there is an Exynos 1330 octa-core SoC paired with Mali G68 GPU for graphics. The phone will come in two different configurations: 4GB RAM with 128GB storage and 6GB RAM with a 128GB storage model. The features a 6.6-inch Full HD+ PLS LCD display with 2408 x 1080 pixels of resolution. Samsung Galaxy M14 5G sports a triple rear camera setup that includes a 50-megapixel main sensor with an f/1.8 aperture. It also consists of a 2-megapixel depth sensor and a 2-megapixel macro sensor. For taking selfies and video calls the handset comes with a 13-megapixel front-facing camera.
The smartphone houses a 6000mAh battery with 25W fast charging support.
The Samsung Galaxy M14 5G is shipped with One UI 5 based on top of Android 13 out of the box. Under the hood, there is an Exynos 1330 octa-core SoC paired with Mali G68 GPU for graphics. The phone will come in two different configurations: 4GB RAM with 128GB storage and 6GB RAM with a 128GB storage model. The features a 6.6-inch Full HD+ PLS LCD display with 2408 x 1080 pixels of resolution. Samsung Galaxy M14 5G sports a triple rear camera setup that includes a 50-megapixel main sensor with an f/1.8 aperture. It also consists of a 2-megapixel depth sensor and a 2-megapixel macro sensor. For taking selfies and video calls the handset comes with a 13-megapixel front-facing camera.
The smartphone houses a 6000mAh battery with 25W fast charging support.
 The Redmi 12 5G has a 6.79-inch full-HD+ display. Under its hood, there is a Qualcomm Snapdragon 4 Gen 2 chipset with up to 8GB of RAM and 256GB of onboard storage. It operates on MIUI 14 with Android 13 out of the box. The mobile phone sports a dual rear camera setup consisting of a 50-megapixel primary and a 2-megapixel macro lens. It also sports an 8-megapixel selfies sensor. Moreover, the 5G phone comes with a 5,000mAh battery with 18W charging support.
 The Samsung Galaxy M34 comes with a Full HD+ 6.5-inch display with a refresh rate of 120 Hz. The device runs OneUI 5.1, an Android 13-based operating system with Exynos 1280 SoC and a Mali-G68 MP4 GPU, up to 8GB of RAM, and 128GB of internal storage. The triple rear cameras on the Samsung Galaxy M34 include a 50-megapixel primary sensor with optical image stabilisation (OIS). A 2-megapixel macro sensor and an 8-megapixel ultra-wide angle camera are also included. A 13-megapixel sensor is located at the front of the device for selfies and video calls.
A 6,000mAh battery powers the device and is said to last up to two days on a single charge.
The Samsung Galaxy M34 comes with a Full HD+ 6.5-inch display with a refresh rate of 120 Hz. The device runs OneUI 5.1, an Android 13-based operating system with Exynos 1280 SoC and a Mali-G68 MP4 GPU, up to 8GB of RAM, and 128GB of internal storage. The triple rear cameras on the Samsung Galaxy M34 include a 50-megapixel primary sensor with optical image stabilisation (OIS). A 2-megapixel macro sensor and an 8-megapixel ultra-wide angle camera are also included. A 13-megapixel sensor is located at the front of the device for selfies and video calls.
A 6,000mAh battery powers the device and is said to last up to two days on a single charge.
 The OnePlus Nord CE 3 Lite 5G comes with a 6.72-inch full-HD+ LCD display with 1,080×2,400 pixels of resolution. The screen has a dynamic refresh rate of 120Hz and 240Hz touch sample rate. It has a peak brightness of 680 nits, a 91.4 percent screen-to-body ratio, a 20:9 aspect ratio, and a 391ppi pixel density. In addition to this, the screen is protected with Corning Gorilla Glass Victus.
The phone runs on OxygenOS 13.1 on top of Android 13 out of the box. OnePlus Nord CE 3 Lite 5G is powered by an octa-core Snapdragon 695 SoC with Adreno 619 GPU for graphics. For the photos and videos, the Nord CE 3 Lite 5G features a triple rear camera setup that includes a 108-megapixel Samsung HM6 sensor with an f/1.75 aperture and EIS support. It includes a 2-megapixel macro lens and another 2-megapixel depth sensor. There is a 16-megapixel front-facing camera for selfies. The phone packs a 5,000mAh battery that supports 67W SuperVOOC fast charging.
The OnePlus Nord CE 3 Lite 5G comes with a 6.72-inch full-HD+ LCD display with 1,080×2,400 pixels of resolution. The screen has a dynamic refresh rate of 120Hz and 240Hz touch sample rate. It has a peak brightness of 680 nits, a 91.4 percent screen-to-body ratio, a 20:9 aspect ratio, and a 391ppi pixel density. In addition to this, the screen is protected with Corning Gorilla Glass Victus.
The phone runs on OxygenOS 13.1 on top of Android 13 out of the box. OnePlus Nord CE 3 Lite 5G is powered by an octa-core Snapdragon 695 SoC with Adreno 619 GPU for graphics. For the photos and videos, the Nord CE 3 Lite 5G features a triple rear camera setup that includes a 108-megapixel Samsung HM6 sensor with an f/1.75 aperture and EIS support. It includes a 2-megapixel macro lens and another 2-megapixel depth sensor. There is a 16-megapixel front-facing camera for selfies. The phone packs a 5,000mAh battery that supports 67W SuperVOOC fast charging. 

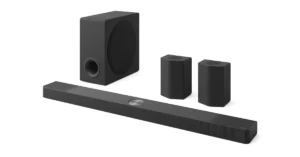 LG Soundbar S95TR is the company’s flagship model consisting of 15 channels to provide an amazing 810W of output with a surround sound experience. It has five up-firing channels, including the industry’s first centre up-firing speaker that produces 3D audio with improved clarity and a larger soundstage.
The angle of the centre up-firing speaker guarantees a flawless audio-visual experience with exact elevation to the level of the TV screen. The LG Soundbar S95TR features improved tweeters for clear and precise audio in addition to a passive radiator to enhance bass tones and better overall balance between the soundbar and subwoofer.
Also Read: Best Amazon year–end smartphone deals you should not miss starting at Rs 25,000
The LG soundbar SG10TY can be paired with LG’s premium OLED TVs with WOW Orchestra, WOW Interface, and WOWCAST, which enhances the viewing experience. WOWCAST allows wireless home entertainment without any visible wires between the screen and the soundbar when paired with an LG premium OLED TV and the SG10TY model. This allows users to enjoy their favourite songs on music streaming services like Tidal Connect and Spotify Connect.
Additionally, LG will release the S70TY soundbar model ideal for LG QNED TVs. It has a compact design and has the industry’s first centre up-firing speaker that is claimed to provide crystal clear audio. The angled design ensures that the audio and visuals are in harmony with the level of the TV screen. The soundbar comes with a dedicated bracket that allows users to arrange the soundbar right underneath the QNED TV. With the bracket, the S70TY soundbar can be wall-mounted at different heights or locations.
LG Soundbar S95TR is the company’s flagship model consisting of 15 channels to provide an amazing 810W of output with a surround sound experience. It has five up-firing channels, including the industry’s first centre up-firing speaker that produces 3D audio with improved clarity and a larger soundstage.
The angle of the centre up-firing speaker guarantees a flawless audio-visual experience with exact elevation to the level of the TV screen. The LG Soundbar S95TR features improved tweeters for clear and precise audio in addition to a passive radiator to enhance bass tones and better overall balance between the soundbar and subwoofer.
Also Read: Best Amazon year–end smartphone deals you should not miss starting at Rs 25,000
The LG soundbar SG10TY can be paired with LG’s premium OLED TVs with WOW Orchestra, WOW Interface, and WOWCAST, which enhances the viewing experience. WOWCAST allows wireless home entertainment without any visible wires between the screen and the soundbar when paired with an LG premium OLED TV and the SG10TY model. This allows users to enjoy their favourite songs on music streaming services like Tidal Connect and Spotify Connect.
Additionally, LG will release the S70TY soundbar model ideal for LG QNED TVs. It has a compact design and has the industry’s first centre up-firing speaker that is claimed to provide crystal clear audio. The angled design ensures that the audio and visuals are in harmony with the level of the TV screen. The soundbar comes with a dedicated bracket that allows users to arrange the soundbar right underneath the QNED TV. With the bracket, the S70TY soundbar can be wall-mounted at different heights or locations. 
 If you are a Snapchat+ subscriber, here’s how you can remove the My AI bot from your chat feed.
Step 1: Launch the Snapchat app on your phone and swipe right to access the chat feed.
Step 2: Long press the My AI chat.
Step 3: Tap on Chat Settings.
Step 4: Select Clear from Chat Feed.
If you are a Snapchat+ subscriber, here’s how you can remove the My AI bot from your chat feed.
Step 1: Launch the Snapchat app on your phone and swipe right to access the chat feed.
Step 2: Long press the My AI chat.
Step 3: Tap on Chat Settings.
Step 4: Select Clear from Chat Feed.
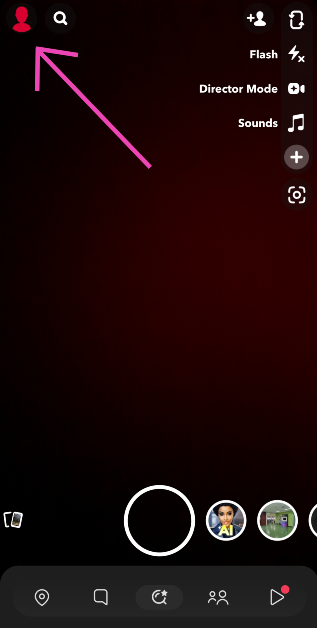
 Step 1: Launch the Snapchat app on your phone and tap on your Bitmoji at the top left corner of the screen.
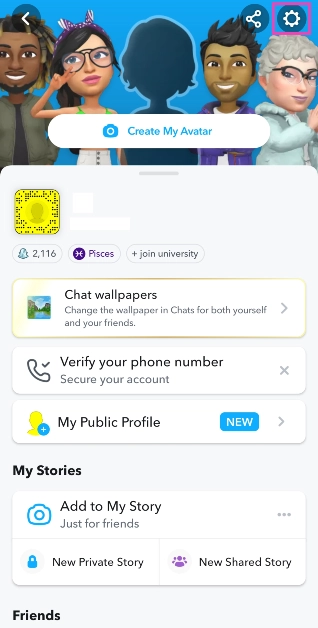
Step 2: Hit the gear icon at the top right corner of the screen to access Settings.
Step 3: Scroll down and select Clear Data under Privacy Controls.
Step 4: Hit Clear Conversations and tap the cross icon next to My AI.
Step 5: Confirm your selection in the popup box.
Read Also: Best 5 ways to fix ‘Phone Screen Turning Green’
Step 1: Launch the Snapchat app on your phone and tap on your Bitmoji at the top left corner of the screen.
Step 2: Hit the gear icon at the top right corner of the screen to access Settings.
Step 3: Scroll down and select Clear Data under Privacy Controls.
Step 4: Hit Clear Conversations and tap the cross icon next to My AI.
Step 5: Confirm your selection in the popup box.
Read Also: Best 5 ways to fix ‘Phone Screen Turning Green’
 If you want to keep the chatbot around but don’t want it as the first conversation in your chat tab, follow these steps to unpin it.
Step 1: Launch the Snapchat app on your device and tap your Bitmoji at the top left corner of the screen.
Step 2: Hit the Snapchat+ banner on your profile.
Step 3: Turn off the toggle switch next to My AI. The AI chatbot will be unpinned from your chat tab.
If you want to keep the chatbot around but don’t want it as the first conversation in your chat tab, follow these steps to unpin it.
Step 1: Launch the Snapchat app on your device and tap your Bitmoji at the top left corner of the screen.
Step 2: Hit the Snapchat+ banner on your profile.
Step 3: Turn off the toggle switch next to My AI. The AI chatbot will be unpinned from your chat tab.
 Step 1: Launch the Snapchat app on your device and swipe right to access the chat page.
Step 2: Long press the My AI chat.
Step 3: Hit Chat Settings and select Unpin Conversation.
Step 1: Launch the Snapchat app on your device and swipe right to access the chat page.
Step 2: Long press the My AI chat.
Step 3: Hit Chat Settings and select Unpin Conversation.
 Step 2: Hit the gear icon at the top right corner of the screen to access Settings.
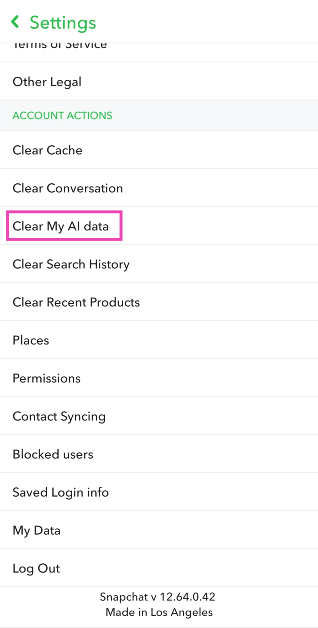
 Step 3: Scroll down and select Clear My AI Data.
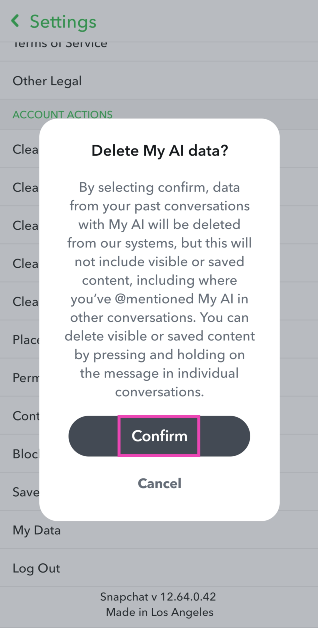
 Step 4: Confirm your selection in the popup box.

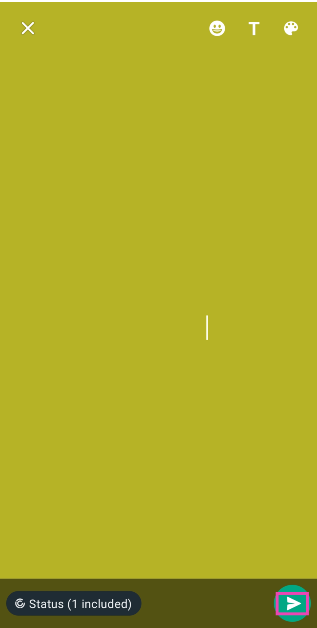
 Step 4: Select a background colour by tapping the paint board icon at the top right corner of the screen.
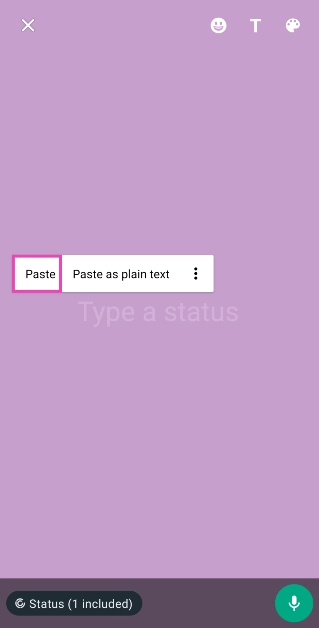
 Step 5: Paste the empty character from your clipboard into the text field.
 Step 6: Hit the Send icon.
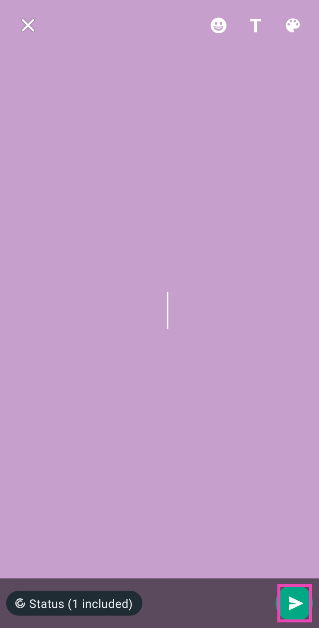 Step 7: The blank status will be uploaded to your WhatsApp profile.

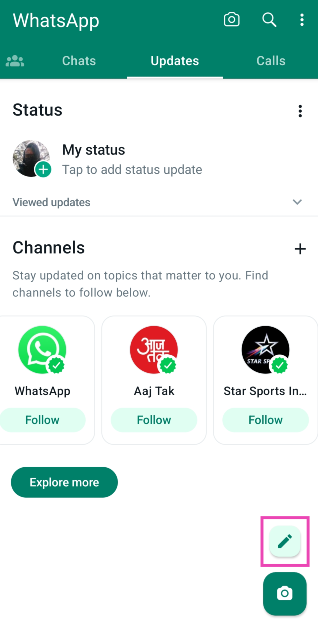
 Step 3: Hit the WhatsApp icon.
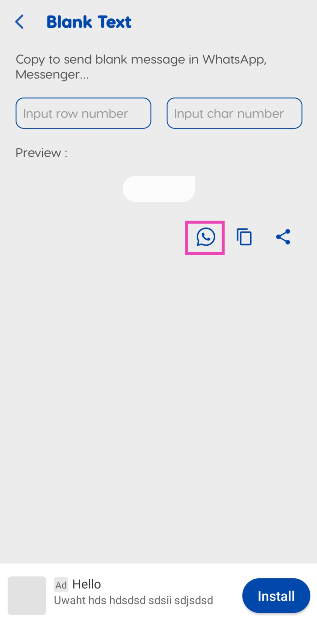 Step 4: Select My Status and hit the Arrow key at the bottom right corner of the screen.
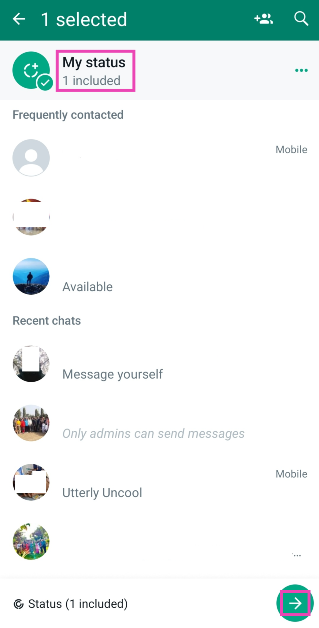 Step 5: Tap the Send icon at the bottom right corner of the screen to post a blank status.
 Step 3: Tap on your profile name at the top of the screen.
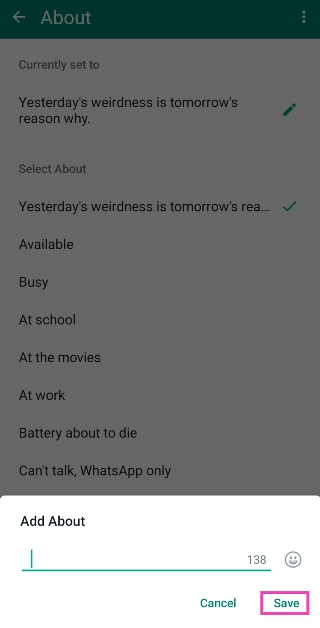
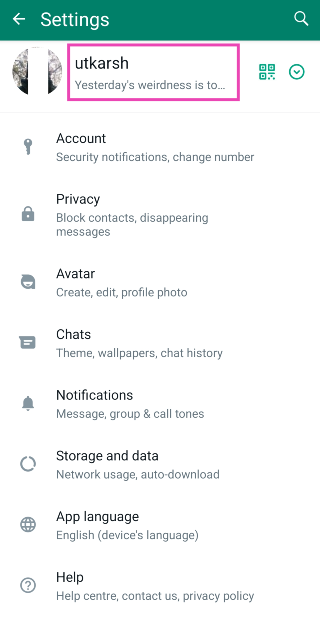 Step 4: Hit the pencil icon next to About.
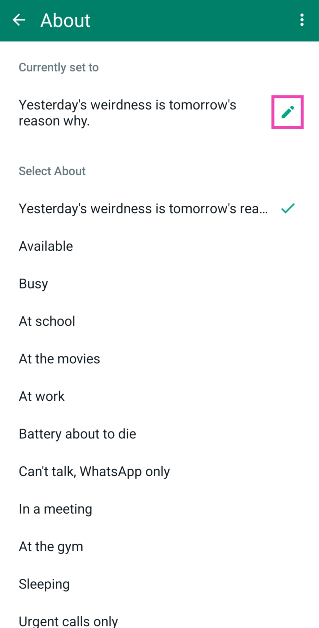
Step 5: Hit the pencil icon again.
Step 4: Hit the pencil icon next to About.
Step 5: Hit the pencil icon again.
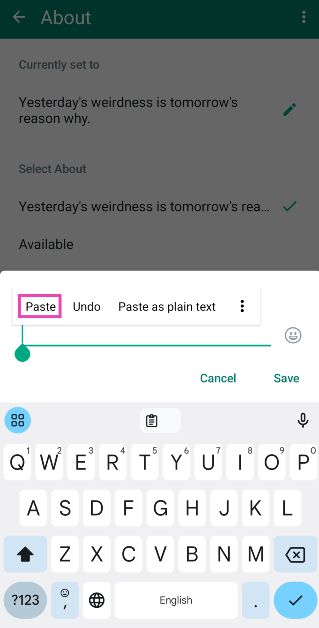
 Step 6: Paste the blank character and hit Save.
 Step 2: Tap on your profile name at the top of the screen.
Step 3: Hit the pencil icon next to About.
Step 4: Hit the pencil icon again.
Step 5: Paste the ⇨ ຸ symbols on the text field.
Step 2: Tap on your profile name at the top of the screen.
Step 3: Hit the pencil icon next to About.
Step 4: Hit the pencil icon again.
Step 5: Paste the ⇨ ຸ symbols on the text field.
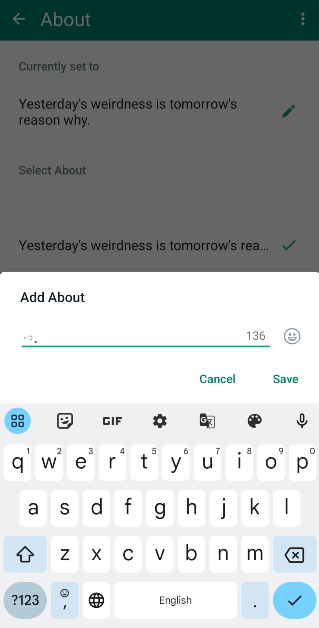 Step 6: Delete the arrow symbol and hit Save.
 Your WhatsApp ‘About’ will be set to blank.
Step 2: Tap on Privacy.
Your WhatsApp ‘About’ will be set to blank.
Step 2: Tap on Privacy.
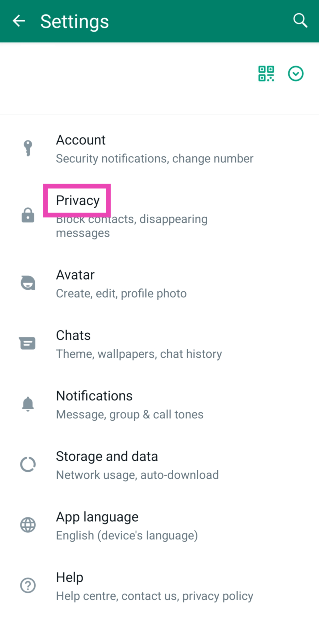 Step 3: Select About.
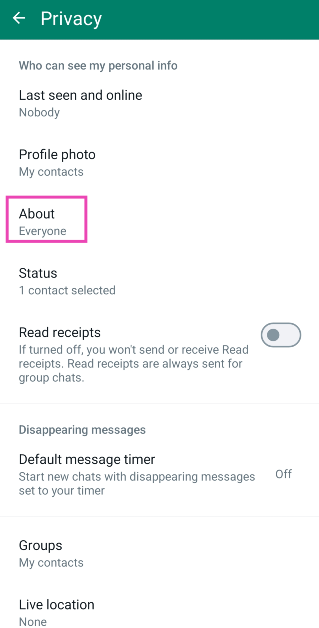 Step 4: Tap on Nobody.
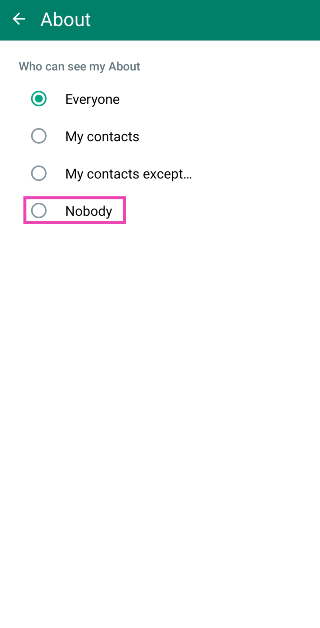 Now that nobody can see your WhatsApp ‘About’, it will appear as a blank field for everyone.

 OnePlus Nord CE 3 5G was launched in India in July this year. But now the device is on sale at Rs 24,999 on Amazon. The OnePlus Nord CE 3 5G (Review)features a 6.7-inch fluid AMOLED display with 2,412 x 1,080 pixels resolution. The screen has a refresh rate of 120Hz, a P3 colour gamut, 10-bit Colour Depth and HDR10+. The phone is powered by a Qualcomm Snapdragon 782G SoC with Adreno 642L GPU.
It operates on OxygenOS 13.1 on top of Android 13. For the photos and videos, the phone has a triple rear camera setup that includes a 50MP Sony IMX890 primary sensor, an 8MP ultra-wide angle lens and a 2MP macro sensor. There is a 16MP front-facing camera for selfies and video calling.
In addition to this, the smartphone boasts a 5,000mAh battery with 80W SuperVOOC charging support.
OnePlus Nord CE 3 5G was launched in India in July this year. But now the device is on sale at Rs 24,999 on Amazon. The OnePlus Nord CE 3 5G (Review)features a 6.7-inch fluid AMOLED display with 2,412 x 1,080 pixels resolution. The screen has a refresh rate of 120Hz, a P3 colour gamut, 10-bit Colour Depth and HDR10+. The phone is powered by a Qualcomm Snapdragon 782G SoC with Adreno 642L GPU.
It operates on OxygenOS 13.1 on top of Android 13. For the photos and videos, the phone has a triple rear camera setup that includes a 50MP Sony IMX890 primary sensor, an 8MP ultra-wide angle lens and a 2MP macro sensor. There is a 16MP front-facing camera for selfies and video calling.
In addition to this, the smartphone boasts a 5,000mAh battery with 80W SuperVOOC charging support.
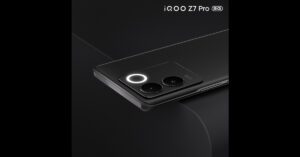 iQoo Z7 Pro 5G is currently available for Rs 23,999 on Amazon. iQoo Z7 Pro 5G comes with a 6.78-inch full-HD+ AMOLED display with 2400 x 1080 pixels of resolution and supports a 120Hz refresh rate. The handset runs on FuntouchOS 13 with Android 13. Under the hood, there is an octa-core 4nm MediaTek Dimensity 7200 SoC with Mali-G610 MC4 GPU. iQoo Z7 Pro 5G features a dual rear camera setup that includes a 64-megapixel Samsung GW3 primary sensor, a 2-megapixel depth sensor and a 16-megapixel front-facing sensor for taking selfies and video calling. The 4,600mAh battery in the iQoo Z7 Pro (Review)supports 66W wired fast charging.
 The iQoo Neo 7 Pro 5G is now listed at Rs 32,999 on Amazon. The smartphone has a 6.78-inch full-HD+ AMOLED screen with 1,080×2,400 pixels of resolution and supports a 120Hz refresh rate and a 300Hz touch sampling rate. It is powered by a Snapdragon 8+ Gen 1 chip and operates on Funtouch OS 13 on top of Android 13. The handset has a triple rear camera setup that includes a 50-megapixel primary Samsung GN5 sensor, an 8-megapixel ultra-wide-angle camera and a 2-megapixel macro camera. The iQoo Neo 7 Pro 5G (Review) further includes a 16-megapixel front-facing camera with an f/2.45 aperture for taking selfies and video calling. The iQoo Neo 7 Pro boasts a 5,000mAh battery with 120W Flash Charge support.
 OnePlus 11R 5G can now be bought for Rs 39,999 on Amazon. This gaming-focused smartphone is powered by the Snapdragon 8+ Gen 1 5G chipset. The device features a 6.74-inch Full-HD+ curved AMOLED display that is notable for its 2772 x 1240 pixel resolution. The dynamic adaptive refresh rate of the screen varies between 40Hz and 120Hz.
The OnePlus 11R (Review)has triple back cameras, one of which has a 50MP Sony IMX890 primary sensor, a 4 cm macro camera with a 120-degree ultra-wide lens and an 8 MP ultra wide-angle sensor. The 16MP front camera is located in a notch at the top of the display. The OnePlus 11R’s 5,000mAh battery supports 100W SUPERVOOC flash rapid charging.
OnePlus 11R 5G can now be bought for Rs 39,999 on Amazon. This gaming-focused smartphone is powered by the Snapdragon 8+ Gen 1 5G chipset. The device features a 6.74-inch Full-HD+ curved AMOLED display that is notable for its 2772 x 1240 pixel resolution. The dynamic adaptive refresh rate of the screen varies between 40Hz and 120Hz.
The OnePlus 11R (Review)has triple back cameras, one of which has a 50MP Sony IMX890 primary sensor, a 4 cm macro camera with a 120-degree ultra-wide lens and an 8 MP ultra wide-angle sensor. The 16MP front camera is located in a notch at the top of the display. The OnePlus 11R’s 5,000mAh battery supports 100W SUPERVOOC flash rapid charging.
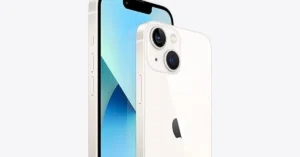 The iPhone 13 was launched in India two years ago and is now up for sale at just Rs 52,999. iPhone 13 features a 6.1-inch Super Retina XDR display. The device is powered by the company’s A15 Bionic chipset. The iPhone 13 has a diagonal rear camera design consisting of a 12-megapixel dual rear camera setup with 4K Dolby Vision HDR support. In addition to this, there is a 12-megapixel TrueDepth selfie camera on the front. The handset is IP68-rated.


 Step 3:
 Step 5:

 Step 2:
 Step 3:
 Step 4:
 Step 5:
 Step 3:
 Step 4: