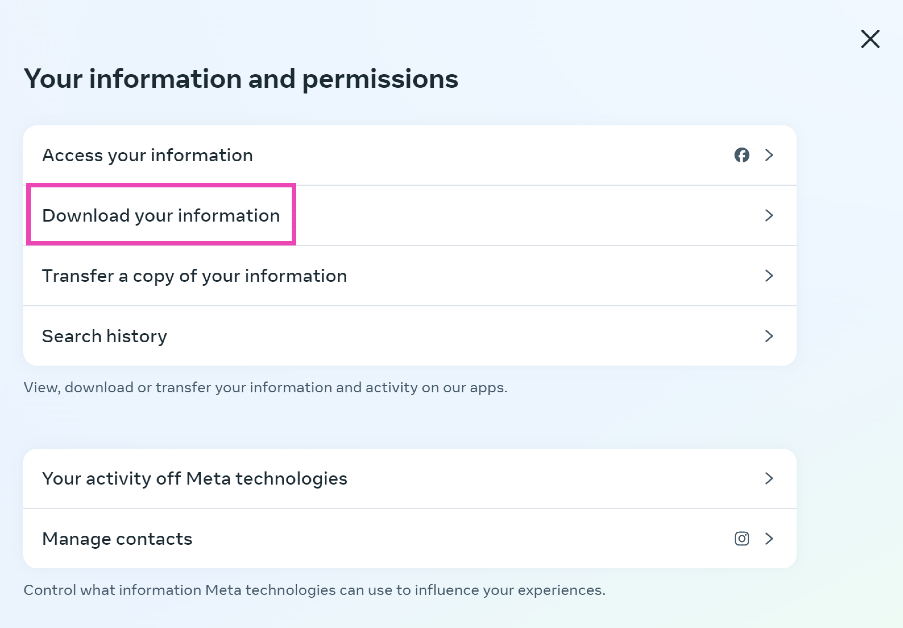
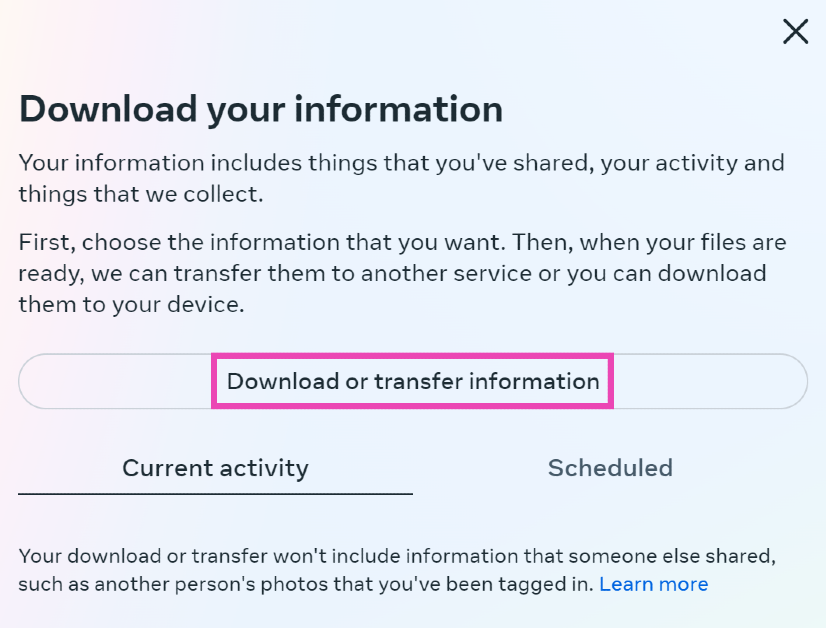
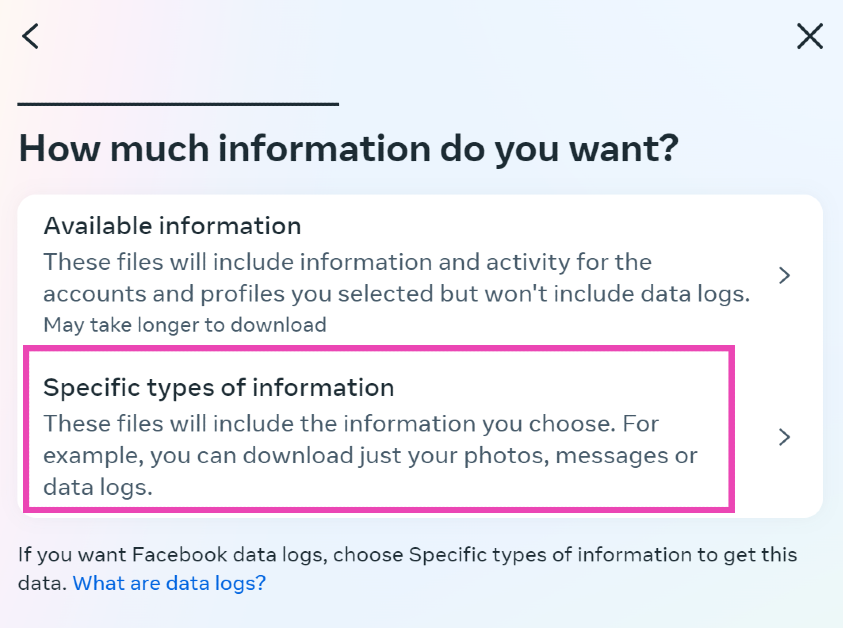
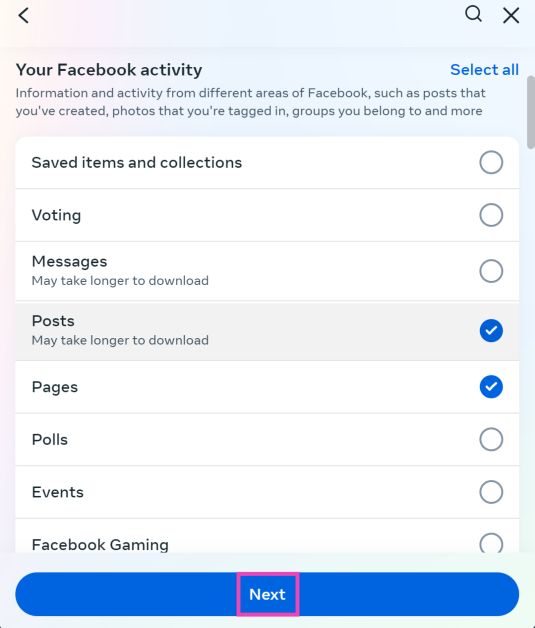
Google Chrome is one of the most popular web browsers in the world, not just for its quick speeds but also for the state-of-the-art productivity tools that are often unmatched by other browsers. One of these tools is ‘tab groups’. For those who struggle with managing dozens of tabs at once, this feature will be a lifesaver. It streamlines the way you go about browsing the web and brings a nice, colourful aesthetic to the entire experience. So, without further ado, here are the top 2 ways to create and save a tab group on Google Chrome.
Read Also: Adobe unveils Project Music GenAI Control, allows creators to generate music from text prompts
In This Article
Why you should use tab groups on Chrome
Google Chrome has a bunch of productivity features that go under the radar because not many people talk about them. Tab grouping is one of them. This is a very simple feature to use and can be easily incorporated into your daily routine. Once you start using it, it will give a massive boost to your productivity.
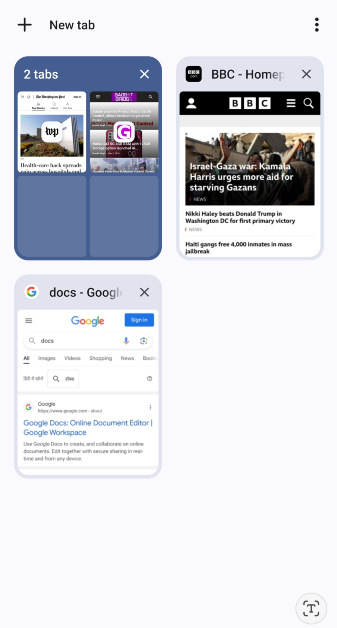
The idea is simple – tab groups let you bunch multiple tabs together. You can collapse the tabs with a single click to create more space on the browser, assign them a particular colour to identify them easily, and even save them for later. You can access your tab groups when you log into your Chrome account on another device. This feature can be used to streamline your work tasks. You can group all the research tabs together and leave some free space for other tabs in the Chrome bar. If you like to go through the daily news while going about your work day, you can access all your favourite media outlets with just one click.
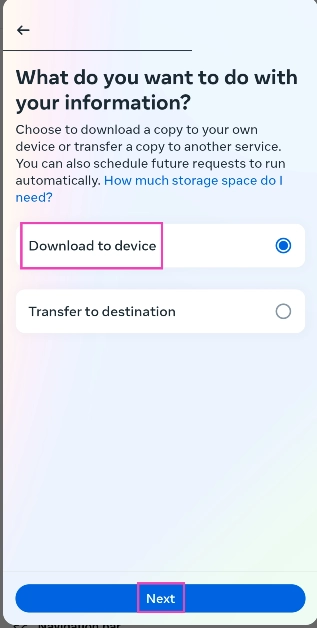
Create and save a tab group on Google Chrome (PC)
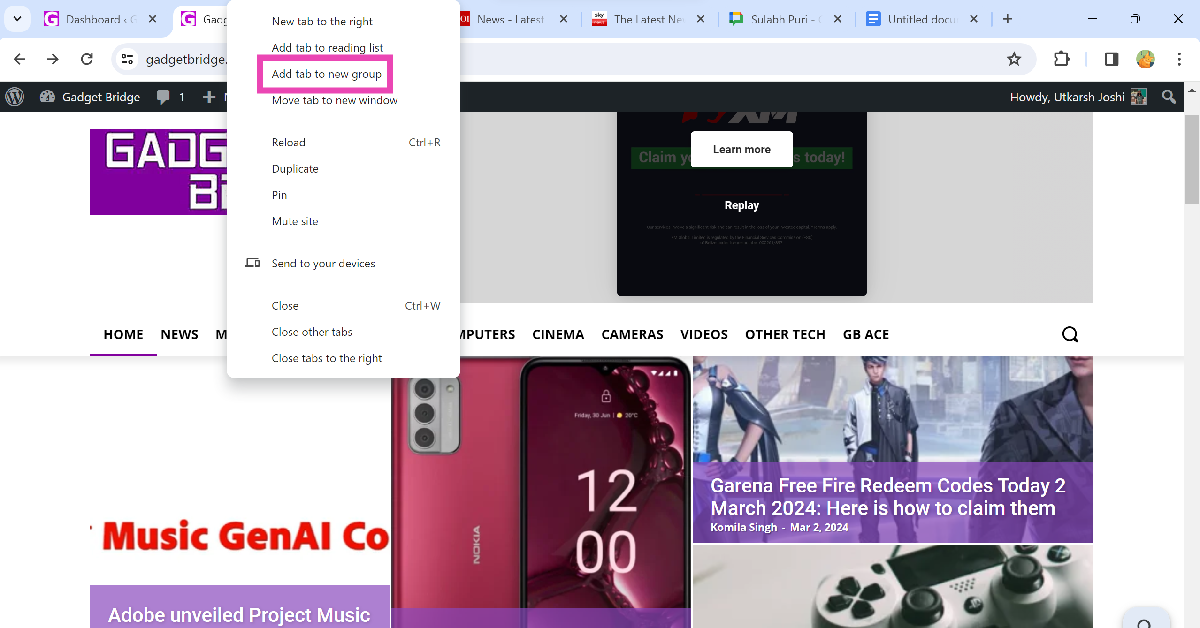
Step 1: Right-click on a tab you want to club in a group.
Step 2: Select Add tab to new group.
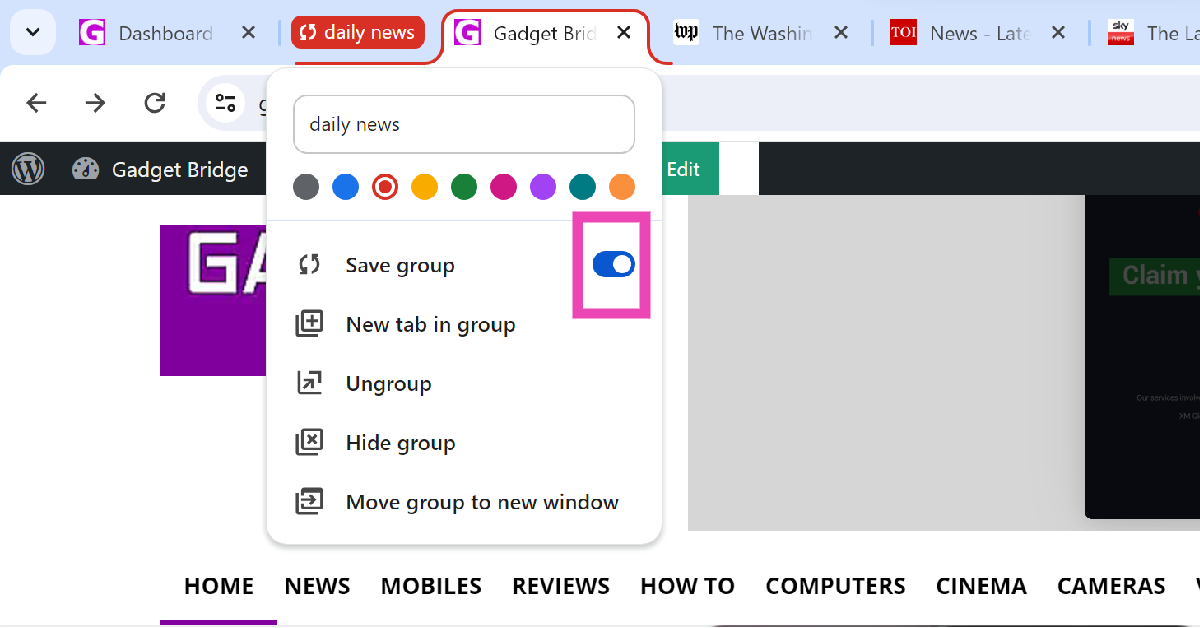
Step 3: Give the group a name and assign its tabs a colour.
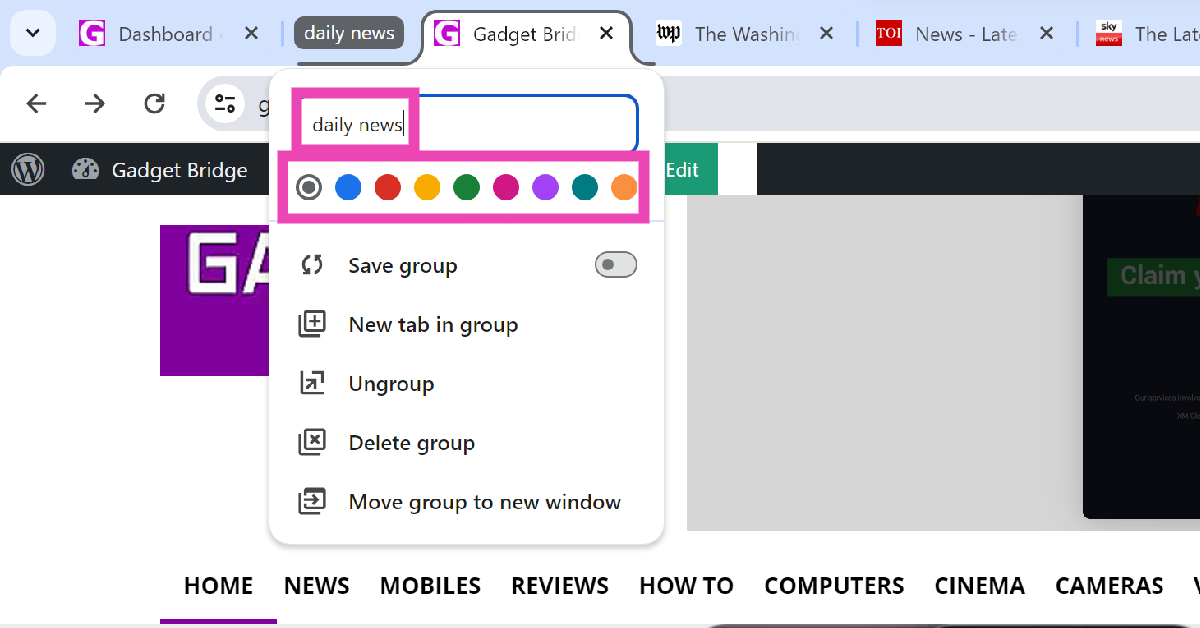
Step 4: Turn on the toggle switch for Save group. When you save a tab group, it appears in the bookmarks bar.
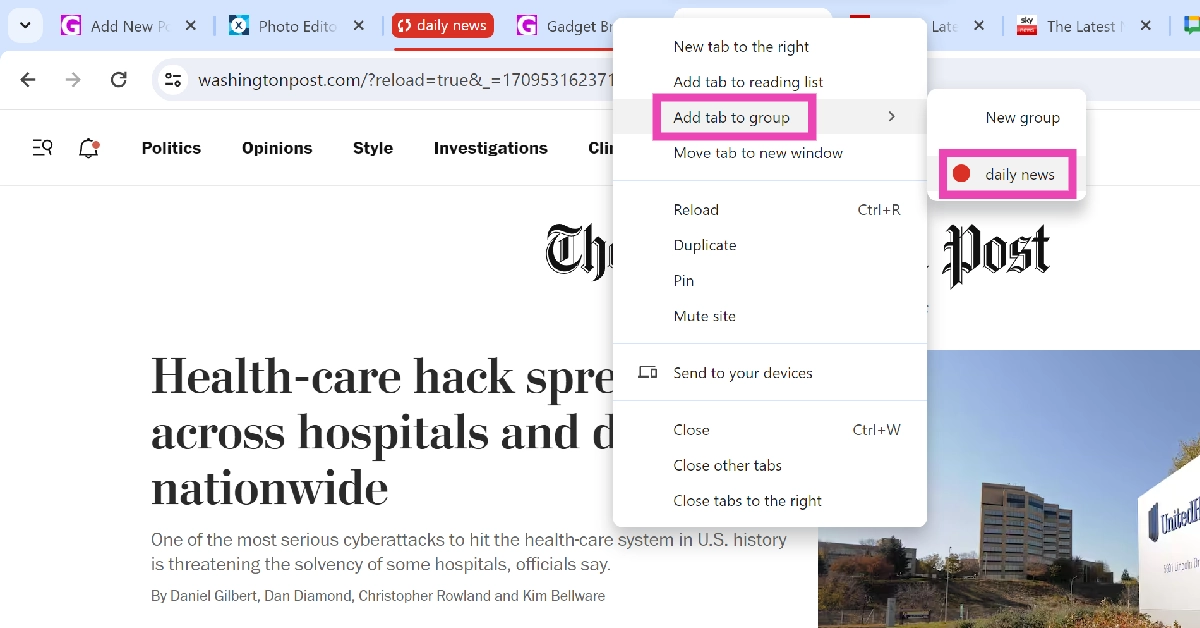
Step 5: Right-click on a tab and go to Add tab to a group>Group name to add it to your selected group.
Step 6: Click on a tab group to collapse its tabs and click on it again to bring them back.
Step 7: To delete the tab group, right-click on it and select Delete group.
Use the tab group tool (PC)
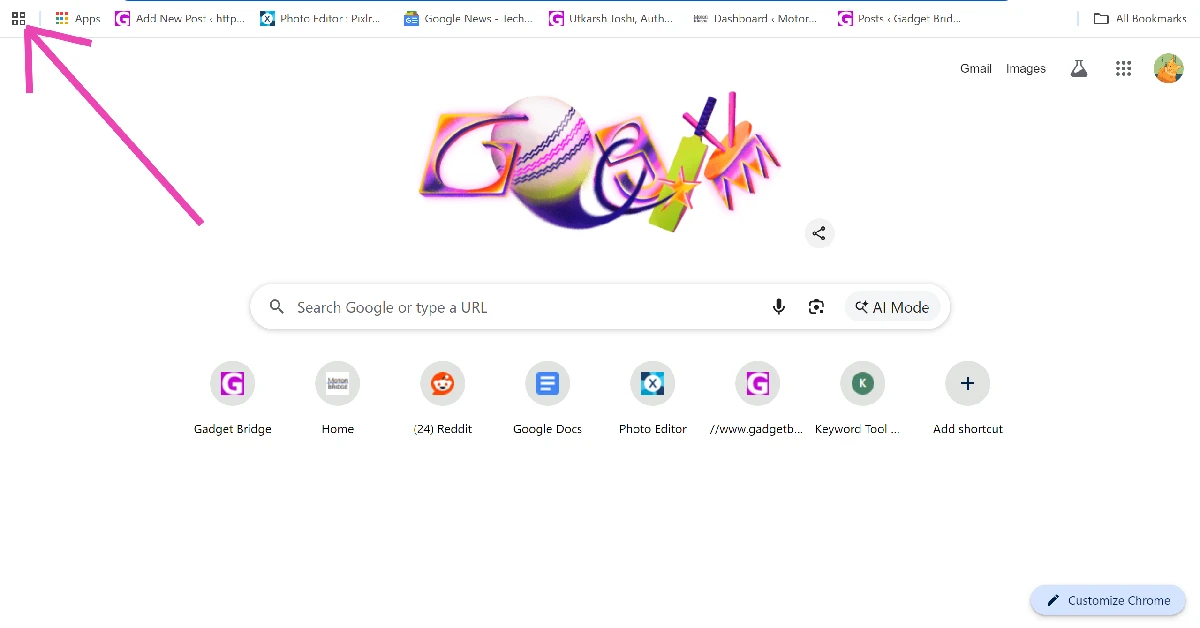
Step 1: Launch Google Chrome on your PC and click the four squares icon in the bookmarks bar.
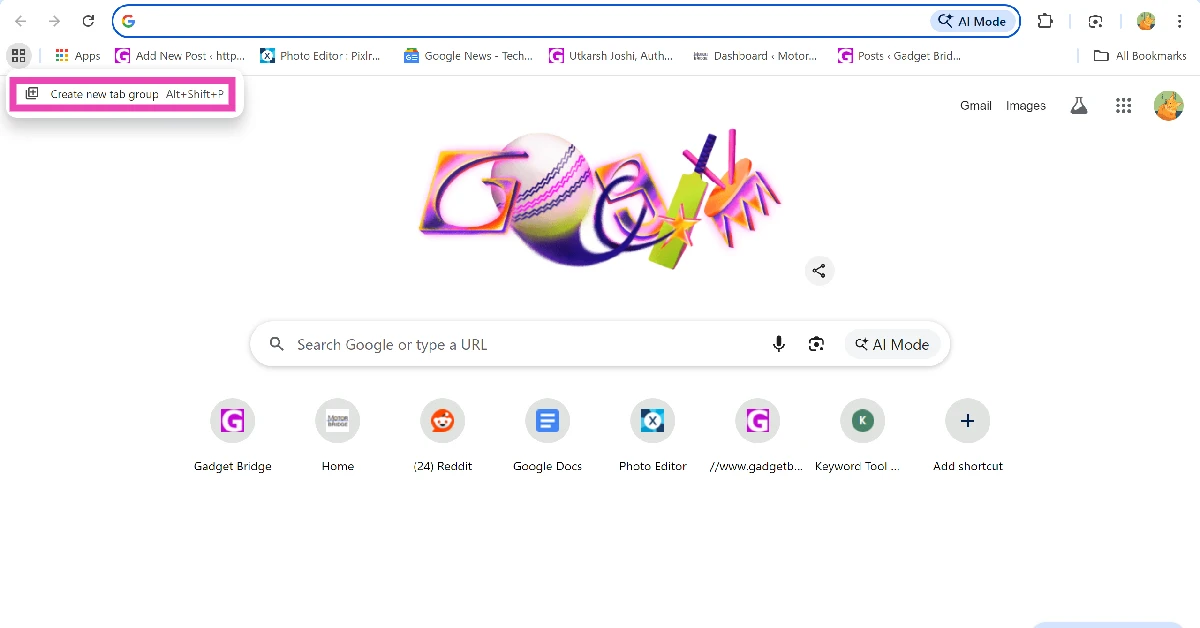
Step 2: Click on Create new tab group.
Step 3: Name the group and assign it a colour.
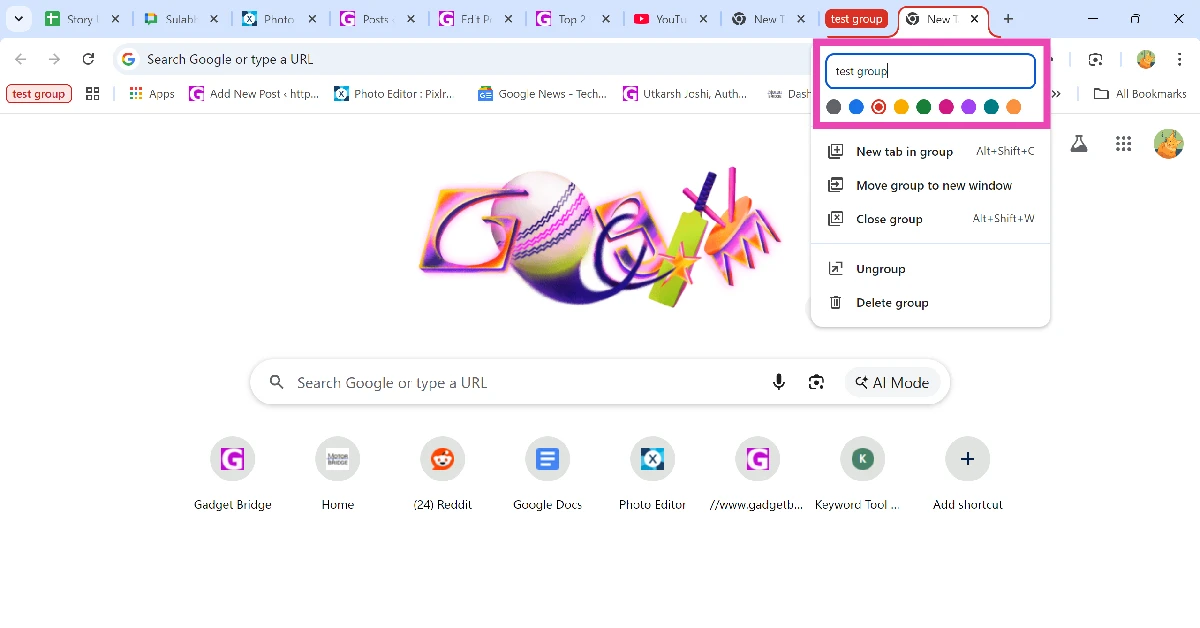
Step 4: Right-click the tab you want to add to the group and go to Add tab to group>[Group name].
![Step 4: Right-click the tab you want to add to the group and go to Add tab to group>[Group name].](https://www.gadgetbridge.com/wp-content/uploads/2026/02/test-group4.webp)
Create a tab group on Google Chrome (Android)
Step 1: Launch Google Chrome on your Android smartphone.
Step 2: Hit the switch tabs icon.

Step 3: Long-press a tab and move it on top of the tab you want to pair it with. Drop the tab to group them together.

Step 4: Once a new group has been formed, you can drop more tabs in it.
Frequently Asked Questions (FAQs)
How do I create a tab group on Google Chrome?
Right-click on a tab and select ‘Add tab to a new group’. Give the group a name. Right-click on other tabs and add them to the group.
What is the shortcut for creating a tab group in Google Chrome?
Press Alt + Shift + P on your keyboard to create a new tab group.
How do I add new tabs to a tab group?
Right-click a tab and go to Add tab to group>[Group name] to add it to the group.
What happens when I save a tab group?
Saving a tab group makes it appear in the bookmarks bar. When you log into your Chrome account on another PC, you will be able to access this group.
Can I assign a colour to a tab group on Chrome for Android?
As of right now, you can only colour-code tab groups on Chrome for PC. This feature is not available for Android yet.
Read Also: Nokia G42 5G 4GB RAM with 128GB storage option launched in India
Conclusion
This is how you can create and save a tab group on Google Chrome for PC and Android. If you have any other Chrome-related productivity tips to share with us, let us know in the comments! While you’re here, check out these 2 ways to hide your tabs in Chrome.


")


? Top 2 Ways")


")


")


")