After being banned for nearly ten months, Battleground Mobile India, aka BGMI, is officially available again in India. BGMI fans are looking for ways to improve their game experience and one such method is the usage of redemption codes, which offers a variety of rewards and advantages using BGMI redeem codes players can gain access to new skins, outfits, loot crates, weapons and free UC and diamonds.
As mentioned earlier, these codes give users the chance to earn unique rewards and gain extra benefits while playing the game. This includes GUN SKINS (M4, AKM, M416, AWM, M24, UZI, KAR98K), free character voucher, Andy, Carlo, Sara, Victor character for free, free Anna Character on completing the mission and UC or Royal Pass Discount. So here we have gathered a list of the most recent BGMI redeem codes as of 18 July 2023. Also, redeem these codes asap as these are only valid for a limited duration.
BGMI Redeem Codes for 18 July 2023
BR43FMAPYEZZ
8F3QZKNTLWBZ
J3ZKQ57Z2P2P
FFCMCPSUYUY7E
EYH2W3XK8UPG
UVX9PYZV54AC
GCNVA2PDRGRZ
XZJZE25WEFJJ
V427K98RUCHZ
MCPW3D28VZD6
ZZZ76NT3PDSH
How to get free Redeem Codes for BGMI on 18 July 2023?
- Launch BGMI on your device.
- Then select the Redeem Code option from the main menu.
- Next, click on the Redeem code tab.
- A new window will open, requesting the redemption code.
- Now enter your BGMI code.
- Confirm and click on the “Redeem” tab.
- If your redeem code is valid then you will get a message confirming that your rewards were successfully redeemed.
(Note that these codes are case-sensitive, so be sure to type them correctly to prevent any errors.)
For the latest
gadget and tech news, and
gadget reviews, follow us on
Twitter,
Facebook and
Instagram. For newest
tech & gadget videos subscribe to our
YouTube Channel. You can also stay up to date using the
Gadget Bridge Android App. You can find the latest
car and bike news here.


 Step 3:
 Step 4:
 Step 6:

 Step 2:
 Step 3:


 Step 3:
 Step 4:
  Step 2:
 Step 3: Connect
 Step 5:
 Step 6:
 Step 7:
 Step 8:
 Step 9:


 Energy Savings:
")


 Step 2:
 Step 3:
  Step 4:
 Step 5:
 Step 6:
 Step 7:
 Step 3:


 Step 3:
 Step 4:
 Step 2:
 Step 4:
  Step 6:
 Step 5:
 Step 7:


")

 Step 3:
 Step 4:
 Step 5:
 Step 2:
 Step 3:
 Step 4:

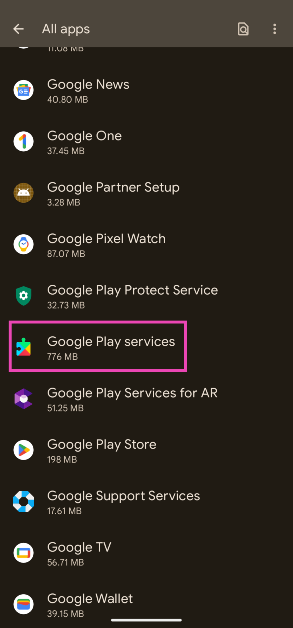
 Step 2: Tap on Google Play Services.
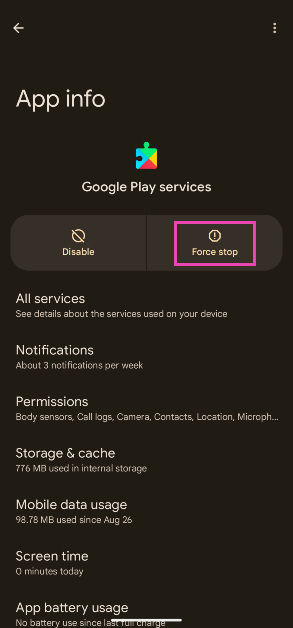
 Step 3: Tap on Force Stop.
 Step 2:
 Step 3:
 Step 2:
 Step 3:
 Step 4: