

In This Article
Reboot your computer
Restarting your computer can fix minor background issues or software glitches that may be keeping it from carrying out the basic functions. Rebooting your computer should be the first step in diagnosing any problem. Click on the Windows icon at the bottom left corner of the screen and select ‘Restart’ from the power options. Check if your keyboard is working properly after the reboot. If the issue still persists, scroll down for other fixes.Check the power switch on your keyboard
If you use a wireless keyboard, it is very likely that it comes with a power switch. This switch disabled your keyboard when it is not in use. It comes in handy when your computer is turned on but you are not using your keyboard. Turning off the keyboard can help save you a significant amount of battery. It is very likely that you turned the power switch off on your keyboard and forgot to turn it on. Check if the switch is turned on before trying out other fixes on this list.Clean the USB port
It is common for dirt and dust particles to accumulate in and around the USB port on your PC, hampering the connection with the keyboard. This may cause the keyboard to stop functioning altogether. Unplug the keyboard and use a small brush to clean the USB port. Blow some air into it to clean out the finer particles. Once that is done, plug in your keyboard again and check if it works.Try using a different USB port
It is possible that your keyboard stopped working due to a faulty USB port on your computer. Try connecting the keyboard to a different USB port to see if it works. If the keyboard still doesn’t work, it is either a hardware issue related to your issue or a software issue on the PC’s end.Unpair and re-pair your keyboard
Wireless keyboard users can try unpairing and then re-pairing their keyboard with their PC. Doing this refreshes the connection and gets rid of any temporary glitches that may be keeping the keyboard from working. You can use the dedicated keyboard app or simply go to Settings>Devices on your PC to unpair the keyboard.Turn off Filter Keys
Step 1: Open Control Panel and select Ease of Access. Step 2: Click on ‘Change how keyboard works’.
 Step 3: De-select ‘Turn on Filter keys’.
 Step 4: Click on ‘Apply’ and then save your changes by clicking on ‘Ok’.
Enter the BIOS mode on your computer
Entering the BIOS mode is a quick way to figure out whether the issue is hardware or software related. To enter BIOS, simply press the F2 or Delete key repeatedly while your PC is rebooting. The key may vary for different PCs, so it is advised to do a quick Google search for which key works on your computer. If you are unable to enter BIOS, the issue is hardware related.Disable fast startup
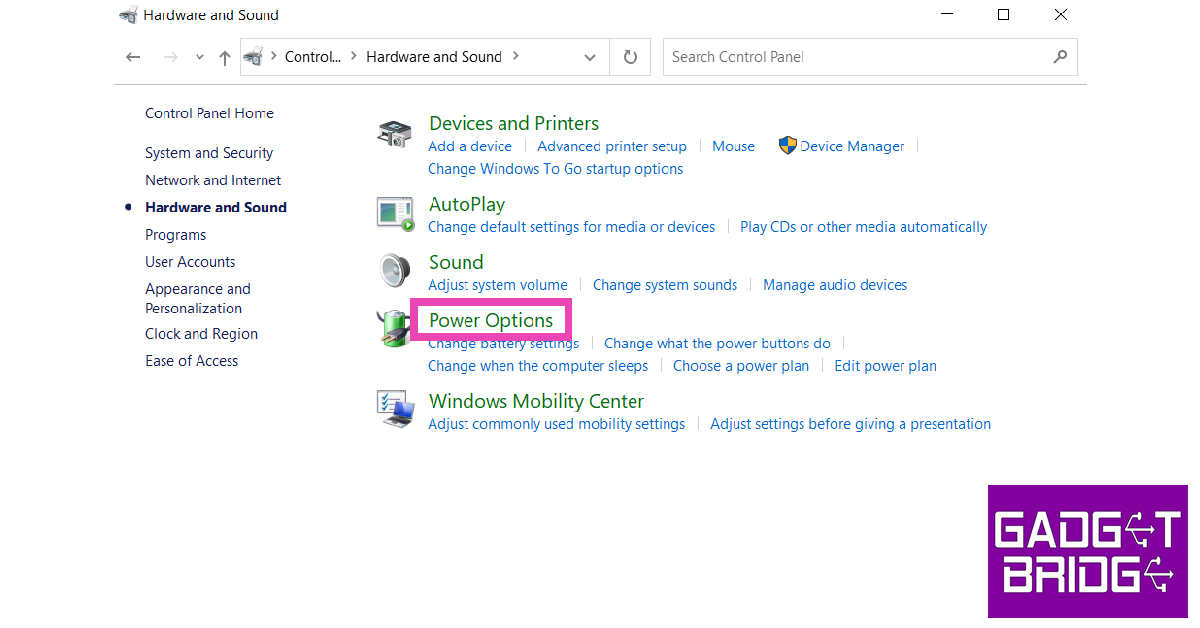
Step 1: Launch the Control Panel and select Hardware and Sound.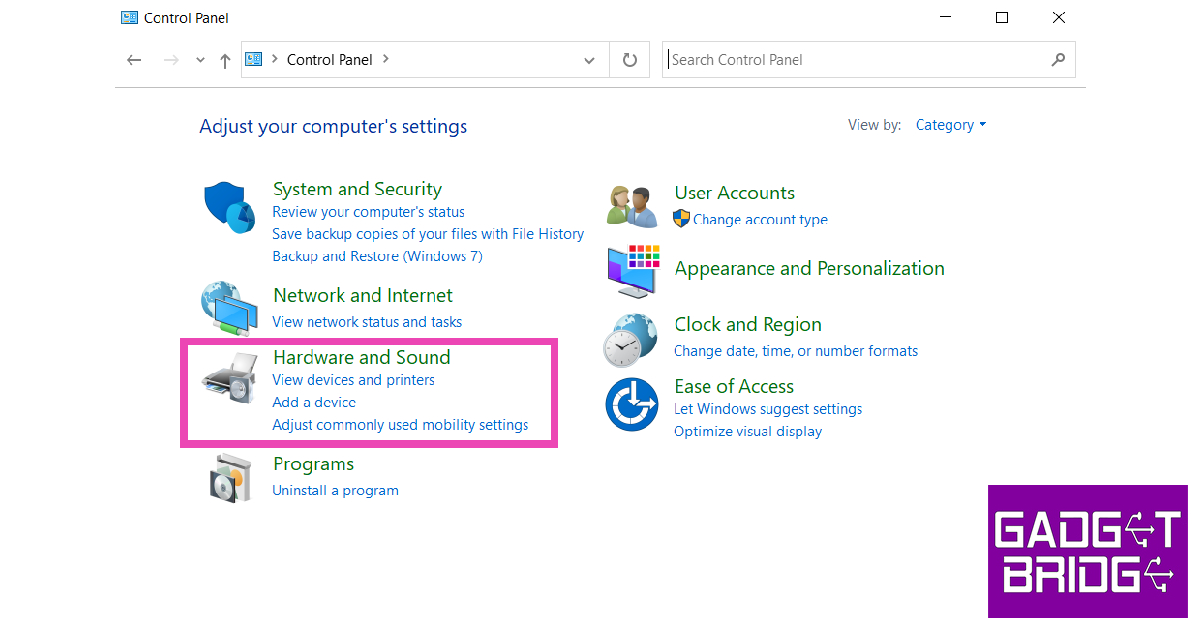 Step 2: Click on Power Options.
 Step 3: Select ‘Choose what power buttons do’ from the side menu.
Step 4: Click on ‘Change settings that are currently unavailable’.
Step 3: Select ‘Choose what power buttons do’ from the side menu.
Step 4: Click on ‘Change settings that are currently unavailable’.
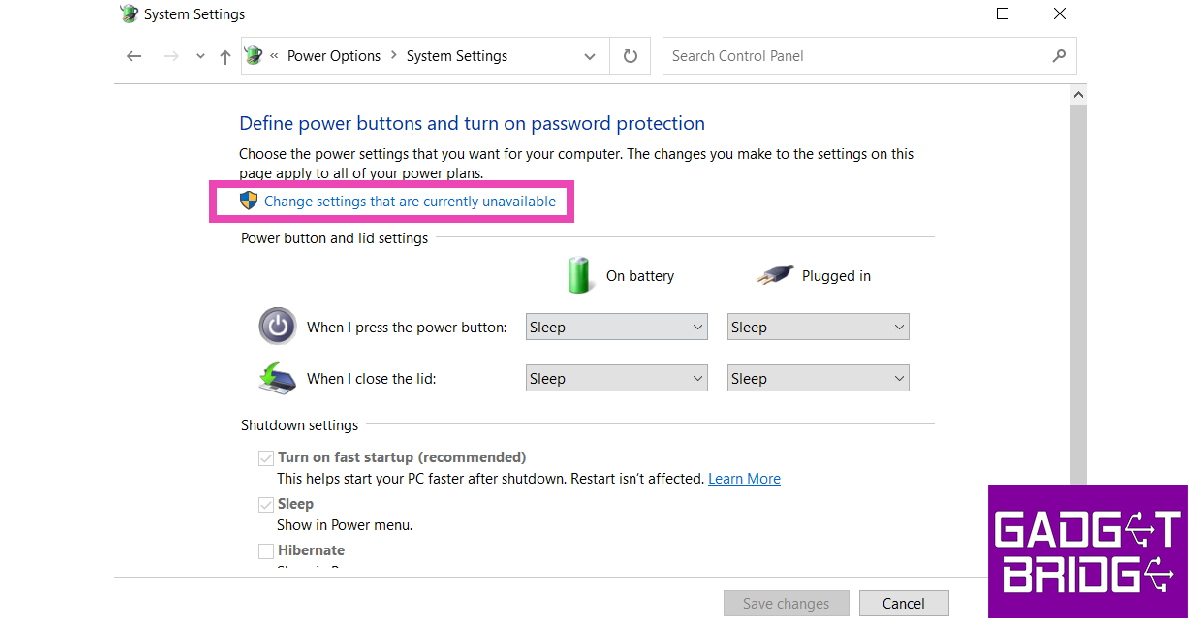 Step 5: De-select ‘Turn on fast startup’ and save changes.

Clean your keyboard
 You’d be surprised how often keyboards stop working because they accumulate too much dirt. It is very common for dust particles and other kinds of dirt to settle beneath the keys on your keyboard. If you want to thoroughly clean your keyboard, check out our full guide here. For easy cleanup, simply reach for the dirt below the keys using a small brush and gently tap your keyboard on the table to push the dirt out. Clean your keyboard with a microfiber cloth and see if it is working again.
Update or reinstall keyboard drivers
Step 1: Type in ‘Device Manager’ in the search bar at the bottom left corner of your screen and select it. Step 2: Click on ‘Keyboard’ to expand the section. Step 3: Right-click on the keyboard listed on the list and select ‘Update driver’. Follow the onscreen instructions and the driver will be updated.
 If your keyboard still doesn’t work, try uninstalling the driver by clicking on ‘Uninstall device’ instead of ‘Update driver.’ Restart your computer. The operating system will automatically download the necessary driver for your keyboard.
Frequently Asked Questions
Why is my keyboard not working?
Your keyboard may stop working due to a hardware malfunction or because of outdated drivers. Make sure your keyboard is clean and dust free at all times.How do I know if my keyboard is locked?
Hold the right shift key button for 8 seconds. If the filer keys icon appears on the taskbar, it means that your keyboard is locked.How do I disable filter keys?
To disable filter keys go to Control Panel>Ease of Access>Change how keyboard works and uncheck the box for ‘turn on filter keys’. Read Also: What to expect from the new Twitter acquisition?Conclusion
There are 10 simple fixes for when your keyboard stops working. If you’ve tried all the fixes mentioned above and your keyboard still doesn’t work, you may need to take it to a repair centre to get it fixed or buy a new one. If you found these fixes to be useful, let us know in the comments!
For the latest gadget and tech news, and gadget reviews, follow us on Twitter, Facebook and Instagram. For newest tech & gadget videos subscribe to our YouTube Channel. You can also stay up to date using the Gadget Bridge Android App. You can find the latest car and bike news here.

 Step 3:
  Step 4:
  Step 5:
  Step 7:
 Step 2:
 Step 3:


 Can you imagine receiving an activity report of every internet movement of your child? Well, that is exactly what FamiSafe does, and it keeps your child safe from explicit content. It has features that search for harmful messages and pictures on your child’s phone. To ensure safety on the web, FamiSafe filters harmful search results so parents remain at peace and satisfied.
 Step 2: There are two ways to log into FamiSafe. You can either use your Apple ID, Facebook, or Google account or register a new Wondershare ID. The application also provides a “Continue as Guest” option to help you access FamiSafe without logging in.
 Step 3: Now, you have to connect your device to your child’s device. Select the “Connect a Device” option. On the next screen, you will find a QR and pairing code which will be used later in this guide whilst setting up your child’s phone.
 Step 4: Follow the guide in the next parts to set up your child’s device. Once that is done, use the Started Wizard to set up basic parental control on your device.
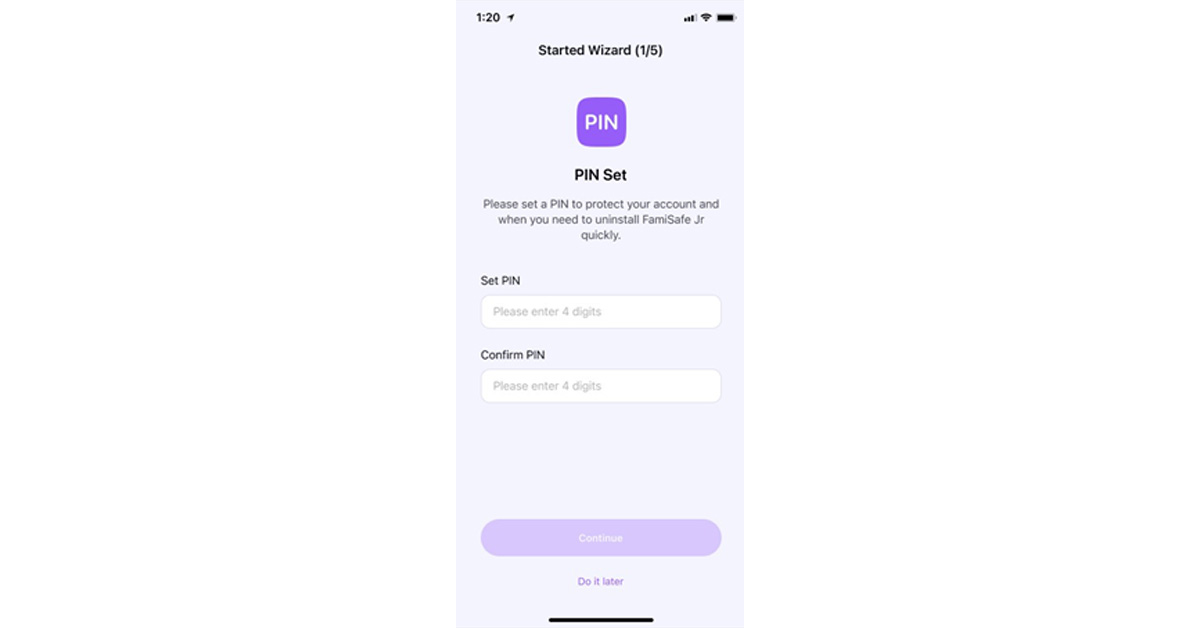
 Method 2: This method is quicker and easier. You have to scan the QR code from your phone using your kid’s phone camera. FamiSafe will be downloaded, and both devices will be connected automatically.


 Wondershare Recoverit is an amazing tool that offers you to recover different types of lost data from your Intel-based Mac. This tool can restore 1000+ kinds of files, images, and folders from 2000+ storage devices. It can recover all the deleted, lost, and formatted files, images, and devices. Moreover, it can restore data from the crashed Intel-based Mac as well. While you proceed with the recovery process, you can find a couple of recovery modes to try out to ensure the success of your process.


 This tool provides three different modes to help you repair iOS issues effectively. The offered modes are Standard, Advanced, and Anti-Recovery, which can be used according to the situation. Standard Mode resolves iOS issues instantly without data loss. On the other hand, to tackle complicated problems, you can use Advanced Mode. Moreover, the Anti-Recovery Mode can be used to delete your existing data on your iPhone permanently. This mode can be used if you want to sell your iPhone after deleting all the data.
 Step 2: Choose Standard Mode
From the new screen, choose the “iOS Repair” option. Now the tool will display multiple errors on your screen. Afterward, click “Repair Now” and select “Standard Mode” to repair the sound issue without data loss.
Step 2: Choose Standard Mode
From the new screen, choose the “iOS Repair” option. Now the tool will display multiple errors on your screen. Afterward, click “Repair Now” and select “Standard Mode” to repair the sound issue without data loss. Step 3: Initiate Recovery Mode
Now enable Recovery mode on your iPhone. To do so, connect your phone to your PC with a USB cable. Afterward, unlock your iPhone and tap on the “Trust” option that appears on the pop-up notification. Following this, select “Enter Recovery Mode” from your PC’s screen. If your iPhone is not functional, click “Guide to Recovery Mode.”
Step 3: Initiate Recovery Mode
Now enable Recovery mode on your iPhone. To do so, connect your phone to your PC with a USB cable. Afterward, unlock your iPhone and tap on the “Trust” option that appears on the pop-up notification. Following this, select “Enter Recovery Mode” from your PC’s screen. If your iPhone is not functional, click “Guide to Recovery Mode.” Step 4: Install Suitable Firmware
Once you have successfully enabled the recovery mode, the tool will bring a list of the firmware. Click on the “Download” button to install the suitable firmware quickly. After installation, the tool will verify the downloaded firmware.
Step 4: Install Suitable Firmware
Once you have successfully enabled the recovery mode, the tool will bring a list of the firmware. Click on the “Download” button to install the suitable firmware quickly. After installation, the tool will verify the downloaded firmware. Step 5: Begin Repairing Process
After complete verification, hit the “Repair Now” button. By doing so, you would start the repairing process easily. You can check the ongoing progress on your computer’s screen. Once the repairing process concludes, click on the “Done” button.
Step 5: Begin Repairing Process
After complete verification, hit the “Repair Now” button. By doing so, you would start the repairing process easily. You can check the ongoing progress on your computer’s screen. Once the repairing process concludes, click on the “Done” button.


 Repairit for Mac can repair corrupted audios from different storage devices, including voice recorders, recording software, and shooting apparatus. Since the tool has a user-friendly interface, you can easily follow three simple steps to repair AAC files on your Mac. Here is the three-step guide for file repairing:


 You do not have to worry about your WhatsApp data while switching to iPhone 14 Pro Max because you can transfer WhatsApp messages, stickers, media files, or voice notes effortlessly. One of the most assistive things about this tool is that you can easily import WhatsApp data from Google Drive into your new iPhone. It also allows you to import or export chats and media for convenience.


 What’s better than getting your hands on a new flagship? What about nabbing it for less? For a limited time, you will be able to buy the Samsung Galaxy S22 Ultra 5G (128GB) for a red-hot price of A$1,199 and save yourself A$650. There’s so much to love about this phone, from its gorgeous OLED display and built-in s-pen support to its featured-packed software and powerful hardware internals. You really shouldn’t miss this opportunity to buy one.
 PhoneBot is also bringing big discounts to the iPhone 13 Pro, knocking a few hundred dollars off its original price. Now, you will only need to part ways with A$1,399 instead of A$1,699 for a 256GB variant. That’s a significant save given what you get back. It has a killer camera system and it’s absurdly fast. The iPhone 13 Pro’s battery life is noticeably better than that of its predecessors. Let’s not forget its exquisite OLED panel which can now deliver a peak refresh rate of 120H. The iPhone 13 Pro does live up to its high expectations.


 Step 2:
 Step 3:
 Step 3:
 Step 3:
 Step 3:
 Step 4:


