Key Highlights
- LinkedIn’s short-form video feed emphasizes jobs, careers, and business insights.
- Features a swipeable vertical feed with options to like, comment, and share videos.
- Offers a new space for creators to share content and reach a wider professional audience.
In an innovative move,
LinkedIn, the professional networking giant owned by Microsoft, is currently testing a new feature that could transform how professionals interact on the platform. The introduction of a short-form video feed, bearing resemblance to the popular TikTok format, marks LinkedIn’s foray into the dynamic world of video content. Unlike the casual and diverse content found on TikTok, LinkedIn’s video feed aims to concentrate on the professional sphere, focusing on jobs, careers, and business insights. Here’s what we know so far about this exciting development.
Discovering Professional Insights Through Video
Spotted by Austin Null, a strategy director at McKinney, an influencer agency, this upcoming feature promises a fresh way for LinkedIn’s user base to engage with content. Null’s demonstration revealed that the feed will be accessible via a new ‘Video’ tab. On tapping this button, users will be greeted by a vertical, swipeable feed of short videos. Similar to other social media platforms, interactions such as liking, commenting, and sharing are enabled, fostering a community of professionals who can exchange ideas and feedback instantly.
Read Also: Facebook users will be able to share videos directly using the “Sharing to
Tailored Content for Professional Growth
Unlike the broad content spectrum seen on platforms like Instagram, YouTube, or Netflix, LinkedIn’s video feed is meticulously curated to cater to professionals seeking to broaden their knowledge and connections in their respective fields. This dedicated approach is designed to maximize engagement and discovery, allowing users to effortlessly browse through insightful videos during their networking journey.
TechCrunch reports highlight LinkedIn’s acknowledgement of videos as a preferred learning and engagement format among professionals. The platform is exploring this new feature to facilitate easier discovery of relevant, educational, and motivational content, directly from experts and industry leaders.
A Future Hub for Creators and Professionals
This short-form video feed not only enhances the user experience but also opens up new avenues for content creators. By providing a specialized space for professional videos, LinkedIn offers creators the chance to expand their reach and impact within the professional community. Furthermore, the potential future monetization of this feed could serve as an additional incentive for creators to share their valuable insights on LinkedIn.
LinkedIn’s Strategic Expansion
The testing of the short-form video feed comes alongside LinkedIn’s exploration into other engagement-driven initiatives, including gaming. With over 1 billion users worldwide, these developments signal LinkedIn’s ambition to evolve beyond a mere networking site into a comprehensive platform for professional development and engagement.
Read Also: What is Instagram reels’ time limit?
Embracing the Future of Professional Networking
As LinkedIn continues to test this feature, the professional world eagerly awaits its roll-out. This innovative approach to content discovery and sharing represents a significant step forward in how professionals connect, learn, and grow together. By leveraging the power of short-form videos, LinkedIn is set to offer an even more engaging and enriching platform for the global professional community.
With these advancements, LinkedIn reinforces its commitment to providing valuable tools for professional development, making it an even more essential part of the professional and business landscape. Stay tuned as we continue to monitor this exciting development, promising to redefine professional networking in the digital age.


")
 Step 1:


")
 Step 1:


 Step 3:
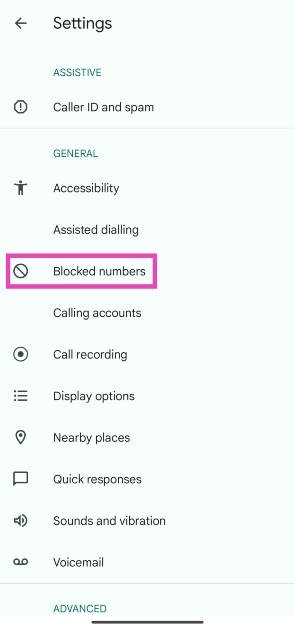 Step 4:
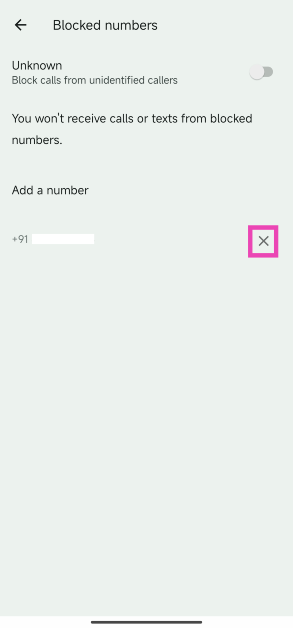
 Step 3:
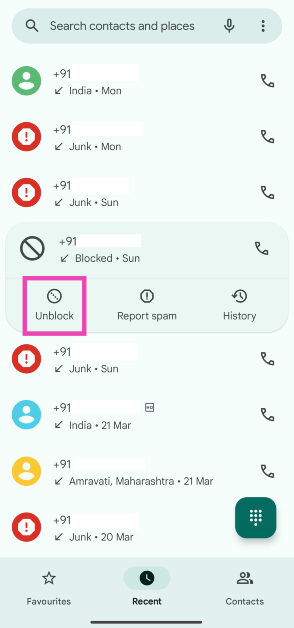 Step 4: Confirm
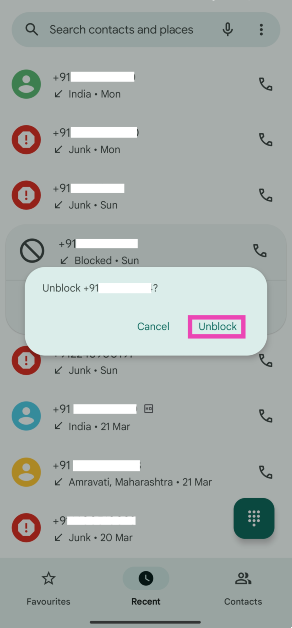
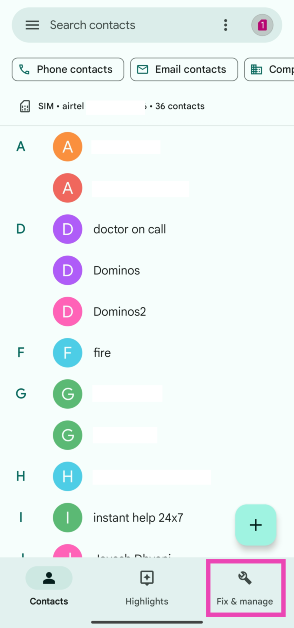 Step 3:
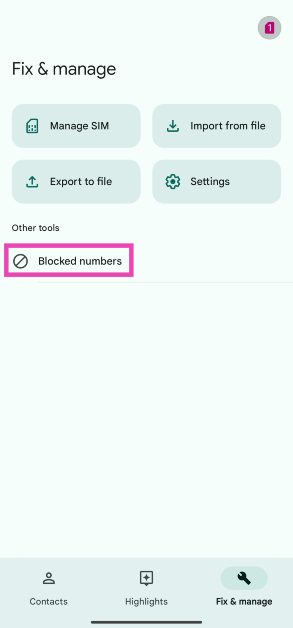 Step 4:
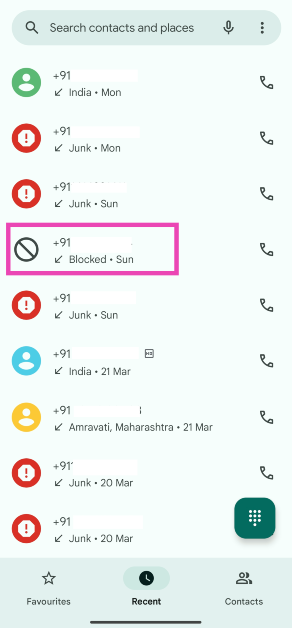
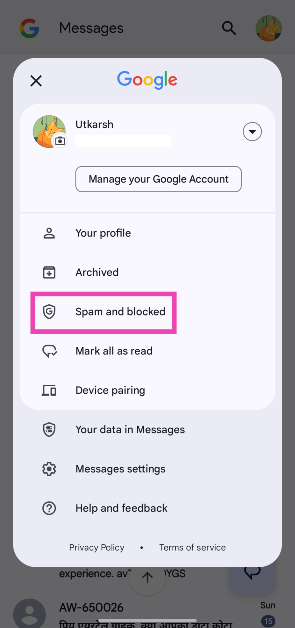
 Step 3: Select Spam and blocked.
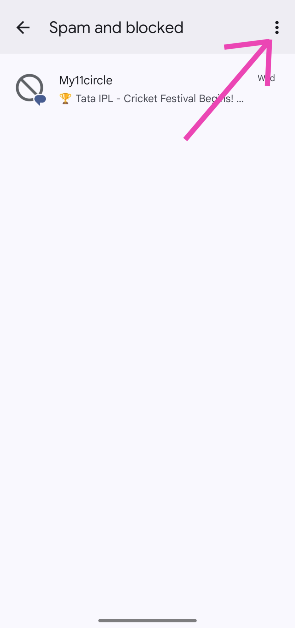
 Step 4: Hit the ellipses at the top right corner of the screen.
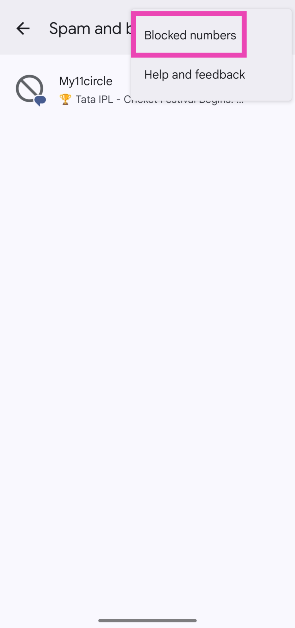
 Step 5: Tap on Blocked numbers.
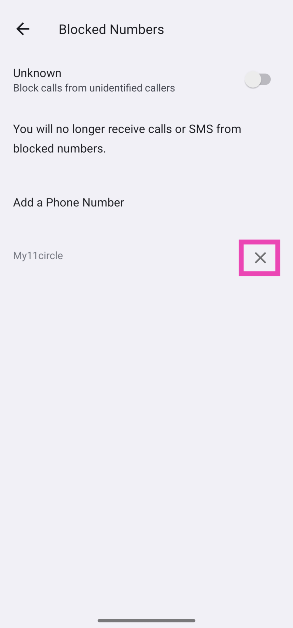
 Step 6: Hit the cross icon next to the number you wish to unblock.


")

 Step 1:


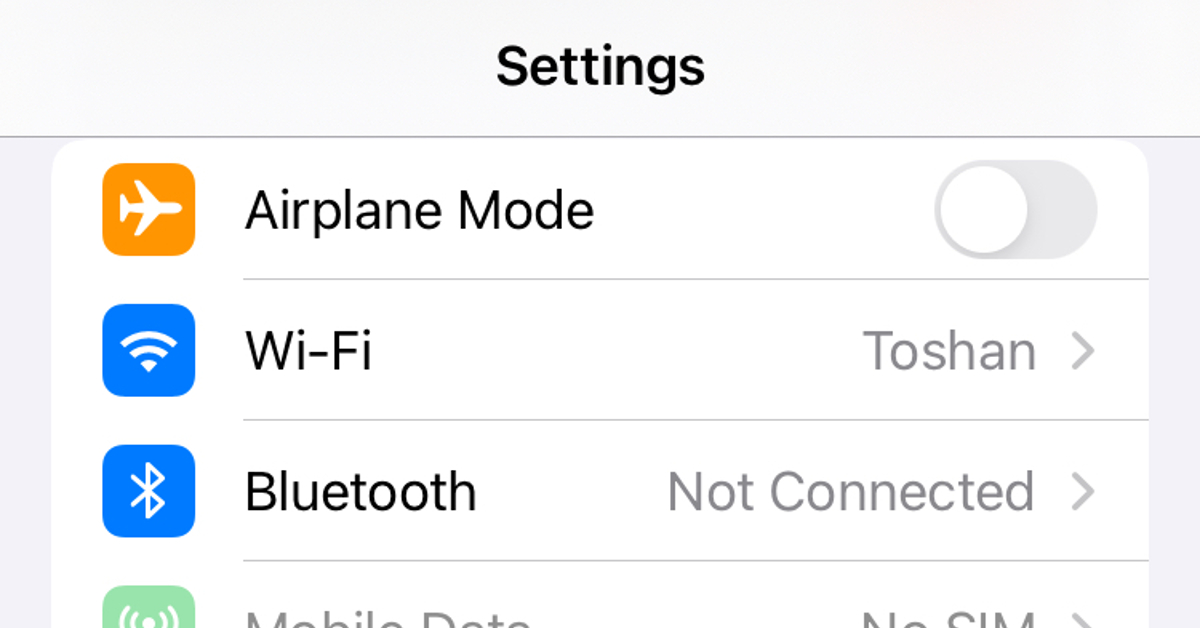


 Sometimes, the VPN app you’re using on your iPhone can cause a brief suspension of cellular services. If changing the VPN server does not work, try turning off the service. You can do this by toggling the power switch in the VPN app. Alternatively, you can go to Settings>General>VPN and Device Management>VPN and turn off the toggle switch next to ‘Status’.
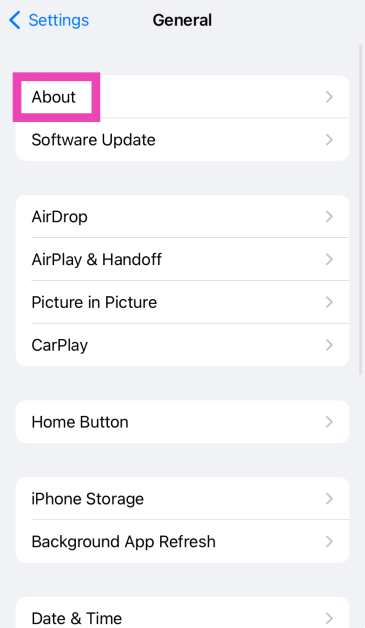
 Step 3: Select About.
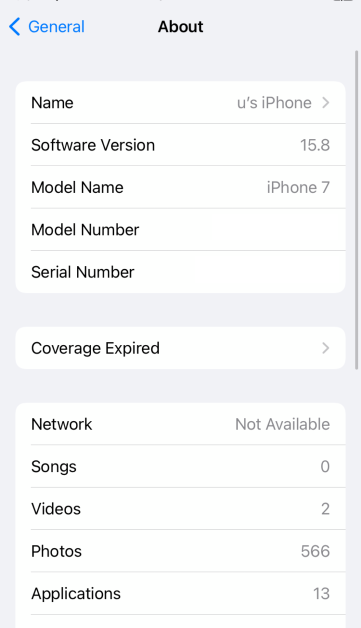
 Step 4: Your iPhone will prompt you to update carrier settings if an update is available.
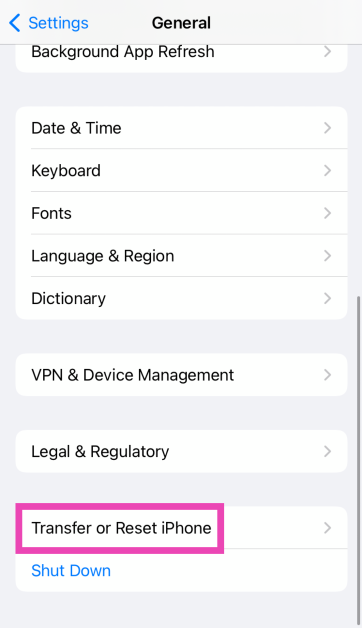
 Step 4:
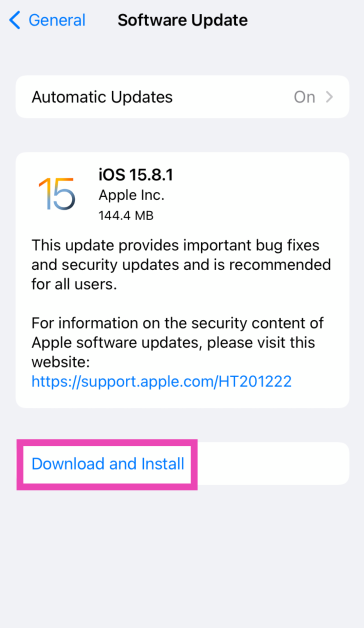
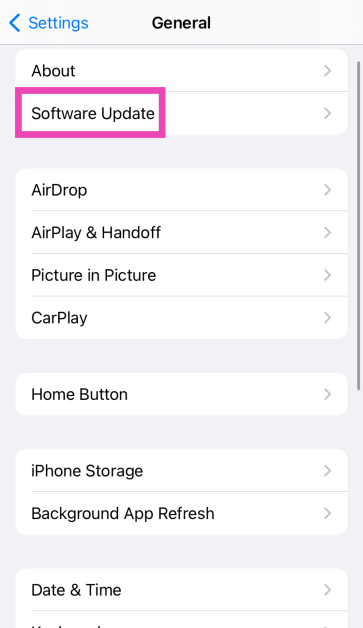
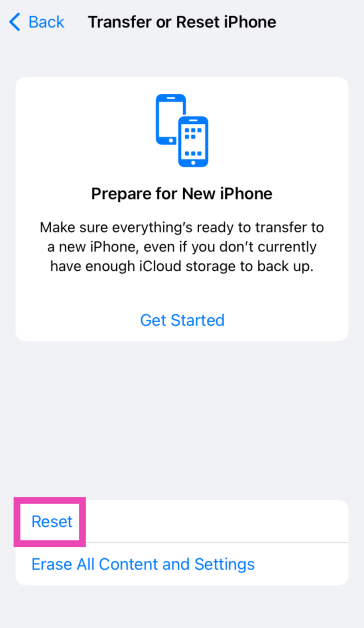
 Step 3: Hit Reset.
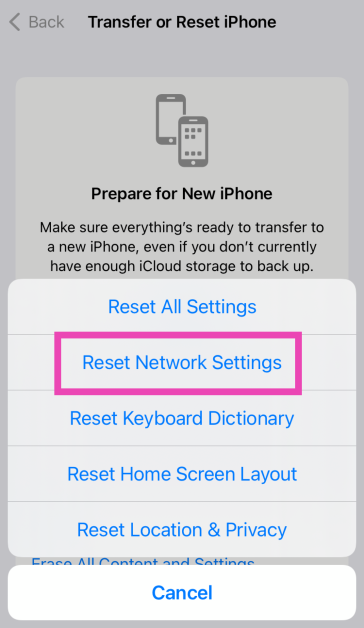
 Step 4: Select Reset Network Settings.


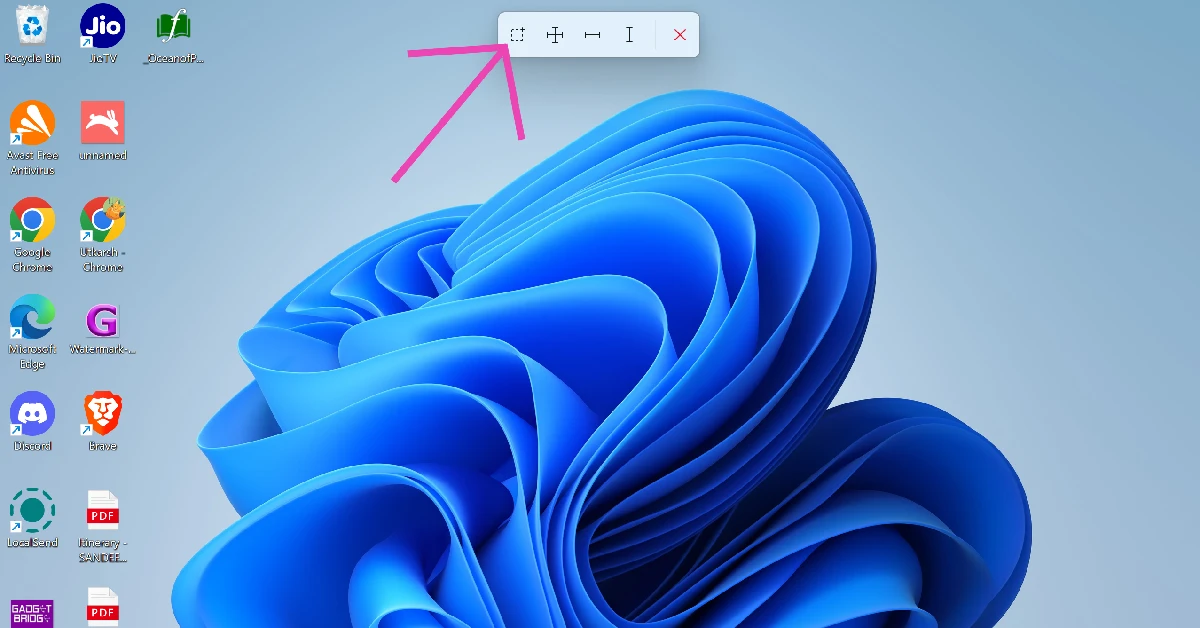 Step 5: Drag the cursor from one corner of the screen to the corner diagonally opposite to it.
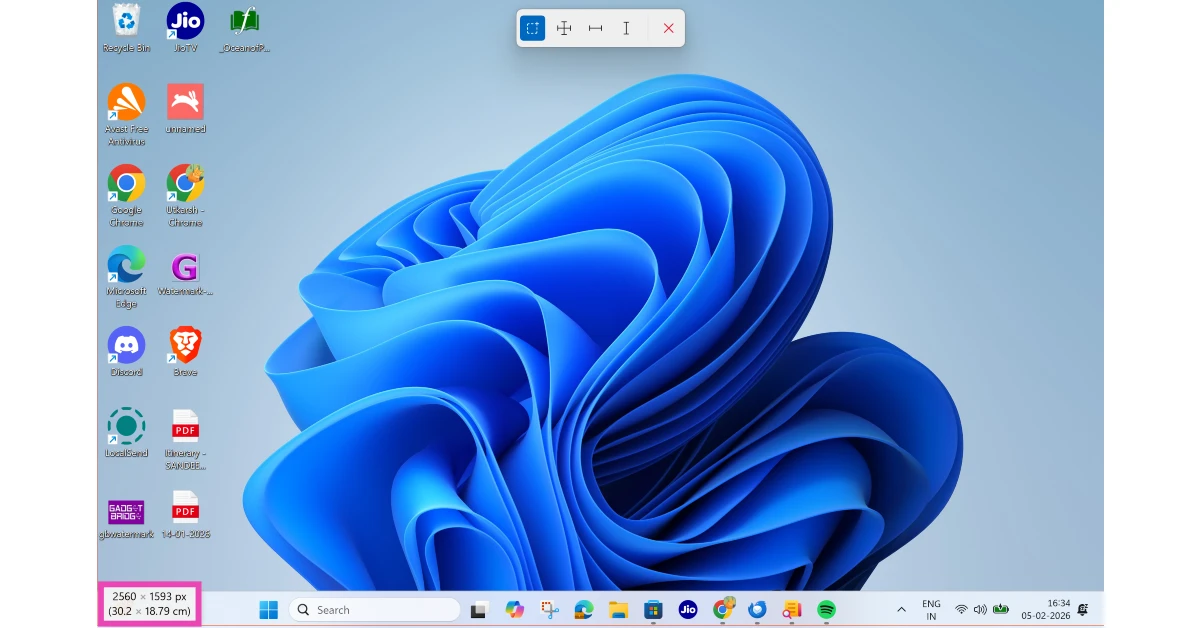 Step 6: The size of the display will be mentioned in the box next to the cursor.