

In This Article
Here’s how you can use the Instant Markup tool on iPhone to edit a screenshot
Step 1: Take a screenshot by pressing the side button and the volume up button. On iPhones with a home button, press the sleep key and the home button to take a screenshot. Step 2: Tap the screenshot thumbnail on the bottom left corner of the screen.
Step 3: In the following preview window you can crop and scale the screenshot. Drag the borders to crop out the irrelevant parts of the screenshot. If that is all you need to do, hit done at the top left corner of the screen. For more editing tools, tap the Markup icon at the top of the screen.
Step 4: At the bottom of the screen you will find all the drawing tools for your screenshot. You can choose from a pencil, pen, or highlighter to draw on your screenshot. Tapping every tool also gives you the option to increase the size of the marker. You can use the colour wheel on the right to pick any colour you want.
Step 2: Tap the screenshot thumbnail on the bottom left corner of the screen.
Step 3: In the following preview window you can crop and scale the screenshot. Drag the borders to crop out the irrelevant parts of the screenshot. If that is all you need to do, hit done at the top left corner of the screen. For more editing tools, tap the Markup icon at the top of the screen.
Step 4: At the bottom of the screen you will find all the drawing tools for your screenshot. You can choose from a pencil, pen, or highlighter to draw on your screenshot. Tapping every tool also gives you the option to increase the size of the marker. You can use the colour wheel on the right to pick any colour you want.
 Step 5: Use the Lasso tool to select a part of the screenshot and drag or duplicate it elsewhere. Use the Ruler tool to draw straight or angular lines over the screenshot. Don’t like what you drew? Use the eraser tool to undo all the errors.
Step 6: Tap on the plus icon at the bottom right corner of the screen to add text, signature, or description to the screenshot. You can pick the font, size, and colour of the text you want to add. You can also add a new signature or select one that’s already saved on your iPhone.
Step 5: Use the Lasso tool to select a part of the screenshot and drag or duplicate it elsewhere. Use the Ruler tool to draw straight or angular lines over the screenshot. Don’t like what you drew? Use the eraser tool to undo all the errors.
Step 6: Tap on the plus icon at the bottom right corner of the screen to add text, signature, or description to the screenshot. You can pick the font, size, and colour of the text you want to add. You can also add a new signature or select one that’s already saved on your iPhone.
 Step 7: The Magnifier tool allows you to enlarge a part of the screenshot without cropping it. This comes in handy when you want to focus on one particular area without losing the area around it. Tap on the Magnifier tool and use the green dot to circle around the area you want to enlarge. Use the blue dot to increase or decrease the size of the magnified area. Once you’ve magnified an area on the screenshot, you can use the opacity tool to cover the rest of the screenshot. You can even select the level of transparency you want.
 Step 8: Tap on ‘Done’ at the top left corner of the screen to save the changes. You can also directly share the screenshot from this window by tapping on the save icon at the top right corner of the screen.
Read Also: Oppo Reno 8 Pro House of the Dragon Limited Edition Set announced in India
Step 8: Tap on ‘Done’ at the top left corner of the screen to save the changes. You can also directly share the screenshot from this window by tapping on the save icon at the top right corner of the screen.
Read Also: Oppo Reno 8 Pro House of the Dragon Limited Edition Set announced in India


")


 If you are experiencing Handoff issues on your Apple Watch, try erasing it. Since all your data is backed to iCloud, it can be easily restored once you re-pair the watch with your iPhone. Here’s how you can erase your Apple Watch.
Step 1: Launch Settings on your Apple Watch.
Step 2: Go to General and select Reset.
Step 3: Tap on ‘Erase all content and settings’. Enter your password.
If you are experiencing Handoff issues on your Apple Watch, try erasing it. Since all your data is backed to iCloud, it can be easily restored once you re-pair the watch with your iPhone. Here’s how you can erase your Apple Watch.
Step 1: Launch Settings on your Apple Watch.
Step 2: Go to General and select Reset.
Step 3: Tap on ‘Erase all content and settings’. Enter your password.
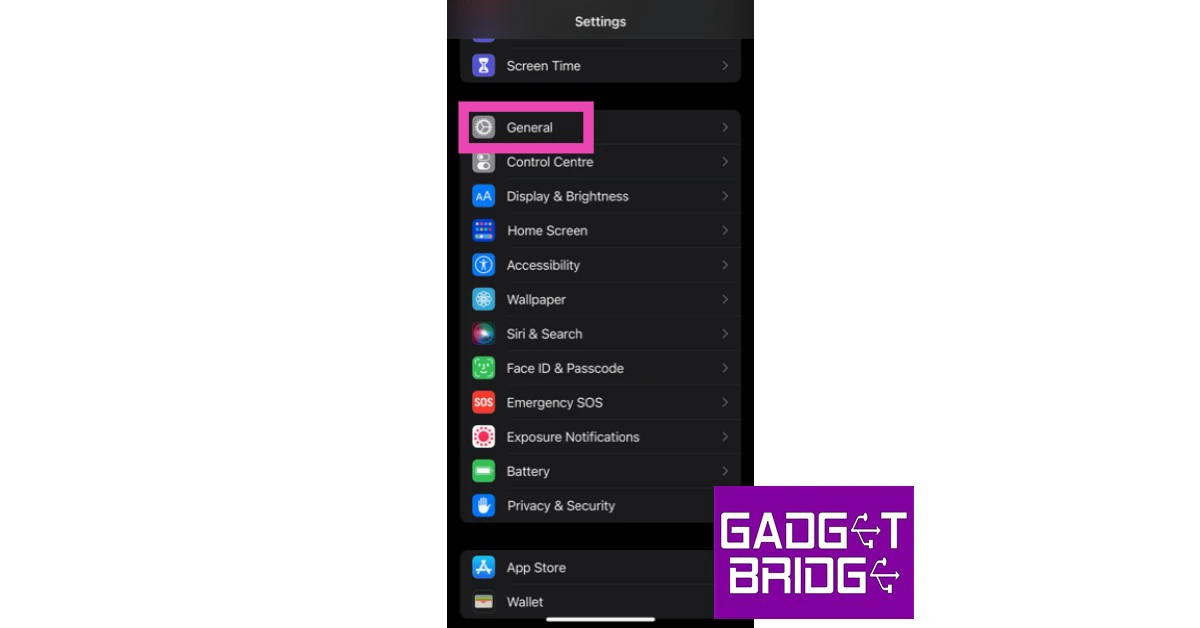 Step 2: Scroll down and select ‘Transfer or reset iPhone’.
 Step 3: Select ‘Reset’ followed by ‘Reset Network Settings’.

 Mac
Mac Apple Watch


")


 Step 2:
 Step 3:
 Step 4:
 Step 2:
 Step 3:
 Step 2:


 Review: Great looks served with an impressive sound")


 Step 3:
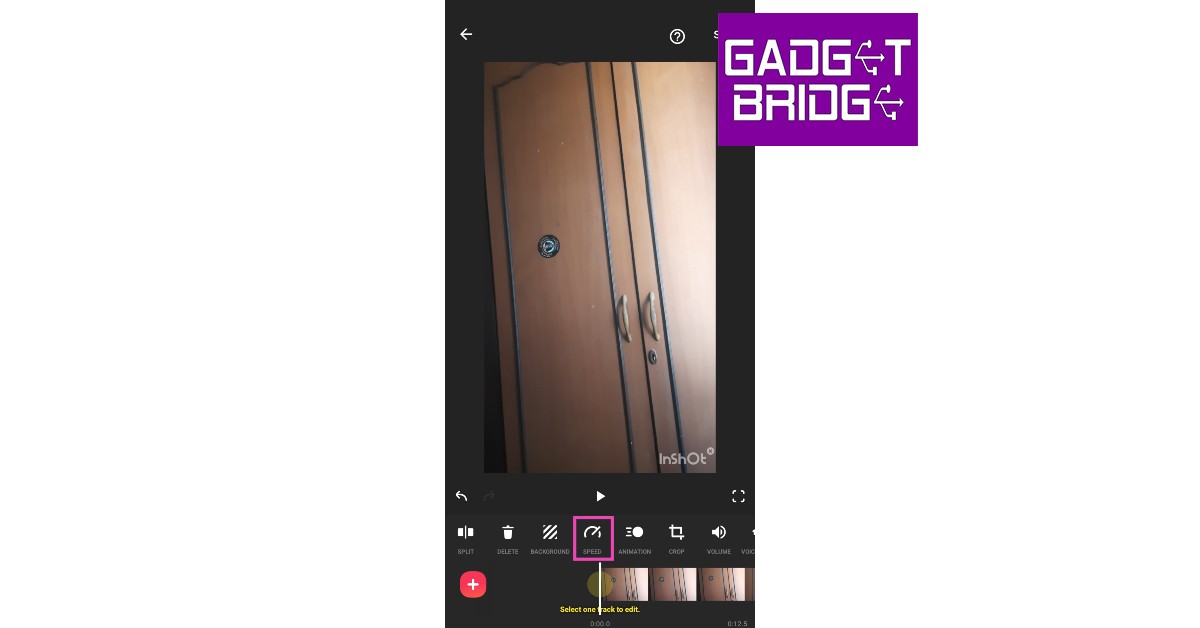 Step 4:
 Step 5:
 Step 6:
 Step 3:
 Step 5:
 Step 3:
 Step 4:
 Step 5:
 Step 6:


