

In This Article
SENS Hendriks 1 review: Design
The SENS Hendriks 1 comes in a compact square box that contains the charging case with earbuds inside, a USB Type-C charging cable, extra silicone tips, a user manual, a warranty card, and a product catalogue. The build and overall design are the highlights of the TWS. The charging case is made entirely out of metal (zinc alloy) and comes in a ‘Gun Metal Grey’ colour. The case feels quite sturdy and capable of withstanding a lot of damage. The lid easily flips open and shut with one finger and the hinge feels quite strong. Since it’s made out of metal, the charging case will get cold pretty quickly in low temperatures. While it may be heavier compared to other TWS, you can easily walk around with the case in your pocket.
 The design has been kept quite minimal on the Hendriks 1. There’s a small border around the lid that extends all the way back to the hinge, essentially dividing the case into two segments. In the lower segment, just below the lid, you will find the SENS logo printed on the case. A small notification light has been housed at the lower part of the front panel. The charging port makes its way to the bottom of the case.
 While the charging case may weigh around 70 grams, the earbuds feel extremely light, weighing just 3.5 grams each. You will barely notice them in your ear and can easily keep them in for hours at a time. There is a small notification on the touch panel of each earbud. The make is entirely plastic.
The in-ear design along with the silicone tips provides a very comfortable, snug fit in the ear. For those that don’t find the fit to be comfortable, the TWS is shipped along with a small pack of extra tips with varying size options. The horizontal stems are touch sensitive and can be used for music and call control.
While the charging case may weigh around 70 grams, the earbuds feel extremely light, weighing just 3.5 grams each. You will barely notice them in your ear and can easily keep them in for hours at a time. There is a small notification on the touch panel of each earbud. The make is entirely plastic.
The in-ear design along with the silicone tips provides a very comfortable, snug fit in the ear. For those that don’t find the fit to be comfortable, the TWS is shipped along with a small pack of extra tips with varying size options. The horizontal stems are touch sensitive and can be used for music and call control.
 With an IPX5 rating, the earbuds can withstand a low-pressure water spray without taking any damage. For a TWS in the entry-level category, this is an impressive rating. We used the TWS while working out and they handled the task expertly. The fit remained undisturbed throughout the workout, even when things got sweaty. The touch controls are easy to use and we were quite surprised to see very minimal accidental touch detection.
SENS Hendriks 1 review: Performance
While the Hendriks 1 certainly impressed us in terms of build, design, and usability, we were left wanting some more improvements in terms of performance. Let’s deep dive into what our experience with the SENS Hendriks 1 was like after a week of use. The Hendriks 1 is equipped with 10mm drivers on each earbud and claims a connection range of 12 metres. However, we experienced certain drops and lags after moving 5-6 metres away from the connected device. If you intend to use these earbuds with your smartphone, the range won’t be an issue as long as you carry your smartphone along with you at all times.
Moving on to the most important part of the review, the sound profile of the SENS Hendriks 1 is slightly underwhelming. The audio output sounds a bit boxy and muffled. While it works well for casual listening, the Hendriks 1 didn’t manage to produce a lot of detail in its sound profile. The bass is constantly overridden by the higher frequencies. The overall mix feels like it lacks some depth, which would’ve been present had the lower frequencies been given more prominence. The ideal volume range for listening on the Hendriks 1 is 40-60% beyond which you will notice a slight increase in distortion of the sound profile.
The Hendriks 1 is equipped with 10mm drivers on each earbud and claims a connection range of 12 metres. However, we experienced certain drops and lags after moving 5-6 metres away from the connected device. If you intend to use these earbuds with your smartphone, the range won’t be an issue as long as you carry your smartphone along with you at all times.
Moving on to the most important part of the review, the sound profile of the SENS Hendriks 1 is slightly underwhelming. The audio output sounds a bit boxy and muffled. While it works well for casual listening, the Hendriks 1 didn’t manage to produce a lot of detail in its sound profile. The bass is constantly overridden by the higher frequencies. The overall mix feels like it lacks some depth, which would’ve been present had the lower frequencies been given more prominence. The ideal volume range for listening on the Hendriks 1 is 40-60% beyond which you will notice a slight increase in distortion of the sound profile.
 The audio quality while calling was decent and the microphone performs well in quiet surroundings, relaying the voice to the recipient without much disturbance. Both earbuds are equipped with a microphone each, so you can use one earbud to call while the other one charges inside the box.
The touch controls work smoothly while listening to music or during a call. Since there is no dedicated app for the TWS, you cannot customise the controls. Single touches on either earbud alter the volume of the music while a double touch can be used to play or pause the track. A long touch can be used to skip back and forth between tracks. The Hendriks 1 also comes with Voice Assistant support, which can be activated by a triple touch on the stem.
SENS claims a battery backup of up to 4.5 hours on either earbud with an additional 30 hours in the case. These figures were consistent with our tests, as we got over 4 hours of battery life even when playing music at a higher volume. The 450mAh charging case was good enough to provide 5-6 charge cycles. The case can get fully charged in around 90 minutes, while the earbuds can reach a 20% charge in 20 minutes.
Read Also: Vivo X90 Pro+ has received 3C certification, to 80W fast charging
The audio quality while calling was decent and the microphone performs well in quiet surroundings, relaying the voice to the recipient without much disturbance. Both earbuds are equipped with a microphone each, so you can use one earbud to call while the other one charges inside the box.
The touch controls work smoothly while listening to music or during a call. Since there is no dedicated app for the TWS, you cannot customise the controls. Single touches on either earbud alter the volume of the music while a double touch can be used to play or pause the track. A long touch can be used to skip back and forth between tracks. The Hendriks 1 also comes with Voice Assistant support, which can be activated by a triple touch on the stem.
SENS claims a battery backup of up to 4.5 hours on either earbud with an additional 30 hours in the case. These figures were consistent with our tests, as we got over 4 hours of battery life even when playing music at a higher volume. The 450mAh charging case was good enough to provide 5-6 charge cycles. The case can get fully charged in around 90 minutes, while the earbuds can reach a 20% charge in 20 minutes.
Read Also: Vivo X90 Pro+ has received 3C certification, to 80W fast charging
Verdict
At the price of Rs 1,699, the SENS Hendriks 1 is not a bad deal for casual music listeners. If you’re looking for an affordable, sturdy pair of earbuds that provide a great battery life, you can look into the Hendriks 1 TWS. However, if you don’t want to make any compromise on the audio output, there may be a few better contenders that are only a few hundred rupees pricier than the Hendriks 1.Pros
Sturdy build Clean design Battery lifeCons
Sound profile has room for improvement Connection quality drops beyond 5-6 metres
For the latest gadget and tech news, and gadget reviews, follow us on Twitter, Facebook and Instagram. For newest tech & gadget videos subscribe to our YouTube Channel. You can also stay up to date using the Gadget Bridge Android App. You can find the latest car and bike news here.


 Can you imagine receiving an activity report of every internet movement of your child? Well, that is exactly what FamiSafe does, and it keeps your child safe from explicit content. It has features that search for harmful messages and pictures on your child’s phone. To ensure safety on the web, FamiSafe filters harmful search results so parents remain at peace and satisfied.
 Step 2: There are two ways to log into FamiSafe. You can either use your Apple ID, Facebook, or Google account or register a new Wondershare ID. The application also provides a “Continue as Guest” option to help you access FamiSafe without logging in.
 Step 3: Now, you have to connect your device to your child’s device. Select the “Connect a Device” option. On the next screen, you will find a QR and pairing code which will be used later in this guide whilst setting up your child’s phone.
 Step 4: Follow the guide in the next parts to set up your child’s device. Once that is done, use the Started Wizard to set up basic parental control on your device.
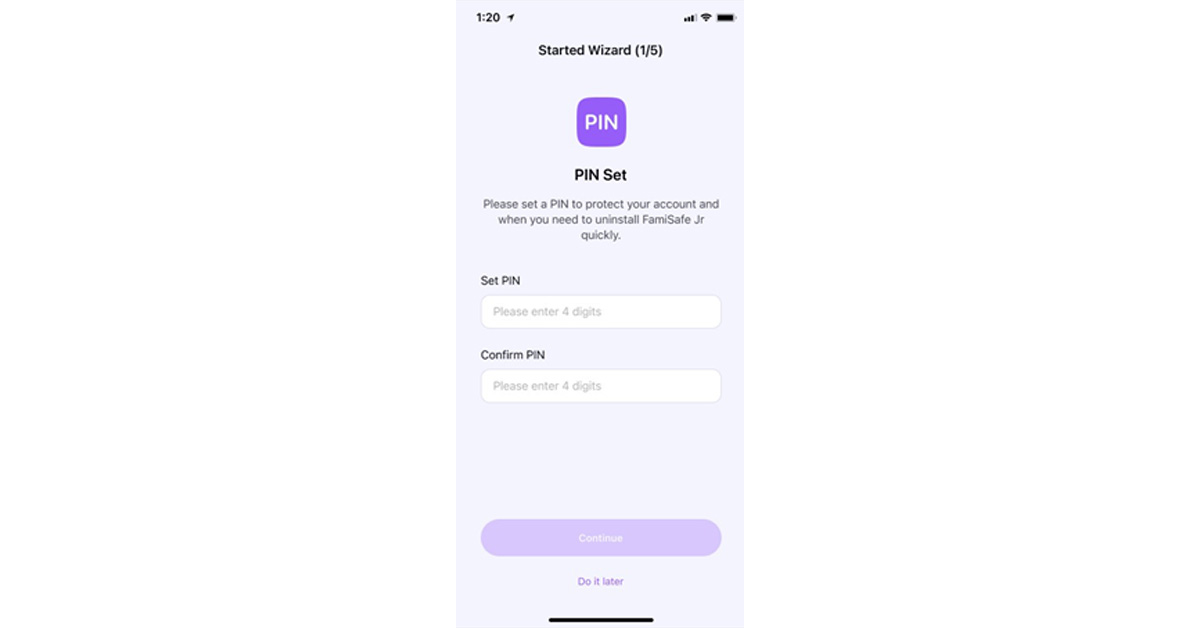
 Method 2: This method is quicker and easier. You have to scan the QR code from your phone using your kid’s phone camera. FamiSafe will be downloaded, and both devices will be connected automatically.


 Wondershare Recoverit is an amazing tool that offers you to recover different types of lost data from your Intel-based Mac. This tool can restore 1000+ kinds of files, images, and folders from 2000+ storage devices. It can recover all the deleted, lost, and formatted files, images, and devices. Moreover, it can restore data from the crashed Intel-based Mac as well. While you proceed with the recovery process, you can find a couple of recovery modes to try out to ensure the success of your process.


 This tool provides three different modes to help you repair iOS issues effectively. The offered modes are Standard, Advanced, and Anti-Recovery, which can be used according to the situation. Standard Mode resolves iOS issues instantly without data loss. On the other hand, to tackle complicated problems, you can use Advanced Mode. Moreover, the Anti-Recovery Mode can be used to delete your existing data on your iPhone permanently. This mode can be used if you want to sell your iPhone after deleting all the data.
 Step 2: Choose Standard Mode
From the new screen, choose the “iOS Repair” option. Now the tool will display multiple errors on your screen. Afterward, click “Repair Now” and select “Standard Mode” to repair the sound issue without data loss.
Step 2: Choose Standard Mode
From the new screen, choose the “iOS Repair” option. Now the tool will display multiple errors on your screen. Afterward, click “Repair Now” and select “Standard Mode” to repair the sound issue without data loss. Step 3: Initiate Recovery Mode
Now enable Recovery mode on your iPhone. To do so, connect your phone to your PC with a USB cable. Afterward, unlock your iPhone and tap on the “Trust” option that appears on the pop-up notification. Following this, select “Enter Recovery Mode” from your PC’s screen. If your iPhone is not functional, click “Guide to Recovery Mode.”
Step 3: Initiate Recovery Mode
Now enable Recovery mode on your iPhone. To do so, connect your phone to your PC with a USB cable. Afterward, unlock your iPhone and tap on the “Trust” option that appears on the pop-up notification. Following this, select “Enter Recovery Mode” from your PC’s screen. If your iPhone is not functional, click “Guide to Recovery Mode.” Step 4: Install Suitable Firmware
Once you have successfully enabled the recovery mode, the tool will bring a list of the firmware. Click on the “Download” button to install the suitable firmware quickly. After installation, the tool will verify the downloaded firmware.
Step 4: Install Suitable Firmware
Once you have successfully enabled the recovery mode, the tool will bring a list of the firmware. Click on the “Download” button to install the suitable firmware quickly. After installation, the tool will verify the downloaded firmware. Step 5: Begin Repairing Process
After complete verification, hit the “Repair Now” button. By doing so, you would start the repairing process easily. You can check the ongoing progress on your computer’s screen. Once the repairing process concludes, click on the “Done” button.
Step 5: Begin Repairing Process
After complete verification, hit the “Repair Now” button. By doing so, you would start the repairing process easily. You can check the ongoing progress on your computer’s screen. Once the repairing process concludes, click on the “Done” button.


 Repairit for Mac can repair corrupted audios from different storage devices, including voice recorders, recording software, and shooting apparatus. Since the tool has a user-friendly interface, you can easily follow three simple steps to repair AAC files on your Mac. Here is the three-step guide for file repairing:


 You do not have to worry about your WhatsApp data while switching to iPhone 14 Pro Max because you can transfer WhatsApp messages, stickers, media files, or voice notes effortlessly. One of the most assistive things about this tool is that you can easily import WhatsApp data from Google Drive into your new iPhone. It also allows you to import or export chats and media for convenience.


 What’s better than getting your hands on a new flagship? What about nabbing it for less? For a limited time, you will be able to buy the Samsung Galaxy S22 Ultra 5G (128GB) for a red-hot price of A$1,199 and save yourself A$650. There’s so much to love about this phone, from its gorgeous OLED display and built-in s-pen support to its featured-packed software and powerful hardware internals. You really shouldn’t miss this opportunity to buy one.
 PhoneBot is also bringing big discounts to the iPhone 13 Pro, knocking a few hundred dollars off its original price. Now, you will only need to part ways with A$1,399 instead of A$1,699 for a 256GB variant. That’s a significant save given what you get back. It has a killer camera system and it’s absurdly fast. The iPhone 13 Pro’s battery life is noticeably better than that of its predecessors. Let’s not forget its exquisite OLED panel which can now deliver a peak refresh rate of 120H. The iPhone 13 Pro does live up to its high expectations.


 Step 2:
 Step 3:
 Step 3:
 Step 3:
 Step 3:
 Step 4:


 feature announced")

