If you find yourself using public and open WiFi networks quite often, we’d strongly suggest using a VPN for your device. Public WiFi networks lack the ideal level of security and can be vulnerable to attacks from malicious entities. If you’re connected to a network that’s intercepted by a third party, your privacy could be at serious risk. A secure VPN service can prevent this. In this article, we show you how to set up a VPN on Android and iPhone.Read Also:How to Check WiFi Router History on Android?
In This Article
Set up a VPN on Android
Step 1: Go to Settings and select Connections.Step 2: Select ‘More connection settings’.Step 3: Tap on VPN.Step 4: Tap the ellipses and select ‘Add VPN profile’.Step 5: Enter the details like VPN name, VPN type, server address, username, and password.Step 6: Hit ‘Save’.
Set up a VPN on iPhone
Step 1: Go to Settings and select General.Step 2: Tap on VPN.Step 3: Tap on ‘Add VPN Configuration’.Step 4: Enter the necessary information.Step 5: Hit ‘Done’.
Use a VPN app
If you don’t want to go the native route, there are plenty of free third-party VPN apps you can download from the Google Play Store or App Store. Apps like Privado, Hotspot Shield, Turbo VPN, TunnelBear, and more offer free basic VPN services for your Android and iOS devices. The only downside is that these apps are generally filled with ads. If you want an adless experience along with faster servers, you will need to buy a premium subscription from these apps. You can also go for premium paid apps like Nord VPN, Express VPN, and Surfshark. We’d recommend this app if you want to unlock the regional libraries of OTT apps like Netflix and Amazon Prime Video.
Frequently Asked Questions (FAQs)
How do I set up a VPN on Android?
To set up a VPN on your Android device, go to Settings>Connections>More Connection Settings>VPN>Add VPN Profile.
How do I set up a VPN on an iPhone?
To set up a VPN on your iPhone, go to Settings>General>VPN>Add VPN Configuration.
Which are some of the best VPN apps and services I can use on my phone?
Anyone who has tried searching for a movie title on a Smart TV must be familiar with the struggle of using the onscreen TV keyboard. Simply put, your regular TV remote simply isn’t cut out for the task of entering text. One of the best things you can do to elevate your TV experience is pairing your smartphone with the TV. This will allow you to enter text using your smartphone’s keyboard. In this article, we bring you the top 4 ways to use your Android smartphone as a TV remote.Read Also:BGMI redeem codes for 4 July 2023, claim and receive rewards and benefits
In This Article
Use the Google TV app
All Android TV users can use the Google TV app to turn their Android phone into a remote control. Here’s how.Step 1: Before you proceed, make sure your phone and TV are connected to the same WiFi network or paired together via Bluetooth.Step 2: Launch the Google TV app on your Android smartphone.Step 3: Tap the Connect TV button at the bottom right corner of the screen.Step 4: Your phone will scan for nearby TVs. Select your TV from the list.Step 5: Your TV will display a pairing code. Enter this code in the Google TV app on your phone.Step 6: Once your TV and phone are paired, the Connect TV icon will be replaced by the remote control icon. Tap it to control your TV with your phone.
Use a third-party app
For non-Android Smart TVs, there are tons of third-party apps that can turn your Android phone into a TV remote control. You may also want to look into the TV manufacturer’s proprietary app to access this feature. Here’s how you can use your Android smartphone as a TV remote with Universal TV Remote app.Step 1: Install the Universal TV Remote app on your Android smartphone.Step 2: Tap on Smart TV Remotes. Make sure your phone and TV are connected to the same WiFi network.Step 3: Select your TV model from the list.Step 4: Once your TV is paired with the app, you will be able to use the onscreen remote.
Use your Android smartphone as an Amazon Fire TV remote
Amazon Fire TV Stick and Fire TV Cube owners can use the official Fire TV app to control their TV with their smartphones. This app covers all the essential features you want from a remote. You can input text into your TV using your smartphone’s QWERTY keyboard, perform a voice search using Alexa, and access all the TV functions with the help of the Amazon Fire TV app. Pairing the Fire TV app with your TV is not a hassle either. You need to ensure that your TV and phone are on the same WiFi network. The Fire TV app will take care of the rest.
Use the SmartThings app for your Samsung phone and TV
If you own a Samsung Smart TV, you can control it using the SmartThings app on your Samsung smartphone. Here’s how.
Step 1: Connect your Samsung smartphone to the same WiFi network as the TV.
Step 2: Launch the SmartThings app on your Samsung phone.
Step 3: Hit the Menu icon and tap on All devices.
Step 4: Select your Smart TV.
Step 5: Use the onscreen remote on your phone to control the TV.
Frequently Asked Questions (FAQs)
Can I use my smartphone as a TV Remote?
You use the Google TV app on your phone to control any Android TV.
Is there a free Smart TV remote app?
Apps like Anymote, Harmony Remote, and Universal TV Remote are available for free on the Google Play Store and can be used to control your TV from your phone.
Are TV Remote apps safe to use?
Google TV and other proprietary apps by TV manufacturers are safe to use. However, you should observe caution while installing third-party TV remote apps as they may contain malware. To avoid any risky downloads, always use the Google Play Store.Read Also:Samsung Galaxy Z Fold 5 images leak showing no gap in the hinge
Conclusion
These are the 4 quick ways to use your Android smartphone as a TV remote. While most third-party TV remote apps are free to use, some of the premium features may be locked behind a paywall or a subscription. If you are an Android TV user, we’d suggest sticking with the Google TV app.
It has been announced that the Samsung Galaxy S21 FE will debut in India with an outdated Snapdragon flagship SoC. According to the firm, the device will now be powered by a Snapdragon 888 SoC. An in-house 5nm Exynos 2100 chipset powers the Galaxy S21 FE variant from 2022. The business is rumoured to soon introduce the Galaxy S23 Fan Edition.Samsung will introduce a new Galaxy S21 FE 5G model in India. The Samsung Galaxy S21 Fan Edition will once again be available in the nation but this time it will use a Snapdragon 888 SoC manufactured in 5nm. The precise launch date hasn’t been made public by Samsung, though.The company said, “Samsung will be launching a new variant of Galaxy S21 FE 5G smartphone in India this month. Designed to deliver the best of Samsung’s flagship experience to young Galaxy Fans, the S21 FE 5G is power-packed with premium “S” series features. Galaxy S21 FE comes with an eye-catching design, powerful performance, a flagship pro-grade camera, and seamless ecosystem connectivity.”The Exynos 2100 SoC-powered Galaxy S21 FE 5G was first introduced in India at the beginning of the year 2022. Adreno 660 GPU and 256GB of inbuilt storage are confirmed for the latest model. The expanded storage capacity will ensure that users can effortlessly store their favourite photos, videos, apps, and files without worrying about running out of space.Also Read:iQoo Neo 7 Pro 5G powered by Snapdragon 8+ Gen 1 SoC launched in IndiaOn its website, the company has set up a dedicated microsite to preview the release of the new Galaxy S21 FE 5G model. The Notify Me Button is also live so to receive the most recent information on the introduction and accessibility of the new phone, interested people should register their contact information with Samsung.Although the new Galaxy S21 FE’s price has not yet been officially announced, a recent report said the model would cost Rs 49,999. Note that the device with the Exynos chipset was launched with a starting price of Rs 54,999. The phone was made available in four colour options of Graphite, Lavender, Olive, and White.
Samsung Galaxy S21 FE 5G specifications
The Samsung Galaxy S21 FE 5G boasts a 6.4-inch full-HD+ Dynamic AMOLED 2X display with a 120Hz refresh rate and up to 240Hz touch sampling rate along with Corning Gorilla Glass Victus protection. It is powered by a 5nm Exynos 2100 chipset. The device has an in-display fingerprint sensor. It’s also designed to IP68 specifications, meaning it can survive dust and water to some extent.The triple rear camera on the phone includes a 12-megapixel primary sensor with an f/1.8 wide-angle lens, a 12-megapixel ultra-wide sensor, and an 8-megapixel telephoto sensor. For selfies and video calls, the gadget also includes a 32-megapixel front camera with an f/2.2 aperture.In addition to this, there is a 4,500mAh battery with 25W cable charging and 15W wireless charging capabilities.
For the latest gadget and tech news, and gadget reviews, follow us on Twitter, Facebook and Instagram. For newest tech & gadget videos subscribe to our YouTube Channel. You can also stay up to date using the Gadget Bridge Android App. You can find the latest car and bike news here.
If you just got your first Smart TV, there are a bunch of cool things you can do on it. Just like your smartphone, your Smart TV can also run apps. The best part is that most of the major apps are perfectly optimised for the big screen. Not only can you watch movies on Netflix, but you can also carry out a Yoga workout using an app that’s specially designed for your TV. In this article, we bring you the best ways to add, remove, and manage apps on your Samsung Smart TV.Read Also:Samsung Galaxy Z Fold 5 images leak showing no gap in the hinge
In This Article
Add/Install an app on your Samsung Smart TV
Step 1: Press the home button on your Samsung Smart TV remote.Step 2: Navigate to the ‘Apps’ icon on your TV’s interface and hit the Select button.Step 3: Now, navigate to the search icon at the top right corner of the screen and select it.Step 4: Enter the name of the app you want to install. You can also select any app from the app store’s home page.Step 5: Select the app and hit ‘Install’.The app will be installed on your Samsung Smart TV.
How to move an app on your Samsung Smart TV
Follow these steps to change the positioning of an app on your TV’s home screen.Step 1: Press the home button on the remote control.Step 2: Navigate to the app you want to move.Step 3: Long press the select key.Step 4: Select ‘Move’ from the list of options.Step 5: Use the navigation buttons on the remote to reposition the app.Step 6: Hit the Select button when you’re done.
How to lock or delete an app
If you don’t want to give other people access to an app on your TV, you can simply lock it. Here’s how.Step 1: Press the home button on your Samsung Smart TV remote.Step 2: Select Apps.Step 3: Navigate to the gear icon at the top right corner of the screen and select it.Step 4: Select the app you want to Delete.Step 5: Hit Delete.Step 6: To lock an app, select Lock from the list of options.Step 7: Enter your TV’s PIN.The app will be locked. In order to use the app, you will need to enter your TV’s PIN.
Auto update an app
If you don’t want to manually update every app on your TV, you can turn on auto-updates. Here’s how.Step 1: Press the home button on your Samsung Smart TV remote.Step 2: Go to Apps and select Settings.Step 3: Scroll down to Auto Update and select On.
Frequently Asked Questions (FAQs)
How do I remove unwanted apps on my Samsung Smart TV?
To remove an app from your Samsung Smart TV, long-press its icon and select ‘Delete’ from the list of options. While this works for third-party apps downloaded from the App Store, you may not be able to delete the preinstalled and native apps on your TV.
How do I add apps to Samsung Smart TV’s home screen?
You can add an app to your TV’s home screen by installing it from the App Store and selecting the ‘Add to Home’ option.
Is it possible to lock an app on my Samsung Smart TV?
To lock an app on your Smart TV, simply long press its icon on the home screen and select ‘Lock’ from the list of options. Enter your TV’s PIN to confirm the action.Read Also:Best 4 Methods to Put Two Pictures Side by Side on Android
iQoo Neo 7 Pro 5G has launched in India today. The gaming smartphone by Vivo’s sub-brand is powered by Qualcomm’s Snapdragon 8+ Gen 1 SoC. It features a 120Hz AMOLED display. In addition to this, there is a 5,000mAH battery with supports 120W fast charging.
In This Article
iQoo Neo 7 Pro 5G price in India, sale details and offers
iQoo Neo 7 Pro 5G debuted in India with a price tag of Rs 34,999 for the 8GB RAM with 128GB storage variant. The price of the 12GB RAM with 256GB storage option comes at Rs 37,999. The phone is offered in two colour options of Dark Storm and Fearless Flame.In terms of availability, the newly launched gaming smartphone is scheduled to go on sale on July 15 via Amazon. Customers who buy the handset by July 18 will receive a Rs 1,000 discount. In addition to this SBI and ICICI Bank debit and credit cardholders can get an immediate discount of Rs 2,000. The device is currently up for pre-booking and those who pre-book are eligible to receive an additional year of warranty protection.
iQoo Neo 7 Pro 5G specifications
iQoo Neo 7 Pro 5G is powered by a Snapdragon 8+ Gen 1 chip paired with up to 12GB of LPDDR5 RAM and up to 256GB of UFS 3.1 storage. The phone operated on Funtouch OS 13 on top of Android 13. The gaming phone is highlighted with a 6.78-inch full-HD+ AMOLED screen with 1,080×2,400 pixels of resolution. The display supports a 120Hz refresh rate and a 300Hz touch sampling rate.For the optics, there is a triple rear camera setup that includes a 50-megapixel primary Samsung GN5 sensor with an f/1.88 aperture. In addition to this, there is an 8-megapixel ultra-wide-angle camera with an f/2.2 aperture and a 2-megapixel macro camera with an f/2.2 aperture. The device further includes a 16-megapixel front-facing camera with an f/2.45 aperture for taking selfies and video calling.The iQoo Neo 7 Pro boasts a 5,000mAh battery with 120W Flash Charge support. In terms of connectivity, there is 5G, 4G LTE, Wi-Fi 6, Bluetooth 5.2, GPS, GNSS, NavIC, and a USB Type-C port. The device includes an in-display fingerprint scanner, an IR blaster, an accelerometer, an ambient light sensor, a proximity Sensor, an e-compass, a gyroscope, and a colour temperature sensor.
For the latest gadget and tech news, and gadget reviews, follow us on Twitter, Facebook and Instagram. For newest tech & gadget videos subscribe to our YouTube Channel. You can also stay up to date using the Gadget Bridge Android App. You can find the latest car and bike news here.
Your WiFi router records the browsing history of the devices that are connected to it. Any page requests made on the network are registered on the router and can be accessed by the device admin. If you ever feel suspicious of excessive data usage on your network, you can easily check the collective browsing history using the router and get an idea of who is the culprit. In this article, we show you how to check the WiFi router history on an Android smartphone.Read Also:Samsung Galaxy Z Fold 5 images leak showing no gap in the hinge
In This Article
Here’s how you can check WiFi router history on Android
Step 1: Go to Settings and select Connections.Step 2: Tap on WiFi.Step 3: Tap the gear icon next to the connected network.Step 4: Select ‘Manage Router’.Step 5: This will lead you to the router’s management portal. Log in using the appropriate credentials. If you don’t remember the password, look for it at the bottom of the router.Step 6: Go to the log page to view the WiFi router history.
Can’t find the Manager Router options? Try this method
Older Android phones may not have the ‘Manage Router’ option in WiFi settings. If you can’t find the option on your phone, there’s nothing to fret about. All you need to do is enter your WiFi router’s IP address in your phone’s web browser and you will be able to access its management portal. You can find your router’s IP address by going to Settings>Connections>WiFi and tapping the gear icon next to the network you’re connected to. Tap ‘View More’ and scroll down to the bottom to view the IP address of the router. Once you’re on the router management portal, all you need to do is log in and access the log page.
Use a third-party app
Third-party router management apps like Fing and All Router Admin can help you check the router history on your Android smartphone. Apart from checking the logs, you can also manage the devices on your network using these apps. They also offer features like hidden camera detection, speed test, and network analysis.
Frequently Asked Questions
Can my WiFi router record my browsing history?
Your WiFi router can record the browsing history of the devices connected to it. To check the recorded history, go to your router’s management portal and check the logs.
How do I view router history on Android?
To check your WiFi router’s history on your Android phone, simply enter the router’s IP address in the web browser and enter the appropriate credentials. Go to the log section in the side menu to check the browsing history.
How can I hide my browsing history from my router?
iQoo today will be launching a new gaming smartphone iQoo Neo 7 Pro 5G in India. The smartphone will be under the mid-range price segment and will succeed iQoo Neo 7 5G. The device will be sold exclusively through Amazon. The upcoming phone is confirmed to have a Snapdragon 8+ Gen 1 SoC. Moreover, the device will include a 50-megapixel primary rear camera.
In This Article
iQoo Neo 7 Pro 5G India launch and expected pricing details
Live streaming of the iQoo Neo 7 Pro 5 India launch will begin at 12:00 today. To view the event live, go to the company’s official YouTube and social media channels including Twitter. It can also be watched on our website as we have embedded the link below.A leak brings us a new piece of information about the price of the forthcoming Neo series smartphone from the Vivo sub-brand. The price of the phone has been disclosed by Amazon India to be Rs 33,999. The pricing of the device was previously predicted by a tipster to be under Rs 40,000.Also Read:Motorola Razr 40, Motorola Razr 40 Ultra launched in India, price starts at Rs 59,999
iQoo Neo 7 Pro 5G specifications
The iQoo Neo 7 Pro 5G is thought to be a rebranded version of the iQoo Neo 7 Racing Edition, which was unveiled in China in December of last year.Amazon and iQoo have teased the features and appearance of the smartphone in advance of its release. The Neo 7 Pro will be available in the colours Dark Storm and Fearless Flame. It is confirmed to be powered by the Qualcomm Snapdragon 8+ Gen 1 SoC. Along with support for 120W fast charging support, it is known that the main rear camera has 50 megapixels.Also Read:Samsung Galaxy Z Fold 5 images leak showing no gap in the hingeLeaks indicate that the 6.78-inch full-HD+ OLED display on the iQoo Neo 7 Pro 5G will have a refresh rate of 120 Hz. A 50-megapixel primary sensor with OIS is claimed to be included, along with an 8-megapixel sensor and a 2-megapixel shooter, in its triple back camera arrangement. The forthcoming device from iQoo is anticipated to include stereo speakers in addition to a 5,000mAh battery for the gaming smartphone.As expected, the OS duties on iQOO Neo 7 Pro will be handled by Android 13 with Funtouch 13 skinned on top of it.
For the latest gadget and tech news, and gadget reviews, follow us on Twitter, Facebook and Instagram. For newest tech & gadget videos subscribe to our YouTube Channel. You can also stay up to date using the Gadget Bridge Android App. You can find the latest car and bike news here.
After being banned for nearly ten months, Battleground Mobile India, aka BGMI, is officially available again in India. BGMI fans are looking for ways to improve their game experience and one such method is the usage of redemption codes, which offers a variety of rewards and advantages using BGMI redeem codes players can gain access to new skins, outfits, loot crates, weapons and free UC and diamonds.As mentioned earlier, these codes give users the chance to earn unique rewards and gain extra benefits while playing the game. This includes GUN SKINS (M4, AKM, M416, AWM, M24, UZI, KAR98K), free character voucher, Andy, Carlo, Sara, Victor character for free, free Anna Character on completing the mission and UC or Royal Pass Discount. So here we have gathered a list of the most recent BGMI redeem codes as of 4 July 2023. Also, redeem these codes asap as these are only valid for a limited duration.
In This Article
BGMI Redeem Codes for 4 July 2023
updating…
How to get free Redeem Codes for BGMI on 4 July 2023?
Launch BGMI on your device.
Then select the Redeem Code option from the main menu.
Next, click on the Redeem code tab.
A new window will open, requesting the redemption code.
Now enter your BGMI code.
Confirm and click on the “Redeem” tab.
If your redeem code is valid then you will get a message confirming that your rewards were successfully redeemed.
Garena Free Fire is a battle royale game with regular awards and tournaments to keep players interested. If you play Garena Free Fire, you should be aware of the redeem codes that are released on a daily basis. However, because the battle royale game is banned in India, players from other countries can use the Free Fire Redeem codes daily. If you’re unfamiliar with the Garena Free Fire redeem codes or don’t know how to get them, we’ve put together a step-by-step guide to help you redeem them. Check out Garena Free Fire Redeem Codes for 4 July 2023.The Free Fire redeem codes are a great way to get free stuff. These are 12-digit codes that contain alphabets and numbers, as well as an expiration date and time. Because the Garena FF redeem codes cannot be used more than once, you should hurry to the redemption page to claim your free reward before someone else does. To get a free reward, all you have to do is go to reward.ff.garena.com/en, which is the official redemption page. Also, keep an eye on this space for daily updates on Garena Free Fire redemption codes and rewards.
With our lives getting so dependent on technology, it doesn’t sound as bizarre today to say that I could survive an entire day with just apps as it would have five years back. But what made it a little challenging (at least in my head) was my editor’s suggestion to not carry my wallet or books that day.
I REALLY don’t know how to survive without either considering that I’m from a generation which at least likes to carry physical currency with them even if they pay digitally most of the time, and whenever I have nothing to do you would almost always find my head buried in a book.
But anything for a story, so here we are! It’ll sound surprising, but the first app that I need on any given day is Spotify because I am one of those people who would definitely snooze the alarm multiple times and then get late to work. And the answer to this problem is music.
Every morning, I would open my eyes when my alarm goes off and instantly play some music. It’s a great way to start the morning, and who knows? It might as well motivate me enough to go to the gym in the morning instead of the evening some day.
Read Also:How to Run Windows Apps on Android with Wine?
I like to keep the music on as I get ready for work and do my daily chores. As fate would have had it, I fell short of sesame seeds as I got my breakfast ready. While on most days I would have just driven down to a store close by to get it, I opted for Blinkit to keep my word on surviving solely on apps.
I usually get to work via a Blusmart cab. Since my commute to work is a recurring ride, I don’t have to book it ever since I set up the ride-along by putting in the place of pick-up, drop location and timings. This along with the fact that Blusmart claims to never cancel rides is a big plus because the last thing one wants is to be late to work because their cab cancelled at the last minute.
I usually read on my way to work, but that obviously couldn’t happen on a day when I was relying entirely on apps. So I put my earphones on and listened to ‘Sweet Bean Paste’, a novel by Tetsuya Akikawa on an unusual yet beautiful friendship, on the Audible app. I had started listening to it a while back but then started reading something else. This challenge proved to be a good reason to come back to it. Since the book has short chapters, I did manage to listen to a few before I got to work.
Now, if you ever try doing this, I would really suggest you stick to your office coffee machine rather than going overboard and using a food delivery app for it. Firstly, it’ll be more expensive, and secondly, it’ll take more time to reach you. It’s simply not practical. You might choose to order breakfast, but I wanted my first meal of the day to be home-cooked.
Since I am a writer, I usually use the Dictionary app a lot on my phone and swear by the Grammarly Chrome extension on my laptop. The former helps me tremendously because of its Thesaurus feature and the latter is like a necessity for writers. Zomato took care of my lunch and Simpl took care of the payment I made for it.
I usually take a small walk after lunch and rely on Apple‘s Health app to keep track of my steps all through the day, so that bit was sorted. In the evening, I called an Uber to head back home and on this ride, I watched a podcast on YouTube. Can there be a better to kill your time in traffic? Well, probably books, but this wasn’t bad either. Anyway, I paid for the cab ride via Google Pay UPI.
Read Also:How to Export a WhatsApp Chat: Complete guide for Android
After getting home, I like to unwind a bit with meditation and my preferred app for it is Headspace, although there are plenty of others available on the Play Store and App Store. If you are into mindfulness as well, you pick the app that suits you since when it comes to this, it’s never one size fits all.
I ordered a salad via Swiggy because I didn’t want to eat two heavy meals in a day and an episode of ‘Touch Your Heart’ on Netflix saved me from getting bored as I ate.
At the end of the day, I realized how easy it is in today’s world to survive solely with my phone. Almost any daily task can be managed with it provided you are in an area with the proper network. My younger self in college would have never trusted her phone to take care of everything throughout the day, but the fact that I can do this today shows how dynamically things have changed because of technology.
P.S. I think I forgot to mention apps like WhatsApp, Instagram and Gmail because I use them so often that my brain didn’t even register them.
For the latest gadget and tech news, and gadget reviews, follow us on Twitter, Facebook and Instagram. For newest tech & gadget videos subscribe to our YouTube Channel. You can also stay up to date using the Gadget Bridge Android App. You can find the latest car and bike news here.
South Korean technology company Samsung is scheduled to unveil its Galaxy Z Flip 5 and Galaxy Z Fold 5 smartphones at the Galaxy Unpacked event later this month. Just weeks before the unveiling, the first set of Samsung Galaxy Z Fold 5 hands-on images have been leaked and they clearly show the camera layout and the hinge of the device.
Samsung Galaxy Z Fold 5 images were posted by tipster Ahmed Qwaider and going by them, there seems to be no gap between the two folding halves of the smartphone. This is in contrast to the previous generation devices of the same family. The smartphone sports a loudspeaker, a microphone and a USB Type C port at its bottom edge, while on the top, there are three microphones and a loudspeaker. This makes a total of four microphones and a stereo loudspeaker setup.
Image courtesy: Ahmed Qwaider’s Twitter
Previous reports have suggested that Samsung might add a waterdrop-shaped hinge in the Galaxy Z Flip 5 and the Galaxy Z Fold 5 smartphones that could be similar to new foldable devices from the likes of Huawei, Vivo, Oppo and Xioami. For the uninitiated, a waterdrop-shaped hinge can remove the gap between two halves of the smartphone and minimize the crease on the internal screen.
Read Also:Samsung Galaxy Z Fold 3 review: Love at third sight
Furthermore, Samsung Galaxy Z Fold 5 images also show its rear camera setup that comprises three rear facing lenses and an LED flash placed on their right. According to reports, the device would come with a 50MP primary sensor, a 12MP ultrawide lens and a 10MP telephoto camera with 3x optical zoom.
Samsung Galaxy Z Fold 5 specifications (leaked)
Previous leaks about Samsung Galaxy Z Fold 5 suggest that the smartphone will come with a 6.2-inch 120Hz Super AMOLED cover screen and a 7.6-inch 120Hz internal foldable Super AMOLED screen. The smartphone will reportedly be powered by a Snapdragon 8 Gen 2 processor clubbed with 12GB of RAM and up to 512GB of internal storage.
The device is said to come with water resistance (varied reports talk about various ratings) and its connectivity features would include GPS, 5G, Wi-Fi 6E, Bluetooth 5.3, NFC and a USB 3.2 Type-C port. Reports suggest the presence of a 4,400mAh battery, 25W fast charging capabilities, Samsung DeX, and Samsung Pay.
Image courtesy: Ahmed Qwaider’s Twitter
However, it should be noted that Samsung Galaxy Z Fold 5 and Galaxy Flip 5 smartphones might not be dust resistant, according to tipster @UniverseIce. If this is true, the devices would not come with an IP58 rating. But then, we can also not rule out the possibility that the tech giant has, in fact, upgraded the IP rating on its upcoming phones but hasn’t talked about it yet.
Read Also:Pete Lau Makes a Hint to a Future OnePlus Foldable Phone
Other than this, the new foldable smartphones are said to have the ability to withstand 200,000 folds for basic use whereas 300,000 folds and unfolds is the upper limit.
For the latest gadget and tech news, and gadget reviews, follow us on Twitter, Facebook and Instagram. For newest tech & gadget videos subscribe to our YouTube Channel. You can also stay up to date using the Gadget Bridge Android App. You can find the latest car and bike news here.
A Wordle app was one of the most requested features for the game when it was released and hit virality in 2021. The lack of a dedicated Wordle app lead to many knock-offs and spin-offs getting published on Android and iOS app marketplaces. Many users still look for the official Wordle app for their smartphones. In this article, we bring you the top 4 ways to install Wordle as an app on your iPhone and Android mobile.Read Also:How to Set Up Emergency SOS on iPhone and Android?
In This Article
Play Wordle on the NYT Games app
After gaining Internet popularity in 2021, Wordle was acquired by the New York Times the following year. The price of the acquisition was rumoured to be $1 million. While Wordle never had a standalone app, assimilating with NYT’s game section meant it would finally have a place in the NYT Games app. Users can download the app from Google Play Store or the App Store. You don’t need an NYT account to play Wordle. However, you only get 7 free games before you’re asked to make an account.
Add Wordle Shortcut to your Android phone’s home screen
If you don’t want to download the NYT Games app, you can add a Wordle shortcut to your Android phone’s home screen, which functions more or less like an app. Here’s how.Step 1: Launch Google Chrome on your Android smartphone.Step 2: Go to NYT’s webpage for Wordle. A simple Google search for ‘Wordle’ will take you there. Or you can click this link.Step 3: Tap on the ellipses (three dots) at the top right corner of the screen.Step 4: Select ‘Add to Home screen’.Step 5: Name the home screen shortcut in the following popup box. Hit ‘Add’.Step 6: Touch and hold the Wordle icon to place it on the home screen. You can also tap on ‘Add’.Step 7: Place the Wordle icon in the position of your choice.
Add Wordle to your iPhone’s home screen
Here’s how you can add the Wordle game to your iPhone’s home screen.Step 1: Launch Safari on your iPhone and go to the Wordle webpage.Step 2: Tap the Share icon on the bottom toolbar.Step 3: Select ‘Add to home screen’.Step 4: Name the icon and hit ‘Add’ at the top right corner of the screen.
Use a third-party app
If you don’t really want to limit yourself to one Wordle puzzle every day, there are plenty of knock-off Wordle apps on the Google Play Store and App Store that you might enjoy. Since these apps aren’t a part of the NYT ecosystem, you won’t get the same puzzle as everyone else. But if you just want to play for the fun of solving new puzzles, these apps will be right up your alley. With over 5 million downloads, Lion Studios Plus Wordle is one of the most popular Wordle apps for Android. You can even try other variations of Wordle like Quordle, Octordle, and more.
Frequently Asked Questions
Is there an official Wordle app?
You can play the official Wordle game on the NYT Games app.
Which is the real Wordle app?
There are a lot of duplicate Wordle apps on the Internet. While Wordle does not have a standalone app, you can play the official game on the NYT Games app.
Motorola Razr 40, and Motorola Razr 40 Ultra have officially debuted in India today. The foldable phones will be taking on Samsung and Oppo’s foldable flip phones namely Samsung Galaxy Z Flip 4 and OPPO Find N2 Flip. The devices will be available for purchase via Amazon in the country and through offline retailers. The Razr 40 has a smaller 1.5-inch cover screen, whilst the Razr 40 Ultra has a larger 3.6-inch outside display.
Also Read:GST rate reduced on household items, TVs, mobile phones and other electronics to get cheaper
In This Article
Motorola Razr 40, Motorola Razr 40 Ultra price in India and availability
The Motorola Razr 40 Ultra has been launched in India with a price tag of Rs 89,999 for the 8GB RAM with 256GB storage model. This model will be offered in two colour options of Viva Magenta and Infinite Black. The company will be offering a Rs 7,000 cashback offer to ICICI Bank customers. It will also come with Jio goodies worth Rs 15,000.
On the other hand, Razr 40 price is set at Rs 59,999 along with cashback of Rs 5,000 to ICICI customers.
The Razr 40 series will be available for purchase via Amazon starting July 15 when the Prime Day sale begins on the platform at midnight. Prime members are eligible to get early access to the product along with bank offers. The device will also be available on Reliance Digital stores across the country. The customers can now pre-book the device on Amazon at just Rs 999.Also Read: Twitter sets a cap on the number of Tweets that can be read by verified and unverified users
The 6.9-inch foldable pOLED screens on the Motorola Razr 40 and Motorola Razr 40 Ultra have a refresh rate of 165Hz, a resolution of 1,080×2,640 pixels, and a maximum brightness of 1,200 nits. The Motorola Razr 40 Ultra model has a larger 1.5-inch cover display whereas the Razr 40 has a 3.6-inch pOLED outer screen with a resolution of 1,056×1,066 pixels and a refresh rate of 144Hz. The Razr 40 has a Corning Gorilla Glass Victus on an external display and is IP52 rated. Whereas Ultra comes with Corning Gorilla Glass Victus on the front and rear. This phone is also IP52 rated.
Snapdragon 7 Gen 1 and Snapdragon 8+ Gen 1 processors power the Motorola Razr 40 and Motorola Razr 40 Ultra, respectively.
The Motorola Razr 40 has a 64-megapixel primary sensor and a 12-megapixel ultra wide-angle camera for optics. A 13-megapixel secondary ultra-wide-angle camera and a 12-megapixel primary sensor are featured on the Razr 40 Ultra, in contrast. For selfies and video calls, both foldable phones have a 32-megapixel front-facing camera.
Batteries of 3,800mAh and 4,200mAh capacities are present in the Motorola Razr 40 and Motorola Razr 40 Ultra, respectively. The first model charges at 33W while the other device can be charged at 30W and also enables 8W wireless charging.
Both the clamshell design phones have dual stereo speakers. Razr 40 is 7.35mm thin when unfolded on the other hand the Ultra model is 6.99mm thin when unfolded.
For the latest gadget and tech news, and gadget reviews, follow us on Twitter, Facebook and Instagram. For newest tech & gadget videos subscribe to our YouTube Channel. You can also stay up to date using the Gadget Bridge Android App. You can find the latest car and bike news here.
If you’re tired of sluggish WiFi speeds even on your home network, you will be happy to know that there are a few things you can do to improve the situation without spending any money. Of course, you can upgrade your WiFi router as an immediate fix, but if you don’t wanna spend any money, these methods will come in very handy. So, without further ado, here are the top 8 ways to boost the WiFi signal for faster internet.Read Also:How to Run Windows Apps on Android with Wine?
In This Article
Update router firmware
Keeping your router’s firmware updated ensures that it is at the top of its game at all times. Router manufacturers routinely push out new updates that optimise the device to produce better speeds. Here’s how you can update the firmware of a D-Link WiFi router. Make sure you establish a wired connection between your router and your PC before beginning.Step 1: Download the latest firmware for your router using this link. You can also browse D-Link’s website to look for any new updates.Step 2: Launch the web browser on your PC and go to http://dlinkrouter, http://dlinkrouter.local, or http://192.168.0.1 to enter the router management portal.Step 3: Enter the login credentials for your router. If you haven’t set up any credentials, enter ‘Admin’ as the username and look for the default password at the back of the router. If you don’t find a password, leave the field empty.Step 4: Once you’re logged in, click on Manual Setup.Step 5: Switch to the Maintenance tab and select Firmware Update from the side menu.Step 6: Navigate to the ‘Firmware Upgrade’ section and click on ‘Browse’.Step 7: Open the file you installed in Step 1.Step 8: The file will take a few seconds to upload. Once it has been uploaded, the router update process will begin. This may take a few minutes. Hit ‘Continue’ when the update is complete.
Place the router in the ideal spot
You may already know this, but the strength of your WiFi network depends on your proximity to the router and the quality of the connection. If the router is far away from your workstation, you will not be able to make the most of the connection. Find out the ideal location to place the router. If you are sharing the connection with multiple people, placing the router in the centre of the house/office is a good idea. Make sure there are no immediate objects obstructing the router. If your router has antennas, adjust them to boost the WiFi signal.
Change the frequency band
Your WiFi router has two frequency bands – 2.4GHz and 5GHz. The 2.4GHz bandwidth covers a large range, meanwhile, the 5GHz frequency band provides greater speeds in a short radius. If you are close to the router, you can use the 5GHz band to enjoy faster speeds. You can set up this band using your WiFi router’s app or digital interface. If the 5GHz bandwidth has the same password as the 2.4GHz one, your device will automatically switch to the former whenever it is in your range.
Change the WiFi password
Your WiFi’s bandwidth may get crammed with several devices using it at any given time. It is also possible that your neighbours may be using your WiFi, leading to slower speeds. The quickest way to disconnect all unnecessary devices from the network is by changing the WiFi password. Open your WiFi router’s digital portal on your PC’s web browser to manage the password and connected devices.
Change the WiFi frequency channel
The two WiFi bandwidths we talked about earlier make use of several different channels to serve coverage within a range. If there are other WiFi networks in your router’s proximity using the same channel, your connection’s speed may be affected due to interference. In this case, you need to change the frequency channel. Apps like NetSpot allow you to view all the available channels for your router’s bandwidths. You can switch to a particular channel using your WiFi router’s app or online interface.
Use a WiFi repeater
If your WiFi router is struggling to direct the network signal to every corner of your house, you need to use a WiFi signal repeater or range extender. An average range extender will cost you between Rs 1,500 – Rs 3,000. Once you’ve linked it to your primary router, it will disperse the signal over a larger area. You can also use an old router as a WiFi repeater.
Remove your phone’s case
Sometimes, your phone’s case can block the antenna from receiving a strong network signal. This problem is more common in older phones. If you’re using your home WiFi at a comfortable spot, you can remove your phone’s case without the risk of it falling down. Once you do that, you will notice an immediate bump in speed.
Use a third-party app
There are several third-party apps for your phone that can boost the WiFi signal strength, leading to better speeds. Apps like Connection Stabilizer Booster and Network Signal Speed Booster will give you that extra bump in speed that you need.
Frequently Asked Questions
Can I boost my WiFi’s speed?
There are a few ways to boost your WiFi connection’s speed. You can try updating the router firmware, placing the router in a better spot, removing unwanted devices from the network, and switching to better bandwidth.
Can I boost the WiFi speed on Android?
To boost the WiFi speed on Android, remove your phone’s case and use a signal booster app.
How can I extend my router’s range?
To extend the range covered by your WiFi router, make sure there are no objects obstructing it. You can also upgrade its antennas or use a range extender for this task.Read Also:How to Set Up Emergency SOS on iPhone and Android?
Conclusion
This is how you can boost the WiFi signal for faster internet speeds. If you are still not happy with the internet speed after trying all the methods mentioned above, it may be time to upgrade your router. Found this article helpful, let us know in the comments!
Imagine a world where technology meets thrill, a place where your favourite casino games are a click away. As we step into the digital age, the online casino realm expands, offering enticing experiences right at your fingertips. But what gadgets will give you the best gaming experience? Let’s discover seven of the most user-friendly devices that could bring your casino play to new heights on the example of top online gambling platforms such as Zodiac Casino Canada, Spin Casino and Casigo.
In This Article
How to choose a perfect online gambling gadget
Choosing the perfect gadget for gambling is not a simple task. Here are some tips and factors you should consider to ensure you make the right choice:
Compatibility: Check if the gadget is compatible with the software of your preferred casino. Most sites, like Zodiac online casino, support Android and iOS devices, but it’s best to verify before purchasing.
Screen Size: A larger screen might be beneficial if you prefer seeing the game details clearly. Tablets and laptops offer this advantage. But if portability is your priority, smartphones or smartwatches might be more suitable.
Battery Life: A gadget with a good battery life ensures your gaming sessions aren’t cut short. This is especially important for mobile devices like smartphones and tablets.
Audio and Visual Quality: High-quality visuals and sounds enhance your gaming experience. Devices with high-resolution screens and superior audio capabilities are a good choice.
Remember, the perfect online gambling gadget depends on your needs and preferences. Considering these factors will help you make an informed decision.
Smartphones
A smartphone is the most crucial gadget for any online enthusiast. With the rise of mobile gaming, these devices have become an essential tools for all of us. Their compactness allows players to enjoy their favourite games anytime, anywhere. Most casinos like Zodiac Signs Casino have apps that are optimized for smartphone use. These apps have great interfaces that make navigation a breeze. They offer games such as slots, poker, blackjack, and roulette. The convenience of having access to these games right in your pocket is unmatched.
But it’s not just about convenience. Smartphones also come with high-resolution screens, offering stunning visuals that enhance the gaming experience. Moreover, many modern smartphones boast excellent audio capabilities, immersing you in the game.
Top Online Casino Apps for Your Smartphone
Whether you’re a fan of Android or iOS, smartphones give you a flexible way to participate in online games. They are truly the gateway to a world of fun and excitement in the casino world. Hence, we’d like to highlight some of the casino apps that will bring the most rewarding casino experience.
Casigo
In addition to its impressive game selection, CasiGo app takes pride in providing a safe and secure gaming environment. The casino warmly welcomes slots fanatics with an enticing welcome bonus that includes free spins on select games. With legitimate and user-friendly customer support options, players can rest assured that assistance is readily available when needed. Furthermore, the casino regularly offers even more rewards for both new and existing players. Casino prioritizes the security and safety of its players, implementing robust measures to ensure a secure gaming environment.
Zodiac Casino
Zodiac Casino is a reputable online gaming destination that holds licenses from the UK Gambling Commission and the Malta Gaming Authority, ensuring a safe and secure experience for players. According to the Zodiac Signs Casino review, members have the convenience of choosing from multiple deposit and withdrawal methods. With its solid regulatory credentials and flexible banking options, Zodiac Casino app provides a trustworthy and user-friendly platform for players to enjoy their gaming adventures.
Spin Casino
Operated by Bayton Limited, a highly reputable company registered in Malta, Spin Casino is dedicated to delivering high-quality and dependable iGaming services to its valued patrons.
What sets Spin Casino apart is its collaboration with the industry-leading software provider, Microgaming. This partnership ensures that casino app users are treated to an extensive collection of over 600 games, guaranteeing an immersive and diverse gaming experience. Whether you’re captivated by the allure of pokies or prefer the timeless classics of roulette, blackjack, baccarat, or poker, Spin Casino offers a wide range of exhilarating options to satisfy every player’s preferences.
Tablets
When it comes to casino gaming, tablets provide an excellent balance between portability and screen size. Larger than smartphones but more mobile than laptops, they offer a platform for online casino apps.
With their wide screens, tablets make it easier to enjoy the vibrant graphics and details. The touch-screen interfaces are easy to use, making gameplay smooth and intuitive. Some tablets also come with excellent battery life, meaning you can play for long periods. In essence, tablets combine the best of both worlds, giving online casino players an engaging and comfortable gaming experience.
Laptops and notebooks
Laptops and notebooks’ power and versatility make them a top choice for casino gaming. Their larger screens provide a more immersive experience compared to smaller devices. Also, laptops and notebooks come with stronger processors and more RAM. It ensures smoother game performance, even when playing resource-intensive live casino games.
Beyond performance, laptops have a full-sized keyboard, which is beneficial when playing certain casino games requiring lots of typing. Plus, with the flexibility to connect to an external monitor, you elevate your gaming to a larger display.
The diversity in laptop models means there’s something for everyone, whether you prioritize portability, power, or both. These gadgets are powerful tools for anyone serious about online gaming.
VR headsets
For immersive gaming, look no further than VR headsets. They transport players into a virtual casino, offering an experience that resembles the real thing. From interacting with virtual slots to sitting at a poker table, VR headsets bring the thrill of the casino to your living room.
The VR technology used in these headsets produces high-quality 3D graphics that create lifelike gaming. The result is an engaging, exciting experience as close as possible to being in a physical casino without leaving home.
VR headsets are continually improving. Newer models are more comfortable and lighter, ensuring they can be worn for extended periods without discomfort. Some even come with integrated headphones. With a VR headset, you plunge into online casino gaming like never before.
Smartwatches
The smartwatch has taken the online casino experience to the next level. While the screen size may be small compared to other devices, the ease of use and convenience are unrivalled.
Most venues now offer apps for smartwatches, allowing players to place bets, spin slots, or deal cards right from their wrists. This makes it easy to enjoy your favourite casino games even when you’re on the move.
Moreover, smartwatches come with push notifications, ensuring you never miss an important update or a bonus offer. The ability to access and manage your casino accounts makes them an innovative and exciting option.
Console
Consoles are not just for traditional video games anymore. They’re also entering the world of casino gaming. Modern consoles like the PlayStation or Xbox have the power to deliver high-quality graphics that can rival PCs. They offer a unique way to engage with your favourite games on the big screen, all from the comfort of your living room.
Online casinos are developing console-specific versions of their games. Consoles come with large communities of players, bringing a social element to your sessions. So, whether spinning the roulette wheel or playing poker, these devices offer an exciting twist.
Automatic card shuffler
For poker enthusiasts seeking to hone their skills at home, an automatic card shuffler is a must-have gadget. This device shuffles cards quickly and efficiently, eliminating any concerns about manual shuffling or fairness. It’s easy to use – simply insert the cards at the top, and the shuffler does the rest. The result is a perfectly shuffled deck, ready for the next round of play.
This device not only saves time but also adds a professional touch to your home games, mirroring the experience you would get in an online or physical casino. Overall, an automatic card shuffler is a nifty tool that adds efficiency and authenticity to your poker games.
Final Words
As we journey through the dynamic world of online casinos, technology continues to enhance our experiences. Various gadgets, from smartphones to consoles, offer unique features to make your gaming time more enjoyable. Ultimately, your choice of the gadget will be personal, based on your gaming preferences and lifestyle. Whichever you choose, the thrill and enjoyment of online casino gaming are sure to follow.
For the latest gadget and tech news, and gadget reviews, follow us on Twitter, Facebook and Instagram. For the newest tech & gadget videos subscribe to our YouTube Channel. You can also stay up to date using the Gadget Bridge Android App. You can find the latest car and bike news here.
Motorola Razr 40 and Motorola Razr 40 Ultra India launch is scheduled to take place today. The full specifications, along with all other relevant information, have been disclosed by the smartphone manufacturer. Both the devices are confirmed to be available for purchase via Amazon in the country.
In This Article
Motorola Razr 40 and Motorola Razr 40 Ultra India launch details
Motorola Razr 40 and Motorola Razr 40 Ultra will be launched in India today. The company will be hosting a launch event today. The event will be live-streamed at 5 PM via the company’s official YouTube channel. Interested ones and fans can also watch the event live via the company’s official social media channels including Twitter.You can also watch it here on our channel as we have embedded the link below.
Razr 40, Razr 40 Ultra price in India expected
The price of the Razr 40 was unintentionally made public on Amazon prior to the formal release. Recall that in China, the foldable phone debuted alongside the Motorola Razr 40 Ultra. The official sales partner for the next series has been confirmed to be Amazon. According to the listing, the price of the clamshell folding smartphone would start at Rs 59,999. Notably, the listing has been taken down, and the online store does not currently reflect the prices for either phone.Also Read:Twitter sets a cap on the number of Tweets that can be read by verified and unverified usersHowever, the business did previously disclose that the e-commerce site will get you a 10% discount when you purchase the Motorola Razr 40 online with ICICI Bank and SBI credit cards.Remember that the Motorola Razr 40 Ultra, which has 8GB of RAM and 256GB of storage, has a starting price of CNY 5,699 in China, whilst the Motorola Razr 40 has a starting price of CNY 3,999, or Rs 46,000, for 8GB of RAM and 128GB of storage.
Razr 40 Ultra and Razr 40 specifications
Motorola Razr 40 Ultra and Razr 40 come with a 6.9-inch foldable pOLED display with a 1,080 x 2,640-pixel resolution. The display on the clamshell phones also supports a 165Hz refresh rate and a maximum brightness of 1,200 nits. The devices run on Android 13 out of the box. The Qualcomm Snapdragon 7 Gen 1 SoC is used in the Razr 40’s entry-level edition, and the Qualcomm Snapdragon 8+ Gen 1 SoC is used in the Razr 40 Ultra.Both the foldable phones will have dual rear cameras. A 12-megapixel primary sensor with OIS and a 13-megapixel secondary ultra-wide-angle sensor make up the camera system of the Razr 40 Ultra. The Razr 40, on the other hand, sports a 64-megapixel primary sensor in addition to a 12-megapixel super wide-angle camera. Both devices have a 32-megapixel front-facing camera for selfies.There will be a 3,800mAh battery on the Razr 40 Ultra supporting 33W rapid charging and 5W wireless charging. Whereas, the Razr 40 supports 30W wired and 8W wireless charging and has a 4,200mAh battery. For the latest gadget and tech news, and gadget reviews, follow us on Twitter, Facebook and Instagram. For newest tech & gadget videos subscribe to our YouTube Channel. You can also stay up to date using the Gadget Bridge Android App. You can find the latest car and bike news here.
Creating a collage is a great way of preserving moments and memories captured in images. If you wanna wish someone on a special occasion, creating an image collage is a great way to go about it. You can either simply stitch two images together, or create an appealing greeting with lots of graphics and added effects. In this article, we bring you the 4 best methods to put two pictures side by side on Android.Read Also:How to Blur Your House or an Object in Google Maps?
In This Article
Use Samsung’s native photo editor
Samsung’s native photo editor allows users to juxtapose two photos together. Here’s how you can go about it.Step 1: Launch the Gallery app on your Samsung smartphone. Select an album.Step 2: Tap the ellipses and select Create.Step 3: Tap on Collage.Step 4: Select the pictures that you want to combine.Step 5: Choose the orientation for the two pictures.Step 6: Hit Save when you’re done.
Use Google Photos to put two pictures side by side on Android
Step 1: Launch the Google Photos app on your Android smartphone.Step 2: Select the two pictures you want to stitch together. You can do this by long-pressing a picture and then simply tapping the other one.Step 3: Select Add to from the bottom toolbar.Step 4: Tap on Collage.Step 5: Choose an orientation for the two images.Step 6: Hit Save at the bottom right corner of the screen.
Use Instagram to combine two pictures together
Step 1: Launch the Instagram app on your Android smartphone.Step 2: Hit the plus icon on your profile picture at the top left corner of the screen.Step 3: Select Camera.Step 4: Tap on the Layout icon.Step 5: Select the layout for a two-image collage.Step 6:Choose the images from your gallery for both panels.Step 7: Once the images are aligned, tap on the tick icon.Step 8:Tap the ellipses at the top right corner of the screen and select Save story.
Use a third-party photo-editing app
There are several third-party Android apps you can use to create a collage. Here’s how you can combine two pictures together using Canva on Android.Step 1: Launch Canva on your Android smartphone.Step 2:Tap the plus icon at the bottom of the screen.Step 3: Select the Photo Collage layout.Step 4: Choose your desired template from the list.Step 5: Tap the template image and select Replace from the bottom toolbar.Step 6:Choose a picture from your device’s gallery to replace the template image.Step 7:Repeat this process for the other template image.Step 8: Choose the background colour. You can also crop the images and make other changes to the collage.Step 9: Hit the upload icon at the top right corner of the screen.Step 10: Select Download.Step 11: Give the image a title and save it on your device.
Frequently Asked Questions (FAQs)
How do I combine two pictures on Android?
The Google Photos app on your Android smartphone has a collage maker that lets you stitch two images together. Samsung’s native photo editor in the Gallery app also has this feature. You can also use a third-party photo editing app like Canva to juxtapose two images together.
How do I put two pictures side by side on Instagram?
Instagram story maker has a ‘Layouts’ option that lets you create a collage. You can only select this option when you’re in the Story creation window. Choose the two-image layout and upload the pictures from your device.
Do I have to download another app to stitch two photos together?
This is how you can put two pictures side by side on Android. While the native tools do a good job of creating a collage, if you want more layout options and greater control over the design, you should use a third-party photo editing app. Apps like Canva not only have more templates for collages, but they also let you change the background colour, alter the image alignment and a bunch of other cool stuff!For the latest gadget and tech news, and gadget reviews, follow us on Twitter, Facebook and Instagram. For newest tech & gadget videos subscribe to our YouTube Channel. You can also stay up to date using the Gadget Bridge Android App. You can find the latest car and bike news here.
The government has reduced the GST on household items including electronics. Users won’t have to pay the full 31.3 percent GST anymore to purchase these items as it has been lowered to 12 percent now. The government has reduced the GST on products including UPS, washing machines, mobile phones, refrigerators, and other electronics.The Finance Ministry announced the reduction in GST rates on electronics and household appliances via Twitter. After slashing the GST, the tax rates were lowered on a number of goods and services, including TVs up to 27 inches, refrigerators, washing machines, electrical appliances, geysers, fans, coolers, mobile phones, etc. As a result, users will find these products more affordable.The items that will be more affordable as a result of the revised GST rates are listed below.Also Read:Twitter sets a cap on the number of Tweets that can be read by verified and unverified users
In This Article
The price of TV will decrease but…
GST has been reduced for TVs with screens smaller than 27 inches from 31.3 percent to 18 percent. But the majority of buyers won’t profit from this as most TVs these days have a minimum screen size of 32 inches or bigger. Note that the GST of 31.3 percent is applicable on televisions that are 32 inches or larger.
The price of mobile phones will drop
Mobile phones are now less expensive thanks to a reduction in GST. Previously one had to pay 31.3 per cent GST which has now been reduced to 12%, allowing firms to lower the cost of their devices.
Also less expensive will be home appliances
These home appliances now have price reductions of up to 12 percent because the GST has been lowered on household appliances like refrigerators and washing machines, coolers, geysers, fans and more. Note that the GST has been reduced from 31.3 percent to 18 percent.The GST has been reduced for a variety of other home appliances and goods like mixers, juicers, vacuum cleaners, LED lights, vacuum flasks and vacuum utensils.This move by the government will ensure customers’ accessibility and affordability thanks to the GST reduction.
For the latest gadget and tech news, and gadget reviews, follow us on Twitter, Facebook and Instagram. For newest tech & gadget videos subscribe to our YouTube Channel. You can also stay up to date using the Gadget Bridge Android App. You can find the latest car and bike news here.
Twitter is restricting the number of tweets that individual accounts can read each day in an effort to deter severe data scraping and system manipulation. This crucial information was shared by the company’s head Elon Musk via Twitter post. Note that verified users were previously restricted to reading 6,000 posts per day.According to the new changes made by the company from now onwards, Unverified accounts will now be limited to 600 posts per day, with new unverified accounts having a limit of 300. Verified accounts were previously restricted to reading 6,000 posts per day.Elon Musk took to Twitter to make this announcement. His tweet reads,
” To address extreme levels of data scraping & system manipulation, we’ve applied the following temporary limits:– Verified accounts are limited to reading 6000 posts/day– Unverified accounts to 600 posts/day– New unverified accounts to 300/day”
Rate limits were later increased to soon to 8000 for verified, 800 for unverified & 400 for new unverified. According to Musk in a separate post, the temporary reading restriction was subsequently doubled to 10,000 posts per day for verified users, 1,000 posts per day for unverified users, and 500 posts per day for new unverified users. Musk did not provide any other information.Also Read: Google Pixel 7a Review: Is it an all-rounder phone at Rs 44,000?Previously, Twitter has said that users will now need to have an account on the social media site in order to access messages. Elon Musk dubbed this decision a “temporary emergency measure.”Musk’s tweet read, “We were getting data pillaged so much that it was degrading service for normal users!” He continued by saying that at least hundreds of organisations were “extremely aggressively” scraping Twitter data.The platform will prompt users who attempt to access information to either create an account or log into an existing account in order to view their favourite tweets.For the latest gadget and tech news, and gadget reviews, follow us on Twitter, Facebook and Instagram. For newest tech & gadget videos subscribe to our YouTube Channel. You can also stay up to date using the Gadget Bridge Android App. You can find the latest car and bike news here.
Emergency SOS is one feature that no one ever hopes to use on their phone. But, it is good to know that there are certain important tasks your smartphone can carry out in case of an emergency. Setting up the safety and emergency section doesn’t take a lot of time and is super helpful in the long run. In this article, we show you how to set up Emergency SOS on iPhone (iOS) and Android.Read Also:Niantic cancels Marvel & NBA games, lays off over 200 people
In This Article
Set up Emergency SOS on iPhone
Step 1: Launch the Health app on your iPhone.Step 2: Tap on your profile icon at the top right corner of the screen.Step 3: Select ‘Medical ID’.Step 4: Tap on ‘Edit’ at the top right corner of the screen.Step 5: Select ‘Add emergency contact’.Step 6: Scroll through your contacts and select one to be your emergency contact.Step 7: Select how they are related to you.Step 8: Hit ‘Done’.You can connect to Emergency services by pressing the side key five times in quick succession. This will work even if your phone is locked. Once you press the side key five times, your phone will play the sound of a siren and will start counting down from three. Here’s how you can set it up.Step 1: Go to Settings and select Emergency SOS.Step 2: Switch on the toggle bar for ‘Call with 5 Presses.’Step 3: To turn off the countdown and siren, switch on the toggle bar for ‘Call Quietly’.Pressing and holding the side key + volume up/down key also triggers the Emergency panel. You can slide the bar across the screen to select Medical ID or Emergency SOS. Once your call with Emergency services has concluded, your iPhone will send a message to your emergency contact(s), letting them know that you triggered Emergency SOS. Your live location will also be sent to the contact(s).
Set up Emergency SOS on Android
Before you begin, you need to add at least one emergency contact on your phone. Here’s how you can do that.Step 1: Go to Settings and select ‘Safety and emergency’.Step 2: Tap ‘Emergency Contacts’.Step 3: Tap on the pencil icon on the right side of the screen.Step 4: Tap on ‘Add member’.Step 5: Select a person from your phonebook as an emergency contact.Step 6: Hit ‘Save’.Once the emergency contact is saved, it can be called without unlocking your phone. To make a call to your emergency contact, you will have to hit the ‘Emergency call’ button on the lock screen.Here’s how you can turn on Emergency SOS on your phone.Step 1: Go to Settings and select ‘Safety and emergency’.Step 2: Select ‘Emergency SOS’.Step 3: Switch on the toggle bar for ‘Share info with emergency contacts’.Pressing the power key three times in quick succession will dial the number for emergency services and share your location with your emergency contact(s).
Frequently Asked Questions
How do I set an emergency contact on Android?
To set an emergency contact on your Android phone, go to Settings>Safety and Emergency and select ‘Emergency Contact’.
What is Emergency SOS?
Emergency SOS quickly connects you to emergency services near you and sends your location to your emergency contact(s).
After being banned for nearly ten months, Battleground Mobile India, aka BGMI, is officially available again in India. BGMI fans are looking for ways to improve their game experience and one such method is the usage of redemption codes, which offers a variety of rewards and advantages using BGMI redeem codes players can gain access to new skins, outfits, loot crates, weapons and free UC and diamonds.As mentioned earlier, these codes give users the chance to earn unique rewards and gain extra benefits while playing the game. This includes GUN SKINS (M4, AKM, M416, AWM, M24, UZI, KAR98K), free character voucher, Andy, Carlo, Sara, Victor character for free, free Anna Character on completing the mission and UC or Royal Pass Discount. So here we have gathered a list of the most recent BGMI redeem codes as of 3 July 2023. Also, redeem these codes asap as these are only valid for a limited duration.
In This Article
BGMI Redeem Codes for 3 July 2023
ZADROT5QLHP
BOBR3IBMTO
SIWEST4YLXR
FENKYU5ATPD
LEVKIN1QPCZ
GPHZDBTFZM24U
KARZBZYTR
SD14G84FCC
VETREL2IMHX
BDNKUPRMF4
How to get free Redeem Codes for BGMI on 3 July 2023?
Launch BGMI on your device.
Then select the Redeem Code option from the main menu.
Next, click on the Redeem code tab.
A new window will open, requesting the redemption code.
Now enter your BGMI code.
Confirm and click on the “Redeem” tab.
If your redeem code is valid then you will get a message confirming that your rewards were successfully redeemed.
Garena Free Fire is a battle royale game with regular awards and tournaments to keep players interested. If you play Garena Free Fire, you should be aware of the redeem codes that are released on a daily basis. However, because the battle royale game is banned in India, players from other countries can use the Free Fire Redeem codes daily. If you’re unfamiliar with the Garena Free Fire redeem codes or don’t know how to get them, we’ve put together a step-by-step guide to help you redeem them. Check out Garena Free Fire Redeem Codes for 3 July 2023.The Free Fire redeem codes are a great way to get free stuff. These are 12-digit codes that contain alphabets and numbers, as well as an expiration date and time. Because the Garena FF redeem codes cannot be used more than once, you should hurry to the redemption page to claim your free reward before someone else does. To get a free reward, all you have to do is go to reward.ff.garena.com/en, which is the official redemption page. Also, keep an eye on this space for daily updates on Garena Free Fire redemption codes and rewards.
Google Maps is an excellent app for navigation, but when it comes to Street View, some people may have reasonable apprehensions. Introduced in India last year, Street View allows you a ‘real’ look at any location on Google Maps. While it is fun to explore Street View and look at different locations across the world, some people may not want their house displayed on it out of privacy and security concerns. In this article, we show you how to blur your house or an object in Google Maps and Street View.Read Also:8 Easy Fixes: Discord Stream Showing Black Screen
In This Article
Here’s how you can blur your house in Google Maps or Street View
Step 1: Open Google Maps on your web browser.Step 2: Enter your address in the search bar and select your location.Step 3: Drag the yellow person icon on your location to enter Street View. You will now be able to view your house on the map.Step 4: Click the ellipses on the address box at the top right corner of the screen.Step 5: Select ‘Report a problem’. This will open a new window on your browser.Step 6: Drag the image so that the part you want blurred out is inside the red square.Step 7: Select a reason for your blurring request. In this case, click on ‘My home’.Step 8: Enter your email address and click on the captcha.Step 9: Hit Submit.Google will process your request after contacting you via email. You may need to give additional details to verify that the area you want blurred is your house. Once that is done, the selected area will be permanently blurred from Google Maps and Street View.
Frequently Asked Questions (FAQs)
Can you blur your house in Google Maps?
Google allows you to blur pictures of your house, number plate, or your face from Google Maps and Street View. Once your request has been submitted, it takes a couple of days to process before it is completely blurred out.
How do I blur my house in Google Maps?
To blur your house in Google Maps, open the location in Street View and click the ellipses on the address box. Select ‘Report a problem’, then drag the image and fit your house in the red square. Select the reason behind your request and hit submit.
Sony India today announced the launch of headphones and microphone for professionals. The Sony MDR-MV1 Reference Monitor Headphones and C-80 microphone have debuted in the country. The Sony MDR-MV1 Headphones offer accurate spatial sound field reproduction with the quality and comfort desired by sound engineers and creators. Whereas the Sony C-80 entry-level microphone is ideal for recording podcasts, webcasts and more.Also Read:Sony CH720N headphones review: Terrific sound with ANC in a good price range
In This Article
Sony MDR-MV1 Headphones features, price
The lightweight, soft, and fitting MDR-MV1 headphones were designed with comfort in mind and have ventilated earpads. The MDR-MV1 comes with a high-quality replaceable, detachable cable with machined aluminium connections.According to the company the Sony MDR-MV1 Headphones offer enhanced spatial sound replication, precise sound object placement in a 360-degree space, and clear, high-resolution, nuanced sound with a super-wide frequency range because of their open back design, which permits accurate reproduction of a large sound field. The audio device includes specially designed driver modules that deliver high-frequency playback with natural ultra-wideband (5Hz – 80 kHz) frequencies.The headphones combine high-quality audio with durable use and dependability. Professionals will find it simpler to record localization, spaciousness and detailed changes in sound processing. The MDR-MV1’s open-back design avoids acoustic resonances and minimises internally reflected sounds while faithfully recreating rich, natural spatial information. It is ideal for expert mixing and mastering situations and meets the highest requirements for audio engineers.The price of the Sony MDR-MV1 Headphones is set at Rs 39,990.Also Read:Sennheiser Profile USB Microphone Streaming Set review: Pro sound on a budget
Sony C-80 Microphone features, price
The Sony C-80 Microphone is a uni-directional condenser microphone which is excellent for vocal/voice recording, instrumental recording, vlogging, webcasting, and podcasting. The technology of Sony’s renowned C-800G and well-liked C-100 microphones is carried over into this new device, making high-quality sound even more affordable.It incorporates the C-100’s microphone capsule with the C-800G’s two-part metallic anti-vibrational body structure to preserve the essence of Sony’s renowned C-800G and well-liked C-100 microphones. It has a “Noise Elimination Construction” which cancels out the acoustic vibration of the microphone body, producing low noise and clear sound. The C-80 also features a dual-diaphragm construction, which reduces proximity effect and other acoustic variations with distance and enhances vocal recording stability.The Sony C-80 also offers an accurate representation of an instrument’s features, such as the resonance of the body and the sound of guitar strings, and it produces a natural and clear recording by cancelling out boomy low frequencies and background noise when used in close proximity to the microphone.The Sony C-80 Microphone will be available with a price tag of Rs 49,990.
After being banned for nearly ten months, Battleground Mobile India, aka BGMI, is officially available again in India. BGMI fans are looking for ways to improve their game experience and one such method is the usage of redemption codes, which offers a variety of rewards and advantages using BGMI redeem codes players can gain access to new skins, outfits, loot crates, weapons and free UC and diamonds.As mentioned earlier, these codes give users the chance to earn unique rewards and gain extra benefits while playing the game. This includes GUN SKINS (M4, AKM, M416, AWM, M24, UZI, KAR98K), free character voucher, Andy, Carlo, Sara, Victor character for free, free Anna Character on completing the mission and UC or Royal Pass Discount. So here we have gathered a list of the most recent BGMI redeem codes as of 1 July 2023. Also, redeem these codes asap as these are only valid for a limited duration.
In This Article
BGMI Redeem Codes for 1 July 2023
VETREL2IMHX – Bumble Bee Set
MIDASBUY-COM – Free rename card
TIFZBHZK4A – Legendary Outfit
BOBR3IBMT- Desert Ranger Set
LEVKIN1QPCZ – Racer Set (Gold)
ZADROT5QLHP – Stealth Brigade Set
SIWEST4YLXR – Assassin Suit and Assassin Bottom
JJCZCDZJ9U – Golden Pan
GPHZDBTFZM24U- Gun Skin (UMP9)
KARZBZYTR- Skin (KAR98 Sniper)
SD14G84FCC- AKM Skin
PGHZDBTFZ95U- M416 Skin ( First 5000 users)
UKUZBZGWF- Free Fireworks
5FG10D33- Falcon
5FG10D33- Outfit
BMTCZBZMFS- Pretty in Pink set and Pretty in Pink Headpiece
RNUZBZ9QQ- Outfit
TQIZBZ76F- Motor Vehicle Skin
SD16Z66XHH- SCAR-L Gun Skin
R89FPLM9S- Free Companion
S78FTU2XJ- New Skin (M16A4)
How to get free Redeem Codes for BGMI on 1 July 2023?
Launch BGMI on your device.
Then select the Redeem Code option from the main menu.
Next, click on the Redeem code tab.
A new window will open, requesting the redemption code.
Now enter your BGMI code.
Confirm and click on the “Redeem” tab.
If your redeem code is valid then you will get a message confirming that your rewards were successfully redeemed.


 Step 2: Select ‘More connection settings’.
 Step 3: Tap on VPN.
 Step 4: Tap the ellipses and select ‘Add VPN profile’.
 Step 5: Enter the details like VPN name, VPN type, server address, username, and password.
 Step 6: Hit ‘Save’.
 Step 1: Go to Settings and select General.
Step 2: Tap on VPN.
Step 3: Tap on ‘Add VPN Configuration’.
Step 4: Enter the necessary information.
Step 5: Hit ‘Done’.
Step 1: Go to Settings and select General.
Step 2: Tap on VPN.
Step 3: Tap on ‘Add VPN Configuration’.
Step 4: Enter the necessary information.
Step 5: Hit ‘Done’.
 If you don’t want to go the native route, there are plenty of free third-party VPN apps you can download from the Google Play Store or App Store. Apps like Privado, Hotspot Shield, Turbo VPN, TunnelBear, and more offer free basic VPN services for your Android and iOS devices. The only downside is that these apps are generally filled with ads. If you want an adless experience along with faster servers, you will need to buy a premium subscription from these apps. You can also go for premium paid apps like Nord VPN, Express VPN, and Surfshark. We’d recommend this app if you want to unlock the regional libraries of OTT apps like Netflix and Amazon Prime Video.
")

 Step 3:
 Step 4:

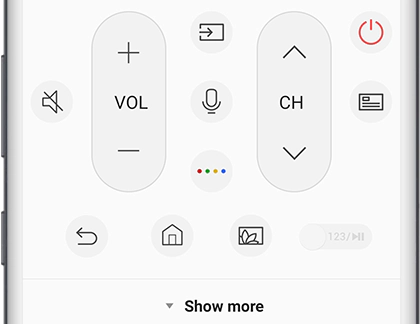 If you own a Samsung Smart TV, you can control it using the SmartThings app on your Samsung smartphone. Here’s how.
Step 1: Connect your Samsung smartphone to the same WiFi network as the TV.
Step 2: Launch the SmartThings app on your Samsung phone.
Step 3: Hit the Menu icon and tap on All devices.
Step 4: Select your Smart TV.
Step 5: Use the onscreen remote on your phone to control the TV.
If you own a Samsung Smart TV, you can control it using the SmartThings app on your Samsung smartphone. Here’s how.
Step 1: Connect your Samsung smartphone to the same WiFi network as the TV.
Step 2: Launch the SmartThings app on your Samsung phone.
Step 3: Hit the Menu icon and tap on All devices.
Step 4: Select your Smart TV.
Step 5: Use the onscreen remote on your phone to control the TV.


 Step 2:
 Step 3:
 Step 5:
 Step 5:
 Step 7:


 Step 4:
 Step 5:
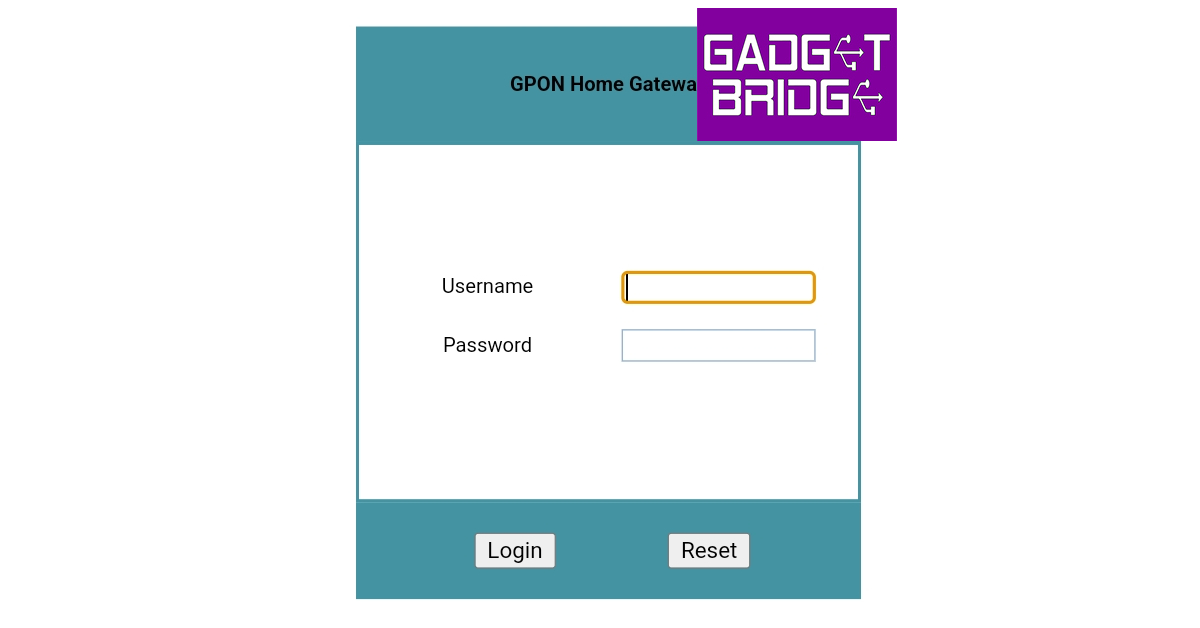 Step 6:


 Step 4:
 Step 5:
 Step 6:
 Step 7:
 Step 3:
 Step 4:


 The Razr 40 series will be available for purchase via Amazon starting July 15 when the Prime Day sale begins on the platform at midnight. Prime members are eligible to get early access to the product along with bank offers. The device will also be available on Reliance Digital stores across the country. The
  Snapdragon 7 Gen 1 and Snapdragon 8+ Gen 1 processors power the Motorola Razr 40 and Motorola Razr 40 Ultra, respectively.
The Motorola
Snapdragon 7 Gen 1 and Snapdragon 8+ Gen 1 processors power the Motorola Razr 40 and Motorola Razr 40 Ultra, respectively.
The Motorola ")
 Step 4:
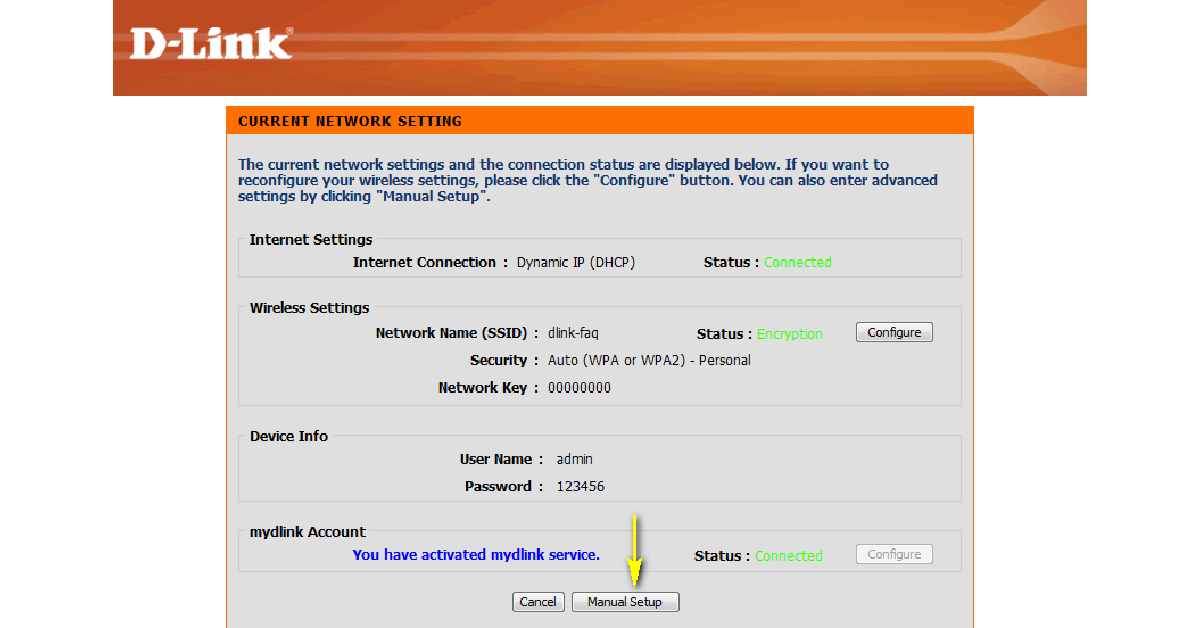 Step 5:
 Step 7:


 Step 3:
 Step 4:
 Step 5:
 Step 4:
 Step 5:
 Step 3:
 Step 6: Choose the images
 Step 7:
 Step 3:
 Step 4:
 Step 5:
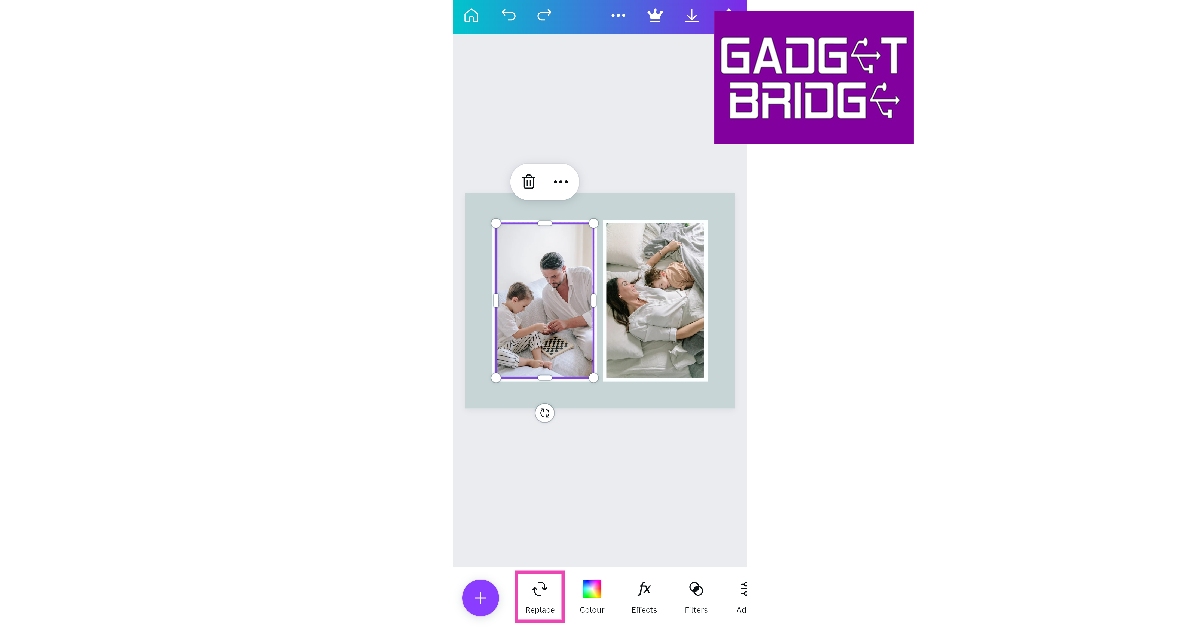 Step 6: Choose a picture
 Step 10:
 Step 11:


 Step 3:
  Step 4:
 Step 6:
 Step 3:
 Step 2:
 Step 3:
 Step 4:
 Step 5:
 Step 3:


 Step 4:
 Step 5:
 Step 6:
 Step 7:
 Step 8:


