Alongside OnePlus Nord 3 the company has also announced another new smartphone that is OnePlus Nord CE 3. The Nord CE 3 features a 6.7-inch AMOLED display and a 50-megapixel triple rear camera set-up. The phone is powered by Snapdragon 782G SoC and is equipped with a 5,000mAh battery.
In This Article
OnePlus Nord CE 3 price in India and sale details
The OnePlus Nord CE 3 has been launched in India in two different models. The 8GB RAM with 128GB storage option is priced at Rs 26,999 whereas the price of the 12GB RAM with 256GB storage variant is set at Rs 28,999. The device will be available in two colour options of Aqua Surge and Gray Shimmer.In terms of availability, the handset is scheduled to go on sale in August. The precise sale date is yet to be announced. However, the phone will be available for purchase via Amazon and OnePlus in the country.On the other hand, OnePlus Nord 3 is scheduled to go on sale on July 15. It will come with a starting price of Rs 33,999 for the 8GB RAM with 128GB of storage and 16GB RAM with 256GB internal storage will be available at Rs 37,999.
OnePlus Nord CE 3 specifications
Coming to the specifications, the OnePlus Nord CE 3 is highlighted with a 6.7-inch fluid AMOLED display with 2412 x 1080 pixels resolution. The screen supports a refresh rate of 120Hz, a P3 colour gamut, 10-bit Color Depth and HDR10+. The device runs on OxygenOS 13.1 on top of Android 13. Under the hood, there is Qualcomm Snapdragon 782G SoC with Adreno 642L GPU. This smartphone comes with up to 12GB of RAM and up to 256GB of internal storage.The triple rear camera system on the OnePlus Nord CE 3 includes a 50MP Sony IMX890 primary sensor. Additionally, there is an 8MP ultra-wide angle lens and a 2MP macro sensor. There is a 16MP front-facing camera for selfies and video calling.Nord CE 3 includes 5G SA/ NSA, Dual 4G VoLTE, Wi-Fi 6, Bluetooth 5.3, GPS, NFC, and a USB Type-C port for connectivity. In addition to this, there is a 5,000mAh battery with 80W SuperVOOC charging support.
For the latest gadget and tech news, and gadget reviews, follow us on Twitter, Facebook and Instagram. For newest tech & gadget videos subscribe to our YouTube Channel. You can also stay up to date using the Gadget Bridge Android App. You can find the latest car and bike news here.
In June Samsung confirmed that its upcoming Galaxy Unpacked event will take place in July and will be hosted in South Korea. Today the tech giant has now made the precise date of its upcoming launch event public. Samsung unveiled its premium Galaxy S23 series of smartphones during the inaugural launch event in February, making this the company’s second Galaxy Unpacked event of the year. The Galaxy Z Fold 5 and Galaxy Z Flip 5—the latest foldable gadgets from the company—may be unveiled. During the Galaxy Unpacked event later this month, the firm is also anticipated to introduce the Galaxy Buds 3 TWS earbuds in addition to these gadgets.Samsung has a history of staging Galaxy Unpacked events to reveal its latest products. The upcoming Galaxy Unpacked event will be hosted on July 26 in Seoul, South Korea, rather than earlier ones that were held in the US and Europe. Live streaming of the event will be available on the company’s website and YouTube channel starting at 4.30 PM IST.
The Galaxy Z Fold 5 and Galaxy Z Flip 5—the company’s newest foldable smartphones—along with the Galaxy Tab S9 series are anticipated to be unveiled. Using a foldable phone displayed in a clamshell manner, the business provided a brief video teaser with the message Join the flip side.The Samsung Galaxy Flip 5, is anticipated to include a cover display that is significantly larger and comparable to the Razr 40 Ultra.Along with the Galaxy Z Flip 5, Samsung is expected to unveil several other products at the upcoming Unpacked event. A larger Galaxy Fold 5 with a revised hinge is also slated to be released by the company.The Galaxy Watch 6 series and the Galaxy Buds 3 TWS earbuds are two new accessories that the firm is anticipated to introduce. The Galaxy Watch 6 and Galaxy Watch 6 Classic, which are expected to have larger displays than their previous generations, are also expected to be released by Samsung. The Exynos W930 chip from the manufacturer is anticipated to power the Galaxy Watch 6 series, which will also provide notifications for irregular heart rates.The Galaxy Tab S9 series is also slated to be revealed by the business.
For the latest gadget and tech news, and gadget reviews, follow us on Twitter, Facebook and Instagram. For newest tech & gadget videos subscribe to our YouTube Channel. You can also stay up to date using the Gadget Bridge Android App. You can find the latest car and bike news here.
The debut of the OnePlus Nord 3, OnePlus Nord CE 3, and OnePlus Buds 2R was announced by the Chinese manufacturer in India. A 50-megapixel Sony IMX890 triple back camera is available on the Nord 3. In addition to a 6.74-inch AMOLED display with a dynamic refresh rate and an HDR10+ certification, there is a 5,000mAh battery and 80W SuperVOOC charging.
In This Article
OnePlus Nord 3 price in India and availability details
Misty Green and Tempest Grey are the two colours that will be offered for the OnePlus Nord 3. The device will be available in two different configurations of 8GB RAM with 128GB of storage at Rs 33,999. In contrast, the 16GB RAM with 256GB internal storage will be available at Rs 37,999. On July 15, Amazon and the official OnePlus stores will begin selling the phone in India. On July 14, during the Prime Day Sale, the early access sale will start on Amazon.
OnePlus Nord 3 specifications
The display on the OnePlus Nord 3 is a 6.74-inch AMOLED screen. The panel has a 450ppi pixel density and a dynamic refresh rate that may vary between 40Hz and 120Hz. According to OnePlus, the screen supports HDR10+ and HDR video from Netflix and Amazon Prime.OxygenOS 13 with Android 13 is the operating system for the OnePlus Nord 3. A Mali-G710 MC10 GPU and an octa-core MediaTek Dimensity 9000 SoC with up to 16GB of LPDDR5X RAM and up to 256GB of internal UFS 3.1 storage make up the device’s internal hardware.For the optics, the OnePlus Nord 3’s triple rear camera setup includes a 50-megapixel Sony IMX890 sensor with OIS support. Additionally, there is an 8-megapixel ultra-wide angle Sony IMX355 sensor with a 112-degree FoV, and a 2-megapixel macro lens. The device is equipped with a 16-megapixel front-facing camera for selfies and video chats.5G, 4G LTE, Wi-Fi 6, Bluetooth 5.3, NFC, GPS, and a USB Type-C port are among the available forms of connectivity. It incorporates a tri-state alert slider, an in-display fingerprint scanner for biometric verification, and an IP54 grade for water and dust resistance. A 5,000mAh battery within the device supports 80W SuperVOOC charging.
For the latest gadget and tech news, and gadget reviews, follow us on Twitter, Facebook and Instagram. For newest tech & gadget videos subscribe to our YouTube Channel. You can also stay up to date using the Gadget Bridge Android App. You can find the latest car and bike news here.
After being banned for nearly ten months, Battleground Mobile India, aka BGMI, is officially available again in India. BGMI fans are looking for ways to improve their game experience and one such method is the usage of redemption codes, which offers a variety of rewards and advantages using BGMI redeem codes players can gain access to new skins, outfits, loot crates, weapons and free UC and diamonds.As mentioned earlier, these codes give users the chance to earn unique rewards and gain extra benefits while playing the game. This includes GUN SKINS (M4, AKM, M416, AWM, M24, UZI, KAR98K), free character voucher, Andy, Carlo, Sara, Victor character for free, free Anna Character on completing the mission and UC or Royal Pass Discount. So here we have gathered a list of the most recent BGMI redeem codes as of 6 July 2023. Also, redeem these codes asap as these are only valid for a limited duration.
Garena Free Fire is a battle royale game with regular awards and tournaments to keep players interested. If you play Garena Free Fire, you should be aware of the redeem codes that are released on a daily basis. However, because the battle royale game is banned in India, players from other countries can use the Free Fire Redeem codes daily. If you’re unfamiliar with the Garena Free Fire redeem codes or don’t know how to get them, we’ve put together a step-by-step guide to help you redeem them. Check out Garena Free Fire Redeem Codes for 6 July 2023.The Free Fire redeem codes are a great way to get free stuff. These are 12-digit codes that contain alphabets and numbers, as well as an expiration date and time. Because the Garena FF redeem codes cannot be used more than once, you should hurry to the redemption page to claim your free reward before someone else does. To get a free reward, all you have to do is go to reward.ff.garena.com/en, which is the official redemption page. Also, keep an eye on this space for daily updates on Garena Free Fire redemption codes and rewards.
Efficient lighting is crucial for nearly every industry, if not for aesthetics, then for safety. Retail stores rely on spotlighting and overhead lighting to provide a comfortable shopping atmosphere for their customers, while industrial workers need high-quality lights to keep darkened areas well-lit for employee safety. We’ve now had lighting for more than a century, but you might be surprised by just how many advancements have been made in recent years to enhance our illumination experience.
In This Article
Light-Emitting Diodes (LEDs)
Traditional store and warehouse lighting like fluorescent, CFL, HID, and metal halide has been more than sufficient for many years, but there’s no denying how transformative LED lighting has been for residential and commercial building owners.
Not only can businesses and individuals enjoy far brighter lights for far longer periods, but they can also enjoy significant energy savings. According to Energy.Gov, LEDs in residential properties use 75% less energy and last up to 25 times longer than incandescent lighting. It’s also believed that energy savings from LED lighting in the United States could top 569 TWh annually by 2035. This is the equivalent of the yearly output of 92 1,000 MW power plants.
Motion Sensors
In the past, businesses wishing to enjoy motion-sensing lights had to install an independent motion sensor system. Such an addition could be costly, and many companies would much prefer to spend their money on more practical technology like computers.
However, lighting manufacturers have now answered the call for a more seamless option, which is why you can now purchase warehouse lights with motion sensors. They are available as optional add-ons or as integrated units.
Motion sensor lights turn off after inactivity and will turn on again when motion is detected. Not only are motion sensor lights convenient, but not running a light continuously might also result in energy and money savings.
Connectivity
We value connectivity in our vehicles and devices, so it was only a matter of time before lighting manufacturers would catch up with lighting connectivity. Depending on the lighting you purchase, there’s potential for it to be easy to control from a mobile device.
This gives businesses and individuals the freedom and flexibility to control lighting even when they’re not near a light switch or on the premises. Some lighting products are also customizable from a mobile device, with color changes and various modes to choose from.
Lighting Robots
Natural light is important for our bodies to produce vitamin D. It also improves our circadian rhythms and focus and makes us happier. Business owners can’t always ensure that windows are in the most appropriate places for their employees, but that doesn’t mean building occupants can’t enjoy the benefits of natural light.
In recent years, manufacturers have started producing solar-powered robots using LED technology. These robots produce natural light where it’s lacking, offering the illusion of an abundance of natural light even when it doesn’t authentically exist.
Lighting technology has come a long way, and we no longer have to put up with dim and expensive traditional lighting options like fluorescent, CFL, HID, and metal halide. Taking advantage of this innovative new lighting technology might provide your business or family with many desirable benefits like cost savings, energy efficiency, and convenience.
For the latest gadget and tech news, and gadget reviews, follow us on Twitter, Facebook and Instagram. For newest tech & gadget videos subscribe to our YouTube Channel. You can also stay up to date using the Gadget Bridge Android App. You can find the latest car and bike news here.
After Twitter experienced a server outage last week, massive groups of users started looking for potential alternatives to the social media platform yet again. The server outage was followed by a ‘rate limit’ which set a cap on the tweets an individual user can view in a day. The turbulent state of affairs has sparked an exodus of users looking for a more stable platform. One of the alternatives that frequently comes up is Truth Social. In this article, we show you how to join Truth Social on iPhone and Android phones.Read Also:Best Gaming Mice Under $100 (July 2023)
In This Article
Join Truth Social on Android
Step 1: Download and install the Truth Social app from Google Play Store.Step 2: Launch the app and select ‘Create Account’.Step 3: Enter your birthdate.Step 4: Enter your email address.Step 5: Truth Social will send you a verification link. Go to your email inbox and click on the link.Step 6: Once your email has been verified, go back to the app and create a password for your account.Step 7: Create a unique username for your profile. This will act as your profile handle.Step 8: Hit ‘Finish’.Step 9: Your Truth Social account will be created. You will be asked to add additional information (like profile picture, bio, etc.) to your account.
Join Truth Social on iPhone
Step 1: Download the Truth Social app on your iPhone from the App Store.Step 2: Open the app and tap on ‘Create Account’.Step 3: Enter your date of birth.Step 4: Enter your email address.Step 5: Verify your email address using the link emailed to you by Truth Social.Step 6: Go back to the Truth Social app and create a password for your profile.Step 7: Create a username.Step 8: Hit ‘Finish’.
Frequently Asked Questions (FAQs)
Do I need an invite to join Truth Social?
You don’t need an invite to join Truth Social anymore. Simply enter your email address while signing up for the app and verify it using the link sent to you by Truth Social.
Is Truth Social free to use?
Yes, Truth Social is completely free to use on Android and iOS platforms.
Instagram will soon be launching an called Threads, which will be a direct rival to microblogging platform Twitter. While the upcoming app is scheduled to launch on iOS (and hopefully Android too) on July 6th, its web interface went live for everyone to explore today. It stayed live for a few hours and gave a better understanding of what all can one expect from the upcoming app.
The parent company of Instagram, Meta later pulled the profiles on Threads down a few hours after it went live. Many brands and creators were already present on Threads including Meta CEO Mark Zuckerber, Gary Vee, Netflix, Instagram and others.
Read Also:Instagram is testing a companion app called Threads
From whatever little time Threads was live, its web interface seemed very basic. There were options to view Threads and like, comment, report and share them. Clicking on any option prompted users to download the mobile app. Also, in countries where there is no support for the upcoming app, only the option to view Threads was available. Like Twitter, Threads has a dedicated section for a profile’s main posts and another one with full reply history.
It is worth pointing out that Instagram’s head, Adam Mosseri, is obviously already present on Threads and has close to 2,500 followers. Meta’s Zuckerberg followed with a little less than 2,000 followers. From all this, it seems like the app’s early access was given to only a few thousand users till now.
While Fediverse integration will not be available at the time of launch of the new app, Instagram will be adding it soon. The profiles on Threads include an Instagram username and link along with threads.net label with a description that reads:
Soon, you’ll be able to follow and interact with people on other fediverse platforms, like Mastodon. They can also find people on Threads using full usernames, like @zuck@threads.net.
The upcoming launch of Threads has been teased by Instagram all week. The App Store and Google Play Store listings of Threads revealed the launch date of the app earlier this week and the main threads.net homepage has the launch countdown live on it.
Read Also:Instagram is working on live captions feature on its platform to be known as “Voice Note” for Threads app
It should be pointed out that Instagram is launching Threads at a time that is quite chaotic for its direct rival Twitter. Just last week, the microblogging website blocked unregistered users from viewing tweets and added temporary rate limits.
Even the platform for scheduling tweets, TweetDeck, completely broke down sometime back and changes had to be rolled out to sort that as well.
For the latest gadget and tech news, and gadget reviews, follow us on Twitter, Facebook and Instagram. For newest tech & gadget videos subscribe to our YouTube Channel. You can also stay up to date using the Gadget Bridge Android App. You can find the latest car and bike news here.
Apple CarPlay and Android Auto have completely changed how our smartphones interact with our cars. Both interfaces allow users to access the contents of their smartphone on the infotainment system of the car. Enabling hands-free usage, they are significantly safer as well. In this article, we show you how to link your Toyota car with your smartphone using Apple CarPlay and Android Auto.Read Also:Here is what the less expensive Moto Razr might cost in the US
In This Article
How to link your Toyota Car with Apple CarPlay
Step 1: Make sure the car is either parked or stationary. Turn on the LCD monitor on the dashboard.Step 2: Connect your Apple smartphone to the LCD monitor using a lightning cable.Step 3: Press the Menu button on the LCD monitor and tap on ‘Apps’.Step 4: Select Apple CarPlay.Step 5: Give the necessary permission on your iPhone.You will now be able to use your iPhone’s apps on your car’s touchscreen infotainment system.
How to link your Toyota Car with Android Auto
Step 1: Download and install the Android Auto app on your smartphone.Step 2: Grant the necessary permissions to the Android Auto app.Step 3: Make sure the car is either parked or stationary. Turn on the LCD monitor on the dashboard.Step 4: Connect your Android smartphone to the infotainment system using a USB Type-C data cable.Step 5: Press the Menu button on the LCD display and select Apps.Step 6: Tap on Android Auto.You will now be able to use your Android smartphone’s apps on your car’s infotainment system.
Frequently Asked Questions (FAQs)
Can I use Android Auto and Apple CarPlay together?
While, your car may offer support for both, Android Auto and Apple CarPlay, you can only use one application at a time.
How do I connect my Toyota to AppleCar Play?
Connect your iPhone to the infotainment system using a lightning cable and tap the CarPlay logo on the LCD screen on the dashboard.
This is how you can link your Toyota car to your smartphone using Android Auto and Apple CarPlay. Once you’re smartphone is connected to your car, you will be able to use some of the apps on the dashboard interface. While most navigation and music streaming apps are optimised for Android Auto and Apple CarPlay, the same cannot be said about Instant Messaging apps. It is only recently that Android Auto started supporting WhatsApp calls. Other IMs are unsurprisingly absent on the platform.For the latest gadget and tech news, and gadget reviews, follow us on Twitter, Facebook and Instagram. For newest tech & gadget videos subscribe to our YouTube Channel. You can also stay up to date using the Gadget Bridge Android App. You can find the latest car and bike news here.
Samsung has opened the doors to its Digital Service Center, a comprehensive platform that is claimed to offer customers personalised product-related customer assistance. According to the company, this service offers self-help content organised by category, DIY videos, innovative symptom-based support, and repair assistance.“At Samsung, we have always believed in catering to the evolving needs of customers. The Digital Service Center is a step towards simplifying post-purchase services and providing personalized support to our consumers. We understand that to fully empower consumers, they need to be offered easy access to a digitalized ecosystem. The platform boasts easy navigation for consumers and also provides them access to product-specific DIY videos, helping them resolve their queries with ease,” said Mr. Sunil Cutinha, Vice President, Customer Service, Samsung India.Customers will be able to find solutions to a variety of product-related problems through the DIY videos, such as how to install your Samsung semi-automatic washing machine, how to set up the Freestyle projector, or how to use the auto restart feature in Samsung Galaxy smartphones.The Samsung Digital Service Center can be accessed by going to the support menu on https://www.samsung.com/in or directly logging on to www.samsungdigitalservicecenter.comAfter logging into their Samsung account, customers can receive customised support based on their needs from the Digital Service Centre. It includes a simplified user navigation process, quick access to self-help content organised by category, DIY videos tailored to particular categories, a mobile app experience, and model-specific repair and spare part prices all on one page.Additionally, customers can use the Digital Service Centre to schedule callback requests for remote and visual support, obtain software updates, locate a service centre, track repairs, get information about service costs, book appointments for priority service at service centres, and get pick-up and drop-off service.Customers of Samsung have access to a number of additional digital service alternatives through the Digital Service Centre, which enables them to address their problems without leaving their homes. Customers have access to a variety of support options, including WhatsApp Support, Remote Support, technical support through the call centre, and DIY videos on the Samsung website and YouTube.Samsung also operates a ‘Smart Touch Call’ service that reduces wait time for customers when they call Samsung’s Customer Care to resolve their queries. Customers have the choice to switch to a synchronized voice and screen interface instead of a traditional call center experience. Smart Touch Call is a user-friendly service that allows callers to engage with the system and captures their demands.
For the latest gadget and tech news, and gadget reviews, follow us on Twitter, Facebook and Instagram. For newest tech & gadget videos subscribe to our YouTube Channel. You can also stay up to date using the Gadget Bridge Android App. You can find the latest car and bike news here.
Microsoft Teams is a great app to take virtual meetings. For those on the go, Microsoft Teams is available on Android and iOS mobile platforms. While the app works fine for the most part, it is not impervious to minor glitches and issues. If you’re taking a meeting on your phone and don’t have access to any other devices, you need quick fixes that can get the app running normally in no time. In this article, we bring you the top 9 ways to fix the ‘Microsoft Teams app not working’ problem on Android.Read Also:How to Set Up a VPN on Android and iPhone?
In This Article
Disable Data Saver
Microsoft Teams has an in-app data saver that limits app usability after a certain amount of data is consumed. Disable the data saver to return to normal functioning. Here’s how.Step 1: Launch the Microsoft Teams app on your Android smartphone and tap the profile icon at the top right corner of the screen.Step 2: Select Settings.Step 3: Select Data and Storage.Step 4: Tap on Reduce Data Usage and select Never from the list of options.
Clear the cache
There are two ways you can go about clearing the app cache of Microsoft Teams. There’s a very handy option to clear temporary files within the app. You can also go the more conventional route and clear the cache from the app settings on your phone. Here’s how you can clear Microsoft Teams’ cache from the app itself.Step 1: Launch the Microsoft Teams app and tap the profile icon at the top right corner of the screen.Step 2: Select Settings.Step 3: Tap on Data and Storage.Step 4: Select Clear temporary files.
Grant the necessary permissions to the app
If you haven’t used the Microsoft Teams app on your Android phone for a long time, its permissions may have been automatically revoked. Here’s how you can grant the Teams app the necessary permissions again.Step 1: Go to Settings and select Apps.Step 2: Scroll down and select Microsoft Teams.Step 3: Tap Permissions.Step 4: Allow Teams access to the necessary permissions.
Sign out and Sign back in
If you’re having trouble with your Microsoft Teams account, signing out and then signing back in can fix any temporary issues. Simply tap the profile icon at the top right corner of the screen and go to settings. Scroll all the way down and select ‘Sign out’. Once you’re signed out, sign back in using your Microsoft account credentials.
Reset Database
Step 1: Launch the Microsoft Teams app on your Android smartphone and tap the profile icon at the top right corner of the screen.Step 2: Select Settings.Step 3: Select Data and Storage.Step 4: Select Reset Database.
Update the app
An older version of the Microsoft Teams app may contain bugs that have already been weeded out in the new update. To update the Teams app, simply launch the Google Play Store on your device and search for Microsoft Teams. Open the app page and select the ‘Update’ option. Once the app has been updated, the background errors will be fixed.
Check your internet connection
It is possible that the issue may not lie with the Microsoft Teams app but with your internet connection. To confirm if this is the case, open the web browser and load a web page. If the web page fails to load, the issue lies with the connection. You can also try sending a message on an instant messaging app to double-check the status of your internet connection. To fix this issue, toggle the airplane mode on and off. A quick refresh of the network typically fixes any temporary issues.
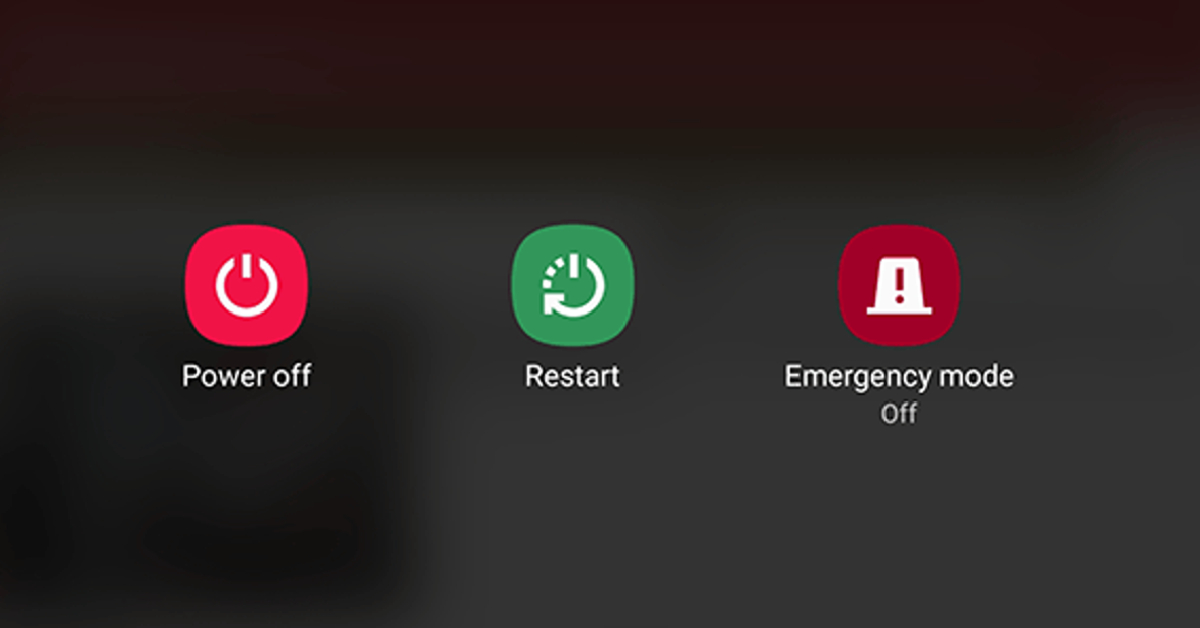
Restart your smartphone
On some occasions, a software glitch may cause the Microsoft Teams app on your phone to malfunction. A quick restart of your smartphone will take care of this. Press the side key along with the volume-up key to access the power menu. Hit ‘Restart’ to reboot your phone.
Delete the Microsoft Authenticator app
This may sound weird, but if you aren’t able to sign into the Microsoft Teams app on your Android smartphone, deleting the Microsoft Authenticator app may help. While the exact reason behind this fix is not known yet, certain users have observed that removing the Microsoft Authenticator app from their devices solved any issues they were facing while logging in. It is possible that the Authenticator app interferes with the login process even if you don’t have two-factor authentication enabled for Microsoft Teams. If you’re facing trouble logging in with your registered account, trying out this fix can’t hurt.
Frequently Asked Questions (FAQs)
Why is the Microsoft Teams app not working on Android?
If the Microsoft Teams app is not working on your phone, try disabling its data saver and clearing the app cache. If the issue still persists, you may want to update the app.
Why is the Teams app not opening?
If you’re unable to open or run the Microsoft Teams app on your phone, check if the app is experiencing a server outage. Visit the Down Detector website to check if other users are experiencing the issue as well.
These are the top 9 ways to fix the ‘Microsoft Teams app not working’ problem on an Android phone. If you are still facing the problem after trying all these fixes, it is possible that the issue lies on Microsoft’s end. Visit the Down Detector website to check if other users are facing a similar outage as well.
Recently the colour options of the upcoming iPhone 15 series were We are now hearing information on the devices’ batteries. According to reports, all of the batteries in the iPhone 15 series will be much bigger. In September of this year, Apple is anticipated to introduce four new models in the upcoming iPhone 15 series: the iPhone 15, iPhone 15 Plus, iPhone 15 Pro, and iPhone 15 Pro Max.According to a Chinese website IT Home, the information was provided by a Foxconn employee that specifies the precise battery sizes for each of the four new models iPhone 15, iPhone 15 Plus, iPhone 15 Pro, and iPhone 15 Pro Max. As per the report, the iPhone 15 will have a roughly 18% larger battery, it appears that the Pro Max will experience a 12% battery gain. It is important to note that the iPhone 15 Pro series will employ the new A17 bionic chip, which uses TSMC’s 3nm process technology and can boost performance while consuming 35% less power than Apple’s existing 5nm process technology.If the information is correct, the battery capacity of this year’s iPhone 15 series has significantly increased compared to the previous generation, reaching as high as 350-600mAh. This is the precise capacity:iPhone 15: 3877mAh (iPhone 14: 3279mAh)iPhone 15 Plus: 4912mAh (iPhone 14 Plus: 4325mAh)iPhone 15 Pro: 3650mAh (iPhone 14 Pro: 3200mAh)iPhone 15 Pro Max: 4852mAh (iPhone 14 Pro Max: 4323mAh)According to a Weibo user cited in a 9to5Mac story, the iPhone 15 Pro will be available in a new “crimson” shade. The new colour option is still quite deep even though it may be a little lighter than the Deep Purple of the iPhone 14 Pro.There will reportedly be a new green colour option for the iPhone 15 and iPhone 15 Plus. The article also features original renderings of the iPhone 15 and iPhone 15 Plus in fresh red, green, and light blue hues.A titanium frame is rumoured to be included with the Pro variants. The iPhone models for this year are anticipated to come with 48-megapixel cameras and USB Type-C ports for charging.The iPhone 15 series is anticipated to be released by Apple in September. The iPhone 15 series would typically sell for $925 (approximately Rs 76,300), according to a prior leak. For the latest gadget and tech news, and gadget reviews, follow us on Twitter, Facebook and Instagram. For newest tech & gadget videos subscribe to our YouTube Channel. You can also stay up to date using the Gadget Bridge Android App. You can find the latest car and bike news here.
A good gaming mouse makes all the difference in those tense, tight-pocket situations in FPS games. While buying a mouse, you have got to take different aspects and specs into consideration. While a high DPI sensor is ideal, the weight distribution and tracking speed of the mouse matter a lot as well. If you’re thinking of updating your gaming rig, here are our top picks for the best gaming mice you can buy for under $100. (2023)Read Also:How to Set Up a VPN on Android and iPhone?
In This Article
Logitech G305 Lightspeed
Price: $39.97 on AmazonIf you’re on a tight budget and looking for a no-nonsense mouse that does not compromise on performance, the Logitech G305 Lightspeed is a rock-solid deal. Priced just under $40, this gaming mouse sports a 12,000 DPI sensor and a precision of 400 IPS. The G305 Lightspeed weighs just 99g, making it ultra-manoeuvrable. It is also one of the cheapest wireless mice you can buy right now. There is a slot for the USB receiver in the body of the mouse, adding to its portability. The G305 Lightspeed offers 250 hours of gameplay on a single AA battery.
Logitech G502 Hero
Price: $42.55 on AmazonOne of the budget-friendly options from Logitech’s G502 series, the G502 Hero gets the all-important Hero 25K optical sensor. The sensitivity on this mouse can be adjusted from 100 – 25,600 DPI. There are 11 buttons on this mouse that can be customised using Logitech’s G Hub app. One of the more impressive things about this mouse is the weight customisation on offer. There are 5 additional weights on this thing that can be taken out individually to tune the device’s weight according to your need.
Razer DeathAdder V2 X Hyperspeed
Price: $59.99 on Razer.comSpecialising in gaming accessories and products, Razer’s influence in the PC peripherals segment is unmatched. The DeathAdder V2 X Hyperspeed gaming mouse is another solid yet affordable product from Razer. It sports an ergonomic design that is ideal for long gaming sessions. You can pair this mouse with your PC using the 2.4GHz wireless receiver or a simple Bluetooth connection. The DeathAdder V2 X Hyperspeed gets a 14,000 DPI sensor with a precision of 300 IPS. There are 7 programmable buttons on the mouse and Razer promises a switch lifecycle of 60 million clicks.
Razer DeathAdder V3
Price: $69.99 on Razer.comA step up from the V3, the DeathAdder V3 gets the Focus Pro 30K Optical Sensor. With a maximum acceleration of 30G, this mouse can track at a speed of 750 IPS. The wired connection ensures that there isn’t any latency in mouse actions. Weighing just 59g, this mouse is ideal for quick gestures and actions in tense gaming situations. Razer claims a switch lifecycle of 90 million clicks on the DeathAdder V3.
Asus ROG III Gladius
Price: $89.99 on Asus.comAsus’ ROG line of products is too good to be left out when it comes to gaming peripherals. The ROG III Gladius is a spec-laden gaming mouse that offers as good a performance as any mouse in this list. It gets a 19,000 DPI sensor with a 1% deviation (specially tuned to 26,000 DPI). The mouse can track at a speed of 400 IPS and has a 1000Hz polling rate. The 100% PTFE feet on this mouse are ideal for gliding. You can save up to 5 profiles on this mouse with the help of Armoury Crate software.
SteelSeries Rival 3
Price: $23.90 on AmazonIf you’re just getting started with gaming, you probably don’t want to splurge a lot on a gaming mouse. Priced at just $23.90, the SteelSeries Rival 3 offers good performance without making a dent in your wallet. This mouse has an 8500 CPI sensor and tracks at 300 IPS with a maximum acceleration of 35G. The ergonomic design of this mouse ensures that the user doesn’t feel any fatigue even after long gaming sessions.Read Also:Top 3 Ways to Use Your Android Smartphone as a TV Remote
Motorola Razr 40 Ultra and Razr 40 have debuted in India recently. They already launched in the USA by the name Moto Razr+ and Razr last month. However, the more affordable Razr was not made available in the USA at that time instead the company said that the device will be available in the coming months after June. Although Motorola withheld the pricing, it did state that the phone would be less expensive than the Razr. But the phone has debuted in India and the India pricing indicated as to what to anticipate for the regular variant in the US.The company did not provide US pricing for the Moto Razr at the time of launch last month but it did reveal the pricing of the Razr+ which is $999. Now that both the devices have launched in India the Indian pricing hints at how much the standard Razr will be priced in the US.Also Read:Motorola Razr 40, Motorola Razr 40 Ultra launched in India, price starts at Rs 59,999The Razr 40 and Razr 40 Ultra, as they are known outside of the US have debuted in India with a price tag of Rs 59,999 ($732) and Rs 89,999 ($1,098) respectively. Note that the US price of the Razr Plus is $999, which is less expensive than the Indian price of $1,098. Given that the regular model costs about $732 in India reportedly it might see a $699 or $649 price tag in the US.Also Read:Motorola Razr 40 Vs Razr 40 Ultra: Which one to buy?
Motorola Razr 40 specifications
Motorola Razr 40 features a 6.9-inch foldable pOLED display with a 144Hz refresh rate and a 1.5-inch display on the outside. The Razr 40 has a Corning Gorilla Glass Victus on an external display and is IP52 rated. The device runs on Android 13 out of the box. Under the hood, there is a Snapdragon 7 Gen 1 SoC with up to 8GB RAM and 256GB storage.For the photos and videos, Razr 40 includes a dual rear camera setup that includes a 64-megapixel primary sensor and a 12-megapixel ultra-wide lens. For selfies, it includes a 32-megapixel camera on the inside. The device is fuelled by a 4,200mAh battery with 30W fast charging
For the latest gadget and tech news, and gadget reviews, follow us on Twitter, Facebook and Instagram. For newest tech & gadget videos subscribe to our YouTube Channel. You can also stay up to date using the Gadget Bridge Android App. You can find the latest car and bike news here.
Motorola Razr 40 Ultra and Razr 40 have officially debuted in India. Both smartphones look identical but there are some major differences between the two. If you were confused about which one to buy here is our step-by-step comparison of Motorola Razr 40 Vs Razr 40 Ultra to help you understand which one you should buy.
Motorola Razr 40: Snapdragon 7 Gen 1 SoCMotorola Razr 40 Ultra: Snapdragon 8+ Gen 1 SoC
Rear camera(s)
Motorola Razr 40: It has a 64-megapixel primary sensor and a 12-megapixel ultra wide-angle camera.Motorola Razr 40 Ultra: There is a 13-megapixel secondary ultra-wide-angle camera and a 12-megapixel primary sensor.
The cover screen is the primary distinction between the Motorola Razr 40 Ultra and the Motorola Razr 40. The cover screen on the Razr 40 Ultra is larger. The Razr 40 Ultra has a bigger cover screen. However, they both have the same pOLED displays but ultra support a higher refresh rate. But when it comes to optics, Razr 40 surpasses its more senior sibling. Instead of the Ultra variant’s 12-megapixel primary sensor, it includes a 64-megapixel primary sensor.The Motorola Razr 40 and Motorola Razr 40 Ultra have batteries with capacities of 3,800mAh and 4,200mAh, respectively. The first model charges at 33W while the other device can be charged at 30W and also enables 8W wireless charging.The Motorola Razr 40 is much less expensive than the Ultra model in terms of price. There is a price difference of Rs 30,000. Therefore, in our opinion, the Razr 40 offers good value. The Razr Ultra is a good option if you want a larger screen.
For the latest gadget and tech news, and gadget reviews, follow us on Twitter, Facebook and Instagram. For newest tech & gadget videos subscribe to our YouTube Channel. You can also stay up to date using the Gadget Bridge Android App. You can find the latest car and bike news here.
After being banned for nearly ten months, Battleground Mobile India, aka BGMI, is officially available again in India. BGMI fans are looking for ways to improve their game experience and one such method is the usage of redemption codes, which offers a variety of rewards and advantages using BGMI redeem codes players can gain access to new skins, outfits, loot crates, weapons and free UC and diamonds.As mentioned earlier, these codes give users the chance to earn unique rewards and gain extra benefits while playing the game. This includes GUN SKINS (M4, AKM, M416, AWM, M24, UZI, KAR98K), free character voucher, Andy, Carlo, Sara, Victor character for free, free Anna Character on completing the mission and UC or Royal Pass Discount. So here we have gathered a list of the most recent BGMI redeem codes as of 5 July 2023. Also, redeem these codes asap as these are only valid for a limited duration.
In This Article
BGMI Redeem Codes for 5 July 2023
LEVKIN1QPCZ
GPHZDBTFZM24U
KARZBZYTR
TQIZBZ76F
BMTFZBZQNC
FENKYYU5ATPD
SD14G84FCC
SIWEST4YLXR
BDNKUPRMF4
BOBR3IBMTO
VETREL2IMHX
ZADROT5QLHP
How to get free Redeem Codes for BGMI on 5 July 2023?
Launch BGMI on your device.
Then select the Redeem Code option from the main menu.
Next, click on the Redeem code tab.
A new window will open, requesting the redemption code.
Now enter your BGMI code.
Confirm and click on the “Redeem” tab.
If your redeem code is valid then you will get a message confirming that your rewards were successfully redeemed.
Garena Free Fire is a battle royale game with regular awards and tournaments to keep players interested. If you play Garena Free Fire, you should be aware of the redeem codes that are released on a daily basis. However, because the battle royale game is banned in India, players from other countries can use the Free Fire Redeem codes daily. If you’re unfamiliar with the Garena Free Fire redeem codes or don’t know how to get them, we’ve put together a step-by-step guide to help you redeem them. Check out Garena Free Fire Redeem Codes for 5 July 2023.The Free Fire redeem codes are a great way to get free stuff. These are 12-digit codes that contain alphabets and numbers, as well as an expiration date and time. Because the Garena FF redeem codes cannot be used more than once, you should hurry to the redemption page to claim your free reward before someone else does. To get a free reward, all you have to do is go to reward.ff.garena.com/en, which is the official redemption page. Also, keep an eye on this space for daily updates on Garena Free Fire redemption codes and rewards.
Imagine you have just authored an extensive research paper, and you want to make it available on your website for easy access and sharing. You’ve saved it as a PDF file, but you’re wondering if there’s a more web-friendly format that would make your content more visible and accessible.
If you’re in a similar spot, then PDF to HTML conversion is something you can really benefit from. So, can a PDF be saved as HTML at all? Absolutely! Without further ado, let’s examine the shortcomings of PDF in the web space, some reasons you should use HTML instead, and walk you through the process of turning PDF to editable HTML.
Let’s begin!
In This Article
The issues of using PDFs in the digital space
The Adobe-invented Portable File Format has long been a popular choice since it is compatible with any device, keeps the original layout and formatting of your documents intact, and is pretty much the gold standard when it comes to file archival work. However, not all is sunshine and roses when it comes to using the format in the online space.
Four issues in particular immediately stick out as soon as you decide to upload a PDF:
Hard to find online. The text within a PDF file is not as easily crawled by search engine bots, so the file might end up getting buried in the search results or not get indexed at all
Difficult to edit. Updating or editing content within a PDF file can be challenging and time-consuming without the use of specialized editing software
Large file size. PDFs and especially image-rich PDFs tend to take a lot of space, which translates to slower loading speeds for the end user
Shunned by social media. If your research paper needs to end up on Facebook, Twitter, or another social network, you’ll be out of luck since they don’t support PDFs natively
This is where HTML steps in to save the day.
What is HTML and why use it over PDF?
HyperText Markup Language, or HTML for short, is a collection of scripts that your browser is trained to read in order to display the content for the end user. While this means that your final work might not always turn out exactly the way you intended due to missing fonts or other errors, it is still the superior format when it comes to uploading content to the web.
For one, HTML documents are easier for search engines to index and access than PDFs, leading to much better visibility. HTML is also highly interactive and it’s not uncommon to see web pages with multiple clickable hyperlinks, buttons, and other elements. And of course, sharing your work on social media is as simple as copying and pasting a link (provided you’ve previously uploaded the content on some website).
The HTML format offers several other advantages as well, such as:
Optimized for SEO. HTML allows you to optimize your content with metadata, keywords, and other SEO best practices, improving its online presence
Easier content management. Editing and updating HTML content is significantly easier than working with PDF files, allowing for more efficient maintenance
Built-in responsiveness. HTML dynamically scales to fit the native resolution of your device, be it a phone, tablet, or a Mac/PC. This ensures a consistent look & feel across the board as opposed to the clunky static nature of PDFs
Faster loading times. HTML doesn’t embed images like PDFs do. Instead, it saves them in a separate folder from where the content is stored, leading to improved page loading times compared to uploading an image-rich PDF as is
When to use a PDF to HTML converter
Perhaps the main reason you may consider going down the PDF to HTML route is when you need it for web applications, such as SEO optimization or web design where a greater range of user-friendly options are required compared to what your typical PDF can offer.
With HTML, your readers will also have a much easier time navigating around the content since it supports quality-of-life features like links and quick navigation buttons.
Some scenarios where you might want to turn PDF to HTML include:
Publishing online documentation, manuals, or guides that need to be easily navigated and updated
Sharing research papers, journals, or educational resources intended for a wide audience
Making legal or government documents more accessible and user-friendly for the general public
Ensuring your content is compatible with various devices and platforms, including mobile devices and screen readers
Turning things like brochures and restaurant menus into interactive website pages that your visitors can quickly skim over instead of downloading large PDF files
How to convert PDF to HTML
There are a lot of tools on the market for you to choose from, but most of the free solutions online often don’t work properly or require you to pay upfront to use them. PDF Extra, on the other hand, is an affordable Adobe Acrobat alternative that offers you just about all the tools you need to create and edit PDFs at the office or on the go.
Laser-focused on simplicity, the app was built from the start to be used by just about anyone, regardless of their level of expertise. This extends to PDF Extra’s PDF to HTML converter, which is incredibly simple and intuitive. The resulting file will imitate your PDF’s original layout and formatting as closely as possible to save you lots of tedious HTML editing work.
Here is how to export PDF to HTML:
Download and install PDF Extra.
Run the app and click on “More” → “Convert to HTML”.
Open the file that you want to convert.
Wait for PDF Extra to export your document as HTML.
Click “Open Containing Folder” to view your new file.
That’s it – you can now easily share your research paper anywhere you want!
Final words
While PDFs will probably still have their place in the business world 50 years from now, they are not that great at turning a piece of content into an exciting and interactive read. So, if you’re looking to supercharge your digital content, think about switching from PDF to HTML. With HTML, creating and updating your content becomes a breeze, not to mention all the SEO benefits that come with it, such as improved discoverability and responsive design.
Time to make some history. Download PDF Extra for free, grab that stash of valuable PDFs, and share your insights for all the world to see!
For the latest gadget and tech news, and gadget reviews, follow us on Twitter, Facebook and Instagram. For newest tech & gadget videos subscribe to our YouTube Channel. You can also stay up to date using the Gadget Bridge Android App. You can find the latest car and bike news here.
If you find yourself using public and open WiFi networks quite often, we’d strongly suggest using a VPN for your device. Public WiFi networks lack the ideal level of security and can be vulnerable to attacks from malicious entities. If you’re connected to a network that’s intercepted by a third party, your privacy could be at serious risk. A secure VPN service can prevent this. In this article, we show you how to set up a VPN on Android and iPhone.Read Also:How to Check WiFi Router History on Android?
In This Article
Set up a VPN on Android
Step 1: Go to Settings and select Connections.Step 2: Select ‘More connection settings’.Step 3: Tap on VPN.Step 4: Tap the ellipses and select ‘Add VPN profile’.Step 5: Enter the details like VPN name, VPN type, server address, username, and password.Step 6: Hit ‘Save’.
Set up a VPN on iPhone
Step 1: Go to Settings and select General.Step 2: Tap on VPN.Step 3: Tap on ‘Add VPN Configuration’.Step 4: Enter the necessary information.Step 5: Hit ‘Done’.
Use a VPN app
If you don’t want to go the native route, there are plenty of free third-party VPN apps you can download from the Google Play Store or App Store. Apps like Privado, Hotspot Shield, Turbo VPN, TunnelBear, and more offer free basic VPN services for your Android and iOS devices. The only downside is that these apps are generally filled with ads. If you want an adless experience along with faster servers, you will need to buy a premium subscription from these apps. You can also go for premium paid apps like Nord VPN, Express VPN, and Surfshark. We’d recommend this app if you want to unlock the regional libraries of OTT apps like Netflix and Amazon Prime Video.
Frequently Asked Questions (FAQs)
How do I set up a VPN on Android?
To set up a VPN on your Android device, go to Settings>Connections>More Connection Settings>VPN>Add VPN Profile.
How do I set up a VPN on an iPhone?
To set up a VPN on your iPhone, go to Settings>General>VPN>Add VPN Configuration.
Which are some of the best VPN apps and services I can use on my phone?
Anyone who has tried searching for a movie title on a Smart TV must be familiar with the struggle of using the onscreen TV keyboard. Simply put, your regular TV remote simply isn’t cut out for the task of entering text. One of the best things you can do to elevate your TV experience is pairing your smartphone with the TV. This will allow you to enter text using your smartphone’s keyboard. In this article, we bring you the top 4 ways to use your Android smartphone as a TV remote.Read Also:BGMI redeem codes for 4 July 2023, claim and receive rewards and benefits
In This Article
Use the Google TV app
All Android TV users can use the Google TV app to turn their Android phone into a remote control. Here’s how.Step 1: Before you proceed, make sure your phone and TV are connected to the same WiFi network or paired together via Bluetooth.Step 2: Launch the Google TV app on your Android smartphone.Step 3: Tap the Connect TV button at the bottom right corner of the screen.Step 4: Your phone will scan for nearby TVs. Select your TV from the list.Step 5: Your TV will display a pairing code. Enter this code in the Google TV app on your phone.Step 6: Once your TV and phone are paired, the Connect TV icon will be replaced by the remote control icon. Tap it to control your TV with your phone.
Use a third-party app
For non-Android Smart TVs, there are tons of third-party apps that can turn your Android phone into a TV remote control. You may also want to look into the TV manufacturer’s proprietary app to access this feature. Here’s how you can use your Android smartphone as a TV remote with Universal TV Remote app.Step 1: Install the Universal TV Remote app on your Android smartphone.Step 2: Tap on Smart TV Remotes. Make sure your phone and TV are connected to the same WiFi network.Step 3: Select your TV model from the list.Step 4: Once your TV is paired with the app, you will be able to use the onscreen remote.
Use your Android smartphone as an Amazon Fire TV remote
Amazon Fire TV Stick and Fire TV Cube owners can use the official Fire TV app to control their TV with their smartphones. This app covers all the essential features you want from a remote. You can input text into your TV using your smartphone’s QWERTY keyboard, perform a voice search using Alexa, and access all the TV functions with the help of the Amazon Fire TV app. Pairing the Fire TV app with your TV is not a hassle either. You need to ensure that your TV and phone are on the same WiFi network. The Fire TV app will take care of the rest.
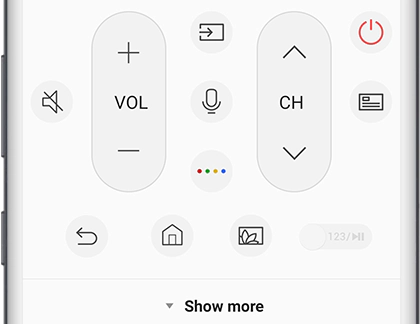
Use the SmartThings app for your Samsung phone and TV
If you own a Samsung Smart TV, you can control it using the SmartThings app on your Samsung smartphone. Here’s how.
Step 1: Connect your Samsung smartphone to the same WiFi network as the TV.
Step 2: Launch the SmartThings app on your Samsung phone.
Step 3: Hit the Menu icon and tap on All devices.
Step 4: Select your Smart TV.
Step 5: Use the onscreen remote on your phone to control the TV.
Frequently Asked Questions (FAQs)
Can I use my smartphone as a TV Remote?
You use the Google TV app on your phone to control any Android TV.
Is there a free Smart TV remote app?
Apps like Anymote, Harmony Remote, and Universal TV Remote are available for free on the Google Play Store and can be used to control your TV from your phone.
Are TV Remote apps safe to use?
Google TV and other proprietary apps by TV manufacturers are safe to use. However, you should observe caution while installing third-party TV remote apps as they may contain malware. To avoid any risky downloads, always use the Google Play Store.Read Also:Samsung Galaxy Z Fold 5 images leak showing no gap in the hinge
Conclusion
These are the 4 quick ways to use your Android smartphone as a TV remote. While most third-party TV remote apps are free to use, some of the premium features may be locked behind a paywall or a subscription. If you are an Android TV user, we’d suggest sticking with the Google TV app.
It has been announced that the Samsung Galaxy S21 FE will debut in India with an outdated Snapdragon flagship SoC. According to the firm, the device will now be powered by a Snapdragon 888 SoC. An in-house 5nm Exynos 2100 chipset powers the Galaxy S21 FE variant from 2022. The business is rumoured to soon introduce the Galaxy S23 Fan Edition.Samsung will introduce a new Galaxy S21 FE 5G model in India. The Samsung Galaxy S21 Fan Edition will once again be available in the nation but this time it will use a Snapdragon 888 SoC manufactured in 5nm. The precise launch date hasn’t been made public by Samsung, though.The company said, “Samsung will be launching a new variant of Galaxy S21 FE 5G smartphone in India this month. Designed to deliver the best of Samsung’s flagship experience to young Galaxy Fans, the S21 FE 5G is power-packed with premium “S” series features. Galaxy S21 FE comes with an eye-catching design, powerful performance, a flagship pro-grade camera, and seamless ecosystem connectivity.”The Exynos 2100 SoC-powered Galaxy S21 FE 5G was first introduced in India at the beginning of the year 2022. Adreno 660 GPU and 256GB of inbuilt storage are confirmed for the latest model. The expanded storage capacity will ensure that users can effortlessly store their favourite photos, videos, apps, and files without worrying about running out of space.Also Read:iQoo Neo 7 Pro 5G powered by Snapdragon 8+ Gen 1 SoC launched in IndiaOn its website, the company has set up a dedicated microsite to preview the release of the new Galaxy S21 FE 5G model. The Notify Me Button is also live so to receive the most recent information on the introduction and accessibility of the new phone, interested people should register their contact information with Samsung.Although the new Galaxy S21 FE’s price has not yet been officially announced, a recent report said the model would cost Rs 49,999. Note that the device with the Exynos chipset was launched with a starting price of Rs 54,999. The phone was made available in four colour options of Graphite, Lavender, Olive, and White.
Samsung Galaxy S21 FE 5G specifications
The Samsung Galaxy S21 FE 5G boasts a 6.4-inch full-HD+ Dynamic AMOLED 2X display with a 120Hz refresh rate and up to 240Hz touch sampling rate along with Corning Gorilla Glass Victus protection. It is powered by a 5nm Exynos 2100 chipset. The device has an in-display fingerprint sensor. It’s also designed to IP68 specifications, meaning it can survive dust and water to some extent.The triple rear camera on the phone includes a 12-megapixel primary sensor with an f/1.8 wide-angle lens, a 12-megapixel ultra-wide sensor, and an 8-megapixel telephoto sensor. For selfies and video calls, the gadget also includes a 32-megapixel front camera with an f/2.2 aperture.In addition to this, there is a 4,500mAh battery with 25W cable charging and 15W wireless charging capabilities.
For the latest gadget and tech news, and gadget reviews, follow us on Twitter, Facebook and Instagram. For newest tech & gadget videos subscribe to our YouTube Channel. You can also stay up to date using the Gadget Bridge Android App. You can find the latest car and bike news here.
If you just got your first Smart TV, there are a bunch of cool things you can do on it. Just like your smartphone, your Smart TV can also run apps. The best part is that most of the major apps are perfectly optimised for the big screen. Not only can you watch movies on Netflix, but you can also carry out a Yoga workout using an app that’s specially designed for your TV. In this article, we bring you the best ways to add, remove, and manage apps on your Samsung Smart TV.Read Also:Samsung Galaxy Z Fold 5 images leak showing no gap in the hinge
In This Article
Add/Install an app on your Samsung Smart TV
Step 1: Press the home button on your Samsung Smart TV remote.Step 2: Navigate to the ‘Apps’ icon on your TV’s interface and hit the Select button.Step 3: Now, navigate to the search icon at the top right corner of the screen and select it.Step 4: Enter the name of the app you want to install. You can also select any app from the app store’s home page.Step 5: Select the app and hit ‘Install’.The app will be installed on your Samsung Smart TV.
How to move an app on your Samsung Smart TV
Follow these steps to change the positioning of an app on your TV’s home screen.Step 1: Press the home button on the remote control.Step 2: Navigate to the app you want to move.Step 3: Long press the select key.Step 4: Select ‘Move’ from the list of options.Step 5: Use the navigation buttons on the remote to reposition the app.Step 6: Hit the Select button when you’re done.
How to lock or delete an app
If you don’t want to give other people access to an app on your TV, you can simply lock it. Here’s how.Step 1: Press the home button on your Samsung Smart TV remote.Step 2: Select Apps.Step 3: Navigate to the gear icon at the top right corner of the screen and select it.Step 4: Select the app you want to Delete.Step 5: Hit Delete.Step 6: To lock an app, select Lock from the list of options.Step 7: Enter your TV’s PIN.The app will be locked. In order to use the app, you will need to enter your TV’s PIN.
Auto update an app
If you don’t want to manually update every app on your TV, you can turn on auto-updates. Here’s how.Step 1: Press the home button on your Samsung Smart TV remote.Step 2: Go to Apps and select Settings.Step 3: Scroll down to Auto Update and select On.
Frequently Asked Questions (FAQs)
How do I remove unwanted apps on my Samsung Smart TV?
To remove an app from your Samsung Smart TV, long-press its icon and select ‘Delete’ from the list of options. While this works for third-party apps downloaded from the App Store, you may not be able to delete the preinstalled and native apps on your TV.
How do I add apps to Samsung Smart TV’s home screen?
You can add an app to your TV’s home screen by installing it from the App Store and selecting the ‘Add to Home’ option.
Is it possible to lock an app on my Samsung Smart TV?
To lock an app on your Smart TV, simply long press its icon on the home screen and select ‘Lock’ from the list of options. Enter your TV’s PIN to confirm the action.Read Also:Best 4 Methods to Put Two Pictures Side by Side on Android
iQoo Neo 7 Pro 5G has launched in India today. The gaming smartphone by Vivo’s sub-brand is powered by Qualcomm’s Snapdragon 8+ Gen 1 SoC. It features a 120Hz AMOLED display. In addition to this, there is a 5,000mAH battery with supports 120W fast charging.
In This Article
iQoo Neo 7 Pro 5G price in India, sale details and offers
iQoo Neo 7 Pro 5G debuted in India with a price tag of Rs 34,999 for the 8GB RAM with 128GB storage variant. The price of the 12GB RAM with 256GB storage option comes at Rs 37,999. The phone is offered in two colour options of Dark Storm and Fearless Flame.In terms of availability, the newly launched gaming smartphone is scheduled to go on sale on July 15 via Amazon. Customers who buy the handset by July 18 will receive a Rs 1,000 discount. In addition to this SBI and ICICI Bank debit and credit cardholders can get an immediate discount of Rs 2,000. The device is currently up for pre-booking and those who pre-book are eligible to receive an additional year of warranty protection.
iQoo Neo 7 Pro 5G specifications
iQoo Neo 7 Pro 5G is powered by a Snapdragon 8+ Gen 1 chip paired with up to 12GB of LPDDR5 RAM and up to 256GB of UFS 3.1 storage. The phone operated on Funtouch OS 13 on top of Android 13. The gaming phone is highlighted with a 6.78-inch full-HD+ AMOLED screen with 1,080×2,400 pixels of resolution. The display supports a 120Hz refresh rate and a 300Hz touch sampling rate.For the optics, there is a triple rear camera setup that includes a 50-megapixel primary Samsung GN5 sensor with an f/1.88 aperture. In addition to this, there is an 8-megapixel ultra-wide-angle camera with an f/2.2 aperture and a 2-megapixel macro camera with an f/2.2 aperture. The device further includes a 16-megapixel front-facing camera with an f/2.45 aperture for taking selfies and video calling.The iQoo Neo 7 Pro boasts a 5,000mAh battery with 120W Flash Charge support. In terms of connectivity, there is 5G, 4G LTE, Wi-Fi 6, Bluetooth 5.2, GPS, GNSS, NavIC, and a USB Type-C port. The device includes an in-display fingerprint scanner, an IR blaster, an accelerometer, an ambient light sensor, a proximity Sensor, an e-compass, a gyroscope, and a colour temperature sensor.
For the latest gadget and tech news, and gadget reviews, follow us on Twitter, Facebook and Instagram. For newest tech & gadget videos subscribe to our YouTube Channel. You can also stay up to date using the Gadget Bridge Android App. You can find the latest car and bike news here.
Your WiFi router records the browsing history of the devices that are connected to it. Any page requests made on the network are registered on the router and can be accessed by the device admin. If you ever feel suspicious of excessive data usage on your network, you can easily check the collective browsing history using the router and get an idea of who is the culprit. In this article, we show you how to check the WiFi router history on an Android smartphone.Read Also:Samsung Galaxy Z Fold 5 images leak showing no gap in the hinge
In This Article
Here’s how you can check WiFi router history on Android
Step 1: Go to Settings and select Connections.Step 2: Tap on WiFi.Step 3: Tap the gear icon next to the connected network.Step 4: Select ‘Manage Router’.Step 5: This will lead you to the router’s management portal. Log in using the appropriate credentials. If you don’t remember the password, look for it at the bottom of the router.Step 6: Go to the log page to view the WiFi router history.
Can’t find the Manager Router options? Try this method
Older Android phones may not have the ‘Manage Router’ option in WiFi settings. If you can’t find the option on your phone, there’s nothing to fret about. All you need to do is enter your WiFi router’s IP address in your phone’s web browser and you will be able to access its management portal. You can find your router’s IP address by going to Settings>Connections>WiFi and tapping the gear icon next to the network you’re connected to. Tap ‘View More’ and scroll down to the bottom to view the IP address of the router. Once you’re on the router management portal, all you need to do is log in and access the log page.
Use a third-party app
Third-party router management apps like Fing and All Router Admin can help you check the router history on your Android smartphone. Apart from checking the logs, you can also manage the devices on your network using these apps. They also offer features like hidden camera detection, speed test, and network analysis.
Frequently Asked Questions
Can my WiFi router record my browsing history?
Your WiFi router can record the browsing history of the devices connected to it. To check the recorded history, go to your router’s management portal and check the logs.
How do I view router history on Android?
To check your WiFi router’s history on your Android phone, simply enter the router’s IP address in the web browser and enter the appropriate credentials. Go to the log section in the side menu to check the browsing history.
How can I hide my browsing history from my router?
iQoo today will be launching a new gaming smartphone iQoo Neo 7 Pro 5G in India. The smartphone will be under the mid-range price segment and will succeed iQoo Neo 7 5G. The device will be sold exclusively through Amazon. The upcoming phone is confirmed to have a Snapdragon 8+ Gen 1 SoC. Moreover, the device will include a 50-megapixel primary rear camera.
In This Article
iQoo Neo 7 Pro 5G India launch and expected pricing details
Live streaming of the iQoo Neo 7 Pro 5 India launch will begin at 12:00 today. To view the event live, go to the company’s official YouTube and social media channels including Twitter. It can also be watched on our website as we have embedded the link below.
The iQoo Neo 7 Pro 5G is thought to be a rebranded version of the iQoo Neo 7 Racing Edition, which was unveiled in China in December of last year.Amazon and iQoo have teased the features and appearance of the smartphone in advance of its release. The Neo 7 Pro will be available in the colours Dark Storm and Fearless Flame. It is confirmed to be powered by the Qualcomm Snapdragon 8+ Gen 1 SoC. Along with support for 120W fast charging support, it is known that the main rear camera has 50 megapixels.Also Read:Samsung Galaxy Z Fold 5 images leak showing no gap in the hingeLeaks indicate that the 6.78-inch full-HD+ OLED display on the iQoo Neo 7 Pro 5G will have a refresh rate of 120 Hz. A 50-megapixel primary sensor with OIS is claimed to be included, along with an 8-megapixel sensor and a 2-megapixel shooter, in its triple back camera arrangement. The forthcoming device from iQoo is anticipated to include stereo speakers in addition to a 5,000mAh battery for the gaming smartphone.As expected, the OS duties on iQOO Neo 7 Pro will be handled by Android 13 with Funtouch 13 skinned on top of it.
For the latest gadget and tech news, and gadget reviews, follow us on Twitter, Facebook and Instagram. For newest tech & gadget videos subscribe to our YouTube Channel. You can also stay up to date using the Gadget Bridge Android App. You can find the latest car and bike news here.


 In terms of availability, the handset is scheduled to go on sale in August. The precise sale date is yet to be announced. However, the phone will be available for purchase via Amazon and OnePlus in the country.
On the other hand, OnePlus Nord 3 is scheduled to go on sale on July 15. It will come with a starting price of Rs 33,999 for the 8GB RAM with 128GB of storage and 16GB RAM with 256GB internal storage will be available at Rs 37,999.
In terms of availability, the handset is scheduled to go on sale in August. The precise sale date is yet to be announced. However, the phone will be available for purchase via Amazon and OnePlus in the country.
On the other hand, OnePlus Nord 3 is scheduled to go on sale on July 15. It will come with a starting price of Rs 33,999 for the 8GB RAM with 128GB of storage and 16GB RAM with 256GB internal storage will be available at Rs 37,999.


 Step 3:
 Step 4:
 Step 5:
 Step 6:
 Step 7:
 Step 1:

 Step 1:
 Step 1:
")
 Step 2:
 Step 3:
 Step 4:

 Step 2:
 Step 3:
 Step 4:

 It is possible that the issue may not lie with the Microsoft Teams app but with your internet connection. To confirm if this is the case, open the web browser and load a web page. If the web page fails to load, the issue lies with the connection. You can also try sending a message on an instant messaging app to double-check the status of your internet connection. To fix this issue, toggle the airplane mode on and off. A quick refresh of the network typically fixes any temporary issues.
 On some occasions, a software glitch may cause the Microsoft Teams app on your phone to malfunction. A quick restart of your smartphone will take care of this. Press the side key along with the volume-up key to access the power menu. Hit ‘Restart’ to reboot your phone.

")


 Also Read:


 Step 2:
 Step 3:
 Step 4:
 Step 5:
 Step 6:
 Step 1:
")

 Step 3:
 Step 4:

 If you own a Samsung Smart TV, you can control it using the SmartThings app on your Samsung smartphone. Here’s how.
Step 1: Connect your Samsung smartphone to the same WiFi network as the TV.
Step 2: Launch the SmartThings app on your Samsung phone.
Step 3: Hit the Menu icon and tap on All devices.
Step 4: Select your Smart TV.
Step 5: Use the onscreen remote on your phone to control the TV.
If you own a Samsung Smart TV, you can control it using the SmartThings app on your Samsung smartphone. Here’s how.
Step 1: Connect your Samsung smartphone to the same WiFi network as the TV.
Step 2: Launch the SmartThings app on your Samsung phone.
Step 3: Hit the Menu icon and tap on All devices.
Step 4: Select your Smart TV.
Step 5: Use the onscreen remote on your phone to control the TV.


 Step 2:
 Step 3:
 Step 5:
 Step 5:
 Step 7:


 Step 4:
 Step 5:
 Step 6:

