
 Here are some evergreen games of yore that we can connect and ruminate over:
In This Article
 Here are some evergreen games of yore that we can connect and ruminate over:
In This Article


In This Article


In This Article

In This Article

In This Article


In This Article
 A cache is a temporary location to store frequently used information while visiting a website. Cookies, on the other hand, hold the login credentials that allow you entry into your account. Cookies are also responsible for timing out the session when you’re visiting a website. Even Facebook has a session limit, after which you get logged out of your account.
In order to clear cache and cookies on your web browser, go to Settings>Privacy and Security>Clear browsing data. Select cache and cookies and clear them.
A cache is a temporary location to store frequently used information while visiting a website. Cookies, on the other hand, hold the login credentials that allow you entry into your account. Cookies are also responsible for timing out the session when you’re visiting a website. Even Facebook has a session limit, after which you get logged out of your account.
In order to clear cache and cookies on your web browser, go to Settings>Privacy and Security>Clear browsing data. Select cache and cookies and clear them.
 Step 2: Scroll down and select Facebook.
 Step 3: Tap on Storage.
 Step 4: Select ‘Clear cache’ from the toolbar at the bottom of the screen.

 It is quite possible someone else is using your account. If your account is logged in on two devices, logging out of one will automatically log you out of the other one. You can fix this by changing your Facebook password so only you have the login credentials to your account. Go to Facebook Settings>Security and Login>Change Password.
 If you’ve linked your Facebook account to any third-party apps, it is possible that they may be responsible for logging you out of your account.
Go to Facebook Settings>Apps and Websites. Remove access to all third-party apps. Hopefully, this will fix the issue at hand.
If you’ve linked your Facebook account to any third-party apps, it is possible that they may be responsible for logging you out of your account.
Go to Facebook Settings>Apps and Websites. Remove access to all third-party apps. Hopefully, this will fix the issue at hand.
 Extensions and add-ons for your web browser may seem innocuous, but the faulty ones can interfere with the most basic tasks on your browser. If you first experienced the Facebook logout problem after downloading a third-party extension, chances are that it is the extension that caused it. To view all your browser extensions, type chrome://extensions in the address bar and hit Enter. Remove any new extensions you may have installed.

In This Article
 The Qualcomm Snapdragon 8+ Gen 1 SoC and Adreno 730 GPU are found inside the Asus ROG Phone 6 with 12GB of RAM with UFS 3.1 storage capacity of 256GB. It has a GameCool 6 cooling system from Asus. It includes an updated, 360-degree CPU cooling system that dissipates heat more effectively.
The Asus ROG Phone 6 includes three back cameras for photography. It has 50-megapixel Sony IMX766 primary sensors, 13-megapixel, 125-degree wide-angle cameras, and 5-megapixel, close-up cameras. The smartphone is equipped with 12-megapixel cameras for selfies and video calls.
In terms of connectivity, Asus ROG Phone 6 has 5G, 4G LTE, Wi-Fi 6 with 802.11 a/b/g/n/ac/ax, Wi-Fi Direct, Bluetooth v5.2, NFC, and two USB Type-C ports as connectivity options. Along with the GNSS systems GPS, Glonass, Galileo, Beidou, QZSS, and NaviC, onboard sensors also include an accelerometer, e-compass, proximity sensor, ambient light sensor, under-display fingerprint sensor, gyroscope, and ultrasonic sensors for grip press and AirTrigger 6.
There is a 6,000mAh battery on board which offers fast charging at up to 65W. To connect the ROG phones to a PS4, Xbox, or Stadia controller with an adjustable arm, there is also a ROG Kunai 3 Gamepad, an expansion dock, and a ROG Clip.
The Qualcomm Snapdragon 8+ Gen 1 SoC and Adreno 730 GPU are found inside the Asus ROG Phone 6 with 12GB of RAM with UFS 3.1 storage capacity of 256GB. It has a GameCool 6 cooling system from Asus. It includes an updated, 360-degree CPU cooling system that dissipates heat more effectively.
The Asus ROG Phone 6 includes three back cameras for photography. It has 50-megapixel Sony IMX766 primary sensors, 13-megapixel, 125-degree wide-angle cameras, and 5-megapixel, close-up cameras. The smartphone is equipped with 12-megapixel cameras for selfies and video calls.
In terms of connectivity, Asus ROG Phone 6 has 5G, 4G LTE, Wi-Fi 6 with 802.11 a/b/g/n/ac/ax, Wi-Fi Direct, Bluetooth v5.2, NFC, and two USB Type-C ports as connectivity options. Along with the GNSS systems GPS, Glonass, Galileo, Beidou, QZSS, and NaviC, onboard sensors also include an accelerometer, e-compass, proximity sensor, ambient light sensor, under-display fingerprint sensor, gyroscope, and ultrasonic sensors for grip press and AirTrigger 6.
There is a 6,000mAh battery on board which offers fast charging at up to 65W. To connect the ROG phones to a PS4, Xbox, or Stadia controller with an adjustable arm, there is also a ROG Kunai 3 Gamepad, an expansion dock, and a ROG Clip.
 The cameras, connectivity options and sensors on the ROG Phone 6 Pro are similar to the vanilla variant.
The 6,000mAh battery housed inside the phone also supports 65W fast charging but shipped with a 30W charger inside the box.
Two 5-magnet 12×16 Super Linear speakers tuned by Dirac are included with the phones. Both phones have an IPX4 water resistance rating.
The AeroActive Cooler 6 is an accessory for the Asus ROG Phone 6 and ROG Phone 6 Pro smartphones that feature an integrated thermoelectric cooling system to drastically reduce the temperature of the devices which can be used wirelessly and is powered by the phone’s battery.
For the latest gadget and tech news, and gadget reviews, follow us on Twitter, Facebook and Instagram. For newest tech & gadget videos subscribe to our YouTube Channel. You can also stay up to date using the Gadget Bridge Android App. You can find the latest car and bike news here.
The cameras, connectivity options and sensors on the ROG Phone 6 Pro are similar to the vanilla variant.
The 6,000mAh battery housed inside the phone also supports 65W fast charging but shipped with a 30W charger inside the box.
Two 5-magnet 12×16 Super Linear speakers tuned by Dirac are included with the phones. Both phones have an IPX4 water resistance rating.
The AeroActive Cooler 6 is an accessory for the Asus ROG Phone 6 and ROG Phone 6 Pro smartphones that feature an integrated thermoelectric cooling system to drastically reduce the temperature of the devices which can be used wirelessly and is powered by the phone’s battery.
For the latest gadget and tech news, and gadget reviews, follow us on Twitter, Facebook and Instagram. For newest tech & gadget videos subscribe to our YouTube Channel. You can also stay up to date using the Gadget Bridge Android App. You can find the latest car and bike news here. ")
In This Article
 Powered by Tenor’s gif library, the gif bot can be summoned whenever you want to respond to a message with a gif. Simply type @gif followed by the search query for the gif you want to post. If you do not have a particular gif in mind, just search for any response and the bot will come up with a relevant gif.
 COMBOT is a necessary bot for groups with a large number of members. COMBOT helps in weeding out spam and inappropriate content from the group. On top of that, it generates metrics that help in managing the group and boost user engagement.
 Using SPOTYBOT you can share your favourite music in any telegram group you want. Just type @SPOTYBOT followed by the name of the artist or the song. SPOTYBOT will then post a 30-second clip of the song along with the link to listen to the full song on Spotify.
 FBvidszBot fetches and downloads the Facebook video from the link you feed to it. This way, any member in your group without a Facebook profile will be able to view videos hosted on the social networking website.
 Vote bot is really helpful for keeping a count of votes in the group. If your group isn’t able to come to an agreement, simply summon the vote bot and create a quick poll. Voting can be done anonymously and publicly.
 movies4Bot is a movie tracker bot. You can simply search for any movie and the bot will post all the relevant information about the movie from its IMDB page. This is a must-have bot for a movie-oriented group.
 As the name suggests, Gamebot lets you play games with your friends in Telegram groups. Once you summon the bot, it’ll give you a list of available games to choose from. The games are light and fun. An easy way to kill time with your friends.
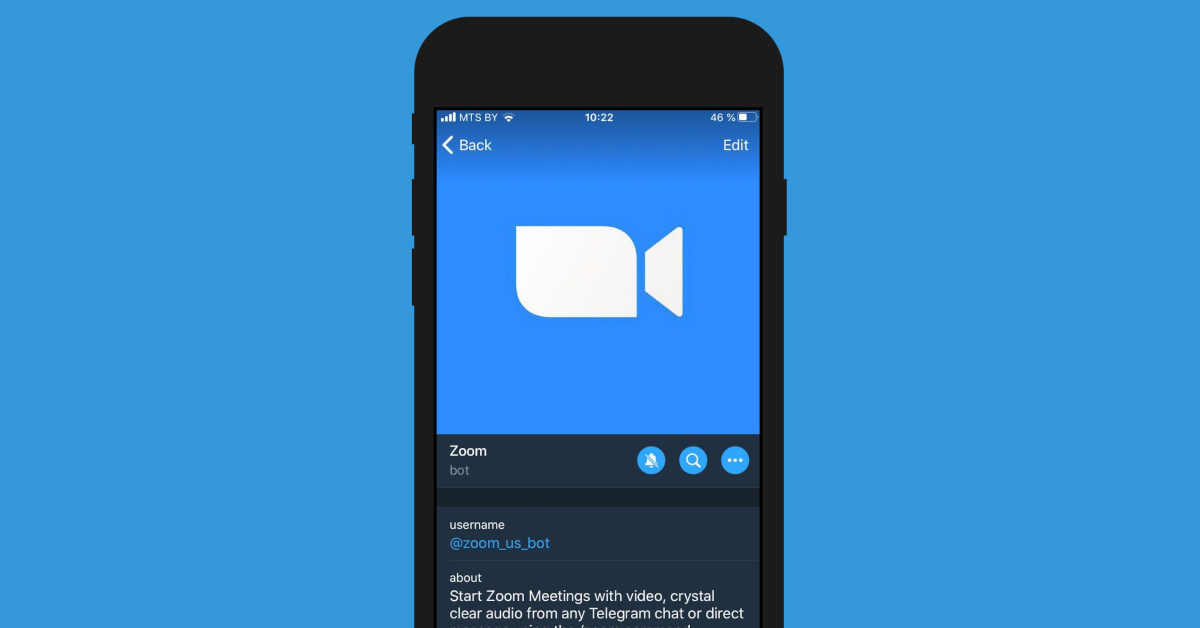 Zoom Bot for Telegram elevates connectivity to a whole new level. If you don’t have enough internal storage on your phone to install the Zoom app, you can use the Zoom Bot on Telegram to make audio or video calls and even share your screen.
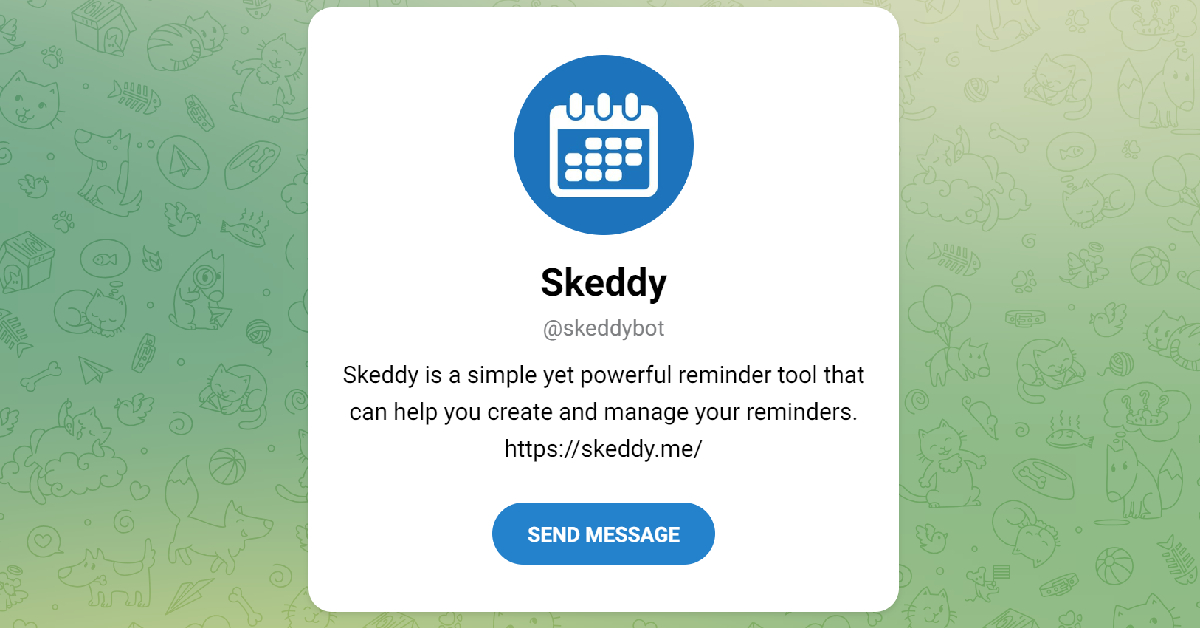 Keep forgetting the important stuff? The Skeddy bot will come in clutch. Using Skeddy, you can set reminders for daily tasks that you would otherwise forget. Want to keep hydrated throughout the day? Set a reminder to drink water every hour. You can also set monthly reminders to pay the bills, call friends on their birthdays, and much more.
 Smooth and seamless file sharing is the reason why a lot of people prefer Telegram to WhatsApp. Telegram’s incredible 2GB file size limit allows users to share anything from books to high-resolution videos. With so many files flying around, security sometimes takes a backseat. Dr.Web ensures that you don’t have to worry about that. This handy bot screens the files before you download them on your device. You can either send a file to the bot before downloading it or add the bot to a group to screen all the files that get sent there.
 If you find yourself spending an unhealthy amount of time on the Internet, you can limit your web activity using the Feed Reader Bot. This bot monitors your RSS feed and pings you whenever a new post is available. By correcting utilising Feed Reader Bot you can cut down the time you spend browsing social media and only look at the important stuff.
 As the name suggests, GetMediaBot fetches you videos, music, pictures, and more from across the Internet. You can send a query and use the bot to download the media you want. Usually, you’d have to go through a lot of steps and use an online tool for this task, but this bot makes it possible to get whatever you want without leaving the Telegram app.
Read Also: How to create GIFs on WhatsApp and YouTube
As the name suggests, GetMediaBot fetches you videos, music, pictures, and more from across the Internet. You can send a query and use the bot to download the media you want. Usually, you’d have to go through a lot of steps and use an online tool for this task, but this bot makes it possible to get whatever you want without leaving the Telegram app.
Read Also: How to create GIFs on WhatsApp and YouTube

In This Article


In This Article
 Step 2: Take a screenshot by pressing the Side button on the right and the Volume Up button on the left at the same time.
 The image will be saved in the Screenshots folder.
While taking a screenshot is the easiest way to get a still photo from a video, the quality of the resulting image isn’t the greatest. The quality of the screenshot depends on the screen resolution. Sometimes the frame of a video depreciates in quality once it is paused.
Luckily, there are some other ways with which you can capture high-quality images from videos.
The image will be saved in the Screenshots folder.
While taking a screenshot is the easiest way to get a still photo from a video, the quality of the resulting image isn’t the greatest. The quality of the screenshot depends on the screen resolution. Sometimes the frame of a video depreciates in quality once it is paused.
Luckily, there are some other ways with which you can capture high-quality images from videos.
 Frame Grabber is an app that lets you export individual video frames to still pictures. Unlike a screenshot, the quality of images exported using Frame Grabber will be considerably richer.
Step 1: Download Frame Grabber from the App Store and download it to your phone.
Step 2: Open Frame Grabber and select a video.
Step 3: Select the frame you want to capture by dragging the white bar at the bottom of the screen.
Step 4: Tap the ‘Tick’ icon at the bottom right to save the frame you’ve selected as an image.
Frame Grabber is an app that lets you export individual video frames to still pictures. Unlike a screenshot, the quality of images exported using Frame Grabber will be considerably richer.
Step 1: Download Frame Grabber from the App Store and download it to your phone.
Step 2: Open Frame Grabber and select a video.
Step 3: Select the frame you want to capture by dragging the white bar at the bottom of the screen.
Step 4: Tap the ‘Tick’ icon at the bottom right to save the frame you’ve selected as an image.
 Grab picture is another great app for capturing images from a video.
Step 1: Download Grab Picture from the App Store and install it on your iPhone.
Step 2: Open Grab Picture and select a video.
Step 3: Select the frame you want to capture by using the navigation icons. You can go through the video frame by frame or five frames at once.
Step 4: Tap the ‘Save’ icon once you’ve landed on the frame you want to capture.
Grab picture is another great app for capturing images from a video.
Step 1: Download Grab Picture from the App Store and install it on your iPhone.
Step 2: Open Grab Picture and select a video.
Step 3: Select the frame you want to capture by using the navigation icons. You can go through the video frame by frame or five frames at once.
Step 4: Tap the ‘Save’ icon once you’ve landed on the frame you want to capture.
 Step 2: Tap the ‘concentric circles’ icon at the bottom to reveal the scroller for the Live Photo.
 Step 3: Use the scroller to pick the frame you like.
Step 4: Tap on ‘Make Key Photo’ and select ‘Done’. This will make the selected frame the new thumbnail for the Live Photo.
Step 3: Use the scroller to pick the frame you like.
Step 4: Tap on ‘Make Key Photo’ and select ‘Done’. This will make the selected frame the new thumbnail for the Live Photo.
 Step 5: Now, tap on the Share icon and select ‘Duplicate’. In the following popup box tap on ‘Duplicate as still photo’.
Your selected frame will be turned into a still photo. You can access it from the Photos app.
Step 5: Now, tap on the Share icon and select ‘Duplicate’. In the following popup box tap on ‘Duplicate as still photo’.
Your selected frame will be turned into a still photo. You can access it from the Photos app.
 If you don’t want to go through the hassle of picking the right frame to screenshot, you can simply take a photo while recording a video on your iPhone. To do this, switch to video recording mode in the Camera and begin shooting a video. You will see a white shutter icon on the screen alongside the red recording button. Tap the white icon to take a quick picture without pausing the video. The picture will be saved in the Camera Roll of your iPhone. The only minor drawback is that the picture won’t be of the same quality as the images taken in Photo mode. However, it is better than taking a screenshot of a still frame from a video.

 The Philips SpeedPro is a high-end option for quick touch-ups or thorough cleaning. It provides continuous cleaning for up to 50 minutes in normal mode. You can clean quickly and thoroughly for up to 22 minutes in Turbo mode. The Philips SpeedPro has a patented 1800 suction nozzle to deliver accurate and strong dirt pickup on both hard surfaces and carpets.
Philips SpeedPro’s unique design allows for maximum reach even under low furniture and appliances. Reach of the vacuum and its special Power Blade motor, which is designed for high air speed, allow for powerful and accurate pick-up at nozzle level.
To maintain high performance for longer, the PowerCyclone 7 technology also instantly removes dust from the air.
The Philips SpeedPro Aqua FC6728 has 3-in-1 vacuum, mop, and handheld capabilities for a uniform, faster cleaning solution. This model’s specially created vacuum and mop function make it possible to quickly clean up a variety of dust, from shoe prints on the living room floor to kitchen filth. It is also simple to switch to the detachable handheld vacuum, which is great for removing dirt and pet hair off your couch.
The Philips SpeedPro is a high-end option for quick touch-ups or thorough cleaning. It provides continuous cleaning for up to 50 minutes in normal mode. You can clean quickly and thoroughly for up to 22 minutes in Turbo mode. The Philips SpeedPro has a patented 1800 suction nozzle to deliver accurate and strong dirt pickup on both hard surfaces and carpets.
Philips SpeedPro’s unique design allows for maximum reach even under low furniture and appliances. Reach of the vacuum and its special Power Blade motor, which is designed for high air speed, allow for powerful and accurate pick-up at nozzle level.
To maintain high performance for longer, the PowerCyclone 7 technology also instantly removes dust from the air.
The Philips SpeedPro Aqua FC6728 has 3-in-1 vacuum, mop, and handheld capabilities for a uniform, faster cleaning solution. This model’s specially created vacuum and mop function make it possible to quickly clean up a variety of dust, from shoe prints on the living room floor to kitchen filth. It is also simple to switch to the detachable handheld vacuum, which is great for removing dirt and pet hair off your couch.
 The Philips SpeedPro cordless vacuum cleaner has an effortless, quick, strong reach and is the ideal appliance for simplifying daily tasks like cleaning. It has a 2-year warranty and a starting price of Rs 29,995.
The Philips Domestic Appliances e-store now allows customers to select and purchase their chosen cleaning assistance.
Commenting on the launch, Mr. Gulbahar Taurani, MD, and CEO Philips Domestic Appliances, India Subcontinent, said, “Given the post-pandemic scenario, there is a growing preference for easy to use, quick yet efficient home cleaning solutions as consumers become more focused towards health, safety and hygiene. There is extra consciousness among people to have spotless clean houses and many continue to clean their houses themselves. Extensive cleaning of dust and dirt across different corners of the house, where traditional methods are unable to give desired results, the Philips SpeedPro cordless vacuum cleaner range delivers on fast, yet effective cleaning. Keeping in mind today’s fast-paced lifestyle coupled with the fact that wet and dry cleaning is of utmost importance in every Indian household, we are confident that this new launch will enable consumers to experience a new dimension of convenient and easy cleaning.”
For the latest gadget and tech news, and gadget reviews, follow us on Twitter, Facebook and Instagram. For newest tech & gadget videos subscribe to our YouTube Channel. You can also stay up to date using the Gadget Bridge Android App. You can find the latest car and bike news here.
The Philips SpeedPro cordless vacuum cleaner has an effortless, quick, strong reach and is the ideal appliance for simplifying daily tasks like cleaning. It has a 2-year warranty and a starting price of Rs 29,995.
The Philips Domestic Appliances e-store now allows customers to select and purchase their chosen cleaning assistance.
Commenting on the launch, Mr. Gulbahar Taurani, MD, and CEO Philips Domestic Appliances, India Subcontinent, said, “Given the post-pandemic scenario, there is a growing preference for easy to use, quick yet efficient home cleaning solutions as consumers become more focused towards health, safety and hygiene. There is extra consciousness among people to have spotless clean houses and many continue to clean their houses themselves. Extensive cleaning of dust and dirt across different corners of the house, where traditional methods are unable to give desired results, the Philips SpeedPro cordless vacuum cleaner range delivers on fast, yet effective cleaning. Keeping in mind today’s fast-paced lifestyle coupled with the fact that wet and dry cleaning is of utmost importance in every Indian household, we are confident that this new launch will enable consumers to experience a new dimension of convenient and easy cleaning.”
For the latest gadget and tech news, and gadget reviews, follow us on Twitter, Facebook and Instagram. For newest tech & gadget videos subscribe to our YouTube Channel. You can also stay up to date using the Gadget Bridge Android App. You can find the latest car and bike news here. 
In This Article
 Step 2: Tap and hold the screen until some options pop up.
Step 3: Select Clipboard.
Step 2: Tap and hold the screen until some options pop up.
Step 3: Select Clipboard.
 The clipboard section will open up and you’ll be able to access your clipboard history. You can delete or recover any items you like.
 Step 3: Press the three dots on the topmost row of the keyboard and select Clipboard.
 Step 4: Turn on Clipboard.
 Anything you copy to the clipboard will be saved there for one hour.
Step 3: Tap on the clipboard icon at the top of your keyboard.
Anything you copy to the clipboard will be saved there for one hour.
Step 3: Tap on the clipboard icon at the top of your keyboard.
 You will be able to view the items you’ve copied to the clipboard.
 Read Also: How to stop YouTube from saving your search history?
These are the 3 best ways you can check and recover clipboard history on any Android smartphone. Apart from text, the clipboard is also capable of storing images, links, and numeric data. There are also some dedicated clipboard apps like Clipboard Pro, Copybox, and Clipboard Manager, that you can use to manage your copied entries on the clipboard.
For the latest gadget and tech news, and gadget reviews, follow us on Twitter, Facebook and Instagram. For newest tech & gadget videos subscribe to our YouTube Channel. You can also stay up to date using the Gadget Bridge Android App. You can find the latest car and bike news here.
Read Also: How to stop YouTube from saving your search history?
These are the 3 best ways you can check and recover clipboard history on any Android smartphone. Apart from text, the clipboard is also capable of storing images, links, and numeric data. There are also some dedicated clipboard apps like Clipboard Pro, Copybox, and Clipboard Manager, that you can use to manage your copied entries on the clipboard.
For the latest gadget and tech news, and gadget reviews, follow us on Twitter, Facebook and Instagram. For newest tech & gadget videos subscribe to our YouTube Channel. You can also stay up to date using the Gadget Bridge Android App. You can find the latest car and bike news here. 
In This Article

In This Article

In This Article

In This Article

In This Article
 It is always a good idea to make sure your Voicemail settings are set correctly whenever you come across an issue with your voicemail. Go to Phone>Settings>Voicemail and make sure all details are legitimate. Check the voicemail number and service provider. If you find any incorrect settings, revert them to the original settings and save them.
 Step 2: Tap on Settings.
 Step 3: Tap on Supplementary Services.
 Step 4: Select Call Forwarding.
 Step 5: Tap on every category and select Disable.

 Using a third-party voicemail app can help evade any issues you might be facing with your network carrier’s voicemail app. There are a bunch of third-party voicemail apps available on the Google Play Store. Browse through the list and pick the one which suits you the best.
 If you’re unable to reach your voicemail inbox on your Android phone, try performing a quick network refresh. Simply swipe down from the status bar and tap the Airplane Mode tile in the Quick Settings Menu. Wait for a few seconds, then tap it again to turn it off. Once your phone starts receiving a network signal, check your voicemail again.
 If your phone is running out of storage space, it won’t be able to receive or store voicemails. As a result, you won’t be able to listen to new voicemails on your device. You will be able to receive them once there’s optimum storage space on your phone. Go to Settings>Battery and device care>Storage and delete any duplicate or large files from your phone’s internal storage. If you use a third-party app for voicemail, check if it has any storage limit.
 Newer Android smartphones have a useful AI feature that screens all of your incoming calls. You can program your phone to ask the caller certain questions before their call is relayed to you. While this is a helpful tool, it can mess with your voicemail settings. Users often report that callers aren’t redirected to voicemail in case you don’t pick up the call. Go to your phone’s AI settings and disable this feature.
 Step 2: Scroll down and select Reset.
 Step 3: Tap on Reset Network Settings.
 Step 4: Select Reset Settings.
 Step 5: Enter your PIN to confirm your selection.
 Step 2: Tap on Download and Install. Your smartphone will check for any new updates.
 Step 3: If an update is available, tap on Install Now. You can also schedule the update for a later time.

?")
 Step 2: Click on the Alarm icon at bottom of your screen.
 Step 3: Select the alarm that you wish to customise. If there are no alarms on your device, make one.
Step 4: Once you’ve selected an alarm, tap on the Sound option on the Edit Alarm screen.
Step 3: Select the alarm that you wish to customise. If there are no alarms on your device, make one.
Step 4: Once you’ve selected an alarm, tap on the Sound option on the Edit Alarm screen.
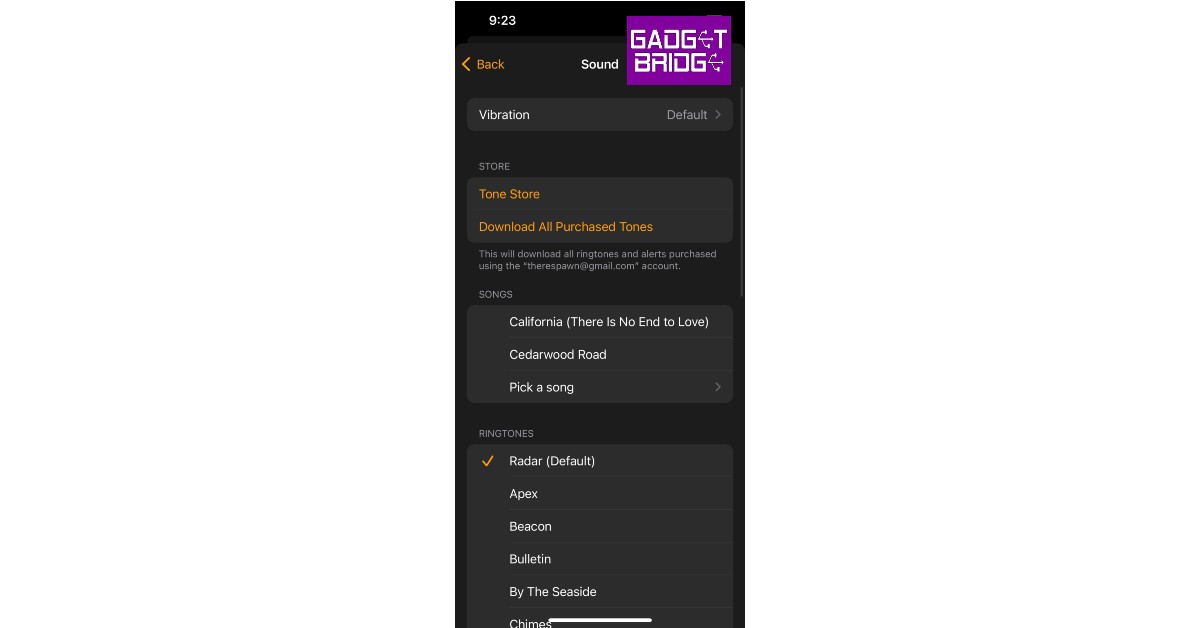
 Step 5: Upon opening the Sound option, you will see a list of sounds that you can set as your alarm tone. Tap on a sound to play it.
 Step 6: Once you’ve selected a sound, tap the back button. This will take you back to the Edit Alarm screen where you can save the changes by tapping Save on the top right end of your screen.
 If you want to set a song as your Alarm tone, follow these easy steps
Step 1: Open an alarm using the steps mentioned above and tap on the Sound option on the Edit Alarm screen.
Step 2: Tap on Pick a Song under the Songs category.
Step 3: You will be directed to your library of downloaded songs in the Apple Music app. Select a song you want to set as your alarm tone. Only songs you’ve downloaded in the Apple Music app can be used as an alarm tone.
Step 4: Go back to the Edit Alarm screen and tap on the Save button to save your changes.
Read Also: 5 best smart locks available in India right now
Apart from using the preset alarm tones on your iPhone, you can also download new alarm tones from the Tone Store. You can access the Tone Store from the Sound section of your alarm. There are a ton of cheap alarm tones you can buy from the Tone Store. Once you’ve downloaded a tone, you can set it as your alarm tone.
If you wish to set a custom vibration as your alarm tone, go to the Sound section of your alarm and select Vibration. Upon selection, you will find a bunch of vibration presets for you to choose from. To make a custom vibration, Tap on Create New Vibration, below the standard vibration options. You will be presented with a new screen to create a custom vibration. Once you’re done creating a vibration, press Play to preview it. If you’re satisfied with the result, press the Save on the top right end of your screen. Give a title to your vibration and it will automatically be selected as your chosen option.
You can even make a voice memo your alarm tone by turning it into a ringtone using the Garage Band app. Once it’s turned into a ringtone it can be accessed from the Sound section of your alarm.
For the latest gadget and tech news, and gadget reviews, follow us on Twitter, Facebook and Instagram. For newest tech & gadget videos subscribe to our YouTube Channel. You can also stay up to date using the Gadget Bridge Android App.
If you want to set a song as your Alarm tone, follow these easy steps
Step 1: Open an alarm using the steps mentioned above and tap on the Sound option on the Edit Alarm screen.
Step 2: Tap on Pick a Song under the Songs category.
Step 3: You will be directed to your library of downloaded songs in the Apple Music app. Select a song you want to set as your alarm tone. Only songs you’ve downloaded in the Apple Music app can be used as an alarm tone.
Step 4: Go back to the Edit Alarm screen and tap on the Save button to save your changes.
Read Also: 5 best smart locks available in India right now
Apart from using the preset alarm tones on your iPhone, you can also download new alarm tones from the Tone Store. You can access the Tone Store from the Sound section of your alarm. There are a ton of cheap alarm tones you can buy from the Tone Store. Once you’ve downloaded a tone, you can set it as your alarm tone.
If you wish to set a custom vibration as your alarm tone, go to the Sound section of your alarm and select Vibration. Upon selection, you will find a bunch of vibration presets for you to choose from. To make a custom vibration, Tap on Create New Vibration, below the standard vibration options. You will be presented with a new screen to create a custom vibration. Once you’re done creating a vibration, press Play to preview it. If you’re satisfied with the result, press the Save on the top right end of your screen. Give a title to your vibration and it will automatically be selected as your chosen option.
You can even make a voice memo your alarm tone by turning it into a ringtone using the Garage Band app. Once it’s turned into a ringtone it can be accessed from the Sound section of your alarm.
For the latest gadget and tech news, and gadget reviews, follow us on Twitter, Facebook and Instagram. For newest tech & gadget videos subscribe to our YouTube Channel. You can also stay up to date using the Gadget Bridge Android App. 
In This Article
 With the flat Rs 1,000 Instant Discount / Cashback on SBI credit cards, consumers can acquire the Moto G42 for an incredible price of just Rs 12,999. Reliance Jio customers can receive cashback on recharges up to Rs 2000 and a Rs 549 discount on an annual Zee5 membership.


 The TruView 1.72-inch TFT LCD Display, which is exclusive to Noise ColorFit Pro 4, features a sharp 356x400px resolution. It has a display with a refresh rate of 60Hz. Additionally, Noise ColorFit Pro 4 Max, which comes in 5 colours, features a 1.80-inch TFT LCD display with a sharp 240x285px resolution for improved display quality. Additionally, it has a display with a 40Hz refresh rate and a 33 percent larger screen than Noise ColorFit Pro 3.
Additionally, both watches provide 150+ adjustable watch faces that are hosted in the cloud, allowing users to customise their look and express their individuality.
Bluetooth calling capability is included with the Noise ColorFit Pro 4 and ColorFit Pro 4 Max. Using the Noise wristwatch, one may also accept, reject, and quiet calls. Not only that, but smartwatches also let you save contacts on the watch and dial and make calls directly from the device. Numerous functions, like smart DND and SMS rapid answers, are part of its productivity suite. Users of ColorFit Pro 4 Max can also ask voice assistants like Alexa, Google Assistant, or Siri to receive answers to their queries.
The TruView 1.72-inch TFT LCD Display, which is exclusive to Noise ColorFit Pro 4, features a sharp 356x400px resolution. It has a display with a refresh rate of 60Hz. Additionally, Noise ColorFit Pro 4 Max, which comes in 5 colours, features a 1.80-inch TFT LCD display with a sharp 240x285px resolution for improved display quality. Additionally, it has a display with a 40Hz refresh rate and a 33 percent larger screen than Noise ColorFit Pro 3.
Additionally, both watches provide 150+ adjustable watch faces that are hosted in the cloud, allowing users to customise their look and express their individuality.
Bluetooth calling capability is included with the Noise ColorFit Pro 4 and ColorFit Pro 4 Max. Using the Noise wristwatch, one may also accept, reject, and quiet calls. Not only that, but smartwatches also let you save contacts on the watch and dial and make calls directly from the device. Numerous functions, like smart DND and SMS rapid answers, are part of its productivity suite. Users of ColorFit Pro 4 Max can also ask voice assistants like Alexa, Google Assistant, or Siri to receive answers to their queries.
 On their watch, users may quickly set the alarm. Additionally, it allows users to check the stock market update and the weather prediction in addition to setting a reminder for a business meeting. They can check their messages, calls, or notifications on their smartwatch while indulging in other activities like running, cycling, swimming, or any other activity, which helps users stay connected overall. The Noise ColorFit Pro 4’s Digital Crown also offers a dynamically scrolling menu, volume control, and a watch face change that gives the timepiece a customised look.
The operating capacity of the Noise ColorFit Pro 4 and Noise ColorFit Pro 4 Max is seven days, and they can operate without issue for up to seven days after receiving a full charge all at once.
On the back of Ingression Protection (IP) code 68, the ColorFit Pro 4 and Noise ColorFit Pro 4 Max have both been developed to endure moisture and perspiration. Moreover, both smartwatches provide 100 sports modes, including jogging, outdoor sports, hiking, cycling, and indoor sports.
Aside from this, the gadget offers a few basic health tracking functions that enable users to monitor health indicators and manage general wellbeing, including continuous heart rate monitoring, SpO2 for tracking blood oxygen levels, female cycle tracking, sleep monitoring, and stress monitoring. The locally created NoiseFit App allows users to keep track of their exercise progress with a detailed health report and performance evaluation.
For the latest gadget and tech news, and gadget reviews, follow us on Twitter, Facebook and Instagram. For newest tech & gadget videos subscribe to our YouTube Channel. You can also stay up to date using the Gadget Bridge Android App. You can find the latest car and bike news here.
On their watch, users may quickly set the alarm. Additionally, it allows users to check the stock market update and the weather prediction in addition to setting a reminder for a business meeting. They can check their messages, calls, or notifications on their smartwatch while indulging in other activities like running, cycling, swimming, or any other activity, which helps users stay connected overall. The Noise ColorFit Pro 4’s Digital Crown also offers a dynamically scrolling menu, volume control, and a watch face change that gives the timepiece a customised look.
The operating capacity of the Noise ColorFit Pro 4 and Noise ColorFit Pro 4 Max is seven days, and they can operate without issue for up to seven days after receiving a full charge all at once.
On the back of Ingression Protection (IP) code 68, the ColorFit Pro 4 and Noise ColorFit Pro 4 Max have both been developed to endure moisture and perspiration. Moreover, both smartwatches provide 100 sports modes, including jogging, outdoor sports, hiking, cycling, and indoor sports.
Aside from this, the gadget offers a few basic health tracking functions that enable users to monitor health indicators and manage general wellbeing, including continuous heart rate monitoring, SpO2 for tracking blood oxygen levels, female cycle tracking, sleep monitoring, and stress monitoring. The locally created NoiseFit App allows users to keep track of their exercise progress with a detailed health report and performance evaluation.
For the latest gadget and tech news, and gadget reviews, follow us on Twitter, Facebook and Instagram. For newest tech & gadget videos subscribe to our YouTube Channel. You can also stay up to date using the Gadget Bridge Android App. You can find the latest car and bike news here. 


In This Article
 Simon B’s plugins consist of a pack of tools that will help you get the most out of Paint.net. It allows you seamlessly transition between layers, add GIFs, and create custom brushes for your project. Using Simon B’s Plugins, you’ll also be able to add text to your project, something that you cannot do in default mode.
 With 43 plugins in the package, BoltBait’s Plugin Pack is considered by many to be the best tool for Paint.net. With BoltBait’s plugin pack, you will be able to work with a rainbow palette, a wide range of different shapes, and much more. If that isn’t enough, you can use the Bevel Object plugins that you get with this pack to make 3D objects in your Paint.net project.
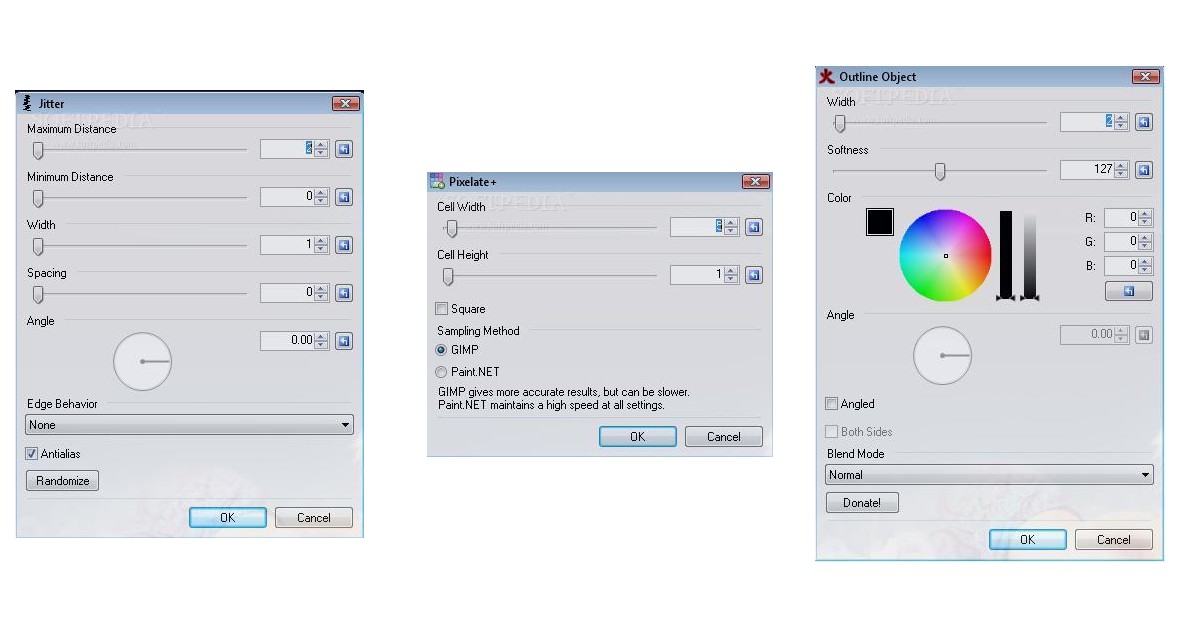 With Pyrochild Plugins you will get access to features like gradient bars, jitter, film, etc. It also includes a Curves+ plugin, which is a significant improvement over Paint.net’s native Curve adjustment tool. Pyrochild Plugins also come with the Colour Match tool which can be used to edit your photo to follow a different colour scheme.
 dpy’s Plugin Pack has a very creative set of tools designed for people who want to get the most out of Paint.net. The Black & Alpha+ plugin and the perspective effect are both very unique tools that will greatly enhance your edited images. On top of that, dpy’s plugin pack also offers a wide variety of text effects, speech bubbles, metallic effects, and a lot more.
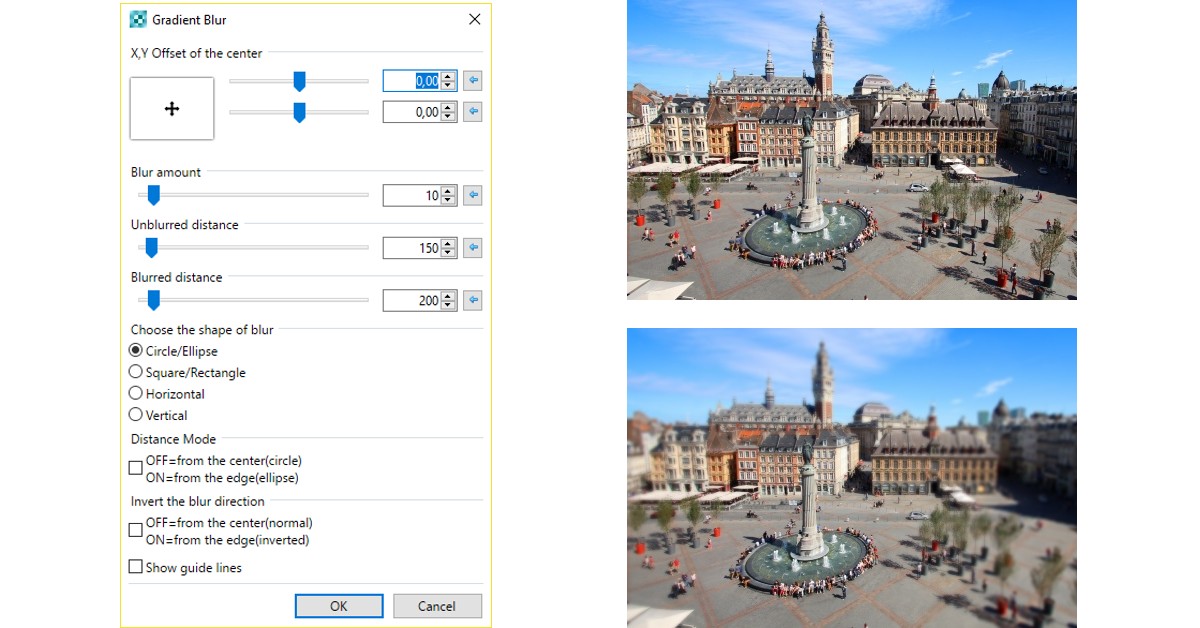 Consisting of 78 tools, MadJik is the biggest plugin pack available for Paint.net. Once you download the MadJik plugin pack you will find a tool for most of your needs, ranging from gradient blur to fractal curly tree. MadJik is one of the most frequently updated packs, so you’ll always have something new to try out. This makes MadJik one of the most essential Paint.net plugins in 2022.
Read Also: How to install Windows 10 using a pen drive
These 5 essential Paint.net plugins will cover all of your photo-editing needs. While most of them are free to use, some may require a small donation to the developer. If you want to explore more plugins, Paint.net forums are always brimming with new tools for users to test. You can even ask for plugin recommendations based on the needs of your project.
For the latest gadget and tech news, and gadget reviews, follow us on Twitter, Facebook and Instagram. For newest tech & gadget videos subscribe to our YouTube Channel. You can also stay up to date using the Gadget Bridge Android App.
Consisting of 78 tools, MadJik is the biggest plugin pack available for Paint.net. Once you download the MadJik plugin pack you will find a tool for most of your needs, ranging from gradient blur to fractal curly tree. MadJik is one of the most frequently updated packs, so you’ll always have something new to try out. This makes MadJik one of the most essential Paint.net plugins in 2022.
Read Also: How to install Windows 10 using a pen drive
These 5 essential Paint.net plugins will cover all of your photo-editing needs. While most of them are free to use, some may require a small donation to the developer. If you want to explore more plugins, Paint.net forums are always brimming with new tools for users to test. You can even ask for plugin recommendations based on the needs of your project.
For the latest gadget and tech news, and gadget reviews, follow us on Twitter, Facebook and Instagram. For newest tech & gadget videos subscribe to our YouTube Channel. You can also stay up to date using the Gadget Bridge Android App. 
In This Article

In This Article