

In This Article
What is Vanish Mode on Instagram?
First rolled out for Facebook Messenger in 2020, Vanish Mode was later incorporated into Instagram Messenger as well. To put it simply, Vanish Mode is similar to Snapchat’s ephemeral messaging where the messages self-destruct after the chat has ended. Any message you send once Vanish Mode has been turned on will disappear as soon as it is read by the receiver. Once Vanish Mode has been turned on, Instagram notifies both parties whenever either one of them takes a screenshot of the conversation. Another thing you need to know is that Vanish Mode cannot be used retroactively. Any messages you send before turning on Vanish Mode will stay in the chat unless you ‘unsend’ them. If the receiver takes a screenshot of those messages, you will not be notified.How to use Vanish Mode?
Before you start using Vanish Mode, you need to make sure your Instagram Messenger is updated. If it isn’t updated, Instagram will prompt you to update Messenger as soon as you try turning on Vanish Mode. Vanish Mode cannot be used in group texts. On top of that, both parties must follow each other to make use of Vanish Mode. Here’s how you can enable it. Step 1: Open the Instagram app and swipe right to the DM window. Step 2: Open the conversation in which you want to use Vanish Mode. Step 3: Scroll down to the very bottom of the conversation and swipe up.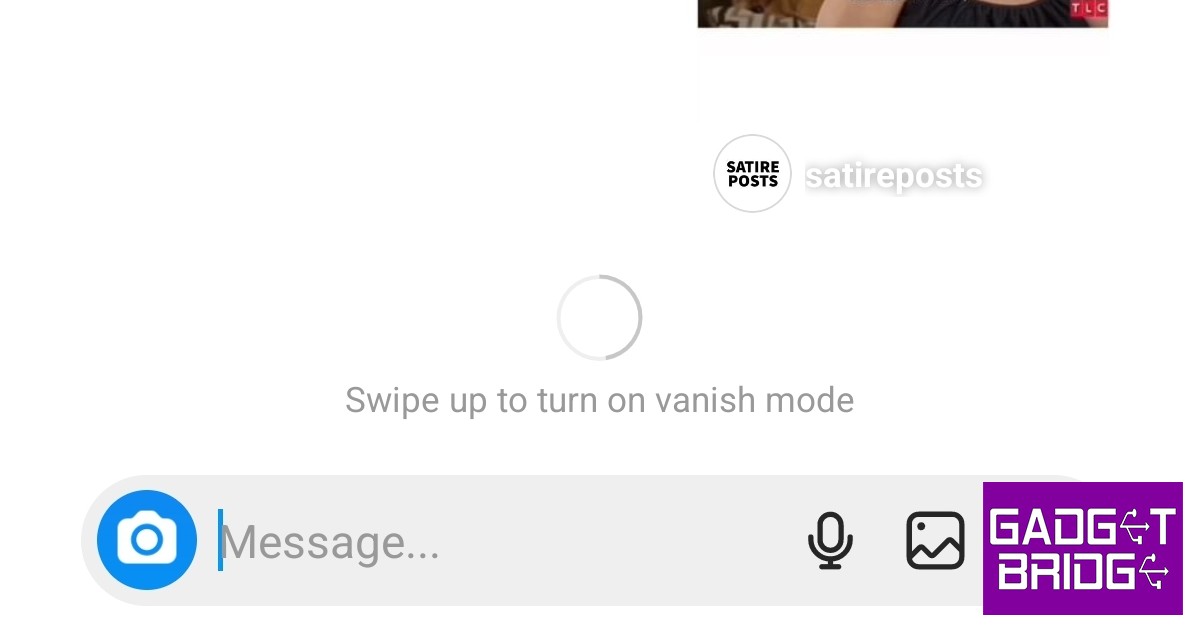 Step 4: Drag and hold the screen until it says ‘Release to turn on vanish mode’.
 Step 5: Release the screen to activate Vanish Mode. Once Vanish Mode is activated, the chat window will turn dark. If it doesn’t turn dark, it means that Vanish Mode failed to activate and you need to try again.
 Swipe up and release again to disable Vanish Mode.
When should you use Vanish Mode?
Since most people like to keep a record of their conversations, using Vanish Mode at all times is certainly not ideal. However, it is a very useful feature for securing private conversations and making sure no one else can view them apart from the receiver. The message notifications you receive from chats that are in Vanish Mode do not contain the contents of the text. This comes in handy when you’re in public and do not want people around you to view any message that pops up on the screen. Since you get notified any time someone takes a screenshot, the chances of your conversations getting ‘leaked’ are reduced as well. If you are sharing some sensitive information that you do not want anyone else other than the receiver to access, make sure you turn on Vanish Mode first. Read Also: Motorola Edge 30 Ultra 12GB variant is now available in IndiaConclusion
Vanish Mode doesn’t just apply to texts. Any media, emojis, emojis, or voice notes you send in Vanish Mode get deleted as soon as they are viewed. A lot of people can take undue advantage of this feature, so make sure you report any inappropriate messages to Instagram. You can also unfollow or block them to keep them from using the Vanish Mode.
For the latest gadget and tech news, and gadget reviews, follow us on Twitter, Facebook and Instagram. For newest tech & gadget videos subscribe to our YouTube Channel. You can also stay up to date using the Gadget Bridge Android App. You can find the latest car and bike news here.

 Step 4:
 Step 3:
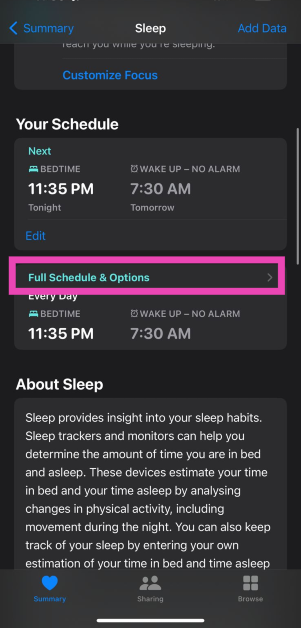
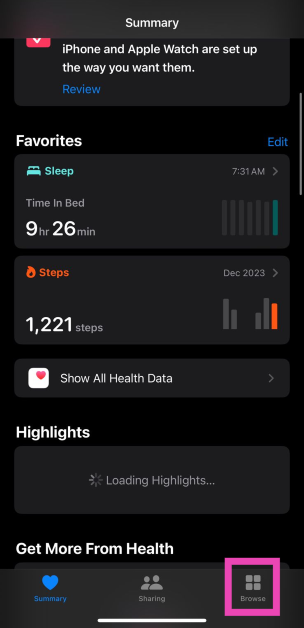 Step 2: Tap on Sleep and select Full Schedule & Options.
 Step 3: Hit the Edit button under the sleep schedule and select Delete Schedule.
 Step 4: Now, select Set Your First Schedule and create a new sleep schedule.
Step 5: Turn on the toggle switches for Sleep Schedule and Use Schedule for Sleep Focus.
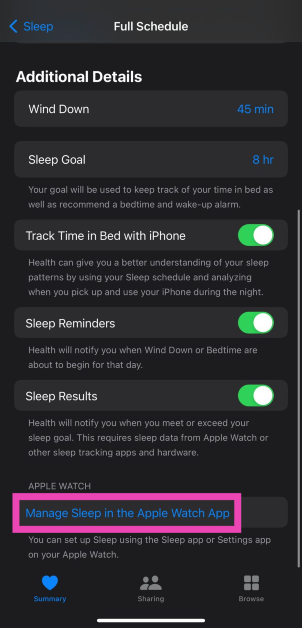
Step 6: Select Manage Sleep in the Apple Watch app.
Step 4: Now, select Set Your First Schedule and create a new sleep schedule.
Step 5: Turn on the toggle switches for Sleep Schedule and Use Schedule for Sleep Focus.
Step 6: Select Manage Sleep in the Apple Watch app.
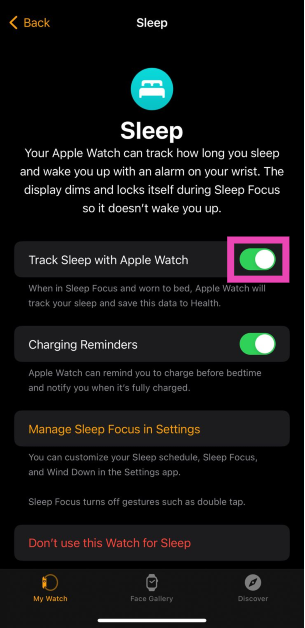
 Step 7: Turn on the toggle switch for Track Sleep with Apple Watch.
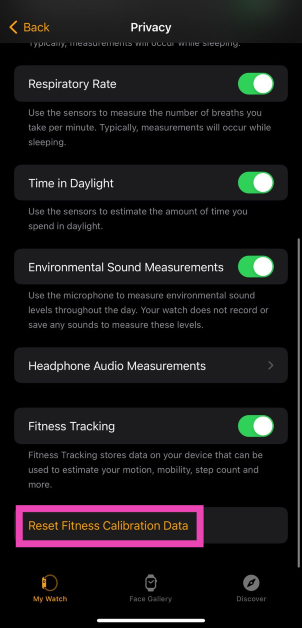
 Step 4: Tap on Reset Fitness Calibration Data.


 Step 3:
  Step 4:
 Step 5:
 for entry-level smartphones announced")


 Step 2: Tap on ‘Data Usage’.
 Step 3: Select ‘Data Saver’.
 Step 4: Turn off the toggle bar for ‘Turn on now’. You can also allow the Facebook app to use data while the data saver is turned on.

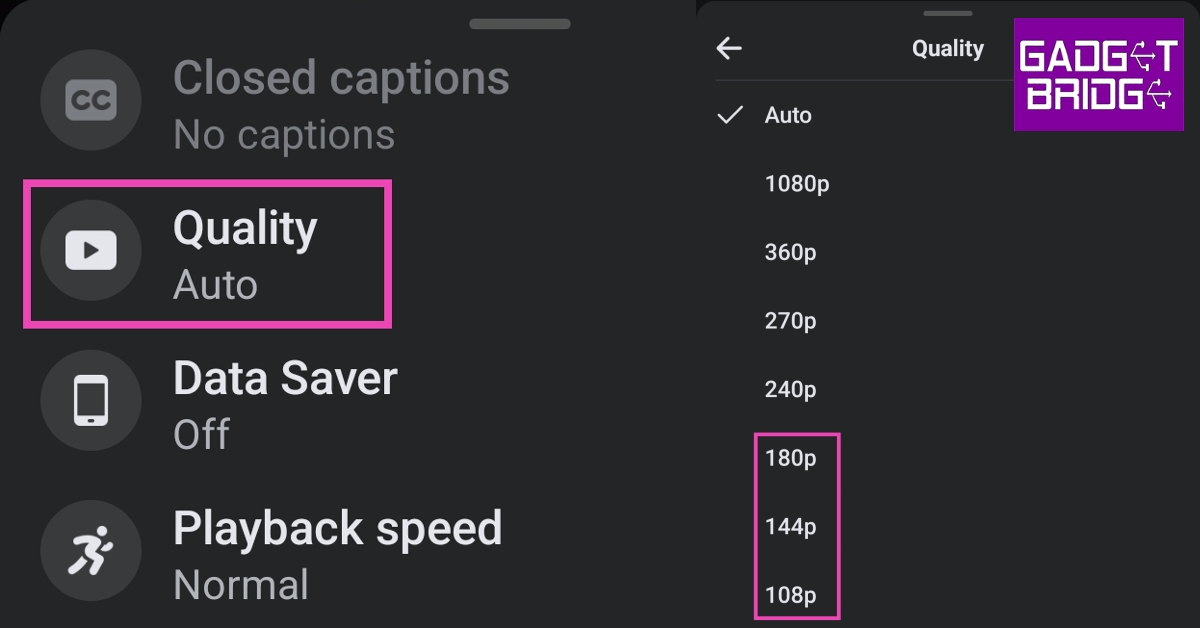 If you are experiencing lags and constant buffers while watching videos on Facebook, try changing the video quality. Streaming in high resolution asks more from your internet connection. Set the video quality to a lower resolution for smooth playback. Tap on the gear icon in the media player, select ‘Quality’ and switch to a lower resolution.
 Step 2:
  Step 3:
  Step 4:


 The device will ask for your google credentials to unlock the FRP.
Now there are instances where you can’t unlock the FRP because you don’t know the password.
Some of these scenarios are mentioned in the paragraph below.
The device will ask for your google credentials to unlock the FRP.
Now there are instances where you can’t unlock the FRP because you don’t know the password.
Some of these scenarios are mentioned in the paragraph below.
 3. Connect your Android device to your pc using a USB cable and press Start.
 (If the app has trouble detecting your device, it will give you a prompt. Reconnect your USB cable and try again or try with another cable.)
4. Be patient on the next screen as the app prepares the configuration file for your device.
(If the app has trouble detecting your device, it will give you a prompt. Reconnect your USB cable and try again or try with another cable.)
4. Be patient on the next screen as the app prepares the configuration file for your device. 5. Once you reach the next screen, tap on Start to Bypass.
 6. The next step is to put your phone in recovery mode, for which instructions will be displayed on the screen.
 7. Once in recovery mode, look for the number right before the “/” on your Android device’s recovery page. Select the correct version of your device on your pc according to the number on the device.
 8. Once the correct version is selected, tap on Download Now.
 9. Once downloaded, the bypass process will start. Then, follow the instructions in the DroidKit interface to complete the bypass.


 Google Play Service is what links the apps you install on your device to your account. If there is a fault with Google Play Services, you will experience frequent crashes on different apps. To clear the Google Play Services cache go to Settings>Apps>Google Play Services>Storage>Clear cache.
 Messenger is one of the apps that serves a very limited purpose if it isn’t allowed to function in the background. You won’t receive any new messages if background usage for Messenger is disallowed. In some cases, the app may crash as soon as you open it. This is more likely when you receive tons of messages at once. Allowing background usage ensures that the app isn’t overwhelmed by the volume of new messages every time you launch it. Go to Settings>Apps>Messenger>Battery and select ‘Unrestricted’.
 featuring A15 Bionic chip and HDR10+ support launched in India")


")


 While we’ve picked the best smartphones across all categories in this list, the