
")
In This Article
Restart your device
 In most electronics a simple restart creates wonders. Restarting your device will give it a fresh start and allow the application to start again which will clear some basic bugs if any case they might have triggered while using Google Maps.
Location permission
Google Maps asks for permission for location, if by chance you have not given all the location permission the application will create a problem. Here is how to check and rectify. Step 1 – Hold the application for two seconds and tap on app info. Step 2 – Select Permission.
 Step 3 – Tap on the location
Step 4 – Now select Allow all the time.
Step 3 – Tap on the location
Step 4 – Now select Allow all the time.
 Open Google apps and try again if it solves the problem.
Try updating the app
Updating the application fixes some features and adds features to the application. There might be some update pending on Google Maps so it’s better to check and get it updated. Step 1 – One Google Play Store. Step 2 – Tap on the profile picture. Step 3 – Select My apps & games
Step 4 – Click Update all.
Step 3 – Select My apps & games
Step 4 – Click Update all.
 If you do not want to update all apps, update Google Maps selectively. After that check, if the solution worked for you.
Uninstall updates
Doing so will convert the applications back to factory settings so by any chance if you update Maps with a buggy version, it will solve the problem. Here is how to do it. Step 1 – Hold the application for two seconds to find the app info setting.
Step 2 – Tap on the 3 dot burger sign and select Uninstall updates.
 Following these steps, the app will go back to the factory setting, see if this method works for you.
Read Also: How to live with a smartphone with low internal storage
Following these steps, the app will go back to the factory setting, see if this method works for you.
Read Also: How to live with a smartphone with low internal storage
Force Stop
 If you are making changes to the application data and it is open in the background, there are chances that these changes won’t affect it. To make it work you need to force stop the application completely. Hold the application, go to app info and press force stop.
Clear data and cache
 Buggy data or bad cache can be a major problem as to why your application is not functioning properly. You can clear the data and cache files by long-pressing the application. Heading to app info and then storage and cache. First try to clear the cache and see if it works for you, if not try removing the app data as well.
Check if Google Maps is down
 If Google Maps is experiencing a server outage, the app will not refresh on your device. To make sure this is the case, go to Downdetector.in and search for Google Maps. If you notice a spike in user reports, it means the service is temporarily down. Wait for Google to restore the servers or use an alternative like Waze or HERE WeGO.
Check the network connection
If the strength of the network connection on your phone is low, you will certainly face issues with the Google Maps app. Switch to a better WiFi network and try again. If you’re on the go, toggle Airplane Mode on and off to refresh the mobile internet network. You can also try using a WiFi hotspot from another device.Disable WiFi Only Mode
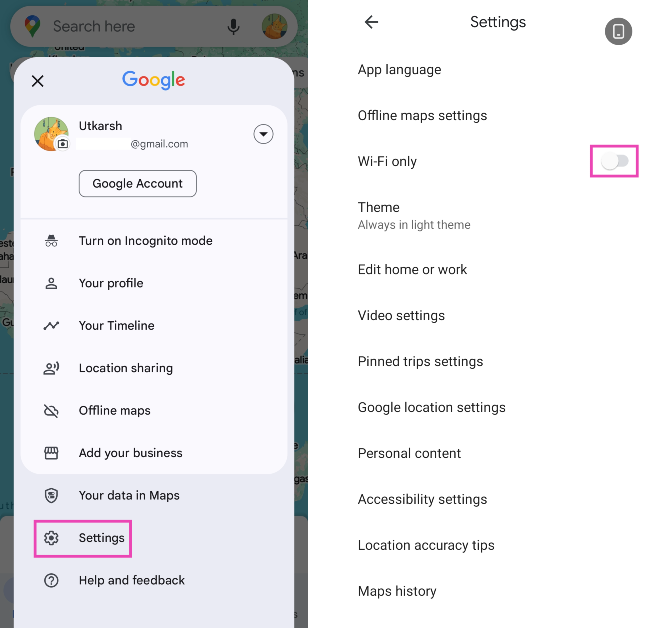
The WiFi Only Mode on Google Maps does not let the app work on mobile data. Here’s how you can turn it off. Step 1: Launch the Google Maps app and tap your profile icon at the top right corner of the screen.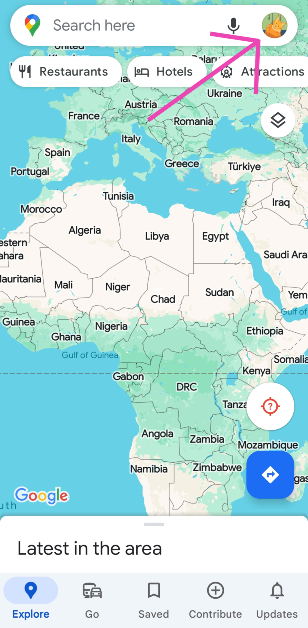 Step 2: Tap on Settings and turn off the toggle switch for WiFi Only.
Unrestricted data
Due to Android’s smart management, it restricts data of applications that have not been used and still takes memory in the background. There is a good chance that this thing might have been interfering with the proper functioning of Google Maps. Here is how to fix it. Step 1 – Hold the Google Maps app to discover more settings. Step 2 – Tap on the App info.
Step 3 – In the application setting tap on Mobile Data and Wi-Fi.
Step 4 – Make sure both the Background data and Unrestricted data usage options are turned on.

Reset Google Play Services
Google Play Services keep all the Google applications working together and run constantly in the background. So in a nutshell, if the Google Play Services are not working fine it will create problems with maps and other applications as well. To solve it try the below method. Step 1 – Go to Settings and open Apps. Step 2 – In the list of applications search Google Play Services.
Step 3 – Head to storage and then clear all data.
Step 2 – In the list of applications search Google Play Services.
Step 3 – Head to storage and then clear all data.
Location accuracy
By enabling high accuracy mode, Google Maps will be able to know your location more accurately. Though these options consume more data and battery it is required by the application to work properly. Step 1 – Open Settings Step 2 – Look for location. Step 3 – Head to advance.
Step 4 – Here, select Google Location Accuracy.
Step 3 – Head to advance.
Step 4 – Here, select Google Location Accuracy.
 Step 5 – Toggle on Improve Location Accuracy.
 Fire up the application and see if it works. This should fix your Google Maps if it is not working.
Calibration
Google Maps shows you your precise location. To achieve that calibration is very important. If the compass is not properly calibrated the Google map will not work properly and give incorrect locations. It’s easy to manually calibrate your Google Maps. Step 1 – Open Google Maps and tap on the blue circle(your current location). Step 2 – An option list will open with calibration as an option on it. Step 3 – Calibrate your phone following the instructions on the screen.
 This should most probably fix the problem and your Google Maps should be working fine again.


")

 If your phone’s power button is broken, it can be quite tricky to restart it. Luckily, fixing it doesn’t always have to be tedious. There are a couple of ways you can go about it, depending on the nature of the problem. If your power button isn’t working due to the dirt that has accumulated around it, take a cotton swab, dip it in isopropyl alcohol, and gently rub the area surrounding the power button. If the button is stuck, take a hair dryer and use it to warm up the button. This will loosen it up a little.


 Read Also:
 : Keeping it clean")
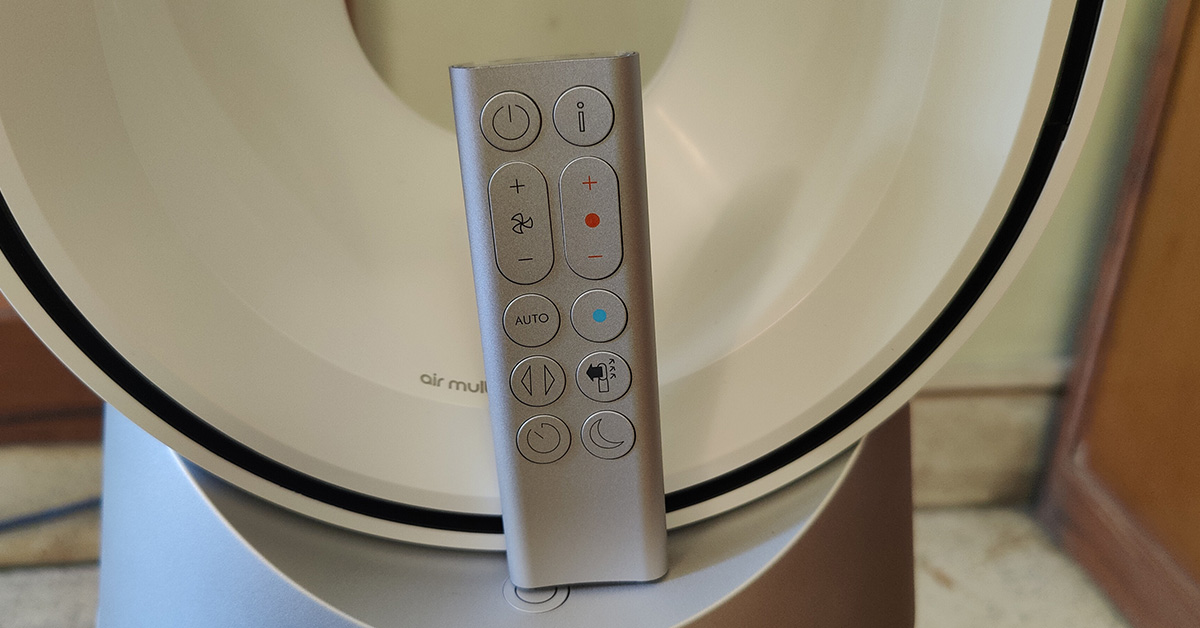
 The twin enclosures at the bottom hide the HEPA H13 filters inside. The process to install them is fairly simple just snap them in and place them onto the Dyson Purifier Hot+Cool. A power button and an LCD screen can also be found on this air purifier which shows fan speed, air quality etc. A remote is also supplied with the air purifier to operate it. The remote is magnetic and can be placed magnetically on the top of the device. The purifier also has oscillation, and it can rotate up to 350 degrees.
 In terms of dimensions, the Dyson Purifier Hot+Cool weighs 5.7Kg, 30-inch in height, 9.7-inch in width (at its fattest point) and has a 15AMP three pin plug with a cord length of 1.8 meters (5 feet 9-inches).
 The company says it can cool in summers as well, but it is not an A/C replacement. It will blow out a gush of air towards you at super high speed, so it can cool you off quickly on a hot day, but that is it. Over that, Dyson does extensive tests before bringing out a product. This time they did a CADR Vs Polar test. The previous is the industry standard, but the polar test is a more advanced version, which Dyson conducts. Putting it in layman terms, the Dyson Purifier Hot+Cool can purify air systematically from every nook and corner of the room (filtering the smallest particles) unlike most air purifiers that just clean around the place they have been placed.
Talking about which, the Dyson Purifier Hot+Cool is ideal for rooms up to 300 square feet. Which covers most of the rooms in an Indian household. Not only this, it can not just remove particles as small as 0.1 microns, but thanks to the activated carbon inside the filters it can remove odour as well.
There are multiple levels of fan speed available on this device. At the highest level, we would not call it quiet, but it is needed if you want to quickly purify the air around you. There is a sleep/night mode available too that reduces the brightness of the LCD screen as well as keeps the fan noise to a bare minimum. There is another smart feature added to this AP (air purifier). Dyson Purifier Hot+Cool also supports voice commands with the help of
The company says it can cool in summers as well, but it is not an A/C replacement. It will blow out a gush of air towards you at super high speed, so it can cool you off quickly on a hot day, but that is it. Over that, Dyson does extensive tests before bringing out a product. This time they did a CADR Vs Polar test. The previous is the industry standard, but the polar test is a more advanced version, which Dyson conducts. Putting it in layman terms, the Dyson Purifier Hot+Cool can purify air systematically from every nook and corner of the room (filtering the smallest particles) unlike most air purifiers that just clean around the place they have been placed.
Talking about which, the Dyson Purifier Hot+Cool is ideal for rooms up to 300 square feet. Which covers most of the rooms in an Indian household. Not only this, it can not just remove particles as small as 0.1 microns, but thanks to the activated carbon inside the filters it can remove odour as well.
There are multiple levels of fan speed available on this device. At the highest level, we would not call it quiet, but it is needed if you want to quickly purify the air around you. There is a sleep/night mode available too that reduces the brightness of the LCD screen as well as keeps the fan noise to a bare minimum. There is another smart feature added to this AP (air purifier). Dyson Purifier Hot+Cool also supports voice commands with the help of 


 Read Also:
 Read Also:


