Apple ID helps you connect to all Apple devices. The unique ID created will keep your settings and Apple services up to date on all of your Apple devices. It protects the security of your personal information from any unauthorised login. And in case, you want to remove your Apple ID from your devices you have the option to remove it. Follow the guide in case you want to remove the Apple ID from your iPhone or iPad.
In This Article
Remove on your iPhone
The Apple ID helps you access many Apple services: Apple Store, Apple Music, iTunes, as well as the cloud. Apple ID creates an identity on the iOS and Mac devices. Hence, connecting your Apple ID is important so that you stay connected with apps and data including photos and documents, emails and text messages, and even your iTunes library. However, when you decide to not use the device anymore or decide to sell the device it is advised not to keep the Apple ID on the device. Apple devices allow you to remove your Apple ID in a few easy steps using the device settings.
On your, iPhone go to settings: Gear-shaped icon
Click on the Apple ID on the top of the screen
Now tap on the iTunes & App store
Then go to Apple ID
Tap View Apple ID
Then click Remove this device
Again go back to the Apple ID page: before iTunes & App store
Connecting Apple ID on your Apple devices gives you accessibility to your private data and apps on any Apple device. To know little about Apple ID it is an authentication method for iPhone, iPad, Mac, and other Apple devices. It helps you to connect with all the Apple devices with one account. When creating an account or Apple ID requires some personal information. So when you want to sell away a device or give away a device it is advised to always remove the Apple ID before giving it away. See how to remove your Apple ID on your Apple ID for safer use. Here is the guide.
On your iPad go to settings
And tap on the image or name icon on the top
Go to iTunes& App store
Click the Apple ID on the top of the screen
Press View Apple ID
Click Remove this device
Now the page will open to enter the password and email ID
Poco X2 users have been complaining of some camera issues with the company. The device comes equipped with a quad rear camera set up and was launched in India earlier last year. The users of the phone have reported the unresponsive camera app when the rear camera is launched. The affected users are mostly reported from India and now the company has issued a fix for the non-working rear camera of Poco X2.Until now there was no fix for the Poco X2 camera issue. As per the users, every time the camera app is launched on the handset it shows a black screen, freezes or crashes unexpectedly. The users have been reporting this issue for some time and now the company has shared a manual fix guide for the handset’s camera functioning.
Here is how to fix the Poco X2 camera issue for smooth functioning
According to Poco India support, less than 0.2 percent of the total Poco X2 user base in India have been experiencing the camera issue. For this, the company has detailed out some manual fixes which are expected to work for most of the devices. Follow these software solution protocol mentioned below:
Clean the camera app data: Open settings and search for managed apps.
Now search for the camera and then open Clear Data.
Then Clear all data and hit OK.
The next step is to reboot the device
After following the above-mentioned steps, check if the camera is working.
In case the issue persists, the Poco X2 users are requested to follow the hardware solution protocol below:
The issue should be reported on the Services and Feedback app which can be found in the app drawer.
Upload the logs under the camera section.
After reporting the issue, approach Poco India support or your nearest authorised service centre along with the feedback ID generated by the app.
One should take a prior appointment before visiting the service centre.
To recall,Poco X2 was launched in India last year and it comes equipped with a quad rear camera set up that includes a 64-megapixel primary sensor with f/1.89 aperture. Further assisted by an 8-megapixel wide-angle lens with a 120-degree field of view, two-megapixel macro lens and a 2-megapixel depth sensor for portrait shots. While on the front it sports a dual-camera setup with the 20-megapixel main camera sensor and a 2-megapixel depth sensor for taking selfies and video calls.
For the latest gadget and tech news, and gadget reviews, follow us on Twitter, Facebook and Instagram. For newest tech & gadget videos subscribe to our YouTube Channel. You can also stay up to date using the Gadget Bridge Android App.
We had been intrigued to use the Vivo X60 Pro smartphone ever since it was launched. The device runs Qualcomm Snapdragon 870 processor, sports triple rear cameras with support for gimbal stabilization, and has a curved display. Who wouldn’t want to use it? We got the chance and we spent a few days using it extensively and here’s our review of Vivo X60 Pro:
In This Article
Vivo X60 Pro design and display
In terms of the design, the Vivo X60 Pro smartphone does bear a resemblance to its predecessor, but then that’s hardly a reason to complain because it looks sleek. The handset’s front panel is dominated by its 6.5-inch AMOLED display that is curved on both sides and is outlined by thin bezels. The selfie lens of the smartphone is placed in a hole-punch camera that is placed in the centre of the top of the screen. If you enable the fingerprint lock, it will appear on the lower half of the display. Flip over and you will see the back panel of the Vivo X60 Pro which has a matte finish and is protected by a layer of Corning Gorilla Glass 6. There is a camera module on the top left of the back panel that houses three lenses and an LED flash. On the bottom left, you can find the Vivo branding. The metallic Power and the Volume Rocker keys are sandwiched on the right edge of the smartphone. The bottom edge has the speaker grill, Type-C charging port and SIM tray, and the microphone, while the secondary microphone is placed on the top.
It is worth noticing that Vivo X60 Pro is available in Midnight Black and Shimmer Blue colour options, and the one that we got for review was dressed in Black.
Coming to the 6.56-inch AMOLED Full-HD+ display, it comes with a maximum refresh rate of 120Hz, however, the option of switching it to 60Hz is also there on the device. In fact, with Smart Switch enabled, the smartphone automatically switches between 60Hz and 120Hz. The display of the device is great and the colour reproduction is excellent. We watched several shows on Netflix and YouTube during our time with the device and the experience was flawless. Even the sunlight readability and the viewing angles of the smartphone were good. Vivo X60 Pro’s display is protected with Schott Xensation Up glass.
To sum it up, we would say that although the design of Vivo X60 Pro is very premium and several aspects contribute to the upmarket looks. However, at this price point, it could have also included some other features like IP rating and wireless charging. The display, on the other hand, offered a great experience to us at all times.
Vivo X60 Pro performance and cameras
Before talking about the performance of the Vivo X60 Pro, let’s take a minute to discuss the rest of its specifications. The device is powered by Qualcomm Snapdragon 870 processor and comes with 12GB of RAM and 256GB of internal storage. The smartphone houses a 4,200mAh battery and comes with a 33W charger. For imaging duties, there is a 48MP primary camera coupled with a 13MP ultra-wide sensor and a 13MP Portrait sensor. On the front panel, there is a 32MP selfie camera. Vivo X60 Pro runs Android 11 skinned with the company’s own Funtouch OS 11.1. Despite being so expensive, the smartphone comes with quite a few bloatware apps including Moj, Prime Video, Amazon, DailyHunt, Facebook, Snapchat, etc. The device also has V-Appstore, which along with DailyHunt sends quite a few notifications. While DailyHunt can be uninstalled, V-Appstore cannot. In terms of connectivity, Vivo X60 Pro comes with support for dual-band Wi-Fi, 4G VoLTE, 5G, and Bluetooth 5.1.
As expected, Vivo X60 Pro’s performance is super smooth and the smartphone can handle any task that’s thrown at it. We used the device extensively during our time with it and multitasked a lot on it, but there was nothing that made the performance lag even for a minute. We multiple apps on the smartphone, a lot of them were graphic-heavy, but there wasn’t anything that didn’t run smoothly.
We have already mentioned that our experience with watching shows on Netflix was good. The video experience was great and the phone didn’t warm up. The sound quality was good too, but in this price range, we have seen better than Vivo X60 Pro’s audio output. We also played several games on the smartphone including Asphalt 9: Legends. We didn’t notice any stutter while playing the game, even though it has some very heavy graphics, but we did see that the battery fell quickly while gaming. However, this doesn’t mean that we don’t recommend the handset for gamers.
Coming to the battery life, the smartphone’s juice lasted at least a day for us with moderate usage. Gaming, watching Netflix shows and a lot of camera usage will reduce this time, but the 33W charger can fully charge Vivo X60 Pro’s battery in an hour so it’s hardly something to complain about.
Finally, let’s talk about the cameras of the Vivo X60 Pro, which are certainly a positive aspect of the handset. The 48MP primary camera has a Sony IMX598 lens and besides this, the device also comes with a 13MP ultra-wide angle lens and a 13MP portrait sensor. The camera app on Vivo X60 Pro is simple to use and has several modes that the user can choose from. It is also backed by AI so cameras can get switched automatically depending on how close you are to the object, and there is a scene optimizer too.
Clicked by the 48MP primary camera
The shots that we clicked from the primary camera turned out to be excellent. We tried clicking from the lens in daylight, during the night and even indoors, and it performed well regardless of the conditions around. There is also an option of clicking images in 48MP UHD, and you might like the feature if you like zooming in a lot on pictures. However, they were grainy on zooming in as compared to the default 12MP shots that are taken from the primary lens. The lens also comes with a gimbal stabilisation system, which means that it physically moves to alter out the shakes while clicking pictures or shooting videos. The feature existed on the smartphone’s predecessor too, and we think it’s a huge plus.
Clicked by the 13MP ultra wide camera
As expected, the quality of images does drop when the cameras are switched, but it wasn’t at all bad. It may not match up to the primary camera, but the image quality remained good. Both the 13MP cameras – ultra-wide and portrait – managed to click images with a good amount of details. The lenses clicked decent pictures in low light too, although enabling the Night Mode improves the output a lot.
Finally, the 32MP selfie camera takes amazing shots in well-lit as well as in dimly-lit surroundings. We are really happy with the selfies we managed to click from Vivo X60 Pro. To make it better for selfie lovers, the device gives users a lot of control in terms of letting them see the effect of filters or different levels of blur before clicking pictures from the front camera. To sum it up, we would again say that the cameras of the smartphone are definitely among its best aspects.
Verdict
At Rs 49,990, Vivo X60 Pro competes with one of the best smartphones in the market. And also, we can say confidently that it is a worthy competitor. The performance is smooth, the display gave us a great experience, and the cameras are simply amazing. Even gaming on the device was good. These are more than enough reasons to go for the device. While the bloatware on the smartphone and the lack of IP rating and wireless charging are cons, if they aren’t deal breakers for you, you would be happy with Vivo X60 Pro.
Pros
After it was banned in India, PUBG Mobile has finally succeeded with Battlegrounds Mobile India, which is a dedicated and exclusive game for the Indian market. Also, the open beta went live on Thursday and was made available for download via Google Play. However, we are pretty much sure the game will not last in the beta phase as it might get launched soon. Until the original version is not launched, you can enjoy the beta version. So for those who were eagerly waiting for the relaunch here is our guide on how to download the Battlegrounds Mobile India on Android devices.
How to download and install Battlegrounds Mobile India on Android devices:
To become a tester all you need to do is join the testing program for Battlegrounds Mobile India by clicking on thislink.
Once you have joined the testing program, download and install the Battlegrounds Mobile India app from theGoogle Play Store which is 721 MB in size. So before installation make sure you have sufficient storage on your device.
The next step is to open the app on your phone and select from the preferred options from HD and Low-spec.
Log in and you are good to go.
Another way of accessing the game is by downloading the Tap Tap app. Here is our step-by-step guide:
PDF files have been used for documentation widely. If you are using PDF files daily you should learn how to edit and compress them. The Portable Document Format better known as PDF in daily terms provides you with the best format to store your valuable documents. The storage of PDF files can be compressed to free up disk space. This is how you can compress PDF files for free.
In This Article
Compress the PDF using Adobe Acrobat
Adobe Acrobat can optimise your PDF file size to the file size you require. The process of compressing a file in Acrobat online is fairly simple. You have to copy or upload the file in the Adobe tool and it lets you reduce the size of the file without compromising its quality. The Adobe Acrobat online compression tool can let you compress files up to 500 MB. To check the size of the file after compression you can check it on Properties. Follow the steps to compress PDF files in Adobe Acrobat.
Go to the online page
Select the file you want to compress from your device
This option is for Mac users. There might be a lot of restricted functions when you use a Mac. Downloading an application can be harder. But you can compress a PDF file using the Preview application and save storage. Preview is Apple’s native image viewer app that is automatically included in most versions of Mac OS. Follow to learn how to compress a file on a Mac.
Open Preview on your Mac: looks like an overlapping snapshot in your application folder
Click menu bar
From the drop-down menu click menu
Select a file on the dialog box and open
Click file again on the menu and from the drop-down menu select export
From the top of the page on the screen choose the option and enter as required
PDF files are to present documents in a manner independent of application, hardware, and operating system. A large size PDF file can take up a lot of storage on your device. PDF is now accepted widely for work or education for the documentation process. However, a PDF often needs to be compressed to a particular size. EasePDF lets you convert the PDF file is an easy step. EasePDF is an online PDF converter specialising in PDF conversion technology. The online PDF converter has more than 20 tools for its users. EasePDF is more than a converter you can merge, unlock, and protect your PDF also. These are the steps to follow:
Click on the Compress PDF option shown on the screen
Now upload your PDF file on the page
Select the Mode or it has its default selection by clicking recommended
Press Compress PDF
And save your file
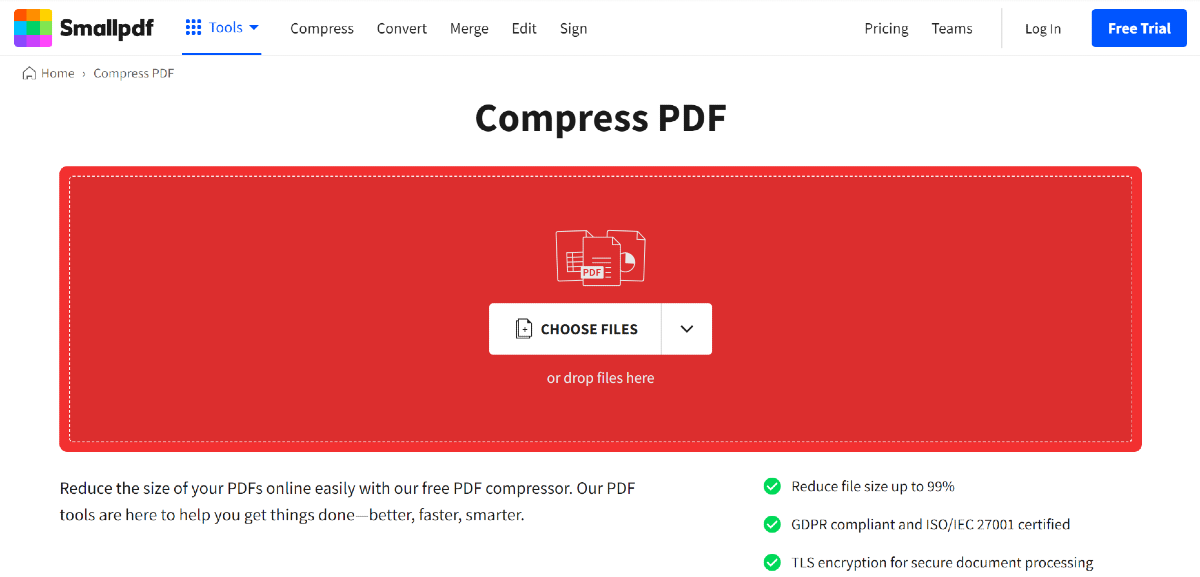
Use Small PDF
Small PDF is another website you can use to compress any PDF to a more desirable size. Simply go to the Small PDF website, select the ‘Compress PDF’ option, drop a file in the red box or upload a file from your PC, choose a compression level, and let the website do its thing. Once the PDF has been compressed, hit the ‘Download’ button.
Use Adobe Acrobat Pro
If you use the Adobe Acrobat Pro tool on your PC, you don’t need a third-party tool to compress a PDF. Simply open the PDF in Acrobat Pro, click on ‘File’, select ‘Compress PDF’, and choose the destination for the compressed file.
Frequently Asked Questions (FAQs)
Which are some of the best online tools to compress a PDF?
You can use Small PDF, Adobe Online Compressor, and Ease PDF to reduce the file size of any PDF for free.
How long does it take to compress a PDF?
Depending on the file size, it can take anywhere between a few seconds to a couple of minutes to compress a PDF.
These are the top 5 ways to compress PDF files for free. If you know any other online tools that can accomplish this task for free, let us know in the comments! If these methods do not work for you, let us know and we will suggest other options!
Samsung today has officially announced the launch of two new tablets in the Indian market. The company has introduced Samsung Galaxy Tab A7 Lite and Galaxy Tab S7 FE that were launched in the UK prior to coming to India. Both the devices come with different specifications as well as are similar in design. The Galaxy Tab S7 FE is an affordable variant of the expensive S7 whereas the Galaxy Tab A7 Lite is a toned-down variant of Tab A7. Samsung Galaxy Tab S7 FE, Samsung Galaxy Tab A7 Lite price and availability detailsSamsung Galaxy Tab S7 FE has been launched in India with a price tag of Rs 46,999 for the 4GB RAM with 64GB storage whereas the 6GB RAM with 128GB storage variant at Rs 50,999. The Tab will be offered in four colour options of Mystic Black, Mystic Green, Mystic Pink, and Mystic Silver. On the other hand, the Galaxy Tab A7 has been introduced in two variants: LTE and Wi-Fi. Both the variants will be available in 3GB RAM with 32GB storage priced at Rs 14,999 and Rs 11,999 respectively.Both the tablets are scheduled to go on sale in India on June 23 via Samsung.com, Samsung Exclusive Stores and leading online and offline retail partners. The launch offers include Rs 4000 cashback on HDFC Debit Card and Credit Card transactions and Rs 10000 off on the Keyboard Cover. Not only this, on Galaxy Tab A7 Lite, you can get up to 6 months of no-cost EMI which means that you can now own Galaxy Tab A7 Lite starting at Rs 2499/- per month.Samsung Galaxy Tab S7 FE 5G specificationsSamsung Galaxy Tab S7 FE features a 12.4-inch WQXGA TFT display with 2,560×1,600 pixels of resolution. The device runs on Samsung One UI based on top of Android 11 and is powered by Qualcomm Snapdragon 750G SoC with up to 6GB of RAM and 128GB of storage options. The storage can be expanded up to 1TB via a microSD card.The tablets come with an 8-megapixel main rear sensor that supports 1080p video recording at 30fps. On the front, there is a 5-megapixel camera sensor for taking selfies. In terms of connectivity, there is Bluetooth v5, USB Type-C port, Gigabit Wi-Fi GPS, and a USB Type-C 3.2 Gen1 port. There is an accelerometer, compass, gyroscope, ambient light sensor, and hall sensor. Moreover, it packs a 10,090mAh battery with 45W fast charging support.Samsung Galaxy Tab A7 Lite specificationsSamsung Galaxy Tab A7 Lite is highlighted with an 8.7-inch WXGA display having 1,340×800 pixels of resolution. Under the hood, there is an octa-core SoC paired with 3GB of RAM and 32GB of storage. The internal storage can be expanded up to 1TB using a microSD card. The tablet features a 5-megapixel camera sensor for taking selfies on the front. On the connectivity front, there is Wi-Fi 802.11ac, Bluetooth v5, GPS, USB Type-C, and a 3.5mm audio jack. Sensors on the Tab include an accelerometer, compass, and ambient light sensor. The device is backed by a 5,100mAh battery that supports 15W fast charging.
For the latest gadget and tech news, and gadget reviews, follow us on Twitter, Facebook and Instagram. For newest tech & gadget videos subscribe to our YouTube Channel. You can also stay up to date using the Gadget Bridge Android App.
Google Chrome has been the best browser choice for browsing the internet. Google Chrome’s natural choice of a search engine is Google, but you also have the option to change the default search engine. The web browser is ideal for many internet users whether you are using a smartphone or a computer, you always have the option to change the default browser. Look at the guide below for know-how.
In This Article
How to change on the Computer: Windows or Mac
Google Chrome is developed by Google, but it does not necessarily mean you have to use Google’s search engine. There are many options to choose from to make your default search engine in Google Chrome. Yahoo, Bing, and DuckDuckGO are some of the options. Even if you are using Google Chrome on any platform Windows 10, Linux, Android, or IOS the browser still permits you to change the default search engine according to your preference. Here are the steps to change the default search engine in Google Chrome.
Open your computer: Windows or Mac
And open the Google Chrome application
Now find the vertical three-dot on the top right corner
From the drop-down menu select settings
And from the left panel option: Find Search engine
Click Search engine and go to manage search engine
Now from the option of search engine select your preference
After selecting click on the three-dot menu
And choose to make default
If Google search engine is not available on the options list you can use the Add option on the top right corner.
When the search engine page pops up enter google.com and add
On a smartphone using Google Chrome is often misled to think Google is the only search engine option. Google services are integrated very much on a smartphone but there are options to change the default search engine according to what search engine you want. Here are the steps you can take to change the default setting on your smartphone.
Open the Google Chrome app on your smartphone
Now go to the vertical three-dot option
Click on the setting by going down the page
On the search engine option input the search engine you want
Now using the blue colour input the default search engine provided on the list
Asus is a company that has long been making laptops for consumers and gamers. One of its most famous series is the Zenbook series. Their recent launch of Asus Zenbook 13 UM325U came to us to play with, and this is our review of the nifty little device, which falls in the ultra-thin category.
In This Article
Asus Zenbook 13 UM325U Design and Display
Let us quickly talk about the Asus Zenbook 13 UM325U design first. The construct of the laptop demands that you fall in love with it. Even though we have seen similar lines and aesthetics in the past Zenbooks, this one still looks fresh and modern. The notebook weighs just 1.14 KG and is very portable. The body is made of plastic and metal, to keep the weight low.
Users get a 13.3-inch FHD OLED display with 400 nits’ peak brightness. The screen to body ratio is 88 percent, which means you get very slim bezels. Users get 1 USB Type-A, 2 USB Type-C and 1 HDMI 2.1 ports along with one microSD card reader on the Asus Zenbook 13 UM325U laptop. An HD IR Webcam is also placed right above the screen for video meetings and for face recognition.
The concept of ergo-lift hinge also comes back with the Asus Zenbook 13 UM325U laptop. This means as soon as you open the laptop it raises a couple of degrees from the ground for better airflow and to keep the laptop cool. The backlit keyboard on this Zenbook lappy is quite big and comfortable to use. Users also get a fully functional NUM pad, which also doubles up as the trackpad. Yes, like other ZenBook’s in the segment, the trackpad can be used at the NUM pad as well.
The display is a treat to work with and you do not see any flicker. We watched quite a few movies and Netflix shows on it during the lockdown and not once did it give us a chance to bicker. We attended Zoom meetings and video chatted with family. The experience was very good. Over that, the AI-powered noise-cancelling MIC on the system made sure the other side only heard our voice and not the bells and whistles of the household. Overall, we were quite happy with the display of the Asus Zenbook 13 UM325U.
Also read:Asus ROG Phone 3 review: Perfect for gaming
Asus Zenbook 13 UM325U Performance
Coming to the performance of the Asus Zenbook 13 UM325U, it comes in two CPU variations. One with AMD Ryzen 5 and the other with Ryzen 7. We are reviewing the Ryzen 7 variant. This is coupled with AMD Radeon onboard graphics unit and 16 GB RAM, which makes the laptop super quick. Another reason why it is so darn quick is the 1 TB M.2 NVMe PCIe 3.0 SSD. The combo starts the laptop in under 12 seconds and apps open in a blink of an eye.
We played games like Counter Strike: GO, DOTA 2 and PUBG. While the first two ran well at 60 FPS, PUBG could not run on the highest graphic settings, but on the medium it was fine. There is not much bloatware on the device, and we liked the minimal look. Though Windows 10 home comes on board as the native OS, we would have preferred the Pro version. Wi-Fi 6 is also on board, which means you end up getting a good internet connection with compatible routers, without interruptions.
The company says the battery will last for 16 hours, but during our time with the machine, it lasted for 14.5 hours. This did include an hour or two of gaming and a couple of hours of Netflix. The battery can be fast-charged to 60% with the supplied charger in under 50 minutes, which is not bad by laptop standards.
Verdict
Overall, the Asus Zenbook 13 UM325U is made for business and casual users. It serves the purpose for both. If you are a designer who wants to work on the go or an office user sitting at home working, this laptop will serve your purpose. The price on the box is Rs 1,09,990, but in the market, you can get it for a couple of thousands cheaper. If you are looking for a very luggable machine that has a neat form factor and the latest brain on offer, your search ends here.
For the latest gadget and tech news, and gadget reviews, follow us on Twitter, Facebook and Instagram. For newest tech & gadget videos subscribe to our YouTube Channel. You can also stay up to date using the Gadget Bridge Android App.
One thing that the pandemic taught is that we must be ready to work from wherever we are. And on the whole, after a year out of the office, we’ve all managed the transition quite well.
But it has come at a cost – having to manage untold numbers of different apps. There are apps for collaborating, sharing ideas, documents, chatting, and video calling, and more – and that’s without going into more complicated corporate apps like CRMs.
As a result, we haven’t actually become experts at working from home – we’ve become experts at juggling different apps.
But what if, instead of dedicating so much attention to this juggling act, we could focus more on our actual work? That’s where Avaya Spaces comes in. A workstream collaboration app for the digital workplace, Avaya Spaces gives you access to everything you need for before, during and after the meeting – all from a simple browser interface or mobile app.
It connects you with all your people and tools—all in one place, as long as you need it. And here are five ways that Avaya Spaces will help you raise your work-from-anywhere game.
In This Article
AI-powered background noise removal
We’ve all been there: Speaking on a video call from home and being rudely interrupted by some loud background noise. Whether it’s a barking dog, construction work outside, or notifications from other devices, these noises are never welcome on your work calls. Avaya Spaces solves this with AI-powered noise removal, which intelligently detects speech and separates it from all the background noise. So wherever you are, the people on your call will hear speech alone. Cancel that order for those expensive noise-cancelling headphones.
Unlimited file sharing and storage
File-sharing services are a big part of the app juggling app, adding plenty of work to the ‘before’ and ‘after’ parts of your meetings. After all, most projects require sharing heavy files between teams, requiring teams to upload to third-party file sharing sites or internal file shares. There’s no need for that with Avaya Spaces, though: Want to share a project plan or the latest creative assets with your team ahead of a meeting? Just drop the files into your shared Space and everyone on the team will see them. The best part? These files stay there securely forever, and there’s no limit on the amount of storage you get. This means anyone who can’t attend the meeting can pick up the conversation later, or you can go back, from any device, and access your files easily.
Huge online meeting rooms
The more the merrier. Many collaboration apps these days only support up to 50 or 100 participants, but not this one. Avaya Spaces supports up to 1,000 participants, so if you are part of a bigger group, you can easily accommodate everyone in an online meeting. Avaya Spaces also offers an industry-best 61-person concert view. So don’t fret about bringing more minds together to bring out more ideas.
Track your progress and manage tasks
Forget about that additional task management app you’re struggling to keep updated: On Avaya Spaces, you can create workflows on the app itself, and get a top-of-mind view of your most pressing tasks at glance. That means you’re never heading into another meeting unprepared. And it keeps teams and managers aware of who’s doing what at any given time.
Unlimited rich calling
Avaya Spaces offers the best in HD video and voice calling. Start a call with a single person or a group with the click of a button. Or have people dial in via telephone from over 45 countries. Finally, you can instantly go from chat to a voice or video call with one click – and even integrate these features into your existing telephony system.
For the latest gadget and tech news, and gadget reviews, follow us on Twitter, Facebook and Instagram. For newest tech & gadget videos subscribe to our YouTube Channel. You can also stay up to date using the Gadget Bridge Android App.
Using Google maps is like our personal travel guide. The internet map by Google gives you recommendations based on the places you have visited if you had turned on the map. It helps you know in real-time the traffic update for your commute. The location history in Google account saves all the places where you went using your device. But conveniently the maps allow you to view, manage, and delete them. Check out how.
In This Article
How to view your location history
Google maps help you to find new places and search the best routes. By using the timeline feature in Google maps you can track every place you have visited in the Location history. The timeline feature is the best in Google maps. For example,e if you visited a memorable shop in a location, but it is hard for you to remember where it was. Browsing your timeline in Google maps will help you to find the exact location. Isn’t it amazing? Check the following on how to view your location history in Google maps.
Open Google map: On app or computer
Click on the three horizontal lines on the top left corner: Hamburger menu
If on the app click on account with a profile icon
Go to timeline
On the timeline, page choose the year, month, and date to see your location history
On the app: Input the date, month, and year shows – As well as day, places, cities, and world
The bottom half of the page indicates all the details
Google maps help you to know where you have been and where you are going. And at times suggests locations you may be interested in visiting. Luckily Google maps give you the options to control and manage your Maps settings. You also have the option to delete the location per your choices. Manage or delete today using the guide below. Learn how in the following:
You can manage your Google using the timeline option: Shown in the above steps
To delete your location history: Open Google map
Select account on the right corner for mobile, on the computer, click the three horizontal line
Go to timeline
For mobile go to more and setting, and for computer tap the setting icon
Facebook was testing Reels ads for Instagram in select countries. Today the popular social media platform has announced the final rollout of the Instagram Reels Ads on its platform to grow and reach new customers. The new feature is helpful to those businesses on the photo-sharing platform to reach people who don’t follow them allowing them to be discovered by anyone across the globe.The news comes by way of a blog post that reads, “After a successful test in select countries, today we’re launching Reels ads to the world. Reels is the best place on Instagram to reach people who don’t follow you and a growing global stage where brands and creators can be discovered by anyone.”As per the company, with the introduction of the new feature to the Instagram Reels, the ads will help businesses reach greater audiences, allowing people to discover inspiring new content from brands and creators.The Reels ads on the social media platform owned by Facebook will be shown on full screen and in a vertical format akin to ads in Instagram Stories. As with regular Reels content, these ads will loop and can be up to 30 seconds. People can comment, like, view, save and share Reels ads.The Reels Ads can be seen in the most popular places to access Reels content including the Reels tab, Reels in Stories, Reels in Explore and Reels in your feed. When the user taps into a reel from Stories, Feed, the Reels Tab or Explore, they will be directed to a viewer that exclusively shows reels that scroll vertically.In addition to this, Facebook will also provide people with controls on the Reels ads they see on Instagram. If people see an ad they don’t like, they can skip the ad, or tap the menu on the post to hide or report it.Instagram’s Chief Operating Officer Justin Osofsky commented, “We seeReels as a great way for people to discover new content onInstagram, and so advertisements are a natural fit. Brands of all sizes can take advantage of this new creative format in an environment where people are already being entertained.”
For the latest gadget and tech news, and gadget reviews, follow us on Twitter, Facebook and Instagram. For newest tech & gadget videos subscribe to our YouTube Channel. You can also stay up to date using the Gadget Bridge Android App.
After launching Samsung Galaxy Tab A7 Lite and Galaxy Tab S7 FE in the UK, the tablets are all set to make their way to the Indian market. The company recently announced to launch both the device in India today and have also been listed on Amazon as well as the company’s official website to tease their availability. Samsung is all geared up to launch its newest tablets: Galaxy Tab S7 FE andGalaxy Tab A7 Lite in India today. The devices are also scheduled to go on sale from June 23 as per the microsite. Samsung Galaxy Tab S7 FE 5G specifications and expected pricingSamsung Galaxy Tab S7 FE 5G runs Samsung One UI based on top of Android 11 and will be powered by Qualcomm Snapdragon 750G SoC with up to 6GB of RAM and 128GB of storage options. The storage can be expanded up to 1TB via a microSD card. The device features a 12.4-inch WQXGA TFT display with 2,560×1,600 pixels of resolution. There is a single 8-megapixel main rear sensor that supports 1080p video recording at 30fps. On the front, there is a 5-megapixel camera sensor for taking selfies. On the connectivity front, there is Bluetooth v5, USB Type-C port, Gigabit Wi-Fi among others. The tab is backed by a 10,090mAh battery with 45W fast charging support and offers up to 12 hours of runtime via the cellular network. There is an S-Pen Samsung DeX app support along with dual speakers optimised by AKG. The device will be offered in different shades of Mystic Black, Mystic Silver, Mystic Green, and Mystic Pink colours.The company has not revealed the pricing of the tab but it was launched at GBP 589 translates to Rs 60,989 for the 4GB RAM with a 64GB internal storage option. The 6GB RAM with 128GB storage variant at GBP 629 translates to Rs 65,123. Samsung Galaxy Tab A7 Lite specifications and expected pricingSamsung Galaxy Tab S7 FE 5G is powered byMediaTek Helio P22T paired with up to 4GB of RAM and 64GB of storage. The internal storage can be expanded up to 1TB using a microSD card. The device runs Samsung One UI based on top of Android 11 and features an 8.7-inch display. It comes with an 8-megapixel main sensor on the back of the phone and a 5-megapixel camera sensor for taking selfies on the front. In terms of connectivity, there is 4G LTE (optional), Wi-Fi 802.11ac, Bluetooth v5, GPS, USB Type-C, and a 3.5mm audio jack. The sensor on the tab includes an accelerometer, ambient light sensor, and magnetometer. It is fuelled by a 5,100mAh battery that supports 15W fast charging. To recall,Samsung Galaxy Tab A7 Lite was launched last month in May at GBP 149 that translates to Rs 15,429 for the WiFi model while the LTE model will be available at GBP 179 that translates to Rs 18,531. The tablet was offered in two colour options, Grey and Silver.
For the latest gadget and tech news, and gadget reviews, follow us on Twitter, Facebook and Instagram. For newest tech & gadget videos subscribe to our YouTube Channel. You can also stay up to date using the Gadget Bridge Android App.
Browsing in Google Chrome is the most convenient way to surf the internet. With so many good features, the chrome web browser is one of the best out there. One of its unique features is that it saves all the passwords entered in the browser. But sometimes you want to remove the saved passwords. Learn how to remove all the saved passwords in your Google Chrome web below.
In This Article
Remove saved passwords on PC and laptop
The Google Chrome web browser records websites you browse and syncs them to your mobile device. And also saves the passwords you have typed in on the browser if you had accepted to save them. The good thing about the browser is that it allows you to delete the saved password of all the websites or the websites you select. You can easily remove or delete the saved password from Google Chrome on your PC or laptop. See the steps below:
Open the Google Chrome browser on your computer
Click on the vertical three-dot on the top right corner
After clicking that scroll down on setting
And tap on Autofill, which is on the left side panel
Saving the online passwords in the Google Chrome browser is the most convenient way to remember our password. The next time you visit a website it will auto-fill and take you directly to the website without the need to log in. All the passwords are stored in the Google password manager portal using which you can easily login into any website of which you have saved the password. Just in case the password is not saved on your smartphone the Chrome browser will ask for your permission. And with your consent, the password to Chrome is saved. Google allows you to remove the saved password if you ever do not need them or want to remove them from the browser. Follow the steps below to know how to remove the saved password.
Open the Google Chrome app on your smartphone
Click on the three-dot for menu options
Go to settings
Scroll down and tap on the password
List of account appears
Select the account you want to remove the password of
Now find the delete option on the top with the bin icon
Amazon Quiz has gone live on its platform. The quiz timings are daily from 12 AM to 11:59 PM. By submitting correct answers, millions of Amazon customers can win free gadgets as well as Amazon Pay Balance. By participating in the Amazon Quiz today you can stand a chance to win Rs 25,000 Amazon Pay Balance.
Daily the e-commerce platform brings a fresh questionnaire to which the contestants have to answer correctly to enter into a lucky draw. The quiz can be played daily from 8 AM to 12 noon. The Amazon Quiz contains five easy questions that are based on current affairs and general knowledge. Only one person is declared as a winner and the results are announced at the end of every month. Answering all the questions correctly might let you win something and a wrong answer will get you eliminated from the quiz. To make sure you answer all the questions correctly Gadget Bridge everyday updates all the correct answers to all 5 questions. check out today’s answers for the Quiz to win a Rs 25,000 Amazon Pay Balance.
June 18 Amazon Quiz Answers
Question 1: As the Chief Minister of which the state of India did Pinarayi Vijayan take oath in May 2021?
The answer is- Kerala
Question 2: Under the ‘International Climate Plan,’ which nation announced that it will double its annual public climate finance to developing countries?
The answer is- The USA
Question 3: Who recently won his 12th Barcelona Open, one of the most important events in Spanish tennis?
The answer is- Rafael Nadal
Question 4: In which 2007 film, did this animal dream of becoming a chef in spite of the disapproval of his family and the prejudice of humans?
The answer is- Ratatouille
Question 5: This picture shows an event that took place at which of these places? The answer is- Bikini Atoll
The American multinational computer technology company, Dell, has unveiled four new laptops in the Indian market today. The company has introduced a new range of Dell Inspiron laptops that includes- Dell Inspiron 14 2-in-1, Dell Inspiron 14, Dell Inspiron 15 and Dell Inspiron 13. All these devices come with a similar design featuring slim bezels on the sides and HD displays with an HD webcam. The laptops come with support for ExpressCharge and a fingerprint reader that uses Windows Hello.
In This Article
Dell Inspiron 14 2-in-1 specifications and pricing
Starting with Dell Inspiron 14 2-in-1, which is a convertible laptop having a 14-inch full-HD touch display with 1,920×1,080 pixels of resolution. This Dell laptop is powered by Intel and AMD processors. The one with an 11th-Generation Intel Core i7 processor paired with Nvidia GeForce MX350 GPU for graphics offers 2GB of GDDR5 graphics memory. Whereas the AMD Ryzen 7 5700U CPU is coupled with Radeon graphics. Both the Intel and AMD configurations offer up to 16GB of DDR4 RAM and 512GB of M.2 PCIe NVMe SSD. You can use this device like a tablet or can switch it to various positions. There is Wi-Fi 6 and Bluetooth v5, an HDMI port, two USB 3.2 Gen 1 Type-A ports, a USB 3.2 Gen 1 Type-C port, and a 3.5mm headphone jack for connectivity. All the models pack a 54Whr battery.In terms of pricing, the Dell Inspiron 14 2 in 1 laptop’s Intel variant will come with a starting price of Rs 57,990 while the AMD version at Rs 65,990. Both the models are now available for sale across the Dell website, Amazon, large-format retail, multi-brand outlets, and select Dell exclusive stores.
Dell Inspiron 14, Dell Inspiron 15 specifications and price
Both of these laptops share some similarities besides the screen size. The Dell Inspiron 14 features a 14-inch full-HD display with 1,920×1,080 pixels of resolution. On the contrary, the Dell Inspiron 15 is highlighted with a 15.6-inch full-HD display having 1,920×1,080 pixels of resolution. The 14-inch laptop equips 11th-Generation Intel Core i7 processors with up to Nvidia GeForce MX450 GPU whereas the 15-inch model includes both Intel and AMD CPUs under its hood. Each of the laptops offers up to 16GB of DDR4 RAM and up to 1TB of M.2 PCIe NVMe SSD.Dell Inspiron 14Both the Dell laptops are fuelled by 54Whr batteries and come integrated with dual speakers as well as microphones. In terms of connectivity, there is Wi-Fi 6 for wireless connectivity, an HDMI port, a Thunderbolt 4 port, a USB Type-C 3.2 Gen2 port, two USB Type-A 3.2 Gen1 ports, an SD card reader, a headphone/ microphone jack.Dell Inspiron 15The price of the Dell Inspiron 14 will start at Rs 44,990 and will go on sale starting June 18 which is tomorrow. Whereas Dell Inspiron 15 price varies on the CPUs, the AMD version can be purchased at a starting price of Rs 57,990 (sale from June 22) and the Intel model at Rs 48,990 (sale begins on June 18).
Dell Inspiron 13 specifications and price
Finally, the Dell Inspiron 13 is powered by an 11th-Generation Intel Core i7-11370H CPU combined with up to Nvidia GeForce MX450 GPU with 2GB of GDDR6 graphics memory. It is provided with up to 16GB of LPDDR34x RAM and 512GB of NVMe SSD for storing content. Besides this, the laptop comes with a 13.3-inch QHD+ display having 2,560×1,600 pixels of resolution. Furthermore, the Inspiron laptop also includes a fingerprint reader that uses Windows Hello for authentications. The machine is backed by a 54Whr battery and it comes with Wi-Fi 6, Bluetooth v5.1, HDMI port, a USB Type-A 3.2 Gen 1 port, two Thunderbolt 4 ports, and a 3.5mm headphone jack as connectivity options.Dell Inspiron 13Speaking of the pricing, the Dell Inspiron 13 price will start at Rs 68,990 in India. It will be available for purchase via the Dell website, Amazon, large-format retail, multi-brand outlets, and select Dell exclusive stores from July 7 onwards.
For the latest gadget and tech news, and gadget reviews, follow us on Twitter, Facebook and Instagram. For newest tech & gadget videos subscribe to our YouTube Channel. You can also stay up to date using the Gadget Bridge Android App.
A laptop without a functioning keyboard is unimaginable. Hardship will be faced if the keyboard is not working. And the keyboard shortcuts make working on a laptop or PC easier and faster. There are some ways to fix keyboard shortcuts, if not working on a laptop or PC. You can follow the below methods.
In This Article
Reset language in the keyboard setting
The change in the language usually interchanges all the keyboard settings. You can easily fix this problem by visiting the control panel and adding or removing a language. For example, the keyboard setting in (US English) keyboard and (UK English) is different. Hence changing the language in the setting will help to fix the keyboard shortcuts that are not working on your laptop or PC.
Typesetting in the search bar on the bottom left corner
Or manually open by clicking on the windows icon next to the search bar
Go to language
Scroll down to Add language
Add you preference
US english is common
Make it primary and your keyboard shortcut will back to normal
Sticky keys are features to make keyboard shortcuts easy to use. Sticky keys is a Windows feature that lets you press on a key at a time for shortcuts. If the keyboard shortcuts are not working, enabling or disabling the sticky keys will help.
Go to the setting by clicking on the Windows icon
Scroll down to Ease of Access
Scroll down again till the end of the panel
Under the interaction option of the left
Find the Use sticky keys option
Toggle it on, if it was off
Toggle it off, if it was on
Reinstall keyboard driver
The driver powers and functions in the laptop or PC. So, reinstalling it can help with the problems of the keyboard shortcuts. Learn how to configure the driver in the steps below.
The troubleshooter function in the laptop can always diagnose the problem and fix it.Using the Windows troubleshooter you can fix the keyboard shortcut problem. Here are the steps.
Click the Windows icon
Go to settings
Find update and security
Select troubleshoot with the tool icon
And navigate to keyboard click on it
Now on the below troubleshooter, you will see “Run the troubleshooter”
It will detect the problem and click on fix it
Re-enable Windows Hotkeys
Another method to fix the keyboard shortcut problem is reenabling the Windows Hotkeys. Learn how to enable the Hotkeys below
Go to the bottom left corner of the screen and press right-click
Computer audio not functioning, can be for many reasons. It might be because of the not-compatible headphones you have plugged in. Or it might be the changes in settings when the Windows update on your laptop. To fix the audio problems in your laptop read the methods below.
In This Article
Audio driver: Install or Uninstall
If any hardware in the computer is not working it is better to check the driver first. To check when it was last updated and if it needs to be updated now. You can access your hardware from the device manager. If you see any yellow exclamation mark you need to update or reinstall the driver. Follow the steps to open the device manager, check, and reinstall the driver if required.
Press Windows + X keys
Find device manager and click on it
Tap on Sound, Video, and game controller
Click on Realtek High definition audio or similar audio property
Another easy option to check the sound problem in your laptop is checking the audio source. You can find the audio source on the taskbar. Check the steps.
Click on the Volume icon on the taskbar
Find the inverted “v” sign and click on it
Check for another speaker and select it
If there are more than two options try clicking and checking on all.
Not selecting the right speakers might be the problem
Other options to fix the speakers on your laptop having no sound is by running Windows Troubleshoot. Many problems can be fixed by Windows Troubleshooters. Follow the steps:
Press Windows + I
It will open settings
Click on Update and Security
Now select Troubleshoot on the left panel
Check for errors
Find audio errors: If any
Click on Playing audio and run Troubleshooter
The troubleshooter will direct you to the problem and you can fix it
Audio services
Another method to fix the no sound on your laptop is by restarting the audio services. By restarting all the audio services, the laptop speaker might work again. Check the method below:
Go to the search box on the taskbar
Type Services
Click on the Services to open the service manager
Locate: Windows Audio, Windows Audio Endpoint Builder, Remote Procedure call (PRC)
Hit the right-click and restart each service
Enable Playback devices
Another method to fix the laptop speaker is to check if the speaker’s might is disabled on the Playback devices. To enable it you can open the control panel and fix the problem. Here is the method.
Press Windows + R
And run mmsys.cpl
Find the disabled speaker and right-click to enable it
Netflix is one of the best OTT (Over-the-top) content platforms to stream movies and shows. By popular choice even in 2021, Netflix has remained as many people’s favourite streaming platform. The streaming platform provides you old, new, and original content to binge-watch. Creating an account on Netflix is also easy and affordable. Netflix allows you to have five users at maximum. But how do you add or remove the users? Follow the guide below:
In This Article
On the Netflix website
Netflix has become one of the most reliable streaming sites that include a broad catalog of video content. You can binge-watch all genres of movies, shows, docu-series, and also Netflix original programming. The choice provided on Netflix is huge and has a long list to watch. Netflix gives you three options to open an account. The Basic plan, the standard plan, and the premium plan. The maximum number of users allowed in any of the plans is 5. You can add the user or remove the user from the parental control. Here’s how.
Read more: Netflix’s StreamFest to kickstart in India on December 5
Add profile
Tap the profile icon on the top right corner
Go to manage profiles
Select add profile
Give profile name and icon
If you want to restrict content and add a profile for kid tick the option in the box
Press continue
Remove profile
Go to the profile icon
Select manage profile
Click on the profile you want to remove
And find the button on the button “Delete profile”
On the Netflix App
As said, you can create a maximum of five profiles on the Netflix account. Every profile can watch their most loved movies and shows on their own profile and does not have to mess with another recommendation. So that all users can watch different shows at different times on different devices. This gives you privacy and also does not change your preferred settings. One important and interesting feature is you can create a profile for kids and give them an account with restricted content. The steps below will show you how to add or remove a profile.
Read also: How to change profile pictures of Gmail, YouTube and Google accounts
Spotify, in March, acquired the sports-focused Locker Room app Betty Labs. Now the music streaming company has announced the launch of a live audio app called Spotify Greenroom with the goal of creating a live audio experience that will delight creators and listeners everywhere. With the launch, the audio-based social media app aims to take on Clubhouse that will allow users to host or join in a live discussion. While announcing the Founder and CEO, Daniel Ek said, “Since bringing the Locker Room app into the fold, we’ve been working to expand its capabilities, with the goal of creating a live audio experience that will delight creators and listeners everywhere. And we wanted to do it with a Spotify twist that operated as an extension of the app already loved by 356 million listeners. That’s why we renamed it “Spotify Greenroom,” With the launch of the live audio platform Greenroom, the Swedish online music streaming giant will provide an opportunity for creators of all types to connect with their fans more deeply and meaningfully. The new Clubhouse-like features are available on iOS and Android in over 135 markets around the world. The Spotify Greenroom will allow creators and artists to host or participate in live rooms. The users can log on to Greenroom using their Spotify log-in info. In addition to this, the live audio platform also allows you to record so you can complement your on-demand content with live conversations and Chat controls.Apart from joining a group, you can also search for upcoming rooms, join and even create one.As per the music streaming app, it will work on evolving the Greenroom, as it understands more about what creators and listeners want from their live audio experience. Additionally, the company also promises to bring exciting new programming to the platform spanning music, culture, and entertainment topics in addition to the sports content Locker Room has been known for. Besides this, to make it a creator-friendly live audio platform a Spotify Creator Fund has been announced that will help live audio creators monetize their work. Those who are interested cansign up to find out more about participation when the Creator Fund opens later this summer.
For the latest gadget and tech news, and gadget reviews, follow us on Twitter, Facebook and Instagram. For newest tech & gadget videos subscribe to our YouTube Channel. You can also stay up to date using the Gadget Bridge Android App.
After long anticipation and rumours, OnePlus has officially launched its second Nord device this year in the market. The OnePlus Nord N200 5G has made its debut in the US, which is a successor of the OnePlus N100. To recall, last week the Chinese smartphone company introduced the OnePlus Nord CE 5G in India. The Nord N200 5G features a 90Hz display, triple rear cameras and a 5,000mAh battery. The device is powered by the Qualcomm Snapdragon 480 SoC.
In This Article
OnePlus Nord N200 5G pricing and availability
The OnePlus Nord N200 5G has been launched in the US and Canada in a single 4GB RAM with a 64GB storage model. The device in the US will be selling at $239.99, which translates to Rs 17,600. Whereas, in Canada, it can be purchased for CAD 319.99, which translates to Rs 19,300. The phone will be available in a single Blue Quantum colour option and will go on sale starting June 25 via the companies official website, Best Buy, Amazon, and B&H in both regions.It should be noted that similar to its predecessor OnePlus Nord N100 the device is expected to stay limited to the US and Canada only.
OnePlus Nord N200 5G specifications
Speaking of the specifications, the OnePlus Nord N200 5G runs on OxygenOS based on top of Android 11 out of the box. The device features a 6.49-inch full-HD+ display and comes with 90Hz refresh rate support. Under the hood, there is an octa-core Qualcomm Snapdragon 480 SoC paired with 4GB of RAM with 64GB of storage that can be expanded further using a microSD card. There is a side-mounted fingerprint sensor onboard as well.The OnePlus Nord N200 5G comes with a triple camera setup on the back of the phone that includes a 13-megapixel primary sensor, in terms of photos and videos. In addition to this, there is a 2-megapixel macro lens and a 2-megapixel monochrome sensor. On the connectivity front, OnePlus Nord N200 5G includes a 5G, 4G LTE, Wi-Fi, Bluetooth, GPS/ A-GPS, USB Type-C, and a 3.5mm headphone jack. In addition to this, the mobile phone also ships a 5,000mAh battery that supports 18W fast charging. The device is touted to last a day when fully charged.
For the latest gadget and tech news, and gadget reviews, follow us on Twitter, Facebook and Instagram. For newest tech & gadget videos subscribe to our YouTube Channel. You can also stay up to date using the Gadget Bridge Android App.
Working on a laptop or studying on the computer has become a necessity. Life has become more indoor and works more remotely with the lockdown. Laptop and computers are being used more than ever, which puts more load on the system. With the increasing use of PC or laptops, the health of the computer is at risk. You can see the health of Windows 10 by following the guide below. There are more ways as well to check a PC’s health, we have jotted those down here too, for your convenience.
In This Article
Windows security
How can encrypt and decrypt files and folders in Windows 10?The first thing you can do to check the health of your computers or laptop without any application is by visiting the Windows security option. You can check the health of the computer down to its battery life. Here are the steps below.
Go to the search box on the left bottom corner
Type Windows Security on the search bar
Find Device & health option and click on it
The device will show your health report and the last time the scan was performed
Below the last time scan, the device will also show you the key areas the device health monitors
The Windows time service: If it is running well it will show a green tick icon
Storage capacity: If good, then you will see a green tick on the left
To check the health status of your Dell laptop or PC there is an easy way. You need to download software from Dell.com. The software is completely malware-free as it is Dell’s own system health check-up tool. And you can download it for free. Here is how you can do
Go to Dell.com
On the top right corner keyword search
Search Free PC Health Check
Click the green button: begin free PC Health check
You can also call an expert from the number given
Now with just three-step after clicking the green button you can check the health
First, run the software on the computer
Open it after running it on your PC or laptop
Second, let the software get the full report of your computer
Third, click on speed up your PC and check if any problems detected
You can download CrystalDiskinfo easily for free on the internet. The third-party app allows you to check the condition of your hard drive (HDD or SSD) and the overall health status of your computer. The app gives an overview of the state of your drives. The software gives the details including temperature, spin-up time, uptime, error rates, and more. And lastly, calculate the overall health status for you to fix.
For the latest gadget and tech news, and gadget reviews, follow us on Twitter, Facebook and Instagram. For newest tech & gadget videos subscribe to our YouTube Channel. You can also stay up to date using the Gadget Bridge Android App.
Using a widget on the Windows 10 taskbar makes things easier instead of searching for it on the search bar. It can help you give information instantly without performing any process such as news and interest widget. But it may create inconvenience when many widgets are pinned on the taskbar. For some people who wish not to use the “news and interest” widget, you can turn off the function by following the steps below.
In This Article
Disable news and interest widget on Windows 10
Microsoft recently unveiled the news and interest widget on the taskbar for Windows 10. The idea is so that people do not have to use their phones to check the weather and see it on the taskbar. The widget will be available on the Windows10 version of 1909, 2004, 20H2, and 2H1. The function on news and interest uses AI technology to show what is relevant for you. However, you can always turn off the widget if you want to by using settings. Here are the steps you can take.
On the home screen of Windows 10 right-click on the taskbar
Now click on News and interest
You see an option: Select turn off to remove it
There is an option also if you want to keep the icon only: it will reduce the widget size in the taskbar
You also have the option to remove the widget from the taskbar using the Registry editor. Follow the steps to know how to remove the widget using Registry.
Press Windows+R for Run dialog
On the Run dialog: Type regedit and enter
Running will open up Registry Editor
Navigate to key path; HKEY_CURRENT_USER\Software\Microsoft\Windows\CurrentVersion\Feeds
Right-click the Feed keys
Go to the new and choose DWORD(32bit) value
Type the new key as ShellFeedsTakbarViewMode and press enter
Double click the newly created keys: shown on the right side of the screen
Click the Ok button when Edit DWORD (32 bit) pops up
Now you can restart your computer and the widget on the taskbar will disable completely
Today, Krafton has released the Battlegrounds Mobile India test program. The early access version is now available for download on the Google Play Store. However, the beta game is available to a limited number of testers; the company announced it through its official Facebook page. Prior to this, the much-awaited battle royal game was up for pre-registration only.The updated Official Facebook page has only mentioned access to the Battlegrounds Mobile India beta game, but it did not disclose anything about the limited access to the game. This is why very few people got access to the early version as the beta testing program and it has closed now. Notably, the Indian fans were already waiting when the PUBG Mobile India remake was announced last month and went up for the pre-registrations on May 18. “BATTLEGROUNDS MOBILE INDIA Early Access version is now available on Google Play Store!http://bit.ly/BATTLEG_EARLYACCESS_FBCan’t get in? Don’t worry, more slots will be made available frequently. Also, your in-game progress and purchases will be stored and available in the final version of the game” says the updated Facebook page.When Gadget Bridge tried to download the game, we were greeted with an internal server error or said that the limited number of beta testers has reached the maximum.
https://twitter.com/sulabhpuri/status/1405398258986278916/photo/1
“Thanks for your interest in becoming a tester for the Battlegrounds Mobile India app. However, at this time the Battlegrounds Mobile India app’s testing program has reached the maximum number of testers that can participate in it and isn’t accepting any testers.”While those who have got early access to the battle royal shared the screenshots. As per the shared screenshot, the game is 721MB in size. It should be noted that the original version is expected to launch on June 18 in India that is tomorrow and the open beta has been released just before the anticipated launch date. However, Krafton, the developer of the PUBG Mobile India remake Battlegrounds Mobile India has not officially announced the exact launch date of the battle royal game.
For the latest gadget and tech news, and gadget reviews, follow us on Twitter, Facebook and Instagram. For newest tech & gadget videos subscribe to our YouTube Channel. You can also stay up to date using the Gadget Bridge Android App.
The Chinese smartphone companies OnePlus and Oppo have announced a merger to provide better product quality as well as services. CEO Pete Lau has officially declared its partnership with its sister company Oppo, however, OnePlus will continue to operate as a separate brand and Oppo’s sub-brand. Those who are unaware, both the companies are a part of the same parent company BBK Electronics and the OnePlus has always shared support to its sibling as we have already noticed in the design features of Oppo smartphones.The news came through the forum post by CEO Pete Lau who is also the co-founder of this premium smartphone company along with Carl Pei. However, Carl Pei went away to start its own venture Nothing. The blog post said, “As many of you know, last year I took on some additional responsibilities to oversee product strategy for both OnePlus and OPPO. Since then, we have integrated a number of our teams together with OPPO to better streamline our operations and capitalize on additional shared resources. After seeing a positive impact from those changes, we’ve decided to further integrate our organization with OPPO.”Also Read: OnePlus Nord CE 5G and TV U1S launched in India: Here are all the price and availability detailsThrowing more light on how both the companies will exactly work on their upcoming products the CEO went on to say that he believes that the integration will bring a positive change for the community as well as for the users and will provide more resources at hand to create even better products, bringing faster and more stable software updates for OnePlus users.Even after this partnership, OnePlus will continue to operate independently. “We will continue launching OnePlus products, holding events (hopefully in person soon) and engaging directly with you for feedback through the same OnePlus channels as before. OnePlus’ commitment to you remains the same.” the OnePlus founder assured.Also read: OnePlus Nord CE 5G Vs Nord Vs Xiaomi Mi 10i: Which one should you go for?Lau further added that “Now, we’re at a turning point for the future of OnePlus. As we’ve begun growing our product portfolio, we’re able to give you more choices than ever before. True to our Never Settle spirit, we want to continue giving you the highest-quality OnePlus experience possible. And to do that, we must adapt as a team and as a brand.”The company did not explicitly state but we have reached the conclusion that with this merger OP aims to expand its product portfolio and bring positive impact to the new users. It should also be noted that OP ships its latest OnePlus 9 Series in China with Oppo’s ColorOS rather than its HydrogenOS. Also, those who are unaware Vivo, iQOO, Realme, Oppo and OnePlus are also the subsidiaries of BBK Electronics therefore it is one of the largest smartphone manufacturers in the world. This merger came when OnePlus is firming its roots in the US market with the launch of the OnePlus 9 and Nord N200 5G.
For the latest gadget and tech news, and gadget reviews, follow us on Twitter, Facebook and Instagram. For newest tech & gadget videos subscribe to our YouTube Channel. You can also stay up to date using the Gadget Bridge Android App.
The e-commerce website Flipkart is hosting Daily Trivia Quiz. Every day it brings a bunch of new questions for its users. By answering them correctly you can win exciting prizes. The questionnaire is based on questions related to general knowledge. Also, the users can win free vouchers and super coins, among other offers via the daily quiz. June 17 Flipkart Daily Trivia Quiz Answers has already gone live on its platform.
The participant should be at least 18 years old and should have a valid login ID. The Quiz is available on the mobile platform and not the web version. E-commerce conducts the quiz on daily basis and goes live at 12:00 AM IST and runs till 11:59 PM IST. The winners are announced within 15 days from the date of participation that can be viewed under the Gems/Rewards section in the app.
In This Article
How to participate in the Flipkart Daily Trivia Quiz
To participate download the Flipkart app on your phone. Then open the Flipkart app then head to Game Zone. Now click on the Daily Trivia Banner or search for Daily Trivia. Enter the game and answer all 5 questions with correct answers.
June 17 Flipkart Daily Trivia Quiz Answers
Question 1: Which of these creature kills its prey by a method called ‘contraction’
Answer: Rock Python
Question 2: In which religion would you find a ritual and family celebration named Bar Mitzvah?
Answer: Judaism
Question 3: Which team won the Syad Mushtaq Ali Trophy 2019 final recently?
Answer: Karnataka
Question 4: On which author’s work is the Hollywood movie ‘ Journey to the Center of the Earth’ based?
Answer: Jules Verne
Question 5: What is used to forward data packets to the appropriate parts of a computer network?
Answer: Router


 The Apple ID helps you access many Apple services: Apple Store, Apple Music, iTunes, as well as the cloud. Apple ID creates an identity on the iOS and Mac devices. Hence, connecting your Apple ID is important so that you stay connected with apps and data including photos and documents, emails and text messages, and even your iTunes library. However, when you decide to not use the device anymore or decide to sell the device it is advised not to keep the Apple ID on the device. Apple devices allow you to remove your Apple ID in a few easy steps using the device settings.
 Connecting Apple ID on your Apple devices gives you accessibility to your private data and apps on any Apple device. To know little about Apple ID it is an authentication method for iPhone, iPad, Mac, and other Apple devices. It helps you to connect with all the Apple devices with one account. When creating an account or Apple ID requires some personal information. So when you want to sell away a device or give away a device it is advised to always remove the Apple ID before giving it away. See how to remove your Apple ID on your Apple ID for safer use. Here is the guide.


 It is worth noticing that Vivo X60 Pro is available in Midnight Black and Shimmer Blue colour options, and the one that we got for review was dressed in Black.
Coming to the 6.56-inch AMOLED Full-HD+ display, it comes with a maximum refresh rate of 120Hz, however, the option of switching it to 60Hz is also there on the device. In fact, with Smart Switch enabled, the smartphone automatically switches between 60Hz and 120Hz. The display of the device is great and the colour reproduction is excellent. We watched several shows on Netflix and
It is worth noticing that Vivo X60 Pro is available in Midnight Black and Shimmer Blue colour options, and the one that we got for review was dressed in Black.
Coming to the 6.56-inch AMOLED Full-HD+ display, it comes with a maximum refresh rate of 120Hz, however, the option of switching it to 60Hz is also there on the device. In fact, with Smart Switch enabled, the smartphone automatically switches between 60Hz and 120Hz. The display of the device is great and the colour reproduction is excellent. We watched several shows on Netflix and  To sum it up, we would say that although the design of Vivo X60 Pro is very premium and several aspects contribute to the upmarket looks. However, at this price point, it could have also included some other features like IP rating and wireless charging. The display, on the other hand, offered a great experience to us at all times.
 As expected, Vivo X60 Pro’s performance is super smooth and the smartphone can handle any task that’s thrown at it. We used the device extensively during our time with it and multitasked a lot on it, but there was nothing that made the performance lag even for a minute. We multiple apps on the smartphone, a lot of them were graphic-heavy, but there wasn’t anything that didn’t run smoothly.
We have already mentioned that our experience with watching shows on Netflix was good. The video experience was great and the phone didn’t warm up. The sound quality was good too, but in this price range, we have seen better than Vivo X60 Pro’s audio output. We also played several games on the smartphone including Asphalt 9: Legends. We didn’t notice any stutter while playing the game, even though it has some very heavy graphics, but we did see that the battery fell quickly while
As expected, Vivo X60 Pro’s performance is super smooth and the smartphone can handle any task that’s thrown at it. We used the device extensively during our time with it and multitasked a lot on it, but there was nothing that made the performance lag even for a minute. We multiple apps on the smartphone, a lot of them were graphic-heavy, but there wasn’t anything that didn’t run smoothly.
We have already mentioned that our experience with watching shows on Netflix was good. The video experience was great and the phone didn’t warm up. The sound quality was good too, but in this price range, we have seen better than Vivo X60 Pro’s audio output. We also played several games on the smartphone including Asphalt 9: Legends. We didn’t notice any stutter while playing the game, even though it has some very heavy graphics, but we did see that the battery fell quickly while  Coming to the battery life, the smartphone’s juice lasted at least a day for us with moderate usage. Gaming, watching

 Finally, the 32MP selfie camera takes amazing shots in well-lit as well as in dimly-lit surroundings. We are really happy with the selfies we managed to click from
 Another way of accessing the game is by downloading the Tap Tap app. Here is our step-by-step guide:
")


 Small PDF is another website you can use to compress any PDF to a more desirable size. Simply go to the
  If you use the Adobe Acrobat Pro tool on your PC, you don’t need a third-party tool to compress a PDF. Simply open the PDF in Acrobat Pro, click on ‘File’, select ‘Compress PDF’, and choose the destination for the compressed file.

 Samsung Galaxy Tab A7 Lite specifications


 The display is a treat to work with and you do not see any flicker. We watched quite a few movies and Netflix shows on it during the lockdown and not once did it give us a chance to bicker. We attended Zoom meetings and video chatted with family. The experience was very good. Over that, the AI-powered noise-cancelling MIC on the system made sure the other side only heard our voice and not the bells and whistles of the household. Overall, we were quite happy with the display of the Asus Zenbook 13 UM325U.
Also read:
The display is a treat to work with and you do not see any flicker. We watched quite a few movies and Netflix shows on it during the lockdown and not once did it give us a chance to bicker. We attended Zoom meetings and video chatted with family. The experience was very good. Over that, the AI-powered noise-cancelling MIC on the system made sure the other side only heard our voice and not the bells and whistles of the household. Overall, we were quite happy with the display of the Asus Zenbook 13 UM325U.
Also read:  The company says the battery will last for 16 hours, but during our time with the machine, it lasted for 14.5 hours. This did include an hour or two of gaming and a couple of hours of Netflix. The battery can be fast-charged to 60% with the supplied charger in under 50 minutes, which is not bad by laptop standards.


 The more the merrier. Many collaboration apps these days only support up to 50 or 100 participants, but not this one. Avaya Spaces supports up to 1,000 participants, so if you are part of a bigger group, you can easily accommodate everyone in an online meeting. Avaya Spaces also offers an industry-best 61-person concert view. So don’t fret about bringing more minds together to bring out more ideas.
 Avaya Spaces offers the best in HD video and voice calling. Start a call with a single person or a group with the click of a button. Or have people dial in via telephone from over 45 countries. Finally, you can instantly go from chat to a voice or video call with one click – and even integrate these features into your existing telephony system.
For the latest
Avaya Spaces offers the best in HD video and voice calling. Start a call with a single person or a group with the click of a button. Or have people dial in via telephone from over 45 countries. Finally, you can instantly go from chat to a voice or video call with one click – and even integrate these features into your existing telephony system.
For the latest 


